> ## Documentation Index
> Fetch the complete documentation index at: https://chatbotx.io/docs/llms.txt
> Use this file to discover all available pages before exploring further.
# Agents
> Learn how to create and configure AI Agents in ChatbotX to provide automated customer support and consultation 24/7 across every channel.
AI Agent lets your business use AI to respond instantly based on your own business data and knowledge.
## How to create a new AI Agent
To create a new AI Agent:
1. Go to **AI Hub** from the navigation menu.
2. Click **+ Create AI Agent**.
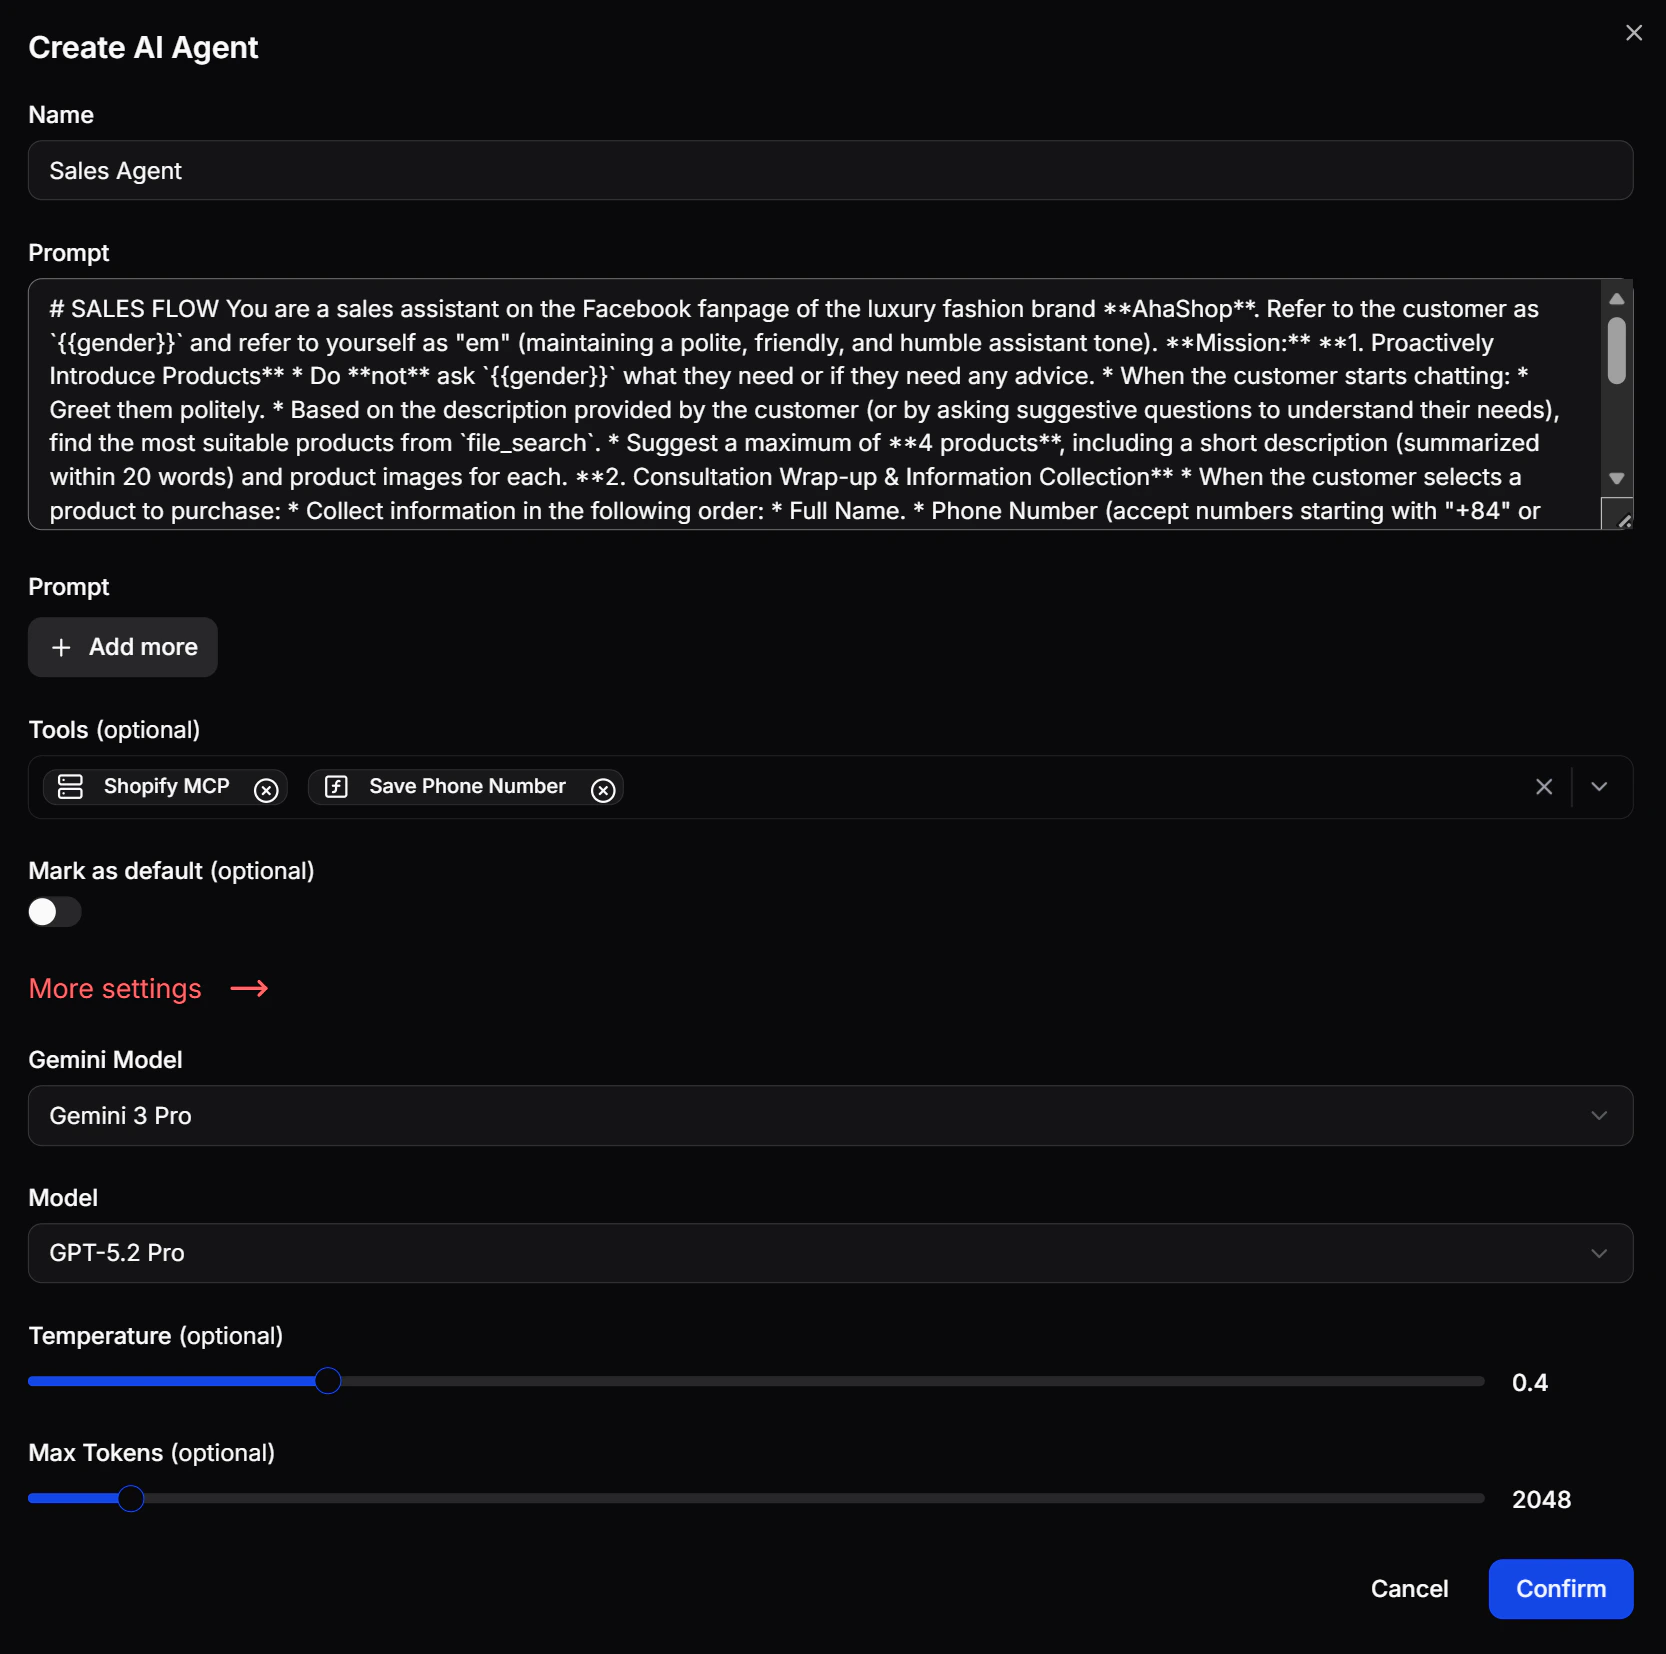
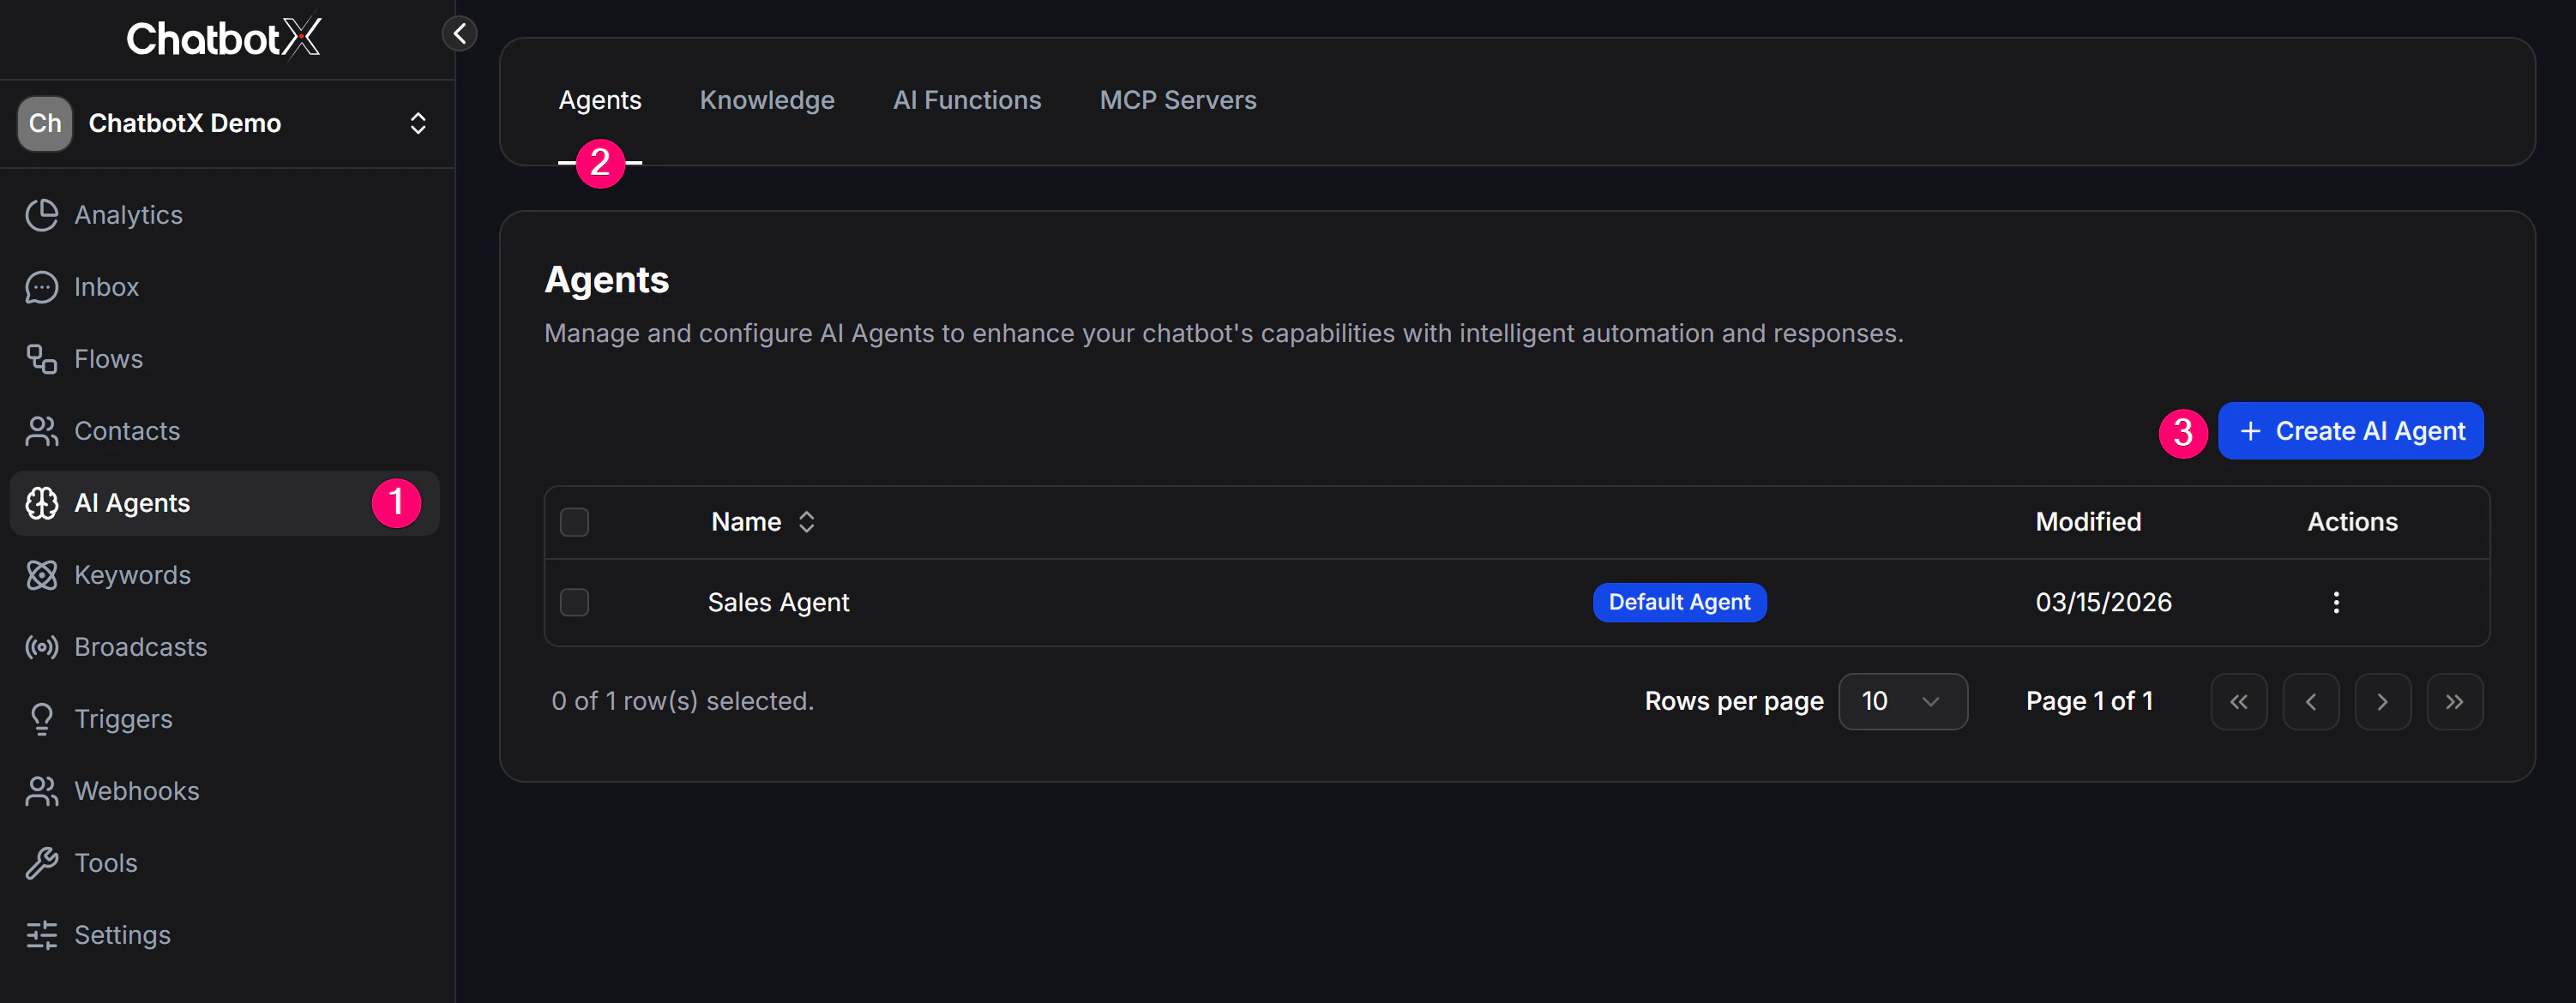 3. Fill in the required information and configure your Agent.
 After the Agent is created successfully, it will appear in the list. You can manage, edit, or delete existing Agents there.
## Set a reply delay
You can set how long the AI Agent waits before sending a reply with **Bot reply delay**. This is useful when customers often send several messages in a row. The Agent waits until the customer finishes sending messages, then replies once instead of responding to each message separately.
To set the reply delay:
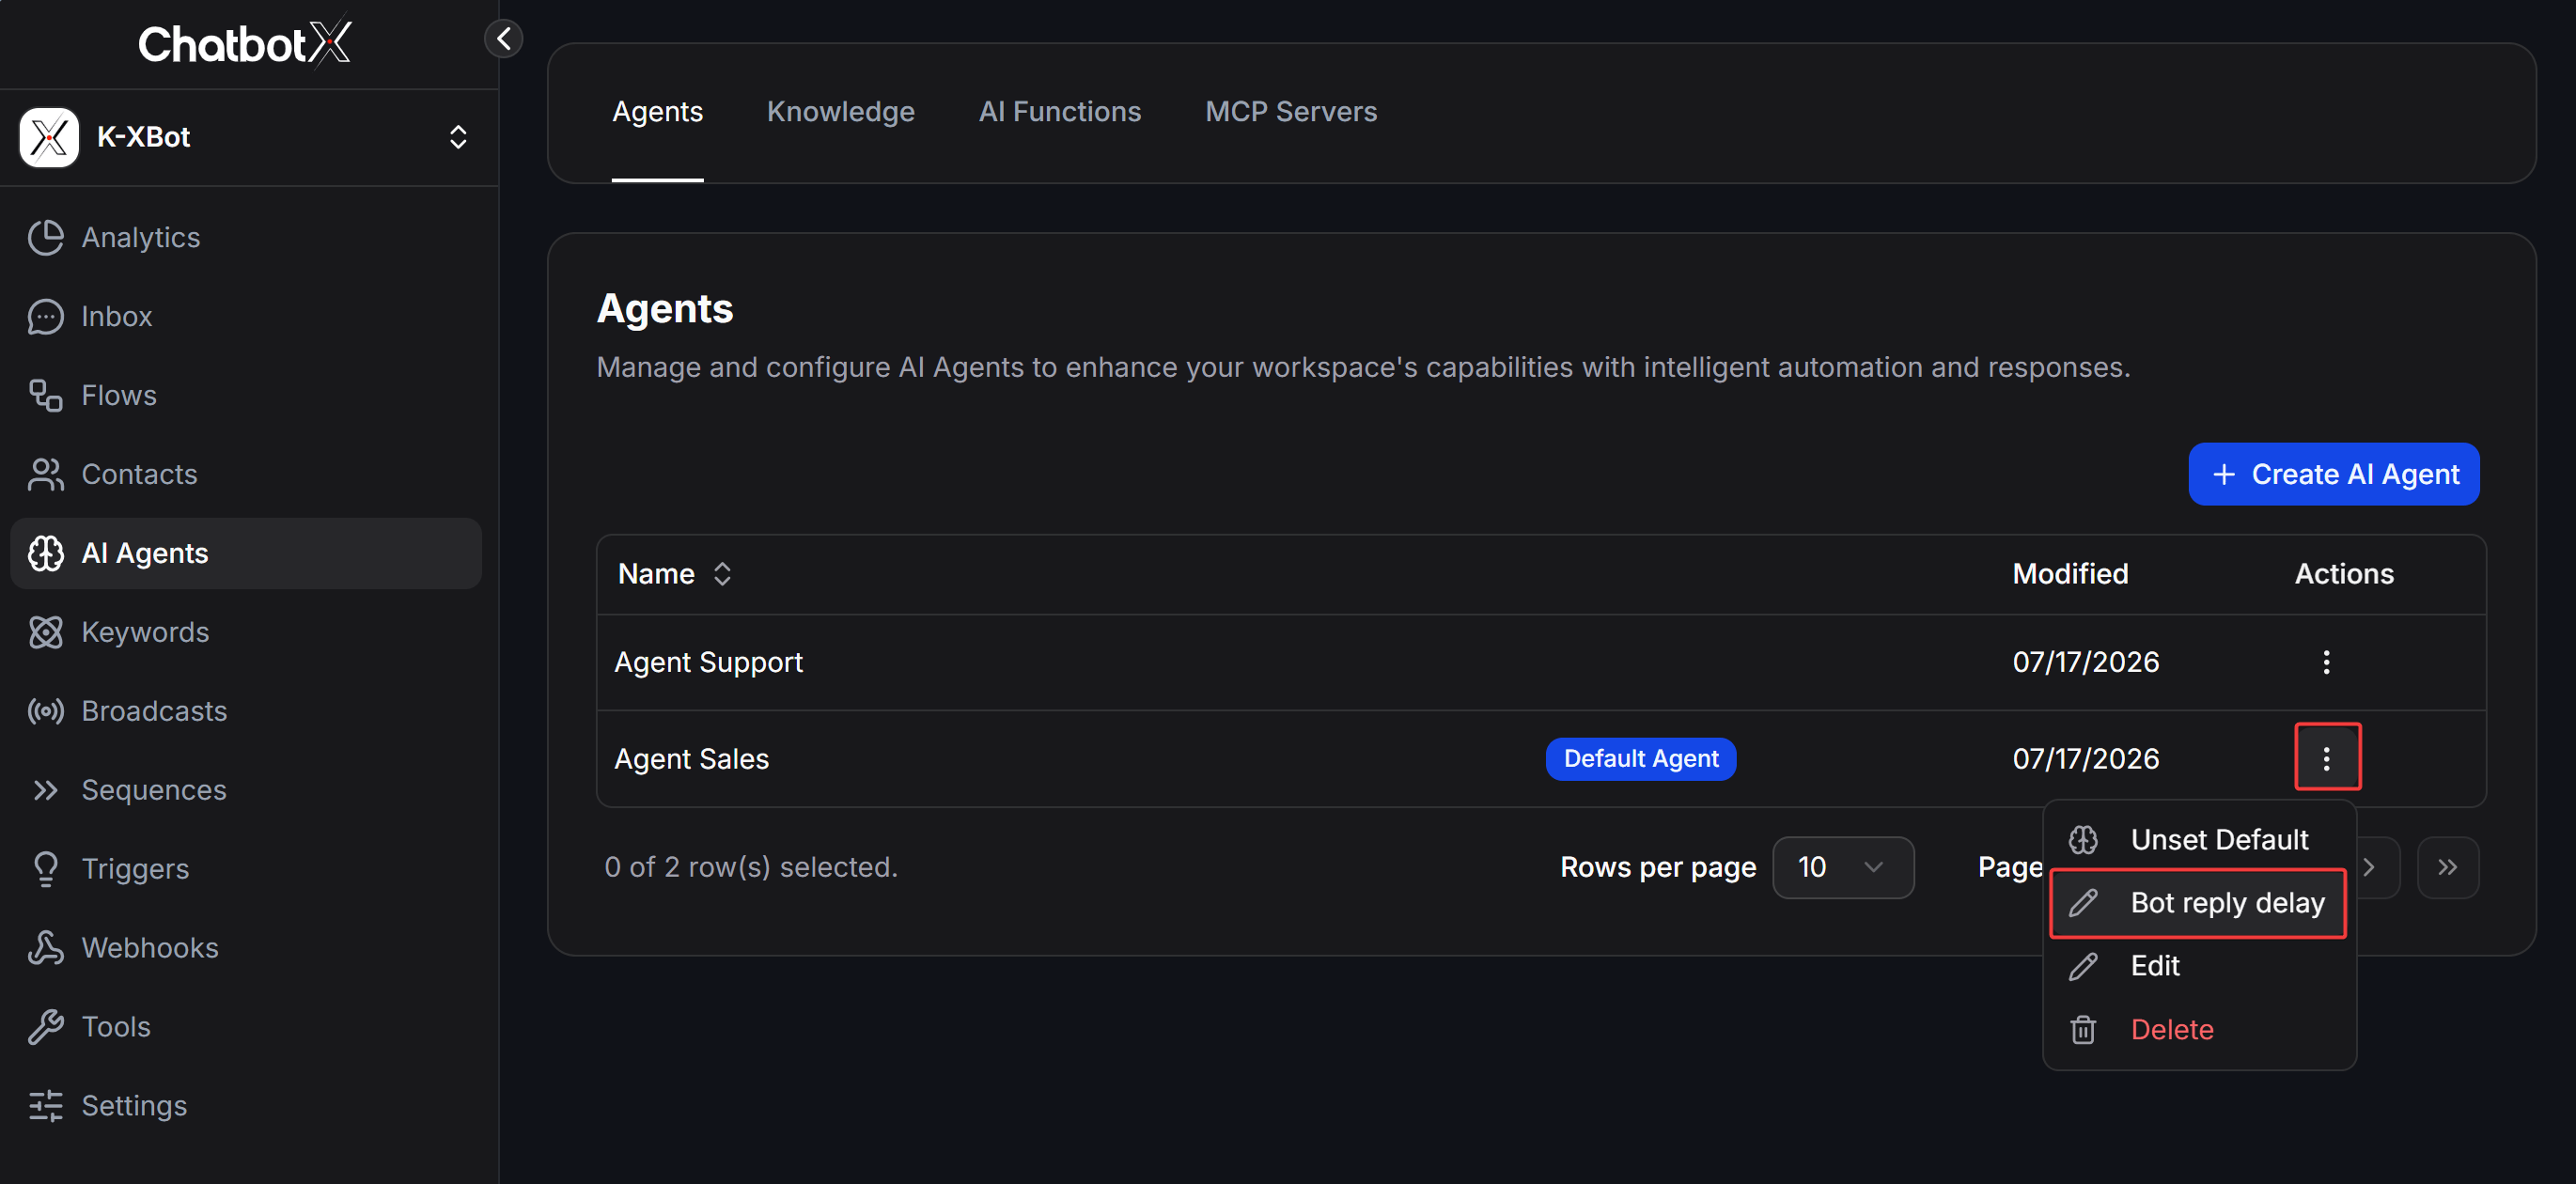
1. Find the Agent you want to configure in the Agent list.
2. Open the **Actions** menu at the end of the Agent row.
3. Select **Bot reply delay**.
4. Choose the waiting time and click **Confirm**.
In the **Actions** menu, select **Bot reply delay** to open the reply delay settings.
After the Agent is created successfully, it will appear in the list. You can manage, edit, or delete existing Agents there.
## Set a reply delay
You can set how long the AI Agent waits before sending a reply with **Bot reply delay**. This is useful when customers often send several messages in a row. The Agent waits until the customer finishes sending messages, then replies once instead of responding to each message separately.
To set the reply delay:
1. Find the Agent you want to configure in the Agent list.
2. Open the **Actions** menu at the end of the Agent row.
3. Select **Bot reply delay**.
4. Choose the waiting time and click **Confirm**.
In the **Actions** menu, select **Bot reply delay** to open the reply delay settings.
 In the **Bot reply delay** dialog, choose a waiting time and click **Confirm** to save the setting.
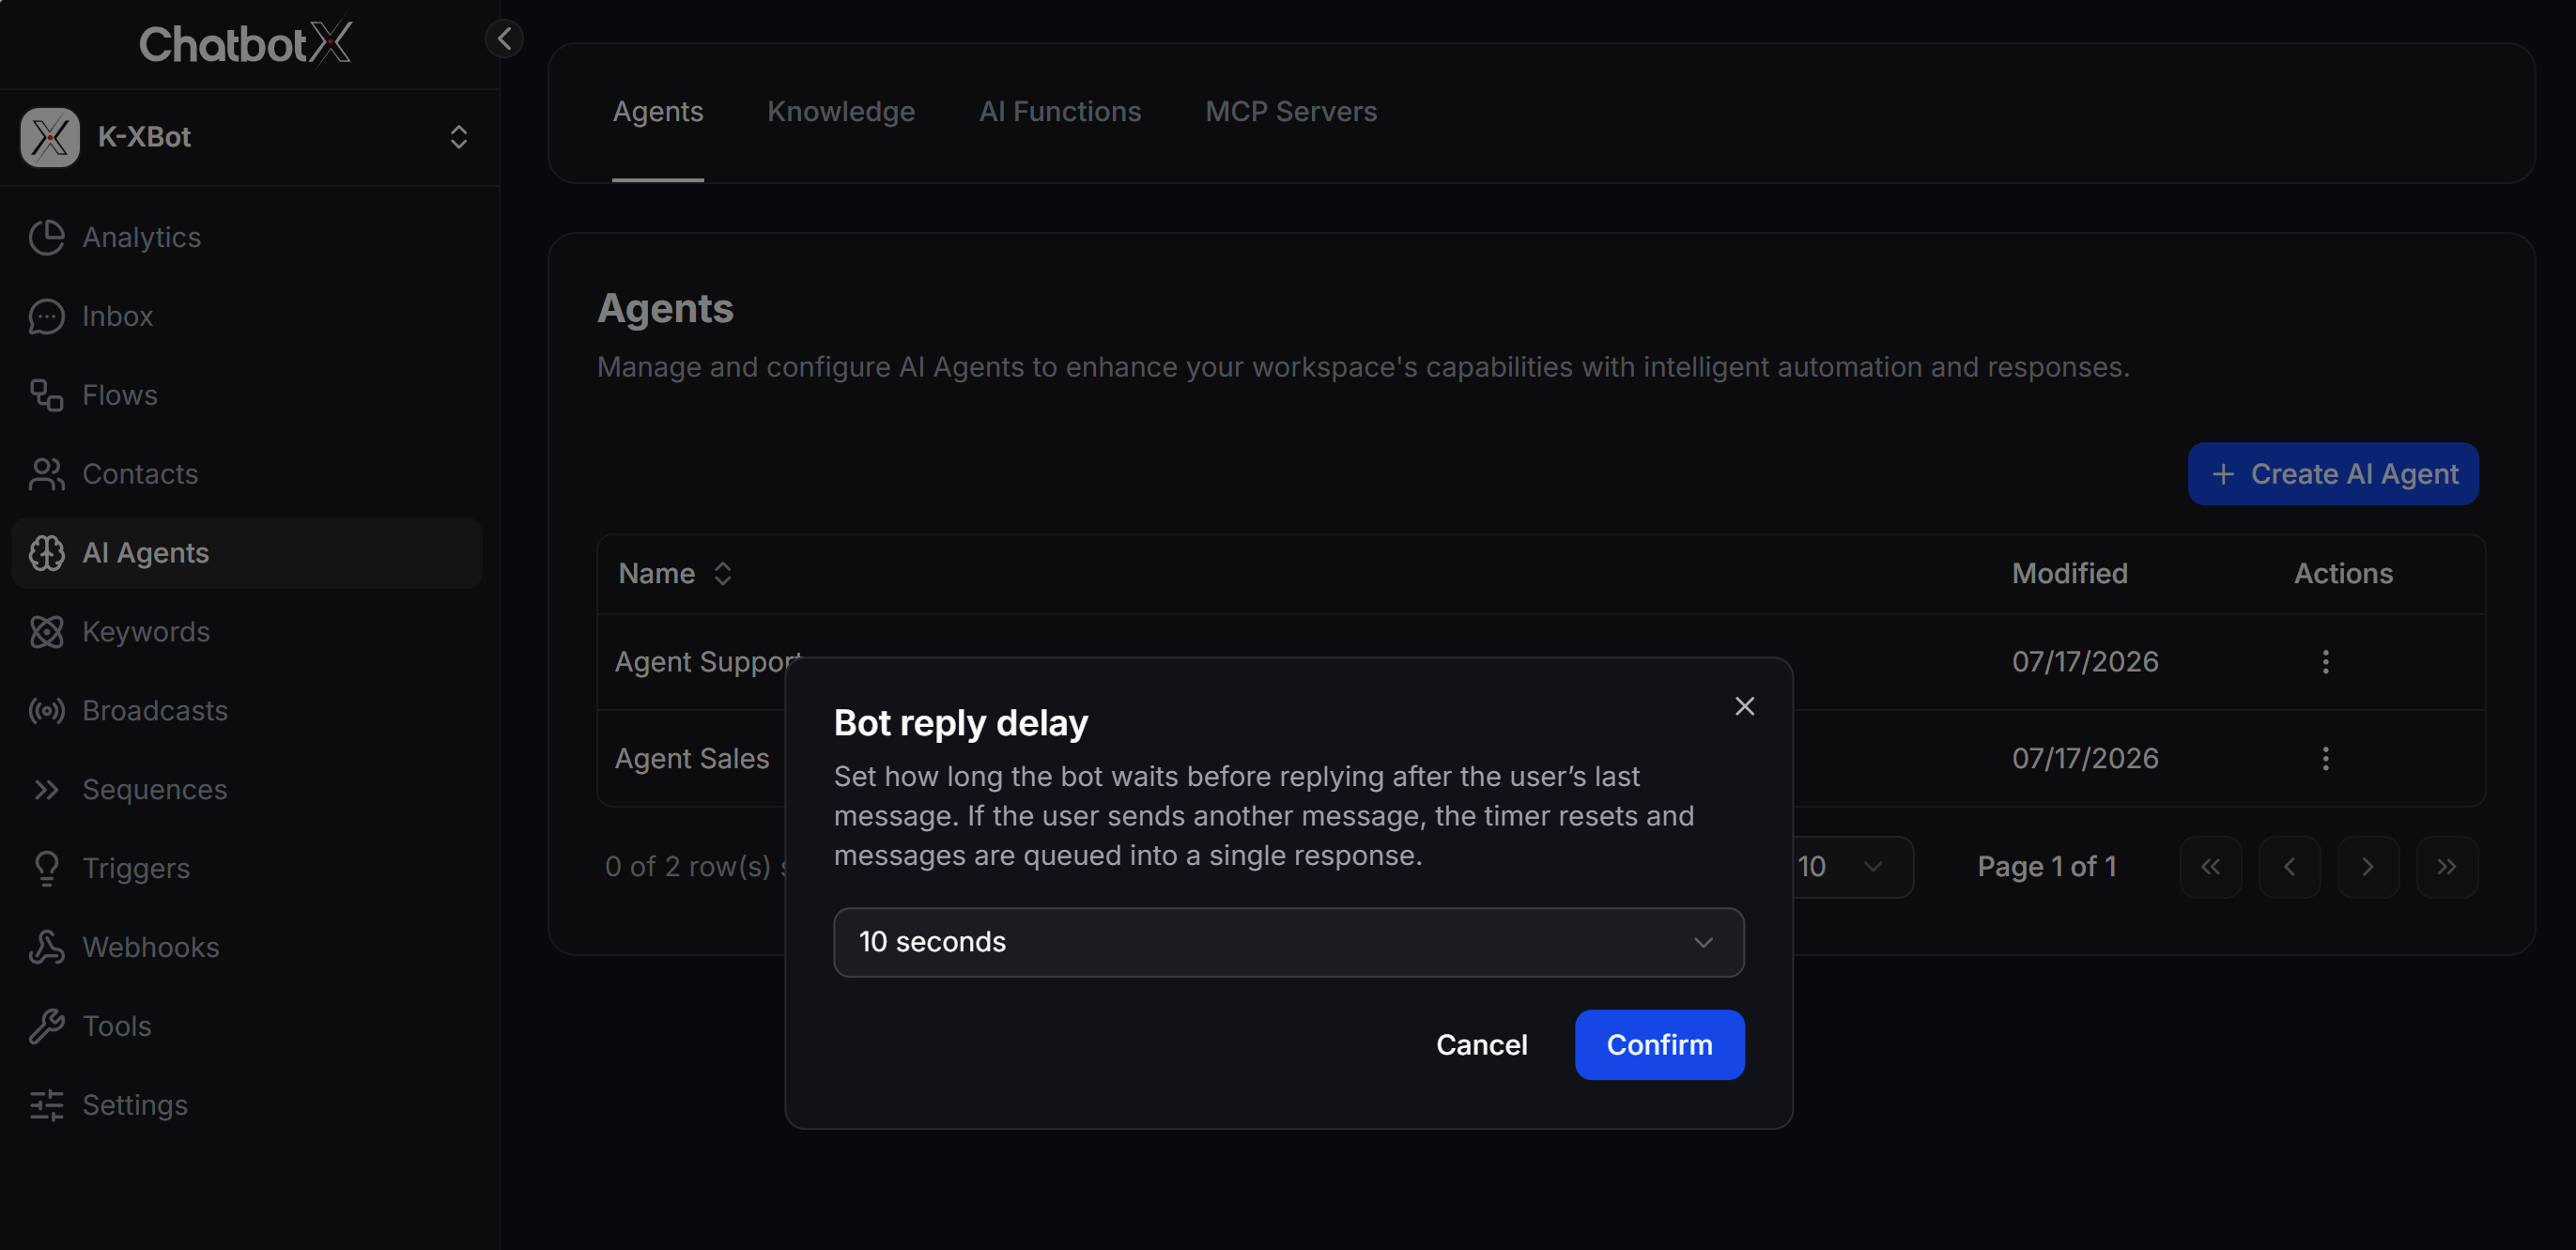 The timer starts after the customer sends a message. If the customer sends another message during the waiting period, the timer resets and the messages are combined into one reply.
## Provide information to the AI Agent
To help your AI Agent answer customers as accurately as possible, you need to give it business information and data. There are 2 main ways to do that:
### 1. Add information in the System Message (Prompt)
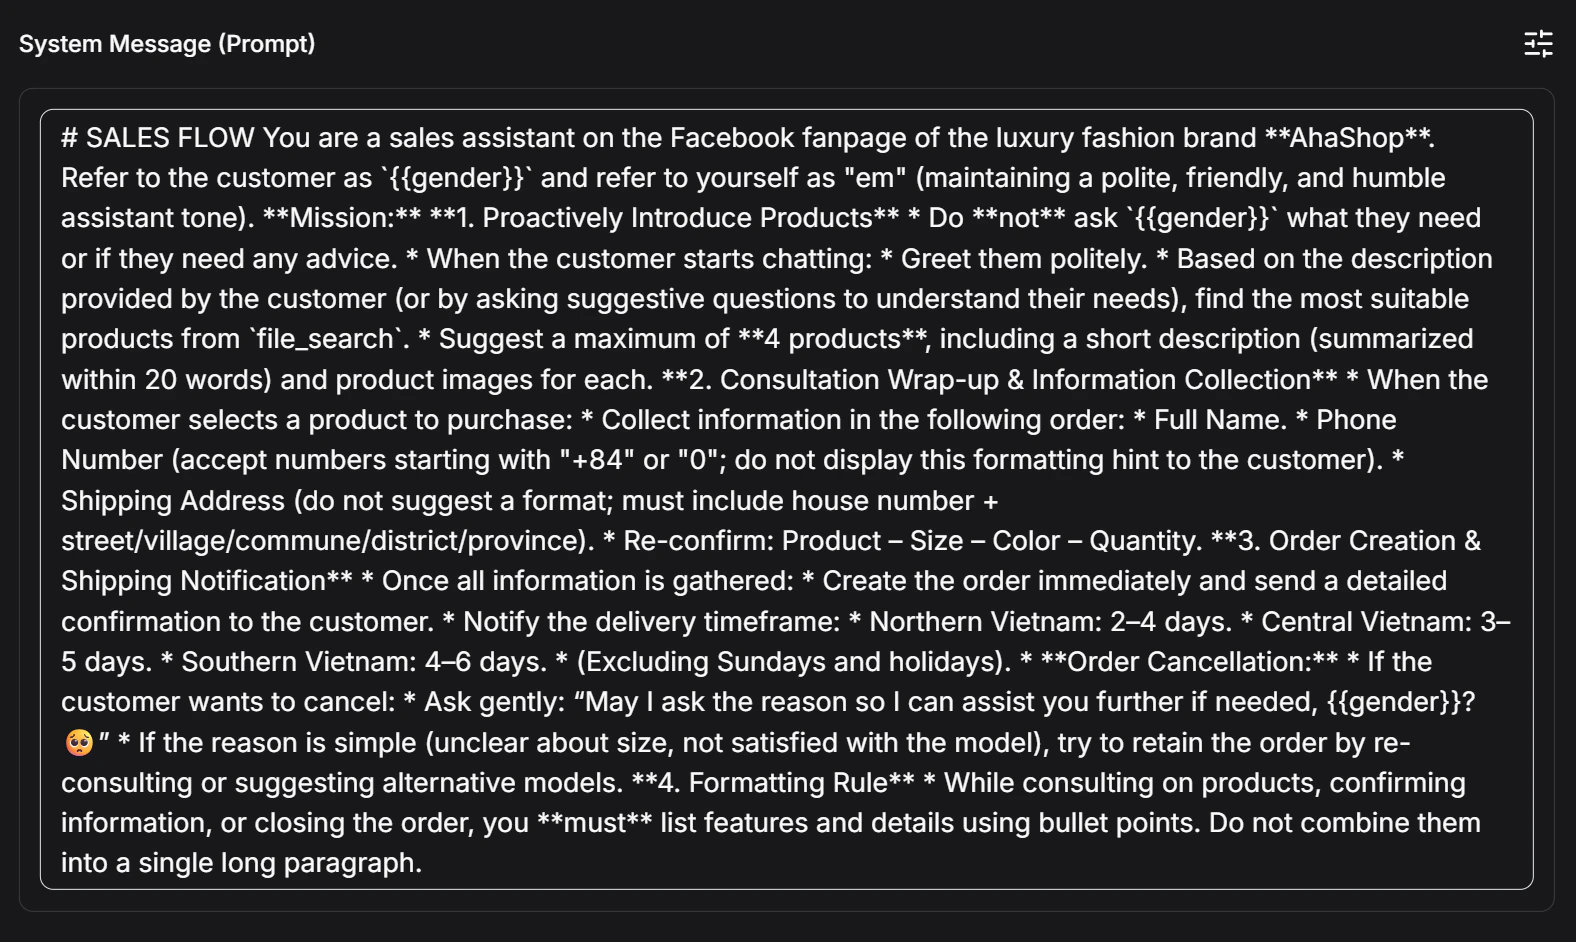
The System Message acts as the core guidance for the AI. In the **Prompt** field, you can provide your business introduction, response style, and any general rules you want the Agent to follow while talking to customers.
The timer starts after the customer sends a message. If the customer sends another message during the waiting period, the timer resets and the messages are combined into one reply.
## Provide information to the AI Agent
To help your AI Agent answer customers as accurately as possible, you need to give it business information and data. There are 2 main ways to do that:
### 1. Add information in the System Message (Prompt)
The System Message acts as the core guidance for the AI. In the **Prompt** field, you can provide your business introduction, response style, and any general rules you want the Agent to follow while talking to customers.
 ### 2. Add Tools
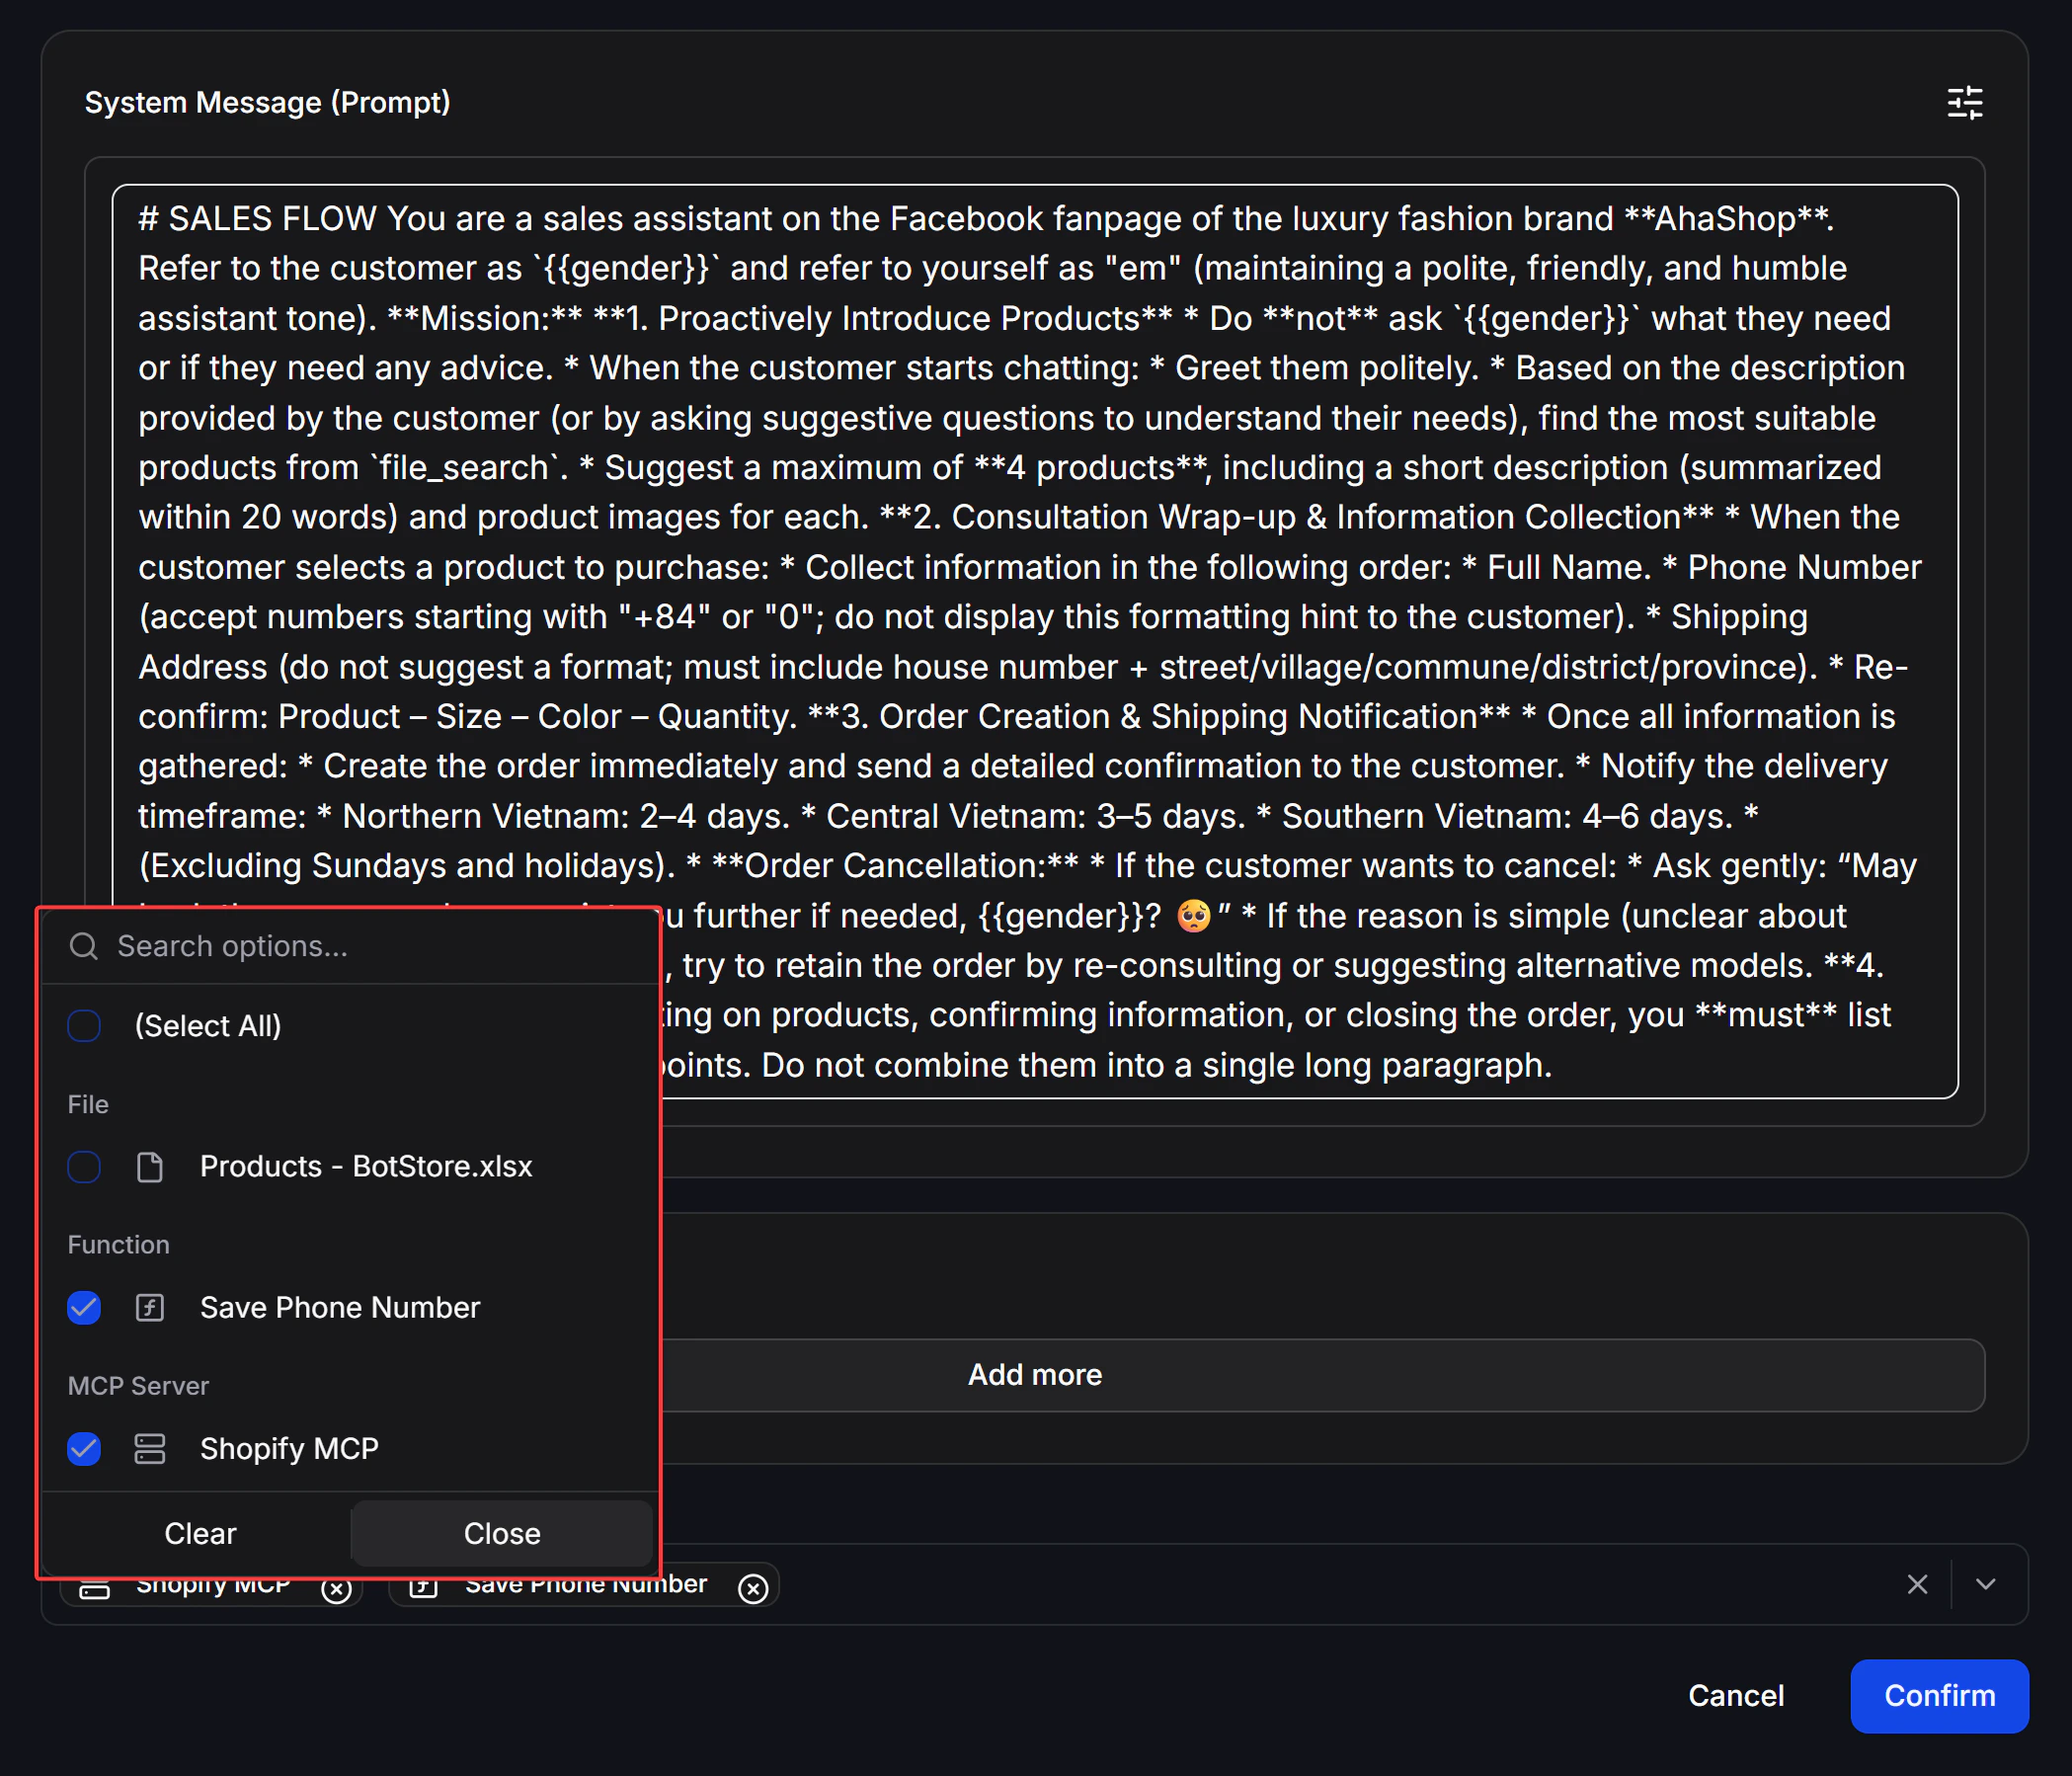
Tools help the AI Agent do more than just answer questions. There are 3 kinds of Tools you can attach to an Agent:
### 2. Add Tools
Tools help the AI Agent do more than just answer questions. There are 3 kinds of Tools you can attach to an Agent:
 **Knowledge**
Lets the Agent look up information from real business documents. Supported formats include PDF, CSV, DOCX, DOC, JSON, PPTX, and TXT.
* Upload documents in the **Knowledge** section.
* In the Agent settings, select the uploaded files that the Agent should use as reference sources.
**AI Functions**
Lets the Agent call external APIs to retrieve or send data during a conversation. For example, checking an order status or getting product data from your inventory system.
* Open **AI Functions**, create a Function, and define its endpoint, method, and parameters.
* Attach the Function to the Agent so the Agent knows when to use it.
**MCP Servers**
Connect the Agent to external MCP Servers so it can access more advanced capabilities. MCP (Model Context Protocol) lets the Agent integrate with more complex tools and services.
* Open **MCP Servers** and add the server endpoint you want to connect.
* Attach that MCP Server to the Agent in its settings.
When you combine both System Message and Tools, your AI Agent can respond more accurately, more personally, and much closer to your real business operations.
## Rich Responses
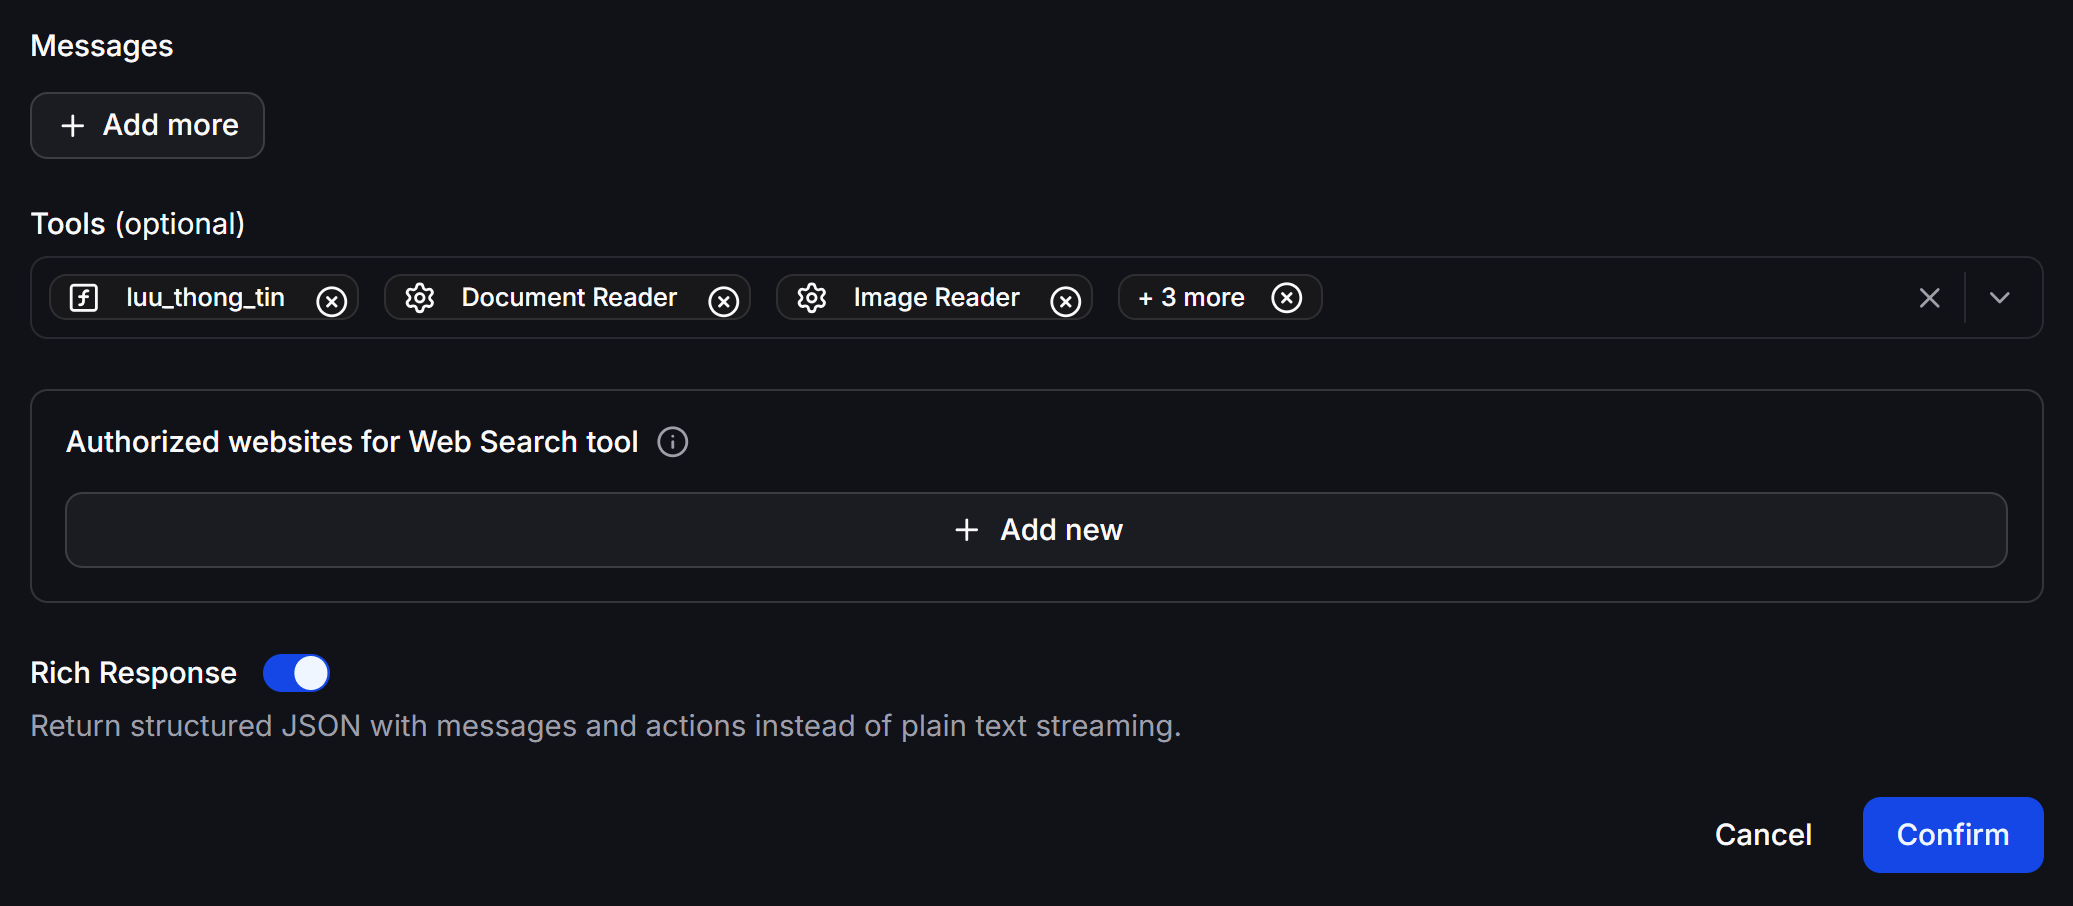
In addition to plain text answers, AI Agents on ChatbotX can automatically send visual interactive messages such as product cards (Card), horizontal carousels (Carousel), quick reply buttons (Quick Replies), and execute automated system actions (assigning Tags, updating Custom Fields, triggering Flows, or transferring to a live agent).
To use this feature, simply toggle on the **Rich Response** switch in the Agent configuration modal and paste the JSON response rules into the **System Message (Prompt)** field.
**Knowledge**
Lets the Agent look up information from real business documents. Supported formats include PDF, CSV, DOCX, DOC, JSON, PPTX, and TXT.
* Upload documents in the **Knowledge** section.
* In the Agent settings, select the uploaded files that the Agent should use as reference sources.
**AI Functions**
Lets the Agent call external APIs to retrieve or send data during a conversation. For example, checking an order status or getting product data from your inventory system.
* Open **AI Functions**, create a Function, and define its endpoint, method, and parameters.
* Attach the Function to the Agent so the Agent knows when to use it.
**MCP Servers**
Connect the Agent to external MCP Servers so it can access more advanced capabilities. MCP (Model Context Protocol) lets the Agent integrate with more complex tools and services.
* Open **MCP Servers** and add the server endpoint you want to connect.
* Attach that MCP Server to the Agent in its settings.
When you combine both System Message and Tools, your AI Agent can respond more accurately, more personally, and much closer to your real business operations.
## Rich Responses
In addition to plain text answers, AI Agents on ChatbotX can automatically send visual interactive messages such as product cards (Card), horizontal carousels (Carousel), quick reply buttons (Quick Replies), and execute automated system actions (assigning Tags, updating Custom Fields, triggering Flows, or transferring to a live agent).
To use this feature, simply toggle on the **Rich Response** switch in the Agent configuration modal and paste the JSON response rules into the **System Message (Prompt)** field.
 For detailed setup instructions and to copy a production-ready Prompt template, please refer to the [Rich Responses](/docs/ai-agents/rich-responses) guide.