> ## Documentation Index
> Fetch the complete documentation index at: https://chatbotx.io/docs/llms.txt
> Use this file to discover all available pages before exploring further.
# AI Functions
> Learn how to configure AI Functions in ChatbotX so your Agent can look up data, process requests, and integrate with external applications automatically.
**AI Functions** let you connect AI with prebuilt automation workflows or external tools. Through AI Functions, your chatbot can collect data from users, trigger the right Flow to process a task, retrieve data from an outside API, and then return the result to AI so the conversation can continue naturally.
For example, if a user asks, *"What's the weather in Hanoi today?"*, AI alone will not have real-time weather data. But with an AI Function, you can trigger a Flow that calls a weather API, pass the result back to AI, and let it reply accurately.
## How to create an AI Function
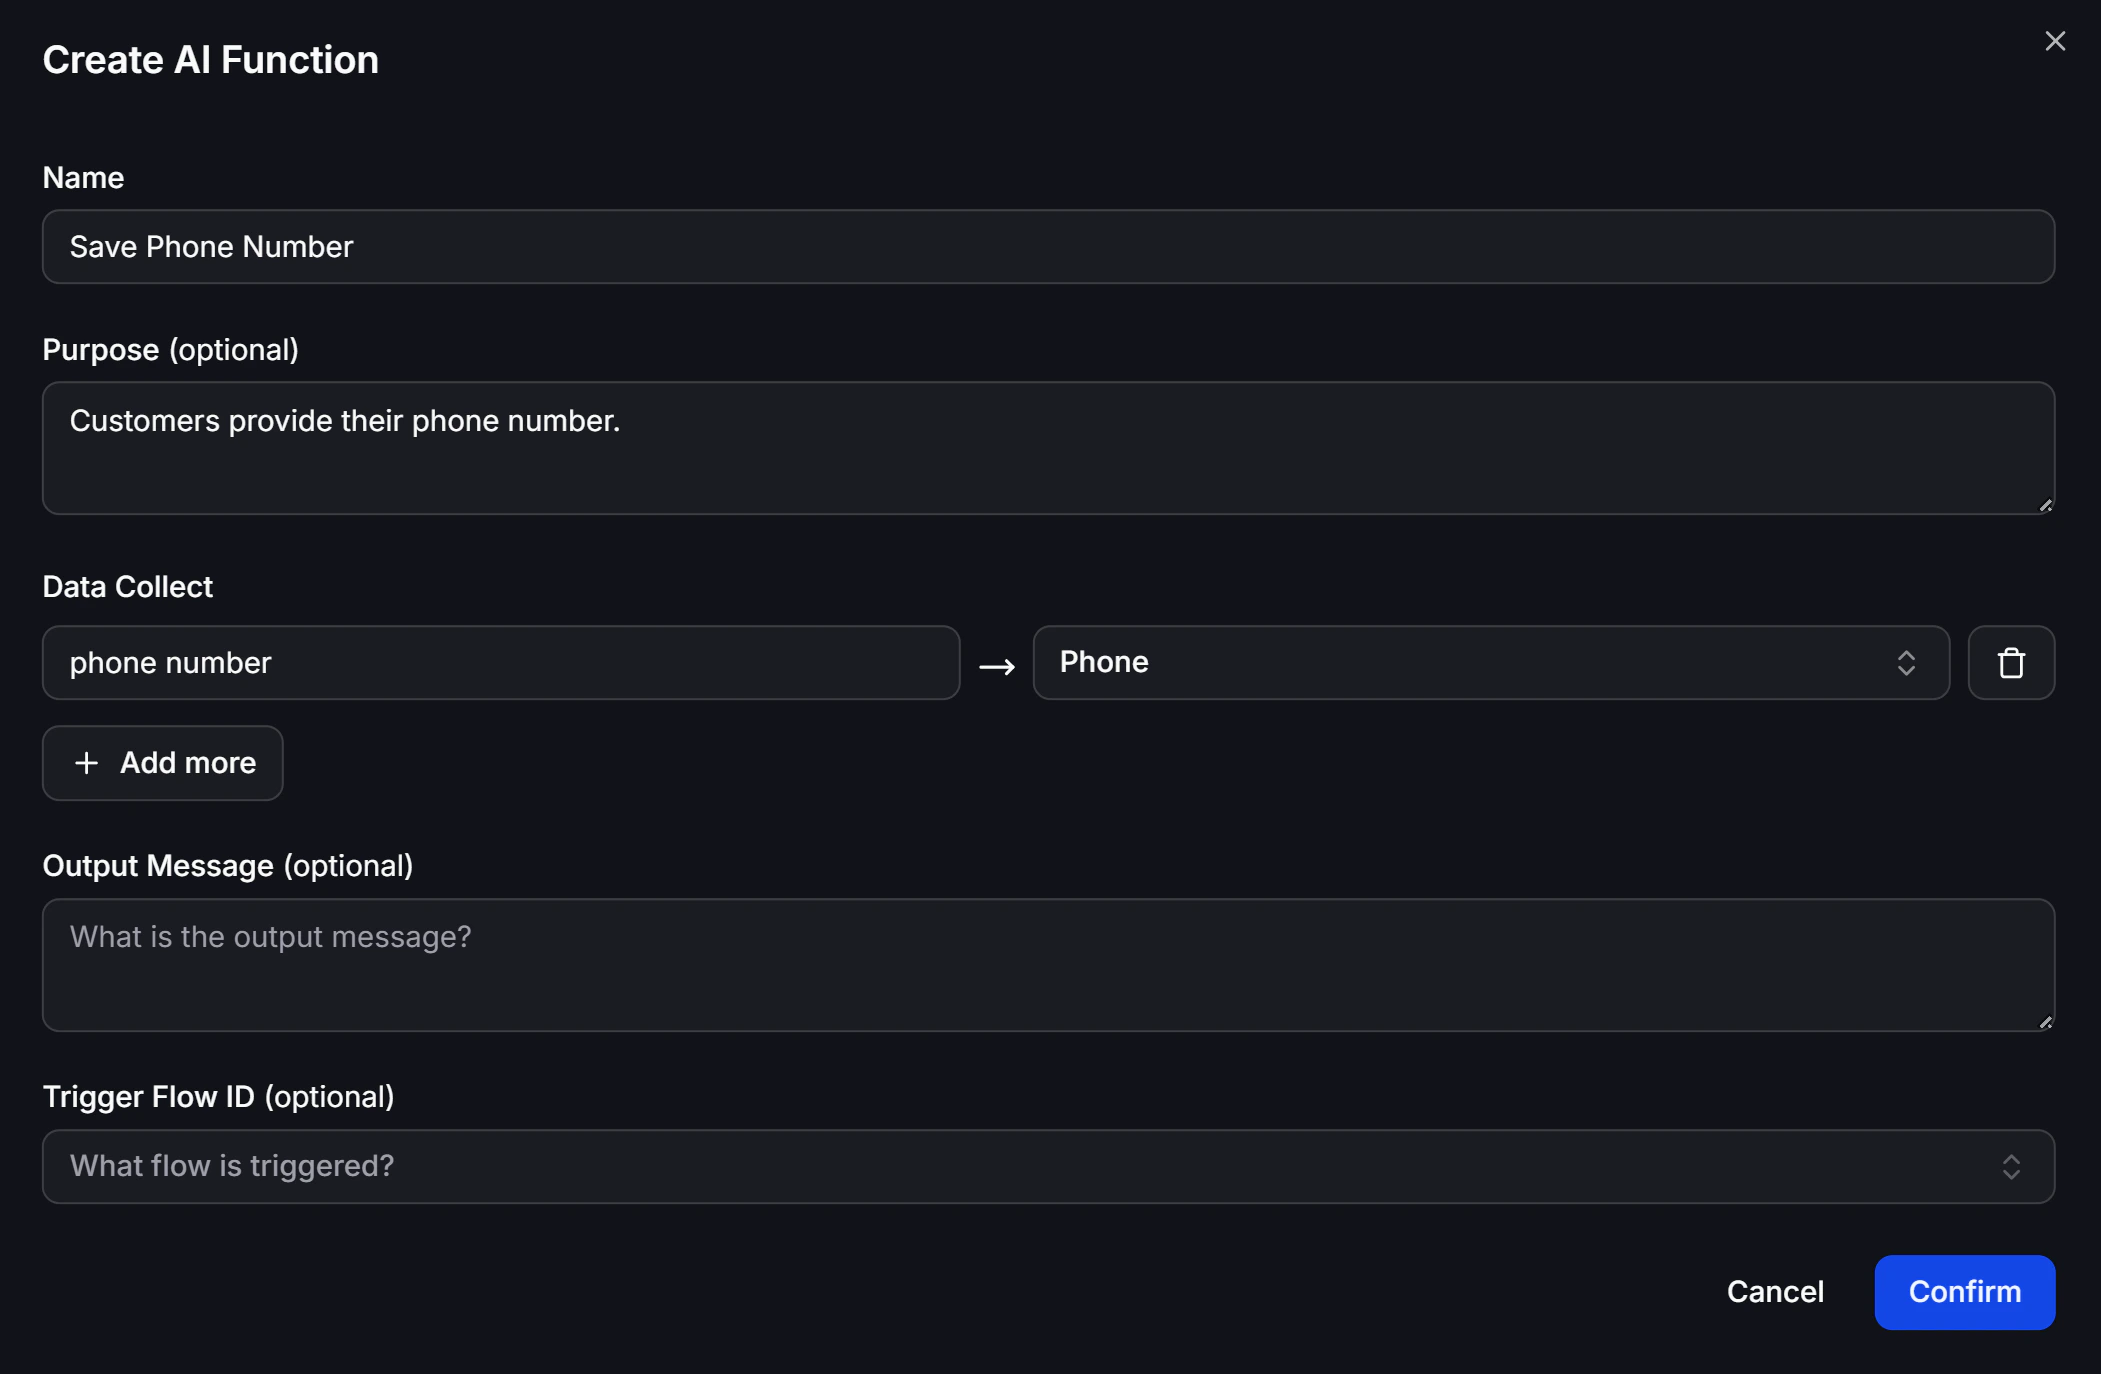
To create a new one, go to **AI Functions** from the left navigation and click **+ Create AI Function**. The configuration screen includes these fields:
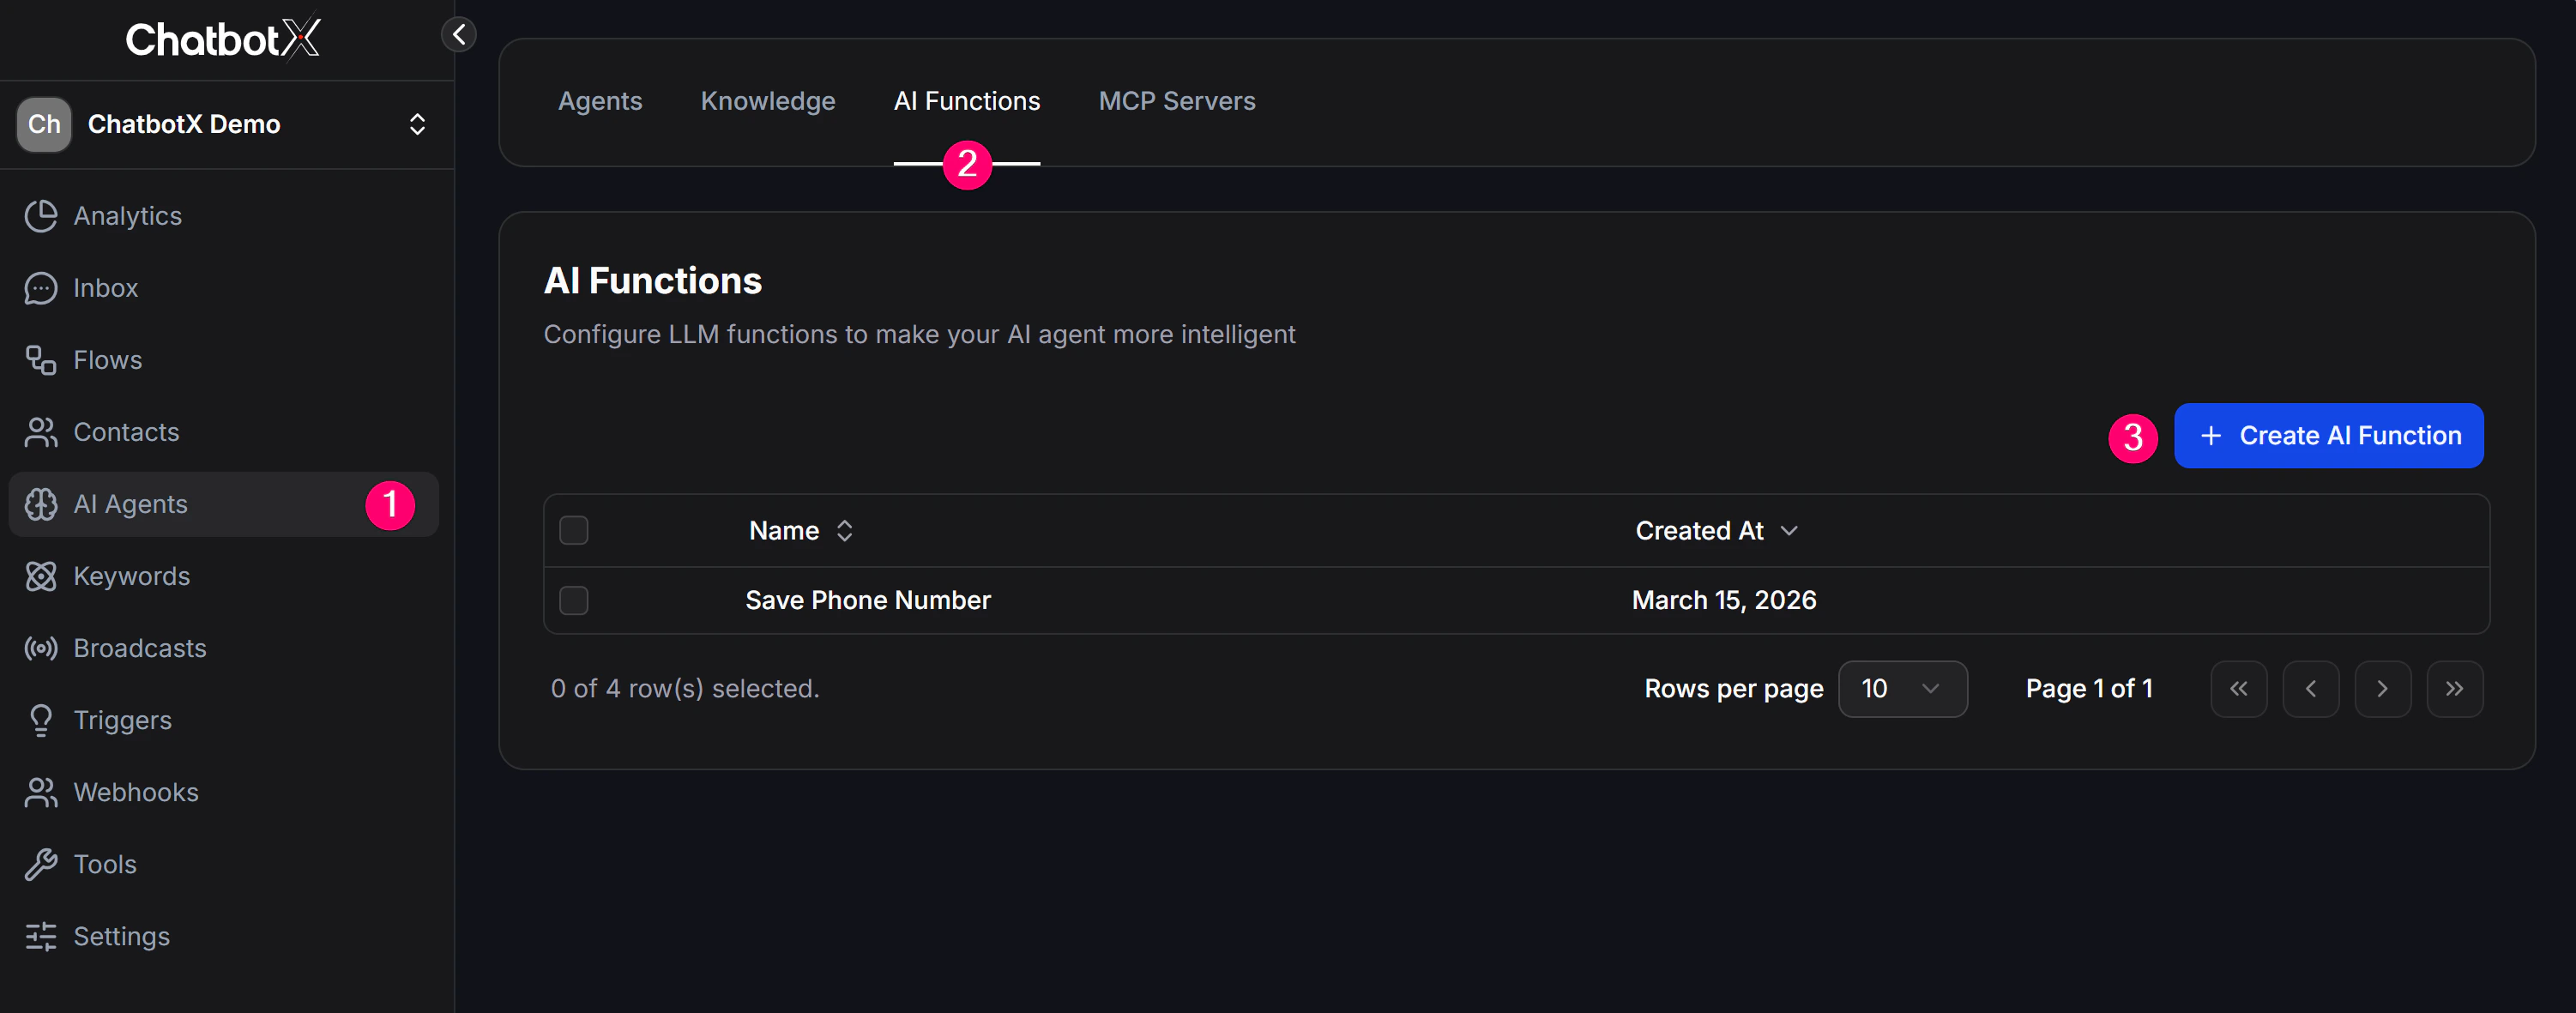 * **Name**: The name of the AI Function. It should clearly describe what it does. For example, instead of a vague name like *"weather"*, use something like *"get\_current\_weather"*. It is best to use English or unaccented text, with at least 2 words.
* **Purpose (What does this trigger do?)**: This helps AI understand when the Function should be used. Explain its job clearly and in enough detail, such as *"Allows users to book a medical appointment"*. You do not need to list the required data in this field.
* **What data to collect?**: Configure the parameters AI needs to collect from the customer's replies before running the Flow, such as date, name, or email. **Note:** variable names should be meaningful. For example, use *"email"* instead of *"collect\_1"* so AI can map chat data correctly.
* **What is the output message?**: This is the raw result returned after the Function finishes running, such as *"Your appointment has been booked successfully"*. In most cases this message is not sent word for word. AI reads it, rewrites it into a smoother response, and sends that to the user.
* **Trigger Flow ID**: (*Optional*) Define the ID of the Flow you want to run after AI has collected all required data. Inside that Flow, you can save customer data, fire a webhook, call an API, or even hand the conversation over to a human with an Inbox Action.
* **Name**: The name of the AI Function. It should clearly describe what it does. For example, instead of a vague name like *"weather"*, use something like *"get\_current\_weather"*. It is best to use English or unaccented text, with at least 2 words.
* **Purpose (What does this trigger do?)**: This helps AI understand when the Function should be used. Explain its job clearly and in enough detail, such as *"Allows users to book a medical appointment"*. You do not need to list the required data in this field.
* **What data to collect?**: Configure the parameters AI needs to collect from the customer's replies before running the Flow, such as date, name, or email. **Note:** variable names should be meaningful. For example, use *"email"* instead of *"collect\_1"* so AI can map chat data correctly.
* **What is the output message?**: This is the raw result returned after the Function finishes running, such as *"Your appointment has been booked successfully"*. In most cases this message is not sent word for word. AI reads it, rewrites it into a smoother response, and sends that to the user.
* **Trigger Flow ID**: (*Optional*) Define the ID of the Flow you want to run after AI has collected all required data. Inside that Flow, you can save customer data, fire a webhook, call an API, or even hand the conversation over to a human with an Inbox Action.
 ## Common AI Function examples
Below are some common examples to help you picture how an AI Function can be configured:
### 1. Book Appointment
* **Name**: `book_appointment`
* **Purpose**: Lets users book an appointment.
* **What data to collect?**: `date`, `email`, `reason`
* **What is the output message?**: Your appointment has been booked successfully.
### 2. Human Transfer
* **Name**: `connect_user_to_human`
* **Purpose**: Lets users talk to a real support staff member. This Function connects them directly.
* **Trigger Flow ID**: Triggers a Flow that contains an Inbox Action to hand the conversation to a human.
* **What is the output message?**: You have been connected to a support representative. We will reply shortly.
### 3. Weather API
* **Name**: `get_current_weather`
* **Purpose**: Lets users check the current weather in a specific location.
* **What data to collect?**: `city`
* **Trigger Flow ID**: Triggers a Flow that contains an External Request to call a weather API.
* **What is the output message?**: `{{data_from_api}}`
### 4. Email List
* **Name**: `join_email_list`
* **Purpose**: Lets users subscribe to our email newsletter list.
* **What data to collect?**: `email`
* **What is the output message?**: Subscription successful.
### 5. Shipping Quote
* **Name**: `request_shipping_quote`
* **Purpose**: Lets users request a shipping quote for a parcel.
* **What data to collect?**: `origin_address`, `destination_address`, `dimensions`, `weight`
* **Trigger Flow ID**: Triggers a Flow that automatically calculates the shipping quote based on parcel weight and size.
* **What is the output message?**: `{{quote}}`
## Using AI Functions
After setting up an AI Function, make sure it is enabled and linked to the correct AI Agent in that Agent's configuration.
## Common AI Function examples
Below are some common examples to help you picture how an AI Function can be configured:
### 1. Book Appointment
* **Name**: `book_appointment`
* **Purpose**: Lets users book an appointment.
* **What data to collect?**: `date`, `email`, `reason`
* **What is the output message?**: Your appointment has been booked successfully.
### 2. Human Transfer
* **Name**: `connect_user_to_human`
* **Purpose**: Lets users talk to a real support staff member. This Function connects them directly.
* **Trigger Flow ID**: Triggers a Flow that contains an Inbox Action to hand the conversation to a human.
* **What is the output message?**: You have been connected to a support representative. We will reply shortly.
### 3. Weather API
* **Name**: `get_current_weather`
* **Purpose**: Lets users check the current weather in a specific location.
* **What data to collect?**: `city`
* **Trigger Flow ID**: Triggers a Flow that contains an External Request to call a weather API.
* **What is the output message?**: `{{data_from_api}}`
### 4. Email List
* **Name**: `join_email_list`
* **Purpose**: Lets users subscribe to our email newsletter list.
* **What data to collect?**: `email`
* **What is the output message?**: Subscription successful.
### 5. Shipping Quote
* **Name**: `request_shipping_quote`
* **Purpose**: Lets users request a shipping quote for a parcel.
* **What data to collect?**: `origin_address`, `destination_address`, `dimensions`, `weight`
* **Trigger Flow ID**: Triggers a Flow that automatically calculates the shipping quote based on parcel weight and size.
* **What is the output message?**: `{{quote}}`
## Using AI Functions
After setting up an AI Function, make sure it is enabled and linked to the correct AI Agent in that Agent's configuration.
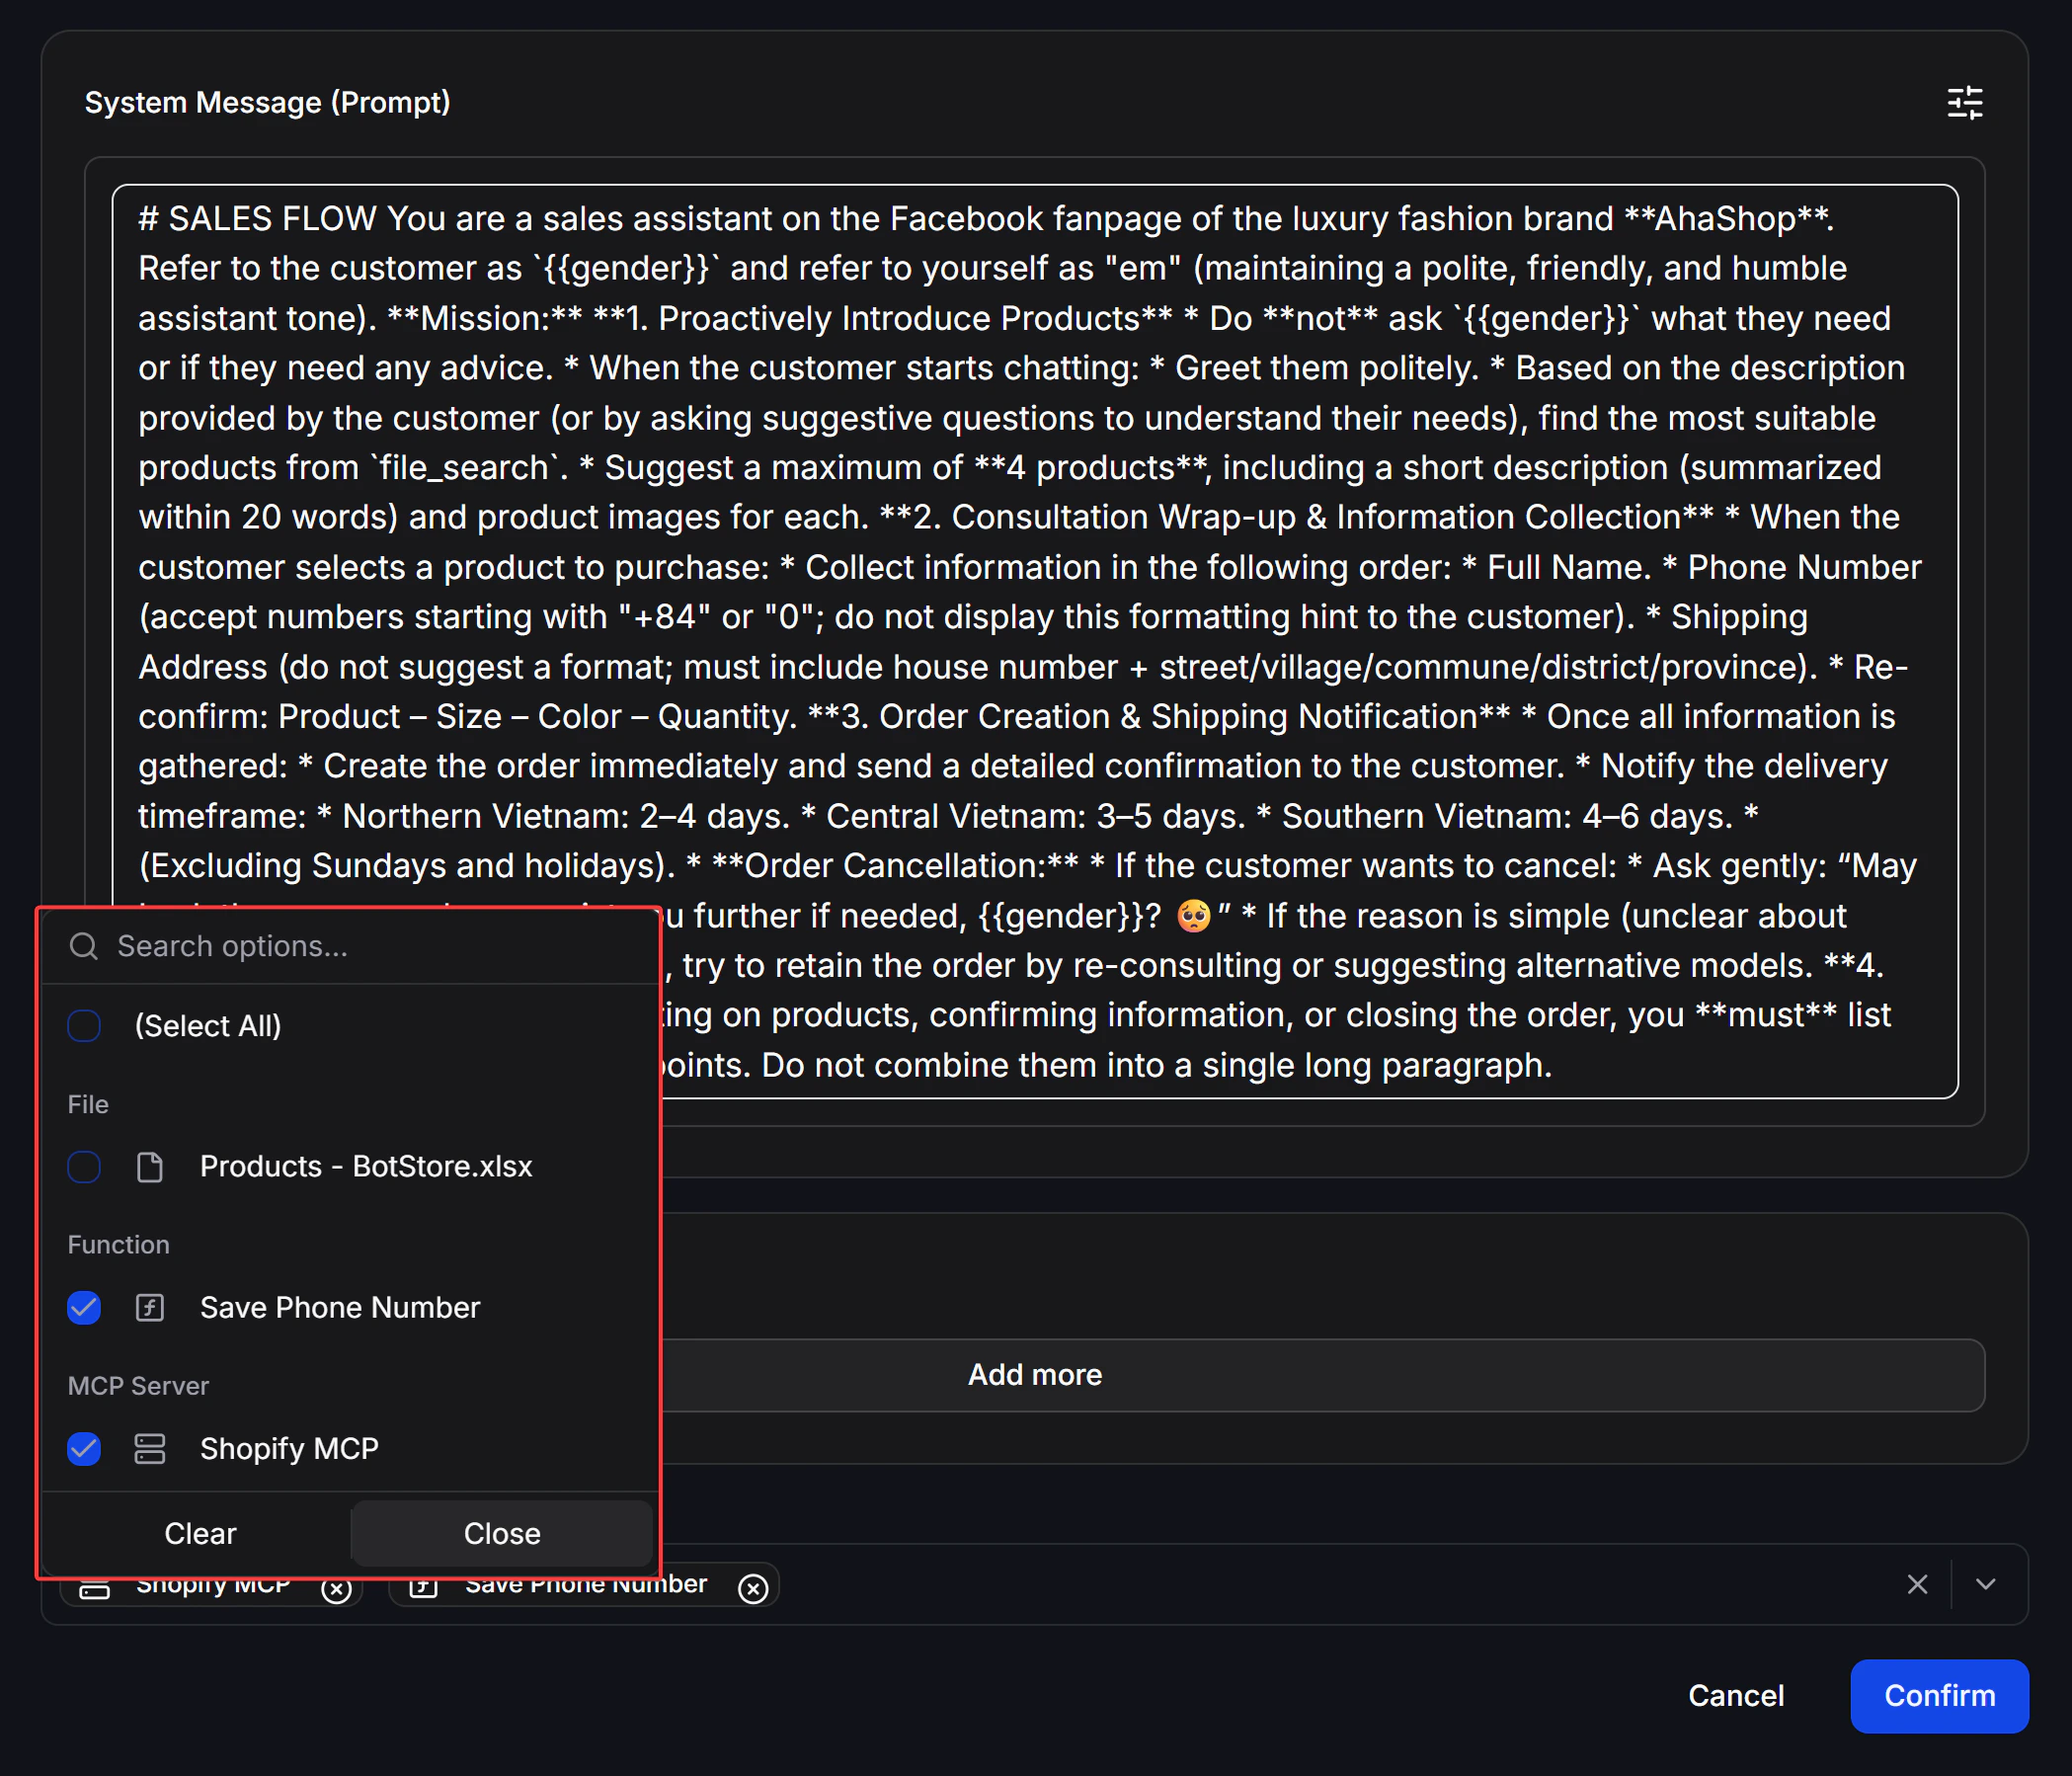 **Tip:** Your System Prompt can strongly influence how AI Functions behave. For example, if you have a restaurant booking Function, add a note like this to the Agent prompt: *"When a user wants to book a table, always ask for the expected time and the number of guests first."* That helps AI proactively collect all required data.