> ## Documentation Index
> Fetch the complete documentation index at: https://chatbotx.io/docs/llms.txt
> Use this file to discover all available pages before exploring further.
# MCP Servers
> Learn how to connect MCP Servers to ChatbotX to expand your AI Agent's integration and data-processing capabilities.
**MCP (Model Context Protocol) Servers** let your AI Agent perform more advanced tasks by connecting directly to external systems and data sources.
*Example:* If you connect to a Shopify MCP Server, your AI Agent can automatically search product details and customer purchase history in real time from your Shopify store. In practice, any system that supports MCP can communicate directly with a ChatbotX AI Agent without requiring you to build complicated custom API integrations yourself.
## How to connect an MCP Server
To connect a new MCP Server, follow these steps:
1. Open **MCP Servers** from the left navigation.
2. Click **+ Create MCP Server**.
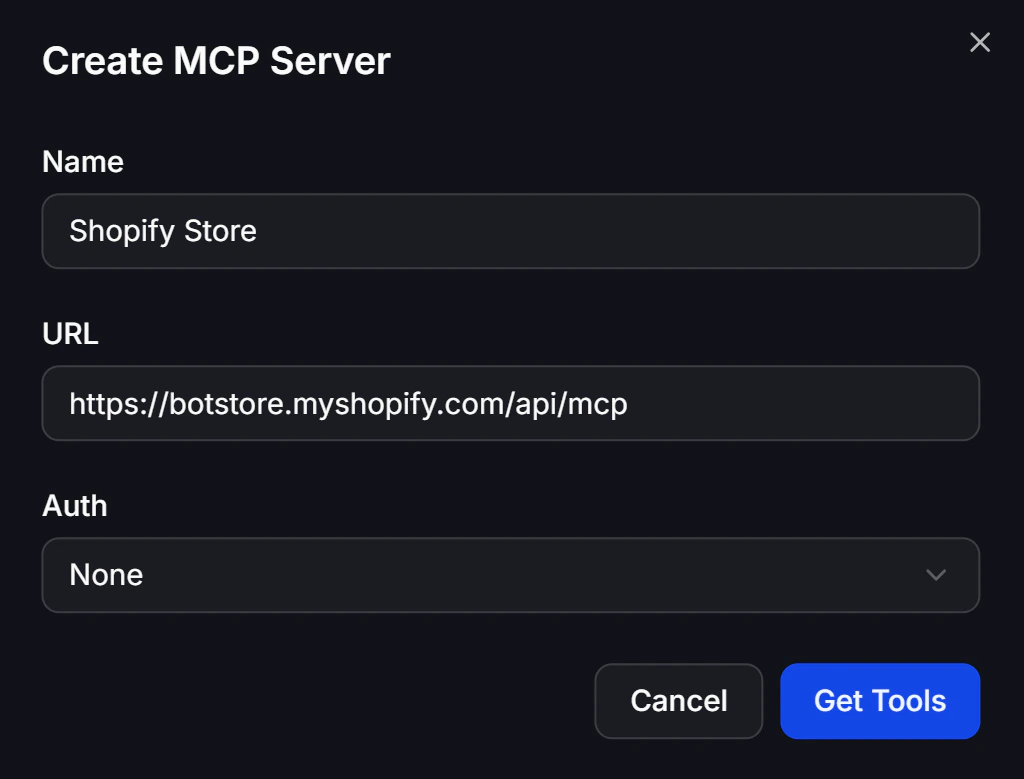
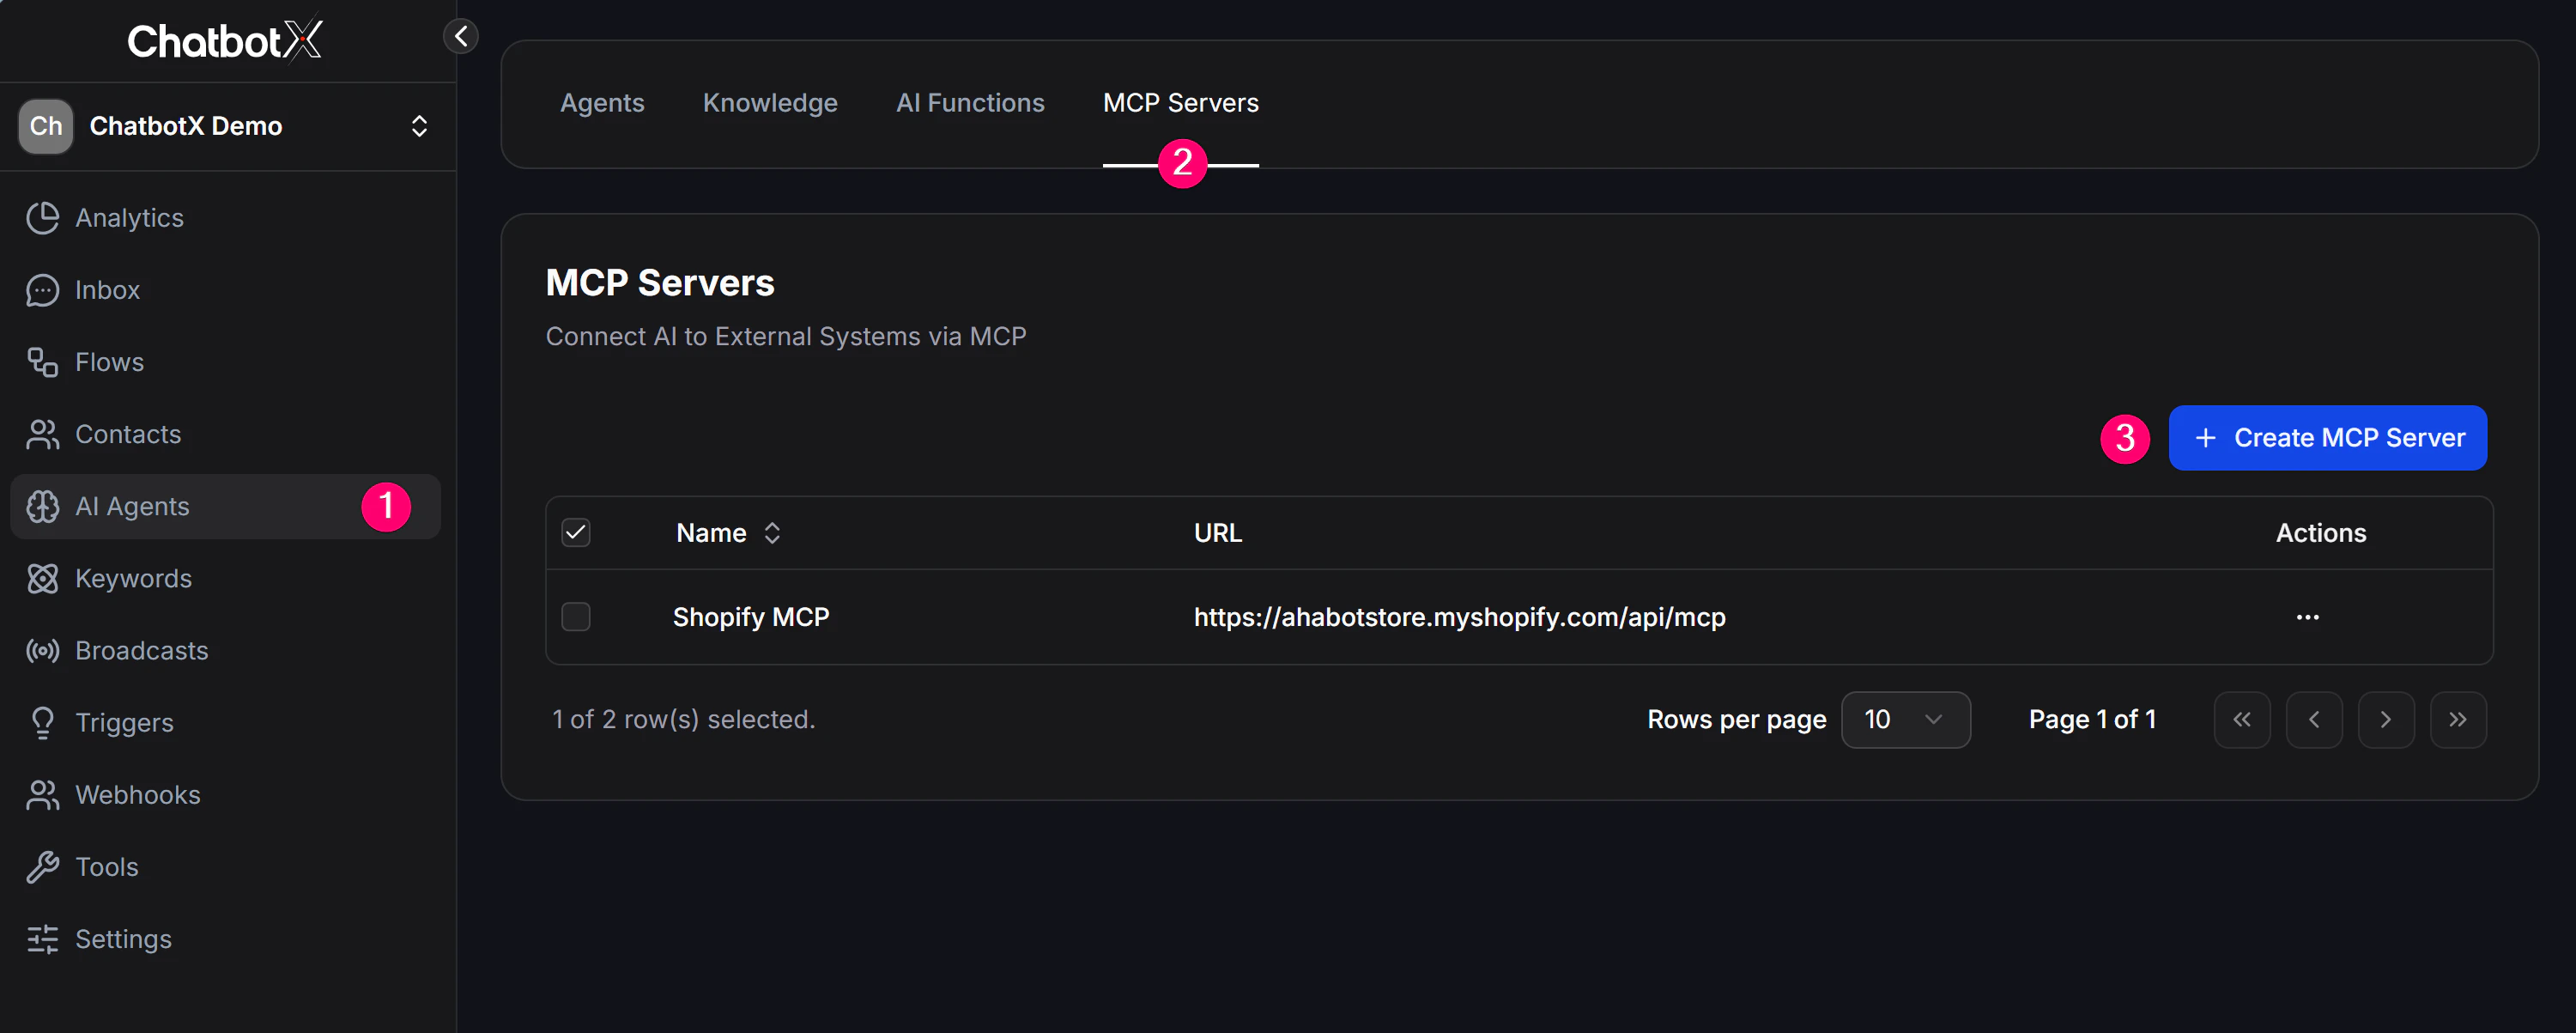 3. In the configuration panel, enter the basic connection details:
* **Name**: A memorable name for this server, such as *Shopify Store* or *Stripe Billing*.
* **URL**: The exact URL of the MCP Server you want to connect.
* **Authentication**: Choose the security method required by your server, such as *None*, *Token*, or *Custom Header*.
4. After filling in the URL and Authentication settings, click **Get Tools**. ChatbotX will automatically scan the MCP Server and load the list of tools it provides.
3. In the configuration panel, enter the basic connection details:
* **Name**: A memorable name for this server, such as *Shopify Store* or *Stripe Billing*.
* **URL**: The exact URL of the MCP Server you want to connect.
* **Authentication**: Choose the security method required by your server, such as *None*, *Token*, or *Custom Header*.
4. After filling in the URL and Authentication settings, click **Get Tools**. ChatbotX will automatically scan the MCP Server and load the list of tools it provides.
 ## Enable MCP for an AI Agent
After you add an MCP Server successfully:
* Open the configuration of the **AI Agent** that should be allowed to use this server.
* In the Agent's tool settings, select the MCP Server you just created to link them together.
## Enable MCP for an AI Agent
After you add an MCP Server successfully:
* Open the configuration of the **AI Agent** that should be allowed to use this server.
* In the Agent's tool settings, select the MCP Server you just created to link them together.
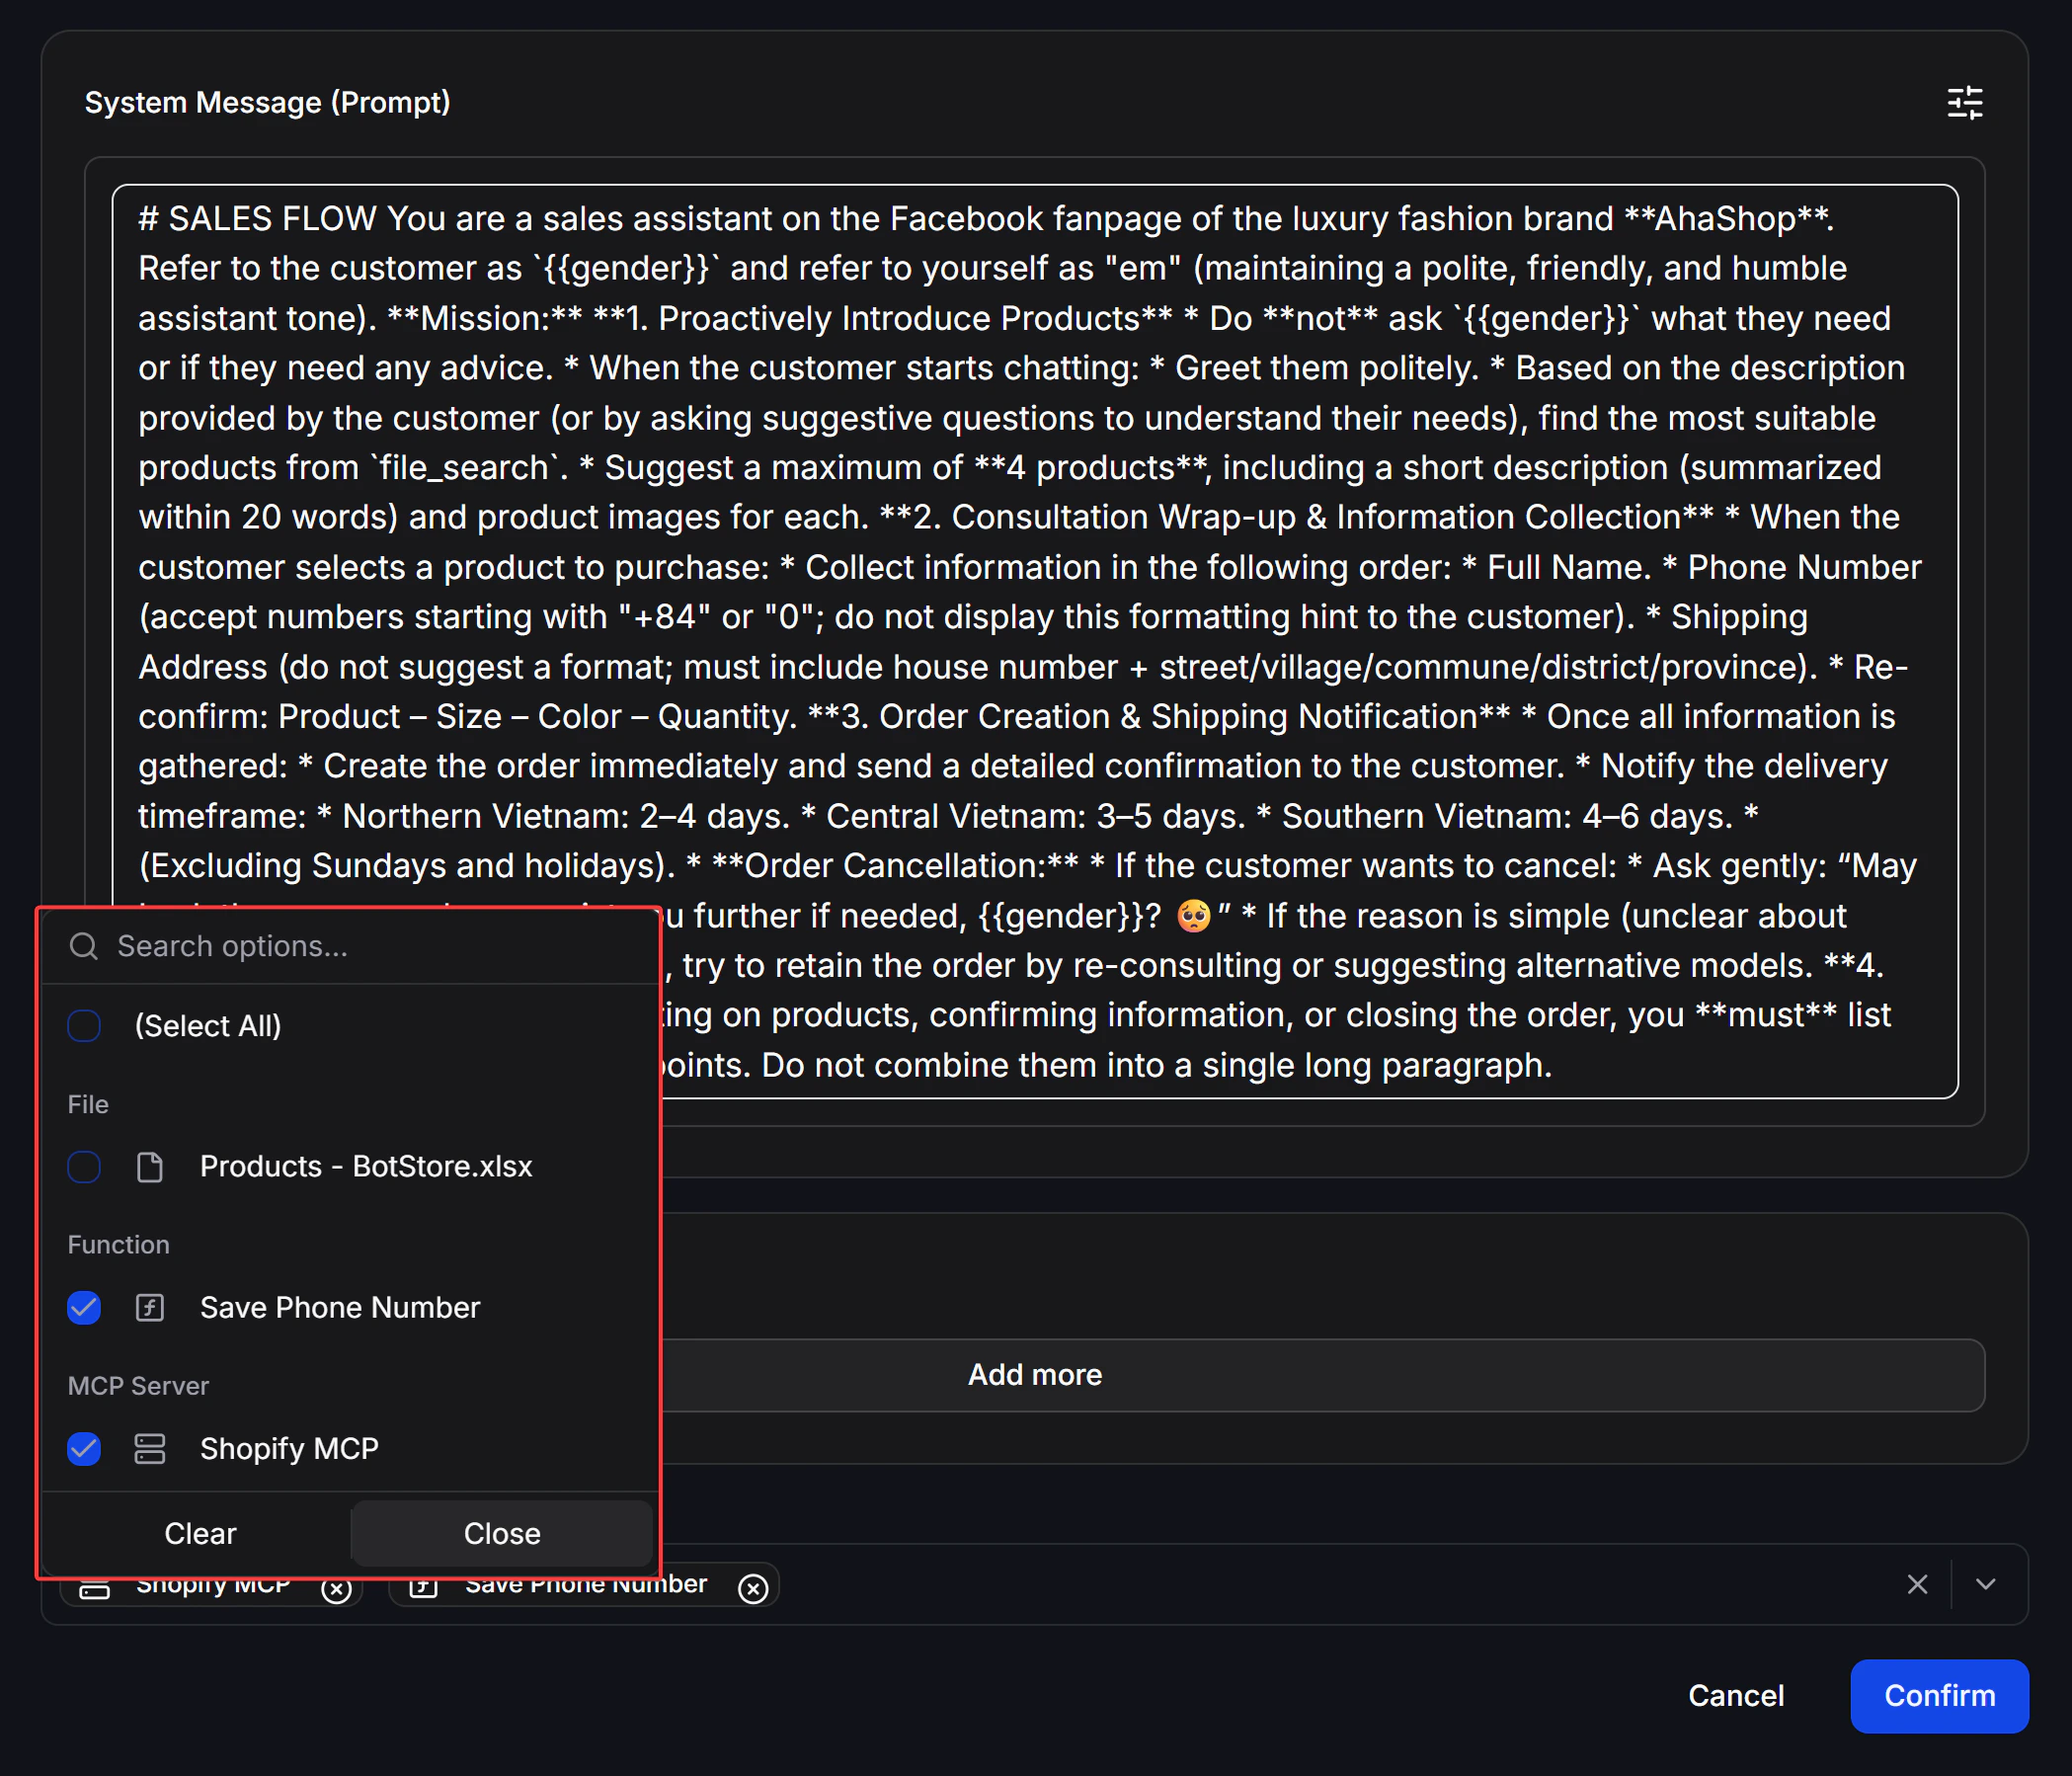 At that point, your AI Agent can start calling the available functions from the external system to serve customers.
*Some popular services and platforms already provide MCP support, including Zapier, Make, Shopify, Stripe, and WooCommerce.*
At that point, your AI Agent can start calling the available functions from the external system to serve customers.
*Some popular services and platforms already provide MCP support, including Zapier, Make, Shopify, Stripe, and WooCommerce.*