> ## Documentation Index
> Fetch the complete documentation index at: https://chatbotx.io/docs/llms.txt
> Use this file to discover all available pages before exploring further.
# Webchat
> Create a Webchat widget to your website so visitors can message you while they browse.
**Webchat** lets you place a chat widget directly on your website. In ChatbotX, you can create a Webchat, choose a Welcome Flow, add authorized domains, configure the opening experience, adjust the widget design, and copy the embed code to install it on your site.
## Prerequisites
Before you begin, make sure you have:
* A ChatbotX installation
* A website where you can paste the embed code
Unlike Facebook or Zalo, Webchat does not require any credential configuration in ChatbotX. You can create and configure a widget directly from the channel settings.
## Step 1 : Create a Webchat
You can create a Webchat in either of these two ways:
From the left menu, choose **Analytics**.
Click **Create Inbox** to begin adding a new channel.
Select **Webchat** from the channel list.
Click **Continue** to open the Webchat creation screen.
Enter the Webchat name, then click **Create Webchat**.
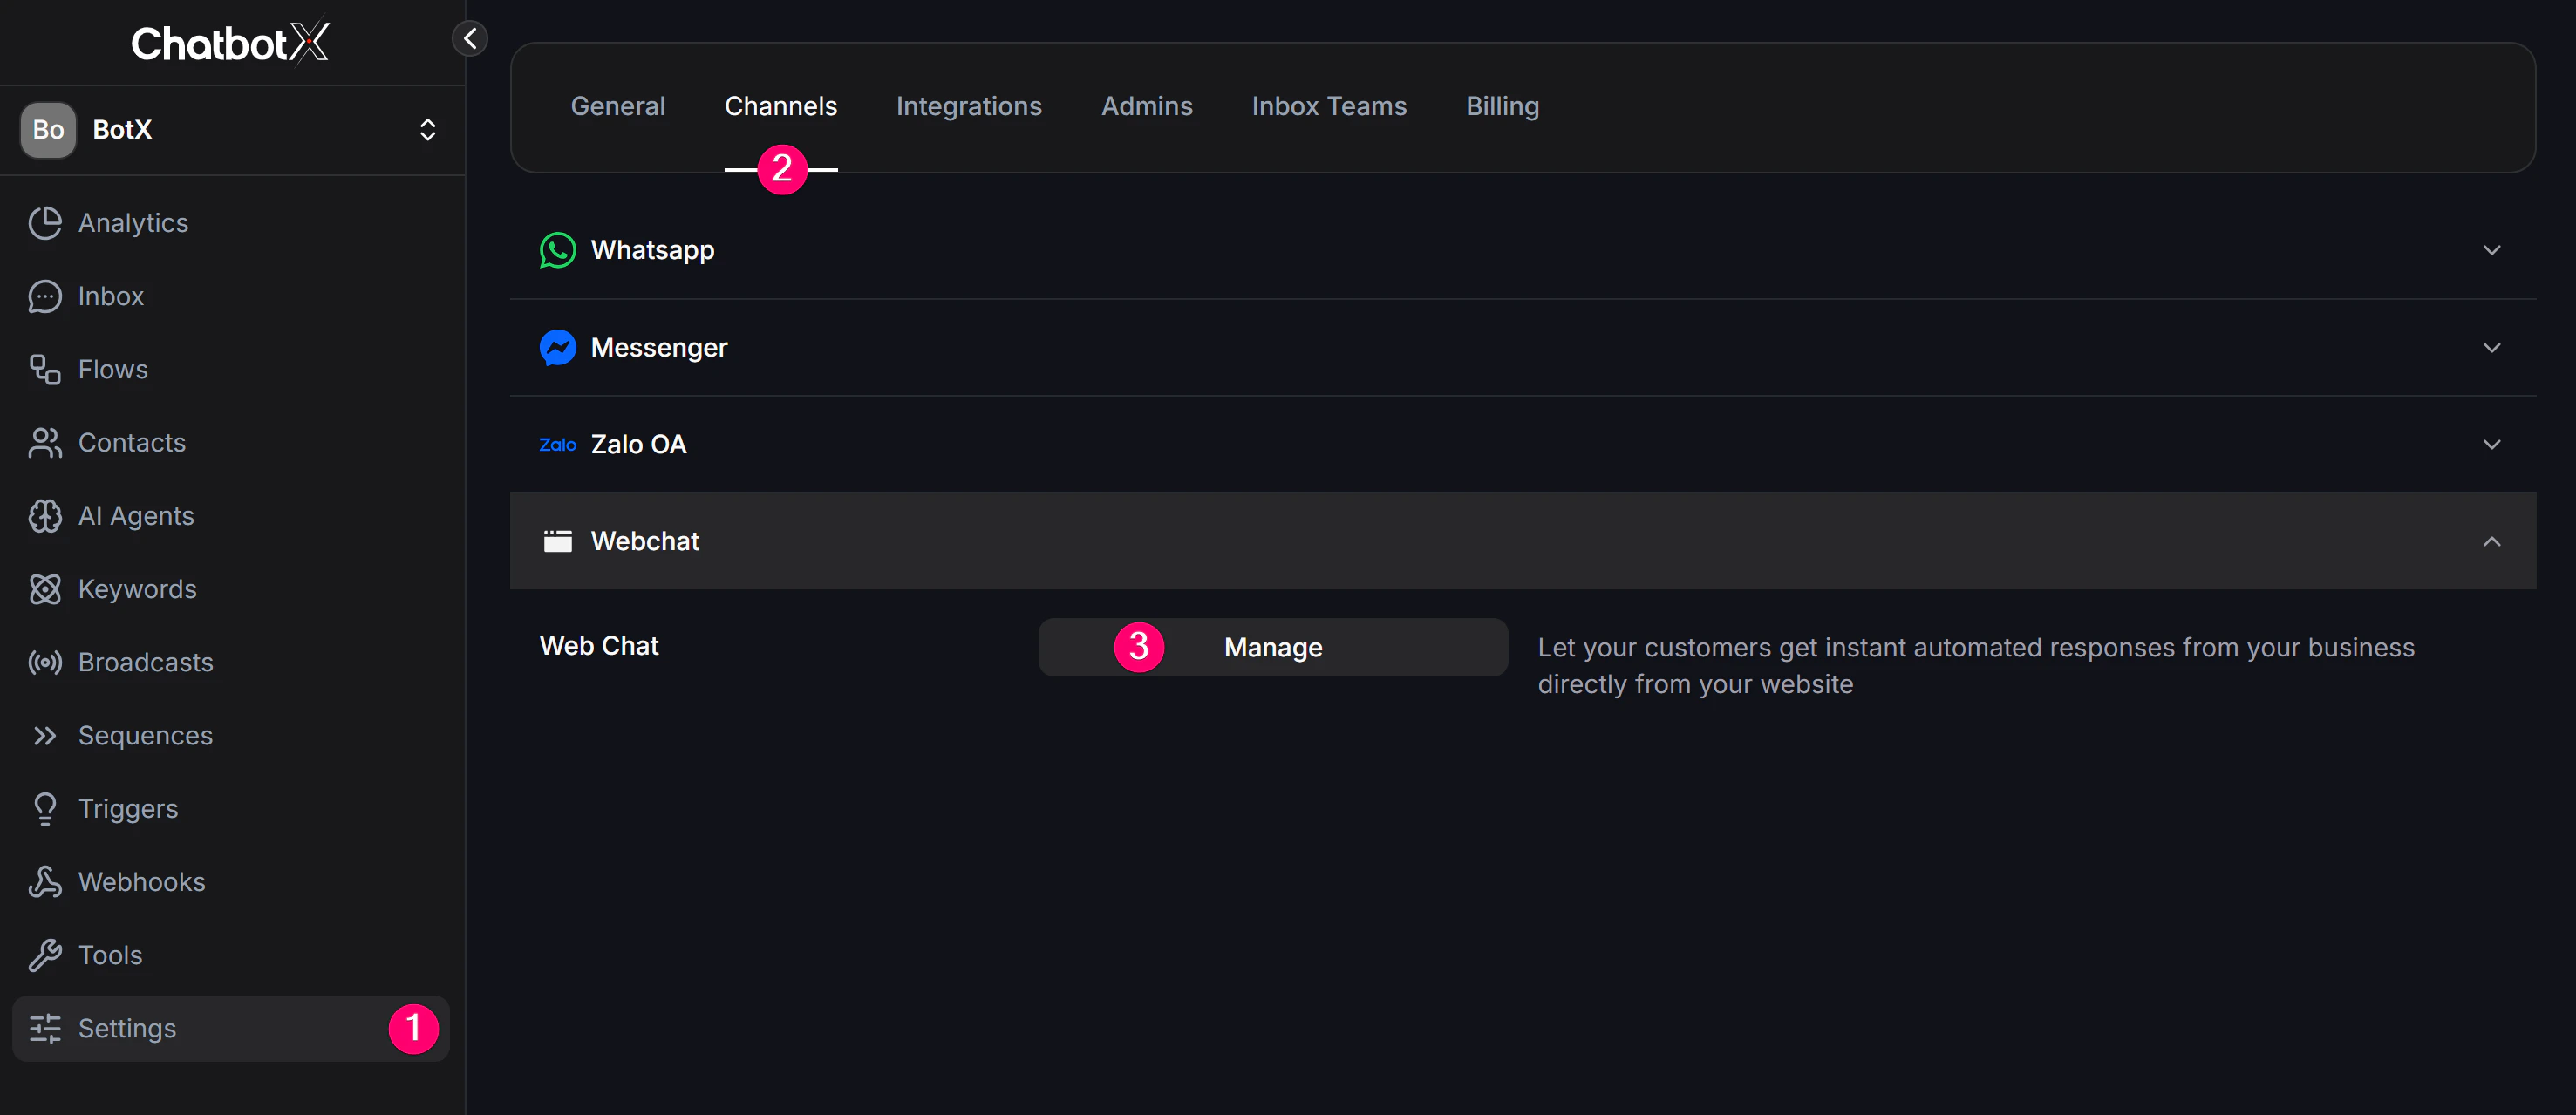
From the left menu, choose **Settings**.
Select **Channels** to view the list of supported channels.
Find **Webchat** in the channel list and click **Manage**.
Click **Add Webchat**.
 ## Step 2: Configure the Webchat
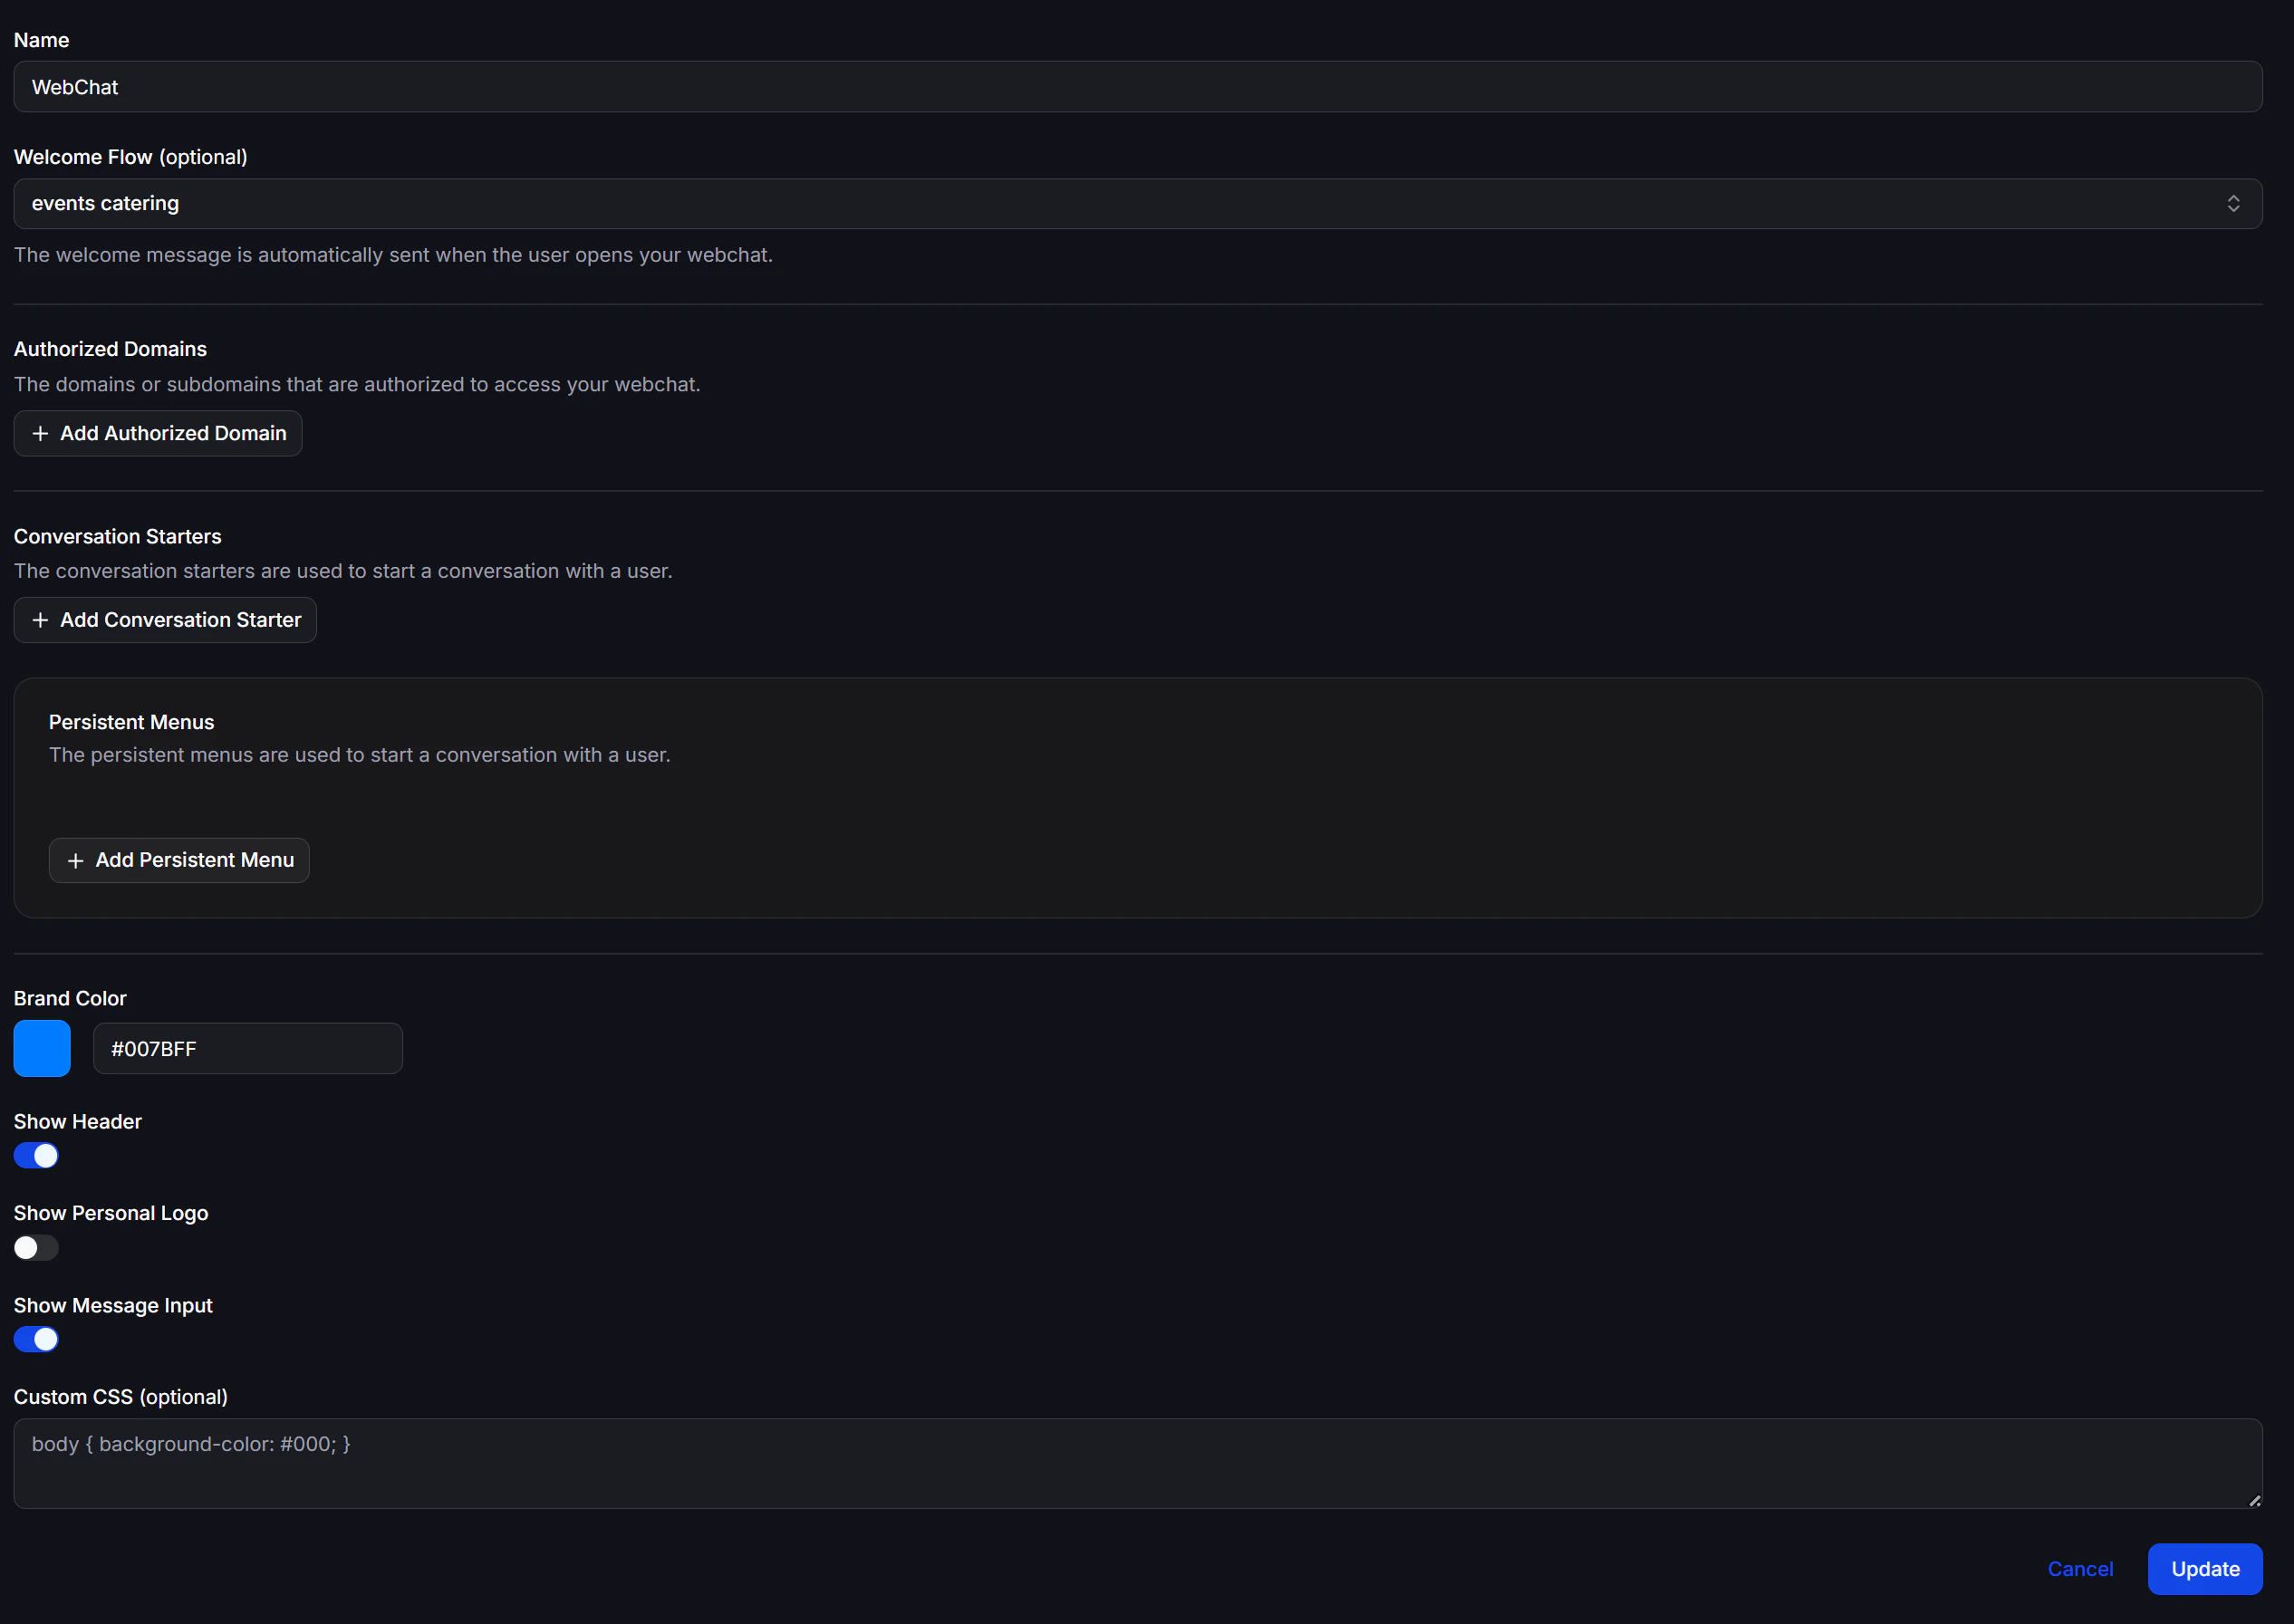 ### Basic settings
| Field | Required | Description |
| ---------------- | -------- | ------------------------------------------------------------------------------------------------------------------- |
| **Name** | Yes | Internal name to distinguish this widget if you run multiple sites or widget versions |
| **Welcome Flow** | No | A Flow that runs automatically when a visitor opens the widget. Leave empty if you don't need an automatic greeting |
### Engagement features
| Feature | Description |
| ------------------------- | ----------------------------------------------------------------------------------------------------------------------------------------------------------------------------------- |
| **Authorized Domains** | Domains or subdomains allowed to load the widget. Click **Add Authorized Domain** to add one. The embed code only works on approved domains |
| **Conversation Starters** | Quick-reply prompts that help visitors start a conversation, for example, *Pricing*, *Book a consultation*, or *Ask about a product*. Click **Add Conversation Starter** to add one |
| **Persistent Menus** | Menu items that stay visible throughout the conversation. Useful when you want visitors to always see their main options. Click **Add Persistent Menu** to add one |
### Appearance
| Setting | Description |
| ---------------------- | -------------------------------------------------------------------------------------------------------------------------------- |
| **Brand Color** | Main color of the widget. Pick from the color picker or enter a hex code (for example, `#007BFF`) |
| **Show Header** | Toggle the widget header on or off |
| **Show Personal Logo** | Toggle a custom logo in the widget on or off |
| **Show Message Input** | Toggle the text input box on or off. When disabled, visitors can only interact through Conversation Starters or Persistent Menus |
| **Custom CSS** | Optional. Add your own CSS to match the widget to your website's design |
For example, to change the page background:
```css theme={null}
body { background-color: #000; }
```
After filling in the required fields, click **Create Webchat** to create the new channel.
## Step 3: Get the Embed Code
After the Webchat is created, go to **Channels → Webchat**.
For each Webchat row, click the **embed code icon** to open the **Embed Code** window.
Copy the code from the **Embed Code** field and paste it into your website's HTML.
### Basic settings
| Field | Required | Description |
| ---------------- | -------- | ------------------------------------------------------------------------------------------------------------------- |
| **Name** | Yes | Internal name to distinguish this widget if you run multiple sites or widget versions |
| **Welcome Flow** | No | A Flow that runs automatically when a visitor opens the widget. Leave empty if you don't need an automatic greeting |
### Engagement features
| Feature | Description |
| ------------------------- | ----------------------------------------------------------------------------------------------------------------------------------------------------------------------------------- |
| **Authorized Domains** | Domains or subdomains allowed to load the widget. Click **Add Authorized Domain** to add one. The embed code only works on approved domains |
| **Conversation Starters** | Quick-reply prompts that help visitors start a conversation, for example, *Pricing*, *Book a consultation*, or *Ask about a product*. Click **Add Conversation Starter** to add one |
| **Persistent Menus** | Menu items that stay visible throughout the conversation. Useful when you want visitors to always see their main options. Click **Add Persistent Menu** to add one |
### Appearance
| Setting | Description |
| ---------------------- | -------------------------------------------------------------------------------------------------------------------------------- |
| **Brand Color** | Main color of the widget. Pick from the color picker or enter a hex code (for example, `#007BFF`) |
| **Show Header** | Toggle the widget header on or off |
| **Show Personal Logo** | Toggle a custom logo in the widget on or off |
| **Show Message Input** | Toggle the text input box on or off. When disabled, visitors can only interact through Conversation Starters or Persistent Menus |
| **Custom CSS** | Optional. Add your own CSS to match the widget to your website's design |
For example, to change the page background:
```css theme={null}
body { background-color: #000; }
```
After filling in the required fields, click **Create Webchat** to create the new channel.
## Step 3: Get the Embed Code
After the Webchat is created, go to **Channels → Webchat**.
For each Webchat row, click the **embed code icon** to open the **Embed Code** window.
Copy the code from the **Embed Code** field and paste it into your website's HTML.
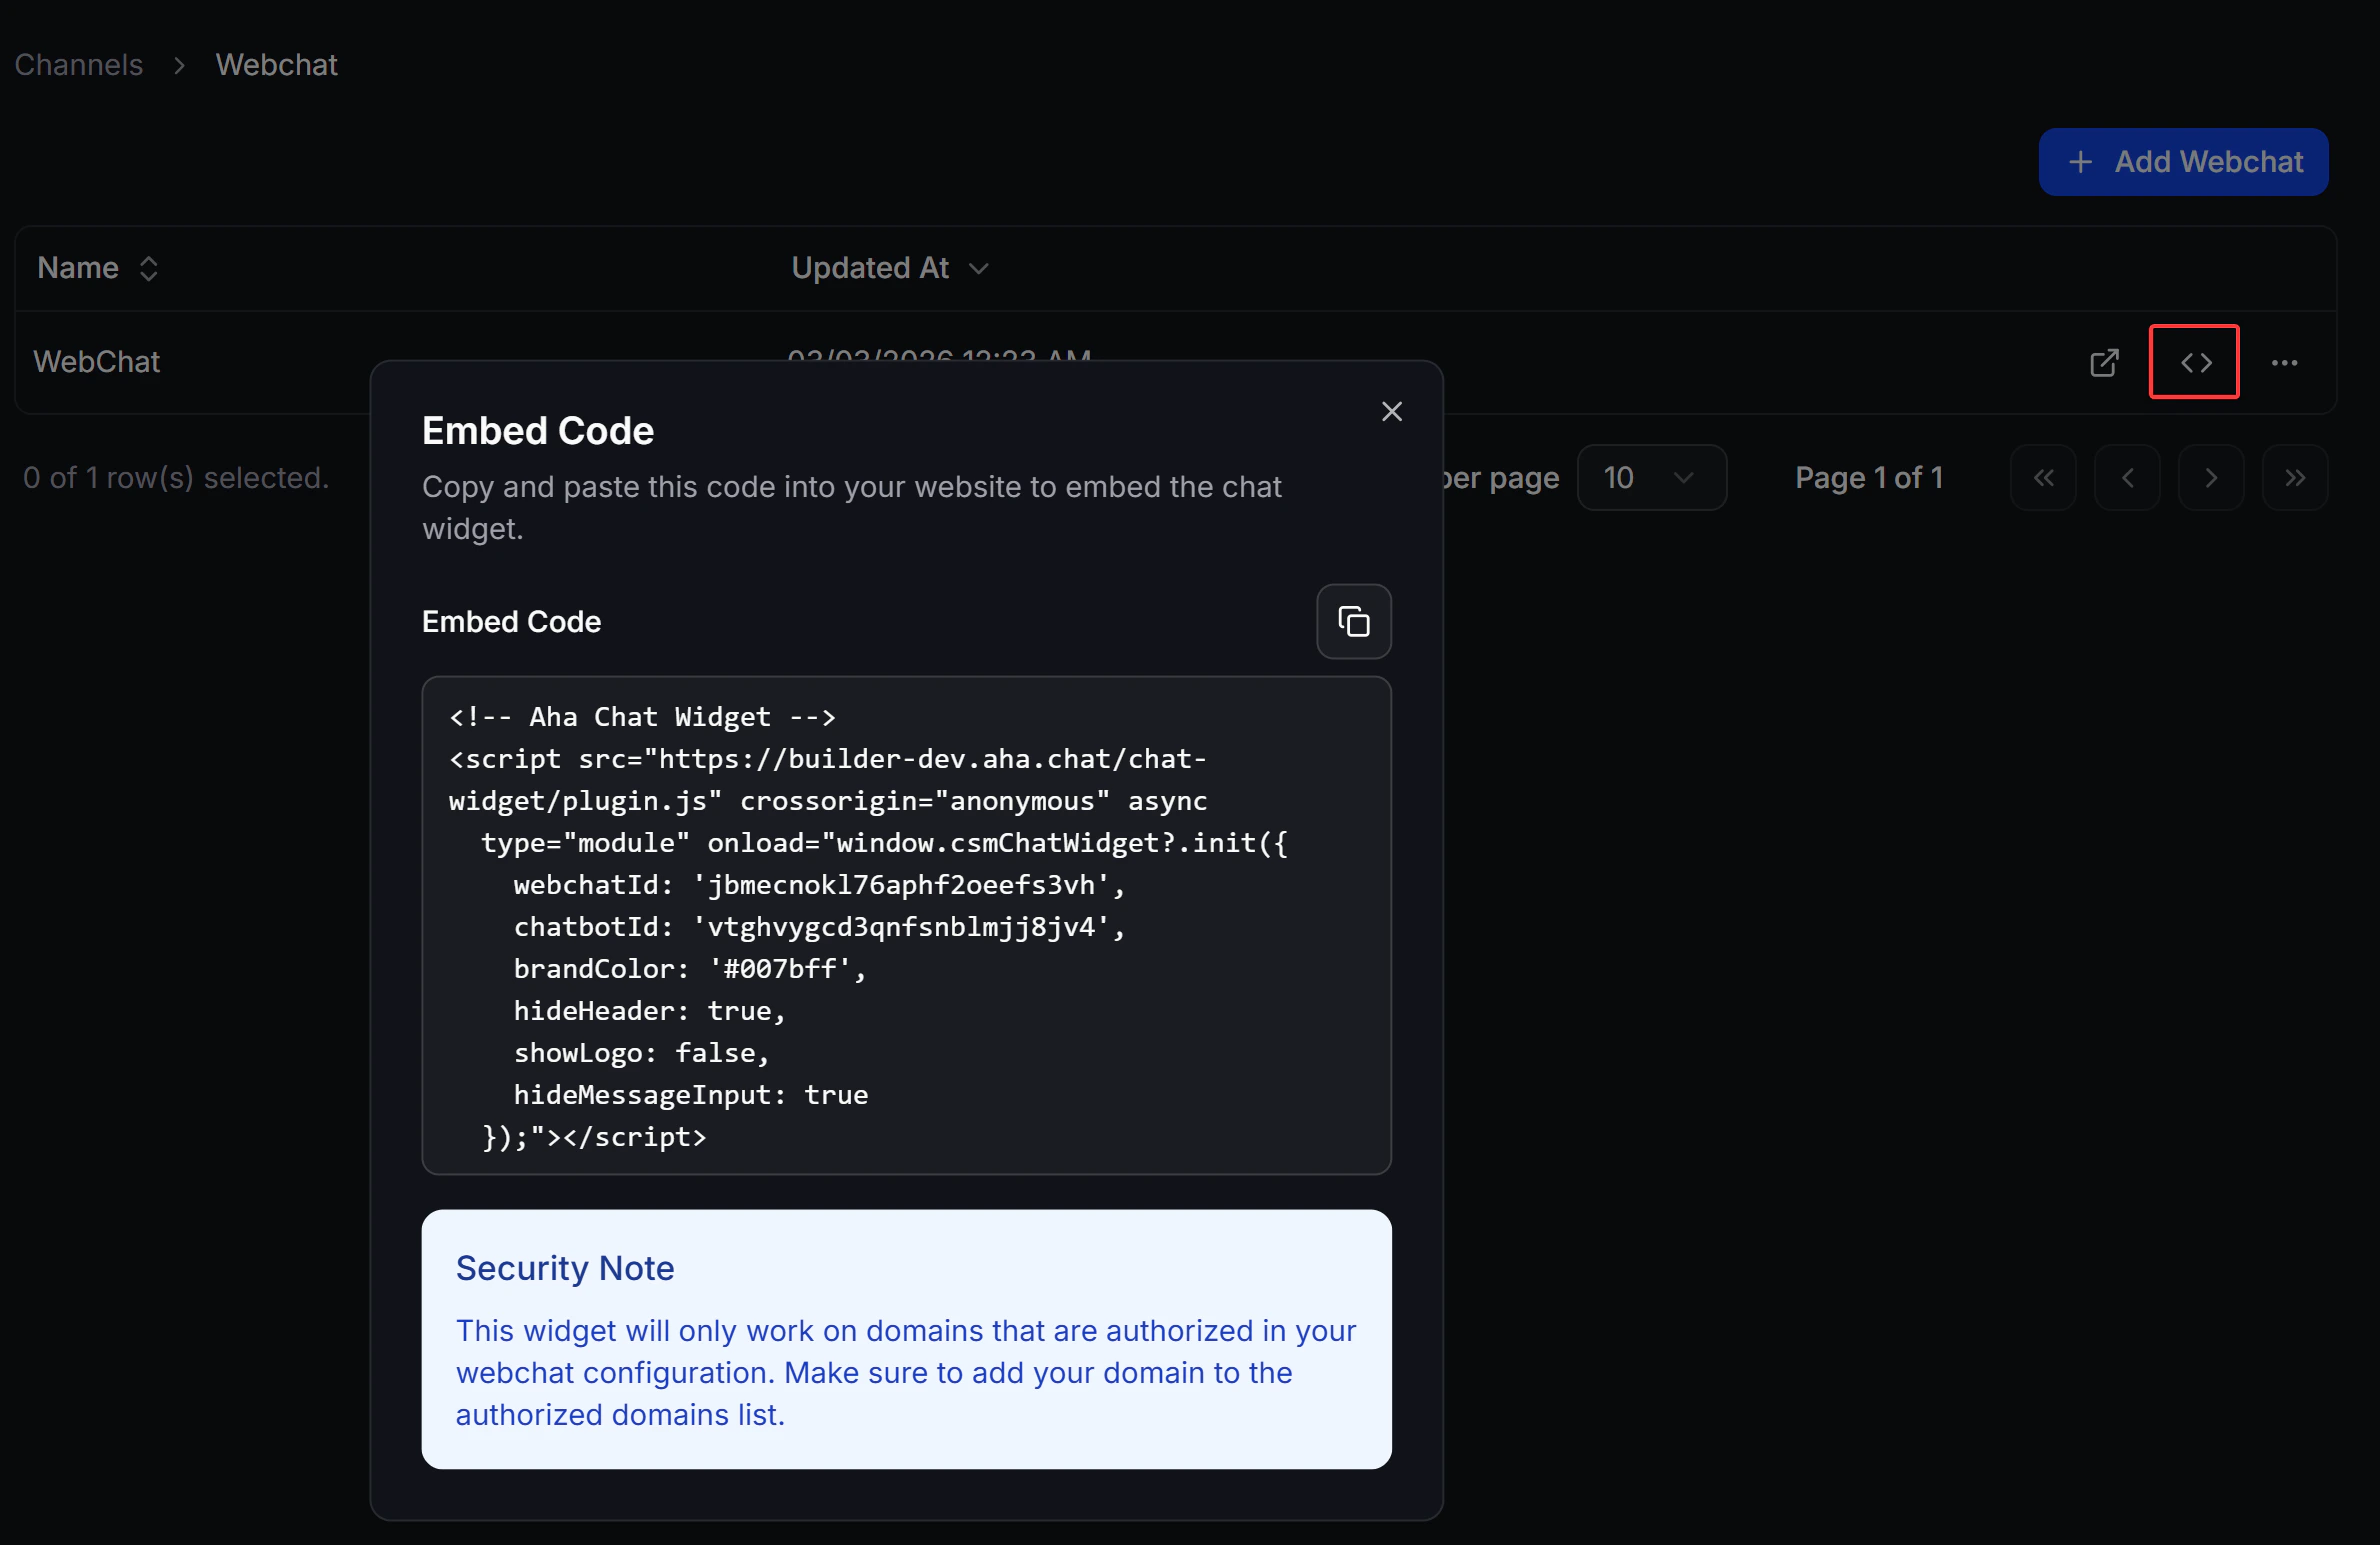 The embed code only works on domains listed under **Authorized Domains**. If Webchat does not work after embedding, check your Authorized Domains configuration first.
## Step 4: Test the Webchat
From the **Channels → Webchat** list, click the **Text now** to open a live preview of the widget. Use this to confirm:
* That the Welcome Flow runs as expected
* That visitors can see Conversation Starters, Persistent Menus, or the message input based on the options you enabled
The embed code only works on domains listed under **Authorized Domains**. If Webchat does not work after embedding, check your Authorized Domains configuration first.
## Step 4: Test the Webchat
From the **Channels → Webchat** list, click the **Text now** to open a live preview of the widget. Use this to confirm:
* That the Welcome Flow runs as expected
* That visitors can see Conversation Starters, Persistent Menus, or the message input based on the options you enabled