> ## Documentation Index
> Fetch the complete documentation index at: https://chatbotx.io/docs/llms.txt
> Use this file to discover all available pages before exploring further.
# Facebook Ads - Custom Audience Integration
> Connect your Facebook Ads account with ChatbotX to automatically sync custom audience lists for your advertising campaigns.
**Facebook Custom Audience** is a tool that allows you to target potential customers by syncing contact information from your chatbot to Facebook Ads Manager.
You can use this feature to run remarketing campaigns targeting users who have interacted with your chatbot, or exclude existing buyers to optimize your ad spend.
## Connect Facebook Ads with ChatbotX
Before you can add users to custom audiences, you must connect your Facebook Ads account and grant permissions to ChatbotX.
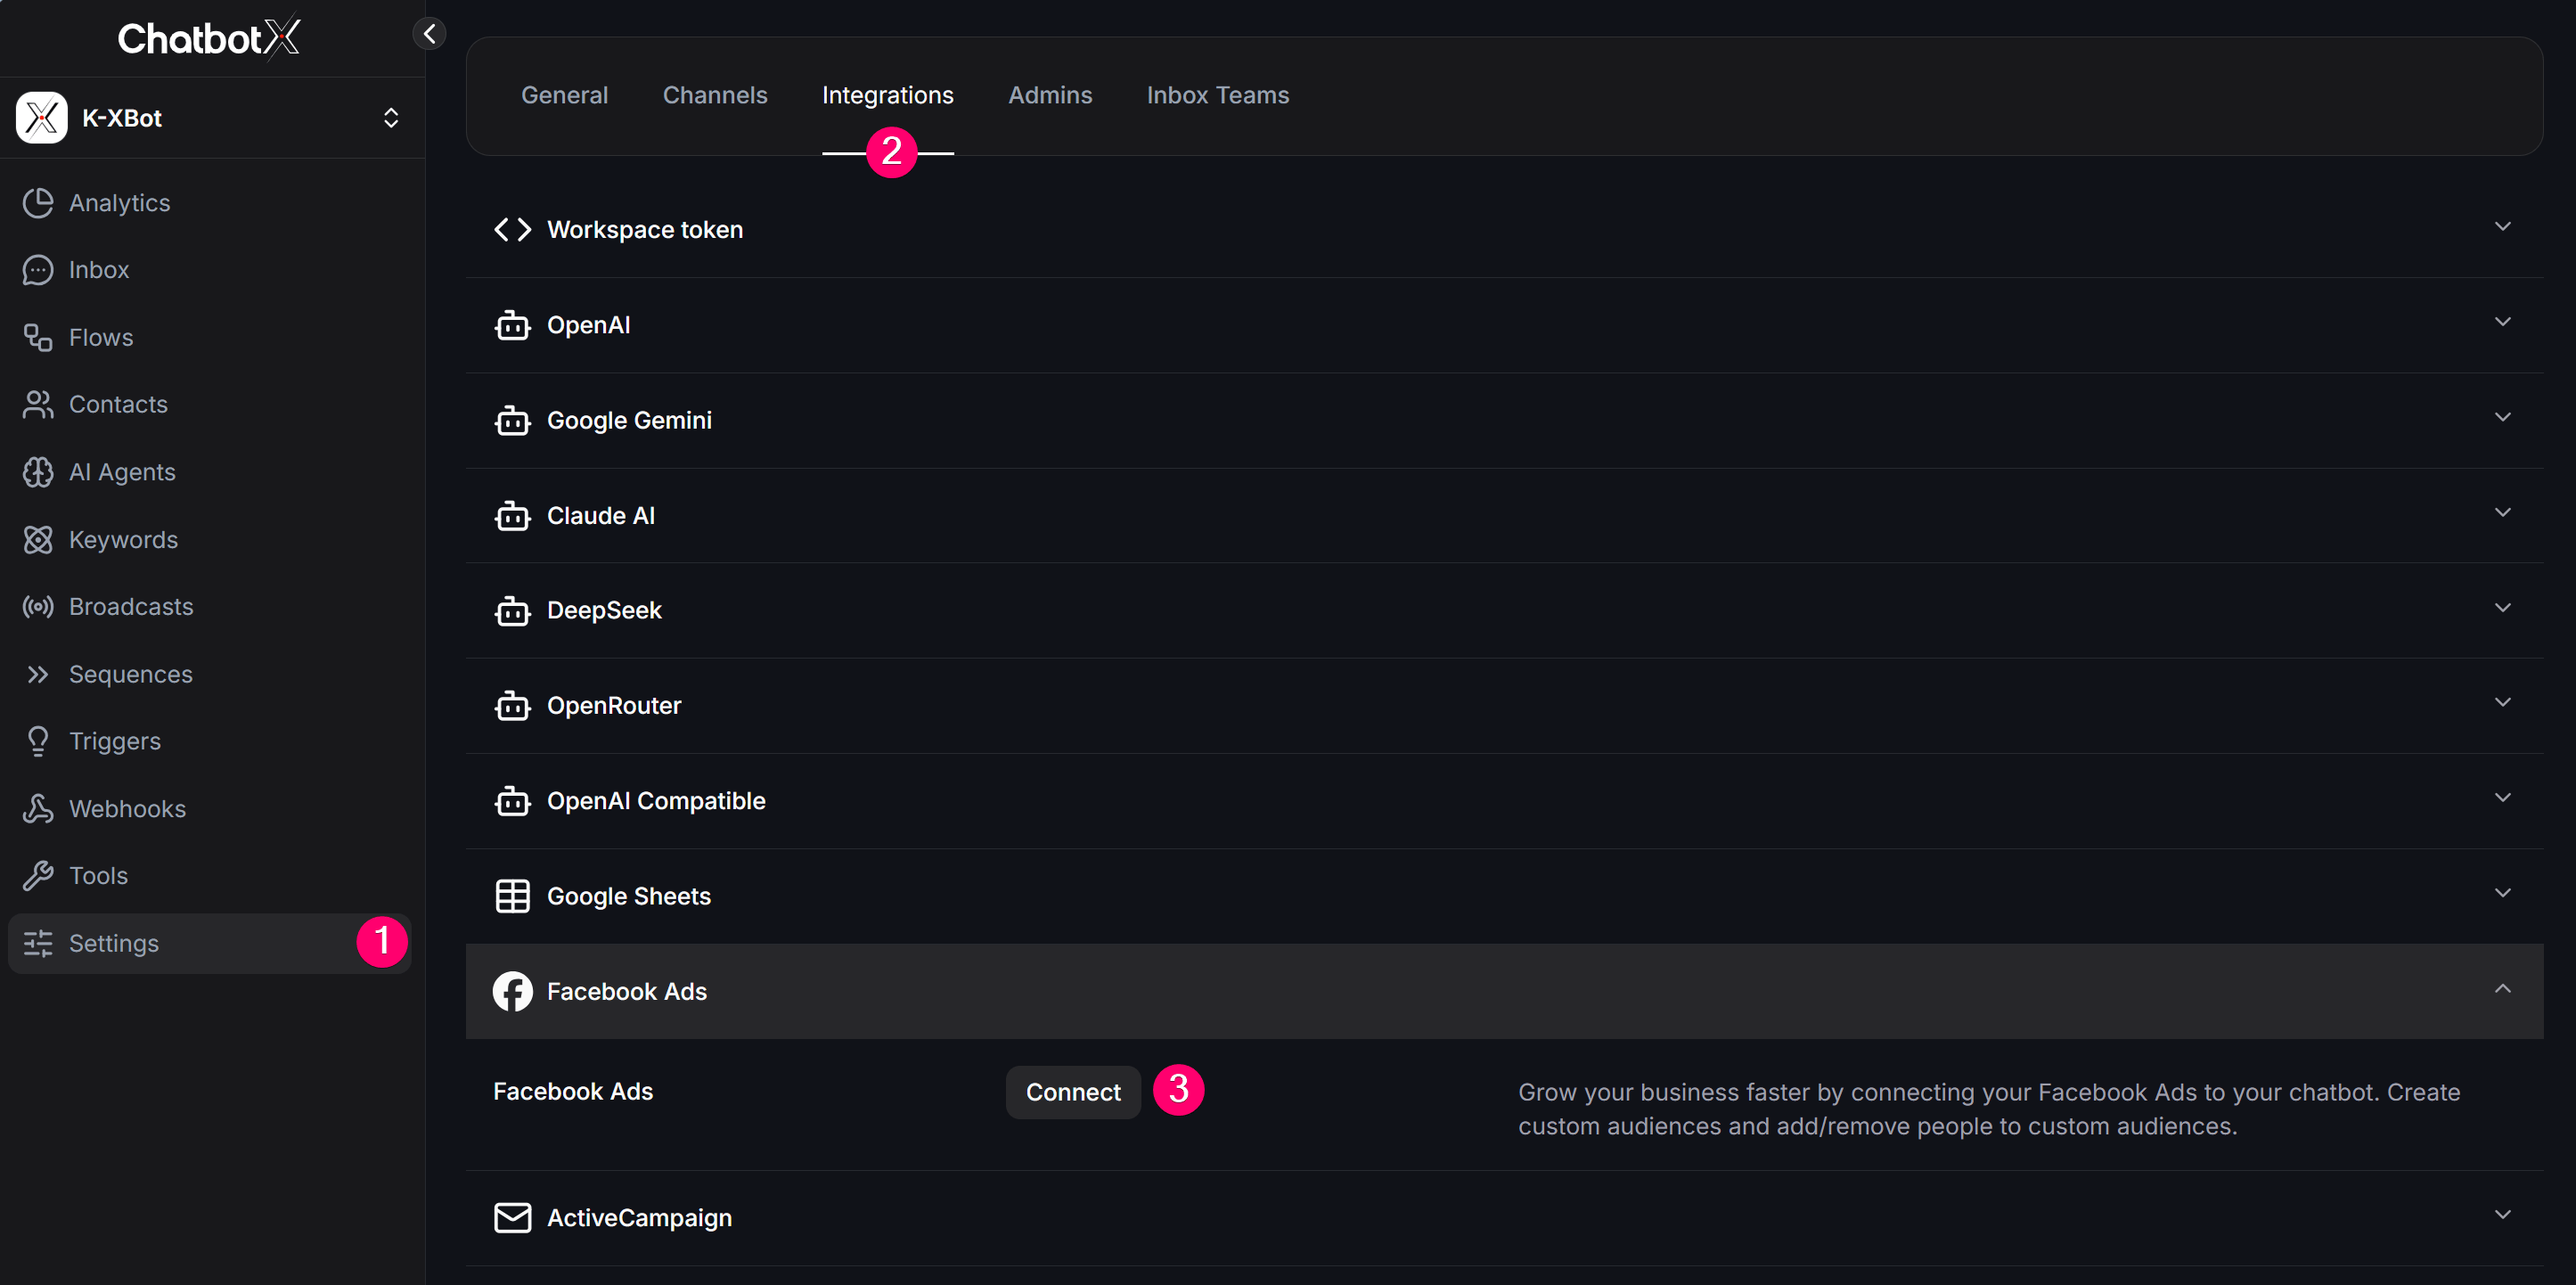
From the left sidebar, click **Settings** > Select the **Integrations** tab from the top menu.
Locate **Facebook Ads** in the list of integrations and click **Connect**.
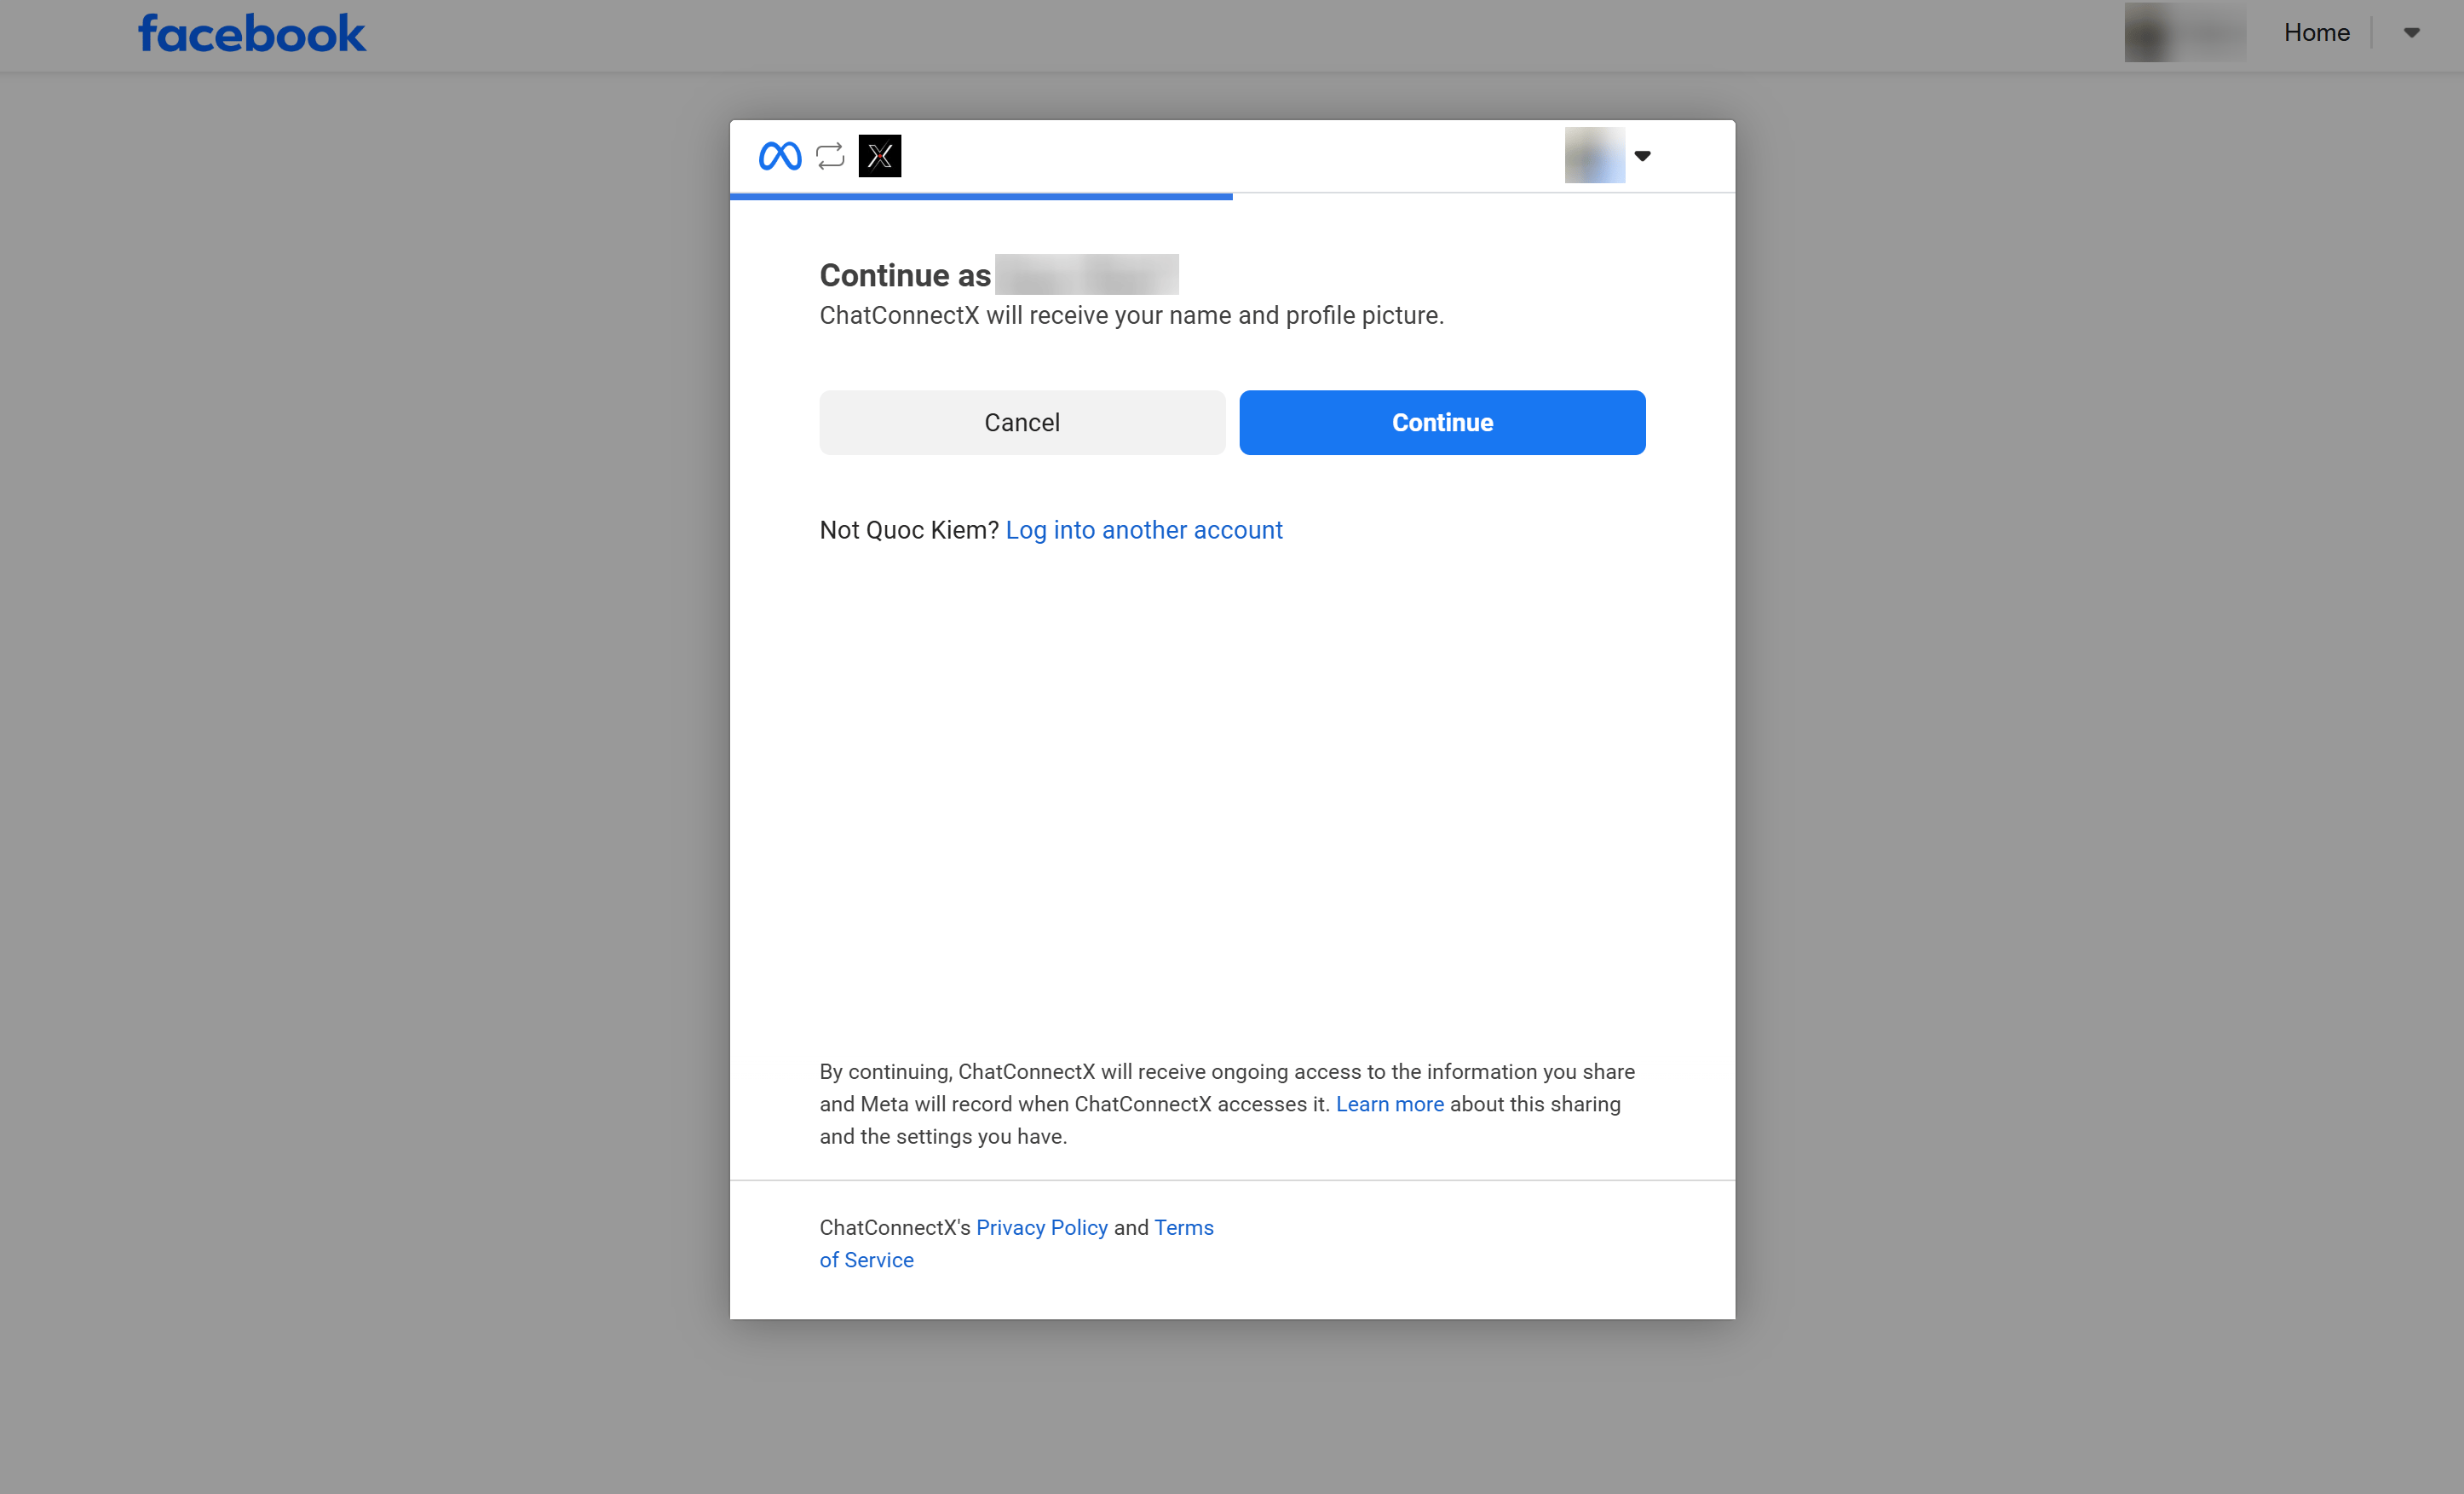
 A login window will open. Click **Continue as...** to log in using the personal Facebook account that manages your ad accounts.
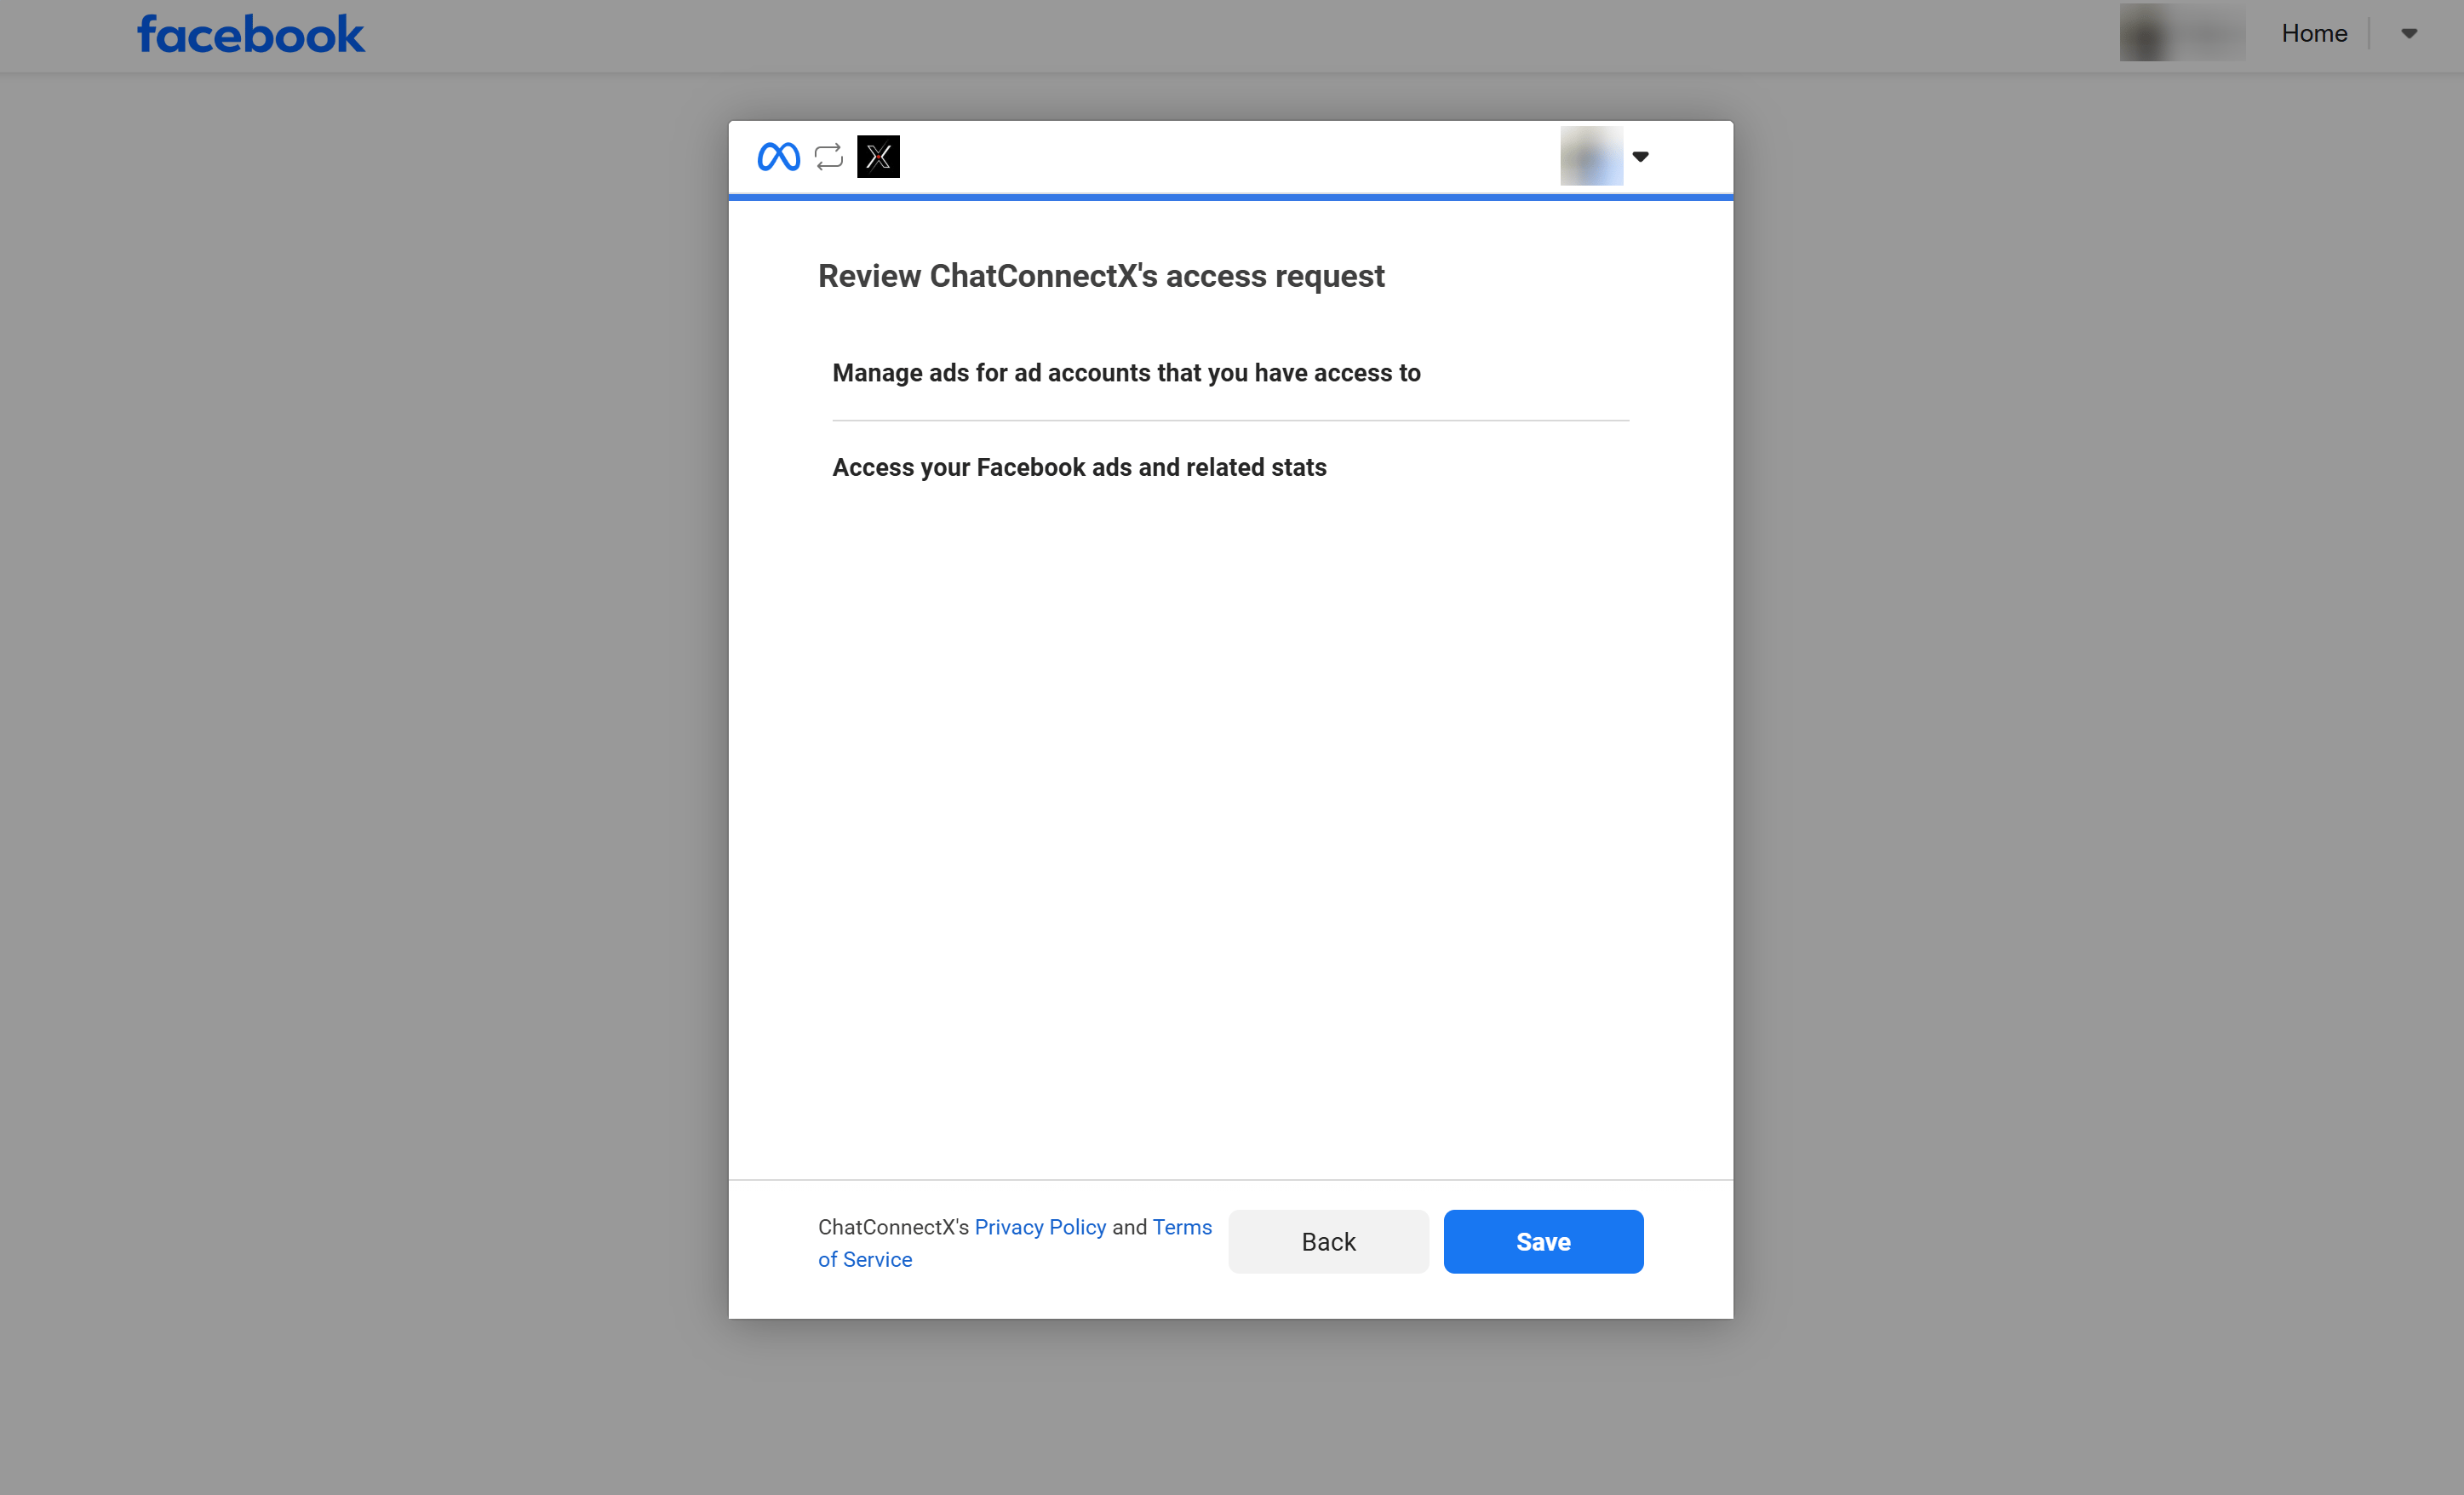
 Ensure you grant all requested permissions for managing ad accounts and viewing stats, then click **Save**.
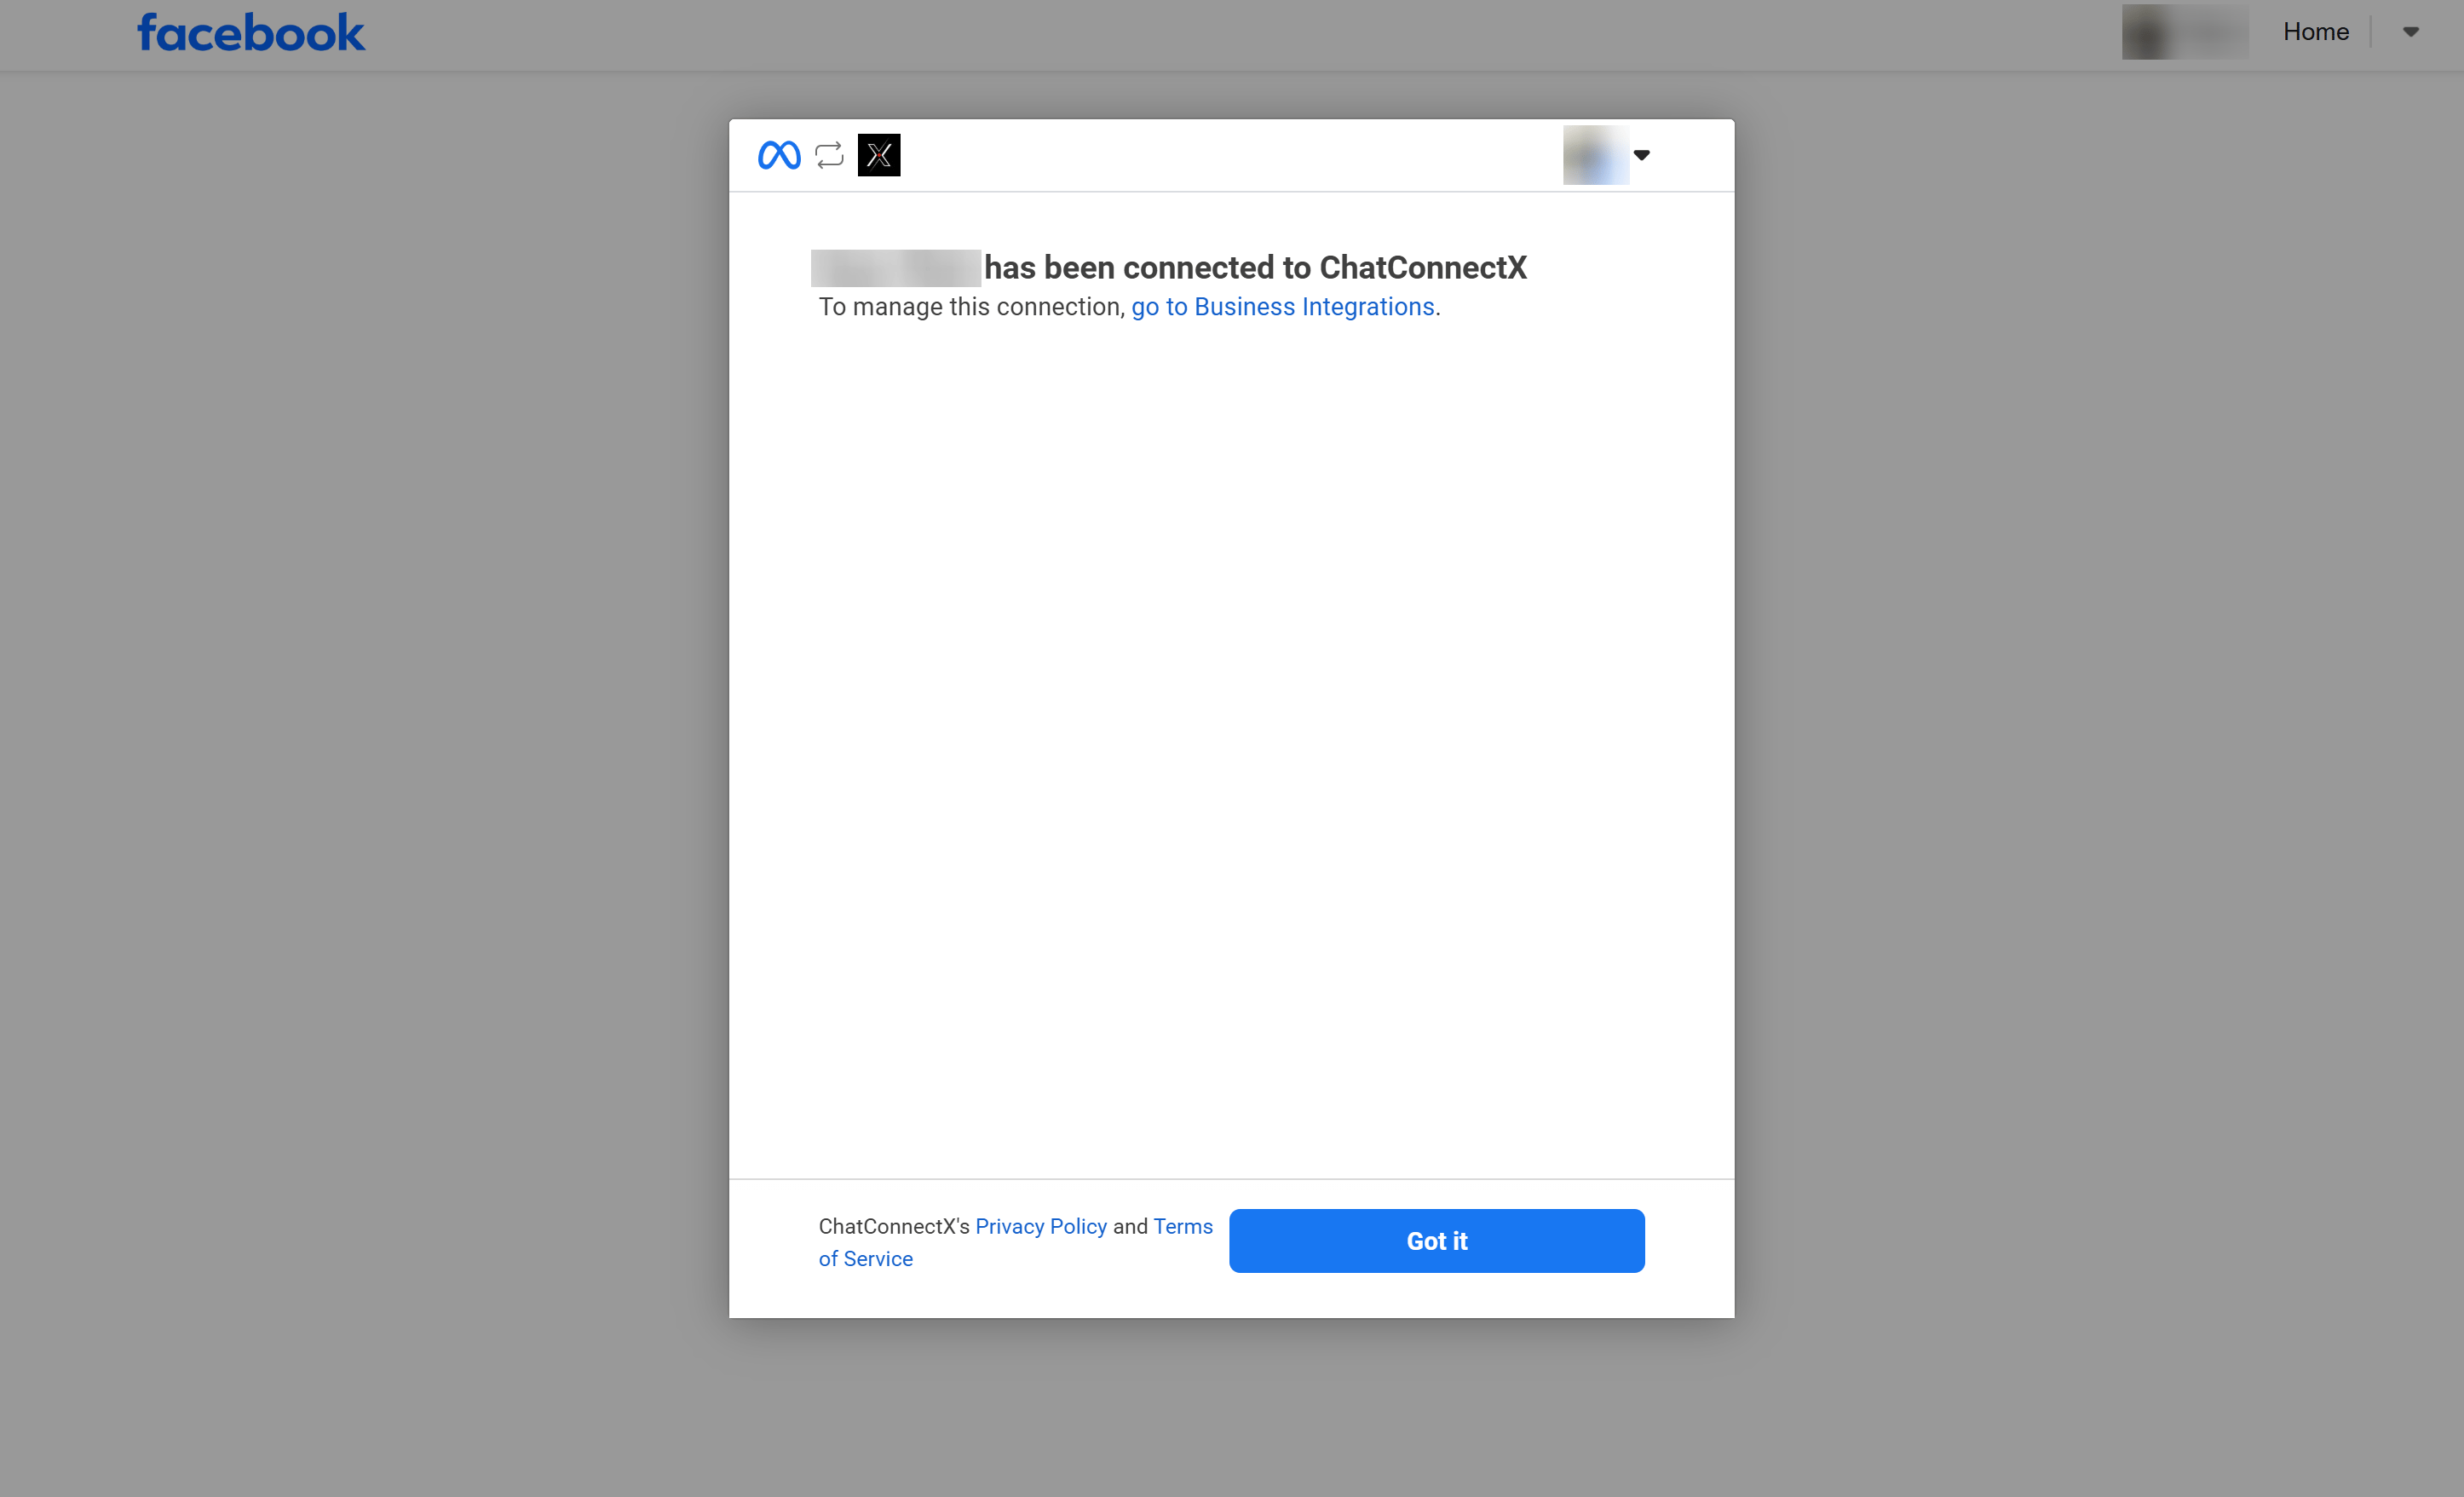
 Once the connection is confirmed, click **Got it** to close the window and complete the integration.
 ## Create a Custom Audience on Facebook
To allow ChatbotX to sync users to the correct list, you need to create a custom audience in Facebook Ads Manager first.
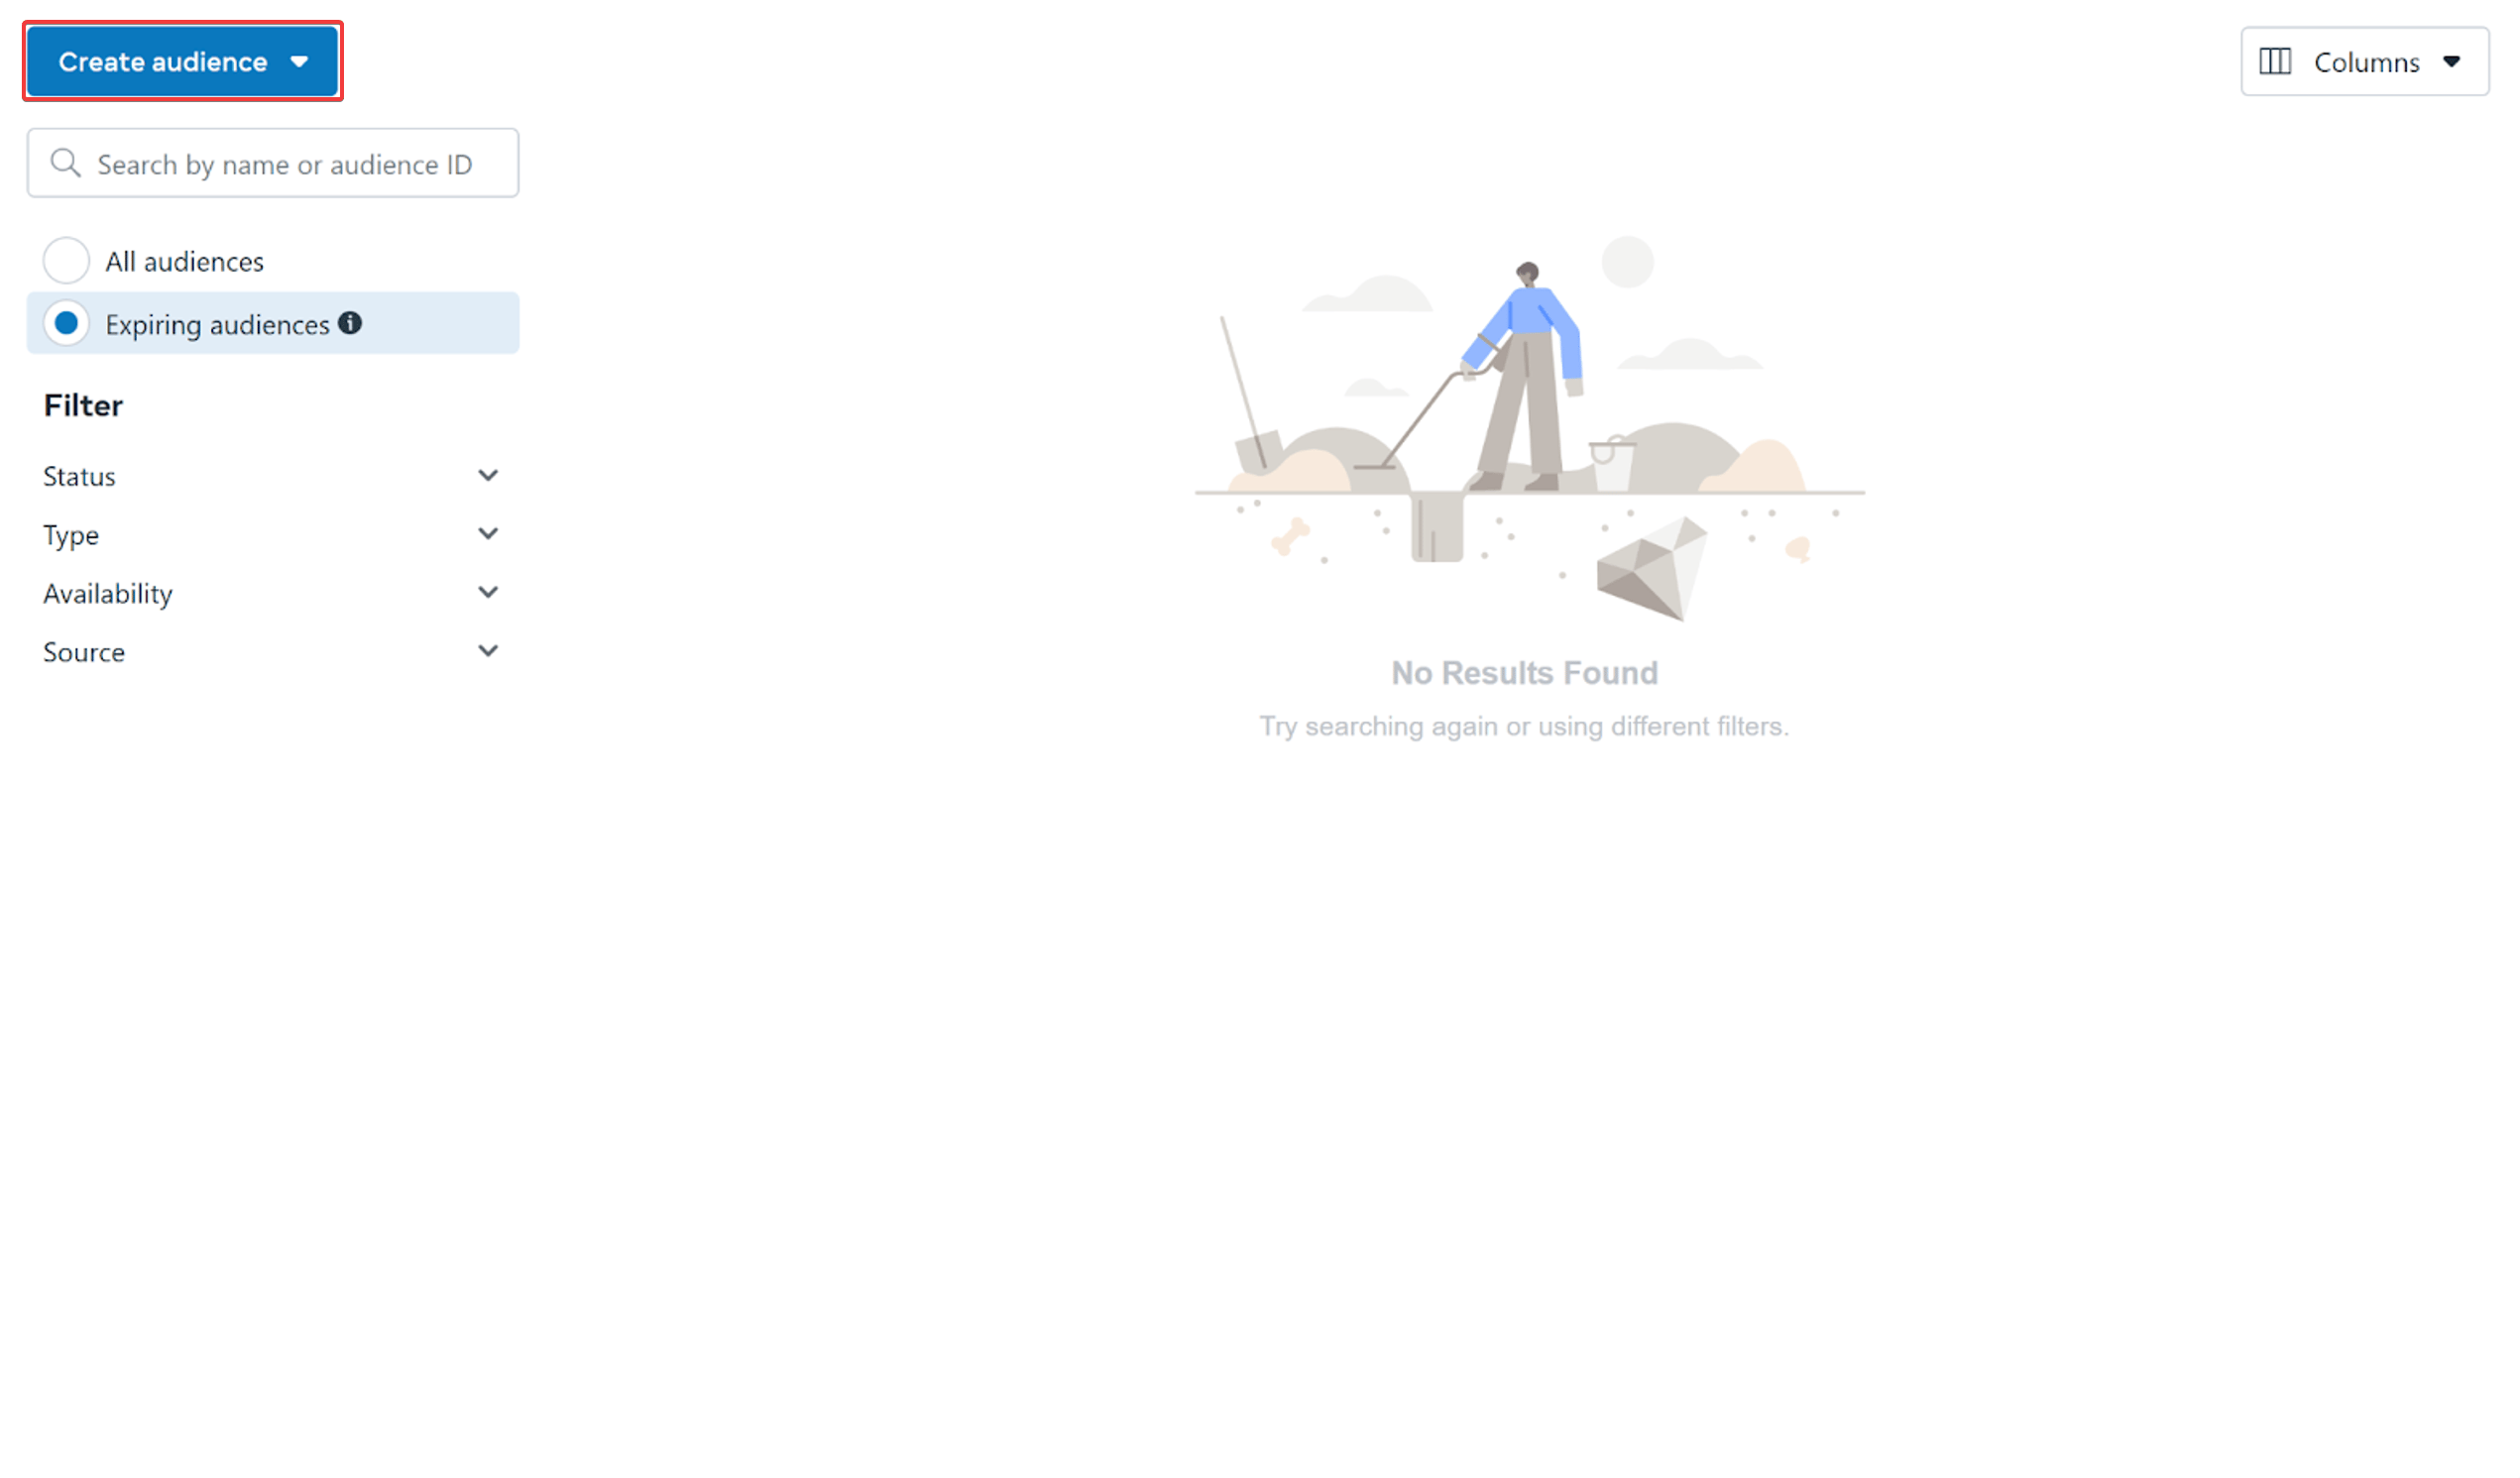
Open Facebook Ads Manager, navigate to the **Audiences** section, then click **Create Audience** and select **Custom Audience**.
## Create a Custom Audience on Facebook
To allow ChatbotX to sync users to the correct list, you need to create a custom audience in Facebook Ads Manager first.
Open Facebook Ads Manager, navigate to the **Audiences** section, then click **Create Audience** and select **Custom Audience**.
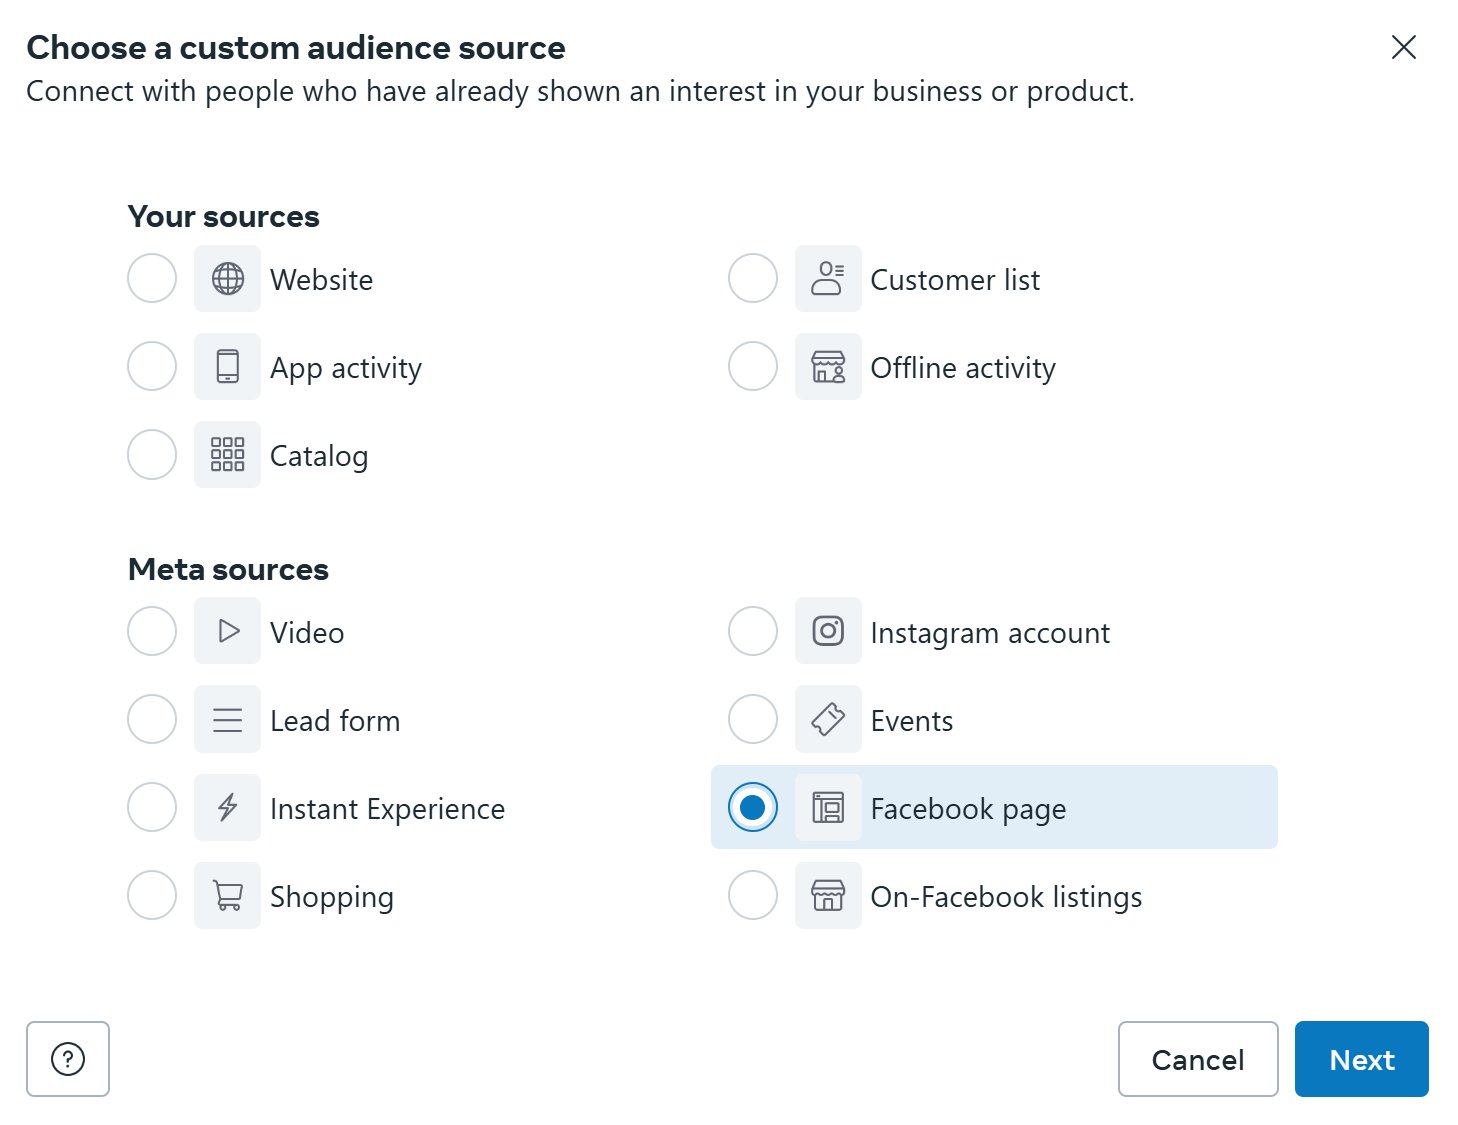
 In the source selection window, choose your data source (e.g., **Facebook Page**).
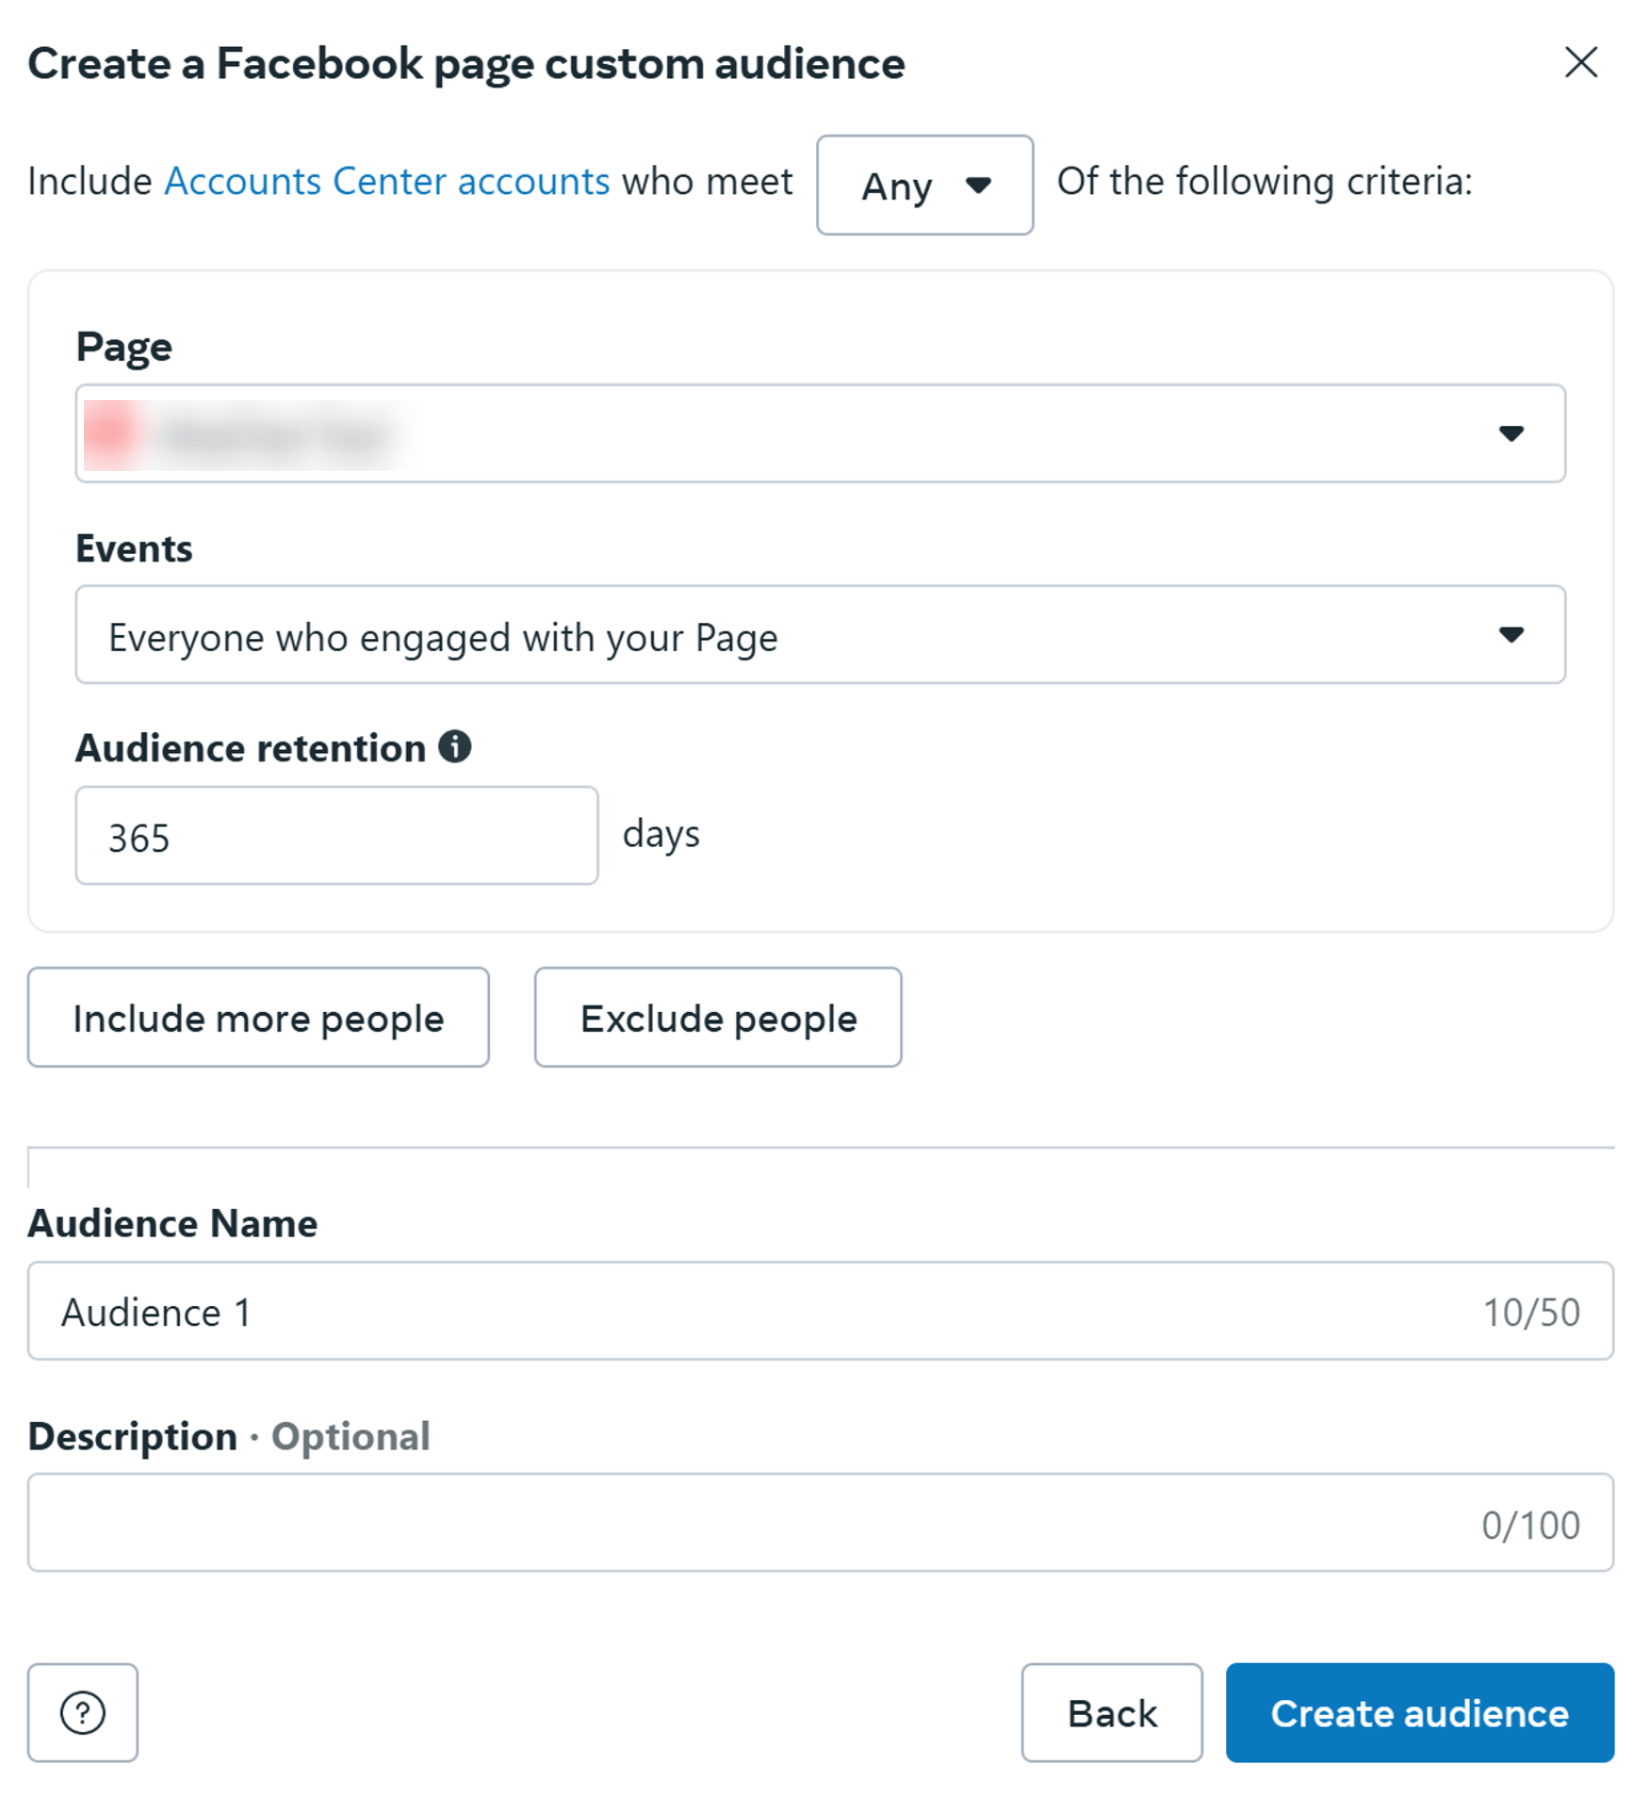
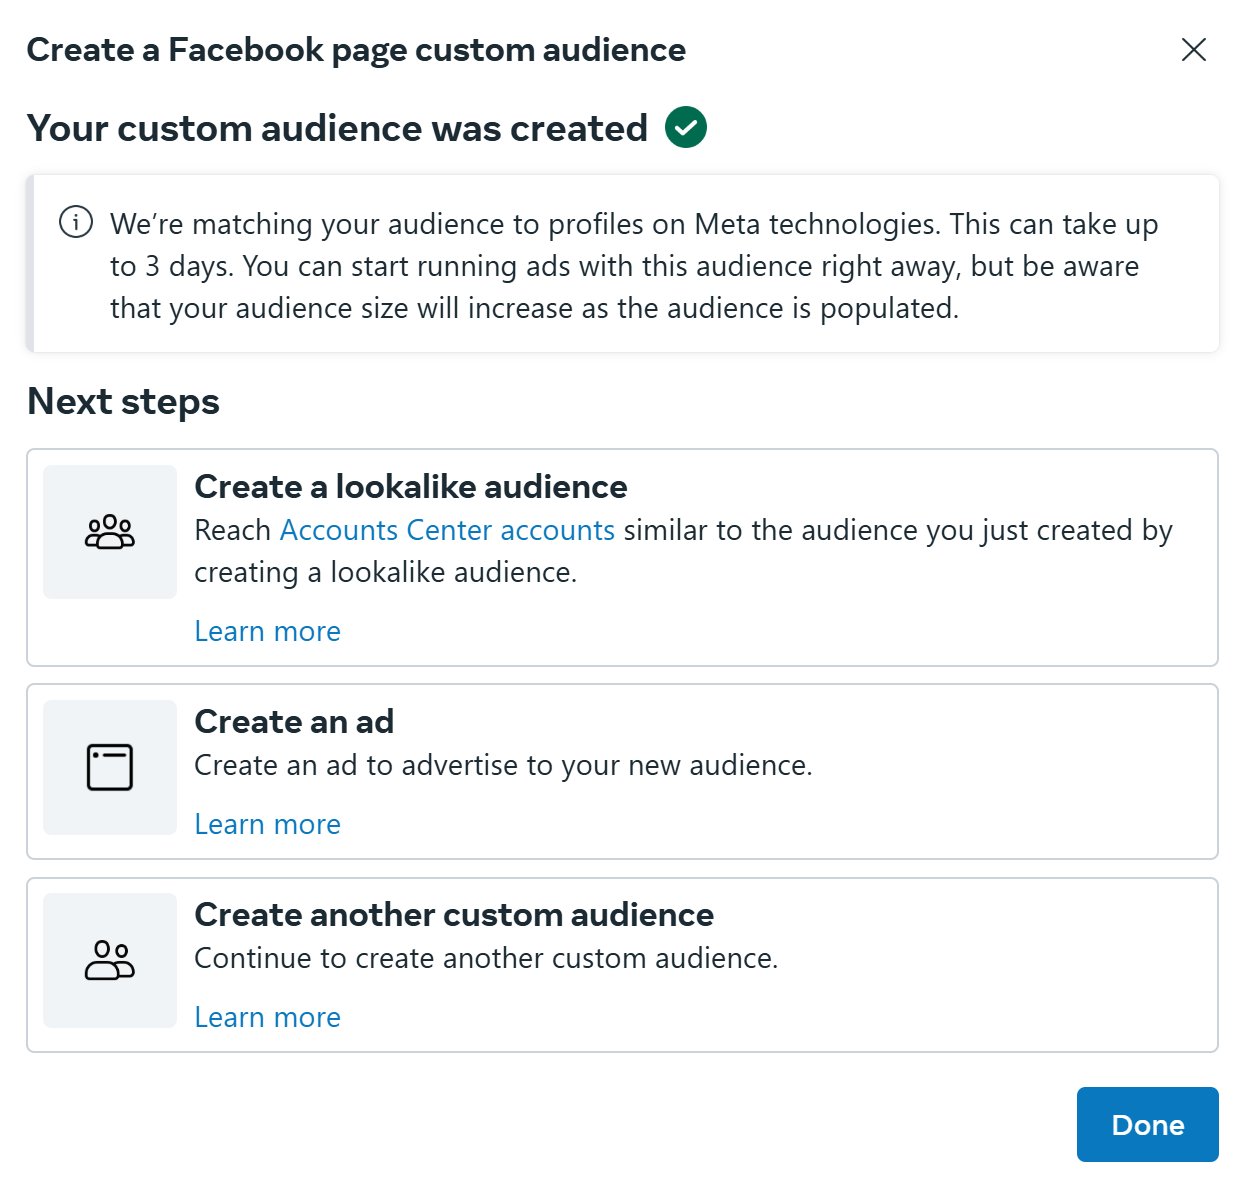
 Select your Facebook Page, set your desired interaction criteria, name your audience, and click **Create Audience** to complete.
 ## Use Facebook Custom Audience Action in Flow Builder
Once connected, you can build automation flows to add or remove contacts from custom audiences based on their behavior in the chat.
From the left sidebar, click **Flows** and open the flow you want to edit (or click **+ Create Flow**).
In the message block editor, perform the following steps:
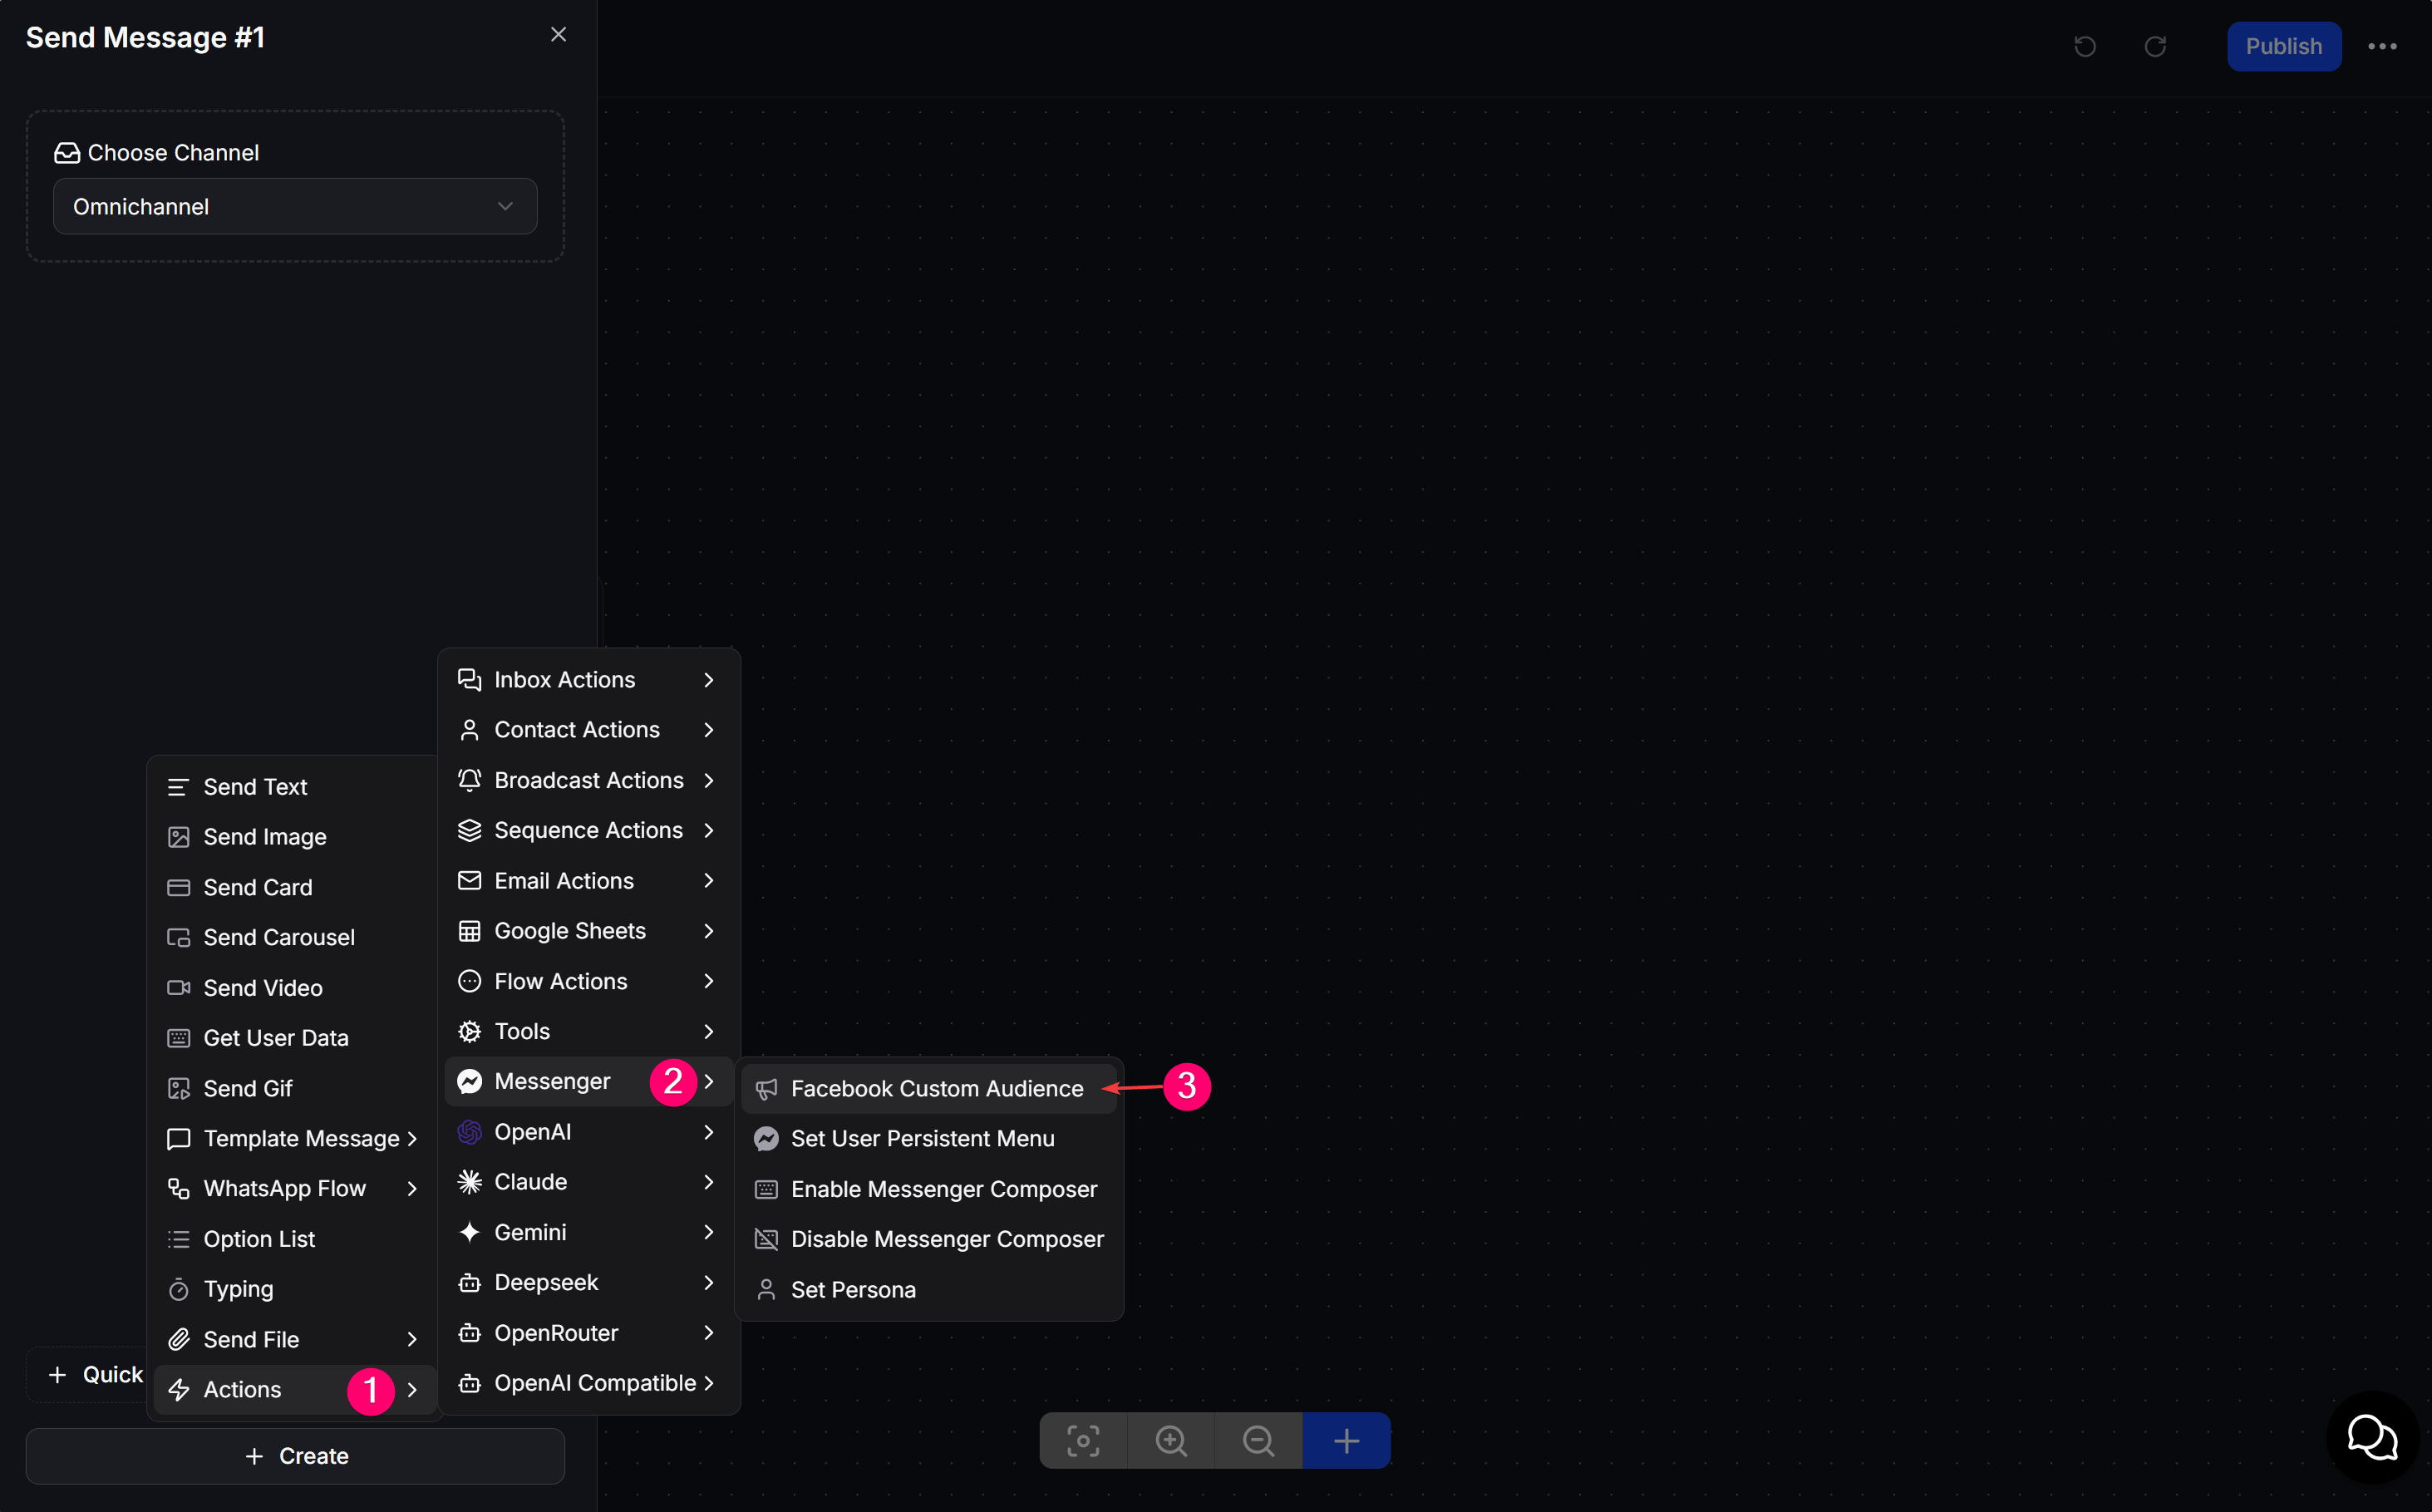
1. Click **Actions** from the block element menu.
2. In the actions panel, select the **Messenger** category.
3. Click **Facebook Custom Audience** to add it to your flow.
## Use Facebook Custom Audience Action in Flow Builder
Once connected, you can build automation flows to add or remove contacts from custom audiences based on their behavior in the chat.
From the left sidebar, click **Flows** and open the flow you want to edit (or click **+ Create Flow**).
In the message block editor, perform the following steps:
1. Click **Actions** from the block element menu.
2. In the actions panel, select the **Messenger** category.
3. Click **Facebook Custom Audience** to add it to your flow.
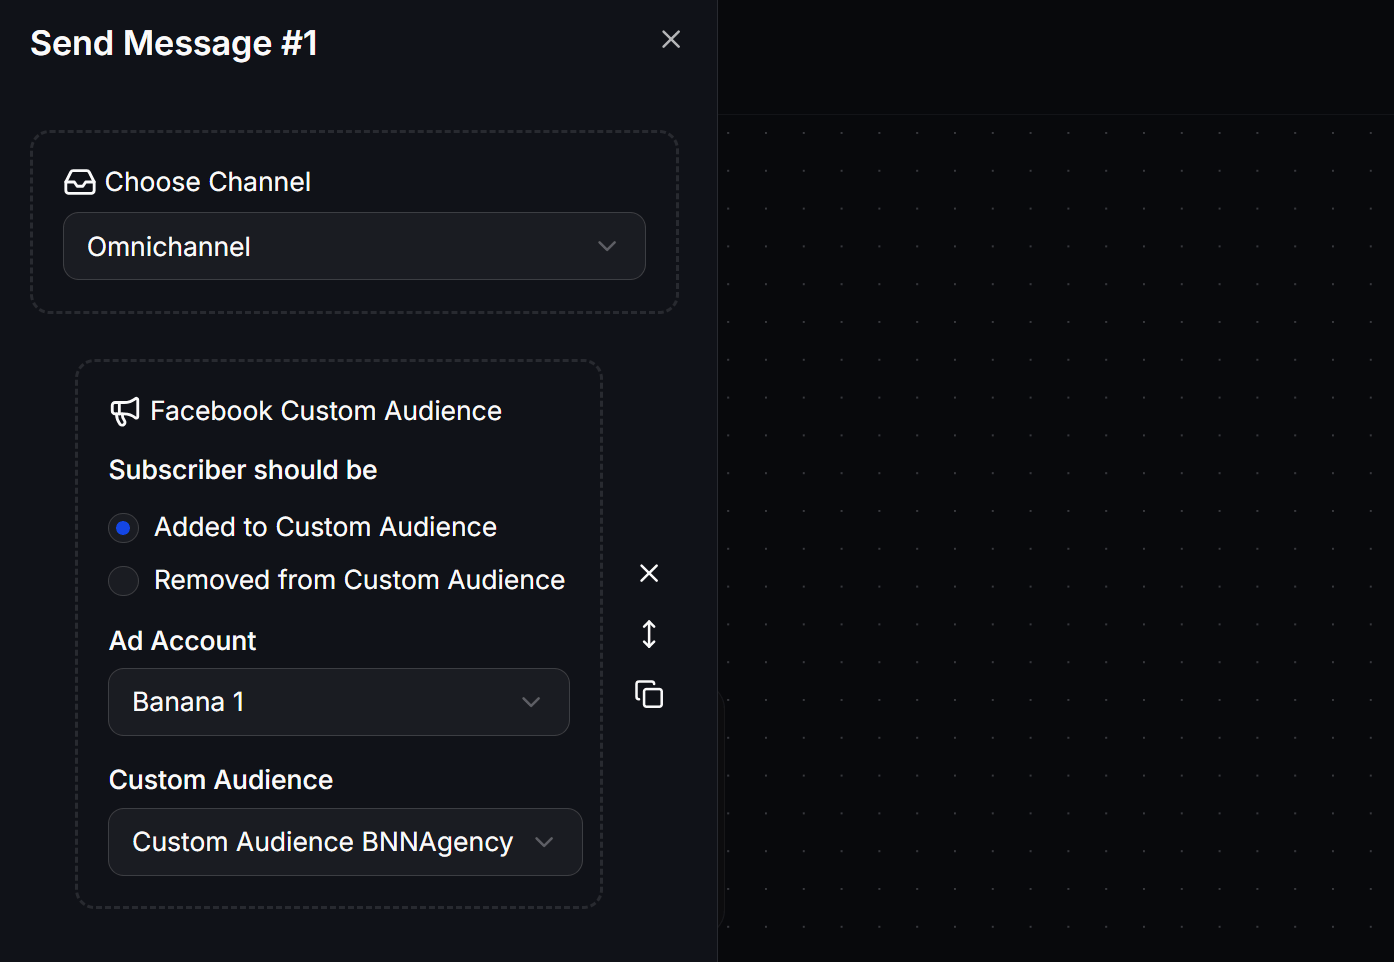
 In the action configuration panel, configure the following:
* **Ad Account**: Select your connected ad account.
* **Action**: Select **Add to Custom Audience** or **Remove from Custom Audience**.
* **Custom Audience**: Select the target custom audience you created on Facebook.
In the action configuration panel, configure the following:
* **Ad Account**: Select your connected ad account.
* **Action**: Select **Add to Custom Audience** or **Remove from Custom Audience**.
* **Custom Audience**: Select the target custom audience you created on Facebook.