> ## Documentation Index
> Fetch the complete documentation index at: https://chatbotx.io/docs/llms.txt
> Use this file to discover all available pages before exploring further.
# Zalo OA Broadcasts
> Create Zalo OA Broadcasts in ChatbotX to send a bulk campaign to a selected group of Zalo OA contacts.
**Zalo OA Broadcasts** help you prepare one campaign and send it to a selected group of contacts on your Zalo Official Account. Use this option when the message is relevant to customers who follow or interact with your Zalo OA.
## Before you begin
Connect the Zalo OA you want to use in ChatbotX and prepare the content for the campaign. The available sending options depend on the channel configuration in your workspace.
## Create a Zalo OA Broadcast
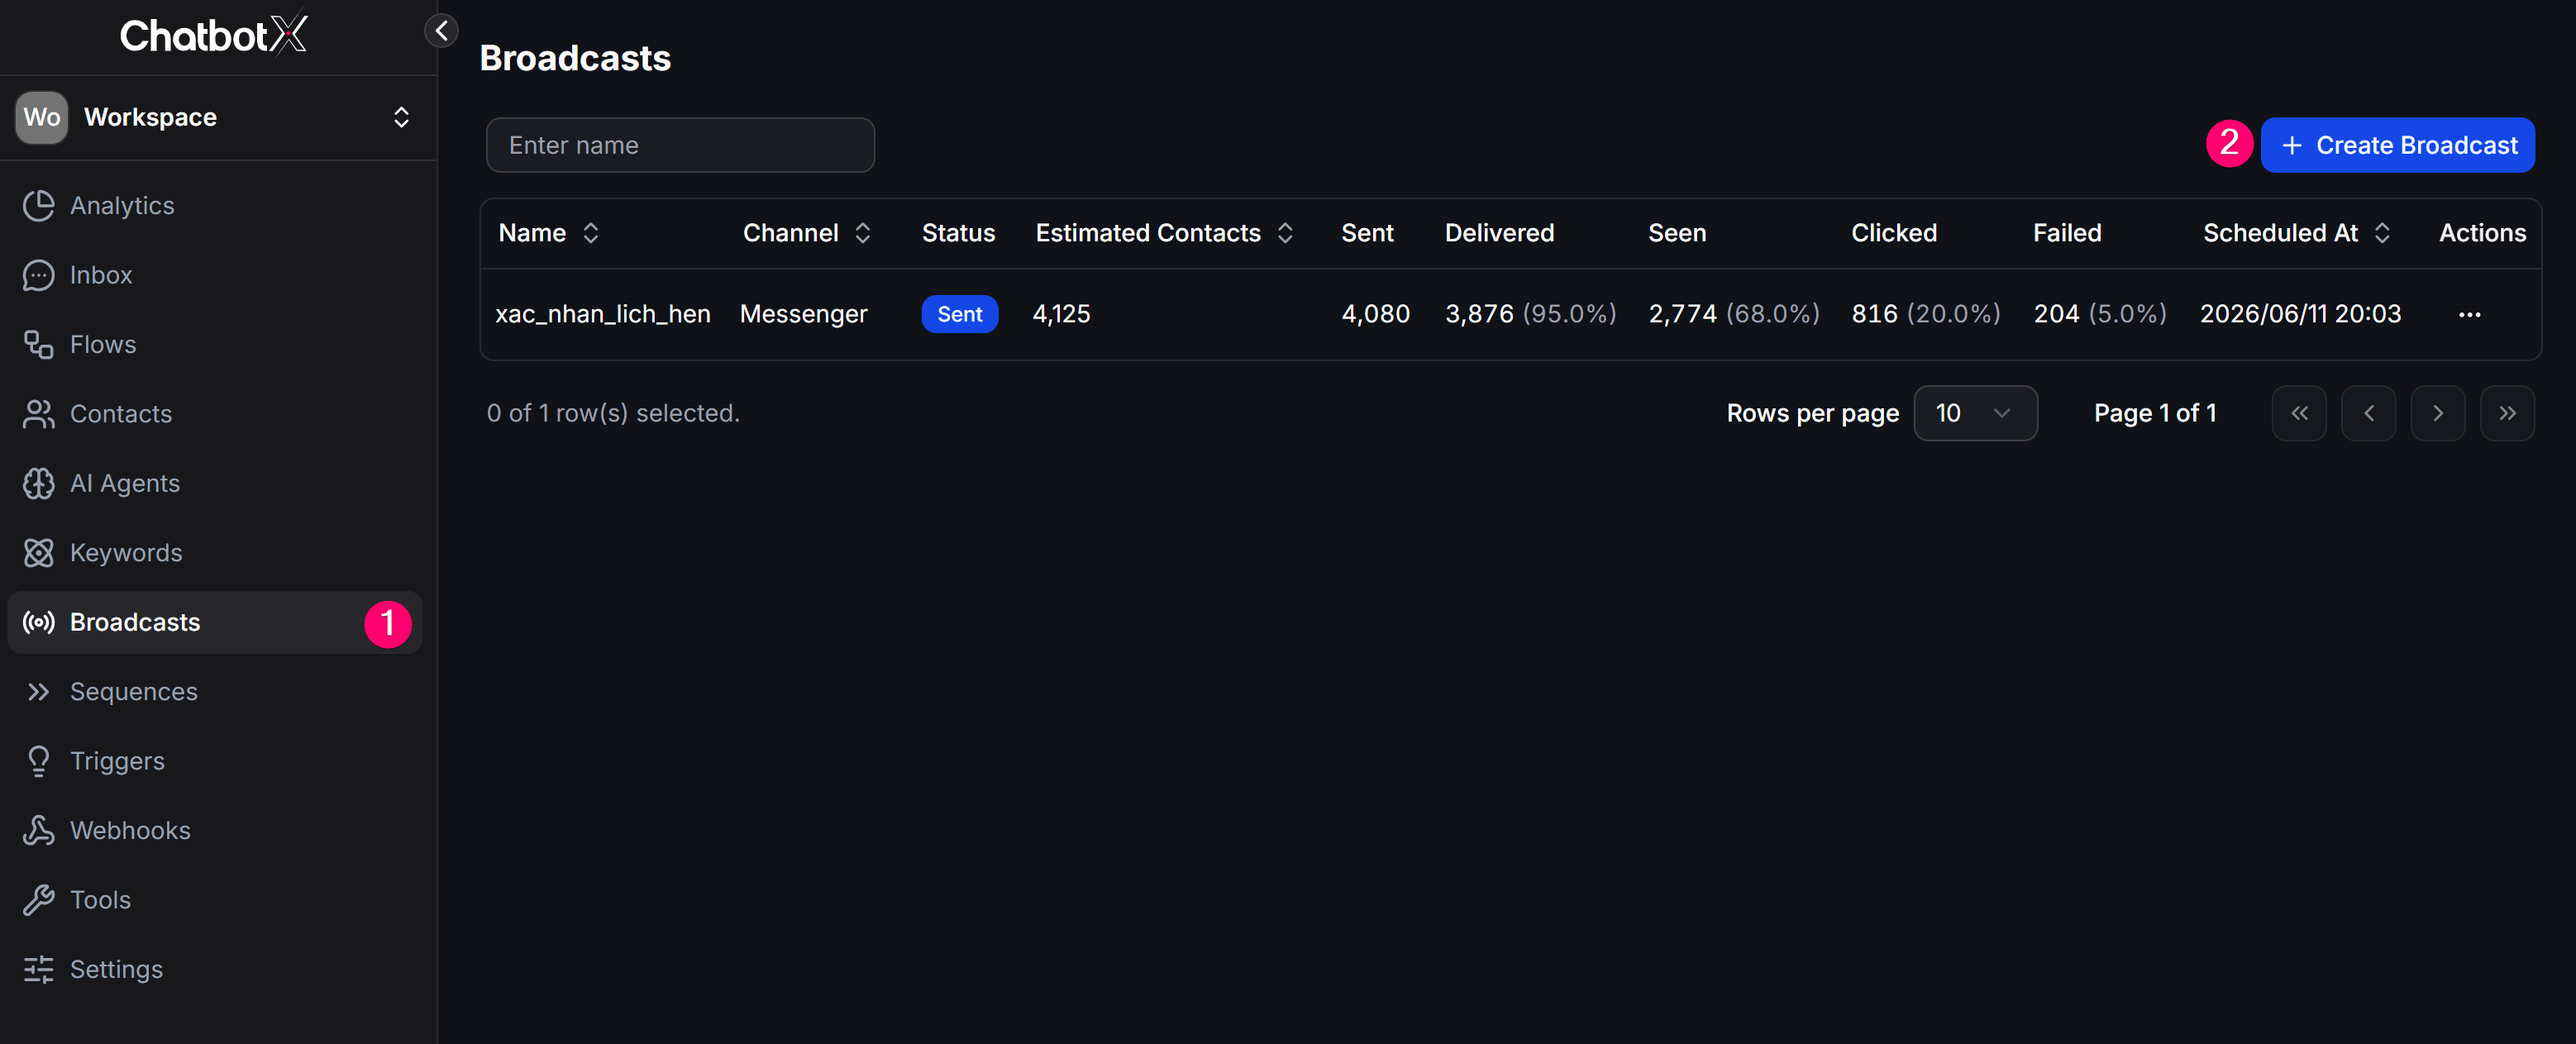
From the left menu, select **Broadcasts**, then click **+ Create Broadcast**.
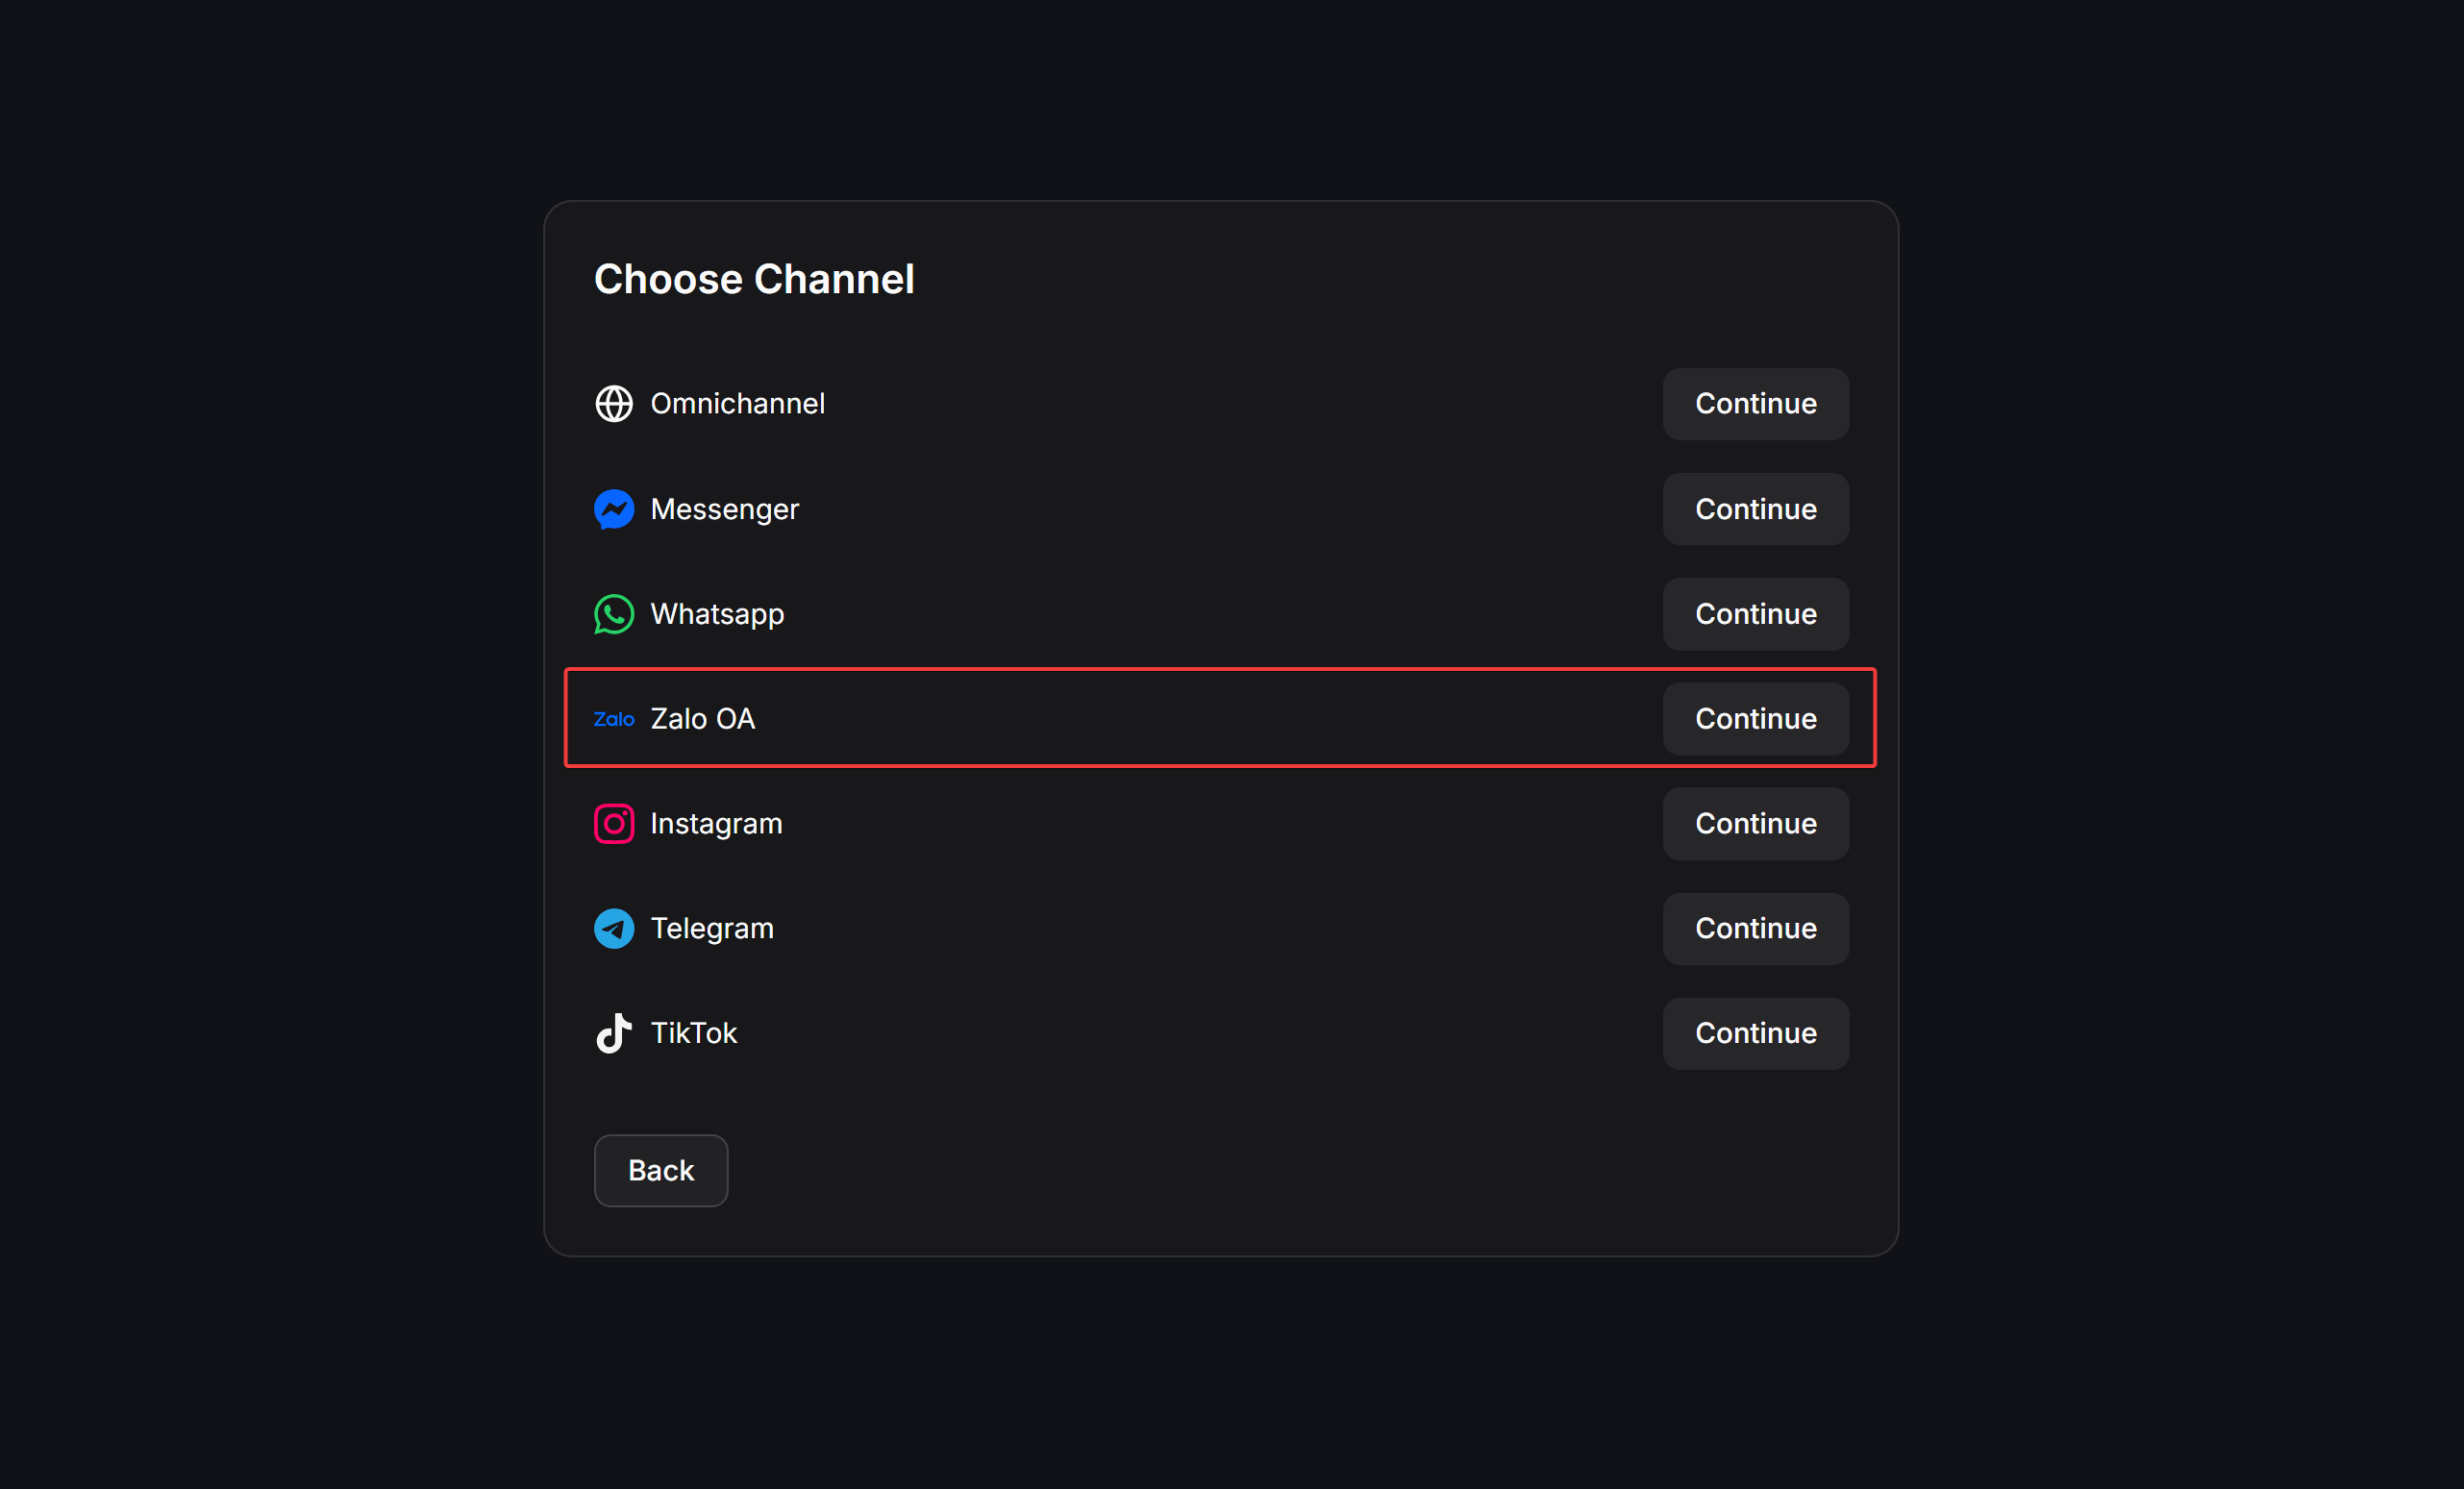
 On the **Choose Channel** screen, select **Zalo OA**, then click **Continue**.
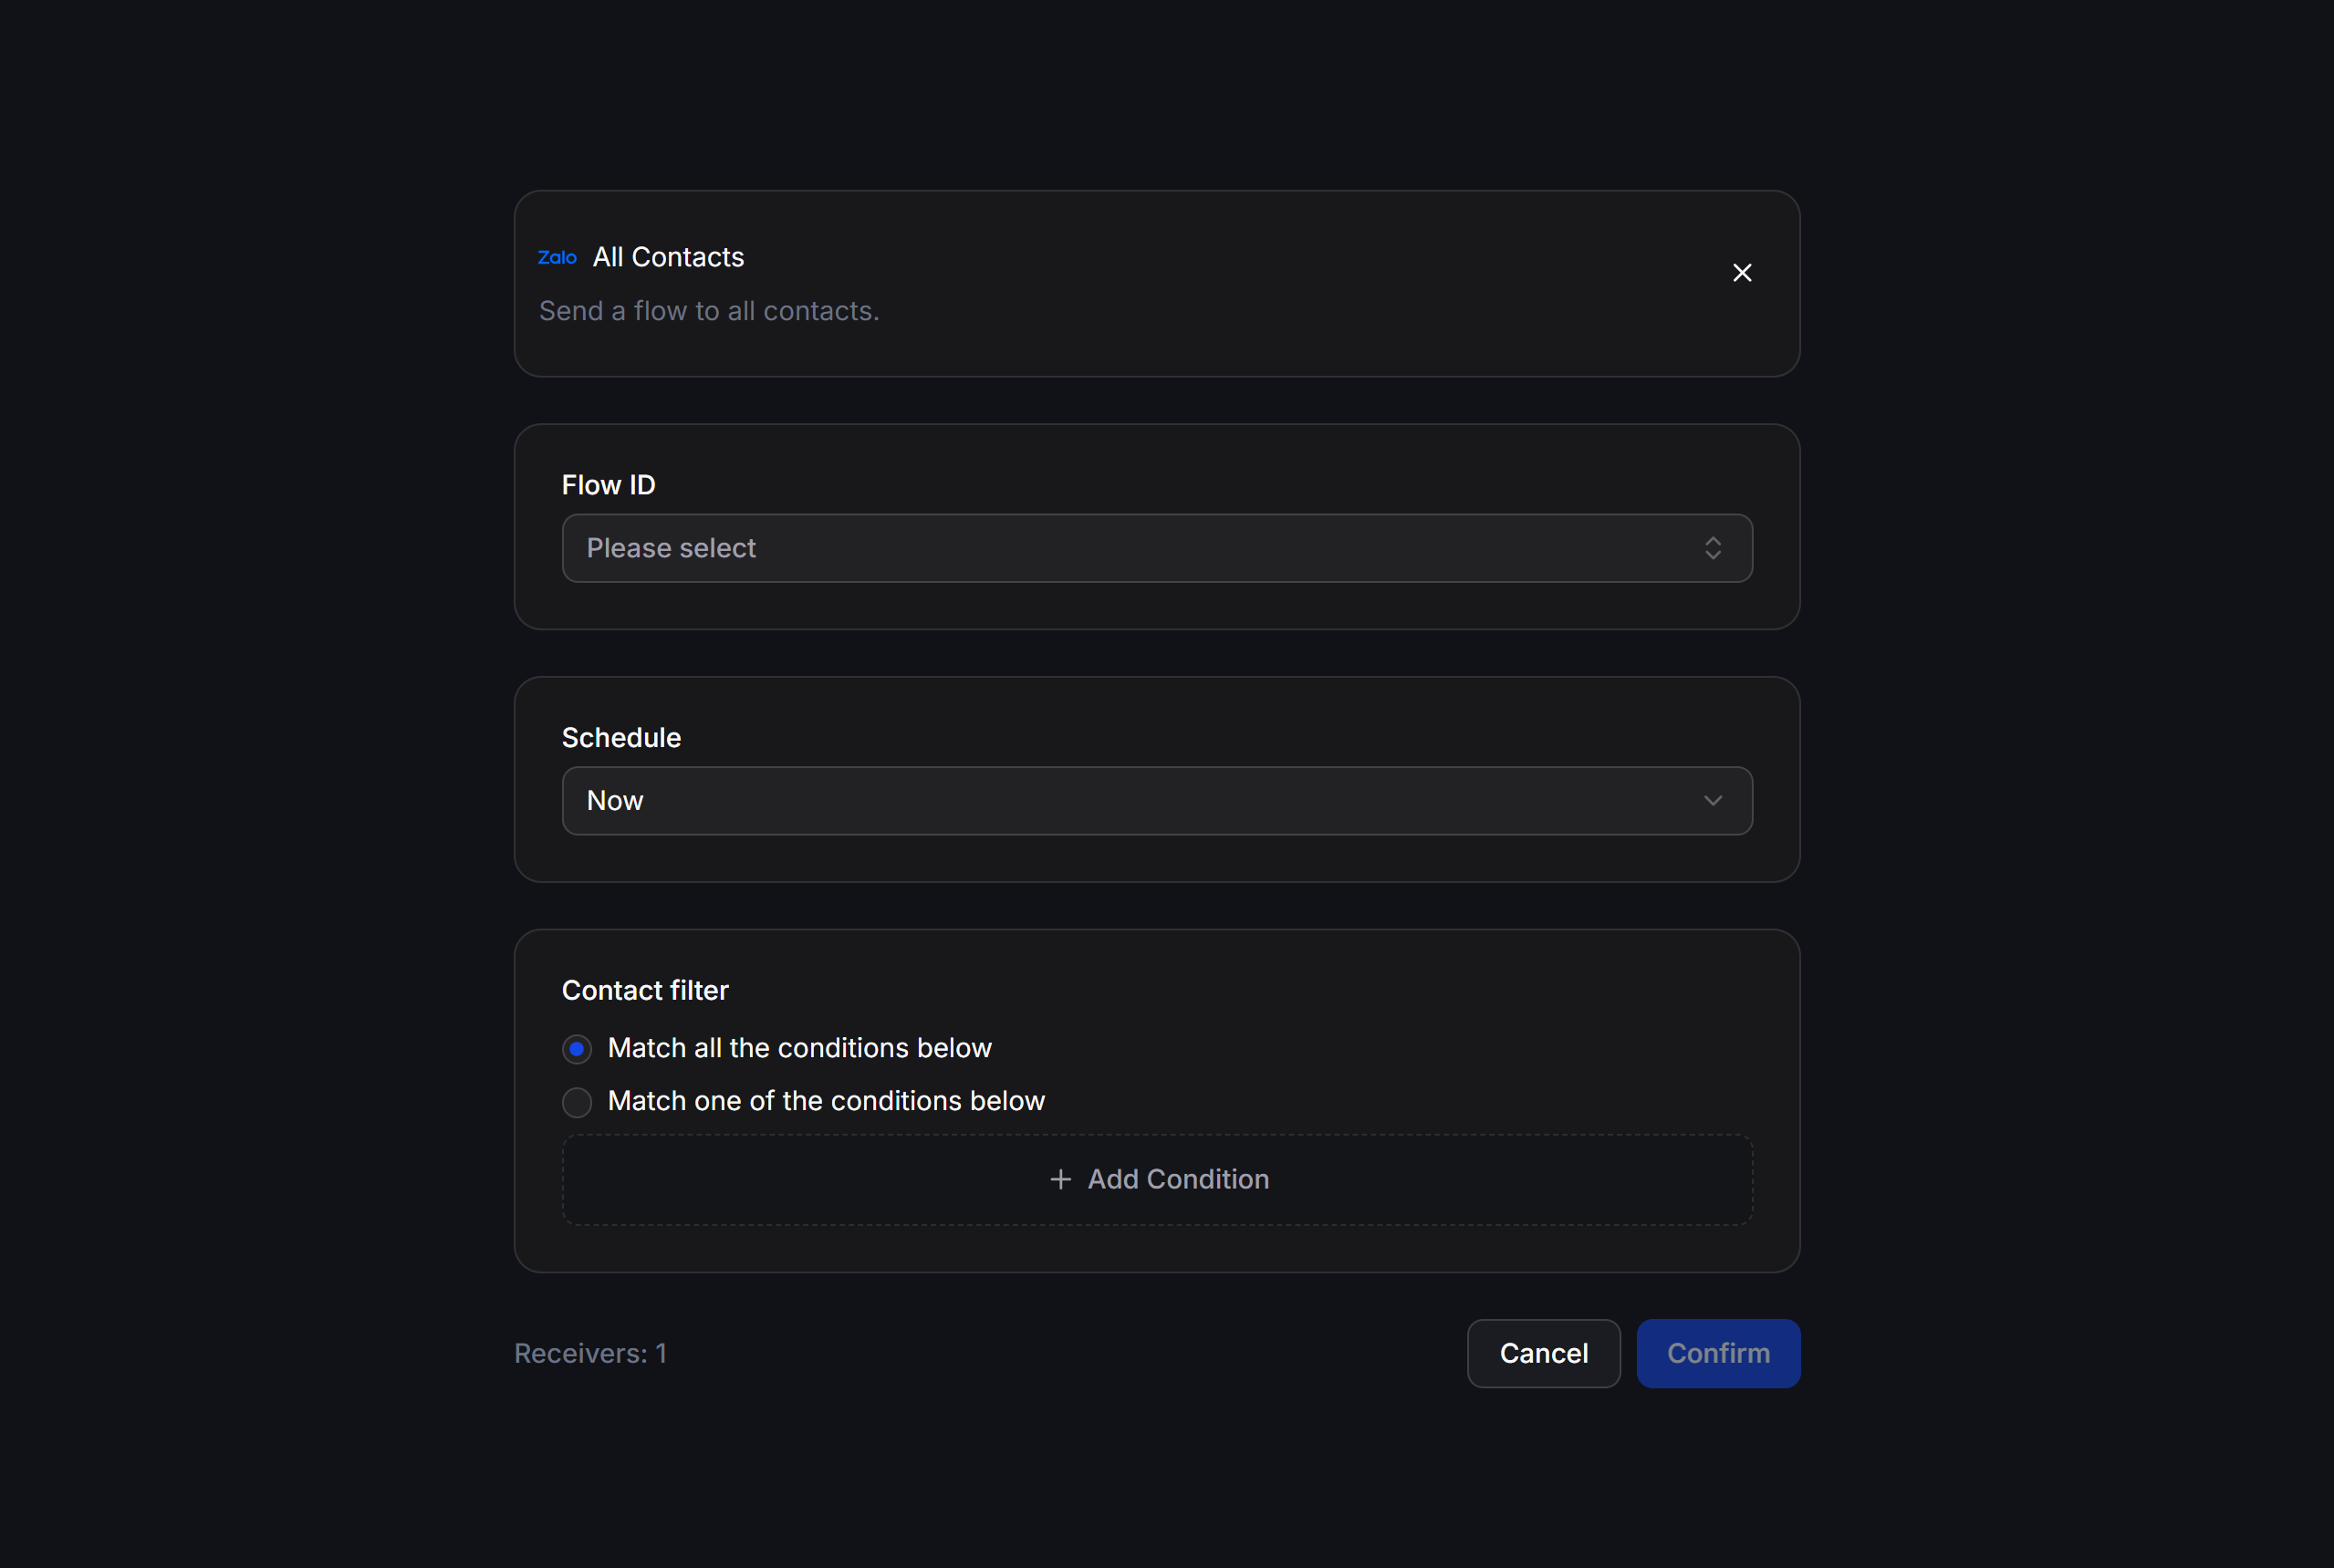
 Select the sending configuration shown for your connected Zalo OA, enter the campaign details, then set **Schedule** and **Contact filter** before confirming the Broadcast.
 ## Set the schedule and audience
Use **Now** to send the campaign after you confirm it. Use **Schedule for later** when you need to select a date, time, and timezone.
Use **Contact filter** to target the right recipients. You can require contacts to match all conditions or at least one condition. Check the number in **Receivers** before confirming the campaign.
The campaign only reaches contacts that match the selected filter and are available for the Zalo OA sending configuration you chose.
## Example
A retail shop can create a Zalo OA Broadcast for customers tagged `Loyal Customer`, schedule it before a member-only offer begins, and review the recipient count before sending.
## Check before sending
* Confirm the connected Zalo OA and campaign content.
* Review the **Receivers** count and the sending time.
* Open the Broadcasts list after sending to review the available delivery metrics.
## Set the schedule and audience
Use **Now** to send the campaign after you confirm it. Use **Schedule for later** when you need to select a date, time, and timezone.
Use **Contact filter** to target the right recipients. You can require contacts to match all conditions or at least one condition. Check the number in **Receivers** before confirming the campaign.
The campaign only reaches contacts that match the selected filter and are available for the Zalo OA sending configuration you chose.
## Example
A retail shop can create a Zalo OA Broadcast for customers tagged `Loyal Customer`, schedule it before a member-only offer begins, and review the recipient count before sending.
## Check before sending
* Confirm the connected Zalo OA and campaign content.
* Review the **Receivers** count and the sending time.
* Open the Broadcasts list after sending to review the available delivery metrics.