> ## Documentation Index
> Fetch the complete documentation index at: https://chatbotx.io/docs/llms.txt
> Use this file to discover all available pages before exploring further.
# Facebook Comment Automation
> Learn how to set up and manage Facebook Comment Automation to automatically reply to public comments and send private inbox messages on your Fanpage.
**Facebook Comment Automation** is a powerful tool that helps you automate customer interactions on your Facebook Fanpage. When a customer comments on a post, the system automatically performs two actions simultaneously: posts a public reply under that comment and sends a private message to the customer's Inbox.
This tool helps you:
* **Optimize Responses:** Reach customers instantly when they show interest in your products or services.
* **Increase Conversion Rates:** Move customers from public comments into personalized consultations in their Inbox.
* **Protect Customer Information:** Automatically hide comments containing phone numbers or sensitive information to prevent competitor hijacking.
* **Save Time:** Automate repetitive replies such as pricing inquiries or requests for details.
## Set Up Comment Automation
You can create and configure your comment automation campaign by following these steps:
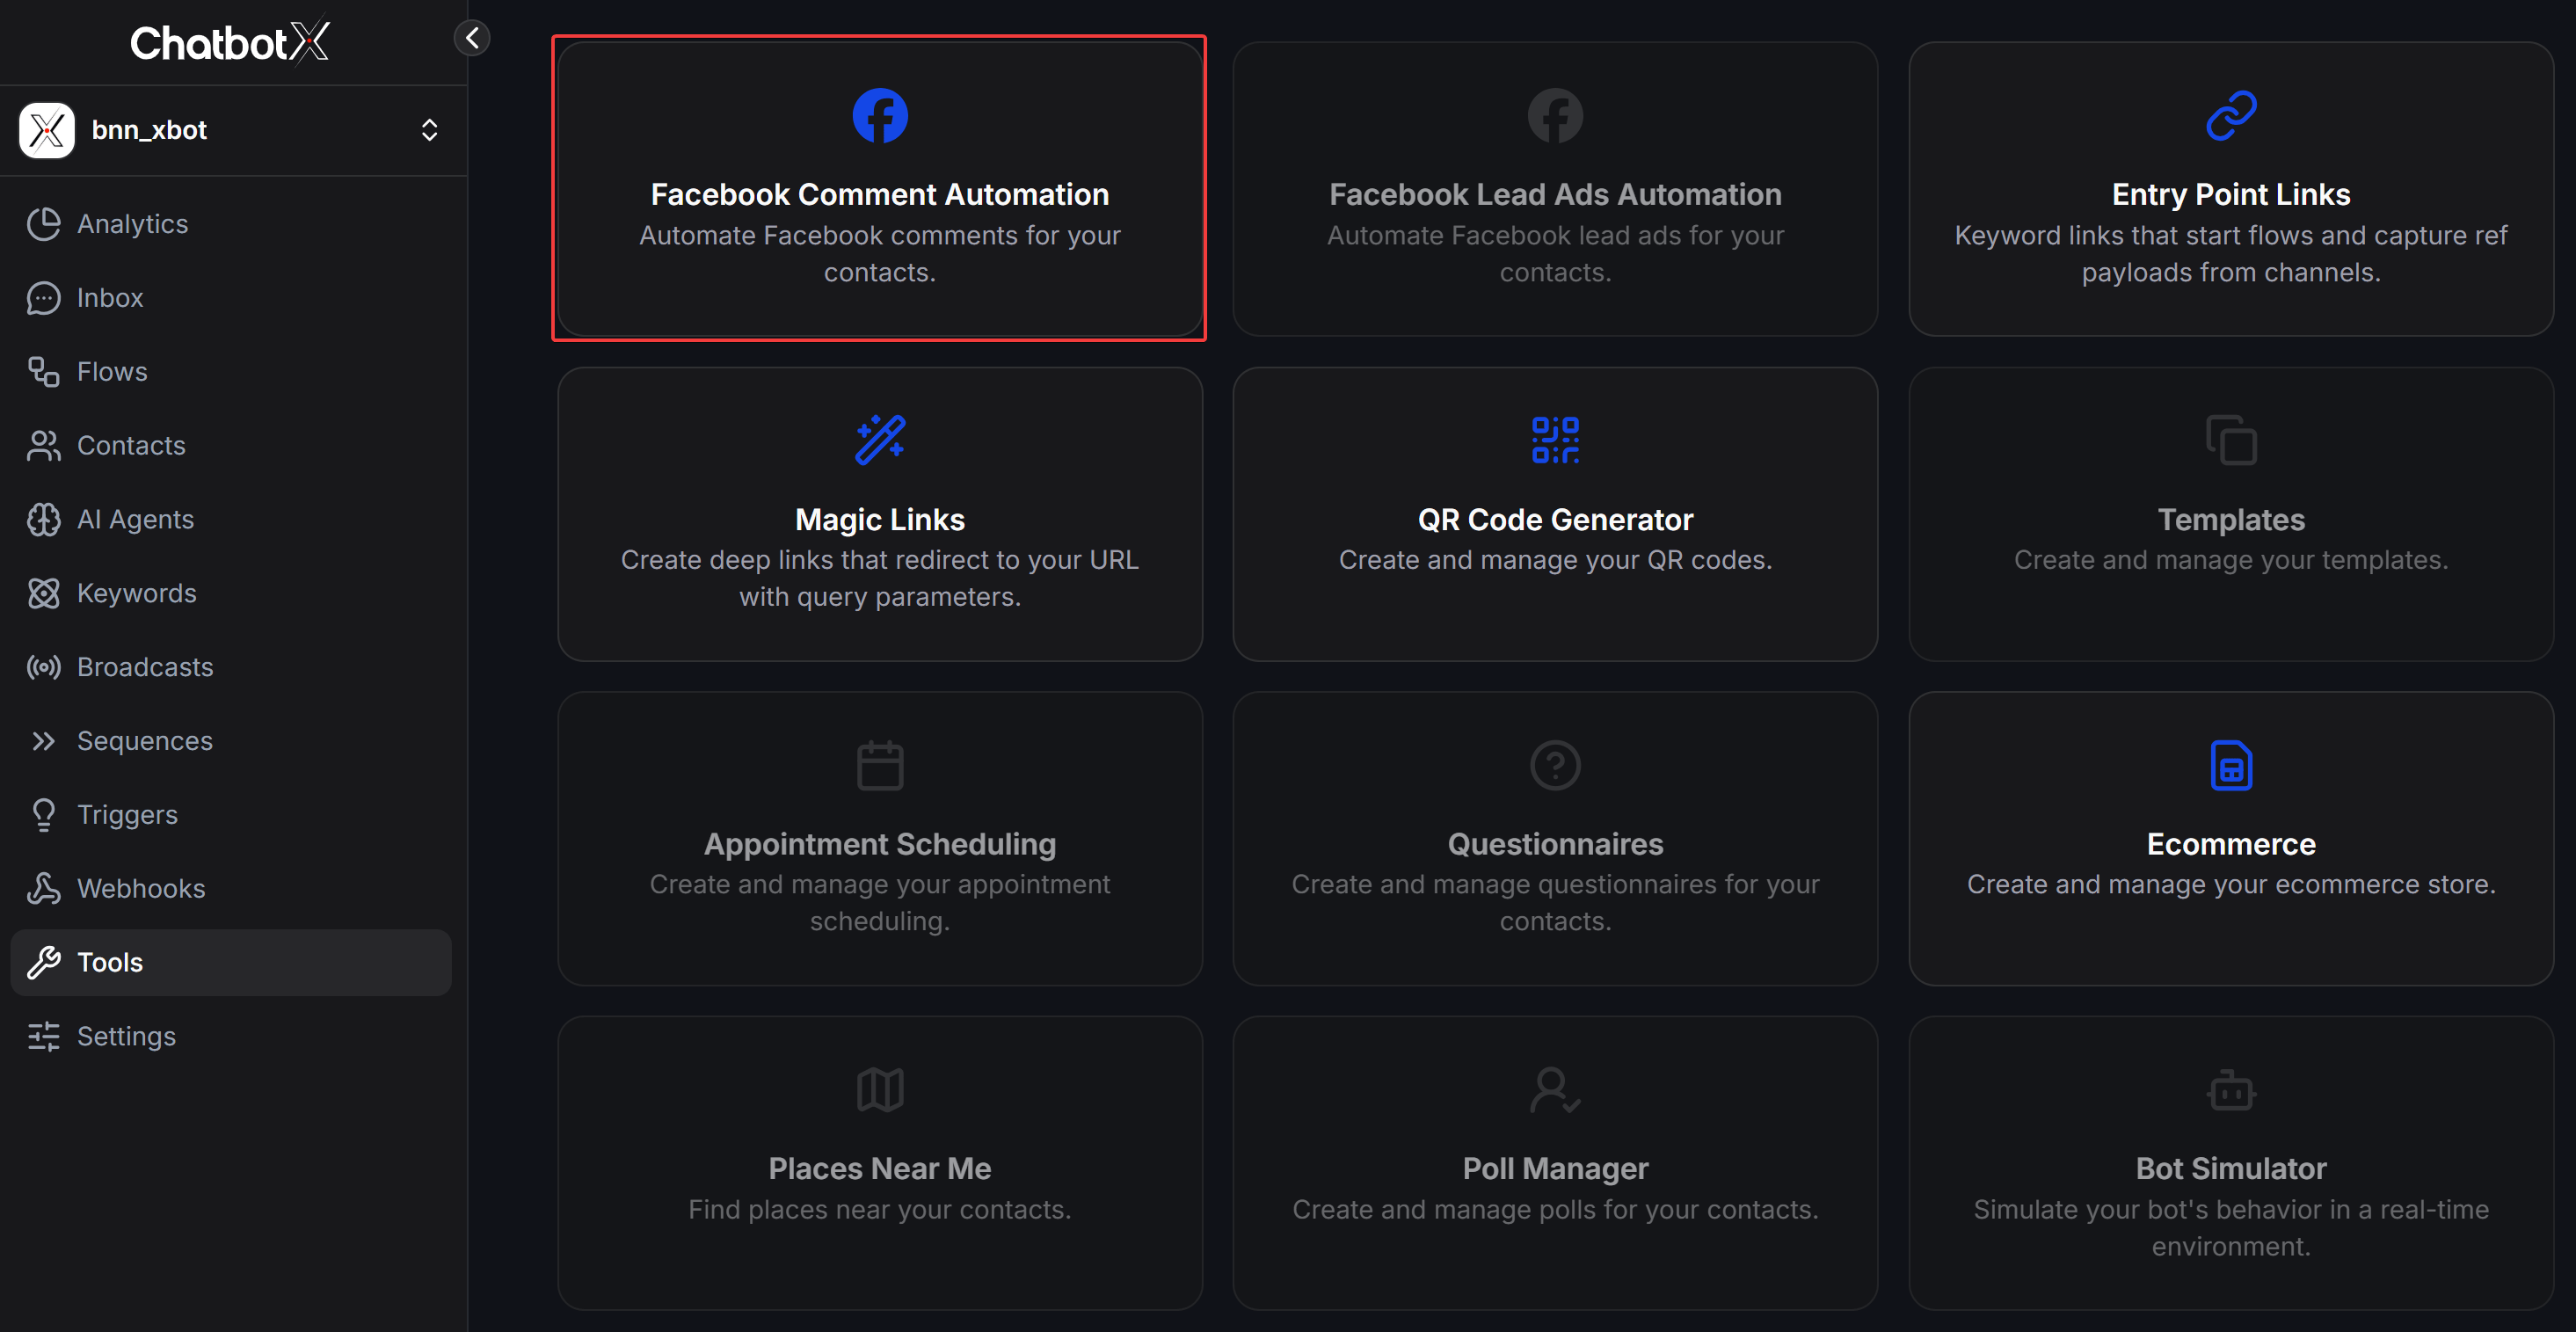
Log in to your admin portal and select **Tools** from the left navigation menu. Then, click on the **Facebook Comment Automation** card.
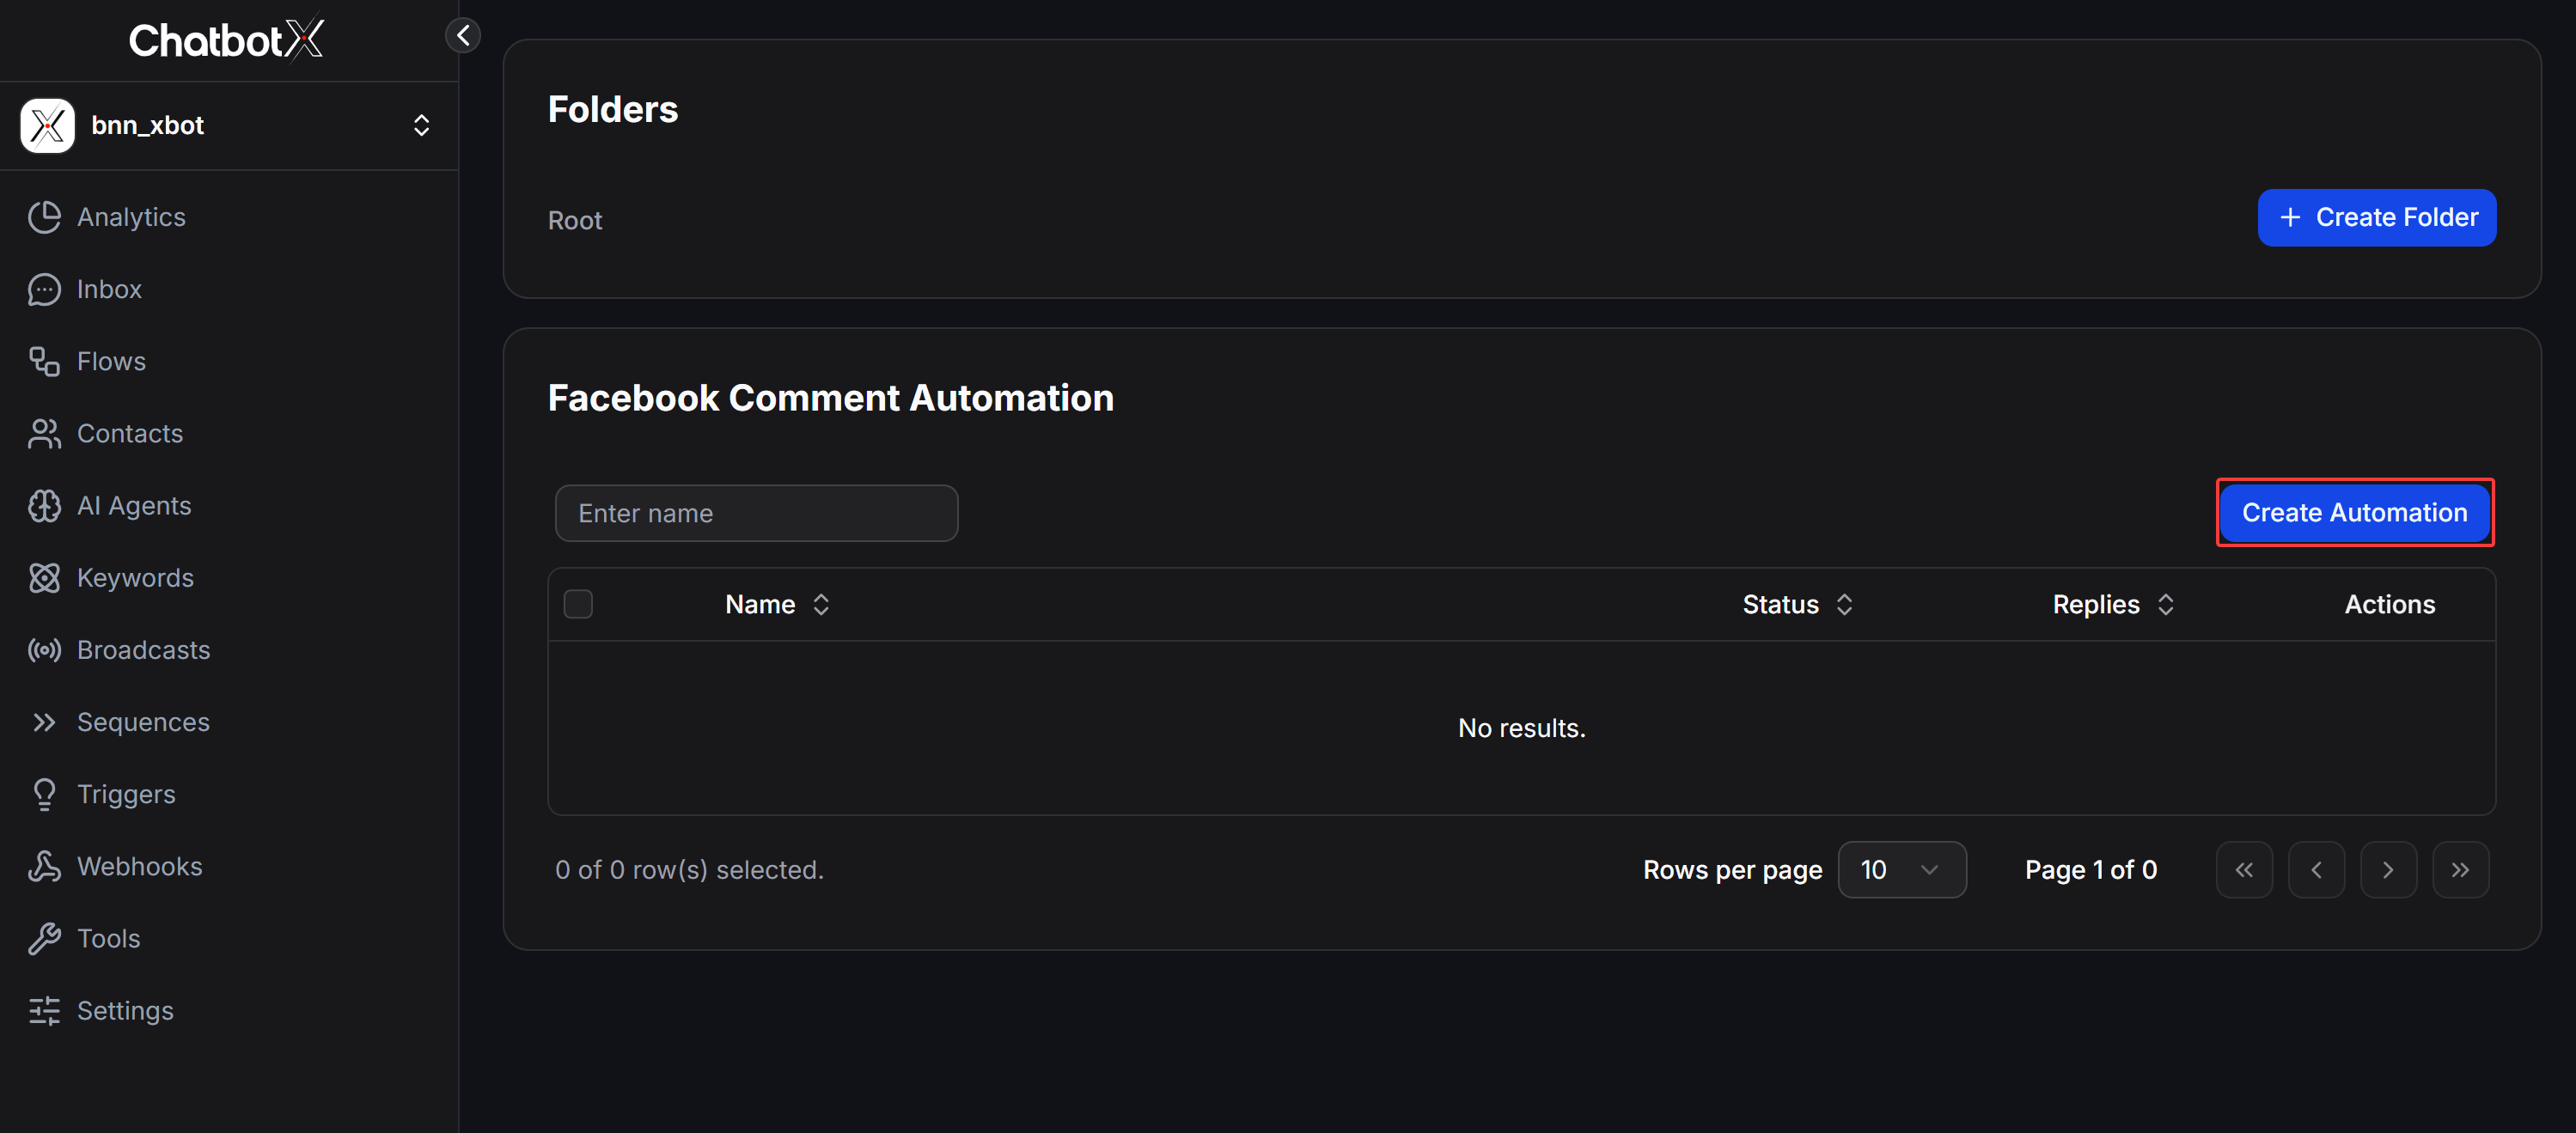
 In the Facebook Comment Automation management interface, click the **Create Automation** button on the right side to start creating a new campaign.
 In the campaign configuration form, set up the following basic settings:
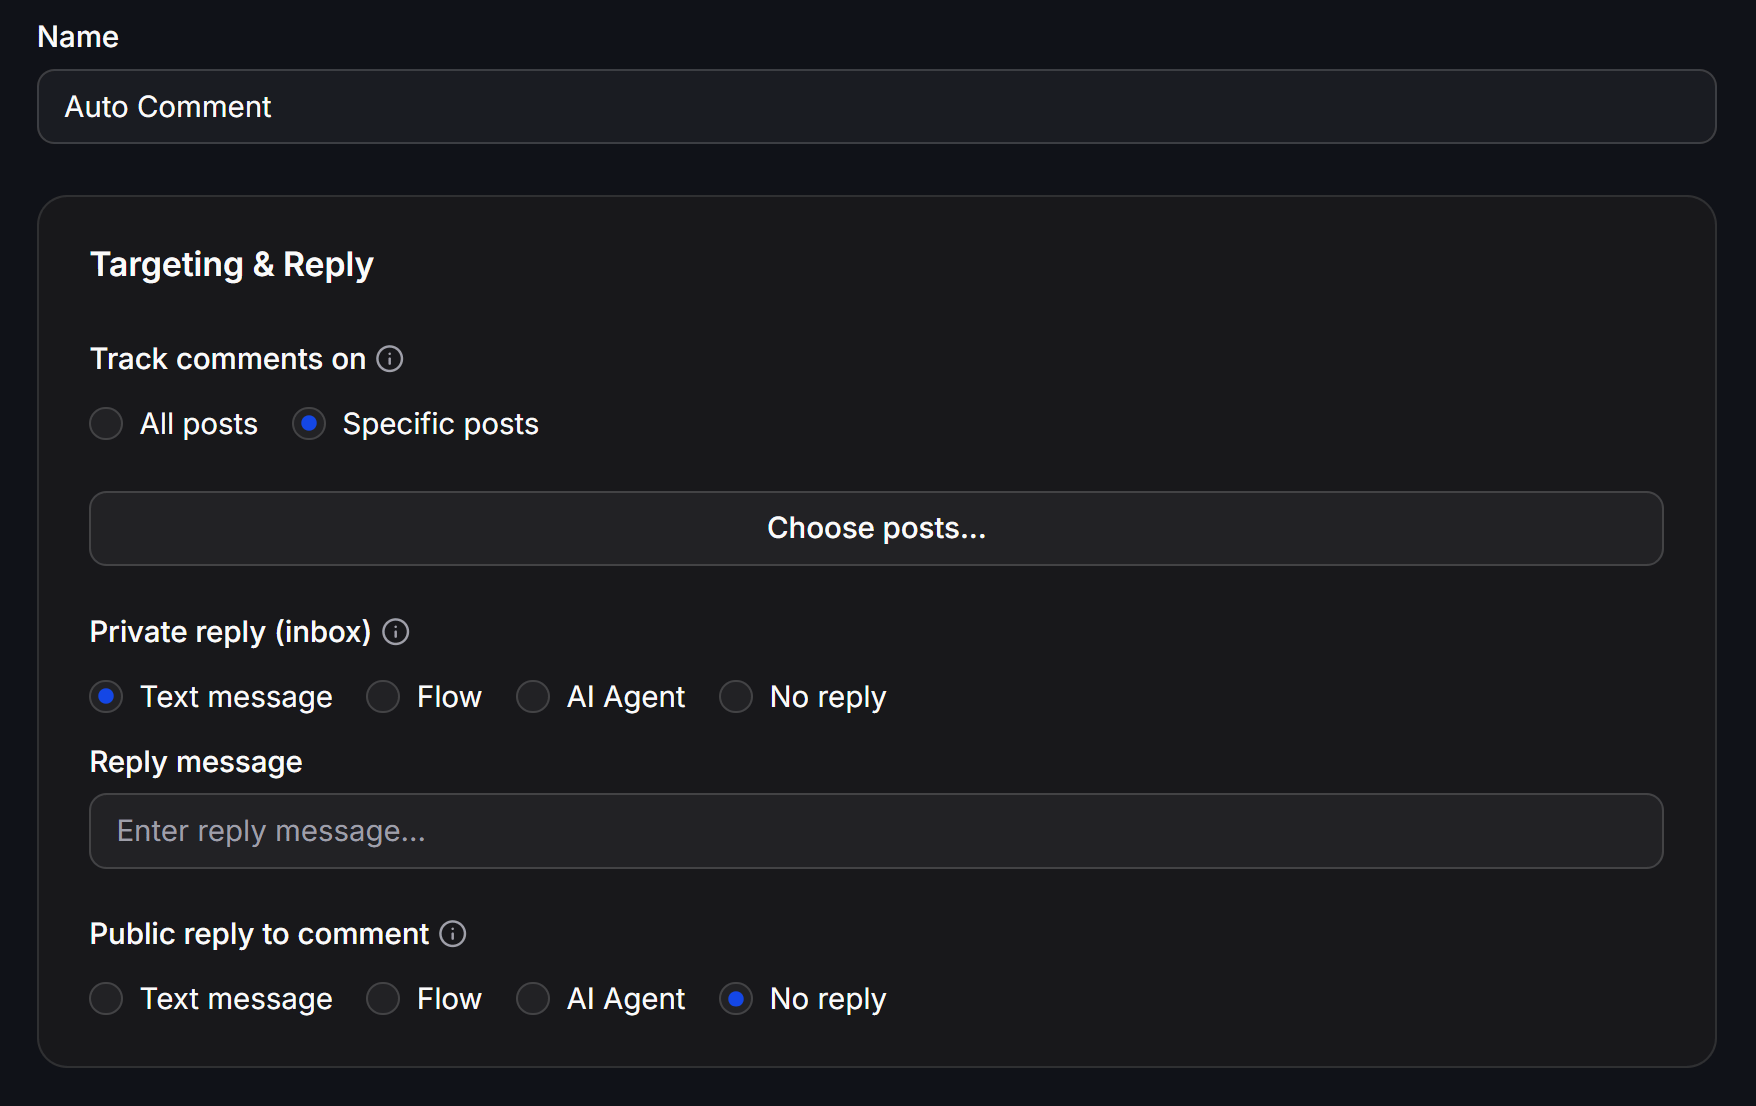 * **Name:** Enter a name to identify your campaign (e.g., `Auto Comment`).
* **Track comments on:**
* **All posts:** Apply automatic replies to all current and future posts on the Fanpage.
* **Specific posts:** Apply only to one or more specified posts. When selecting this option, click the **Choose posts...** button to open the post selection dialog.
* **Name:** Enter a name to identify your campaign (e.g., `Auto Comment`).
* **Track comments on:**
* **All posts:** Apply automatic replies to all current and future posts on the Fanpage.
* **Specific posts:** Apply only to one or more specified posts. When selecting this option, click the **Choose posts...** button to open the post selection dialog.
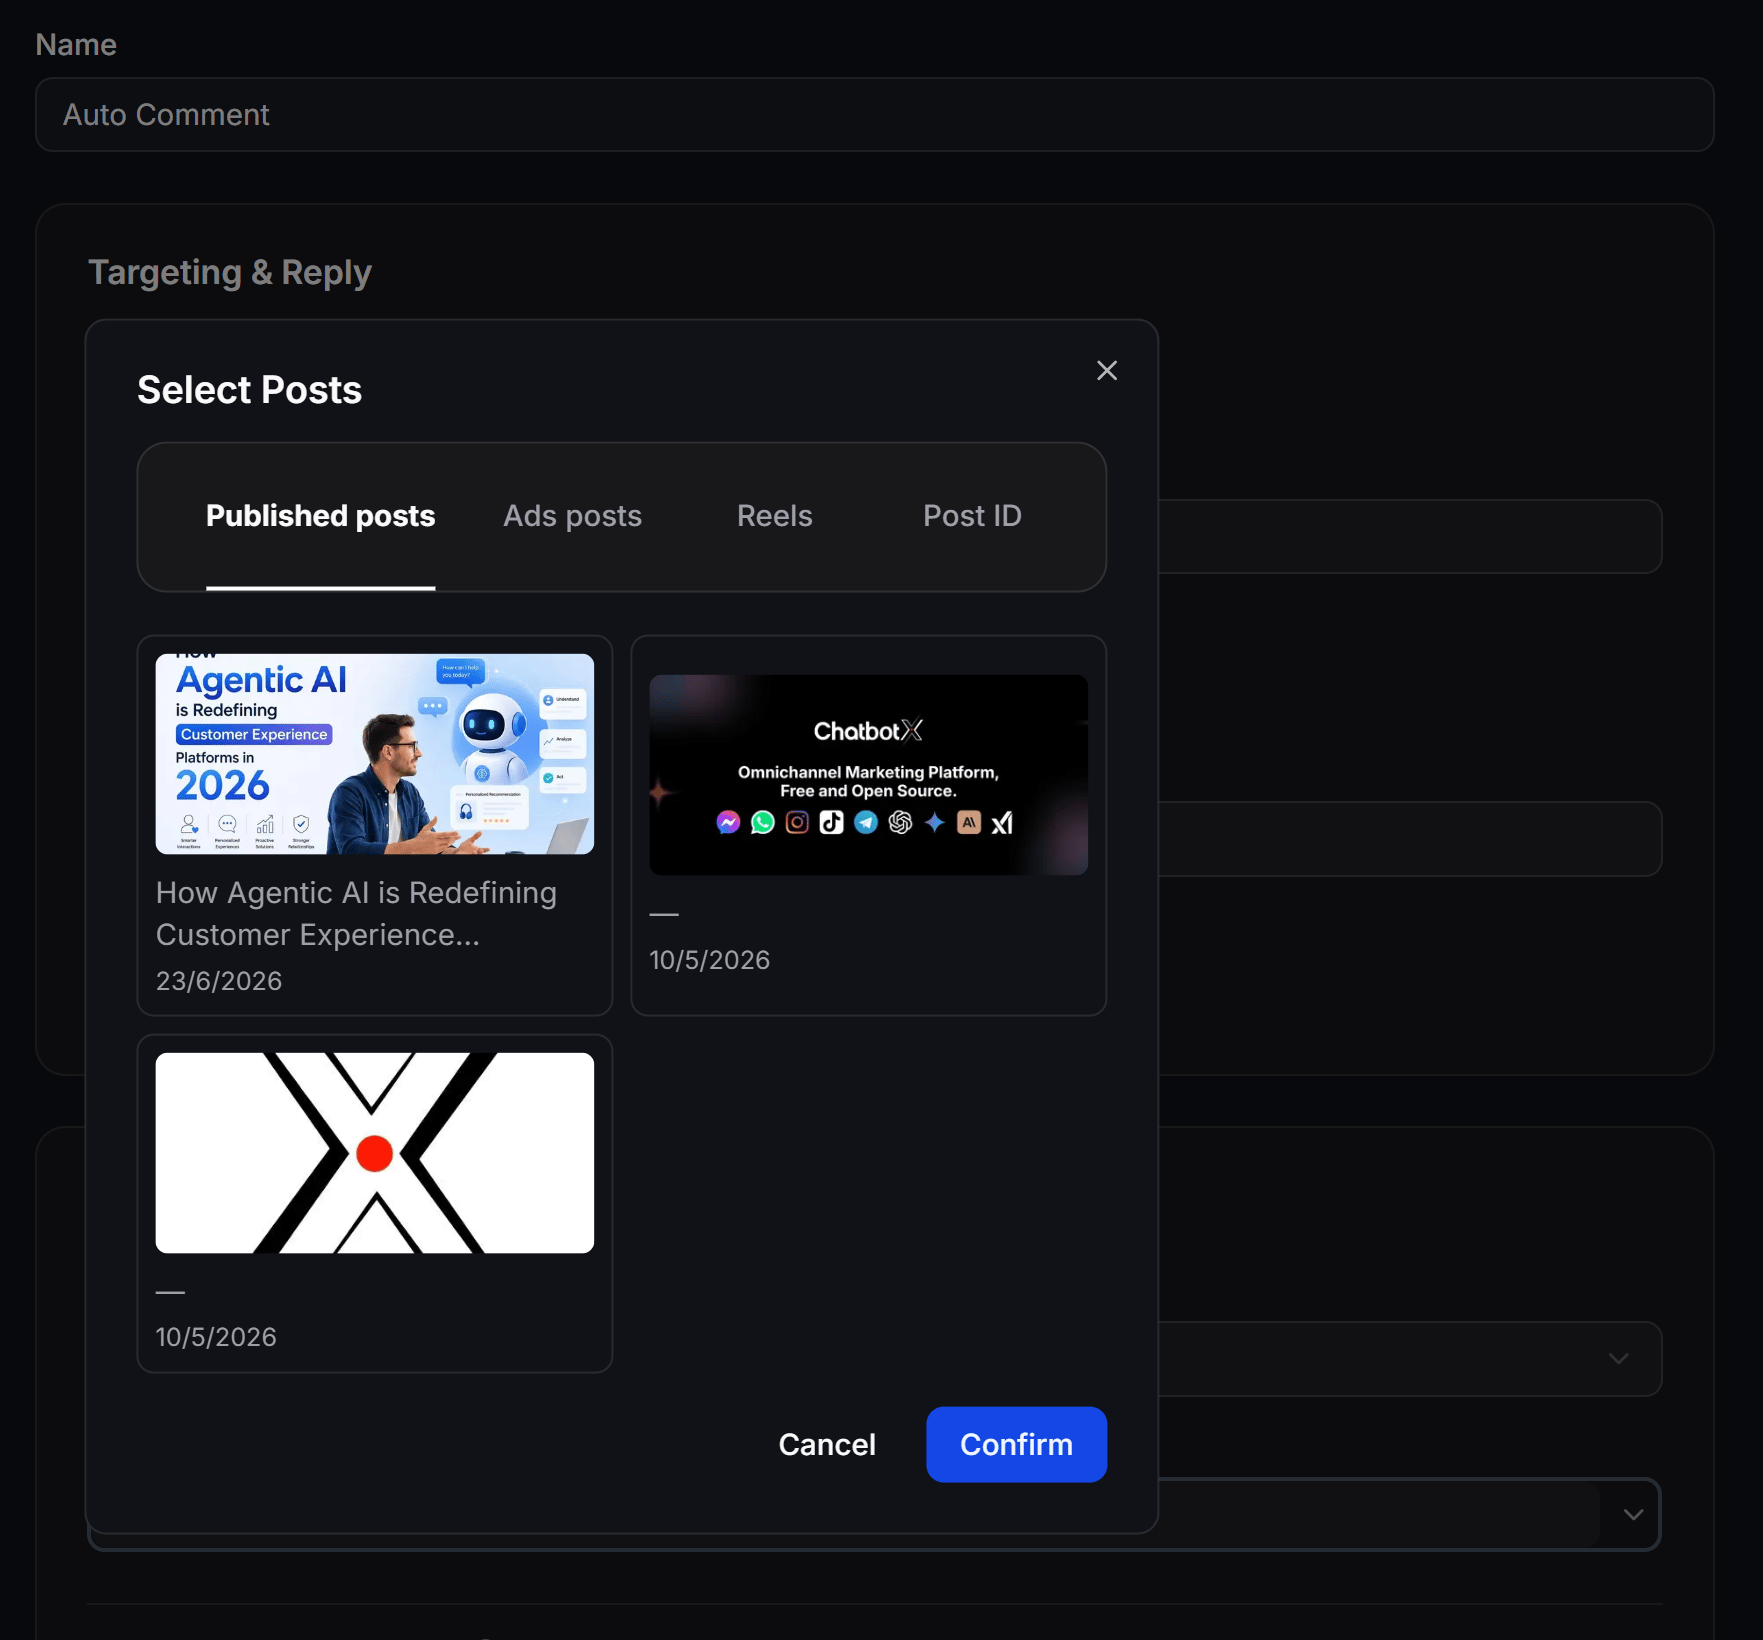 *The post selector includes 4 filter tabs for easy searching:*
* *Published posts:* Posts publicly published on the page.
* *Ads posts:* Posts currently used for running ads.
* *Reels:* Short video reels on the Fanpage.
* *Post ID:* Directly enter the specific post ID from Facebook. After selecting the post(s), click **Confirm** to complete.
* **Private reply (inbox):** Choose the type of message automatically sent to the customer's Inbox when they comment:
* **Text message:** Send a standard text message. Enter the message content in the **Reply message** field below.
* **Flow:** Send a pre-built message script (Flow) from Flow Builder.
* **AI Agent:** Hand over the conversation directly to an AI Agent to automate response handling using your knowledge base.
* **No reply:** Do not send a private Inbox message.
* **Public reply to comment:** Choose how to reply publicly directly under the customer's comment. The options are similar: *Text message*, *Flow*, *AI Agent*, or *No reply*.
Set detailed conditions to ensure the bot only responds to your target audience:
*The post selector includes 4 filter tabs for easy searching:*
* *Published posts:* Posts publicly published on the page.
* *Ads posts:* Posts currently used for running ads.
* *Reels:* Short video reels on the Fanpage.
* *Post ID:* Directly enter the specific post ID from Facebook. After selecting the post(s), click **Confirm** to complete.
* **Private reply (inbox):** Choose the type of message automatically sent to the customer's Inbox when they comment:
* **Text message:** Send a standard text message. Enter the message content in the **Reply message** field below.
* **Flow:** Send a pre-built message script (Flow) from Flow Builder.
* **AI Agent:** Hand over the conversation directly to an AI Agent to automate response handling using your knowledge base.
* **No reply:** Do not send a private Inbox message.
* **Public reply to comment:** Choose how to reply publicly directly under the customer's comment. The options are similar: *Text message*, *Flow*, *AI Agent*, or *No reply*.
Set detailed conditions to ensure the bot only responds to your target audience:
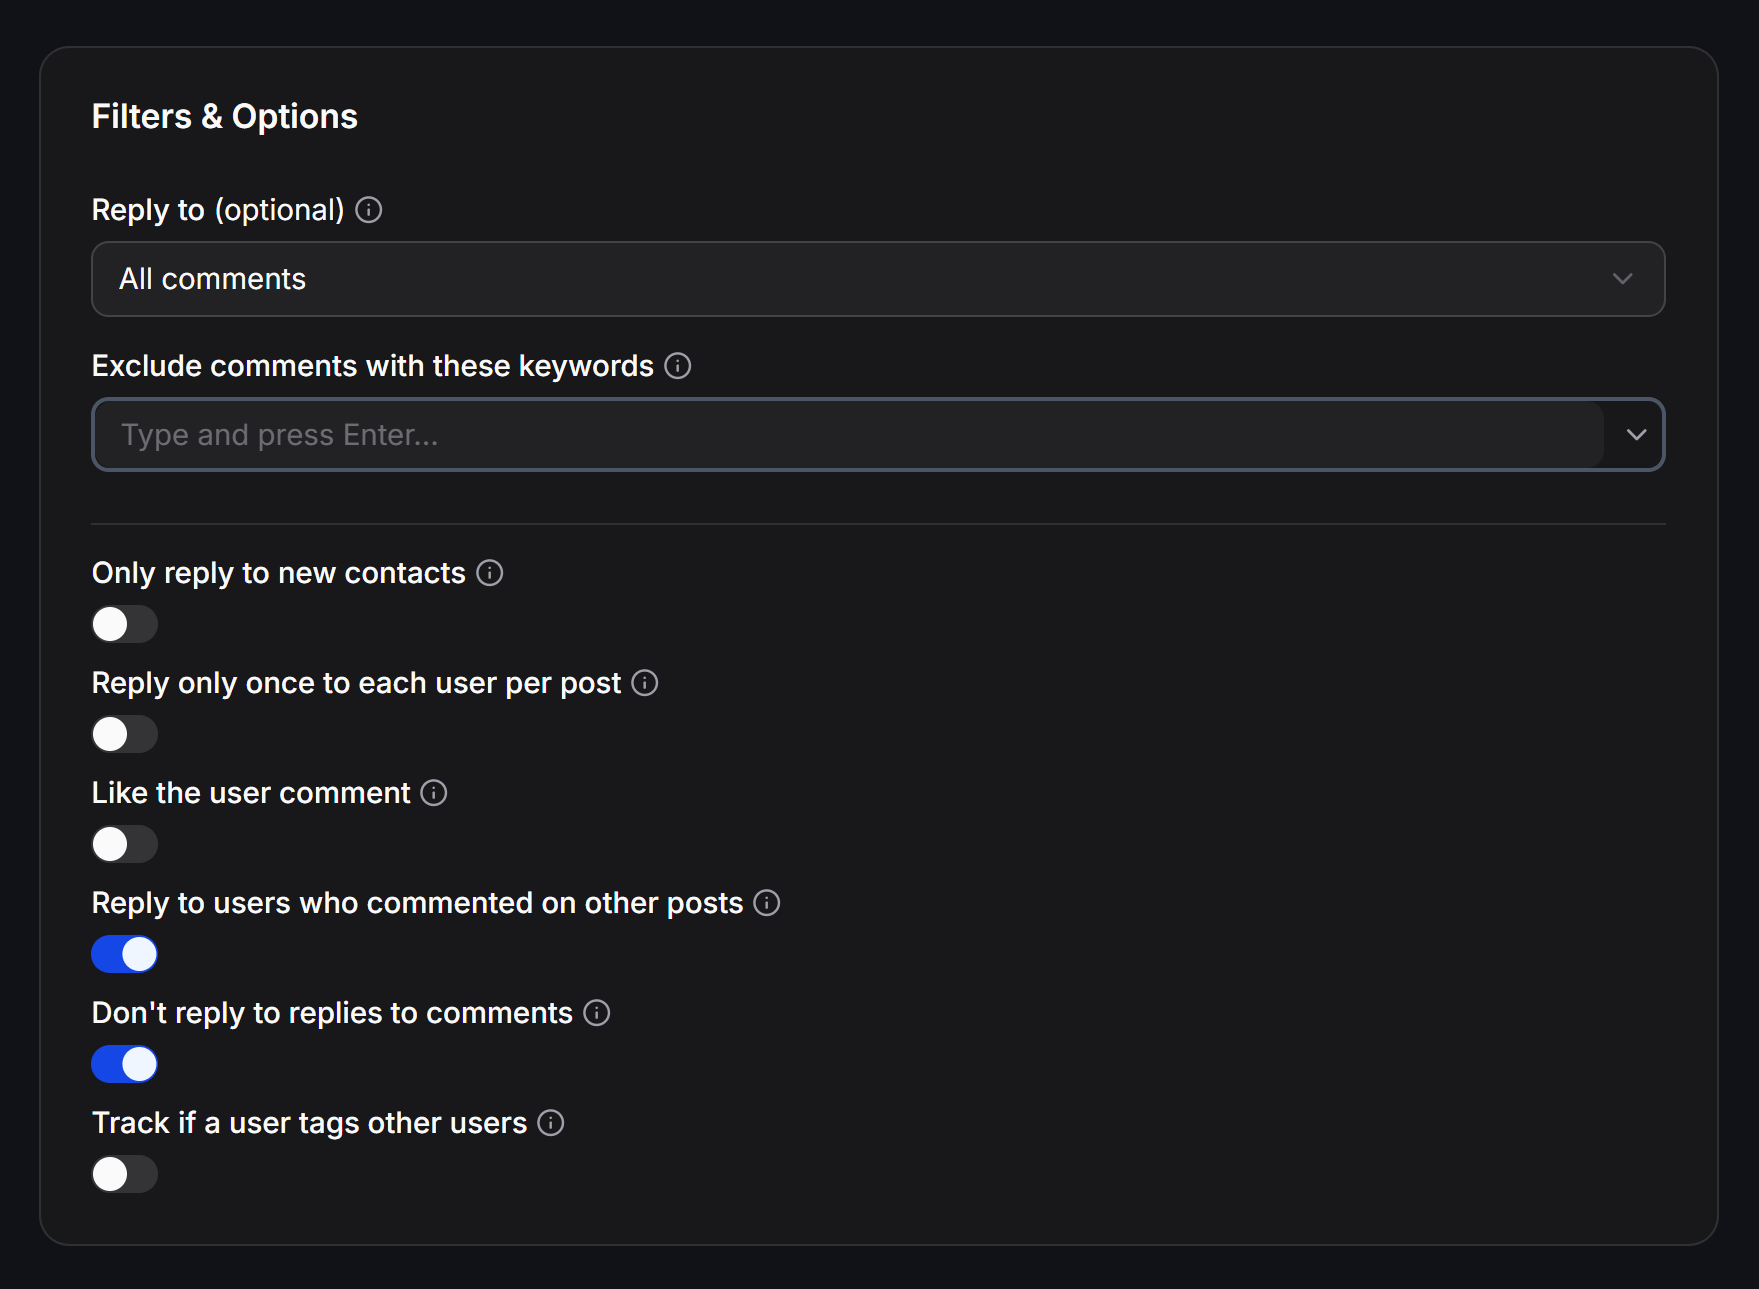 * **Reply to (optional):** Define comment conditions to trigger responses:
* **All comments:** Respond to all comments regardless of content.
* **Exact match:** Respond only when the comment matches the configured keywords exactly.
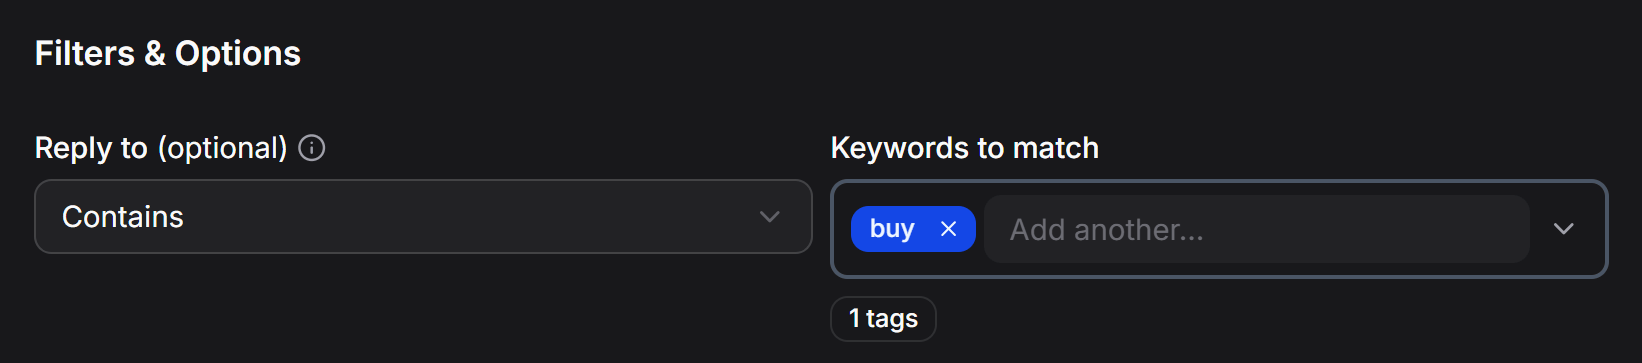
* **Contains:** Respond when the comment contains the configured keywords. *Note: When choosing **Exact match** or **Contains**, enter the keywords in the **Keywords to match** field and press Enter to save.*
* **Reply to (optional):** Define comment conditions to trigger responses:
* **All comments:** Respond to all comments regardless of content.
* **Exact match:** Respond only when the comment matches the configured keywords exactly.
* **Contains:** Respond when the comment contains the configured keywords. *Note: When choosing **Exact match** or **Contains**, enter the keywords in the **Keywords to match** field and press Enter to save.*
 * **Exclude comments with these keywords:** Enter keyword exclusions. The system will skip and not reply to any comments containing these keywords (e.g., negative or spam words).
* **Only reply to new contacts:** When enabled, the system only replies to users who have never messaged or interacted with the Fanpage before.
* **Reply only once to each user per post:** When enabled, each customer receives an automatic reply at most once per post, preventing repetitive messages if they comment multiple times.
* **Like the user comment:** Automatically like the customer's comment when replying.
* **Reply to users who commented on other posts:** When enabled, the bot still responds to customers who have previously commented on other Fanpage posts.
* **Don't reply to replies to comments:** When enabled, the bot ignores sub-comments (replies within a main comment thread) to avoid replying to nested discussions.
* **Track if a user tags other users:** Detect whether customers tag their friends in the comments. This feature is ideal for organizing Mini-Games or Giveaways that require tagging friends to receive rewards.
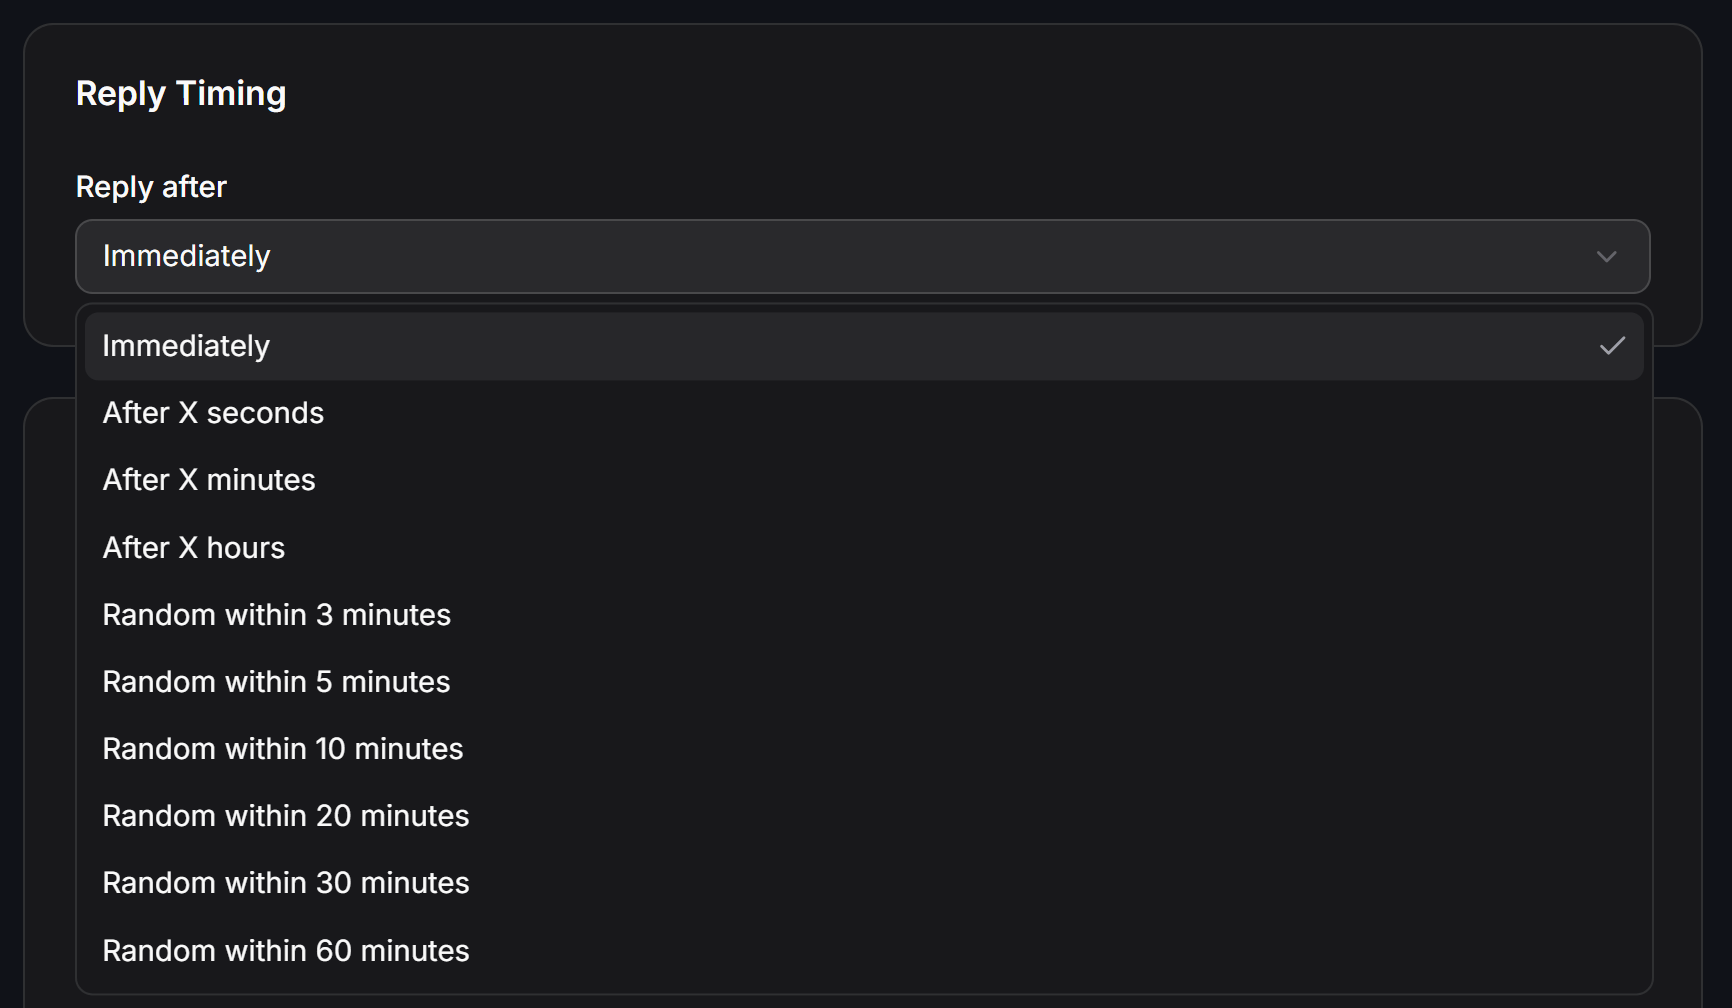
Configure the delay before the system sends a reply by selecting the dropdown under **Reply after**:
* **Immediately:** Reply immediately after a customer comments.
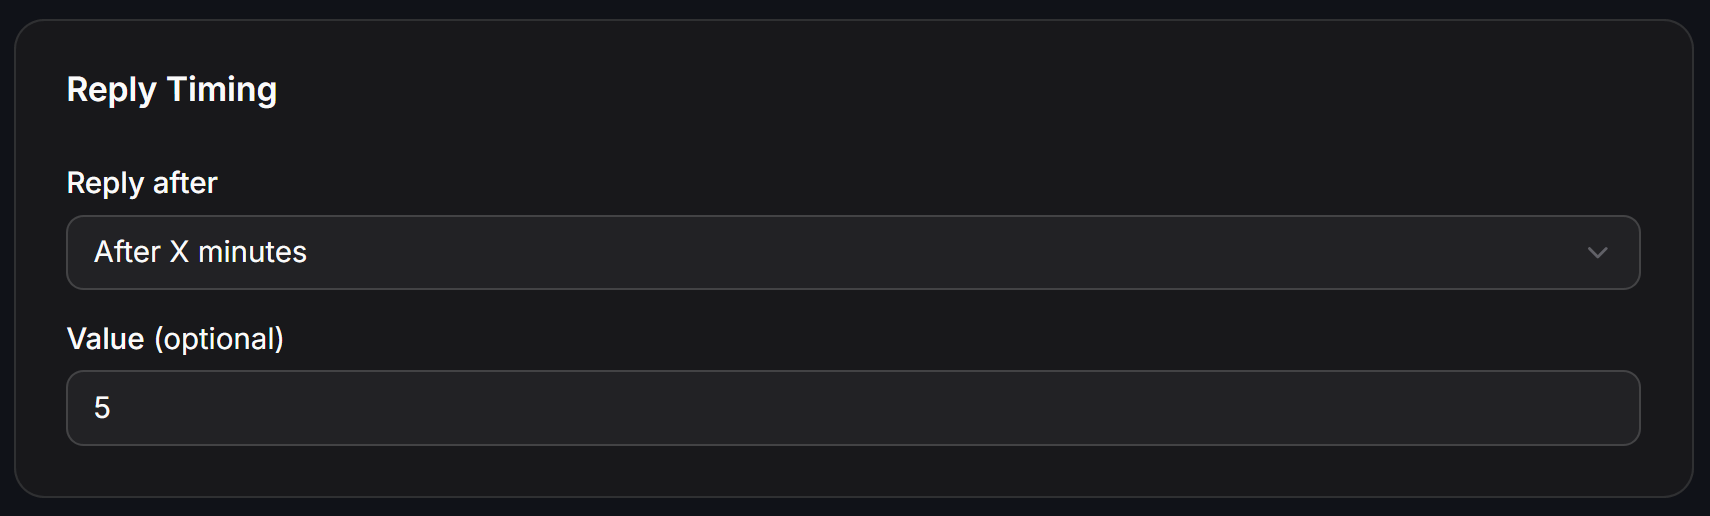
* **After X seconds / minutes / hours:** Delay the reply by a specific number of seconds, minutes, or hours. Enter the number in the **Value (optional)** field.
* **Random within X minutes:** The system replies randomly within the specified time range (from 3 to 60 minutes). Creating a random delay makes the bot's behavior feel more natural (like a real person) and helps avoid Facebook spam flags.
* **Exclude comments with these keywords:** Enter keyword exclusions. The system will skip and not reply to any comments containing these keywords (e.g., negative or spam words).
* **Only reply to new contacts:** When enabled, the system only replies to users who have never messaged or interacted with the Fanpage before.
* **Reply only once to each user per post:** When enabled, each customer receives an automatic reply at most once per post, preventing repetitive messages if they comment multiple times.
* **Like the user comment:** Automatically like the customer's comment when replying.
* **Reply to users who commented on other posts:** When enabled, the bot still responds to customers who have previously commented on other Fanpage posts.
* **Don't reply to replies to comments:** When enabled, the bot ignores sub-comments (replies within a main comment thread) to avoid replying to nested discussions.
* **Track if a user tags other users:** Detect whether customers tag their friends in the comments. This feature is ideal for organizing Mini-Games or Giveaways that require tagging friends to receive rewards.
Configure the delay before the system sends a reply by selecting the dropdown under **Reply after**:
* **Immediately:** Reply immediately after a customer comments.
* **After X seconds / minutes / hours:** Delay the reply by a specific number of seconds, minutes, or hours. Enter the number in the **Value (optional)** field.
* **Random within X minutes:** The system replies randomly within the specified time range (from 3 to 60 minutes). Creating a random delay makes the bot's behavior feel more natural (like a real person) and helps avoid Facebook spam flags.
 Automatically hide customer comments on posts to protect their contact info or prevent competitors from hijacking your leads:
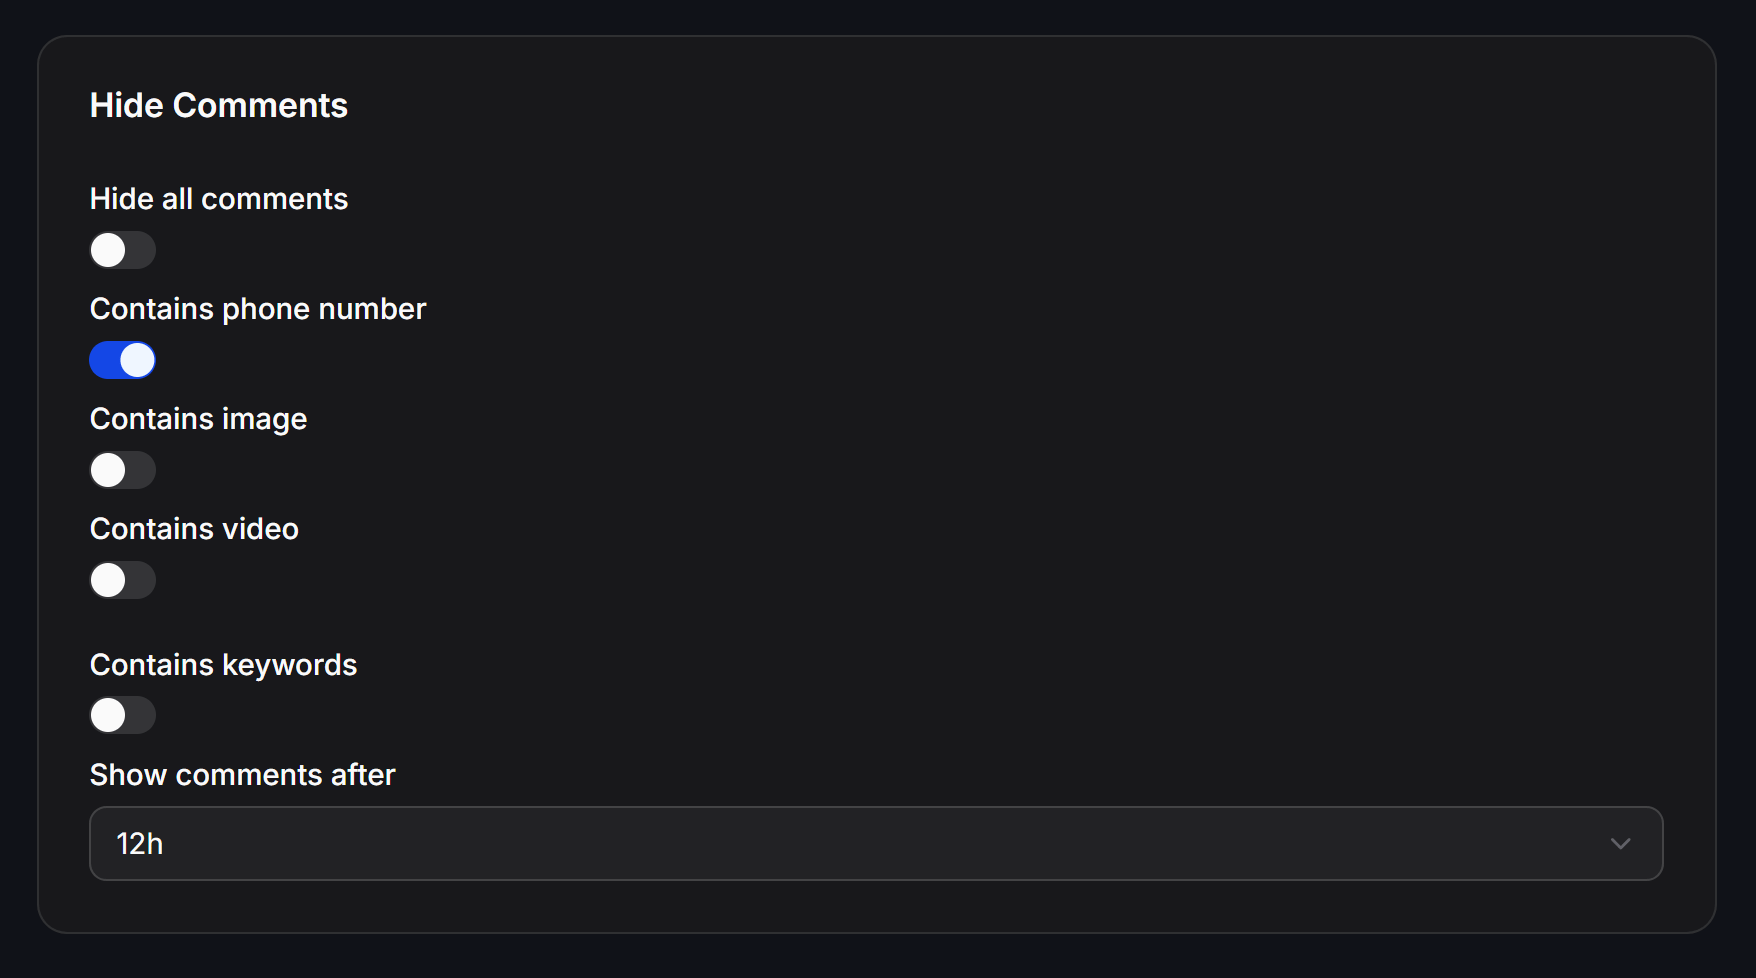 * Click the **Hide Comments** dropdown and select the duration:
* **Never:** Never hide comments.
* **6h / 12h / 1d - 10d:** Automatically hide the customer's comment after the corresponding duration (from 6 hours to 10 days) after they comment.
* After completing the configuration, click **Create** in the bottom-right corner to save and activate the campaign.
## Managing Facebook Comment Automation
Once successfully created, your automation campaigns will be listed on the main dashboard. From here, you can manage and track their performance:
* Click the **Hide Comments** dropdown and select the duration:
* **Never:** Never hide comments.
* **6h / 12h / 1d - 10d:** Automatically hide the customer's comment after the corresponding duration (from 6 hours to 10 days) after they comment.
* After completing the configuration, click **Create** in the bottom-right corner to save and activate the campaign.
## Managing Facebook Comment Automation
Once successfully created, your automation campaigns will be listed on the main dashboard. From here, you can manage and track their performance:
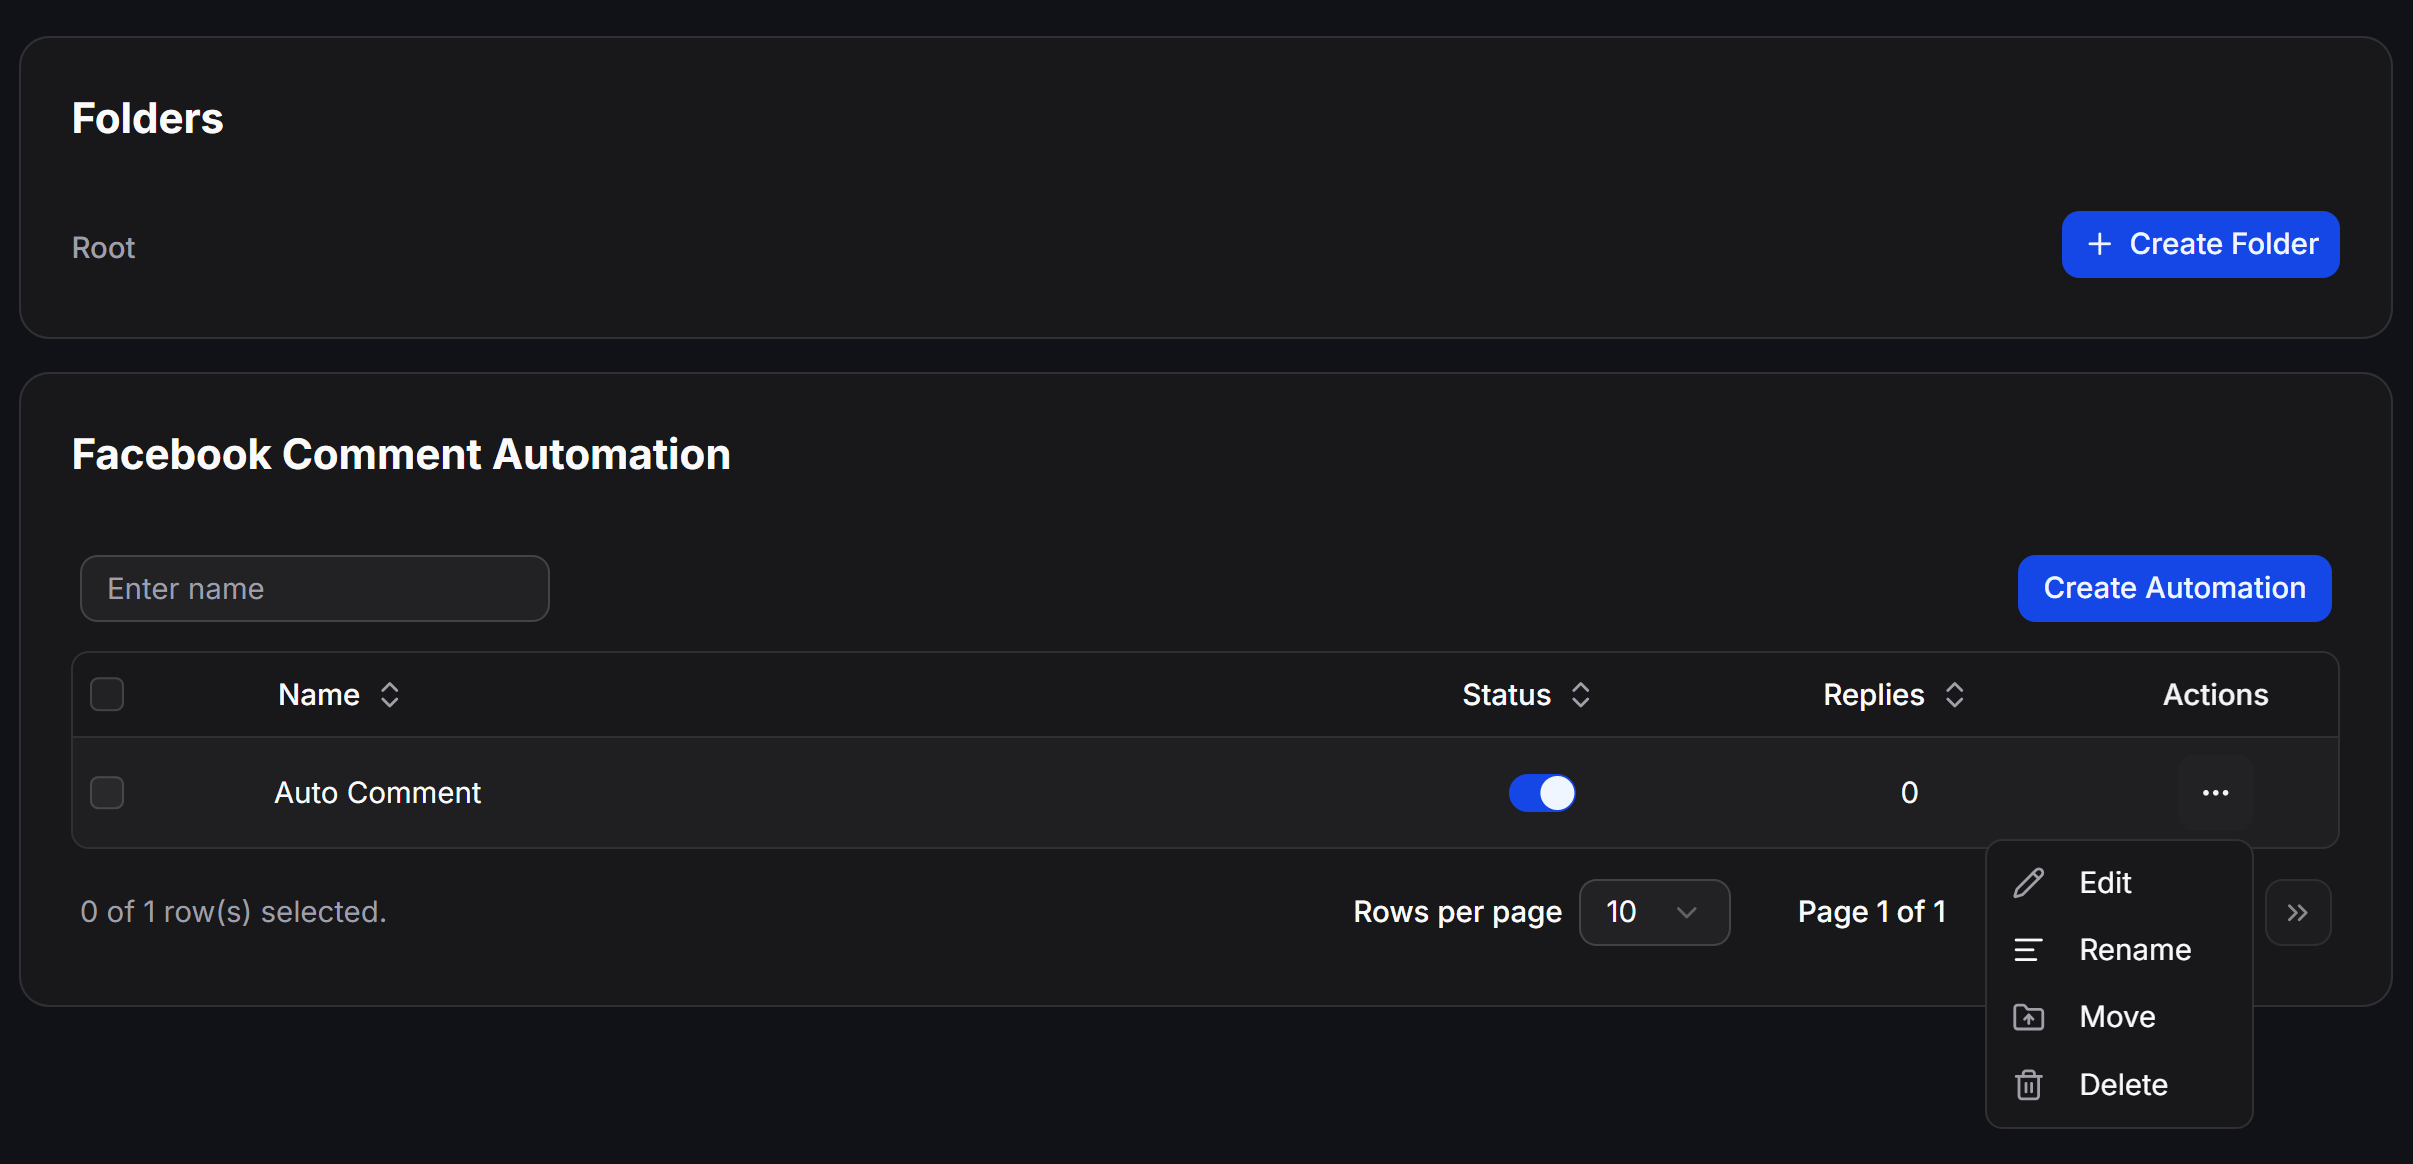 * **Quick Toggle Status:** Use the switch in the **Status** column to activate (green) or pause (gray) the bot on your posts at any time.
* **Track Metrics:** The **Replies** column displays the total number of automatic messages and comments sent by the bot for that campaign.
* **Quick Actions (Action menu):** Click the three-dot icon `...` in the **Actions** column to open advanced options:
* **Edit:** Open the configuration editor to adjust settings and filters.
* **Rename:** Quickly change the automation campaign's name.
* **Move:** Move the campaign into different folders for organized resource management.
* **Delete:** Permanently remove the automation campaign from the system.
* **Quick Toggle Status:** Use the switch in the **Status** column to activate (green) or pause (gray) the bot on your posts at any time.
* **Track Metrics:** The **Replies** column displays the total number of automatic messages and comments sent by the bot for that campaign.
* **Quick Actions (Action menu):** Click the three-dot icon `...` in the **Actions** column to open advanced options:
* **Edit:** Open the configuration editor to adjust settings and filters.
* **Rename:** Quickly change the automation campaign's name.
* **Move:** Move the campaign into different folders for organized resource management.
* **Delete:** Permanently remove the automation campaign from the system.