> ## Documentation Index
> Fetch the complete documentation index at: https://chatbotx.io/docs/llms.txt
> Use this file to discover all available pages before exploring further.
# Facebook Lead Ads Automation
> Set up Facebook Lead Ads Automation in ChatbotX to capture Lead Form data automatically and start a Flow for each new lead.
**Facebook Lead Ads Automation** lets ChatbotX capture customer information automatically when someone submits a Facebook Lead Form. You do not need to download leads from Meta and import them manually.
Use this feature to save contact details, send a confirmation message, or move each lead into a follow-up process built in a Flow.
## How it works
When someone submits a Lead Form, ChatbotX receives the data from the connected Facebook Page and saves it to the contact. How the data is saved depends on the Lead Form scope you select. If the automation includes a Flow, ChatbotX then runs that Flow to process the lead.
| Setting | Purpose |
| ------------------------------------- | ------------------------------------------------------------------------------------------------------------------------------------------------- |
| **Facebook Page** | Selects the Page that contains the Lead Forms you want to monitor. |
| **Lead Form** | Captures leads from every form on the Page or from one specific form. When you select a specific form, you can choose where each answer is saved. |
| **What flow is triggered (optional)** | Selects the Flow that runs after ChatbotX receives a lead. Leave it empty if you only want to save the data. |
When you select **All forms**, standard fields such as `email`, `phone`, `name`, and `gender` are saved automatically to the matching contact fields. When you select a specific form, ChatbotX displays its fields so you can choose the contact field or **Custom Field** used to store each answer.
## Before you begin
Prepare the following items before creating an automation:
* A Facebook Page that your Facebook account can access.
* At least one Lead Form created for the Page if you want to select a specific form.
* Any Custom Fields needed for answers such as company name or consultation needs.
* A prepared Flow if you want to send messages or perform actions after receiving a lead.
The Flow is optional. If you do not select one, ChatbotX can still capture and save the standard fields from the Lead Form.
## Create a Facebook Lead Ads Automation
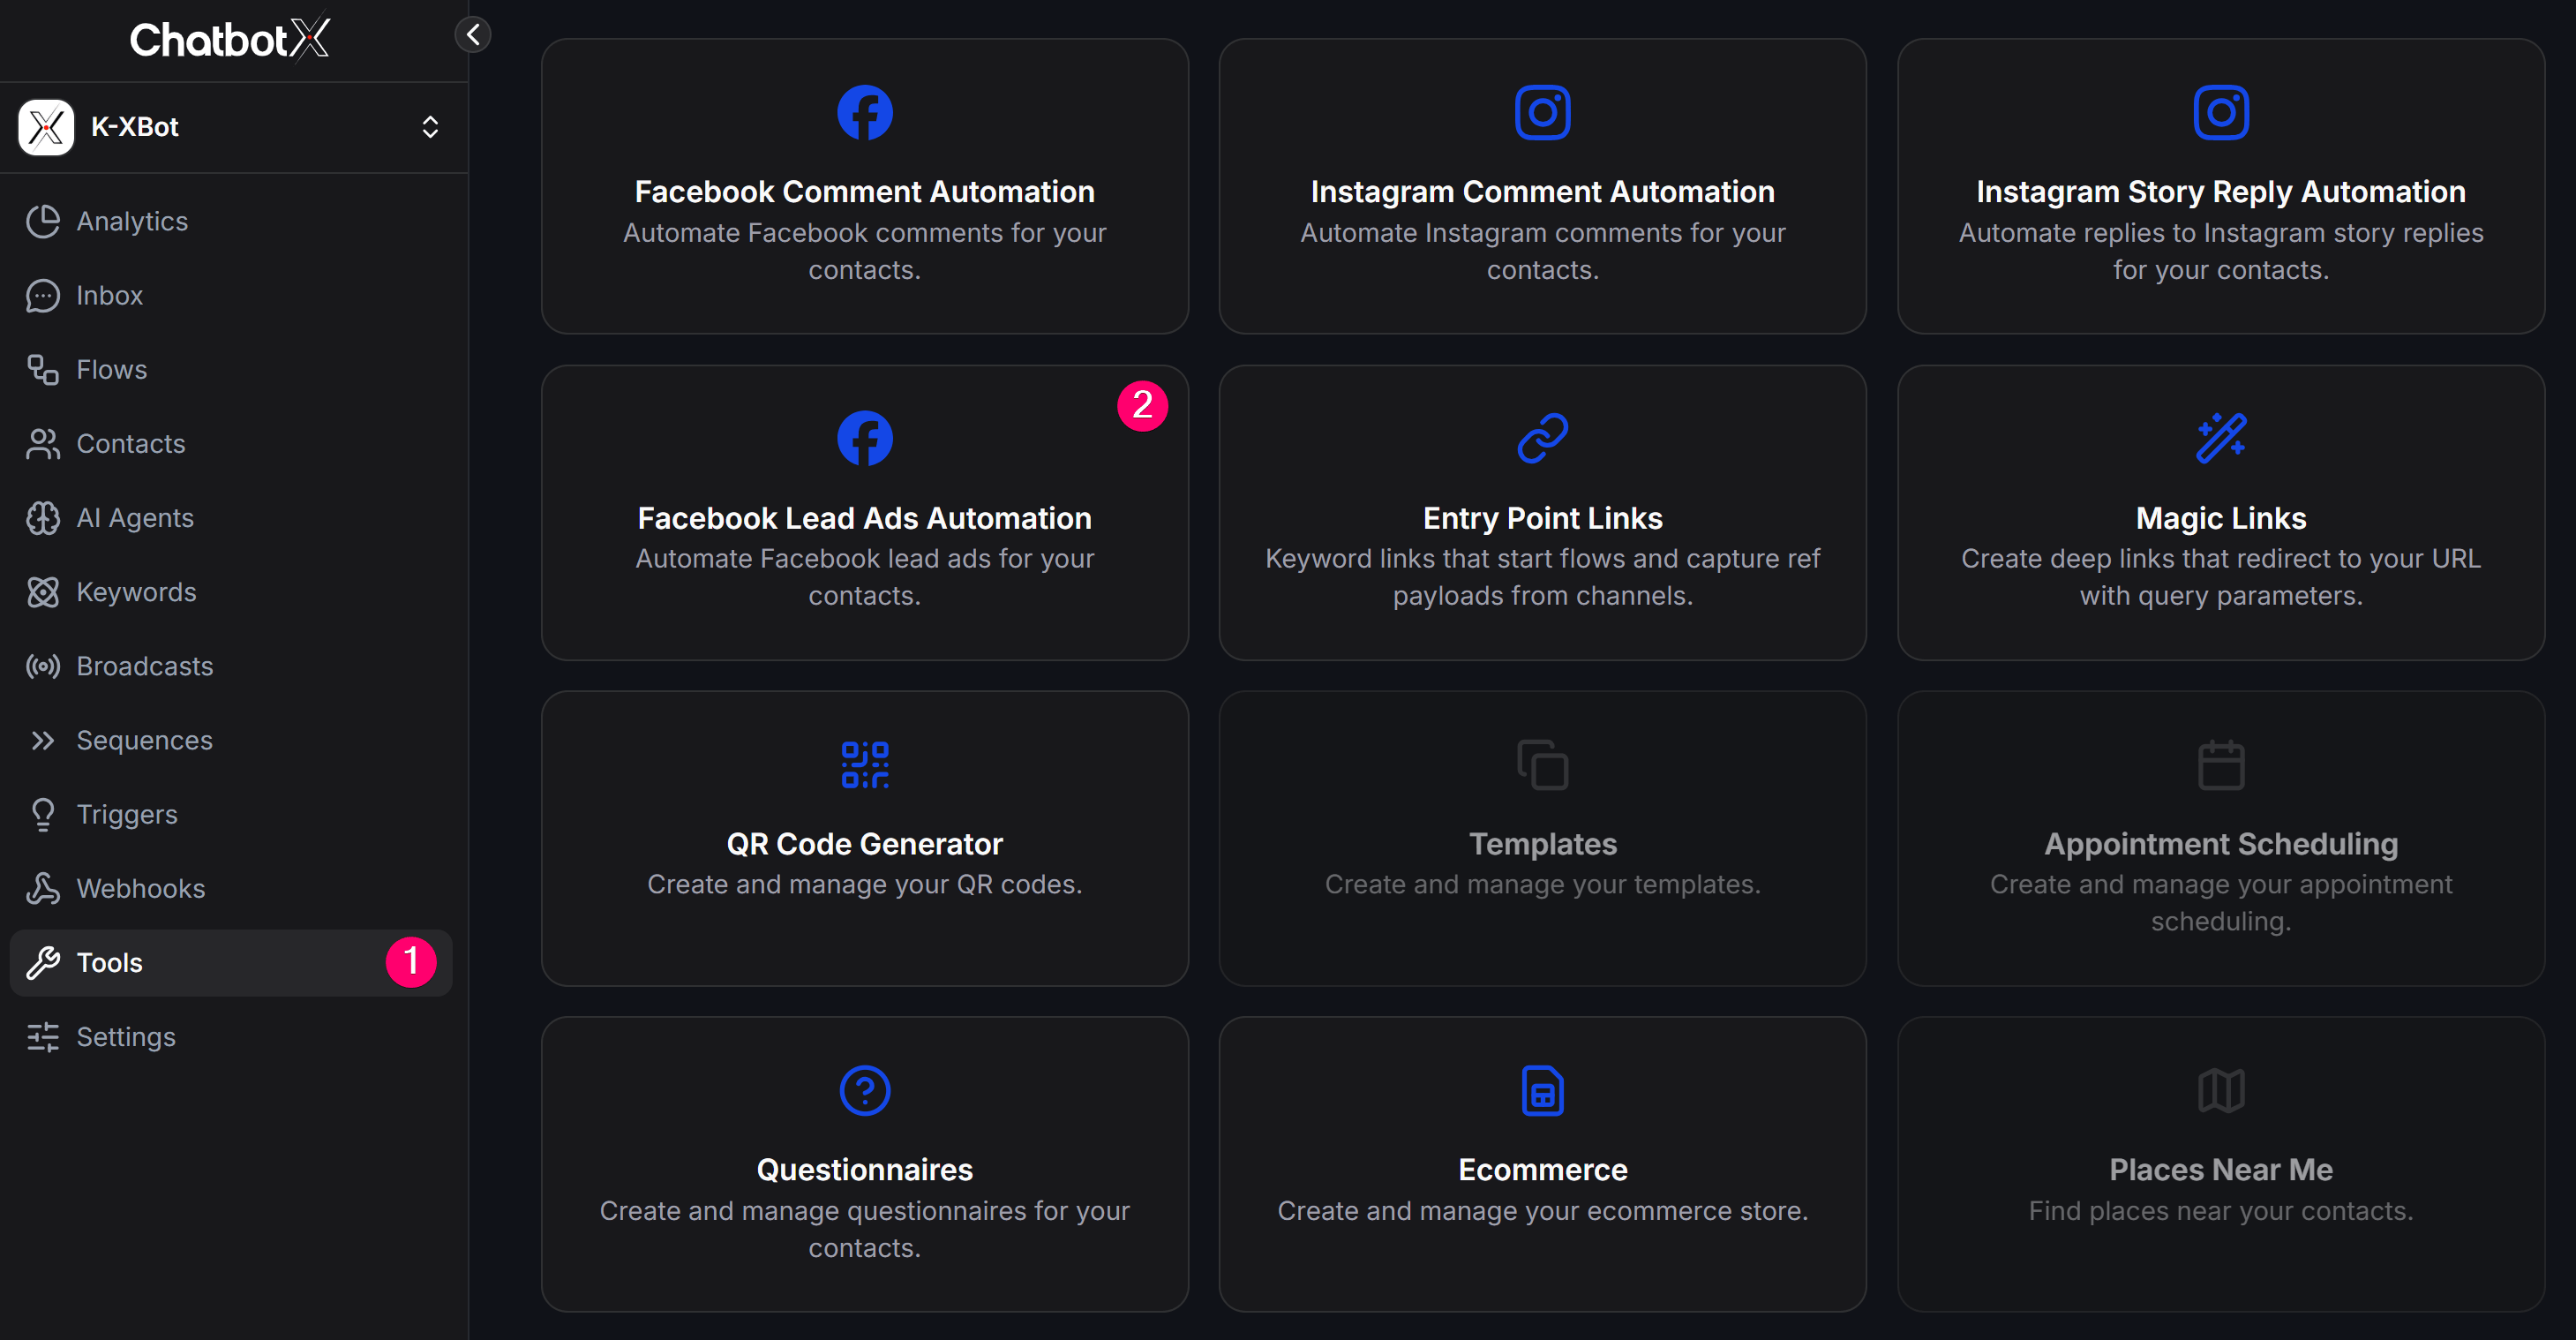
From the left menu, select **Tools**, then click **Facebook Lead Ads Automation**.
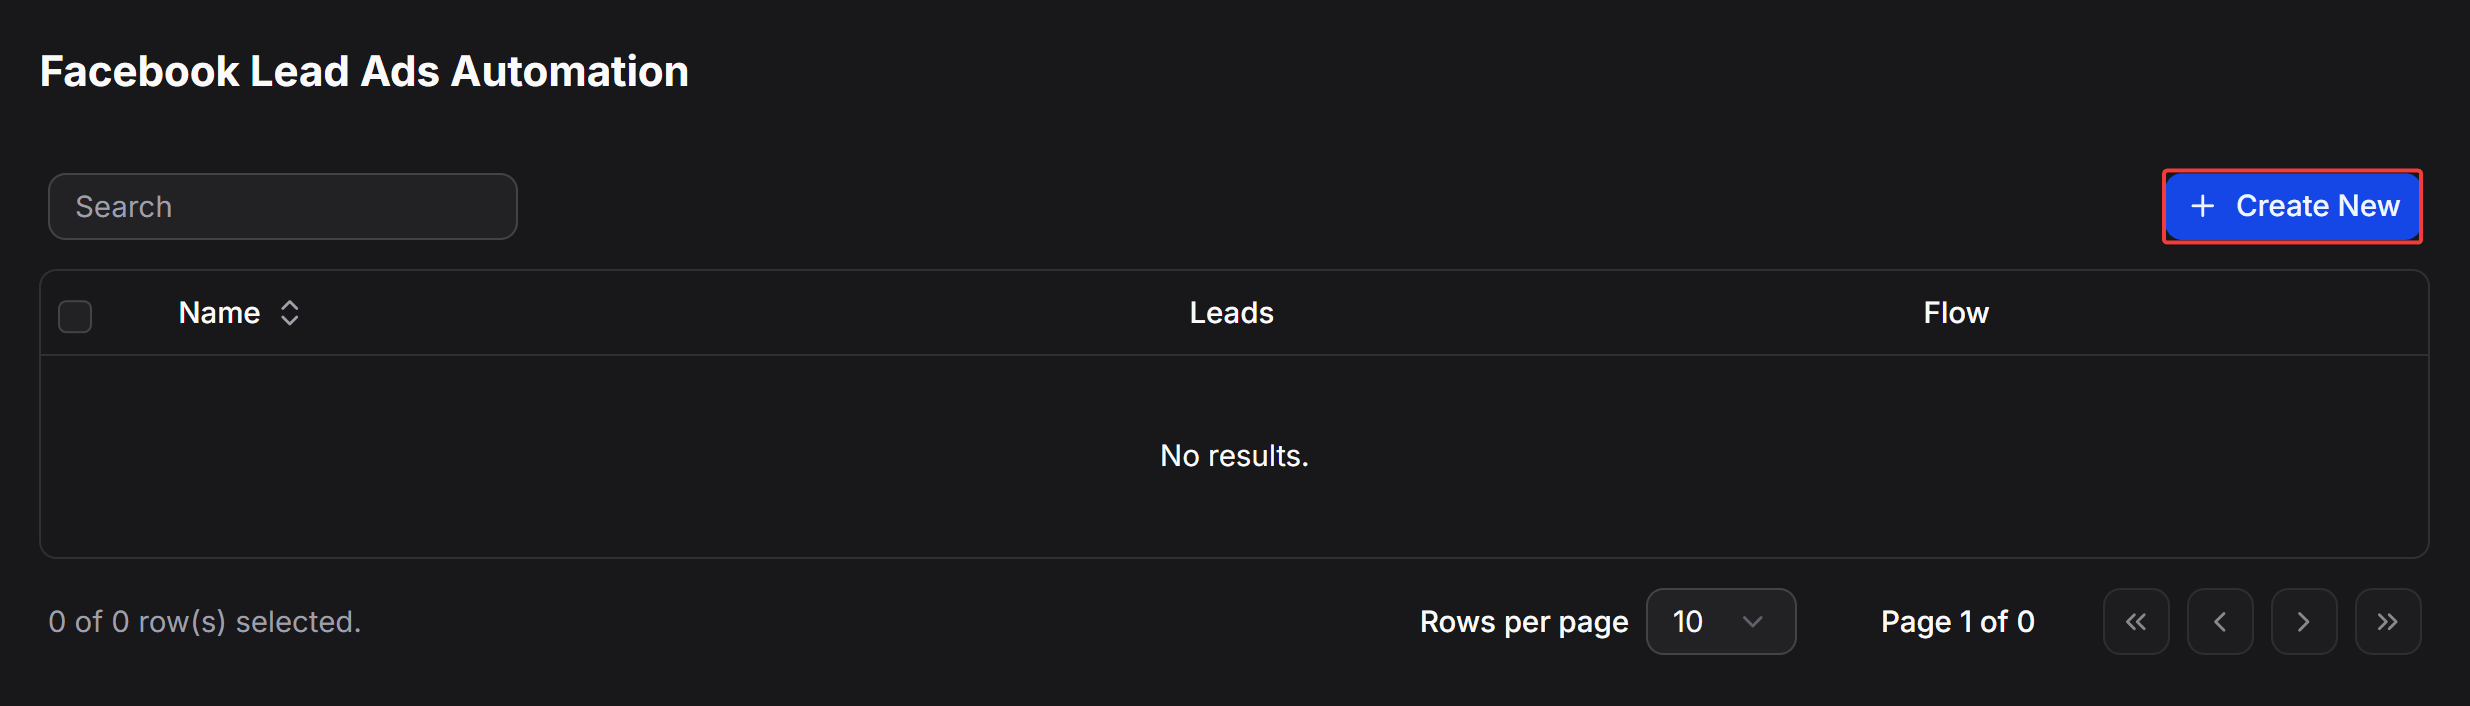
 The list shows the **Name**, **Leads**, and **Flow** columns. Click **Create New** to start.
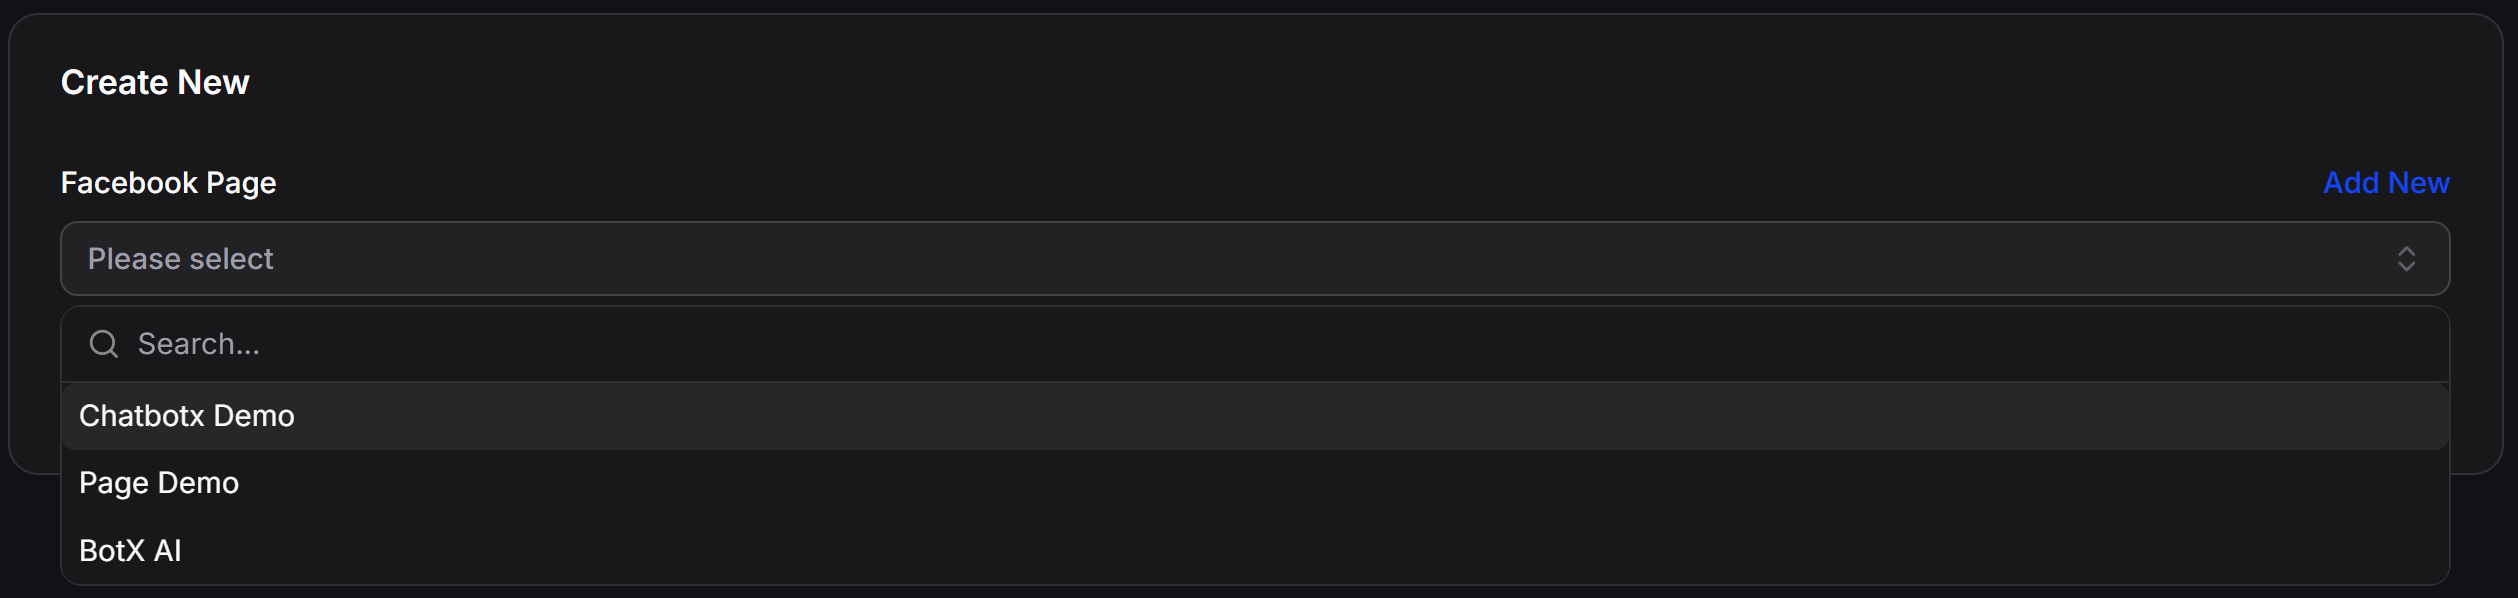
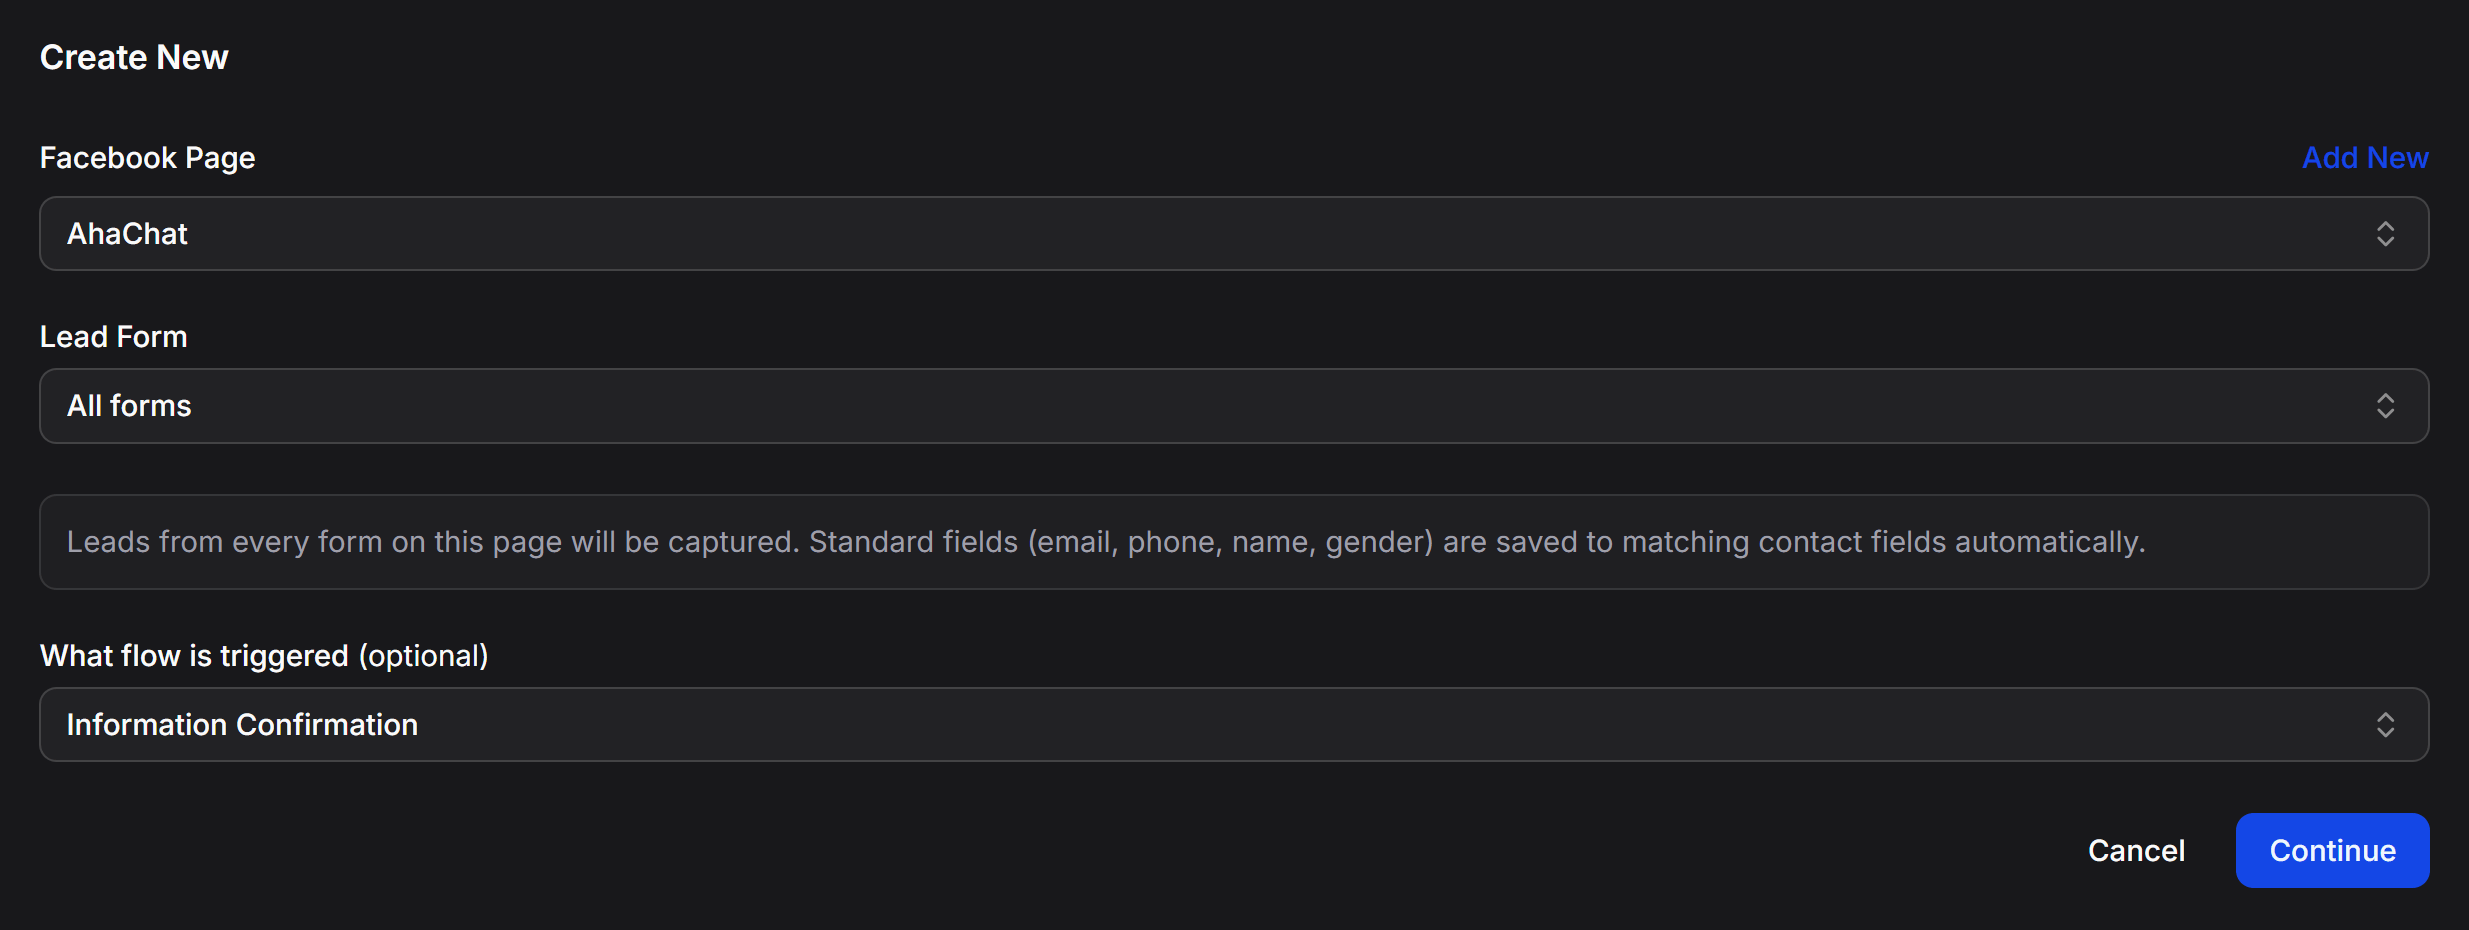
 Open the **Facebook Page** list and select the Page that contains your Lead Form. If the Page is not available, click **Add New** to connect it.
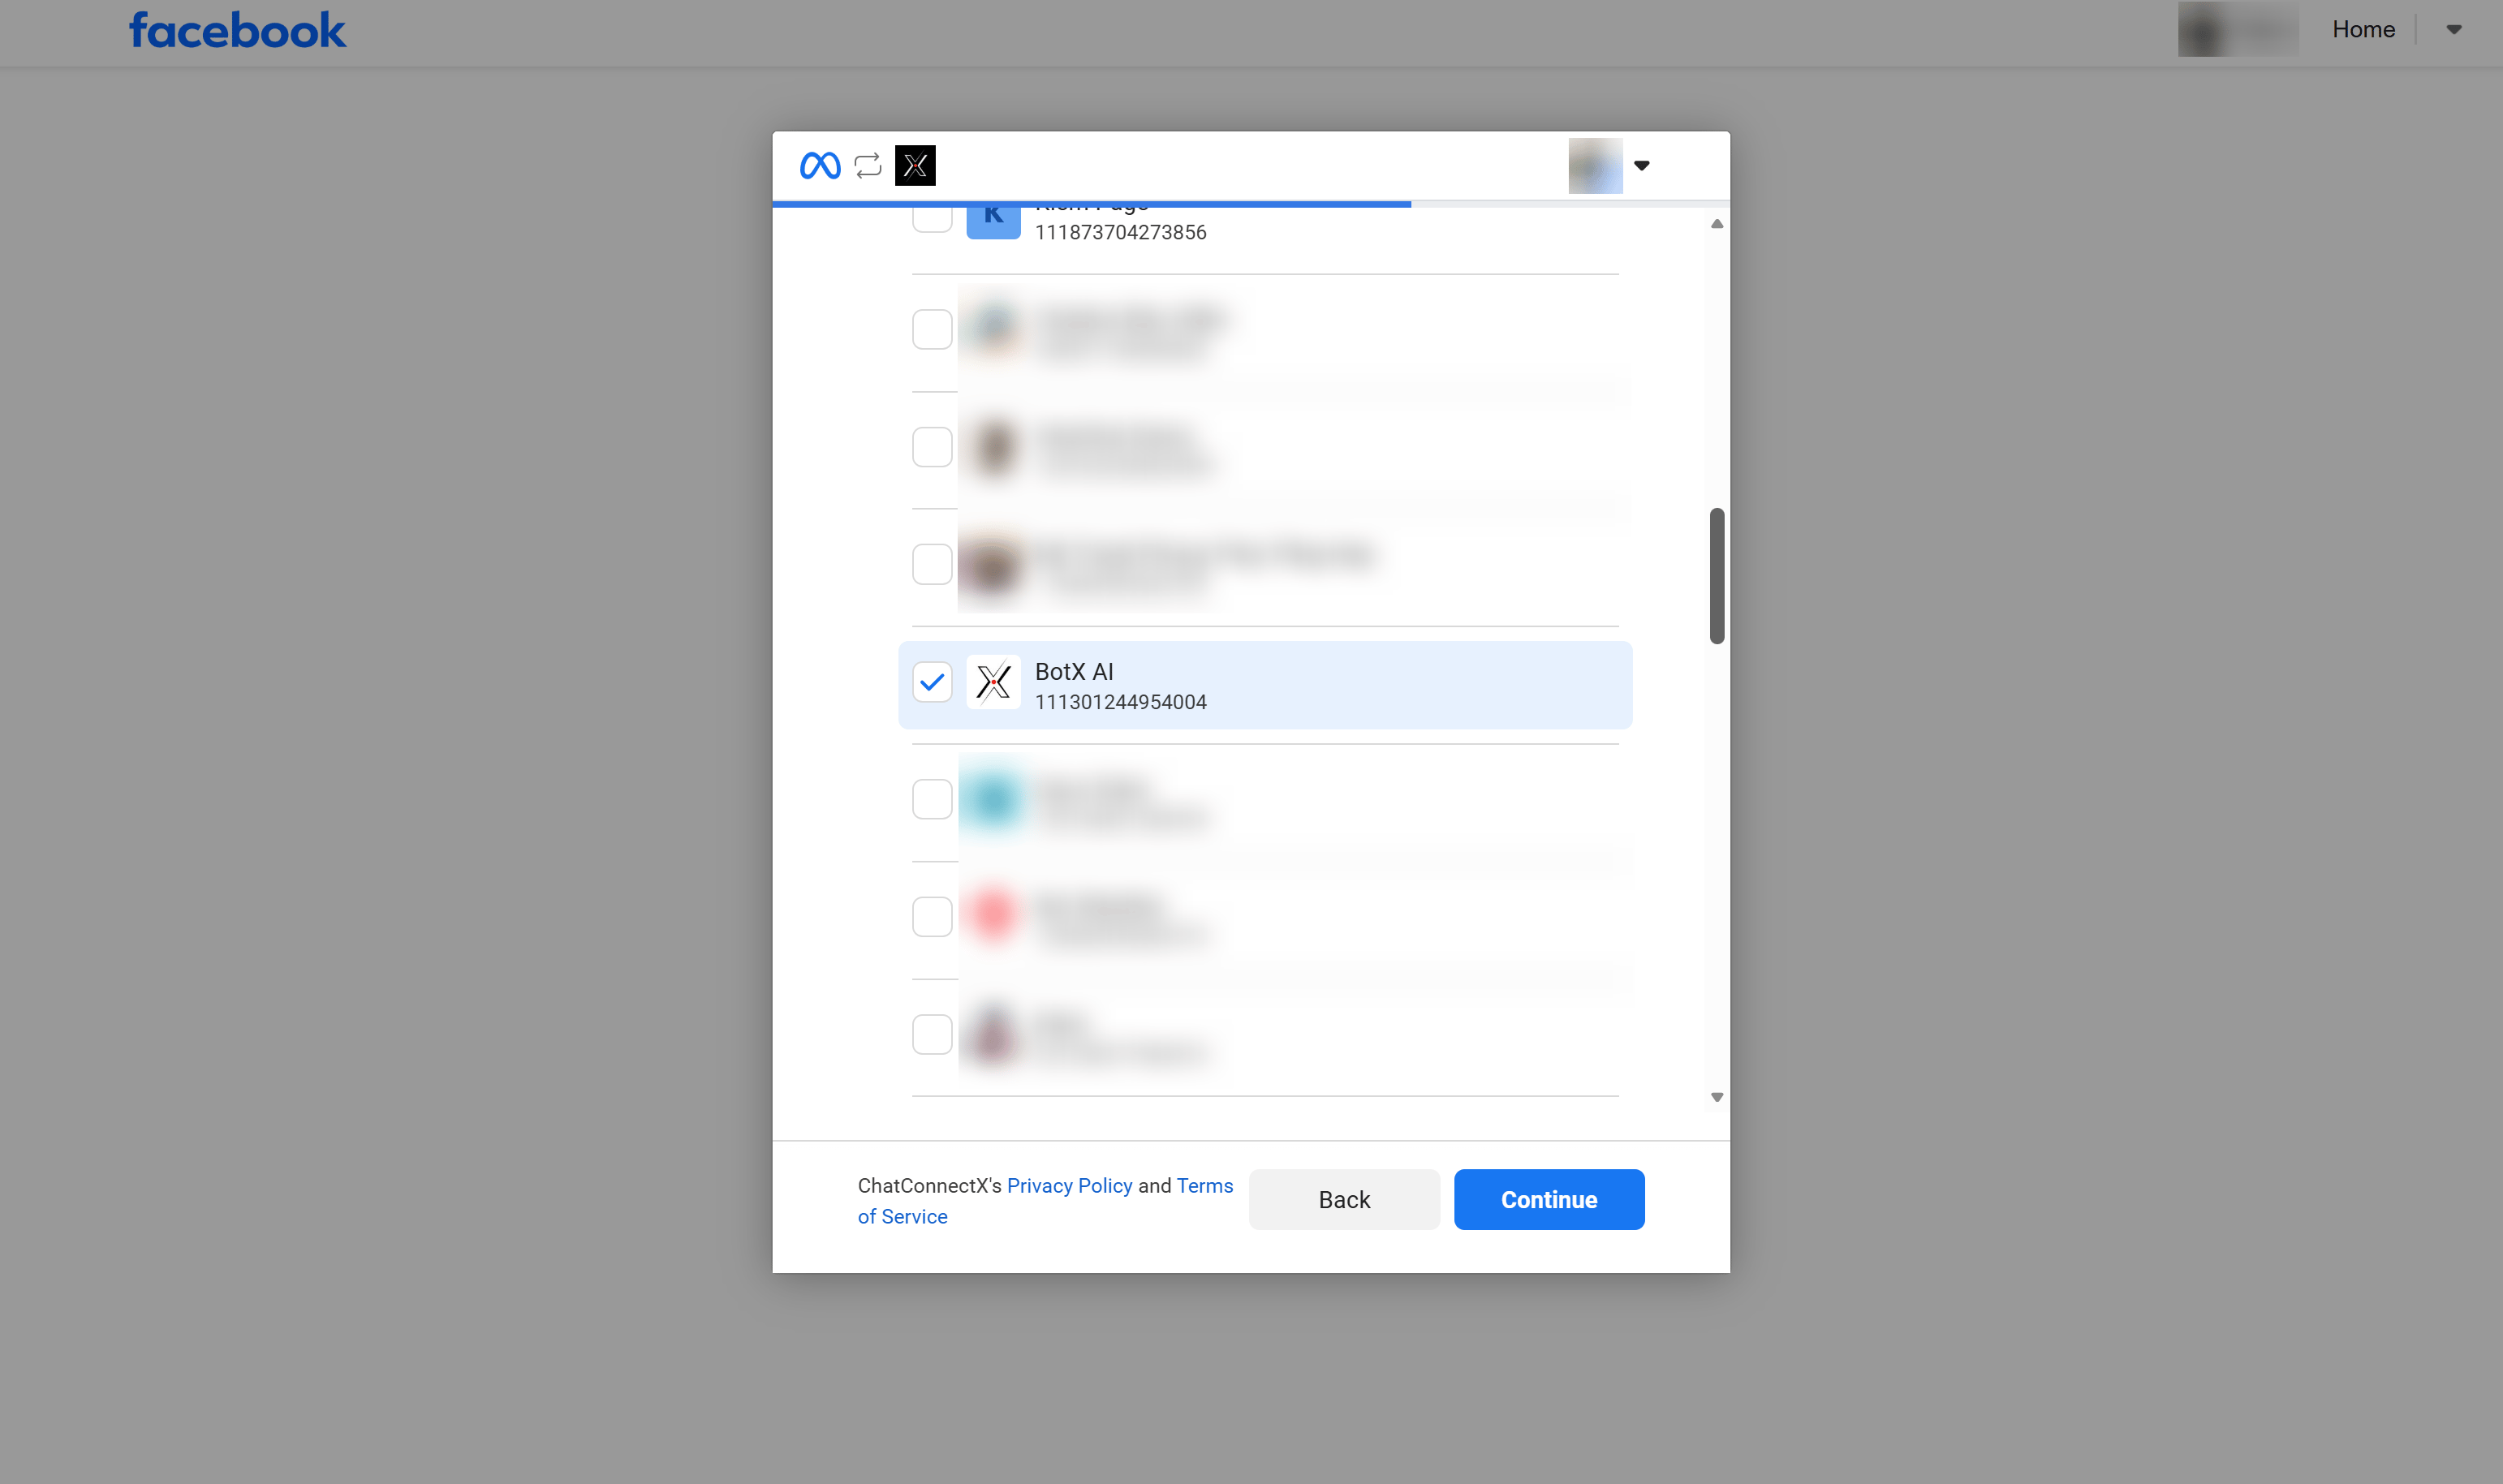
 In the Meta window, select the Page that ChatbotX can access, then click **Continue**. After granting access, return to ChatbotX and select the connected Page.
 Under **Lead Form**, choose the appropriate lead source:
| Option | When to use it |
| ----------------- | ------------------------------------------------------------ |
| **All forms** | Capture leads from every form on the selected Facebook Page. |
| **Specific form** | Capture leads from one campaign form only. |
Use **All forms** when every form on the Page follows the same process. Select a specific form when each campaign requires a different Flow or follow-up process.
Under **What flow is triggered (optional)**, select the Flow that should run when ChatbotX receives a lead. Leave this field empty if you only want to save the lead data to the contact.
Review the Facebook Page, Lead Form, and Flow, then click **Continue**.
Under **Lead Form**, choose the appropriate lead source:
| Option | When to use it |
| ----------------- | ------------------------------------------------------------ |
| **All forms** | Capture leads from every form on the selected Facebook Page. |
| **Specific form** | Capture leads from one campaign form only. |
Use **All forms** when every form on the Page follows the same process. Select a specific form when each campaign requires a different Flow or follow-up process.
Under **What flow is triggered (optional)**, select the Flow that should run when ChatbotX receives a lead. Leave this field empty if you only want to save the lead data to the contact.
Review the Facebook Page, Lead Form, and Flow, then click **Continue**.
 This step appears when you select a specific Lead Form. ChatbotX shows each form field on the left and its destination field on the right.
Open the list next to each form field, then select the contact field or Custom Field where the answer should be saved. If you do not select a destination, ChatbotX does not save that field's answer.
For example, save **Full name** to the name field, **Phone number** to the phone field, and **Company name** to a Custom Field for company names. Review the Flow, then click **Save**.
This step appears when you select a specific Lead Form. ChatbotX shows each form field on the left and its destination field on the right.
Open the list next to each form field, then select the contact field or Custom Field where the answer should be saved. If you do not select a destination, ChatbotX does not save that field's answer.
For example, save **Full name** to the name field, **Phone number** to the phone field, and **Company name** to a Custom Field for company names. Review the Flow, then click **Save**.
 ## Process lead data with a Flow
The selected Flow runs only when ChatbotX receives a new lead that matches the automation's Facebook Page and Lead Form. You can configure the Flow to perform one or more actions:
* Send a confirmation message after a customer submits the form.
* Add a Tag to identify the lead source or campaign.
* Notify a sales representative to follow up with the lead.
* Save the information to Google Sheets if the Flow includes the appropriate integration step.
* Send the information to your CRM through an available integration.
Configure these actions inside the Flow. Facebook Lead Ads Automation only captures the lead and starts the selected Flow.
## Example: process consultation requests
Suppose you run a Facebook ad that collects product consultation requests. You can use the following setup:
| Setting | Suggested value |
| ------------------------------------- | ------------------------------------------------------------------------------------------------------------------------------- |
| **Facebook Page** | The Page running the Lead Ad. |
| **Lead Form** | The consultation request form. |
| **Data destination** | Save the full name, phone number, and email to their matching contact fields. Save the company name to a separate Custom Field. |
| **What flow is triggered (optional)** | The `Information Confirmation` Flow. |
When a customer submits the form, ChatbotX saves their full name, phone number, and email to the matching contact fields. The `Information Confirmation` Flow can send a confirmation and notify the assigned team member.
## Manage and test the automation
After you create an automation, it appears in the **Facebook Lead Ads Automation** list:
* **Name:** Identifies the automation.
* **Leads:** Shows how many leads the automation has received.
* **Flow:** Shows the Flow connected to the automation.
* **Search:** Finds an automation by name.
Before running your campaign, submit a test lead through the selected form. Then verify the following results:
* The contact appears or is updated in ChatbotX.
* The `email`, `phone`, `name`, and `gender` fields contain the available form data.
* Additional answers are saved to the correct Custom Fields when you use a specific form.
* The selected Flow runs successfully.
* Message, Tag, and team notification steps work as expected.
If the Facebook Page or Lead Form does not appear, check the Facebook account's Page access. You can also click **Add New** to grant access again.
## Process lead data with a Flow
The selected Flow runs only when ChatbotX receives a new lead that matches the automation's Facebook Page and Lead Form. You can configure the Flow to perform one or more actions:
* Send a confirmation message after a customer submits the form.
* Add a Tag to identify the lead source or campaign.
* Notify a sales representative to follow up with the lead.
* Save the information to Google Sheets if the Flow includes the appropriate integration step.
* Send the information to your CRM through an available integration.
Configure these actions inside the Flow. Facebook Lead Ads Automation only captures the lead and starts the selected Flow.
## Example: process consultation requests
Suppose you run a Facebook ad that collects product consultation requests. You can use the following setup:
| Setting | Suggested value |
| ------------------------------------- | ------------------------------------------------------------------------------------------------------------------------------- |
| **Facebook Page** | The Page running the Lead Ad. |
| **Lead Form** | The consultation request form. |
| **Data destination** | Save the full name, phone number, and email to their matching contact fields. Save the company name to a separate Custom Field. |
| **What flow is triggered (optional)** | The `Information Confirmation` Flow. |
When a customer submits the form, ChatbotX saves their full name, phone number, and email to the matching contact fields. The `Information Confirmation` Flow can send a confirmation and notify the assigned team member.
## Manage and test the automation
After you create an automation, it appears in the **Facebook Lead Ads Automation** list:
* **Name:** Identifies the automation.
* **Leads:** Shows how many leads the automation has received.
* **Flow:** Shows the Flow connected to the automation.
* **Search:** Finds an automation by name.
Before running your campaign, submit a test lead through the selected form. Then verify the following results:
* The contact appears or is updated in ChatbotX.
* The `email`, `phone`, `name`, and `gender` fields contain the available form data.
* Additional answers are saved to the correct Custom Fields when you use a specific form.
* The selected Flow runs successfully.
* Message, Tag, and team notification steps work as expected.
If the Facebook Page or Lead Form does not appear, check the Facebook account's Page access. You can also click **Add New** to grant access again.