> ## Documentation Index
> Fetch the complete documentation index at: https://chatbotx.io/docs/llms.txt
> Use this file to discover all available pages before exploring further.
# Templates
> Learn how to package, share, and install comprehensive chatbot templates with automated updates in ChatbotX.
## Overview of Templates
**Templates** allow you to package all chatbot resources (including message Flows, Triggers, AI Agents, Products, Custom Fields, and Settings) into a single shareable link. This feature enables you to duplicate, distribute, and install complete chatbot solutions with one click.
Key benefits of Templates:
* **Instant Duplication:** Easily deploy identical chatbot architectures across multiple accounts, business branches, or client workspaces without manual re-creation.
* **Built for Agencies & Creators:** Package industry-specific chatbot workflows to deliver or monetize turnkey solutions for clients.
* **Resource Organization:** Automatically nest installed assets into dedicated folders on recipient workspaces to prevent conflicts with existing flows.
* **Smart Update Mechanisms:** Notify recipients or automatically synchronize updated flows and assets when authors republish templates.
## Accessing the Templates Tool
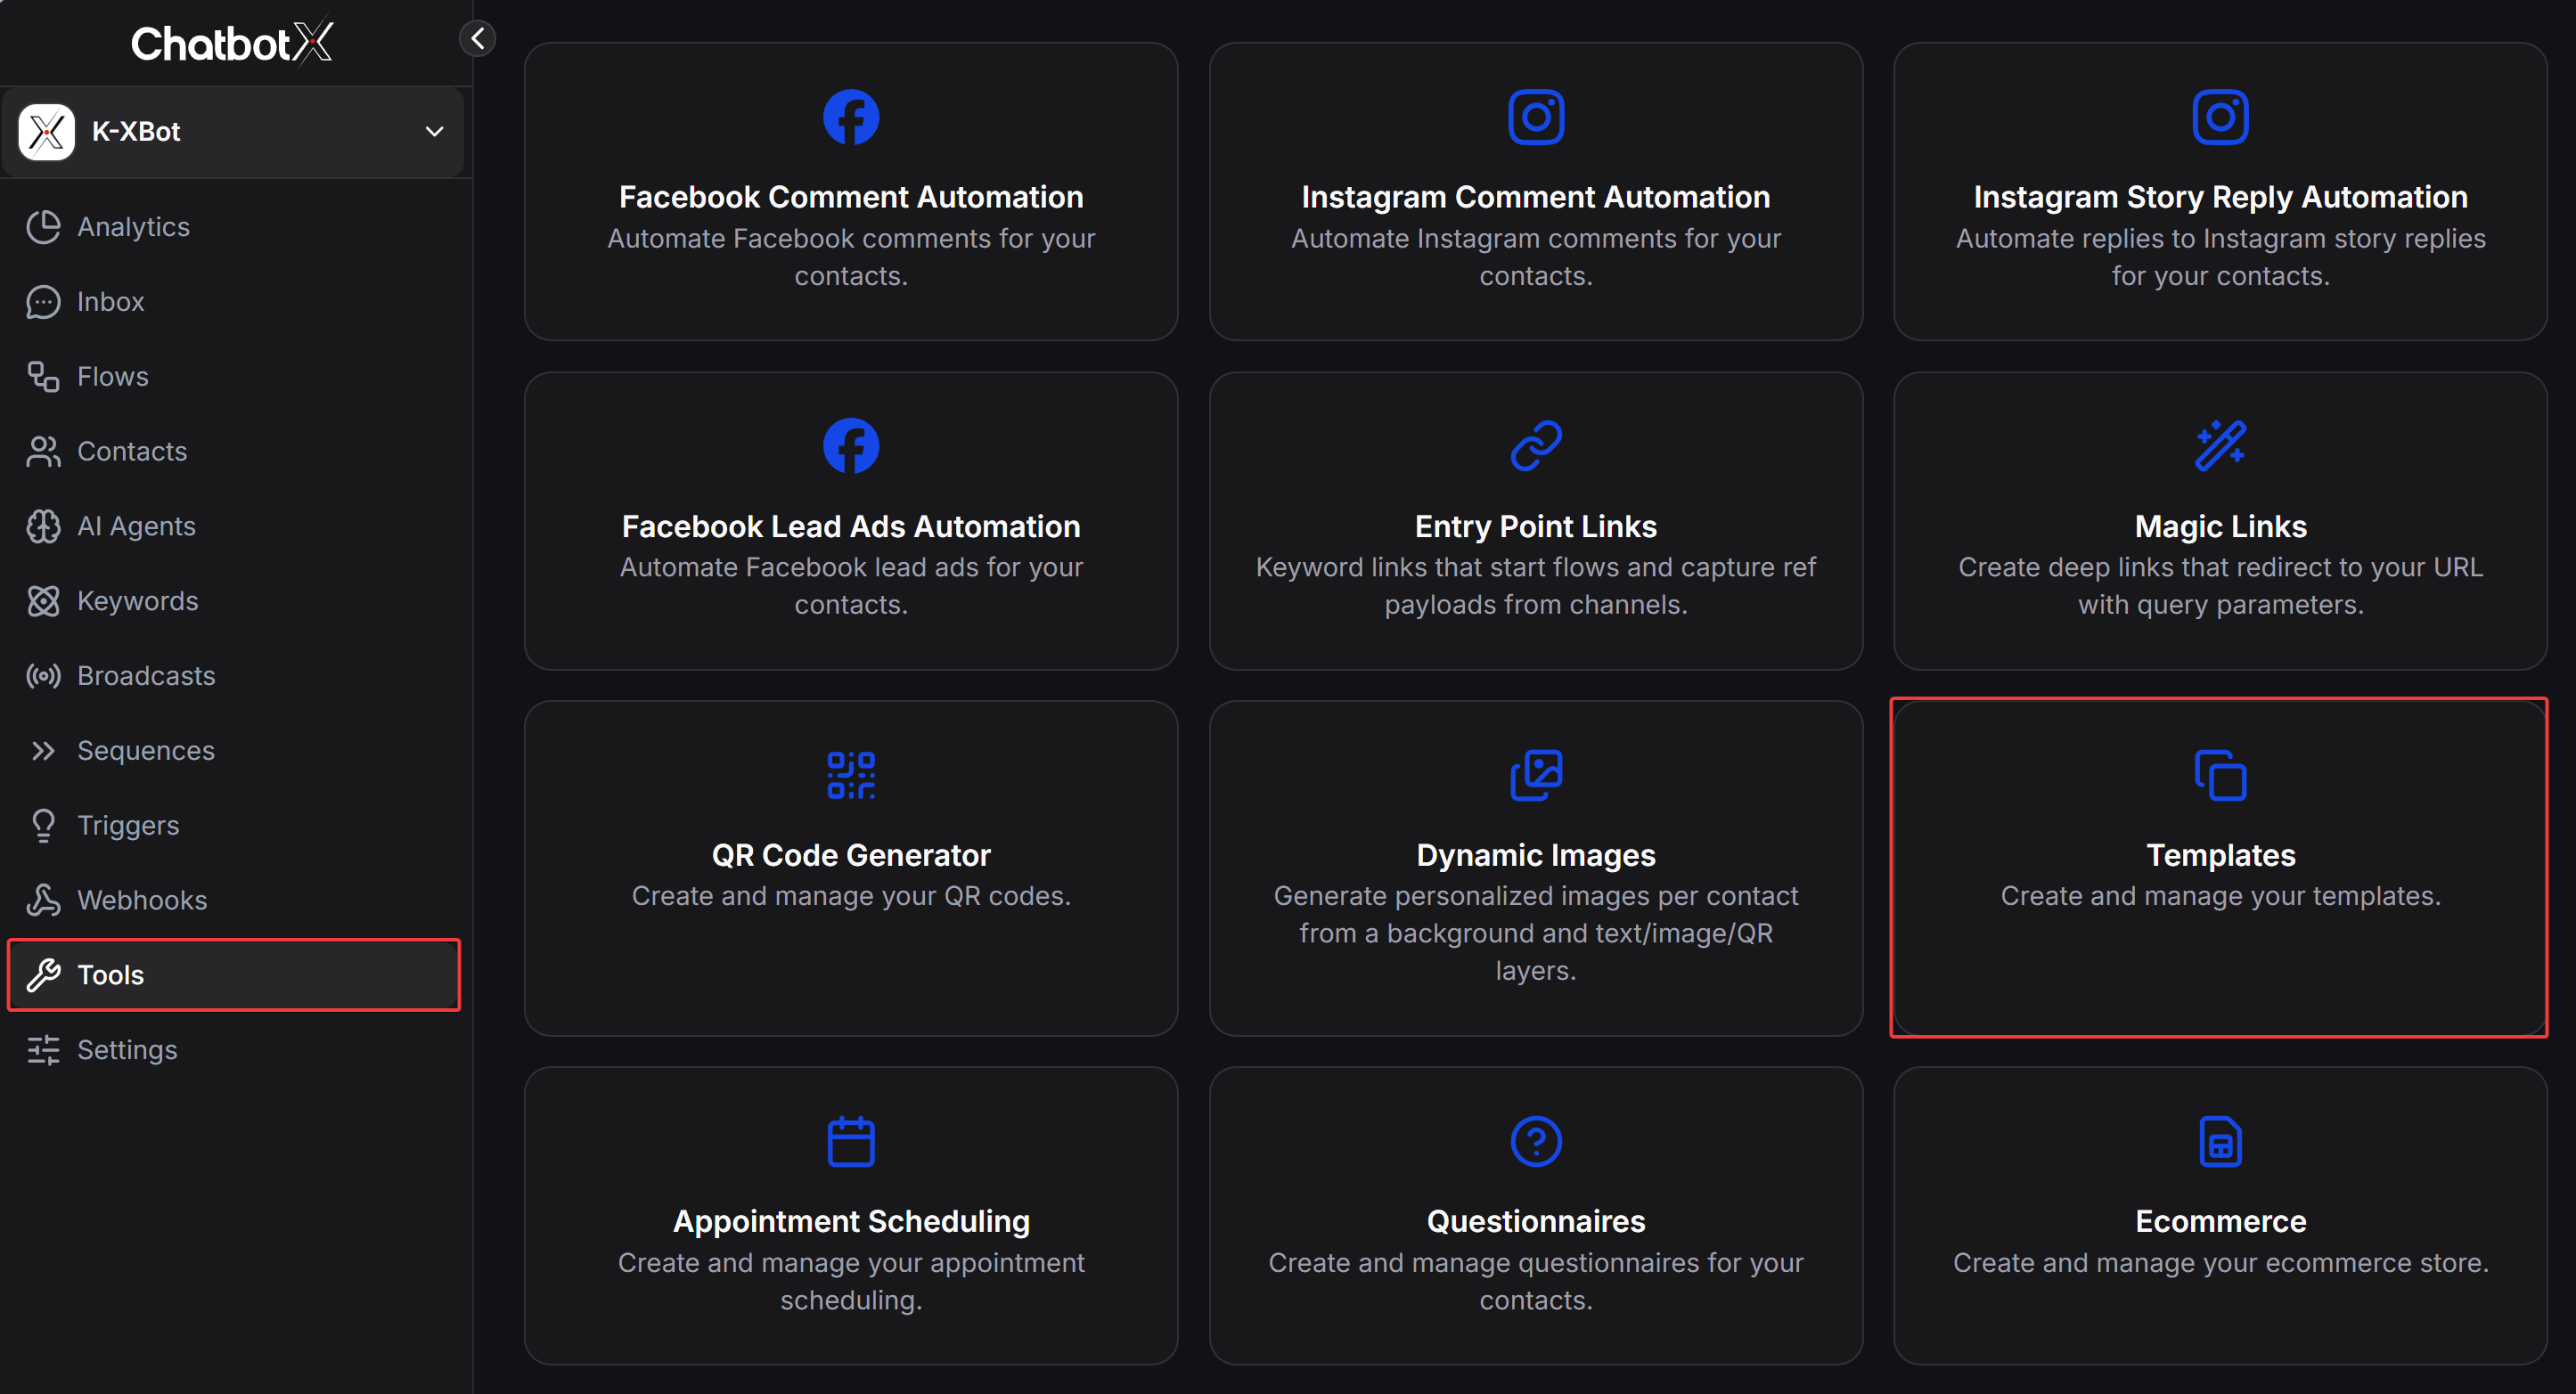
To open the Templates management dashboard, navigate to **Tools** from the left sidebar and click on the **Templates** card.
 ## Templates Management Dashboard
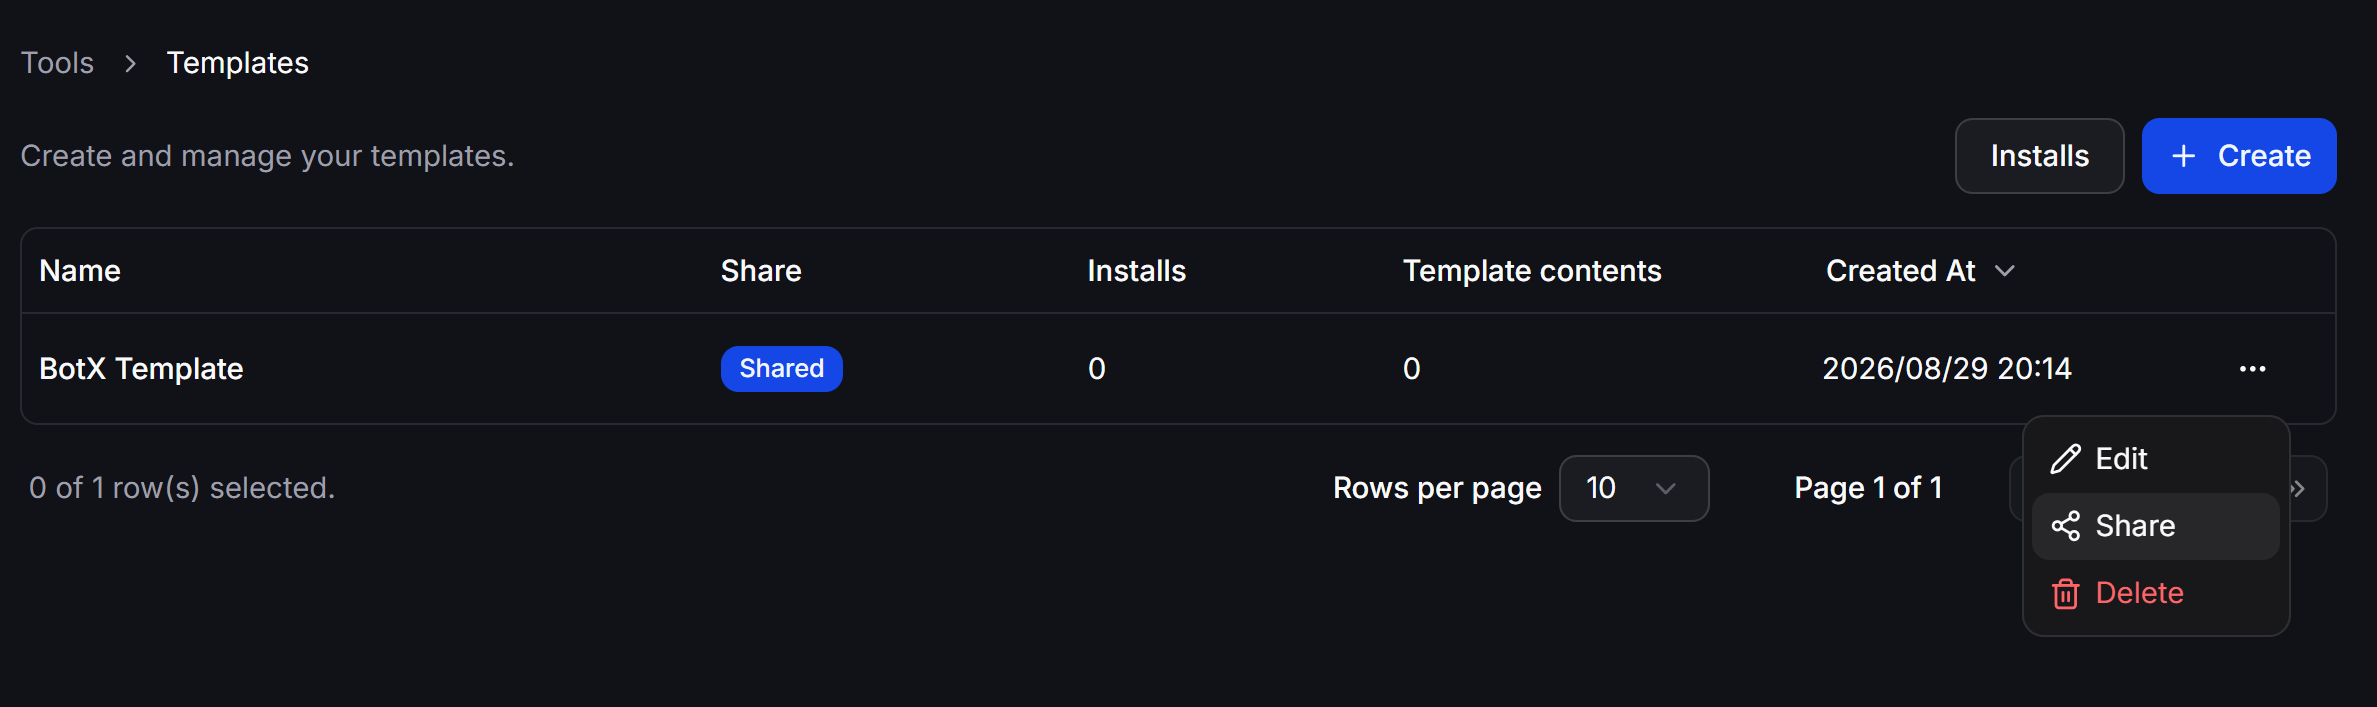
The main Templates interface displays all created templates along with real-time operational statistics:
## Templates Management Dashboard
The main Templates interface displays all created templates along with real-time operational statistics:
 ### Dashboard Columns
* **Name:** The title of the template.
* **Share:** Sharing link status (displays the `Shared` badge when public sharing is enabled).
* **Installs:** Total count of workspaces that have installed this template.
* **Template contents:** Total number of packaged assets included in the template.
* **Created At:** Timestamp when the template was created.
### Key Actions
* **+ Create Button:** Starts the step-by-step creation workflow for a new template.
* **Installs Button:** Switches to the installations tracker and auto-update management view.
* **Row Options Menu (`...`):**
* **Edit:** Reopen the configuration form to modify details or adjust included assets.
* **Share:** Open the sharing modal to manage and copy the public template URL.
* **Delete:** Permanently delete the template.
## Creating a New Template
To bundle your chatbot configuration into a shareable template, complete the 3 configuration steps:
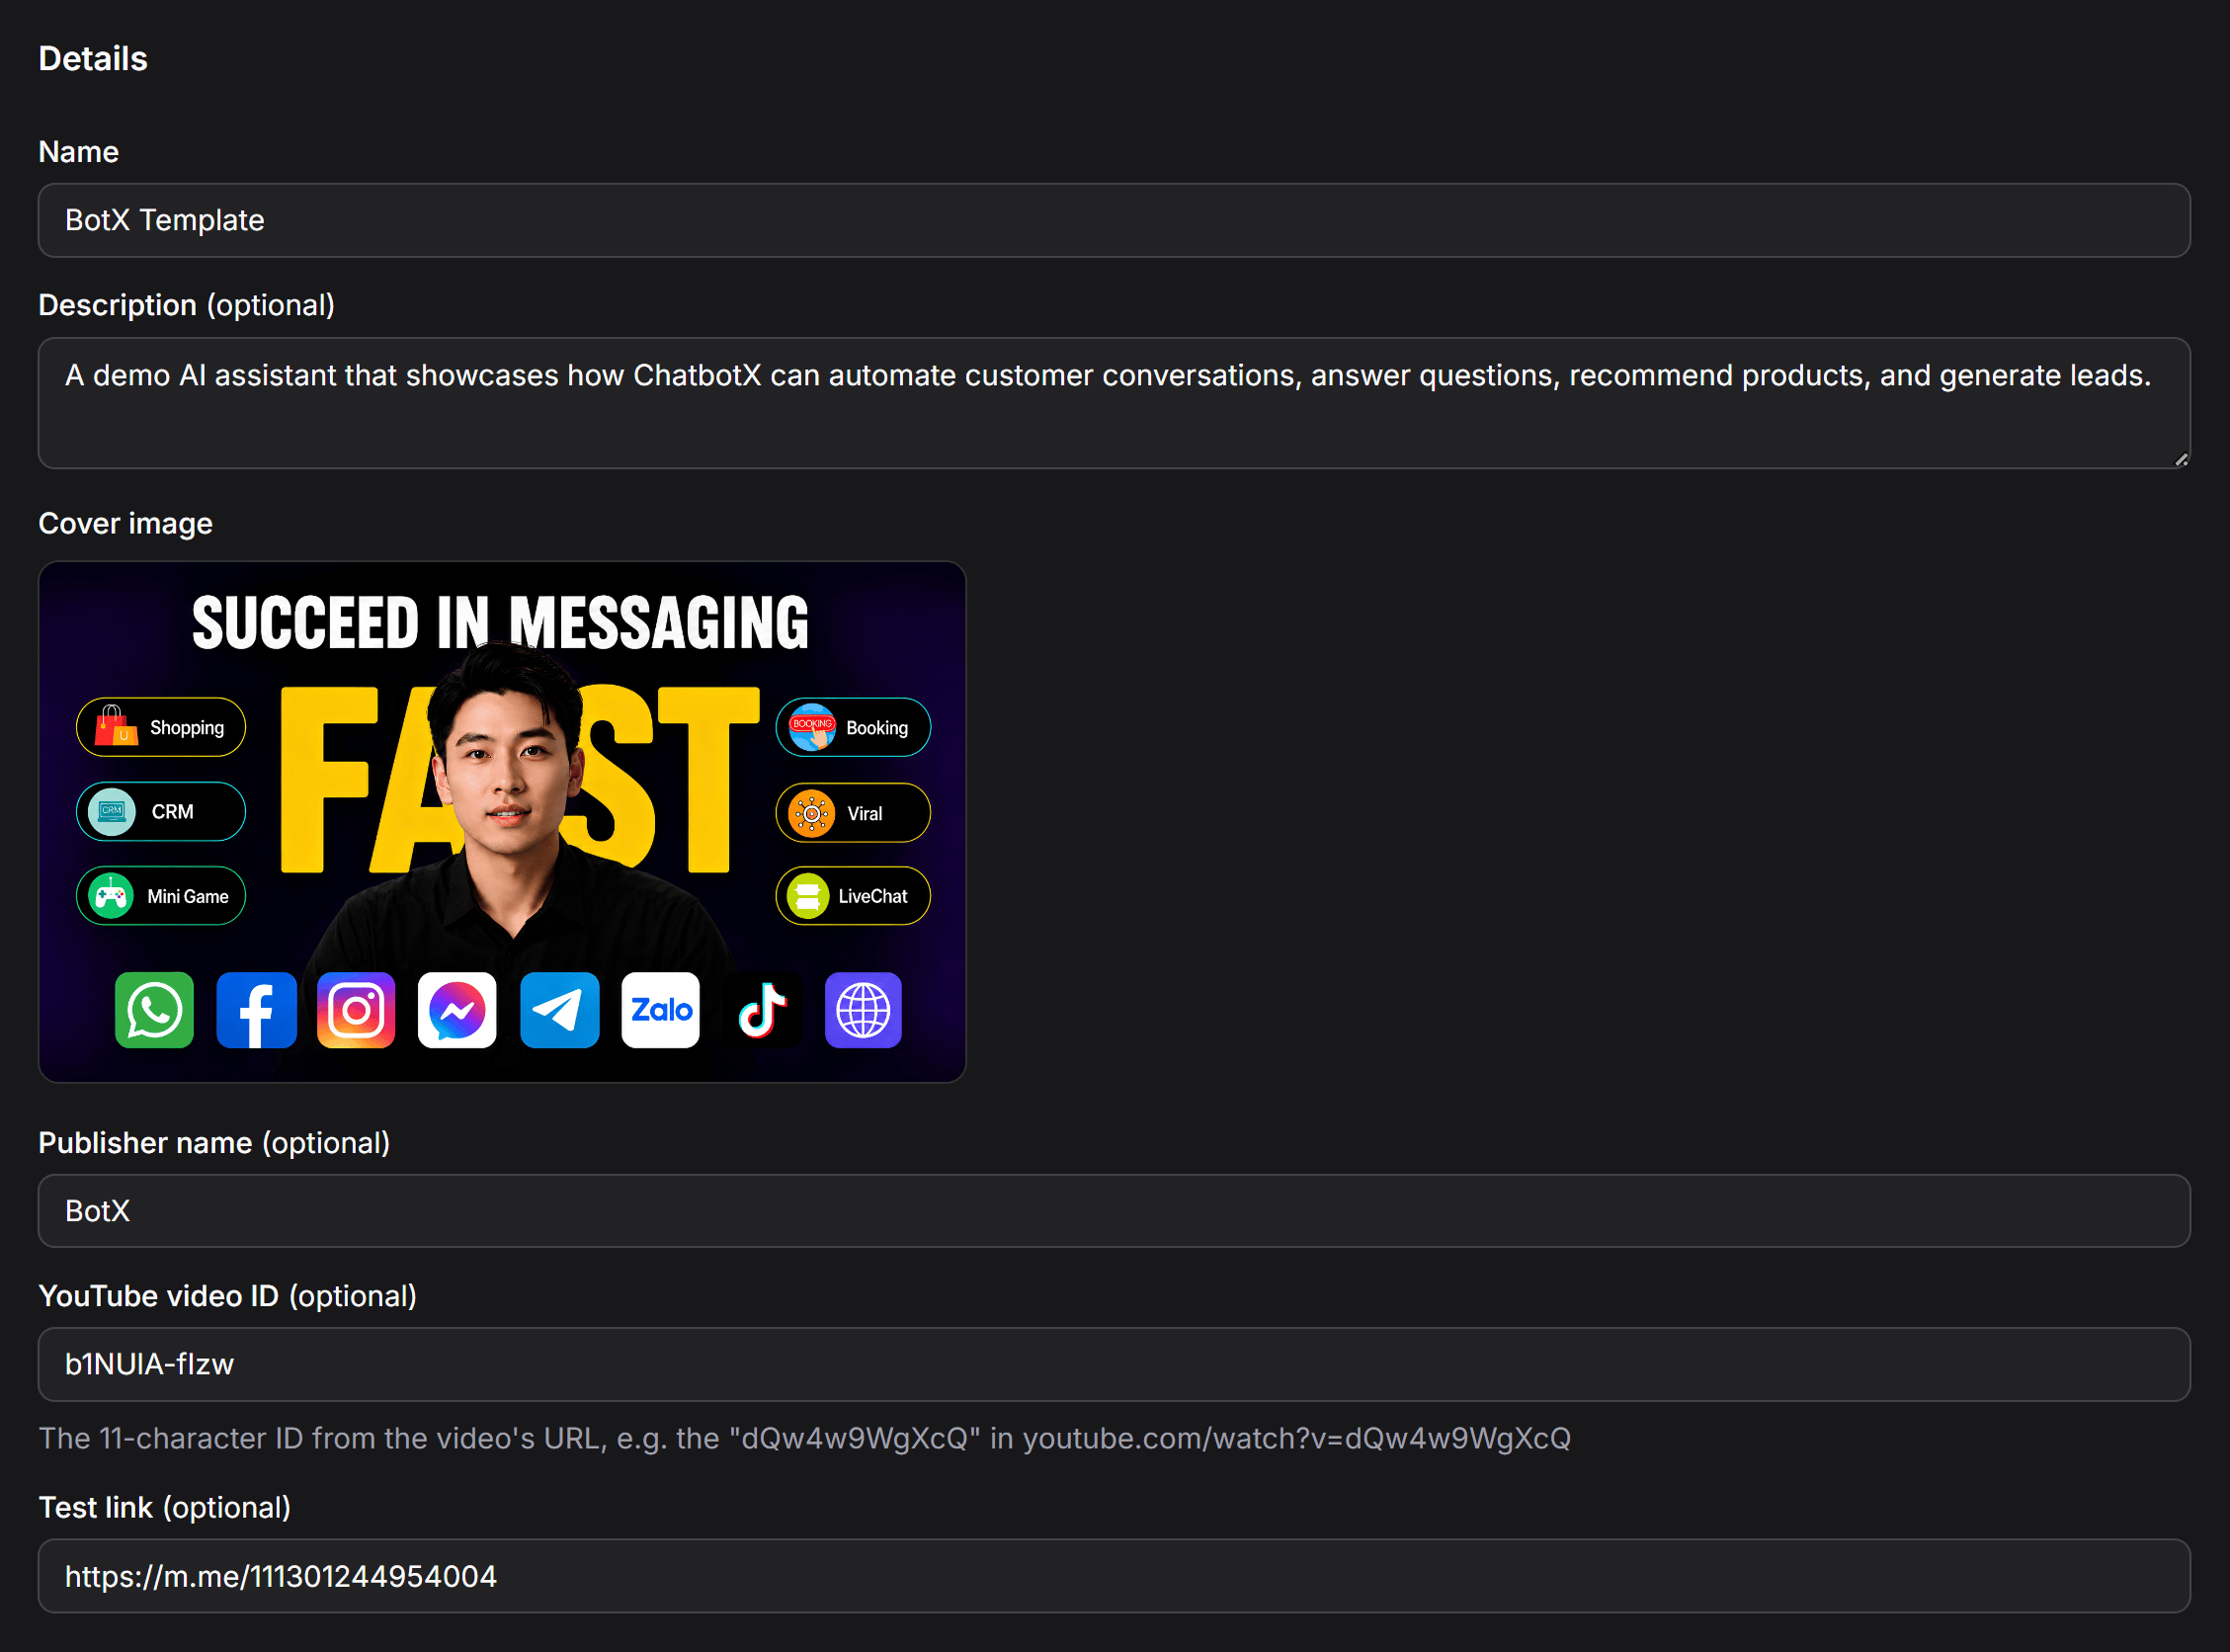
Click **+ Create** in the Templates dashboard and fill in the introduction fields:
* **Name:** The template title (required).
* **Description (optional):** A summary describing the features, value, and target use cases.
* **Cover image:** Upload a thumbnail banner from your computer or select an existing asset from the Media Library.
* **Publisher name (optional):** The author or organization name (for example: `BotX`, `ChatbotX`).
* **YouTube video ID (optional):** Enter the 11-character video ID from a YouTube walkthrough (for example: `b1NUIA-flzw`).
* **Test link (optional):** A direct link to a live preview chatbot (such as a Messenger link `https://m.me/...`).
### Dashboard Columns
* **Name:** The title of the template.
* **Share:** Sharing link status (displays the `Shared` badge when public sharing is enabled).
* **Installs:** Total count of workspaces that have installed this template.
* **Template contents:** Total number of packaged assets included in the template.
* **Created At:** Timestamp when the template was created.
### Key Actions
* **+ Create Button:** Starts the step-by-step creation workflow for a new template.
* **Installs Button:** Switches to the installations tracker and auto-update management view.
* **Row Options Menu (`...`):**
* **Edit:** Reopen the configuration form to modify details or adjust included assets.
* **Share:** Open the sharing modal to manage and copy the public template URL.
* **Delete:** Permanently delete the template.
## Creating a New Template
To bundle your chatbot configuration into a shareable template, complete the 3 configuration steps:
Click **+ Create** in the Templates dashboard and fill in the introduction fields:
* **Name:** The template title (required).
* **Description (optional):** A summary describing the features, value, and target use cases.
* **Cover image:** Upload a thumbnail banner from your computer or select an existing asset from the Media Library.
* **Publisher name (optional):** The author or organization name (for example: `BotX`, `ChatbotX`).
* **YouTube video ID (optional):** Enter the 11-character video ID from a YouTube walkthrough (for example: `b1NUIA-flzw`).
* **Test link (optional):** A direct link to a live preview chatbot (such as a Messenger link `https://m.me/...`).
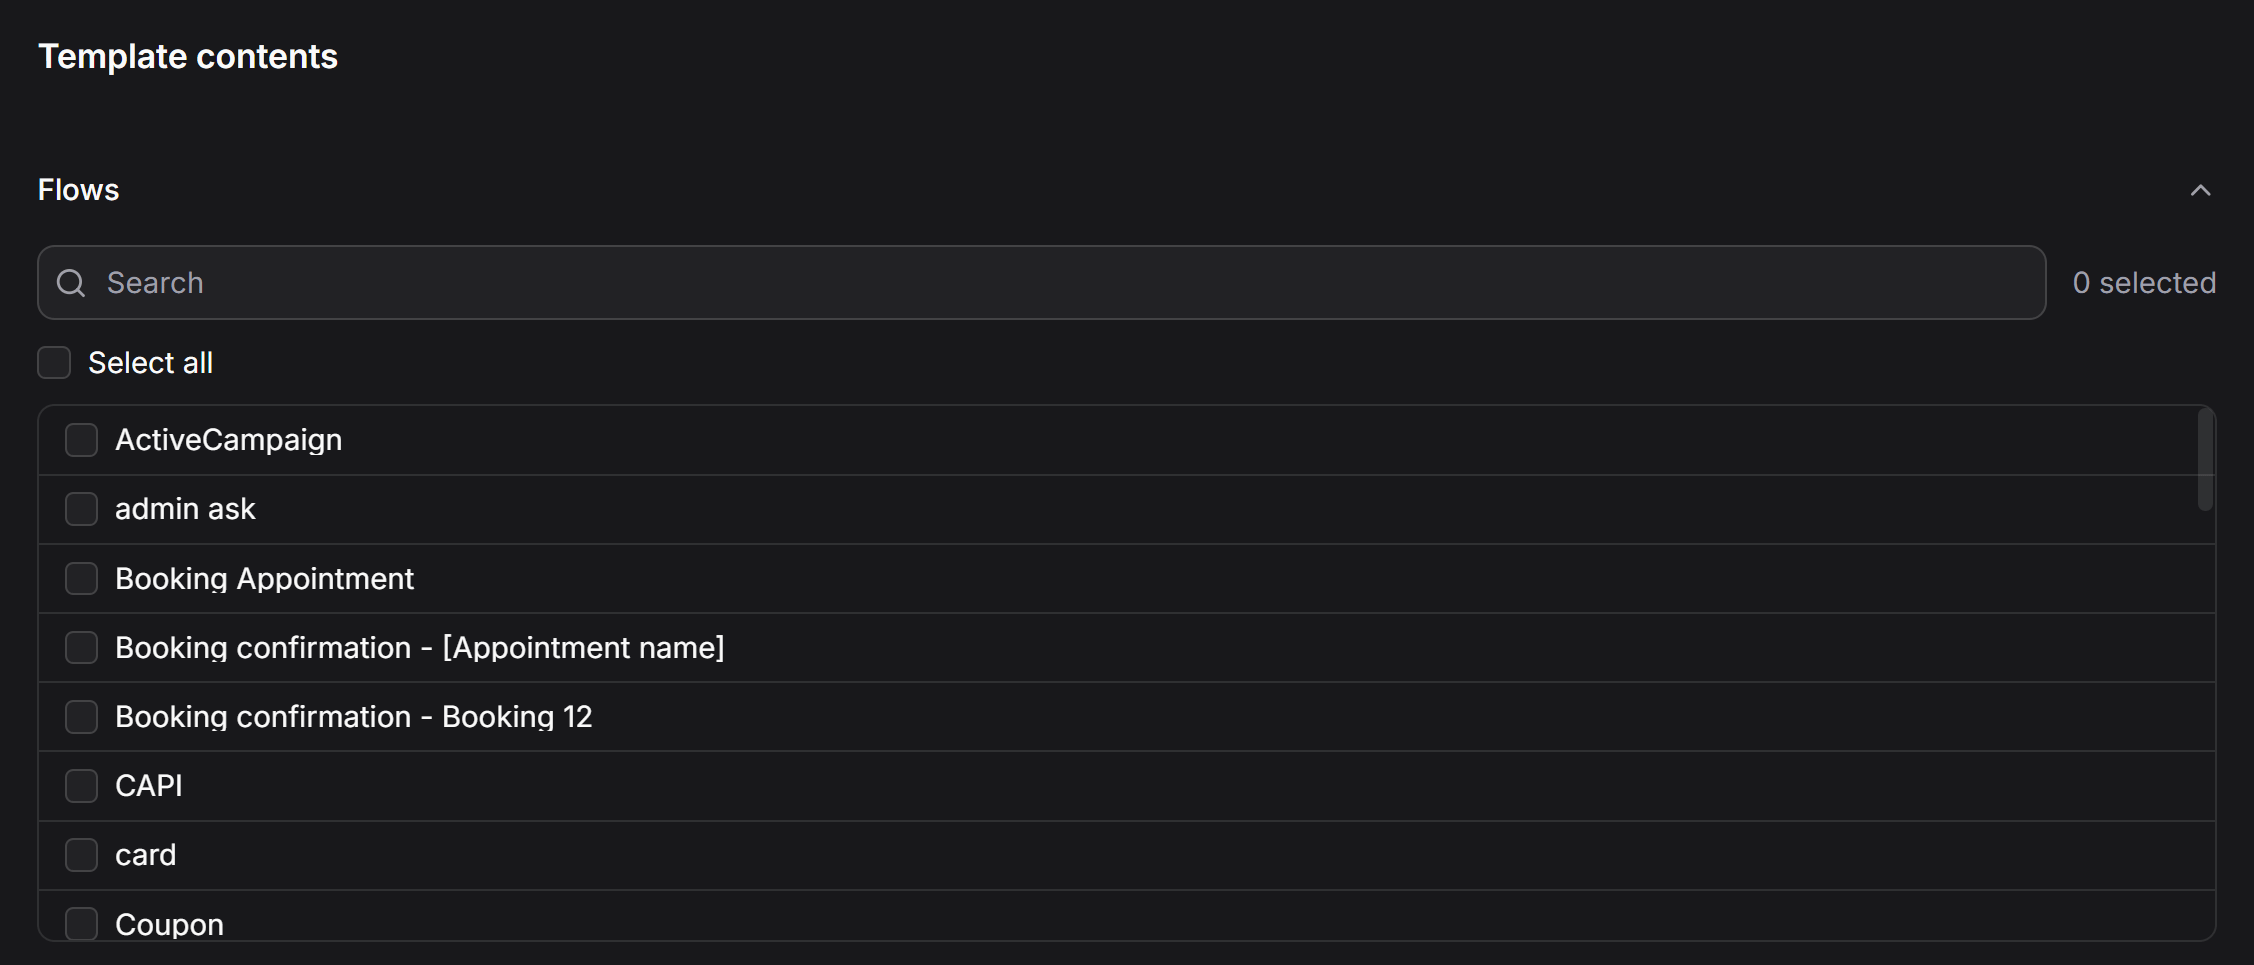
 Under the **Template contents** section, select the system resources you want to bundle into the template. The system supports 14 asset categories:
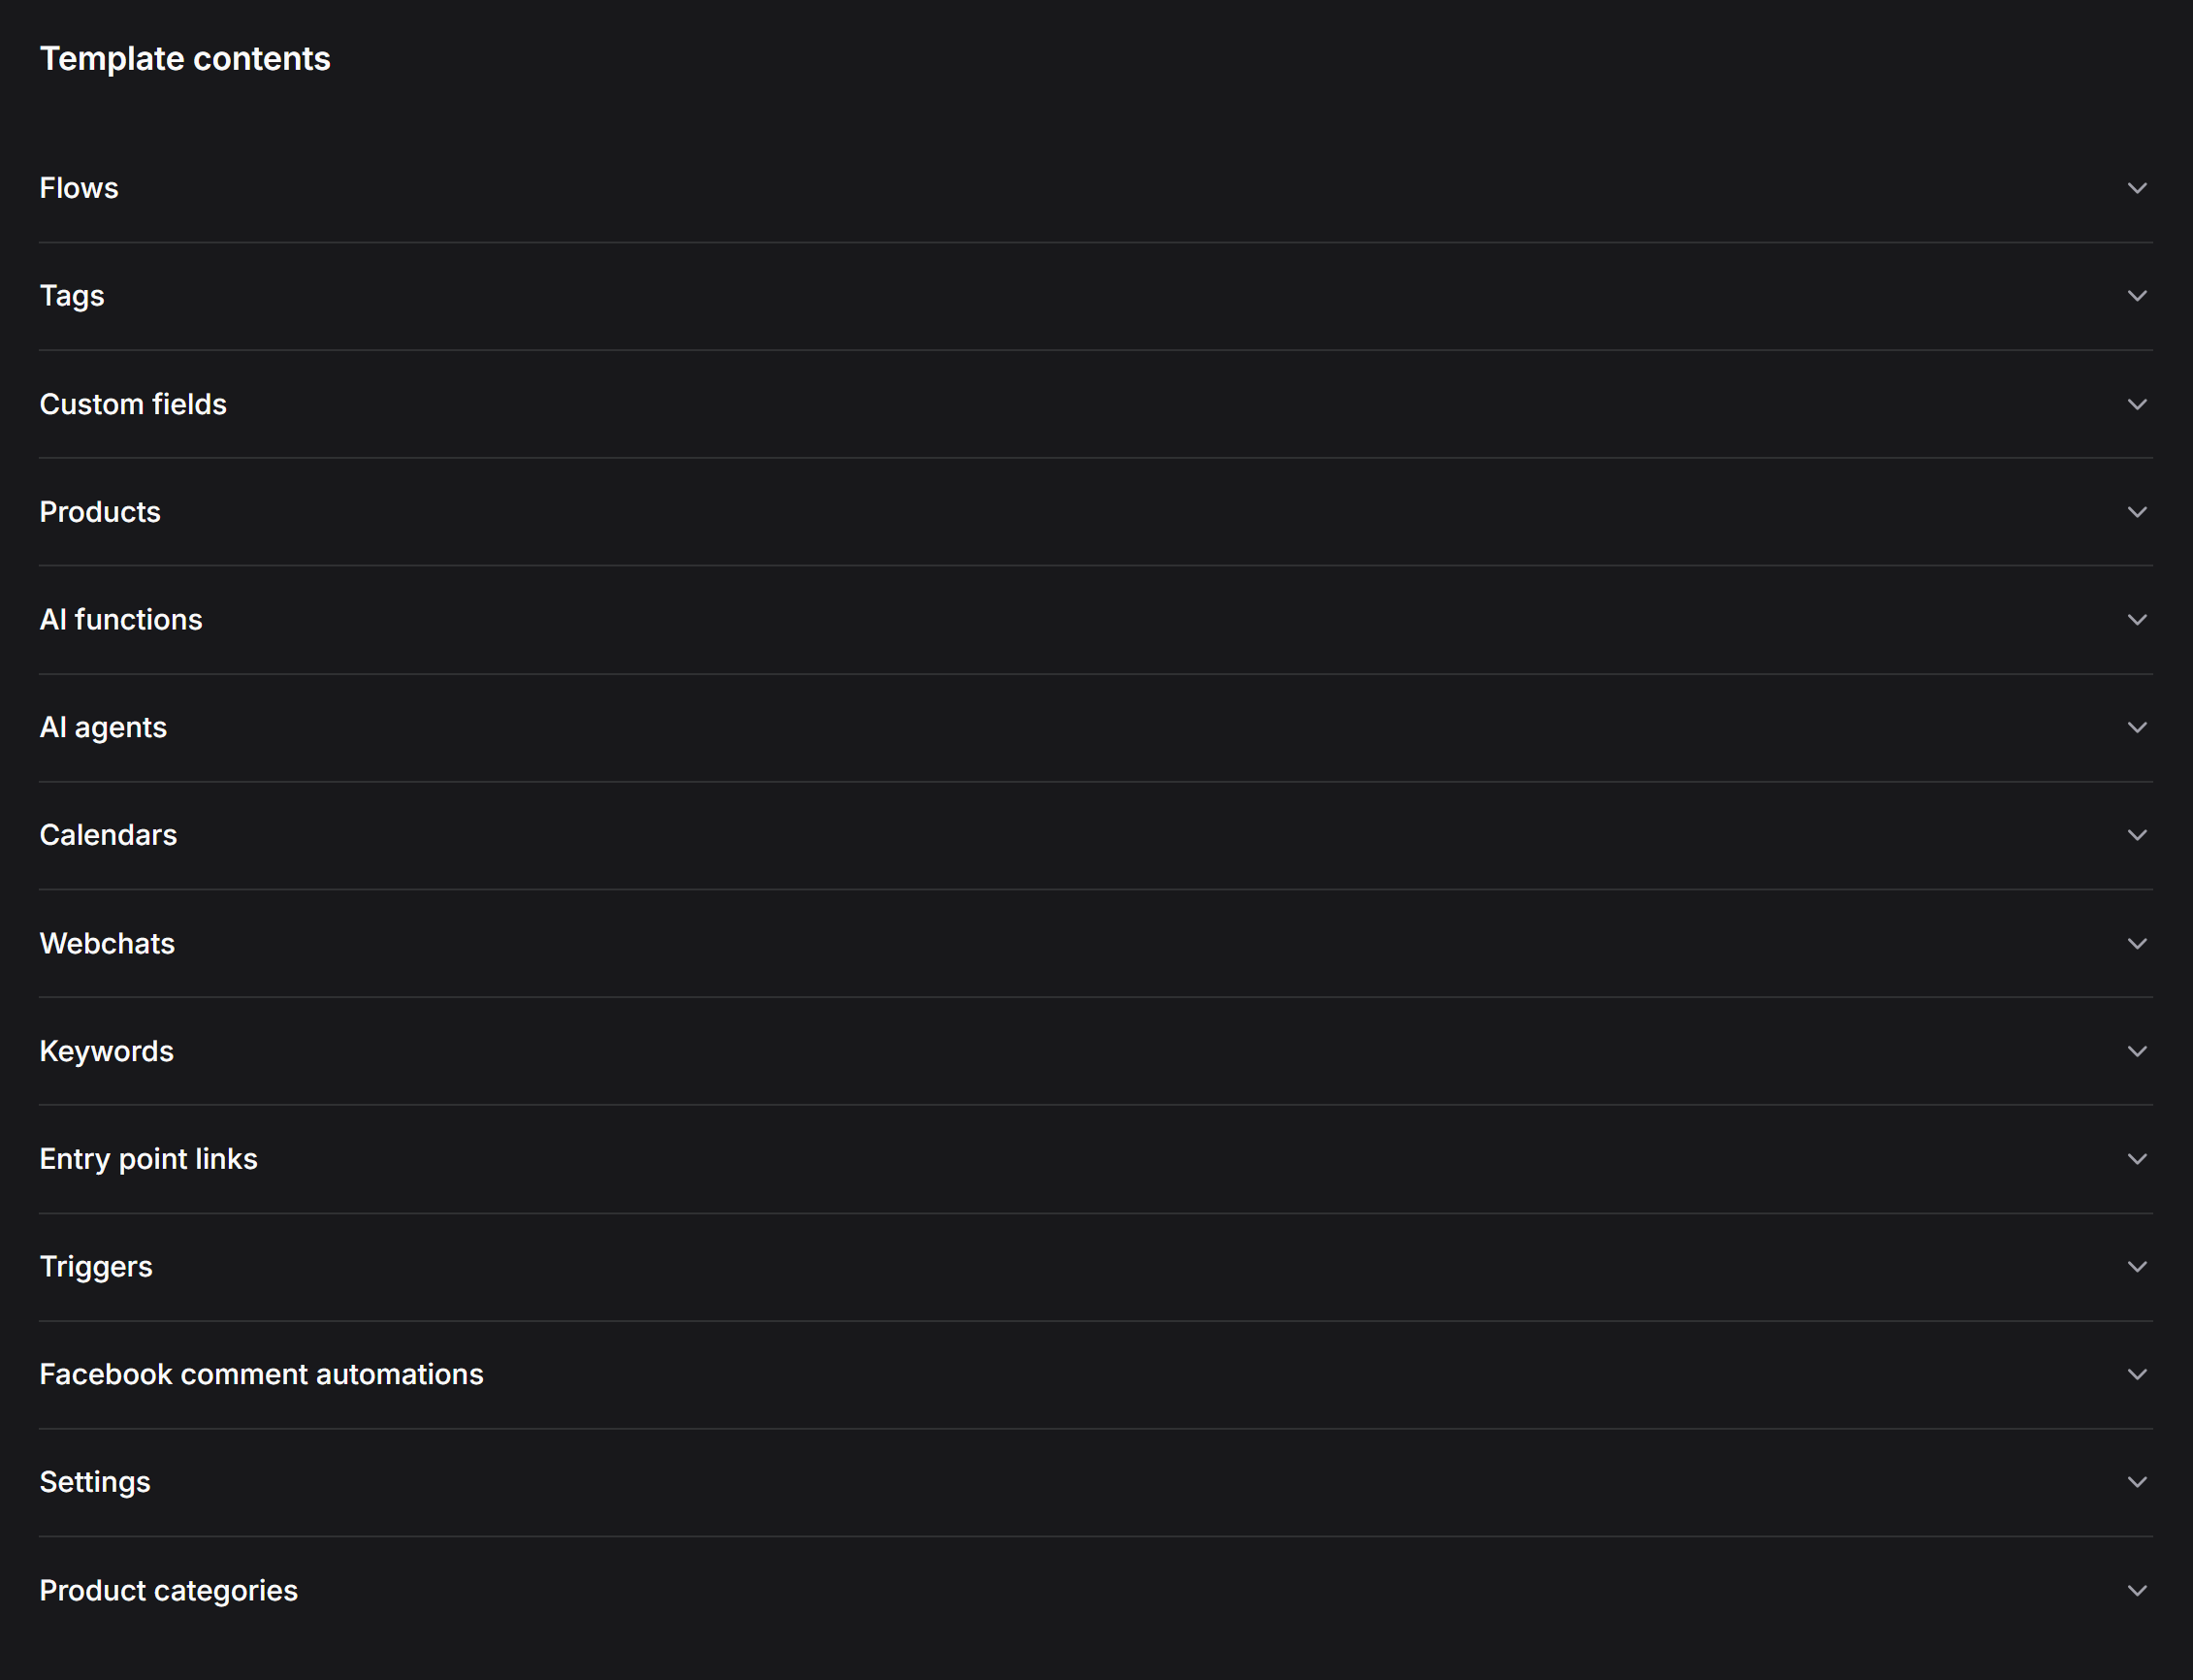 * **Flows:** Message scripts. You can choose **Select all** or handpick specific Flows.
* **Tags:** Contact categorization tags.
* **Custom fields:** Custom user attributes.
* **Products & Product categories:** Ecommerce items and store categories.
* **AI functions & AI agents:** Configured AI personas and connected tools.
* **Calendars:** Booking and appointment schedules.
* **Webchats:** Webchat widget customizations.
* **Keywords:** Keyword triggers.
* **Entry point links:** Reflink entry points.
* **Triggers:** Automation event listeners.
* **Facebook comment automations:** Facebook auto-reply rules.
* **Settings:** General system configurations.
* **Flows:** Message scripts. You can choose **Select all** or handpick specific Flows.
* **Tags:** Contact categorization tags.
* **Custom fields:** Custom user attributes.
* **Products & Product categories:** Ecommerce items and store categories.
* **AI functions & AI agents:** Configured AI personas and connected tools.
* **Calendars:** Booking and appointment schedules.
* **Webchats:** Webchat widget customizations.
* **Keywords:** Keyword triggers.
* **Entry point links:** Reflink entry points.
* **Triggers:** Automation event listeners.
* **Facebook comment automations:** Facebook auto-reply rules.
* **Settings:** General system configurations.
 Set access rights and behavioral defaults for workspaces that install this template:
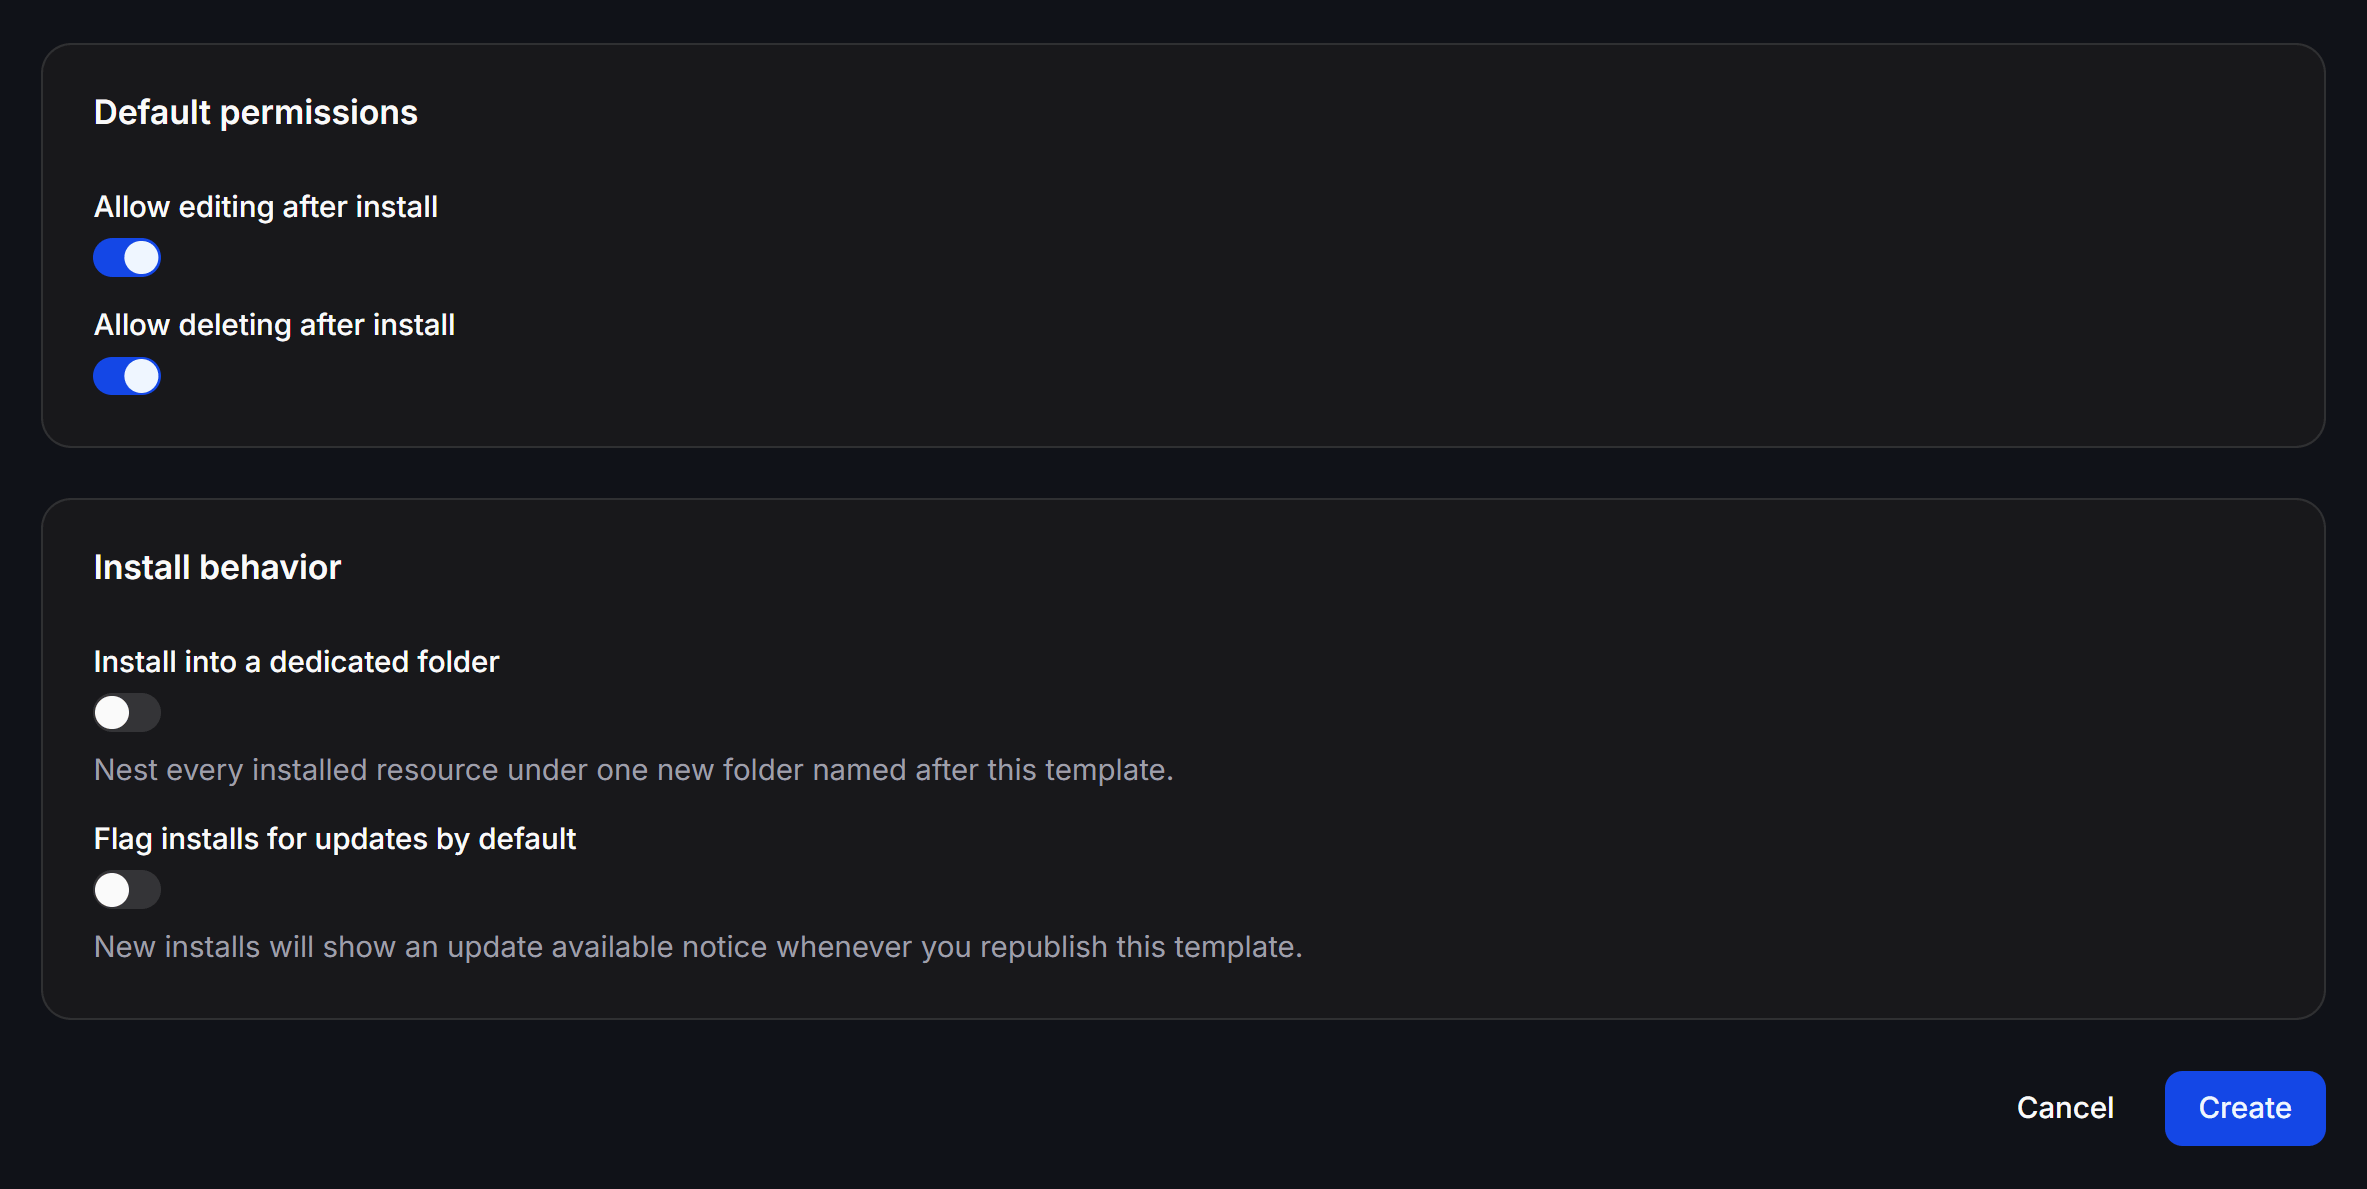 * **Default permissions:**
* **Allow editing after install:** Permits recipients to edit and customize installed resources.
* **Allow deleting after install:** Permits recipients to delete installed assets when no longer needed.
* **Install behavior:**
* **Install into a dedicated folder:** Nests every installed asset under one new folder named after this template, keeping existing workspace flows clean.
* **Flag installs for updates by default:** Automatically notifies recipients when you publish updates or improvements to this template.
Once configured, click the blue **Create** button to publish your template.
## Sharing Your Template (Share Link)
Once created, generate a public sharing link to distribute your template:
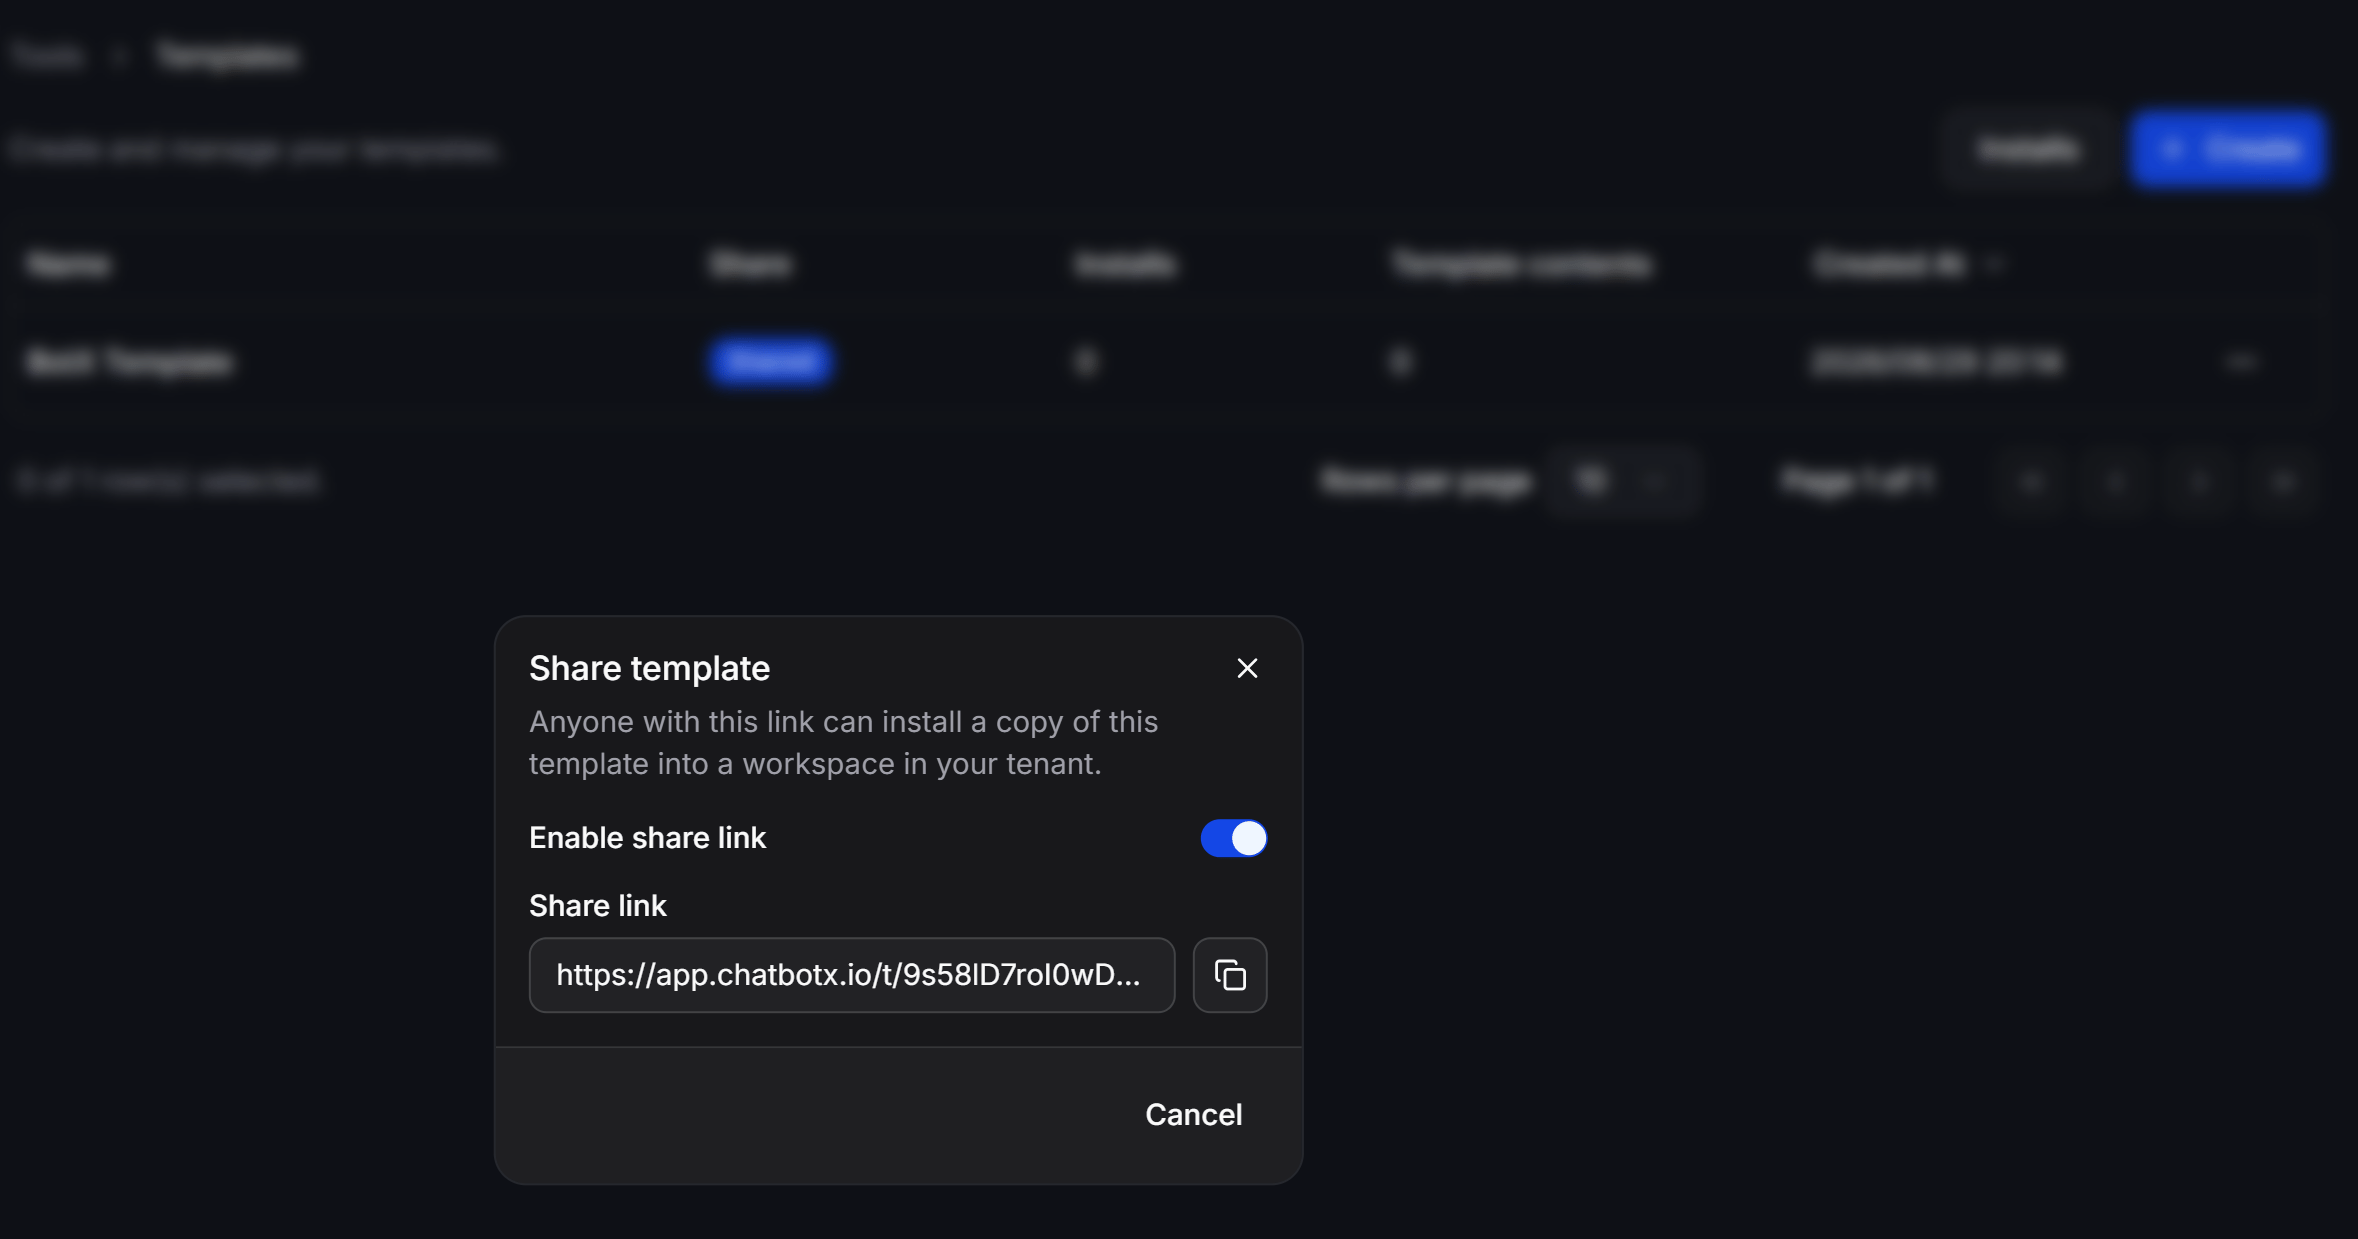
1. In the Templates table, click the three dots `...` on the target template row > select **Share**.
2. Toggle on **Enable share link**.
3. Click the copy icon next to **Share link** to copy the URL formatted as `https://app.chatbotx.io/t/...`.
* **Default permissions:**
* **Allow editing after install:** Permits recipients to edit and customize installed resources.
* **Allow deleting after install:** Permits recipients to delete installed assets when no longer needed.
* **Install behavior:**
* **Install into a dedicated folder:** Nests every installed asset under one new folder named after this template, keeping existing workspace flows clean.
* **Flag installs for updates by default:** Automatically notifies recipients when you publish updates or improvements to this template.
Once configured, click the blue **Create** button to publish your template.
## Sharing Your Template (Share Link)
Once created, generate a public sharing link to distribute your template:
1. In the Templates table, click the three dots `...` on the target template row > select **Share**.
2. Toggle on **Enable share link**.
3. Click the copy icon next to **Share link** to copy the URL formatted as `https://app.chatbotx.io/t/...`.
 ## Installing a Shared Template (Recipient Guide)
When recipients open a template link in their browser:
1. **Template Landing Page:** They can watch the YouTube video, read the overview, and click **Preview** to inspect the flow diagram.
2. **Installation Options:** Clicking **Install** presents 2 choices:
* **Install into an Existing Bot:** Select an active workspace / bot from their account to import the packaged resources.
* **Create a New Chatbot:** Select a channel platform (Messenger, Instagram, WhatsApp, TikTok, Telegram, Webchat...) to create a fresh bot with the template pre-installed.
## Tracking & Managing Installations (Installs)
The **Installs** dashboard provides comprehensive tracking for both template users and authors:
## Installing a Shared Template (Recipient Guide)
When recipients open a template link in their browser:
1. **Template Landing Page:** They can watch the YouTube video, read the overview, and click **Preview** to inspect the flow diagram.
2. **Installation Options:** Clicking **Install** presents 2 choices:
* **Install into an Existing Bot:** Select an active workspace / bot from their account to import the packaged resources.
* **Create a New Chatbot:** Select a channel platform (Messenger, Instagram, WhatsApp, TikTok, Telegram, Webchat...) to create a fresh bot with the template pre-installed.
## Tracking & Managing Installations (Installs)
The **Installs** dashboard provides comprehensive tracking for both template users and authors:
 ### 1. For Template Users (Installation Status & Auto-Update)
When you install a template into your workspace, the **Tools > Templates > Installs** table displays:
* **Name:** The title of the installed template.
* **Status:** Installation health (`Completed`, `Installing`, or `Failed`).
* **Resources:** Count of successfully imported assets.
* **Warnings:** Asset conflict or duplicate warnings (if any).
* **Created At / Completed at:** Start and completion timestamps of the installation process.
* **Auto-update Switch:** Enable or disable automatic asset synchronization when the original author republishes updates.
### 2. For Template Authors (Workspace Overview & Remote Uninstall)
As a template author, the **Installs** menu allows you to:
* View a detailed list of all client or student workspaces that have installed your template.
* Monitor real-time installation metrics.
* **Remote Uninstall:** Click **Uninstall** next to a specific workspace to remotely revoke and remove the template assets (ideal when a subscription or service agreement ends).
When you republish a Template with updated flows or new features, all workspaces with **Auto-update** enabled will automatically receive the newest version without needing to reinstall manually.
### 1. For Template Users (Installation Status & Auto-Update)
When you install a template into your workspace, the **Tools > Templates > Installs** table displays:
* **Name:** The title of the installed template.
* **Status:** Installation health (`Completed`, `Installing`, or `Failed`).
* **Resources:** Count of successfully imported assets.
* **Warnings:** Asset conflict or duplicate warnings (if any).
* **Created At / Completed at:** Start and completion timestamps of the installation process.
* **Auto-update Switch:** Enable or disable automatic asset synchronization when the original author republishes updates.
### 2. For Template Authors (Workspace Overview & Remote Uninstall)
As a template author, the **Installs** menu allows you to:
* View a detailed list of all client or student workspaces that have installed your template.
* Monitor real-time installation metrics.
* **Remote Uninstall:** Click **Uninstall** next to a specific workspace to remotely revoke and remove the template assets (ideal when a subscription or service agreement ends).
When you republish a Template with updated flows or new features, all workspaces with **Auto-update** enabled will automatically receive the newest version without needing to reinstall manually.