> ## Documentation Index
> Fetch the complete documentation index at: https://chatbotx.io/docs/llms.txt
> Use this file to discover all available pages before exploring further.
# Help Links
> Detailed guide on configuring Help Links in Whitelabel ChatbotX to customize help resources and documentation links on your clients' left sidebar.
**Help Links** is a feature designed specifically for Platform Owners of Whitelabel ChatbotX. This feature allows you to create and customize support links (such as help documentation, technical support portals, contact pages) displayed at the bottom of the left sidebar of all client workspaces (sub-accounts) under your platform.
This helps Whitelabel businesses build a unified support experience under their own brand, directing customers to their own custom knowledge base or customer care portal instead of default system documentation.
## Accessing Help Links Configuration
To access the Help Links configuration page:
From the Admin Dashboard, select **Help Links** under the **Platform** section on the left sidebar.
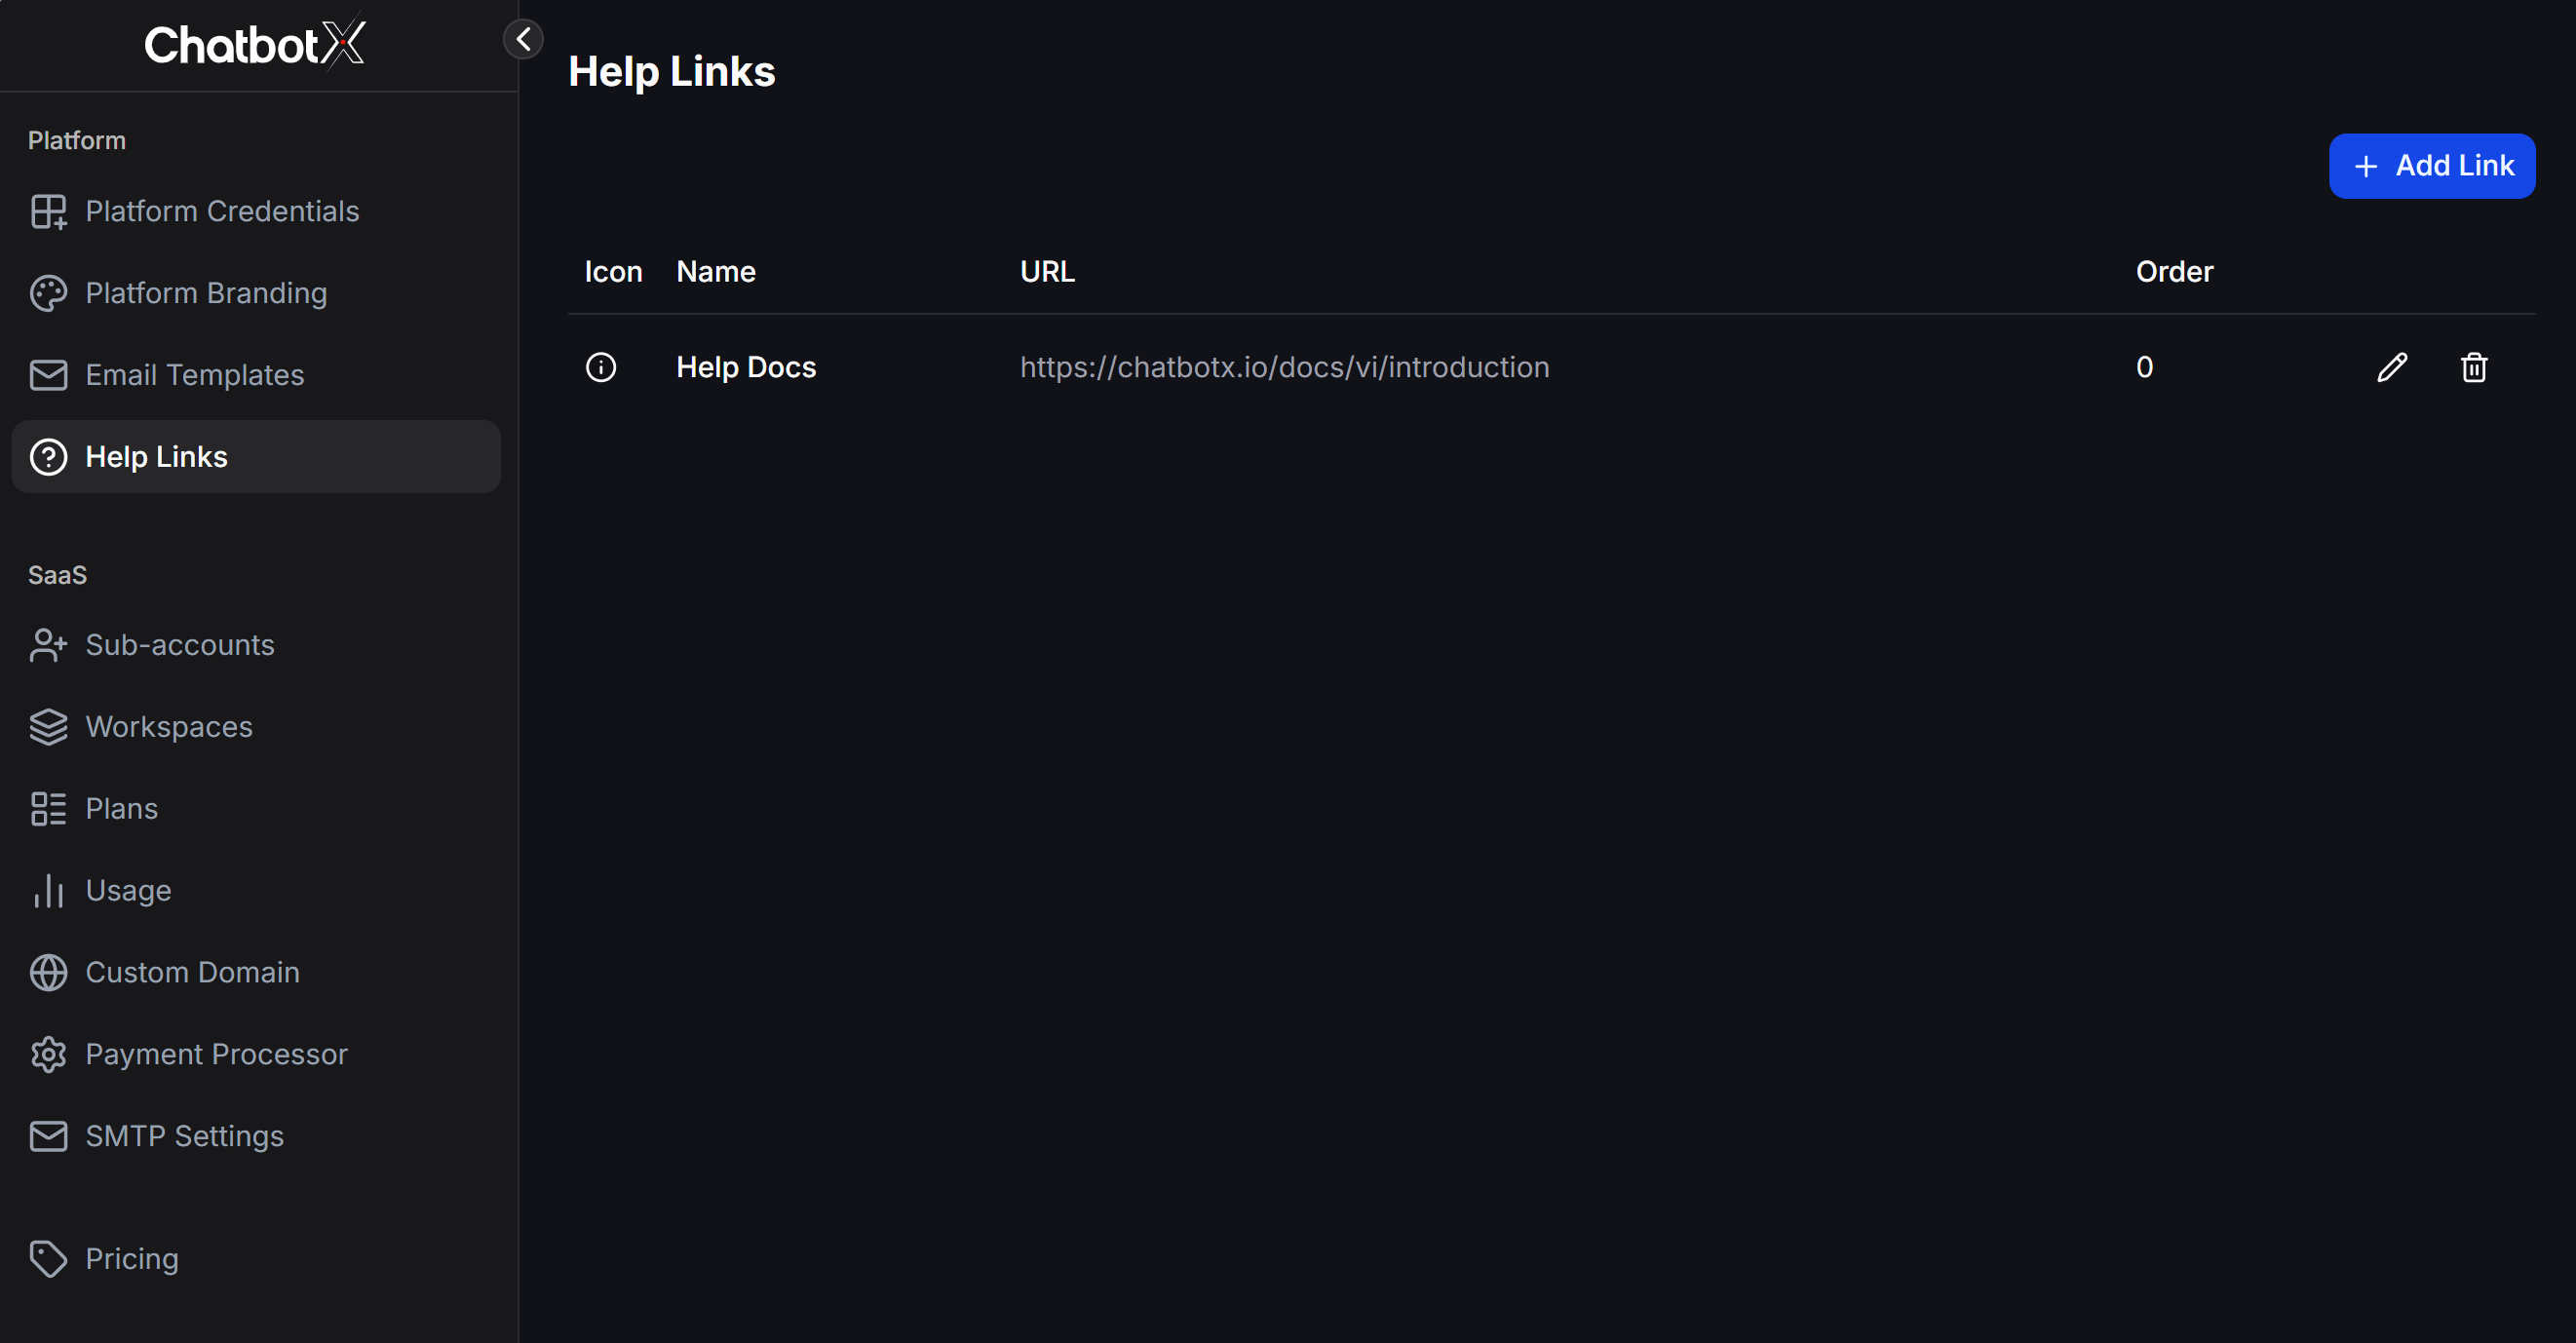 The list of currently configured help links will be displayed with the following columns: Icon, Name, destination URL, display Order, and Edit/Delete action buttons.
## How to Add a Help Link
In the Help Links management dashboard, click the **+ Add Link** button at the top right.
In the **Add Help Link** modal, set up the following fields:
* **Name**: Enter the display name for the help link (e.g., `Help Docs`, `Technical Support`, `User Community`).
* **URL**: Enter the destination URL where customers will be redirected when clicking the link (e.g., `https://chatbotx.io/docs/vi/introduction`).
* **Icon (optional)**: Enter the icon name from the [Lucide Icons](https://lucide.dev) library to show in front of the link name (e.g., `circle-info`, `book-open`, `star`, `help-circle`). You can click the *Browse Lucide icons* link to search for suitable icons.
* **Order (optional)**: Enter a number to set the display order (smaller numbers will display on top).
The list of currently configured help links will be displayed with the following columns: Icon, Name, destination URL, display Order, and Edit/Delete action buttons.
## How to Add a Help Link
In the Help Links management dashboard, click the **+ Add Link** button at the top right.
In the **Add Help Link** modal, set up the following fields:
* **Name**: Enter the display name for the help link (e.g., `Help Docs`, `Technical Support`, `User Community`).
* **URL**: Enter the destination URL where customers will be redirected when clicking the link (e.g., `https://chatbotx.io/docs/vi/introduction`).
* **Icon (optional)**: Enter the icon name from the [Lucide Icons](https://lucide.dev) library to show in front of the link name (e.g., `circle-info`, `book-open`, `star`, `help-circle`). You can click the *Browse Lucide icons* link to search for suitable icons.
* **Order (optional)**: Enter a number to set the display order (smaller numbers will display on top).
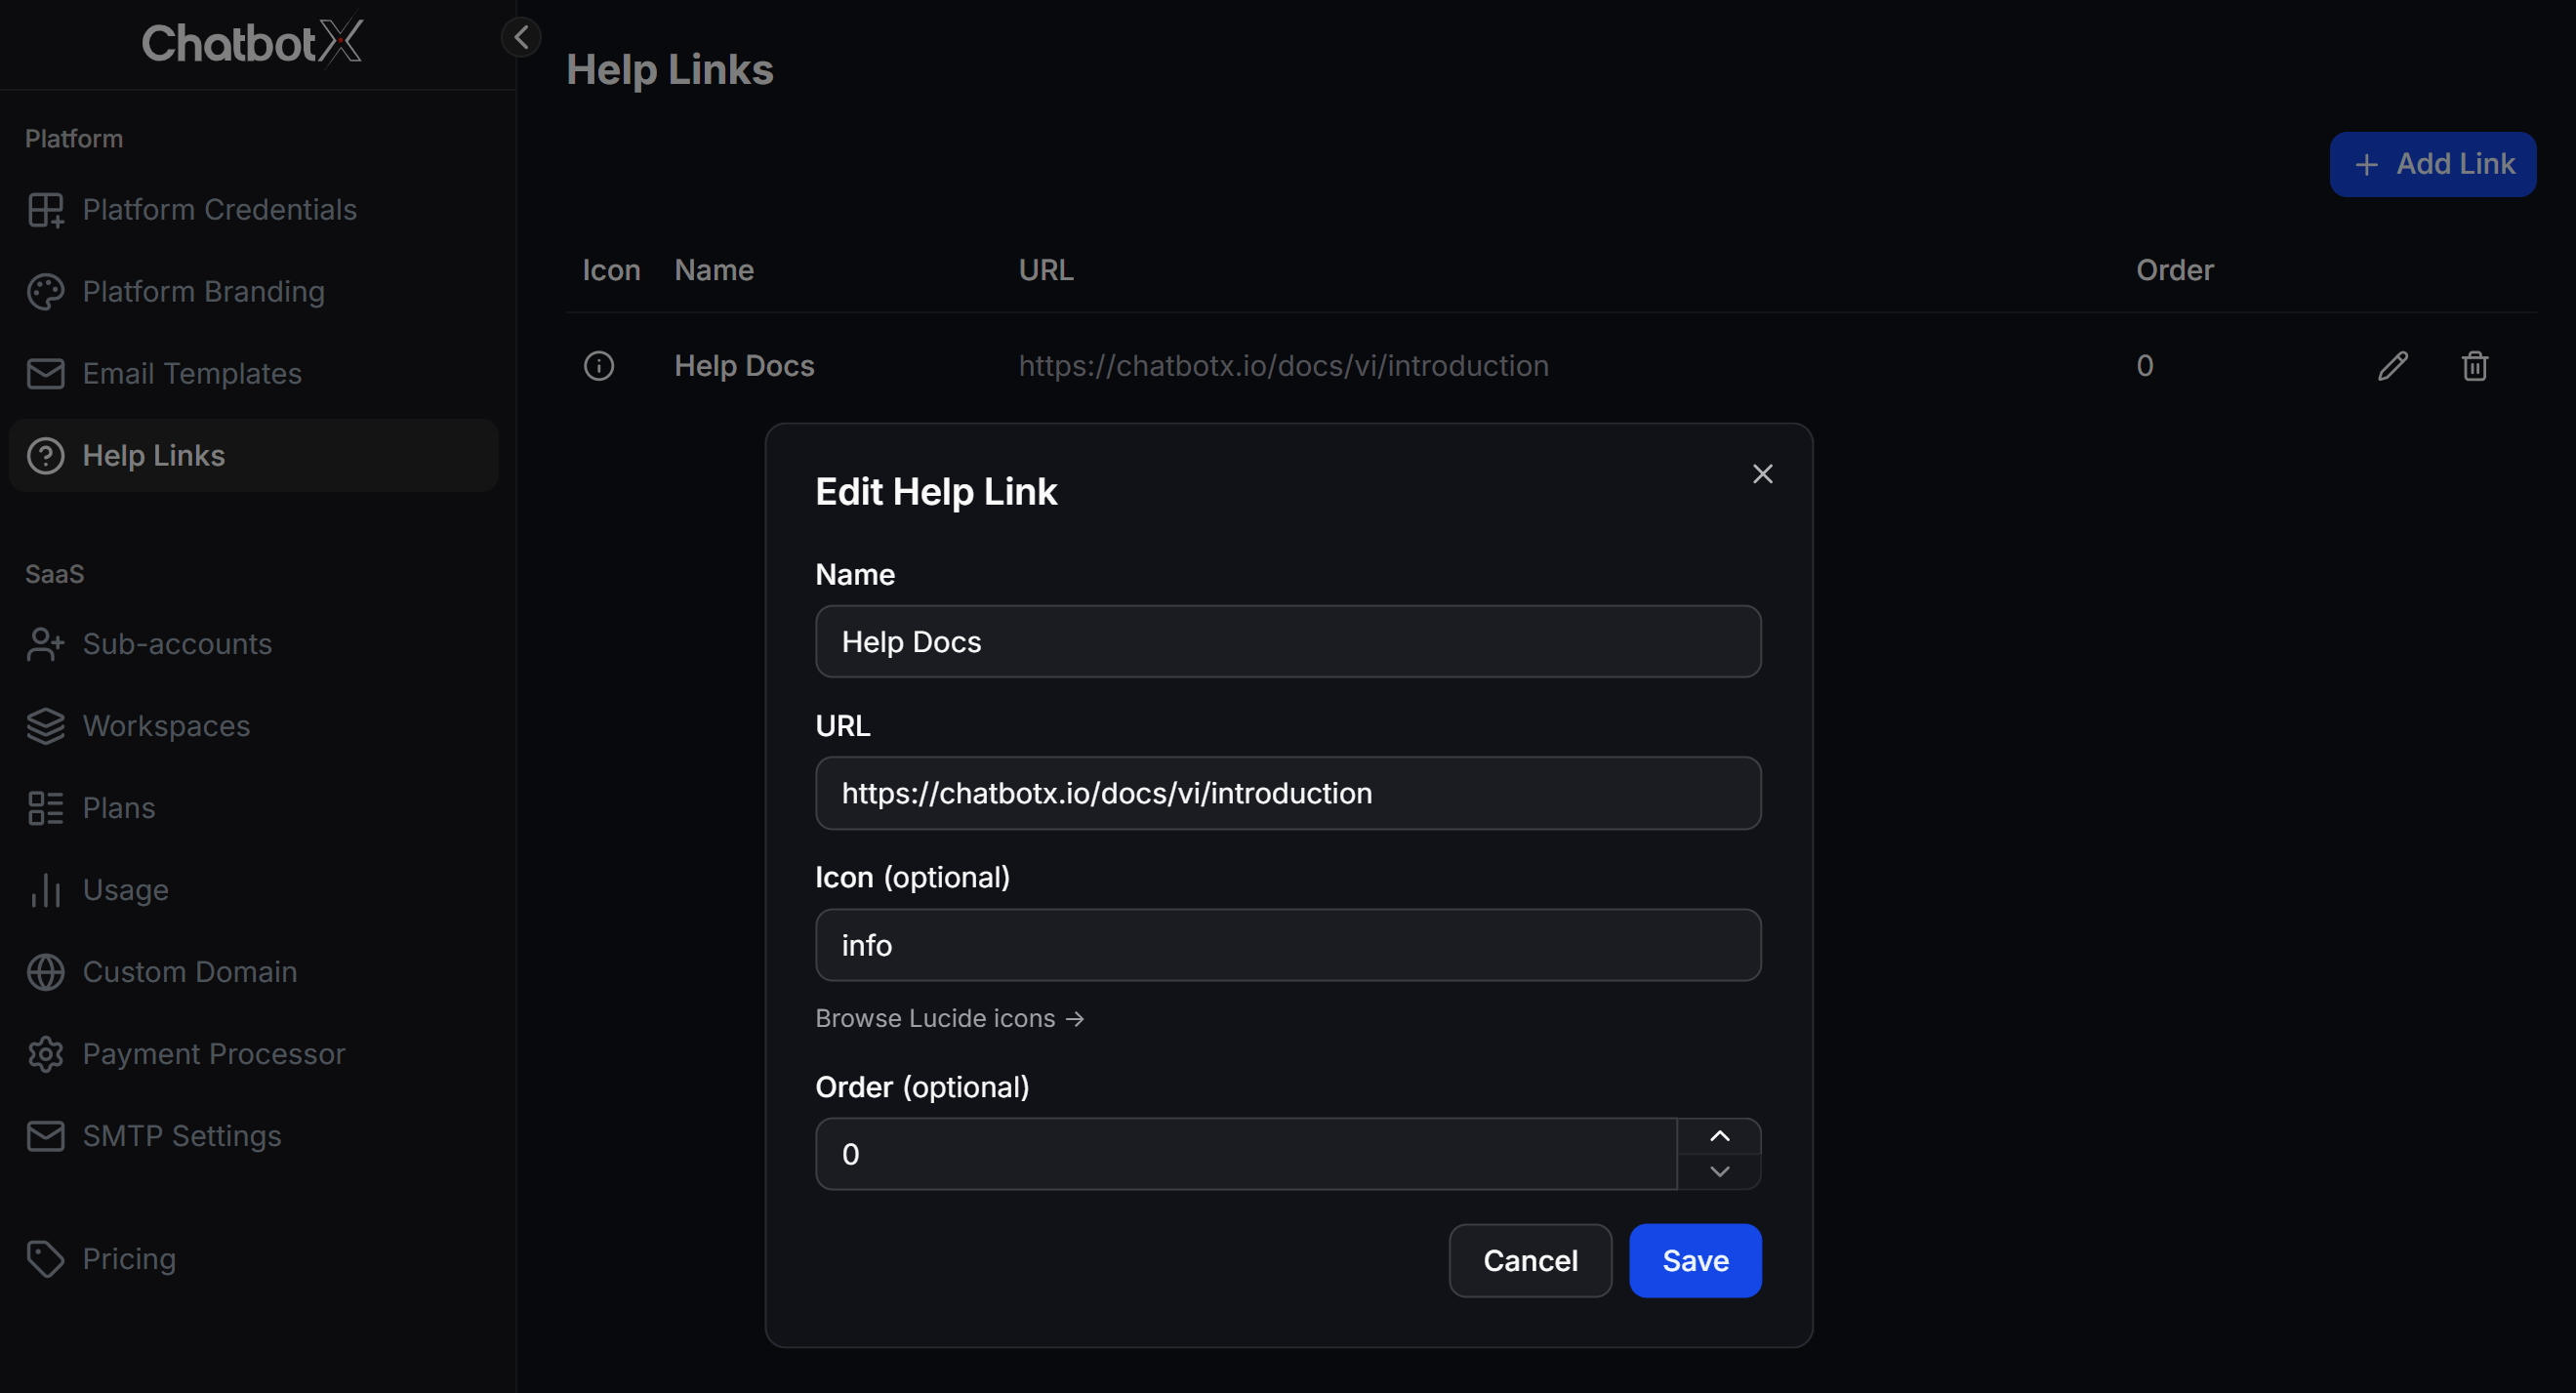 Click **Save** to complete the creation.
## Display Position on Client Workspaces
After successfully configuring and saving the link, when clients log in to their workspace (sub-account), they will see these help links appear directly at the bottom of the left sidebar (just below the *Settings* menu).
Clients can simply click these links to quickly open the support portal you configured in a new browser tab.
## Best Practices and Notes
You can create multiple Help Links to categorize different support channels (e.g., one link for the User Guide and another link pointing to a live support chat or error reporting form).
Make sure the URL you enter begins with a standard protocol like `http://` or `https://` to prevent local routing errors from breaking the link.
Click **Save** to complete the creation.
## Display Position on Client Workspaces
After successfully configuring and saving the link, when clients log in to their workspace (sub-account), they will see these help links appear directly at the bottom of the left sidebar (just below the *Settings* menu).
Clients can simply click these links to quickly open the support portal you configured in a new browser tab.
## Best Practices and Notes
You can create multiple Help Links to categorize different support channels (e.g., one link for the User Guide and another link pointing to a live support chat or error reporting form).
Make sure the URL you enter begins with a standard protocol like `http://` or `https://` to prevent local routing errors from breaking the link.