

Public pricing page
ChatbotX creates a public pricing page from Plans that have both Public and Active enabled. The URL usually follows this format:https://[your-domain]/portal/pricing.
- Copy URL: Copy the pricing page URL to share with customers or add to your website.
- View pricing page: Open the page and review what customers see.
Manage the Plan list
Each row represents a Plan and its current status. Select the three-dot menu... to open the available actions.
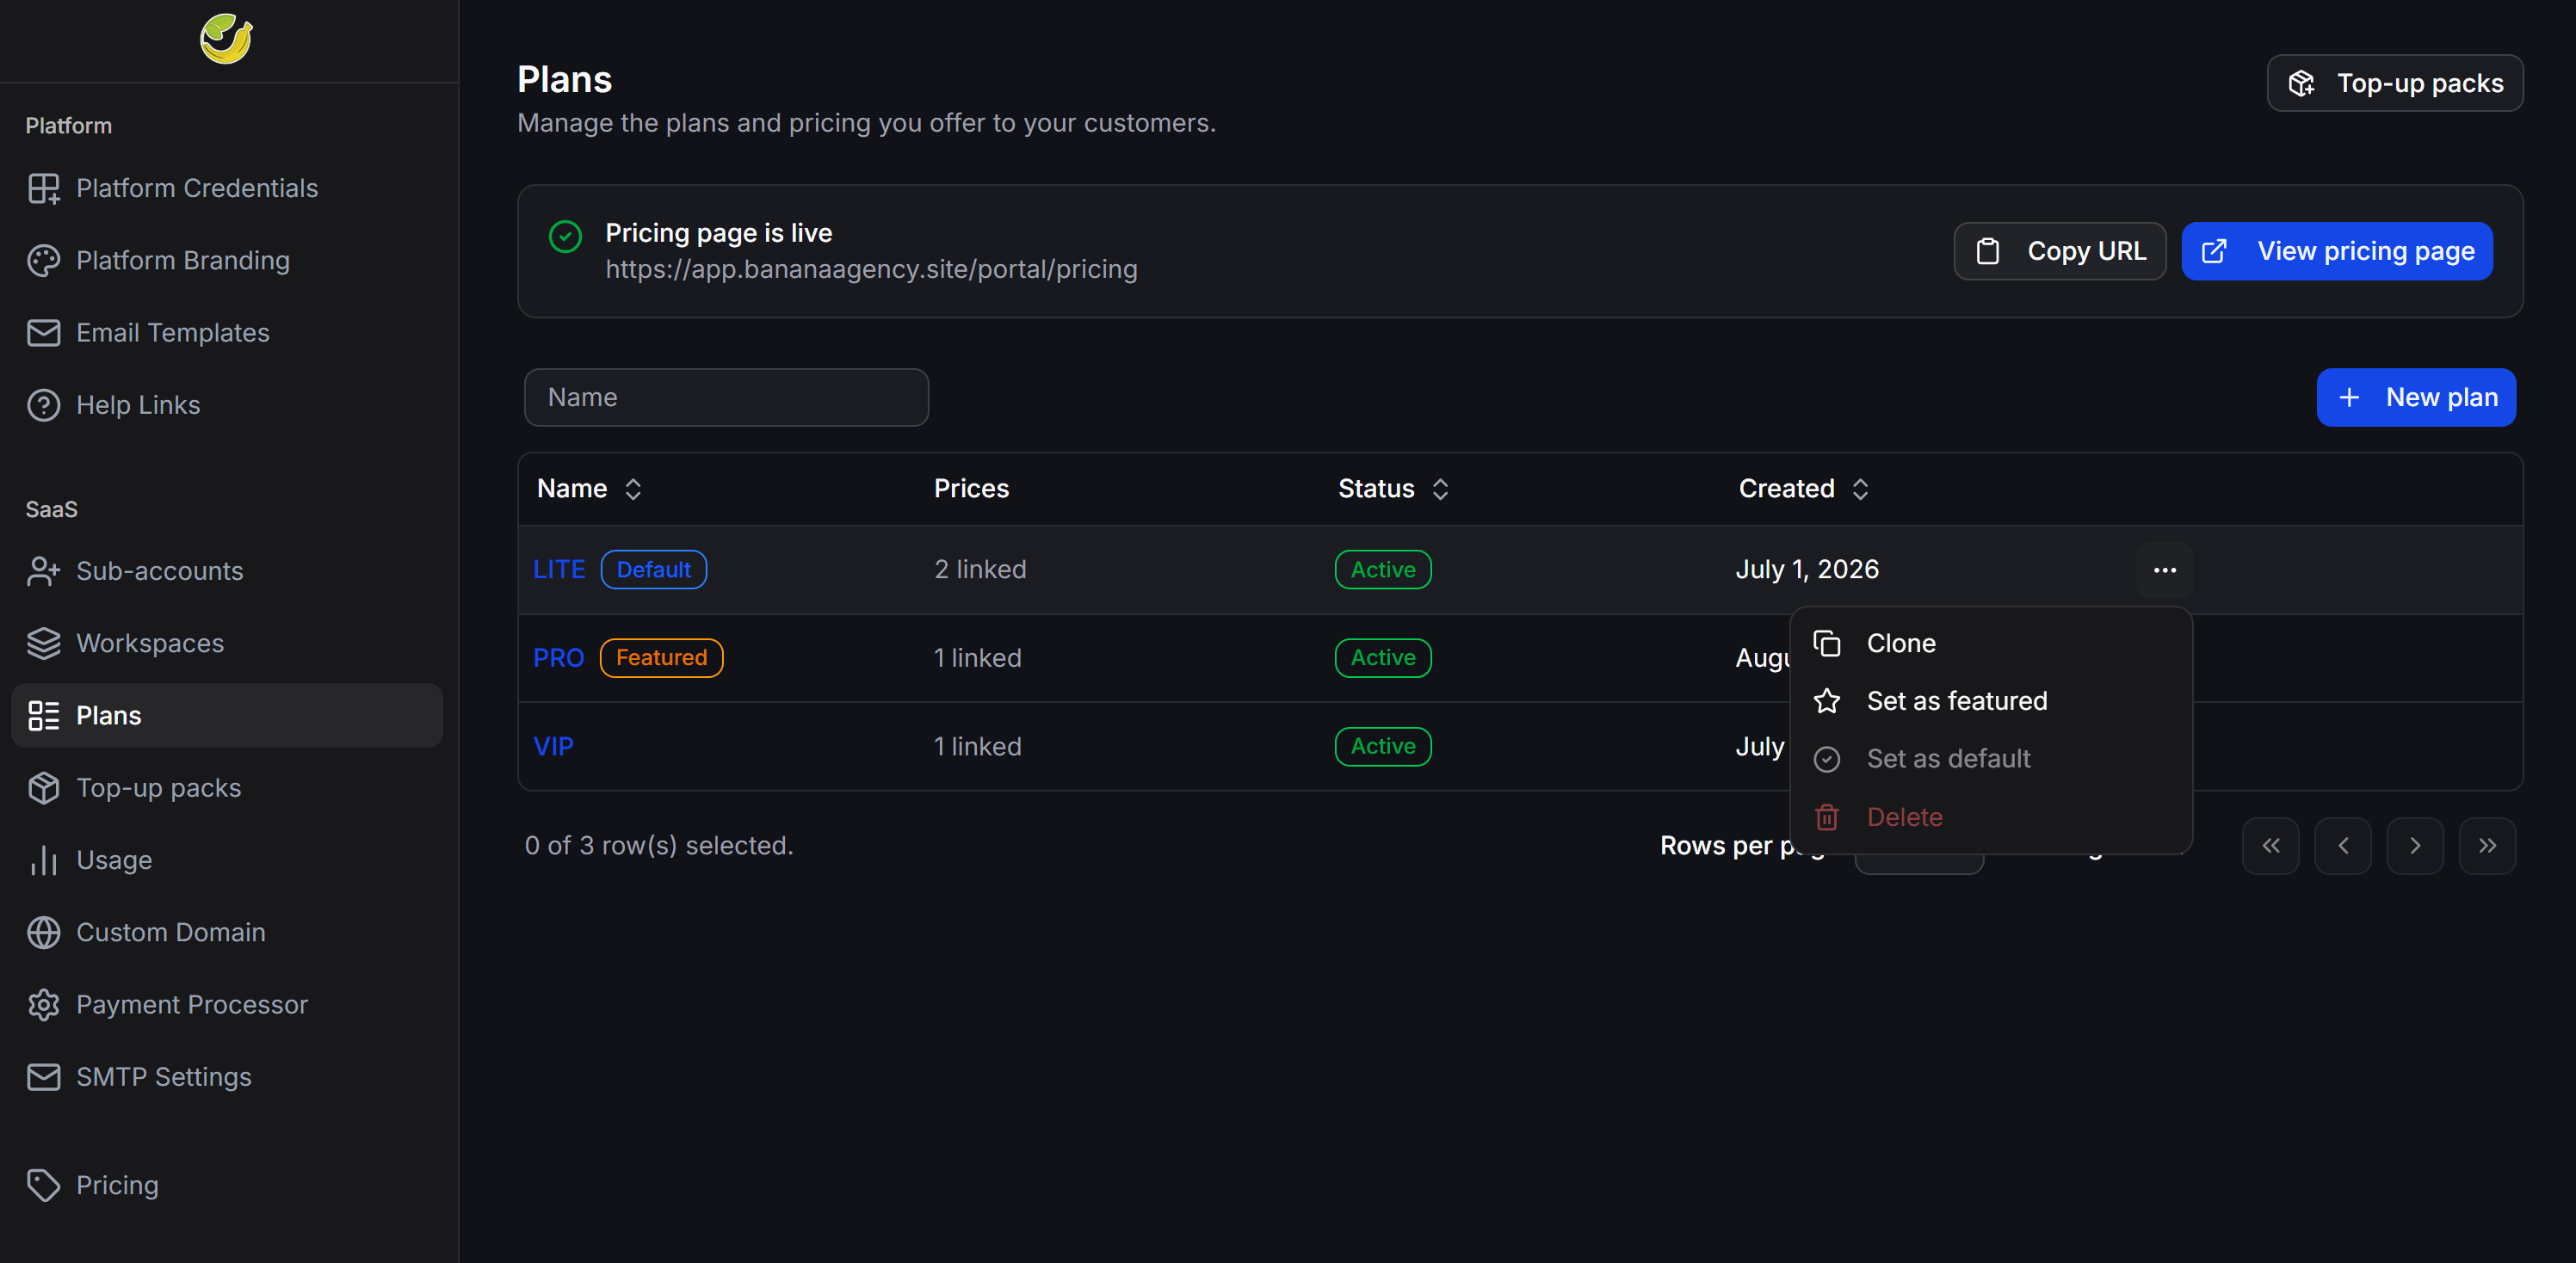
- Clone: Create a new Plan from the current configuration.
- Set as featured: Highlight the Plan. The public pricing page displays it with the Most Popular label.
- Set as default: Use the Plan as the default package for new accounts.
- Delete: Remove the Plan from the list of available options.
Top-up packs
Top-up packs are additional bot-message credit packages sold on top of a Plan allowance. Each pack uses a one-time Stripe Price. On the Plans page, select Top-up packs in the upper-right corner. You can also select SaaS > Top-up packs from the left sidebar.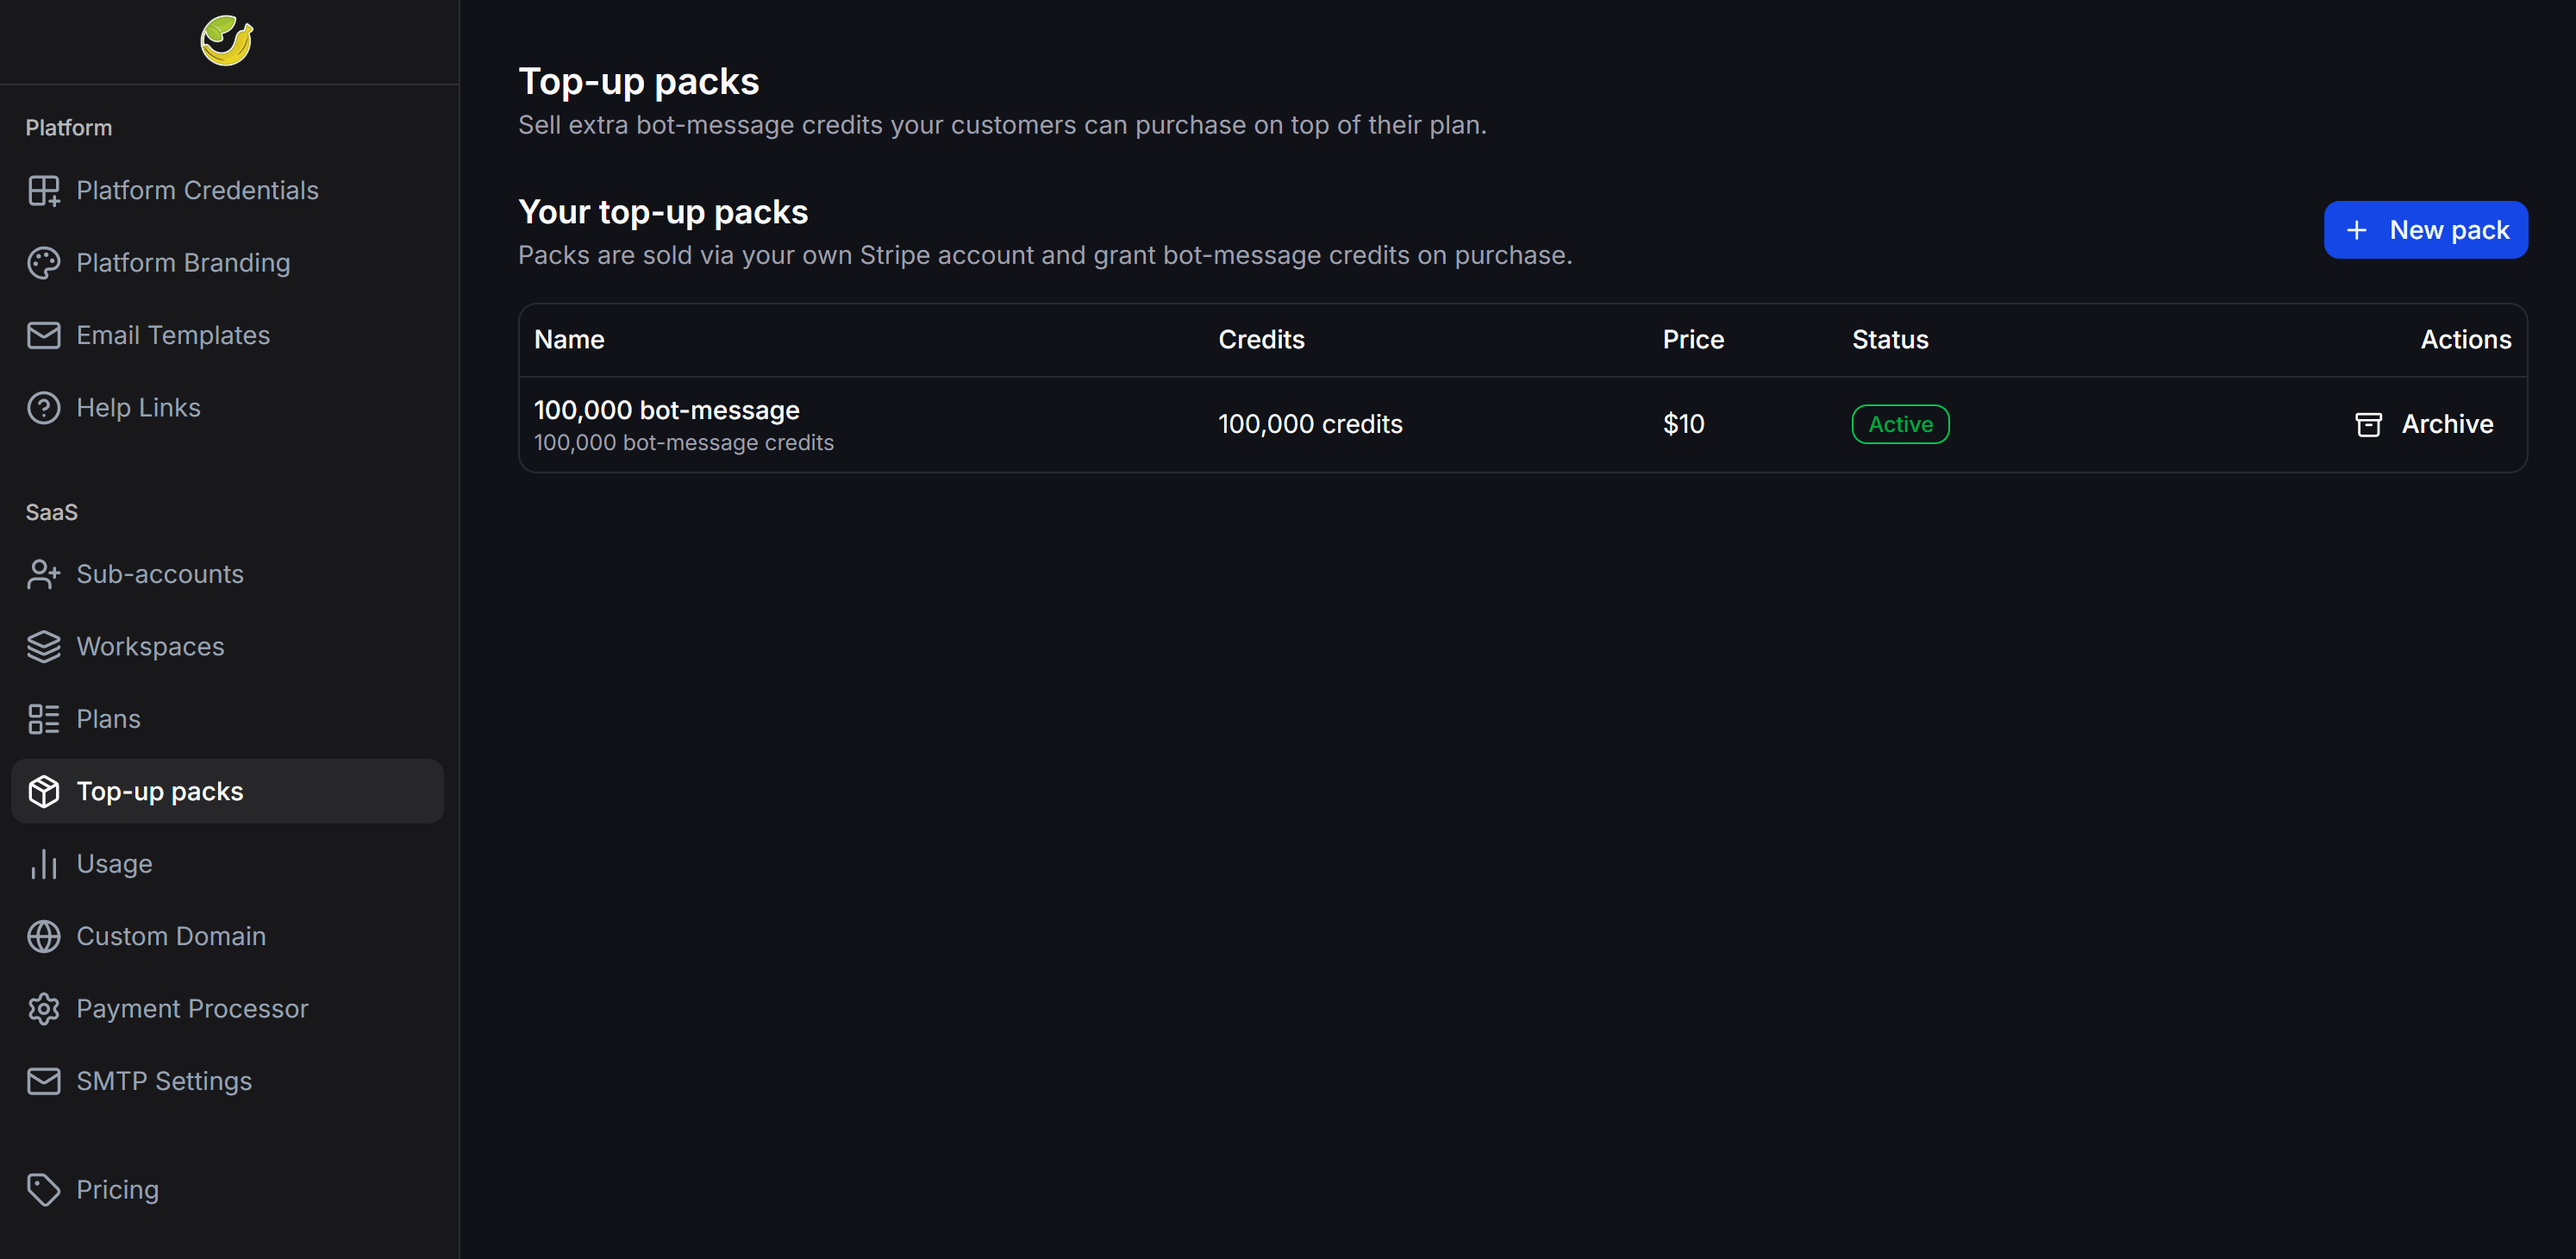
- Credits: The number of bot-message credits granted per purchase.
- Price: The amount from the linked Stripe Price.
- Status: The pack’s current status.
- Archive: Archive a pack when you no longer want to sell it.
Create a new Top-up pack
Connect your Stripe account and create a one-time Stripe Price before creating a pack.1
Open the new pack form
On the Top-up packs page, select + New pack.
2
Enter the pack details
Enter the name, description, credit quantity, Stripe price ID, and sort order.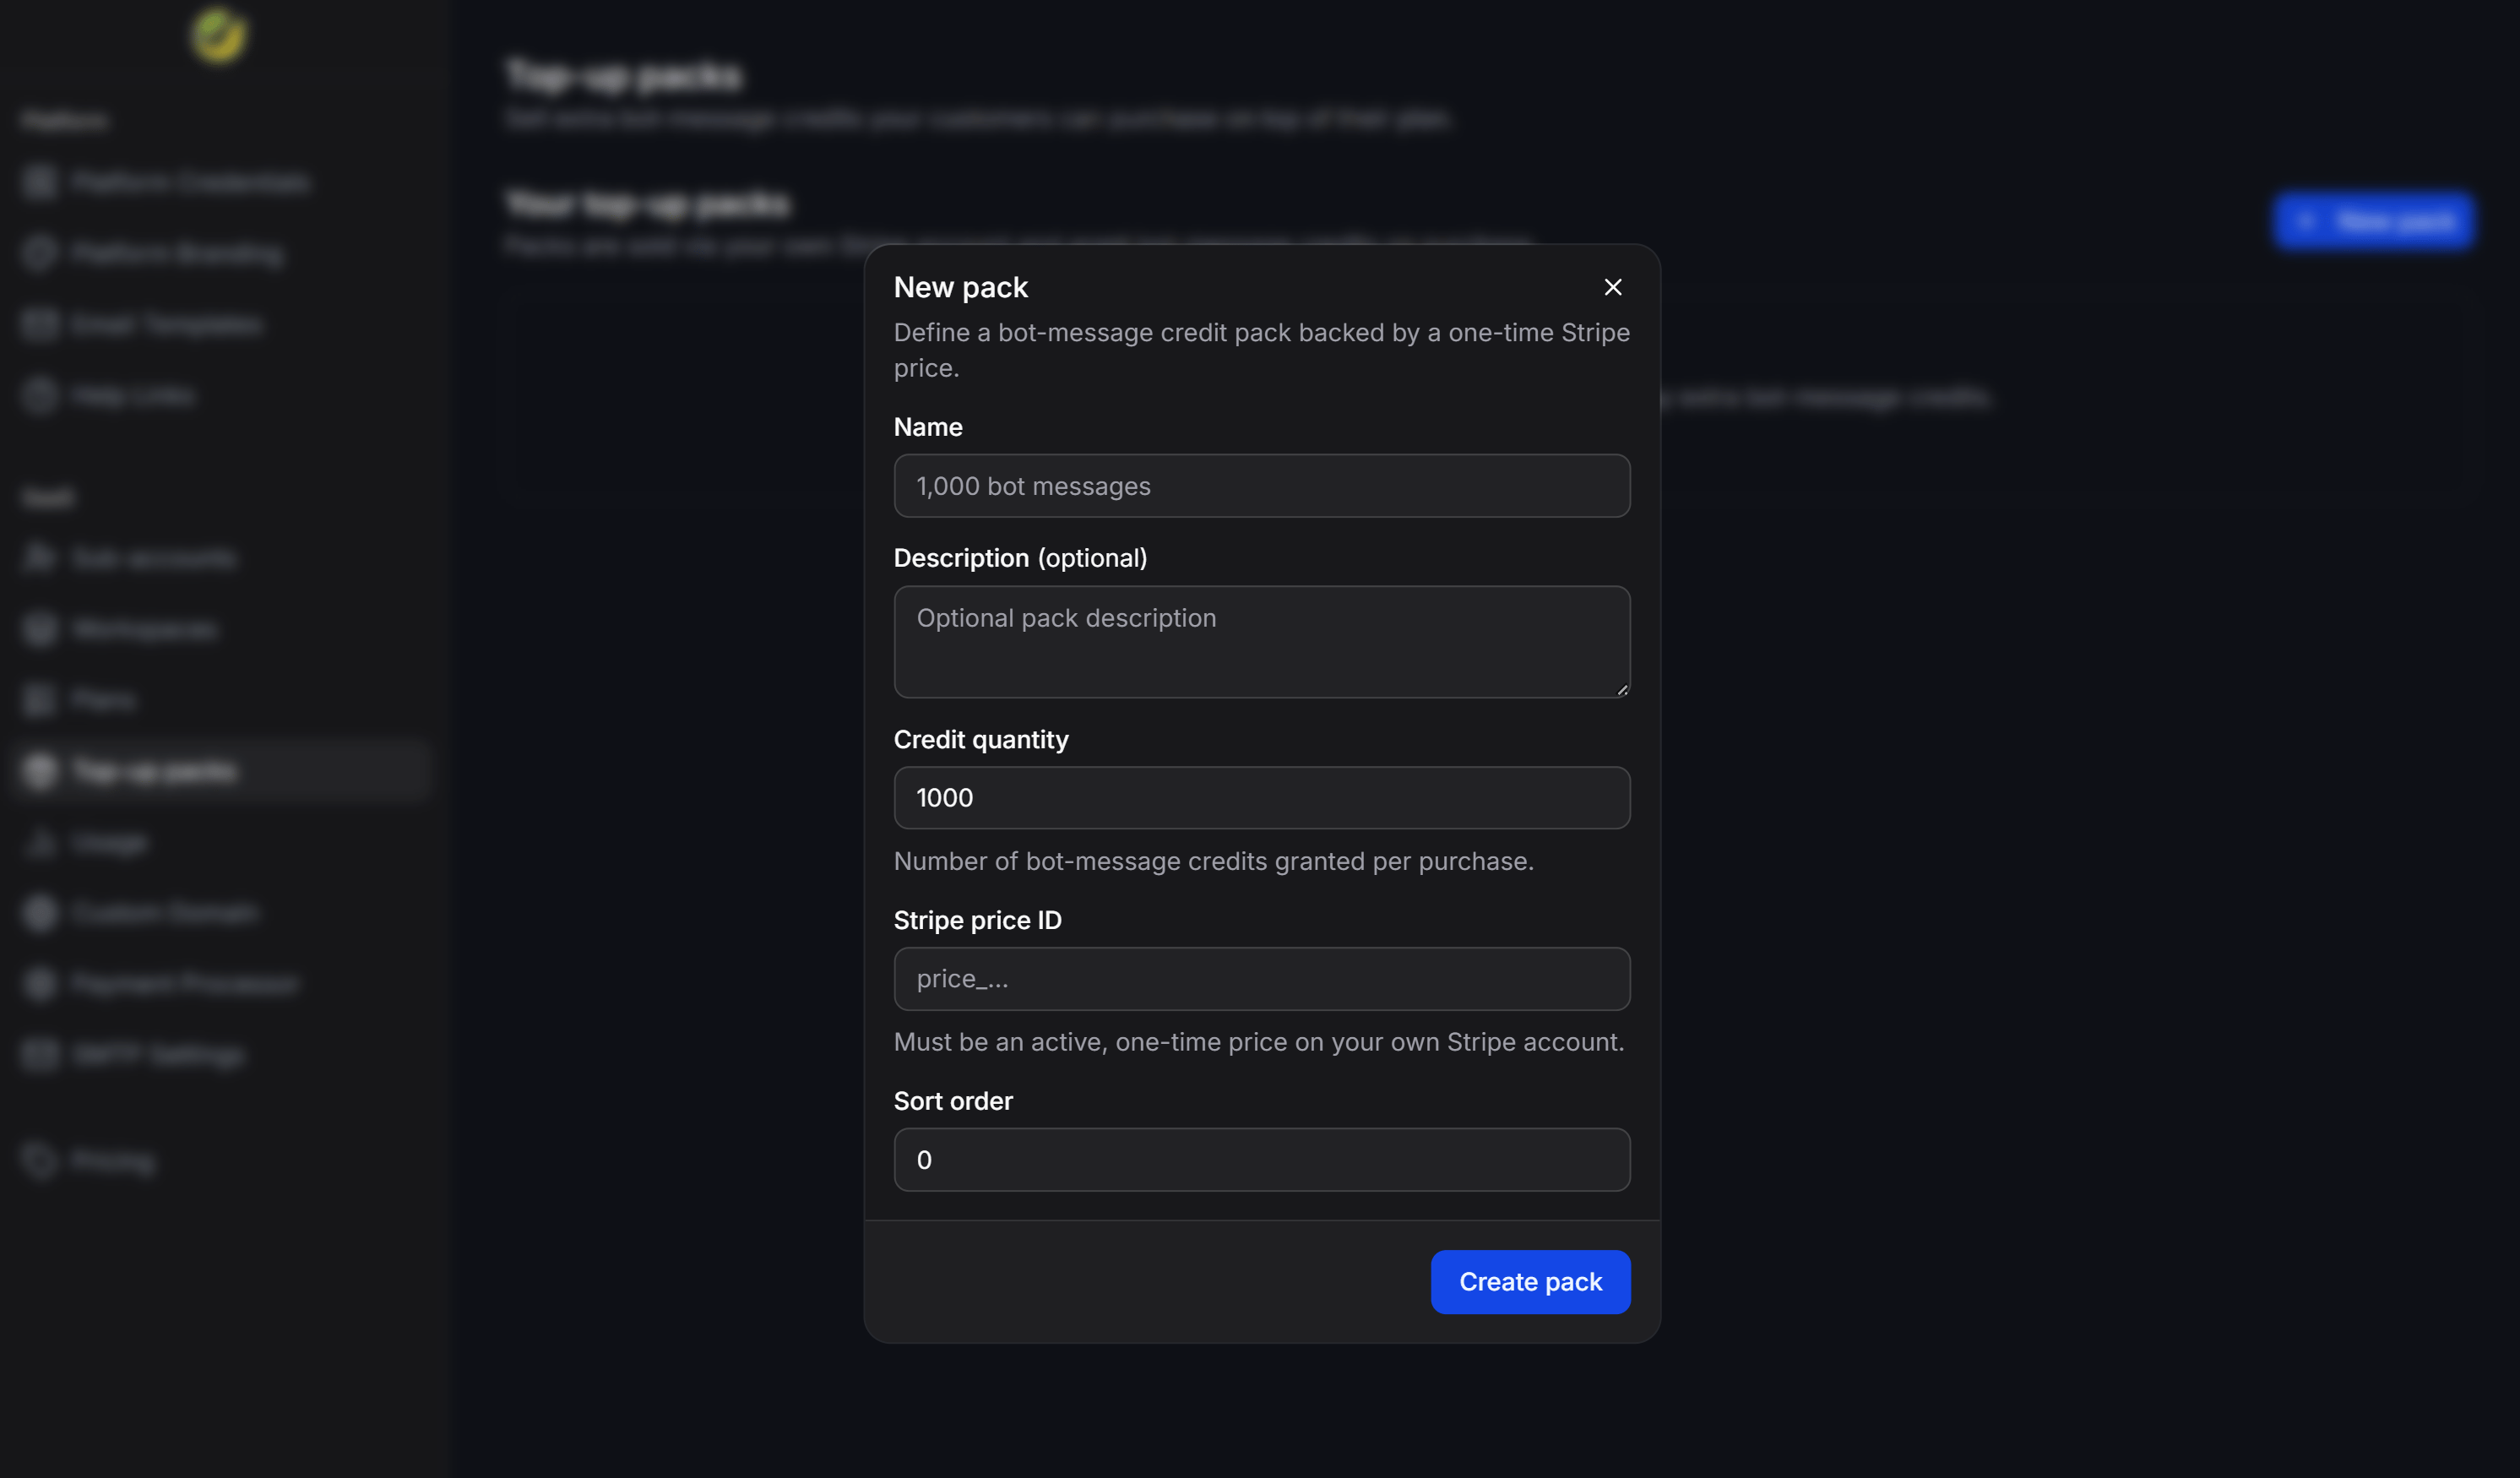
3
Create the pack
Review the details, then select Create pack.
Let customers purchase a Top-up pack
Customers open Billing and find Bot-message top-ups. They select a pack and then select Buy to pay through Stripe.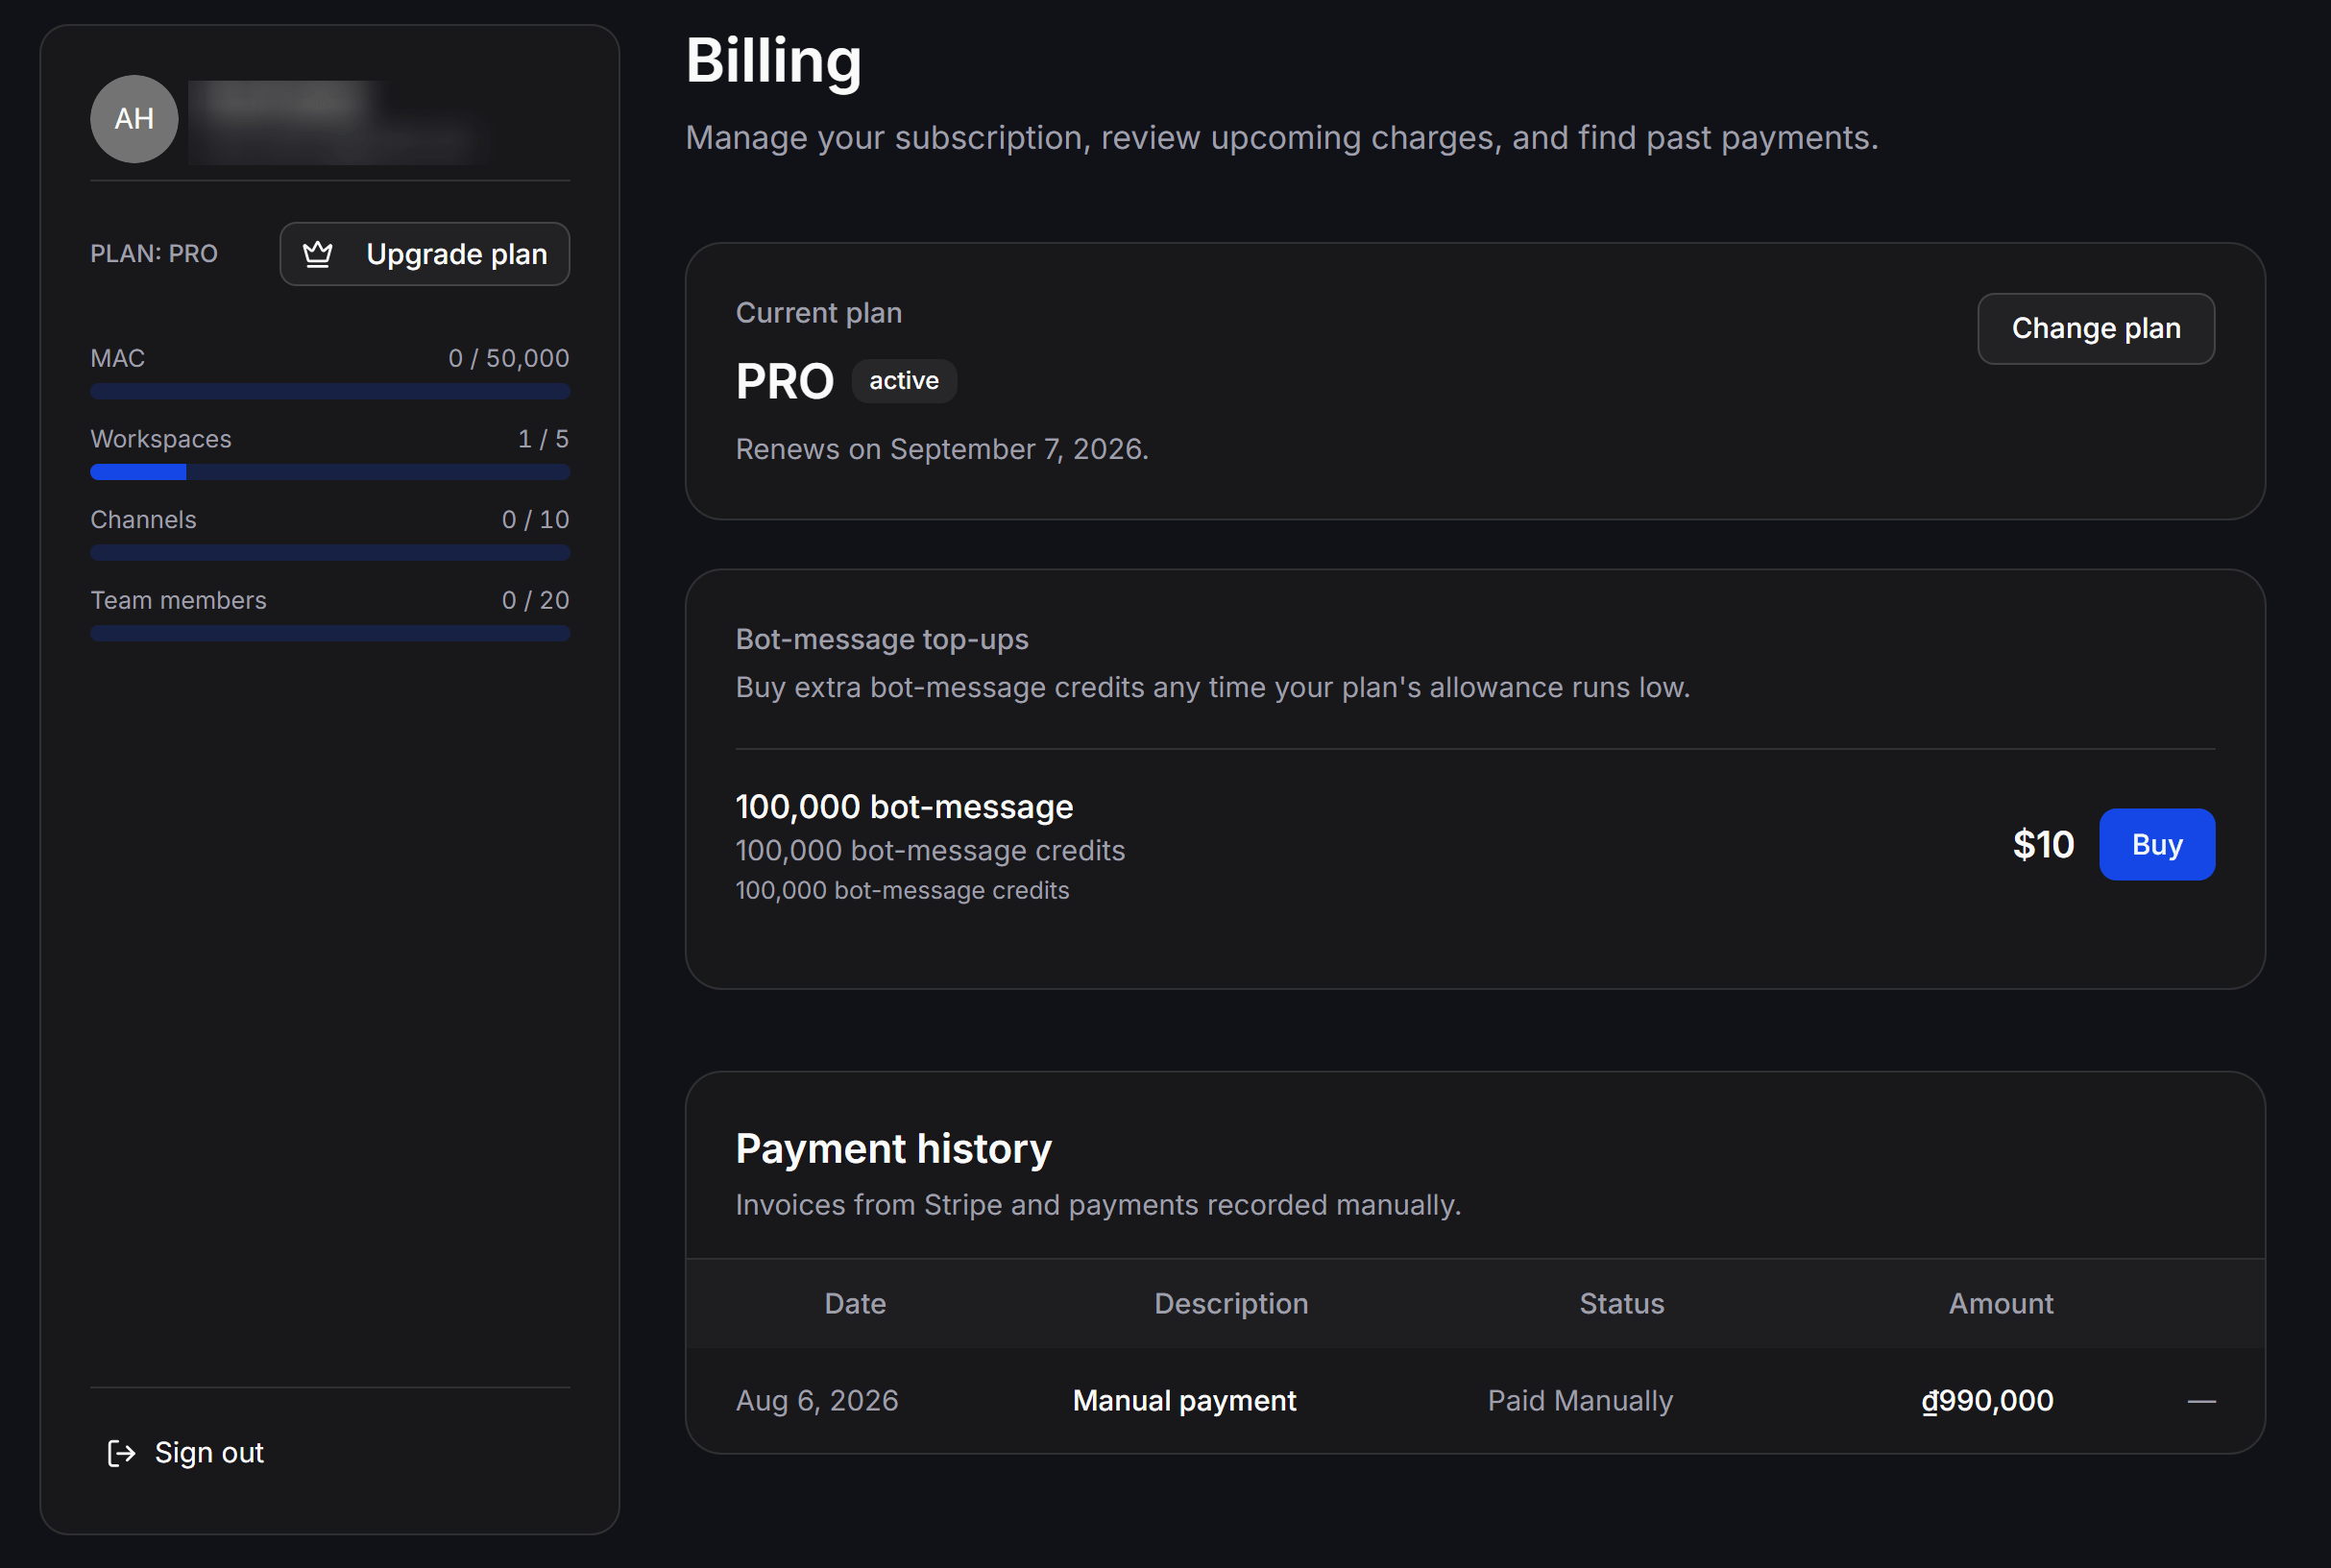
A Top-up pack adds only bot-message credits. It does not change the Plan’s Workspaces, Channels, Team members, or Monthly active contacts limits.
Create a new Plan
Create the Plan first. Then open the new Plan to add one or more prices.1
Open the new Plan form
Go to SaaS > Plans and select + New plan.
2
Enter the information and limits
Enter the name, description, free-trial period, and sort order. Then choose the Public and Active states for the Plan.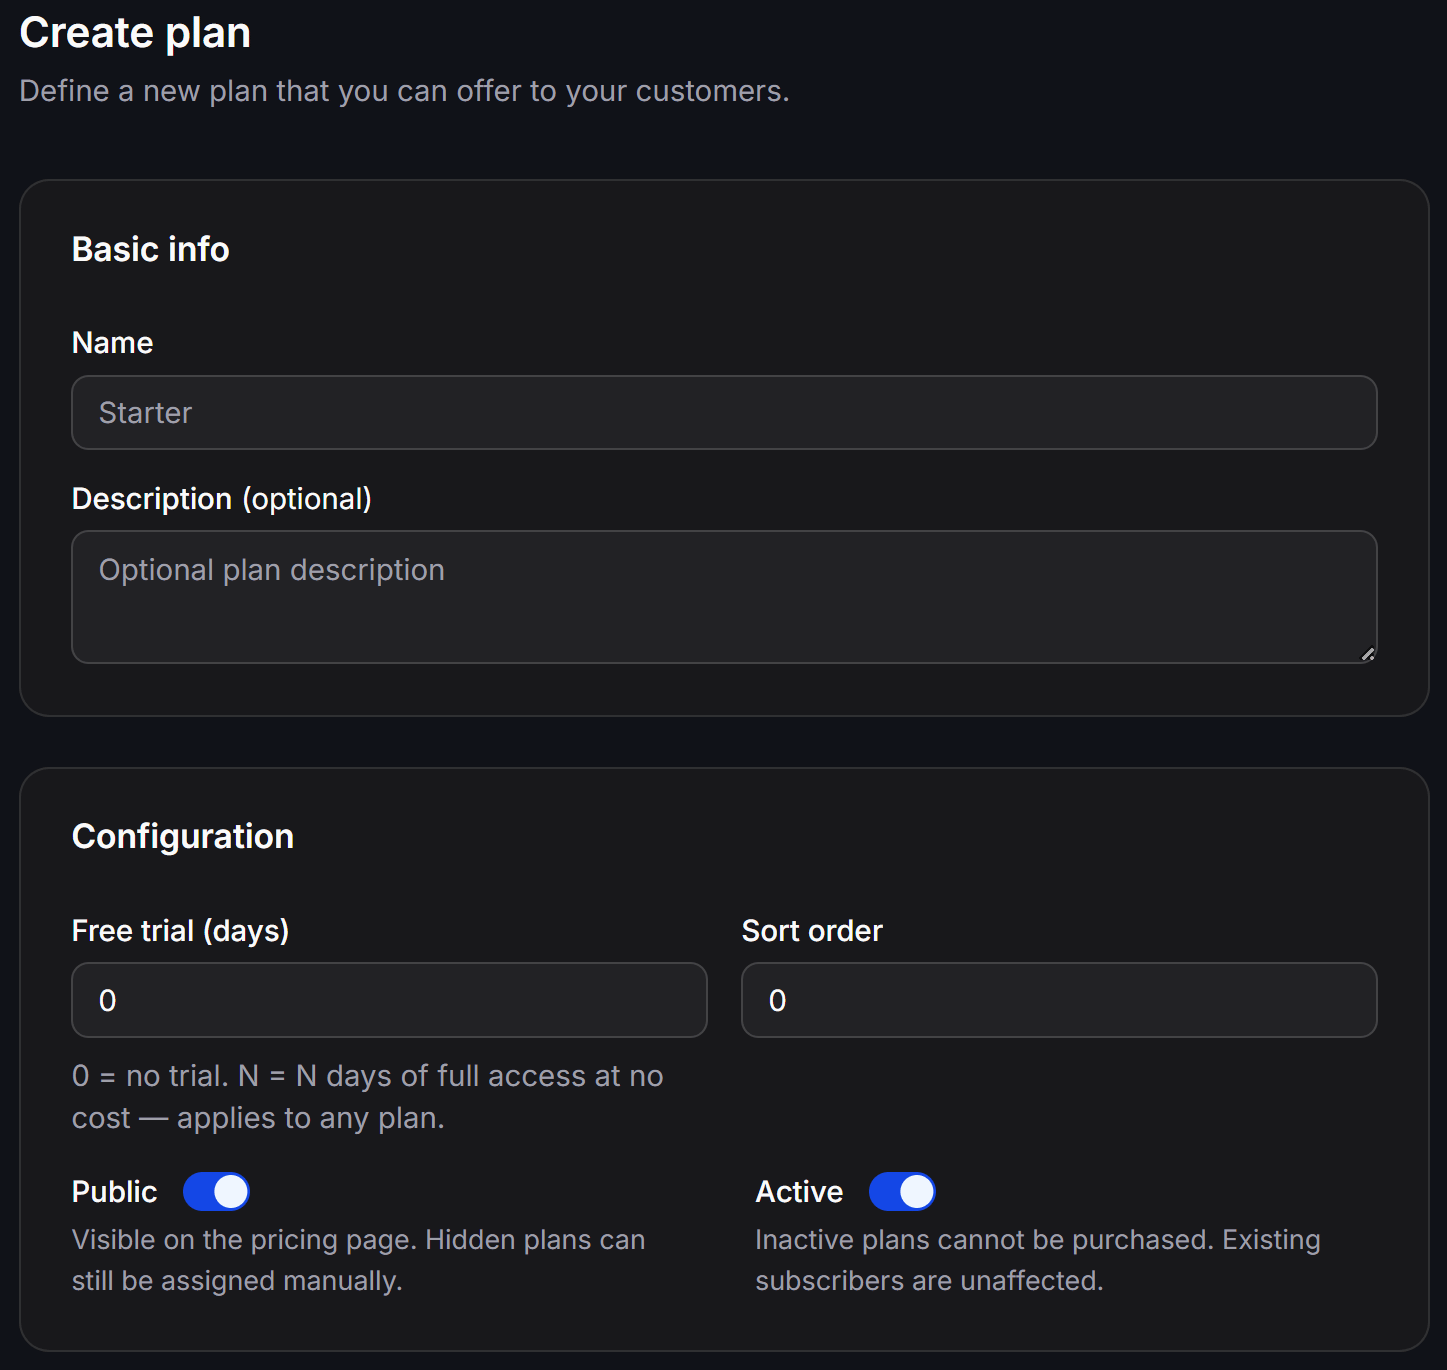
3
Create the Plan
Review the configuration, then select Create plan.
Basic info
- Name: The Plan name displayed to administrators and customers.
- Description (optional): A short description of the intended customer or the Plan’s primary value.
Starter Plan can serve a new store with one workspace and a monthly Bot message allowance.
Configuration
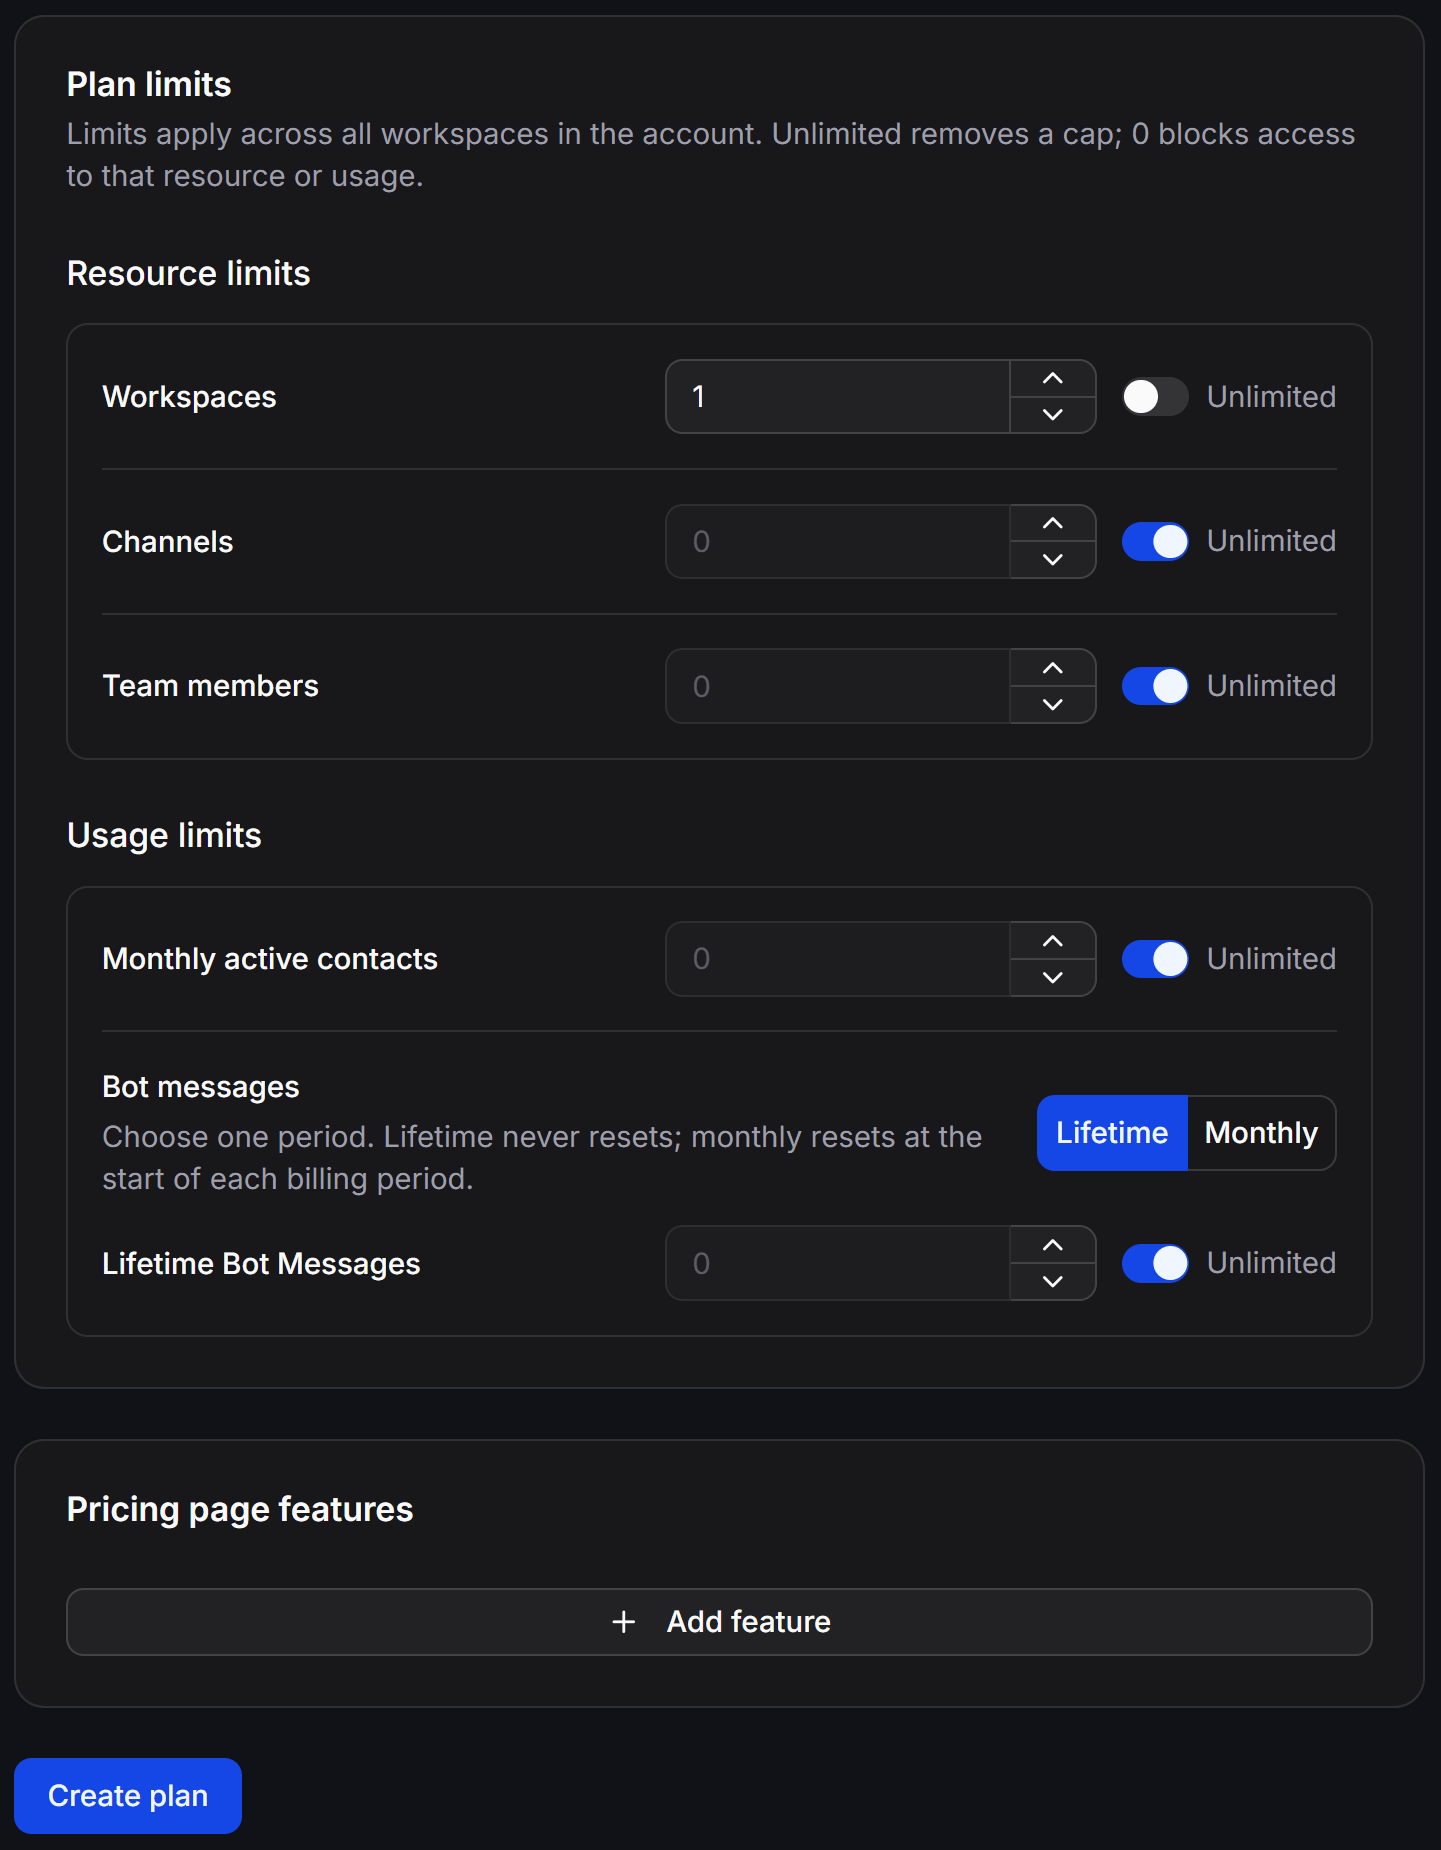
Set Plan limits
Plan limits apply across the customer’s entire account, including every workspace in that account. Each workspace does not receive a separate copy of the allowance.Enable Unlimited to remove a cap. When Unlimited is disabled, a value of
0 blocks access to that resource or usage type.Resource limits
For example, if a Plan includes
3 Channels and the customer connects two channels in workspace A, only one channel remains for all other workspaces.
Usage limits
Calculate Bot messages
Bot messages use one of these allowance periods:- Lifetime: Accumulates Bot messages for as long as the customer uses the Plan and never resets automatically.
- Monthly: Resets the number of used Bot messages at the start of each billing period.
100000 and select Monthly to allow up to 100,000 Bot messages in each billing period.
Add pricing page features
Under Pricing page features, select + Add feature to add descriptions to the Plan card. These entries help customers compare Plans but do not change the actual limits. For example:24/7 priority support or No ChatbotX branding.
Add a price to a Plan
After creating a Plan, open its details page and find Linked prices. Select + Add price to create a price.Manual / Offline price
Select Manual / Offline when you confirm payments yourself or sell a Plan under a custom agreement.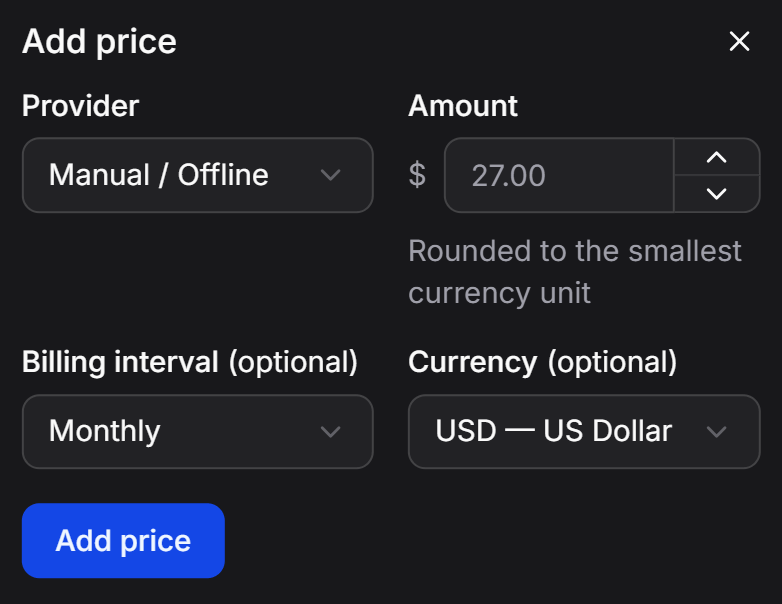
For example, enter
27 with USD to charge USD 27. With VND, enter 270000 to charge VND 270,000. Do not convert the amount to cents before entering it.
The current interface displays these currencies:
Select Add price to link the price to the Plan.
Stripe price
Select Stripe to collect payments and manage subscriptions through Stripe. Connect Stripe before adding a price to the Plan.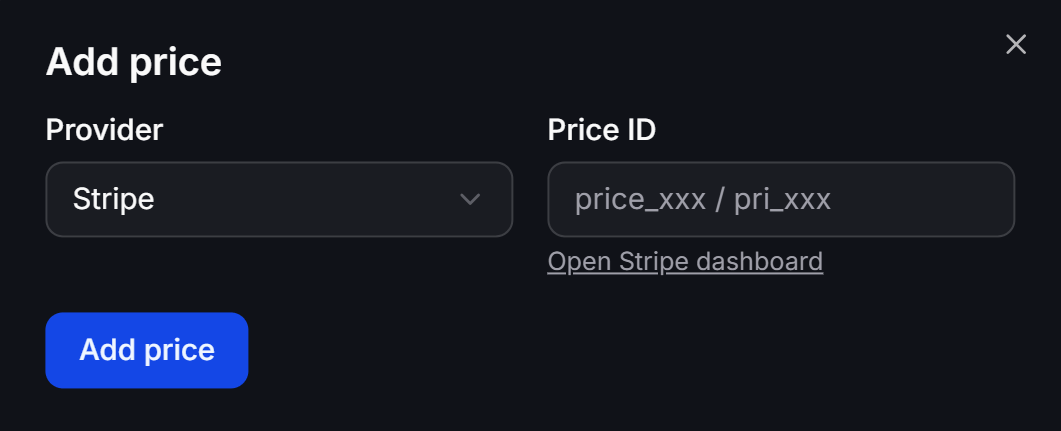
Check before publishing
Before sharing the pricing page with customers, confirm that:- The Plan has both Public and Active enabled.
0appears only for resources you intend to block.- Bot messages use the correct Lifetime or Monthly period.
- Amount, Billing interval, and Currency match the published price.
- Pricing page features match the configured limits.