If you do not have a dedicated SMTP provider yet, see the Emails configuration guide for recommended providers and connection string examples.
Step 1: Get SMTP credentials from your provider
Depending on the Email service provider you are using, you will need the following basic information to connect with ChatbotX:- SMTP Host/Server
- SMTP Port (Usually
465for SSL or587for TLS) - SMTP Username (Usually your email address)
- SMTP Password (App Password or API Key, not your main account login password)
1. Gmail / Google Workspace
1. Gmail / Google Workspace
Enable 2-Step Verification
Log in to your Google account, go to the Security section, and make sure you have turned on 2-Step Verification.
Get the password
Enter an app name (e.g.,
ChatbotX SMTP) and click Create. Google will provide you with a 16-letter string. This is your SMTP Password.Connection parameters
- Host:
smtp.gmail.com - Port:
465(SSL) or587(TLS) - Username: Your Gmail address.
See the official documentation for more details: Sign in with App Passwords - Google Account Help
2. Outlook / Office 365
2. Outlook / Office 365
Access security settings
Log in to your Microsoft account, go to Security > Advanced Security Options.
Create an App Password
Ensure Two-step verification is turned on. Then scroll down to the App passwords section and click Create a new app password.
Connection parameters
- Host:
smtp-mail.outlook.com(orsmtp.office365.comfor business accounts) - Port:
587(TLS) - Username: Your Outlook/Office 365 email address.
See the official documentation for more details: Manage app passwords - Microsoft Support
3. SendGrid (Twilio)
3. SendGrid (Twilio)
Connection parameters
- Host:
smtp.sendgrid.net - Port:
465(SSL) or587(TLS) - Username:
apikey(Write exactly “apikey”, not your email).
See the official documentation for more details: Sending Email with SMTP - Twilio SendGrid Docs
4. Amazon SES
4. Amazon SES
Access SMTP Settings
In the AWS console, open the Amazon SES service, and navigate to SMTP Settings.
Create SMTP credentials
Click Create My SMTP Credentials. The system will create a new IAM user with permissions to send emails.
Get Username and Password
Download or immediately copy the provided SMTP Username and SMTP Password on the final screen.
Connection parameters
- Host: (Depends on your Region, e.g.,
email-smtp.us-east-1.amazonaws.com) - Port:
465or587 - Username: The newly created SMTP Username string.
- Password: The newly created SMTP Password string.
See the official documentation for more details: Obtaining SMTP credentials - Amazon SES Developer Guide
5. Brevo (Sendinblue)
5. Brevo (Sendinblue)
Connection parameters
- Host:
smtp-relay.brevo.com - Port:
587 - Username: Your Brevo login email.
- Password: The newly created SMTP key string.
See the official documentation for more details: Set up Brevo SMTP - Brevo Help Center
Step 2: Create an Email Channel
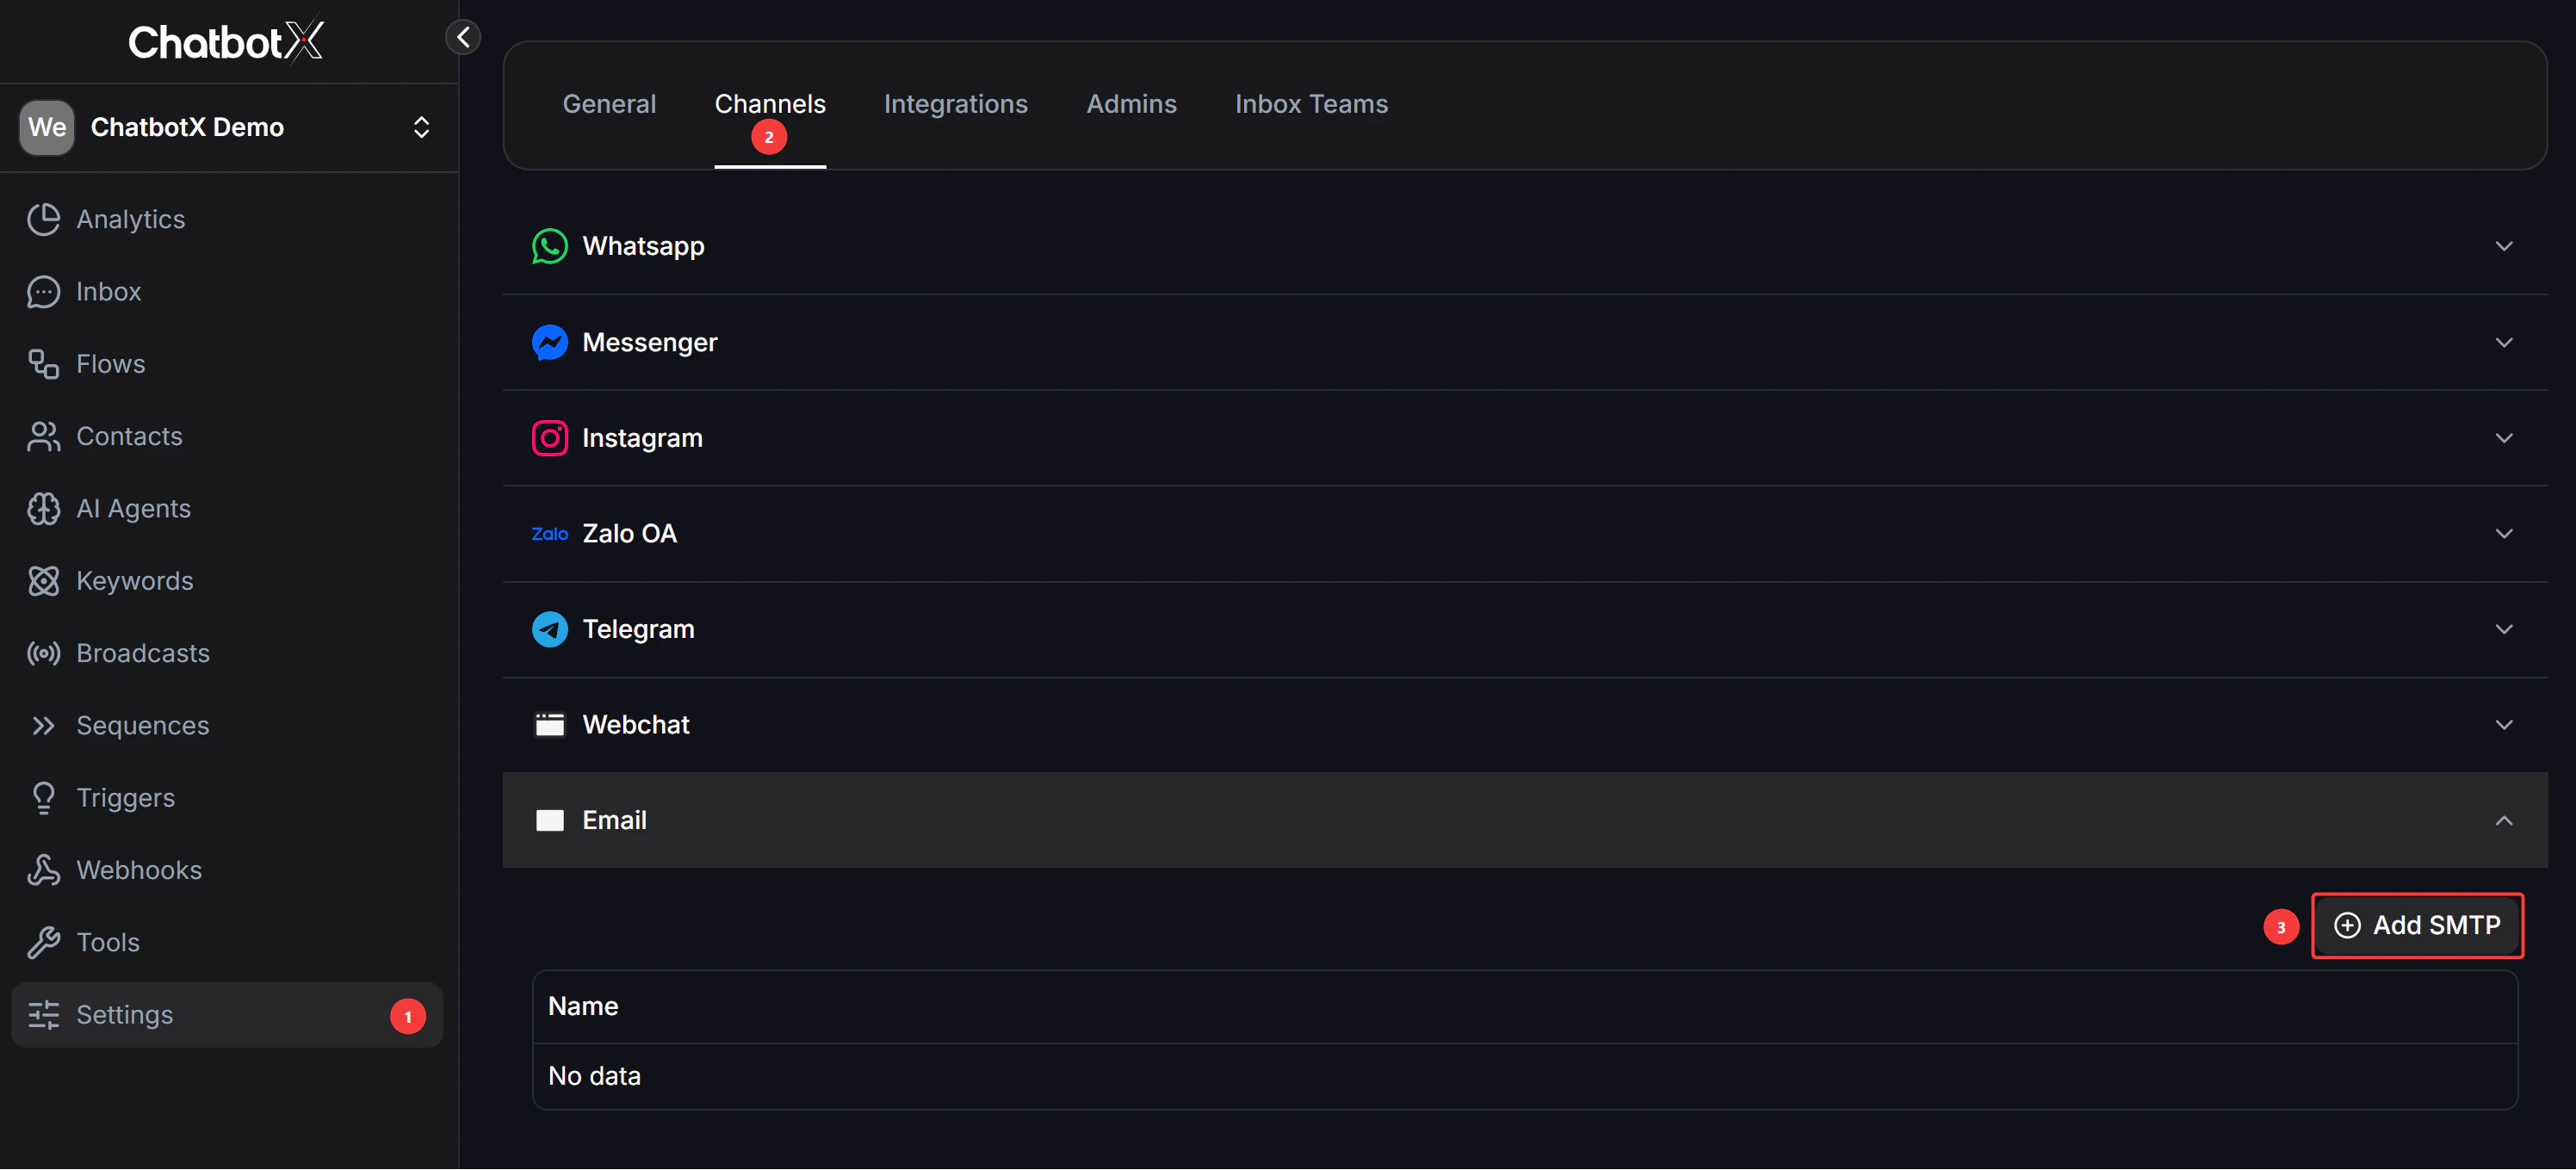
Choose a Provider
Find and select your Email service provider from the dropdown list (e.g., Google (Gmail), Outlook, SendGrid, Amazon SES,…).
Enter SMTP connection details
Fill in the SMTP credentials obtained in Step 1. The fields include: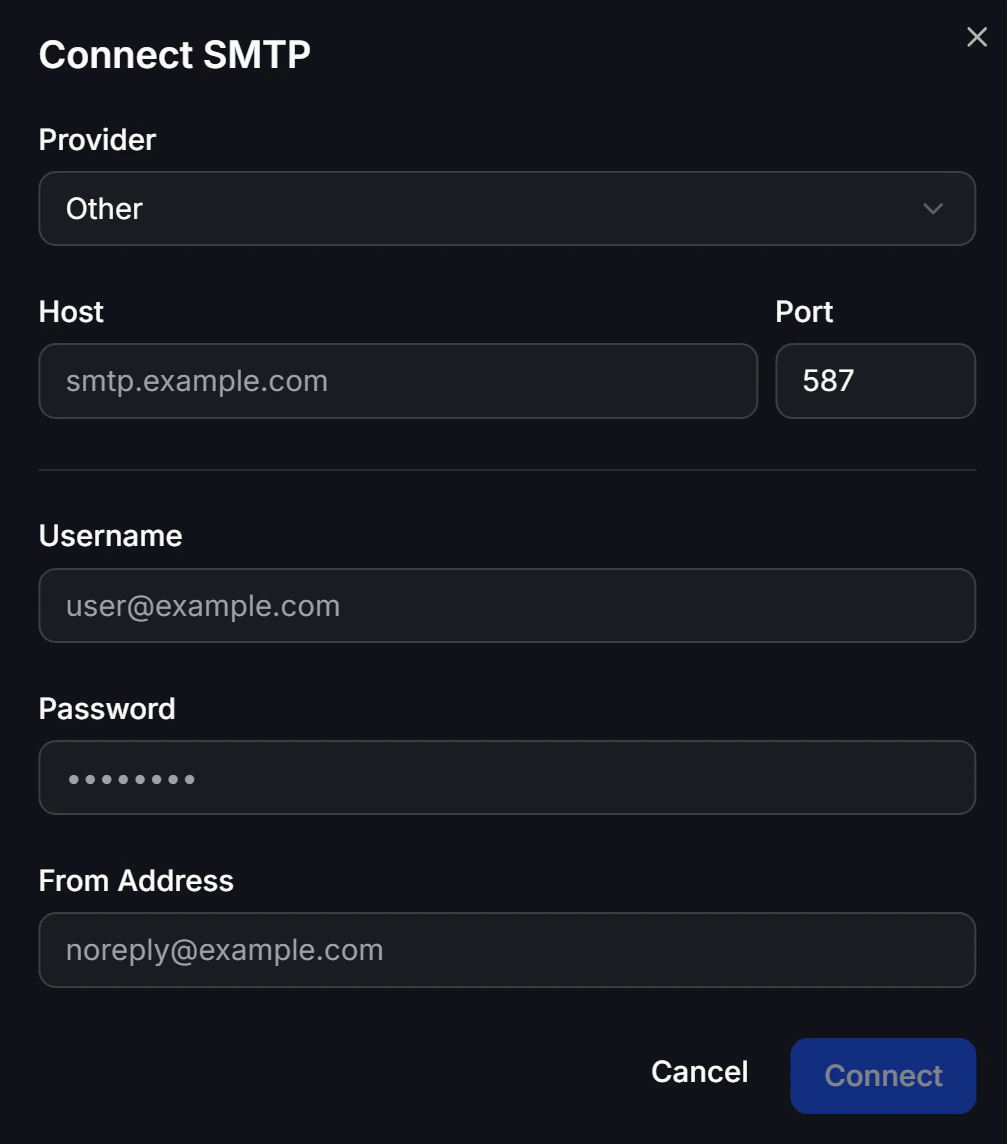
| Field | Description |
|---|---|
| Host | The provider’s SMTP server (e.g., smtp.gmail.com) |
| Port | The SMTP connection port (usually 587 or 465) |
| Username | SMTP login name (usually the email address) |
| Password | App Password or SMTP Key (not the main login password) |
| From Address | The email address that will appear as the sender when customers receive the email (e.g., noreply@yourdomain.com) |
Step 3: Request permission (Opt-In) and Collect Customer Email
Before you can send Emails to customers via ChatbotX Flow, you must have two elements: Storing their Email address and the Customer has agreed to receive emails (Email Opt-In).Collect Email using Get User Data
Use the Get User Data block in the flow to ask for the customer’s email address. In the Reply Format section, select the Email format and save the result to an Output Custom Field (e.g., 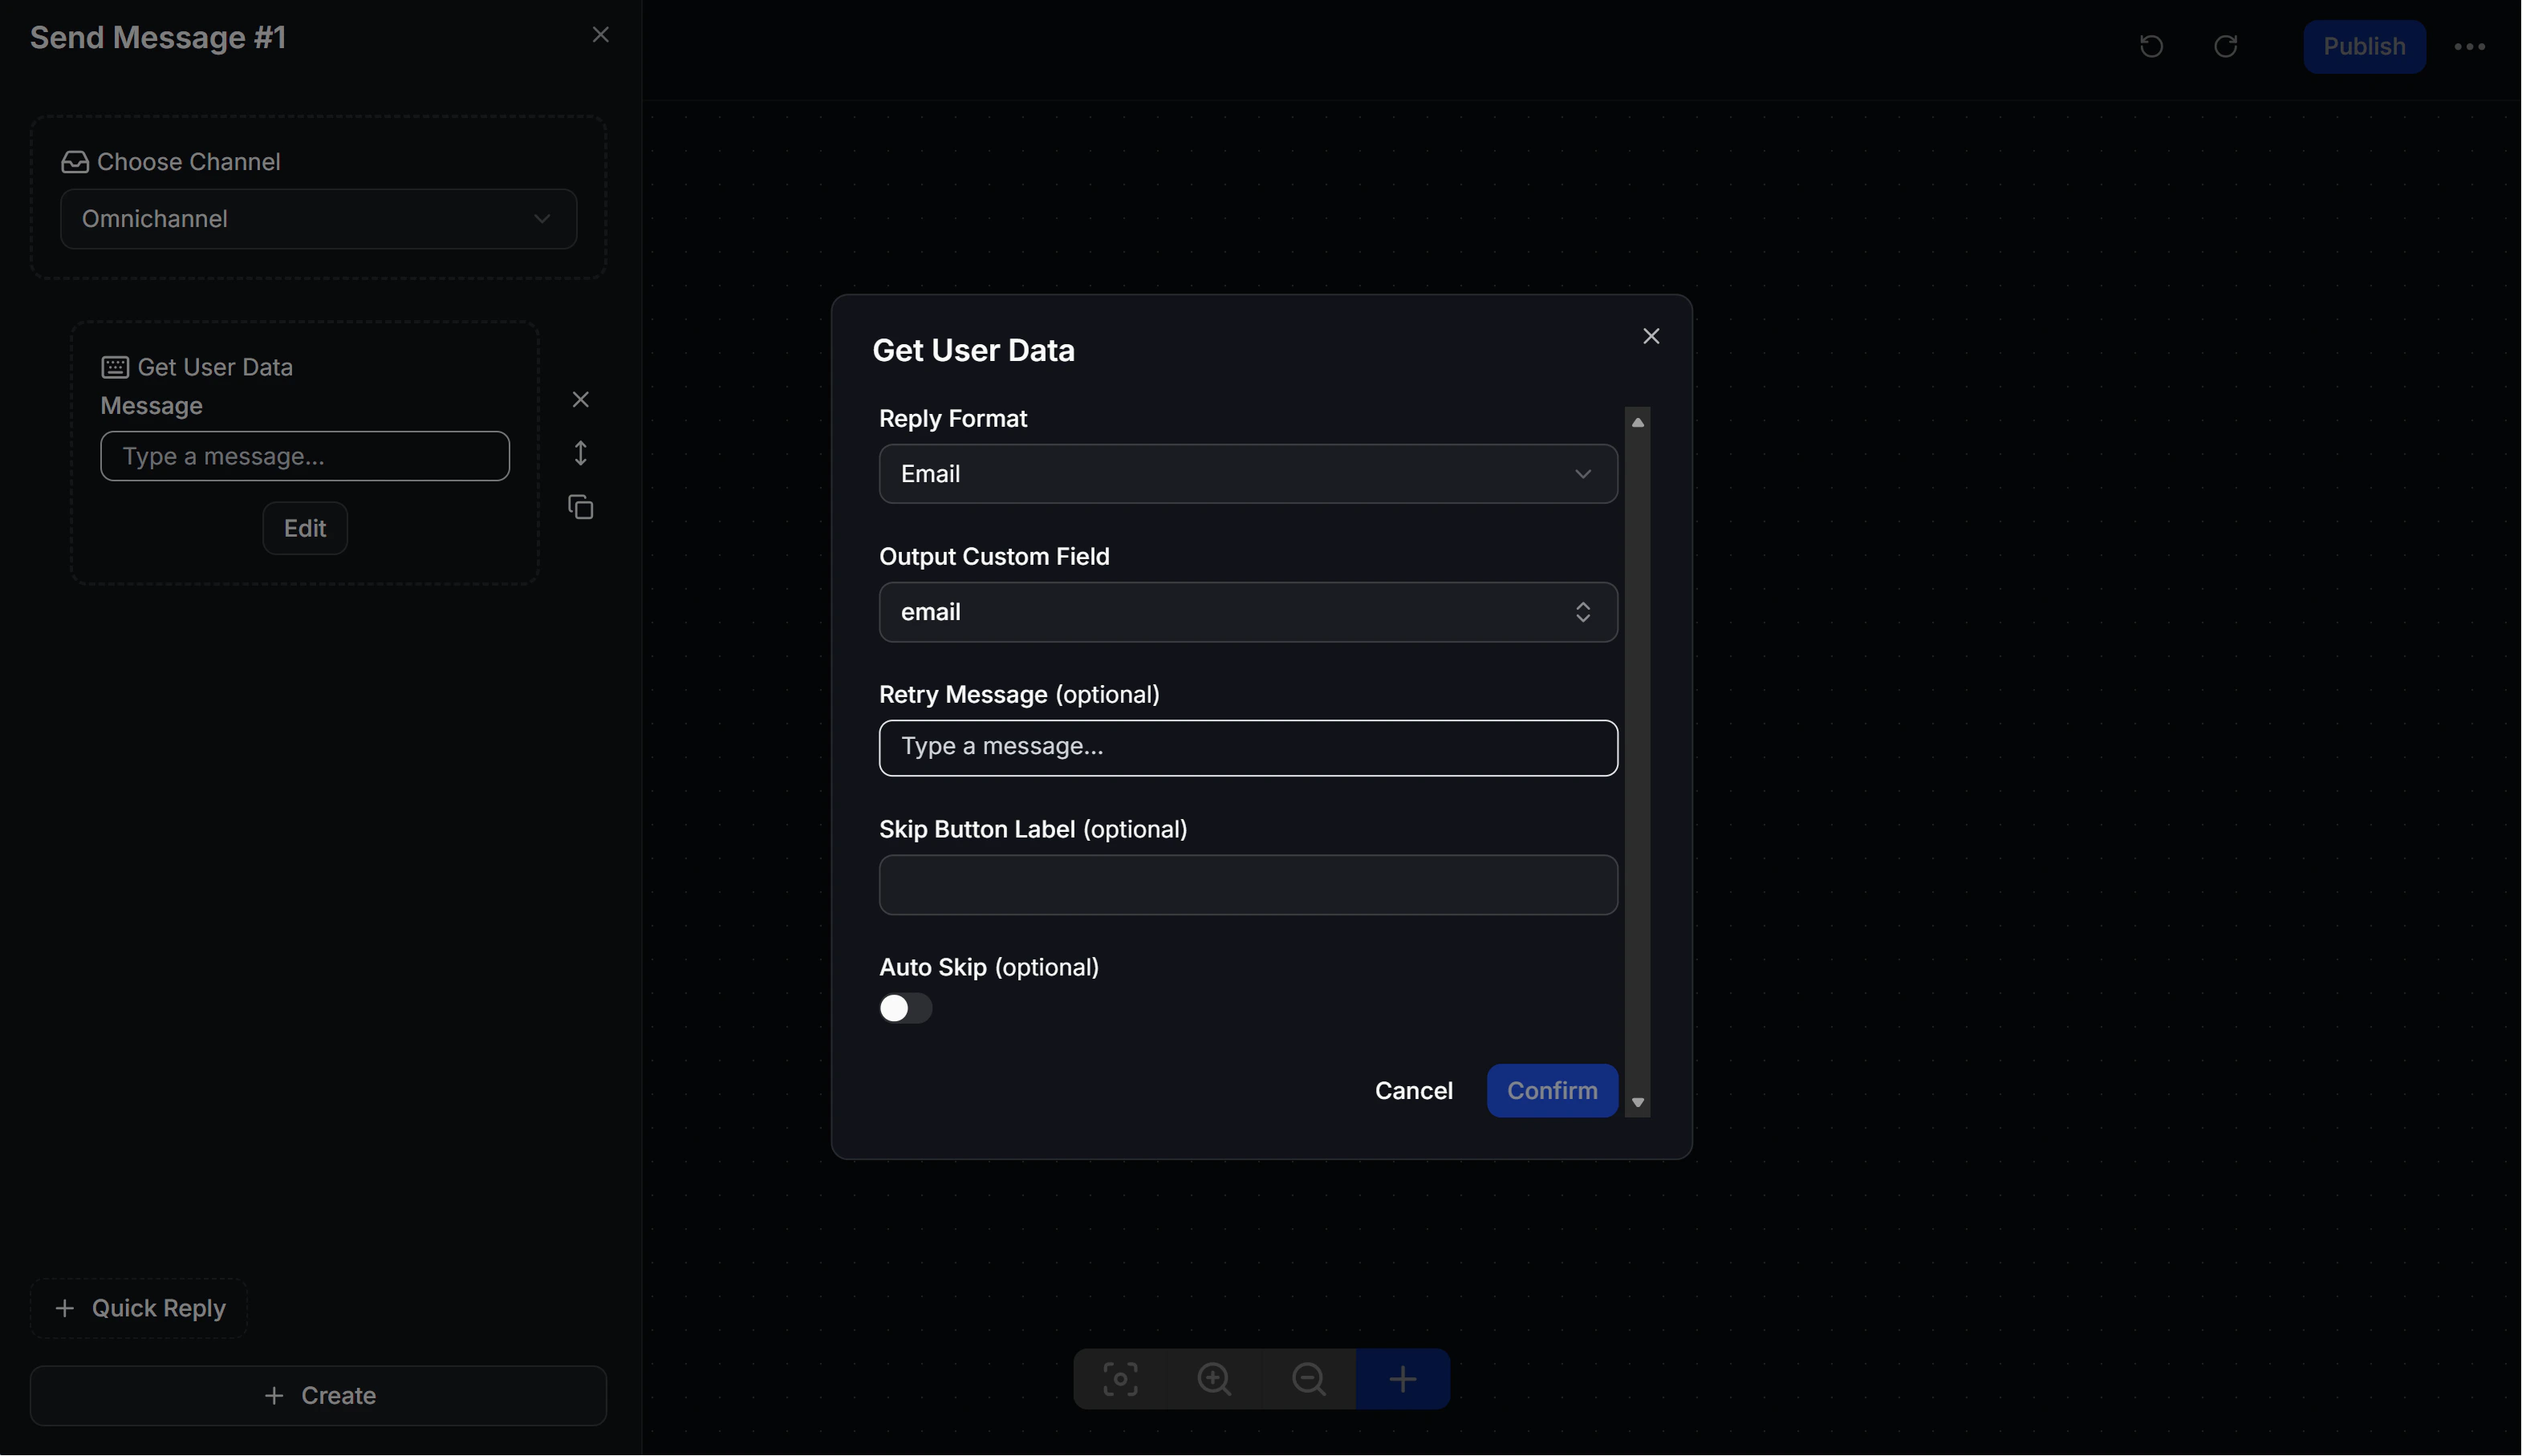
email field).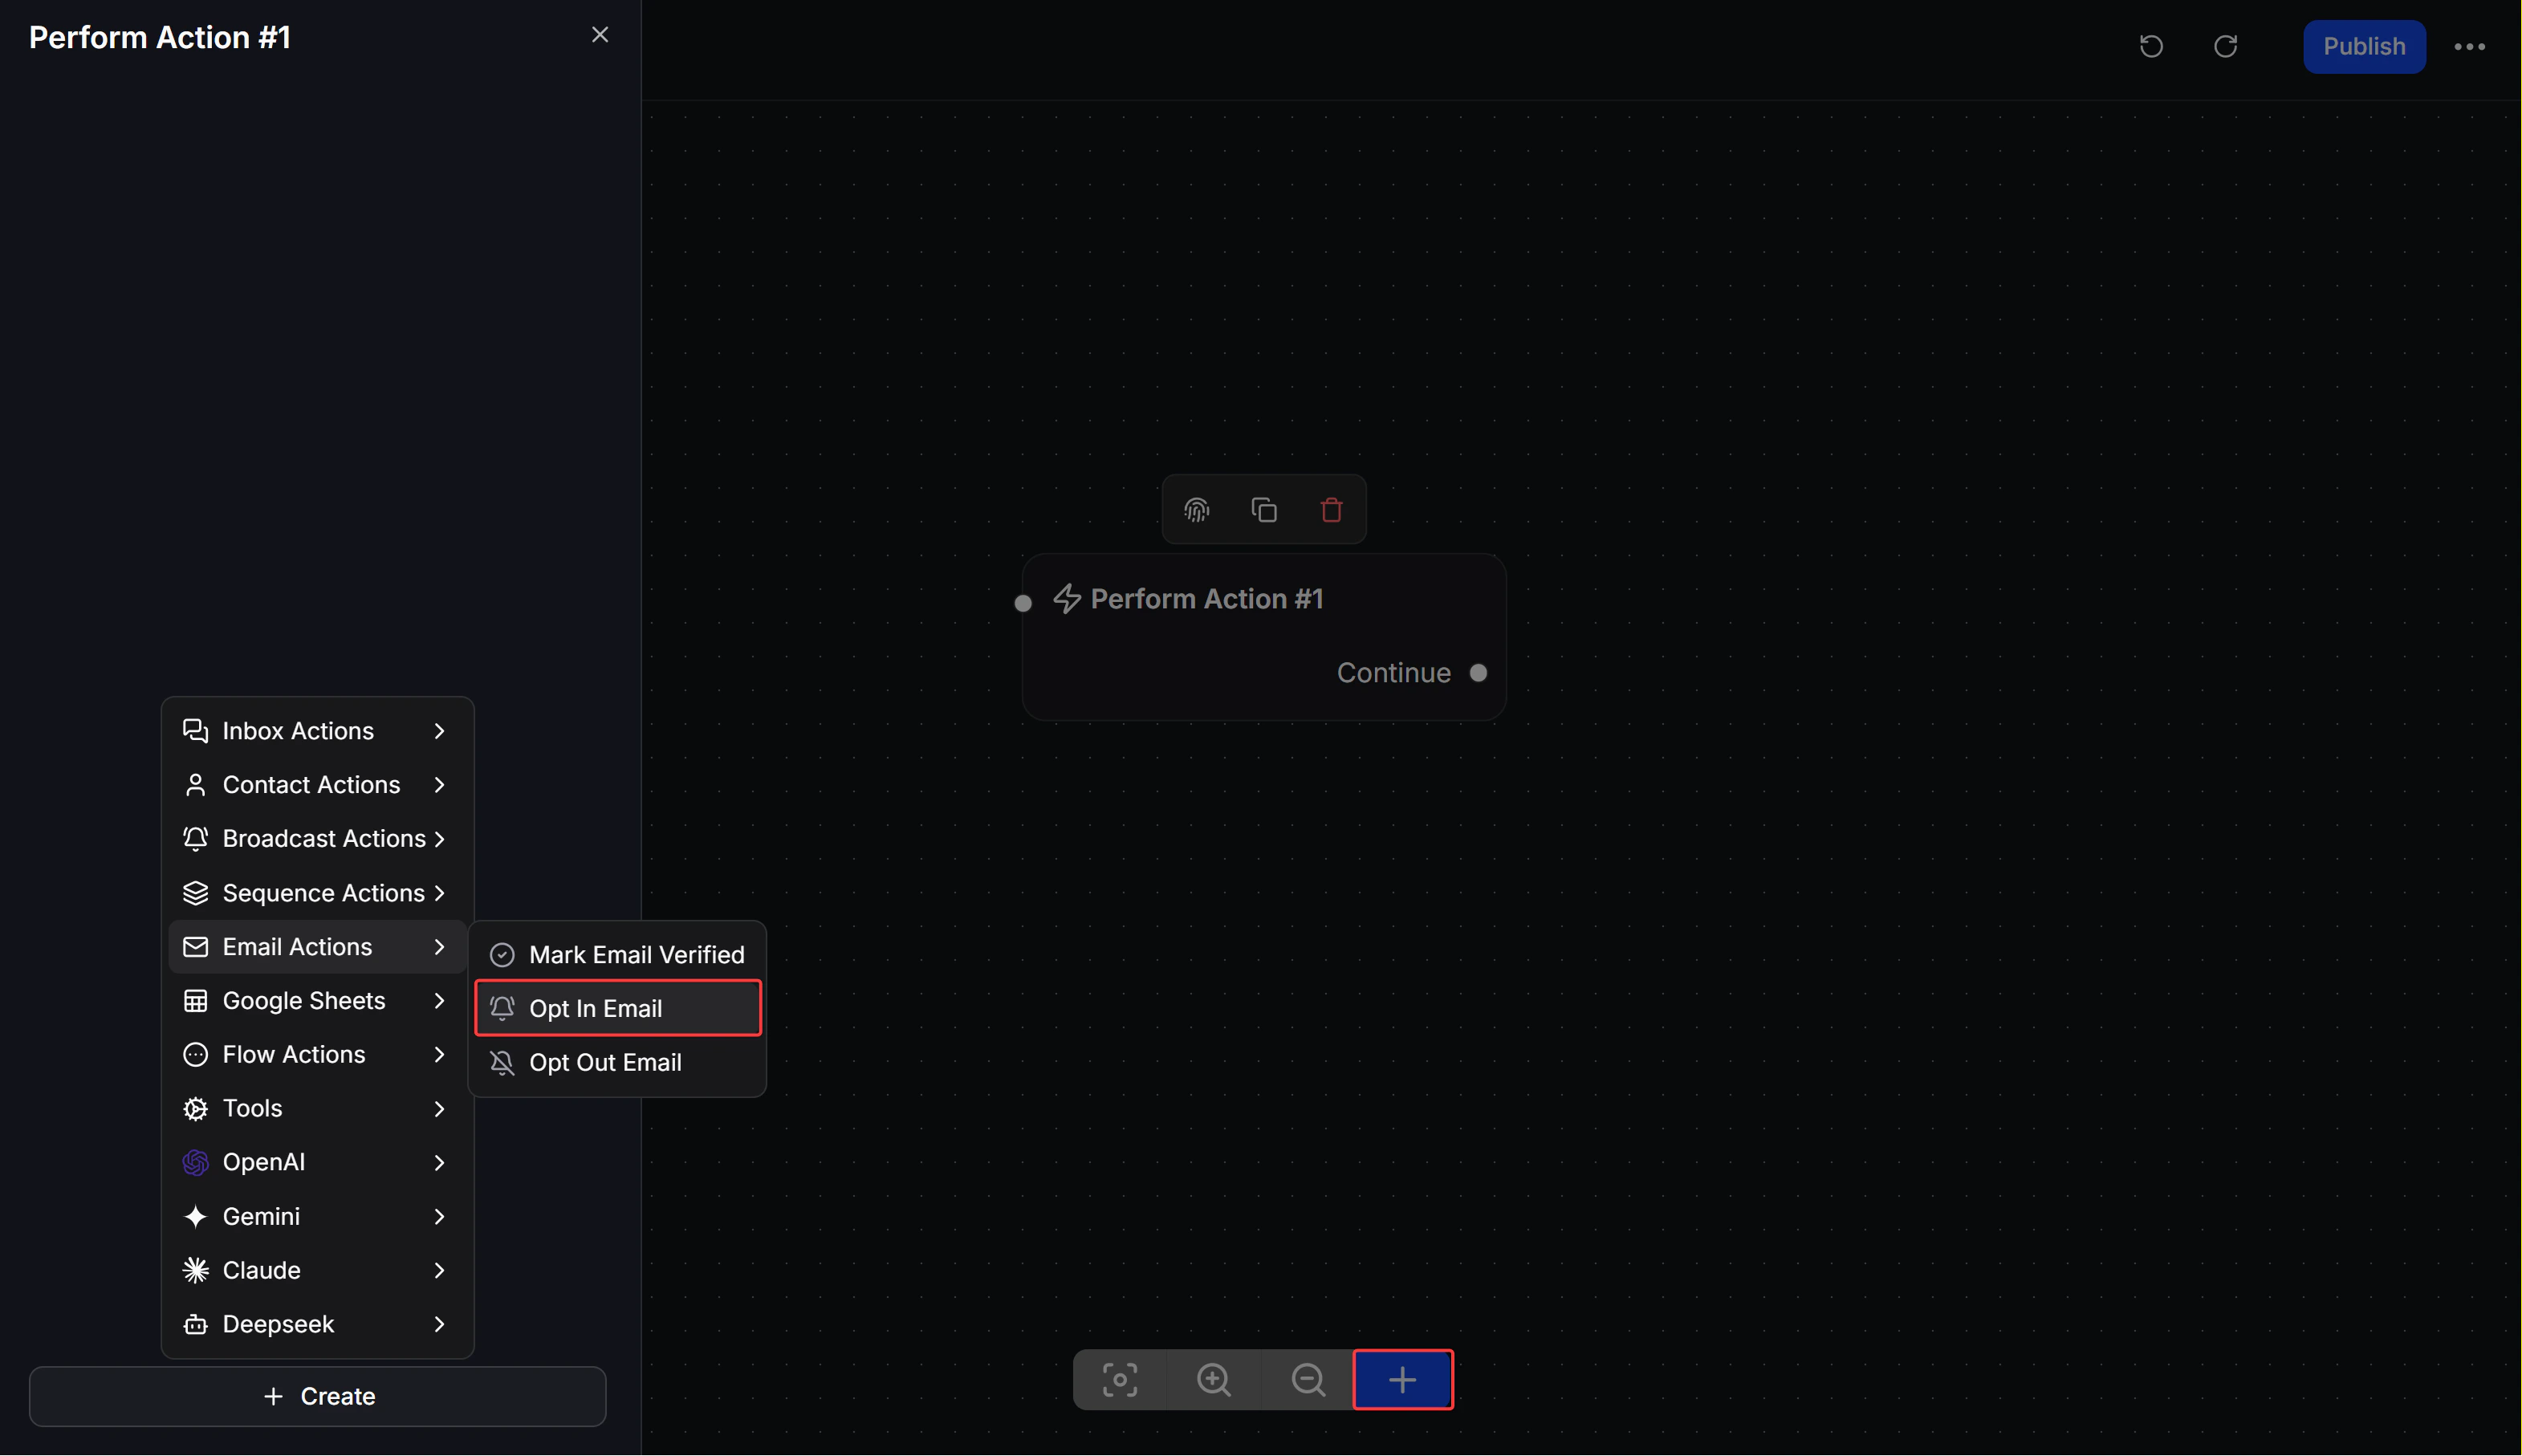
Step 4: Set up automated Email sending in Flow
Once customers have agreed to receive emails, you can automatically send emails anywhere in the Flow.Add the Send Mail node
In the Flow workspace, click the + button to open the node menu. Select Send Mail from the list.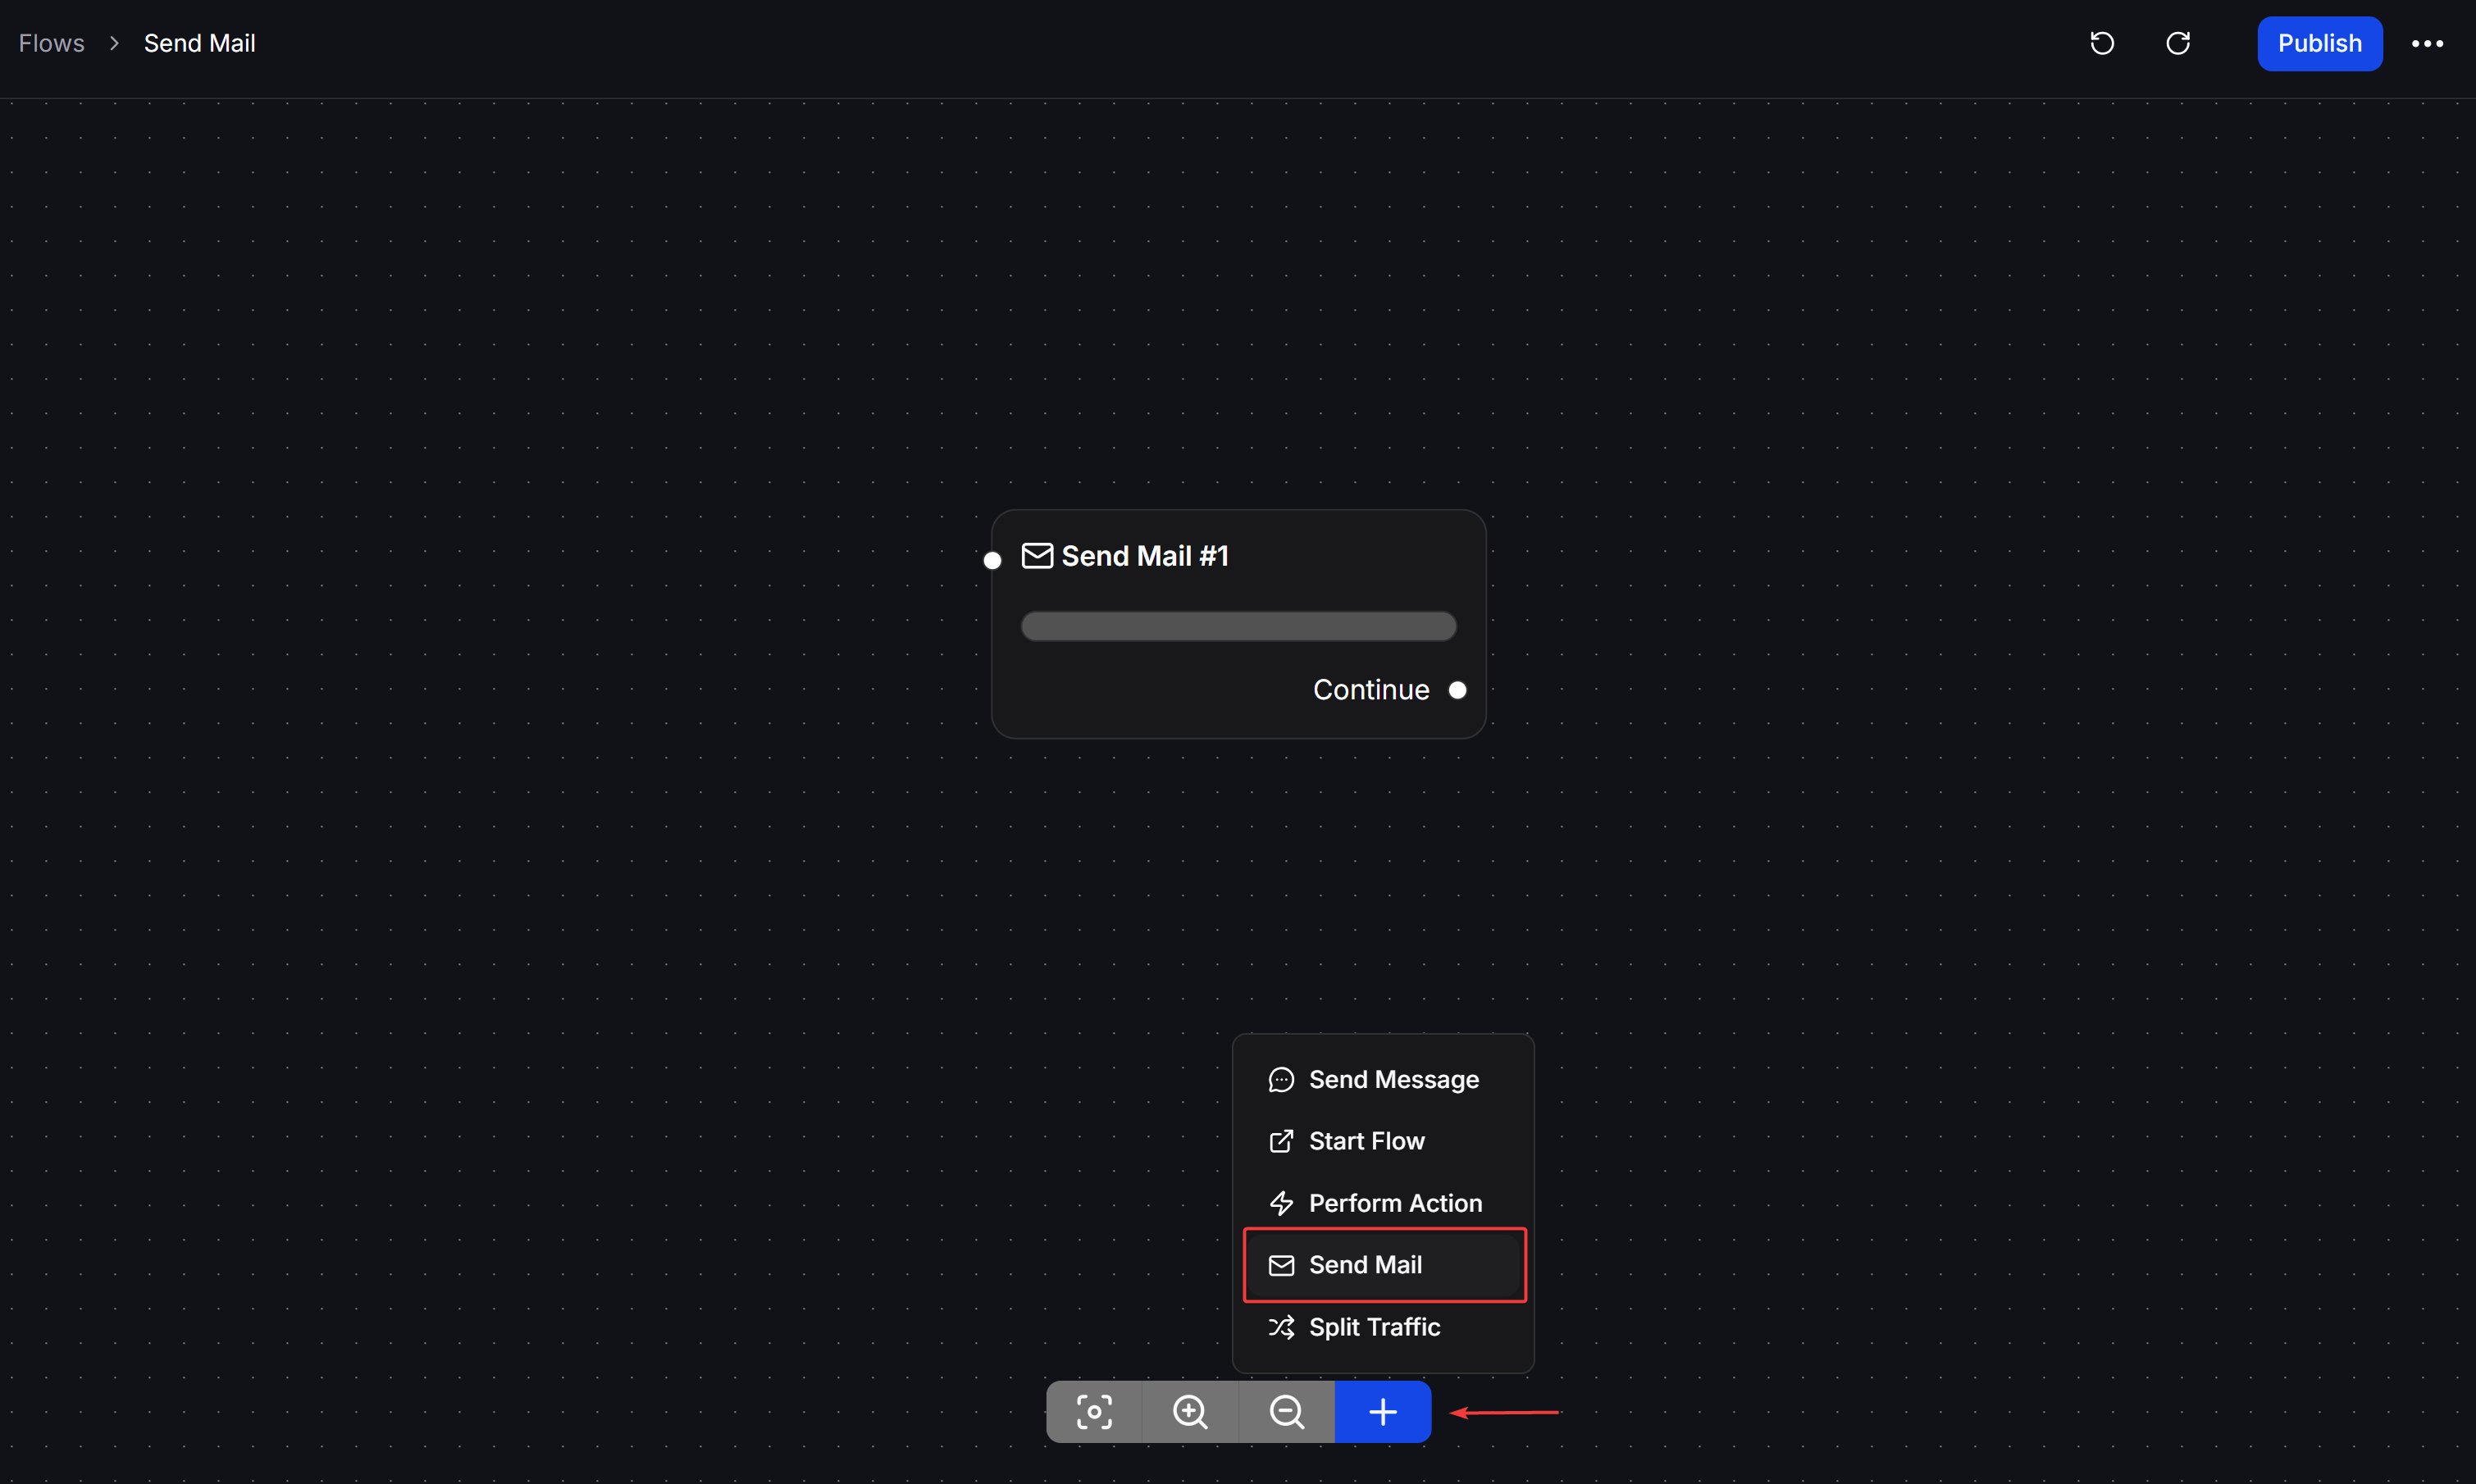
Choose the sending channel and topic
In the Send Mail configuration panel, choose the SMTP Channel that should send this email. If you have connected more than one SMTP channel, select the sender that matches this Flow.You can also choose a Topic ID. An Email Topic helps you track email performance and run actions based on how contacts interact with your emails.
Fill in the email details
Complete the main fields in the Send Mail panel: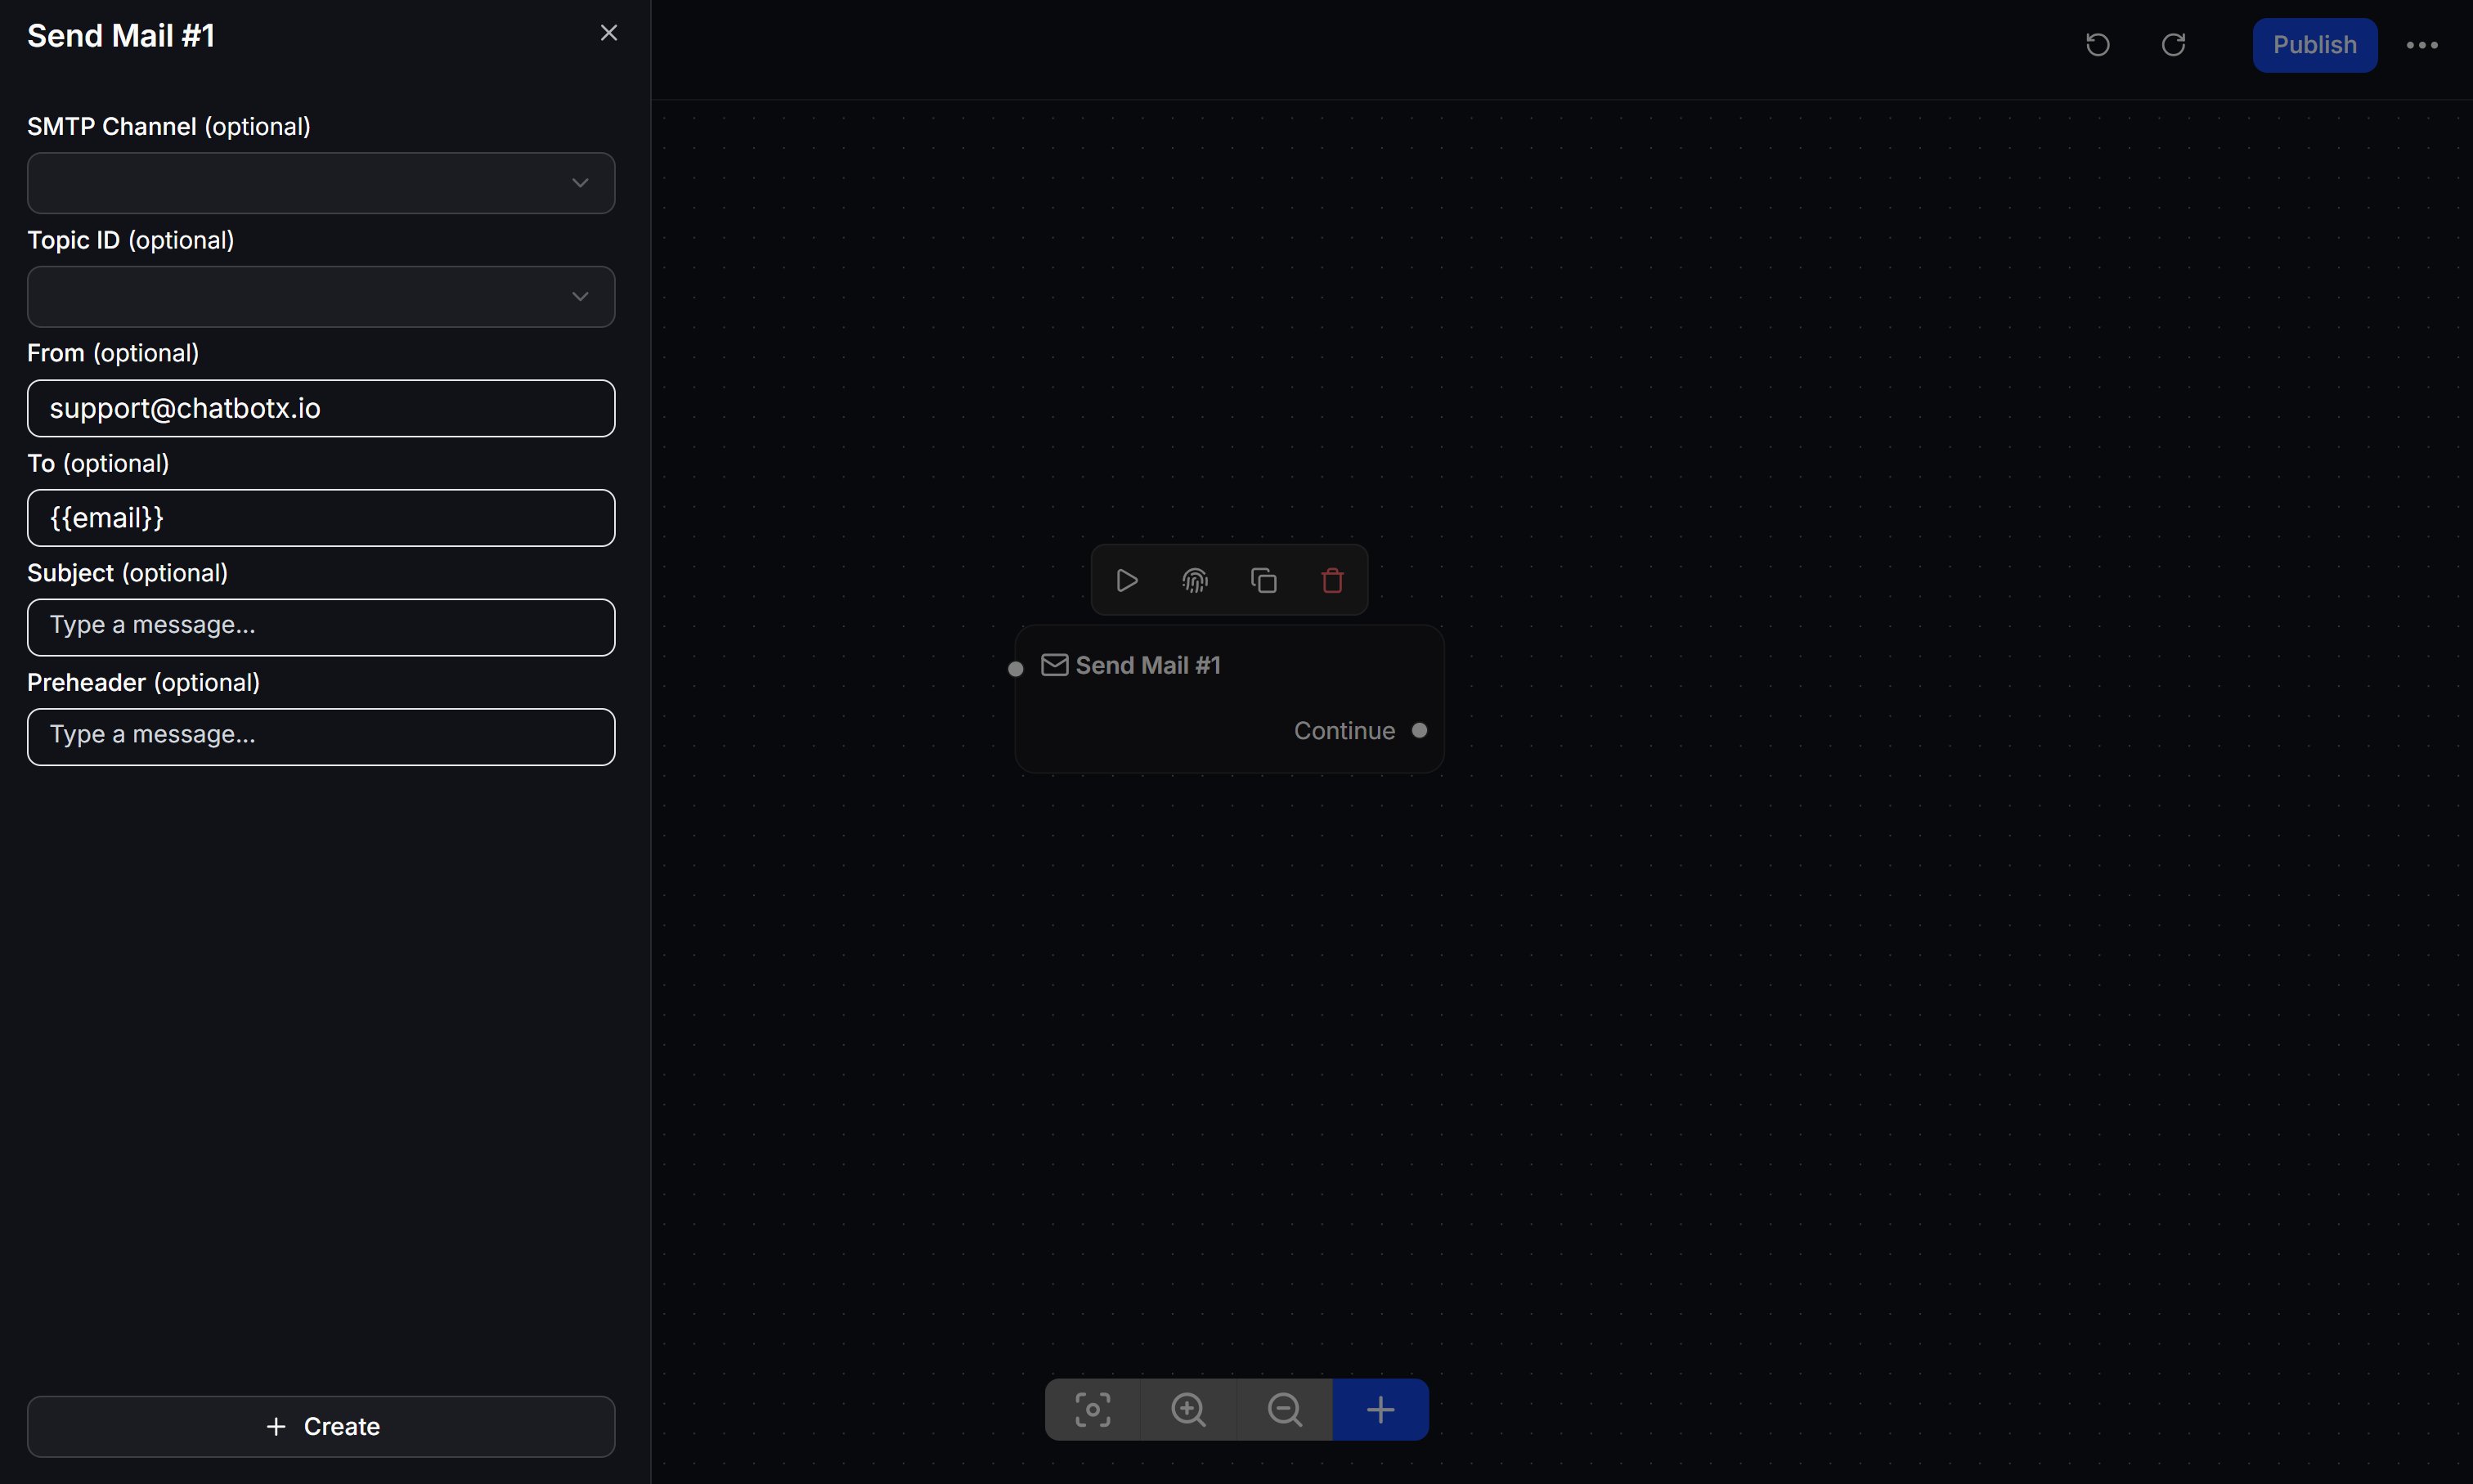
- From: The sender email address. You can use a fixed address or a variable such as
{{email}}if your Flow needs a dynamic sender. - To: By default, the system will send to the current user’s email (if provided). You can also set it to send internal notification emails to your team.
- Subject: The subject of the email. You can use variables (e.g.,
{{first_name}}) to personalize the subject. - Preheader: The short preview text that appears in many inboxes under the subject line.
Compose the email content
Build the email body with the editor inside the Send Mail panel. You can add Heading, Text, Image, Button, Line, Spacing, and Code blocks.Use variables from the contact profile or Custom Fields to personalize the message, such as order details, customer name, or support ticket information.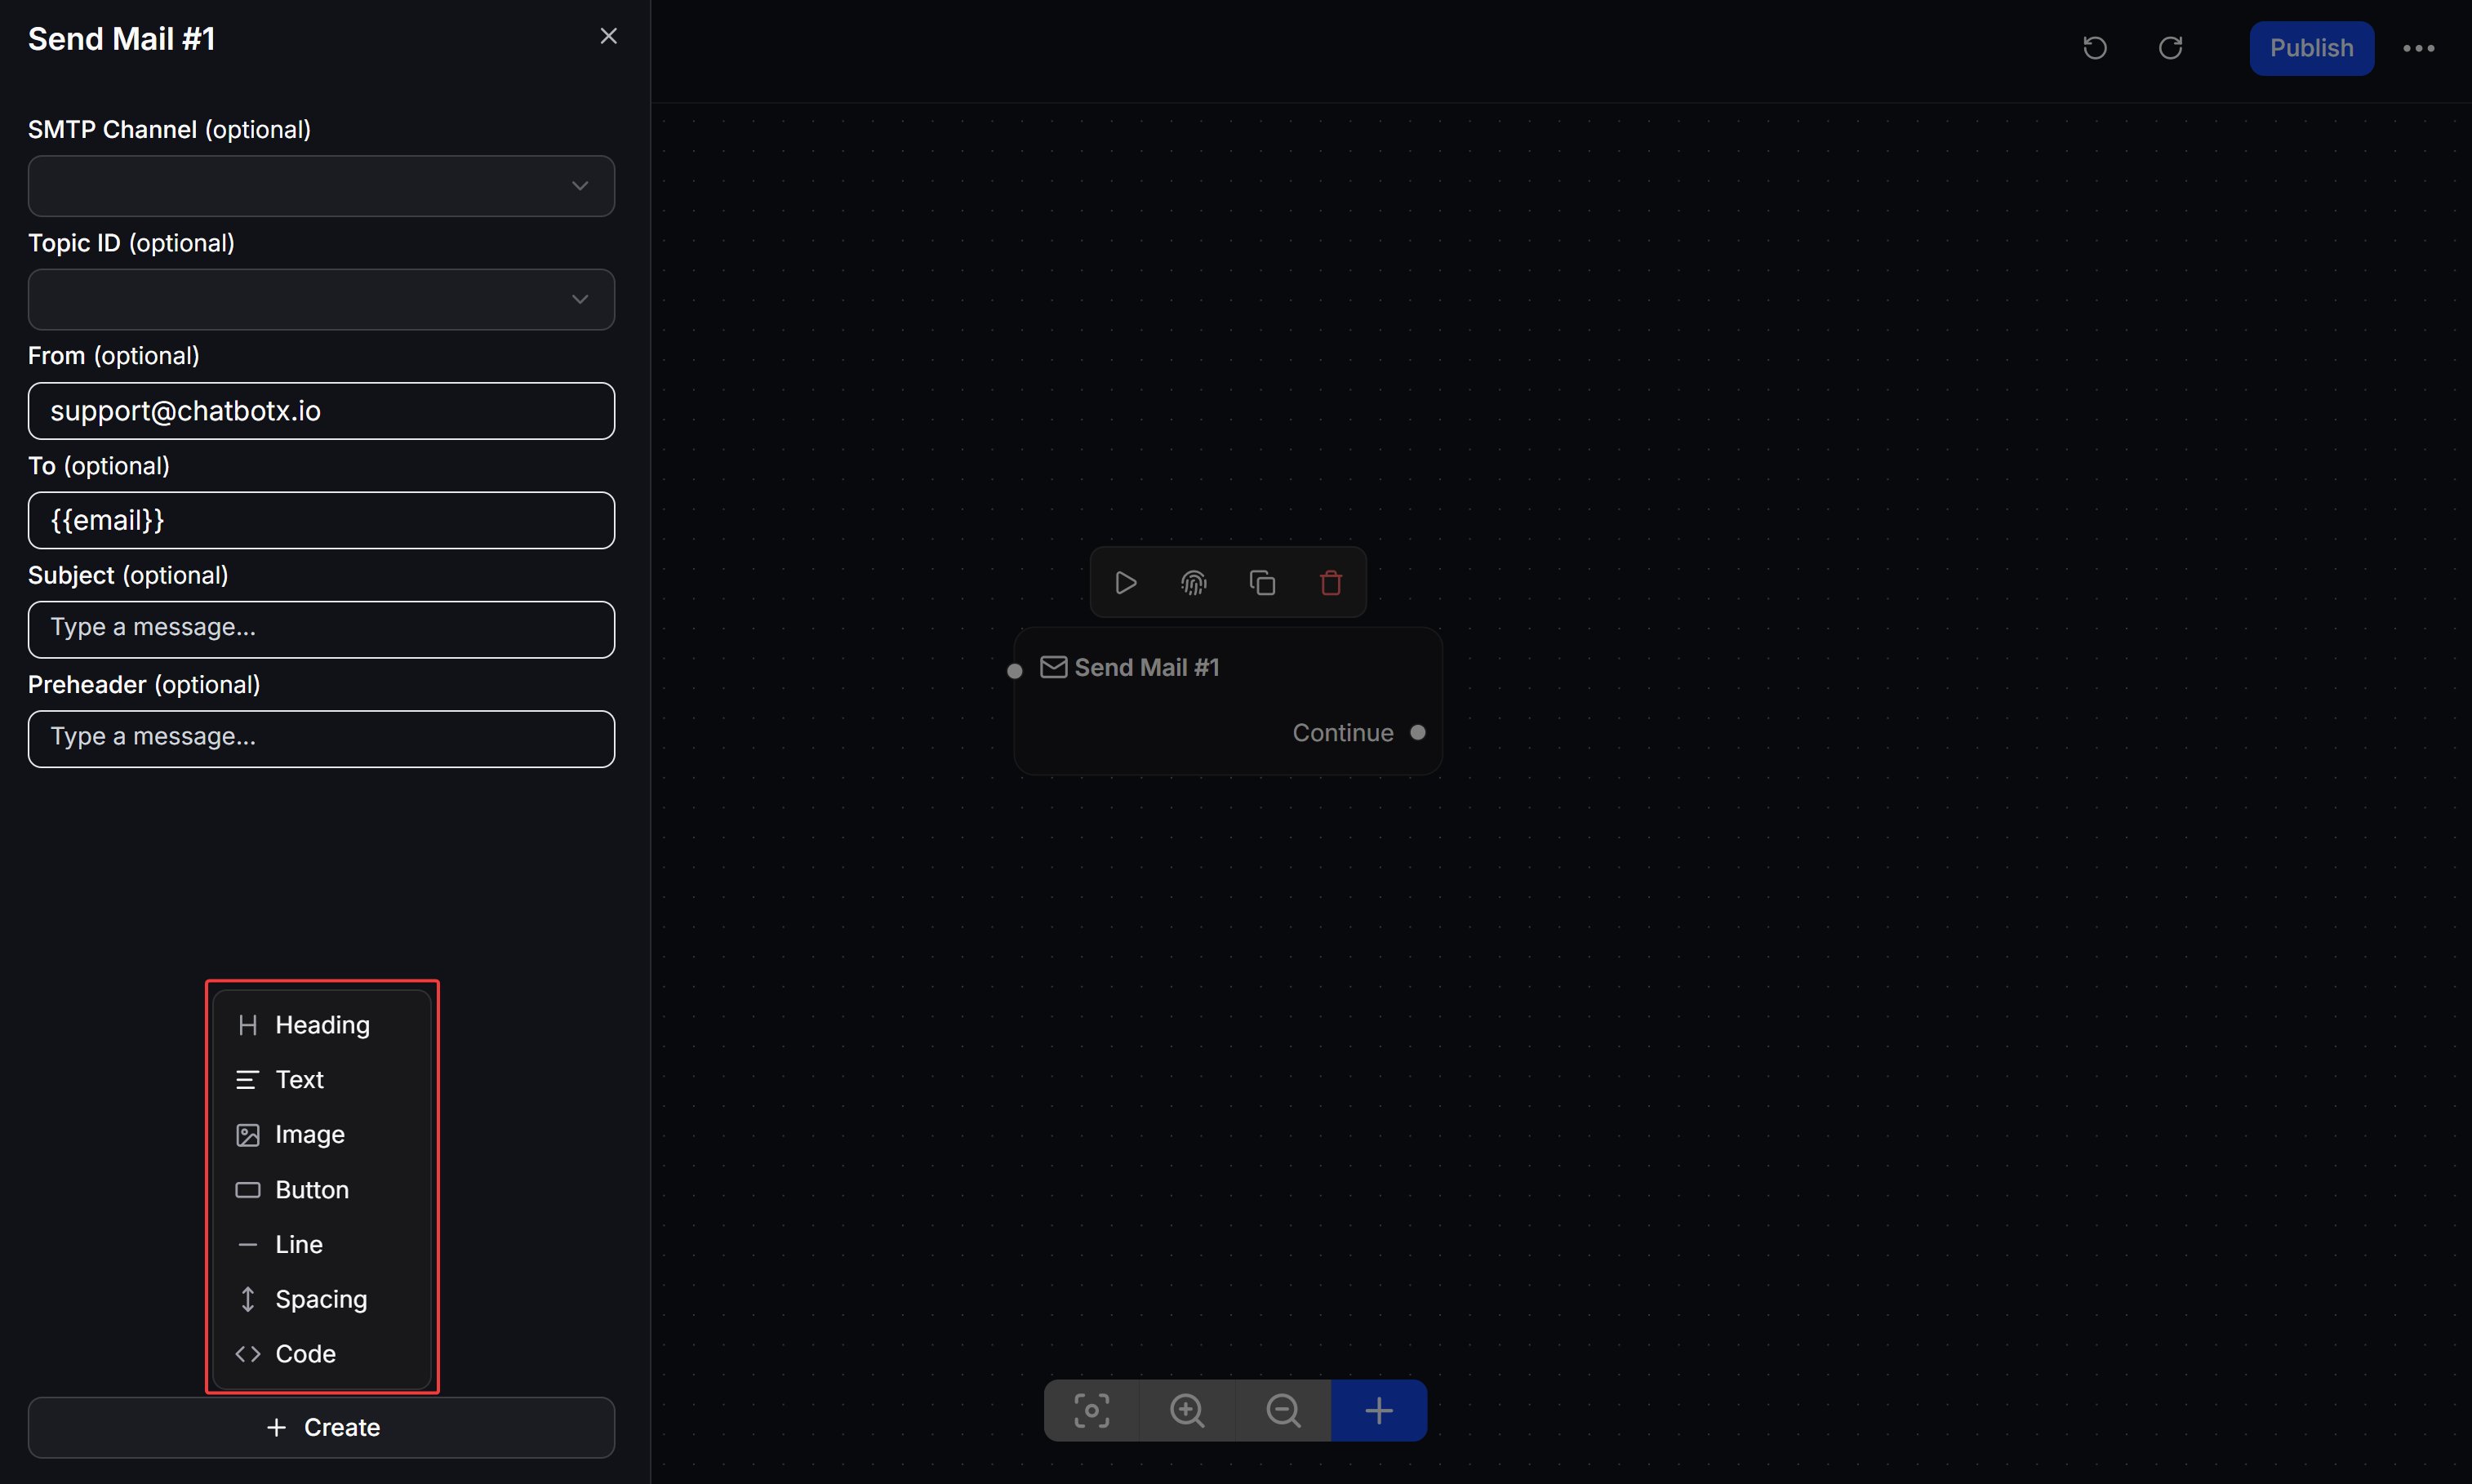
Manage Email Topics in Flows
Email Topics help you group emails sent from Flows and track how contacts interact with them. Use topics when you want to compare email performance across campaigns, order updates, onboarding messages, or internal notifications. You can manage Email Topics from the Flows menu.
Name the topic
Enter a clear topic name, such as
Order confirmation, Welcome email, or Monthly promotion.Email Topic statistics
The Email Topics page includes a statistics table for each topic.
| Column | Description |
|---|---|
| Name | The Email Topic name |
| Sent | The number of emails sent with this topic |
| Delivered | The percentage of emails delivered successfully |
| Seen | The percentage of emails opened or seen by contacts |
| Clicked | The percentage of contacts who clicked a link or button in the email |
Create a topic from Send Mail
When you configure a Send Mail node, you can select an existing topic in Topic ID. If the topic does not exist yet, click Add New next to the field to create it quickly without leaving the Flow editor.
Troubleshooting
If the system cannot send the email successfully, please check some of the following common cases:Error: 'Authentication Failed' or 'Invalid Login'
Error: 'Authentication Failed' or 'Invalid Login'
- Cause: Incorrect SMTP Username or Password.
- Solution: Do not use your main login password. Ensure you have created and used a separate App Password or API Key/SMTP Key as instructed in Step 1.
Timeout or Connection Refused Error
Timeout or Connection Refused Error
- Cause: Incorrect SMTP Port or blocked by a firewall.
- Solution: Make sure the Port matches the correct encryption standard. For example, Port
465must use SSL, Port587must use TLS. If using Google Workspace, ensure IMAP/SMTP access is not disabled by the administrator.
Flow passes the Send Mail node but the email does not arrive
Flow passes the Send Mail node but the email does not arrive
- Cause: The customer has not been granted permission (Email Opt-in) in the system.
- Solution: Check the Audience data to see if the user has an Email and the Opted-in status. Ensure your Flow has a step passing through the
Set Email Opt-InAction before reachingSend Mail.
Sent emails land in Spam folder
Sent emails land in Spam folder
- Solution: As recommended at the beginning, configure DNS records (
SPF,DKIM) for the domain displayed on the sending email (From Email). Avoid sending emails that contain too many images without text, or using “spammy” words.