Prerequisites
Before you begin, make sure you have:- A valid Facebook account
- A WhatsApp Business account (or the ability to create one)
- A ChatbotX installation with a publicly accessible URL
- Admin access to your ChatbotX installation
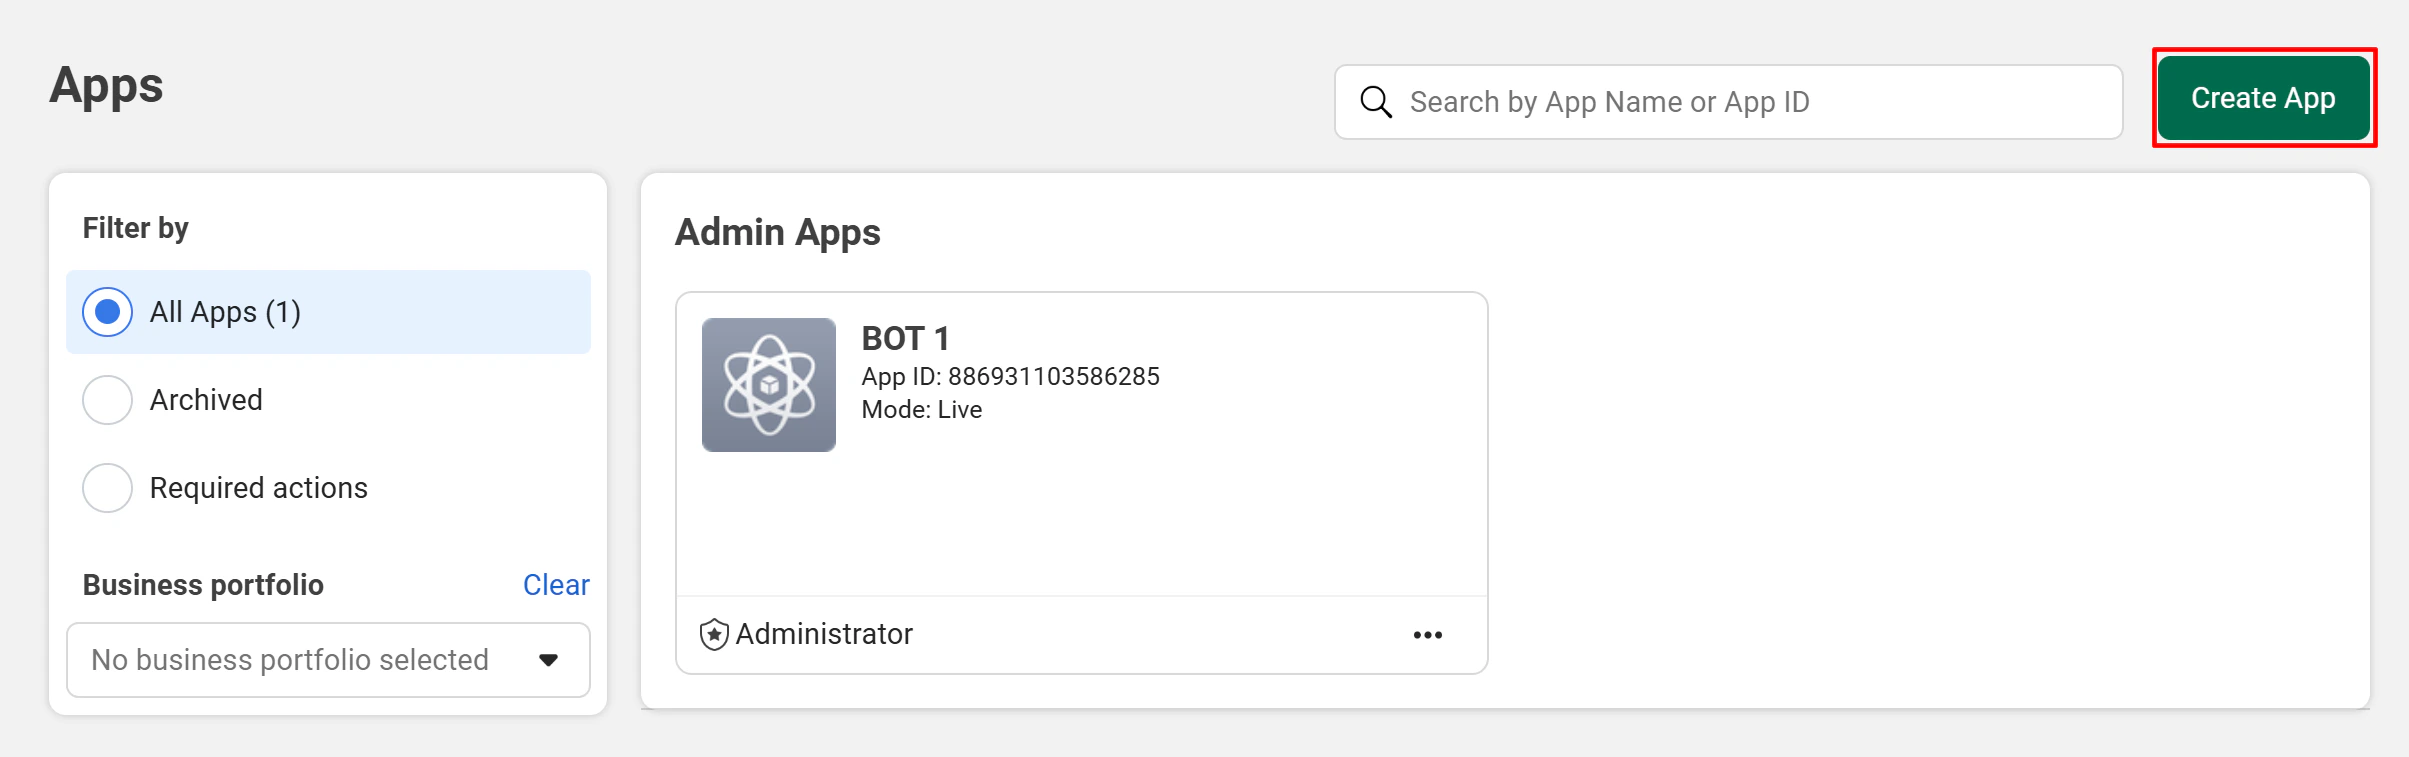
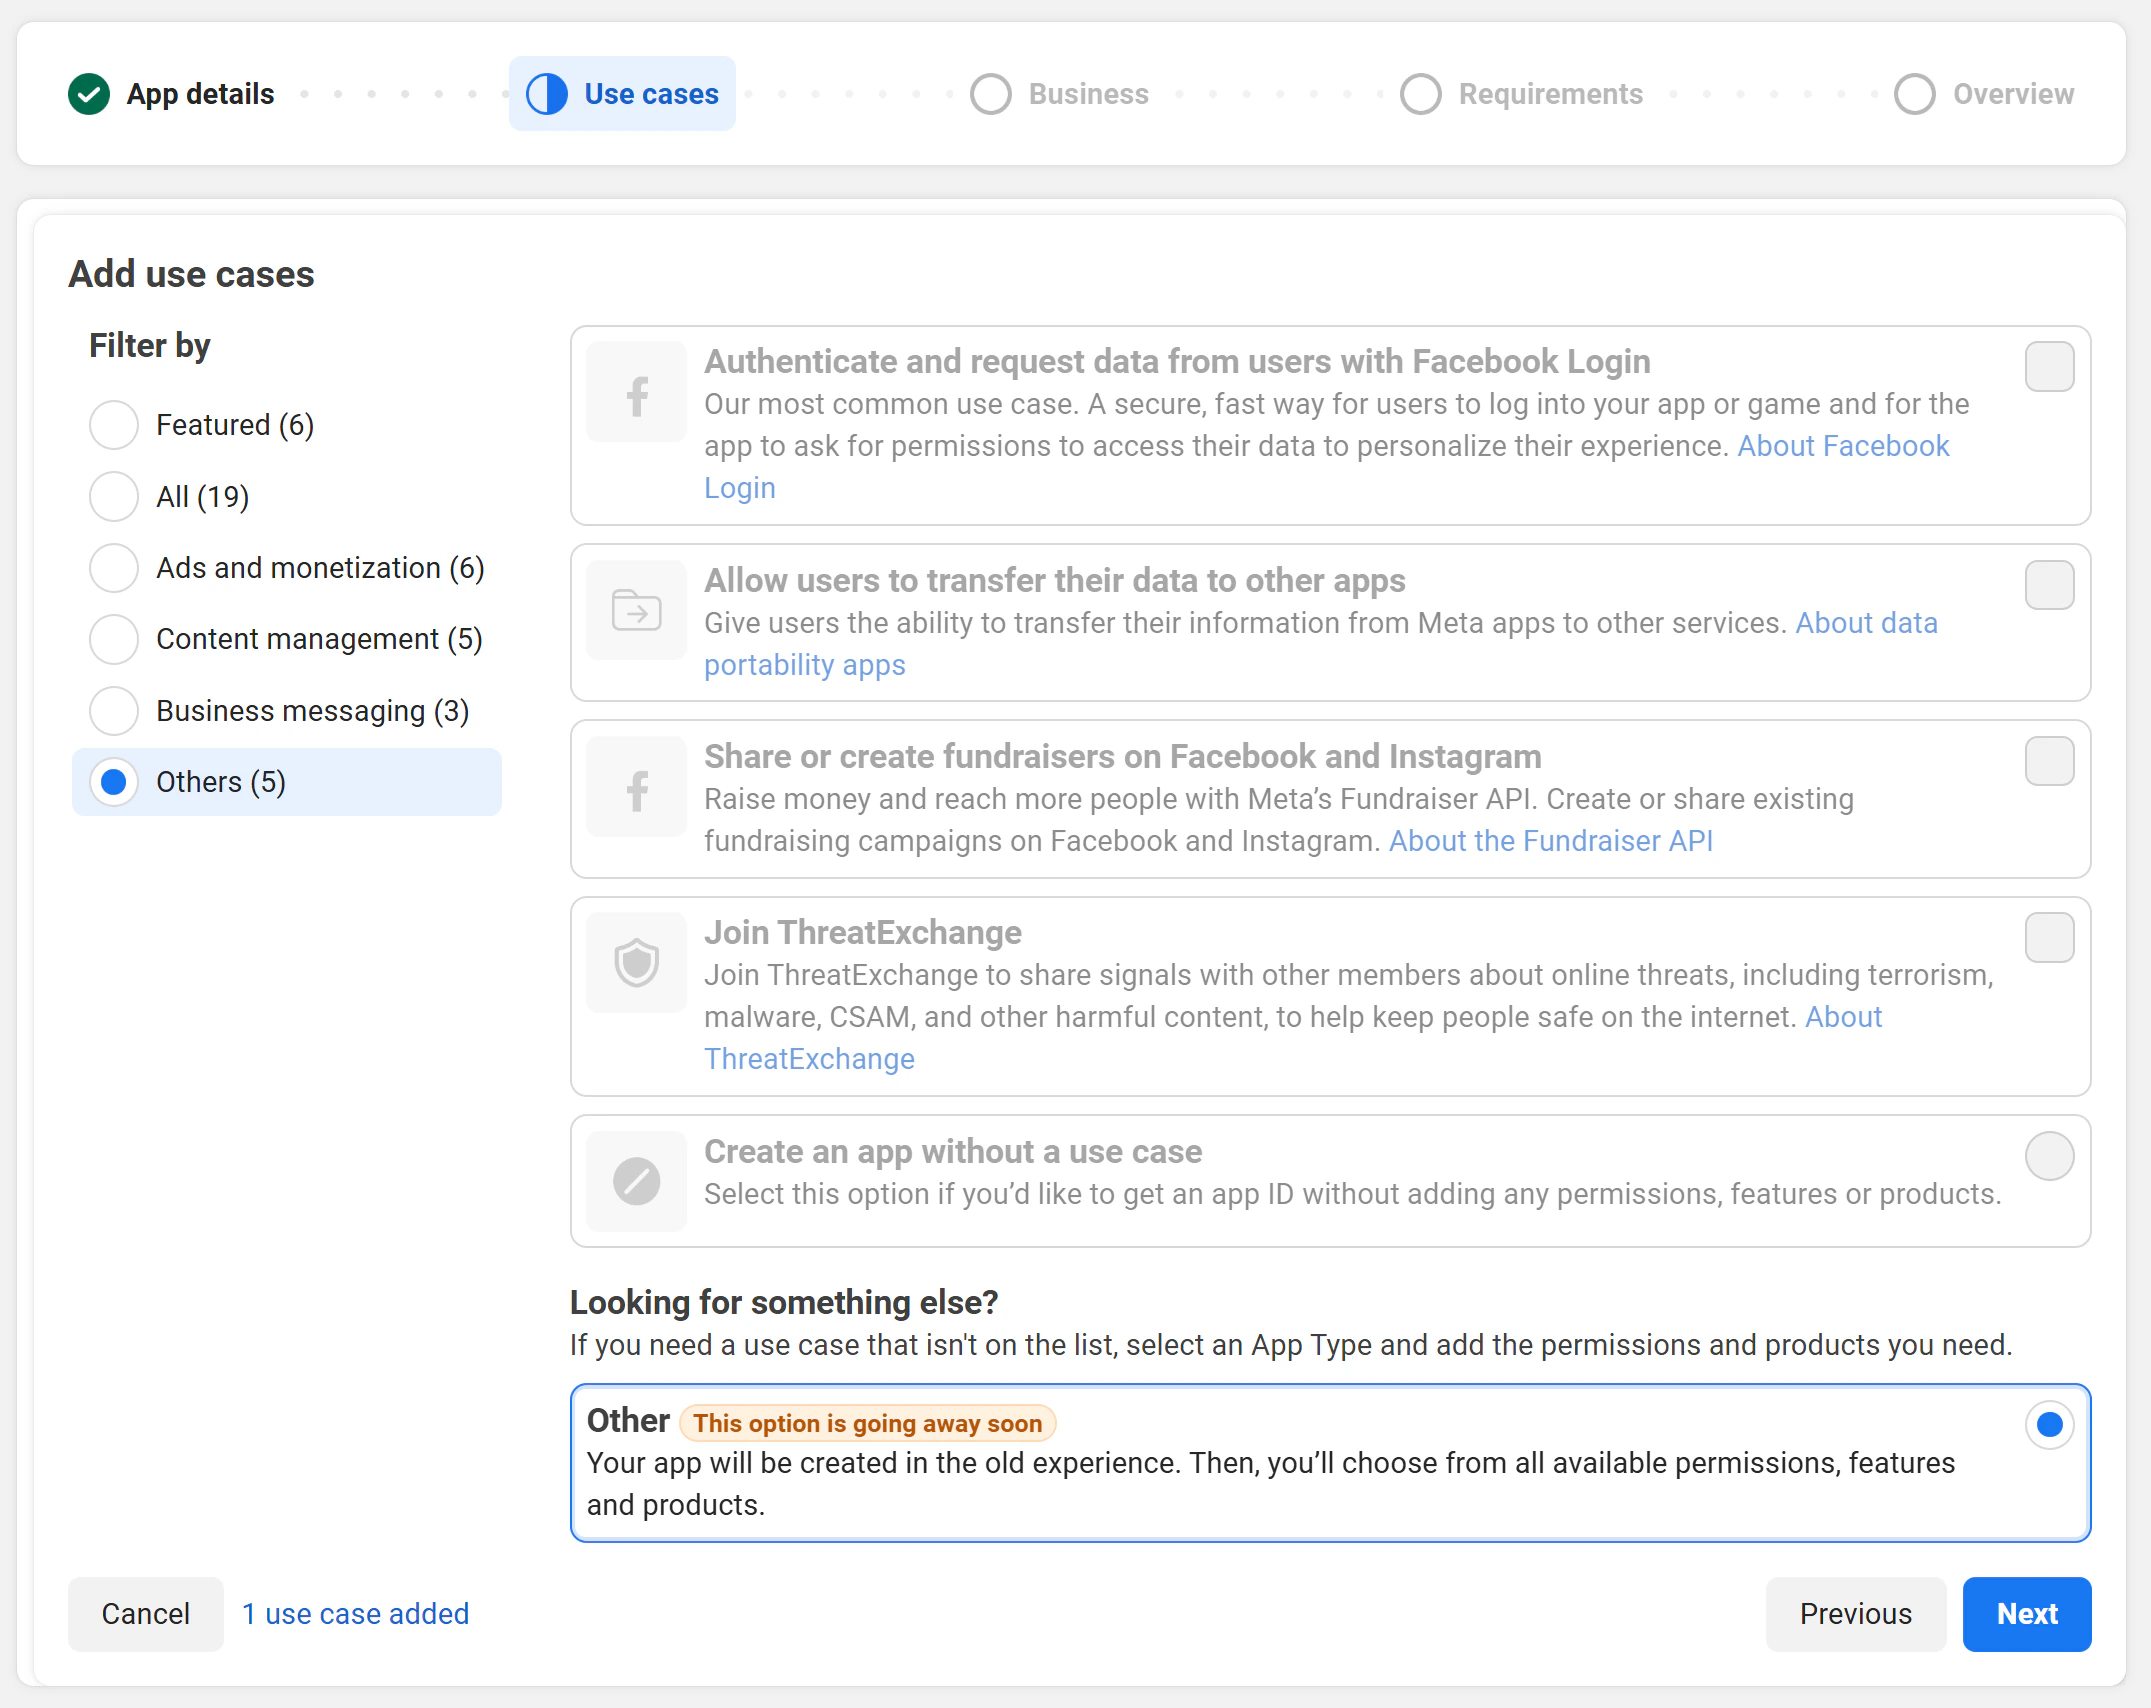
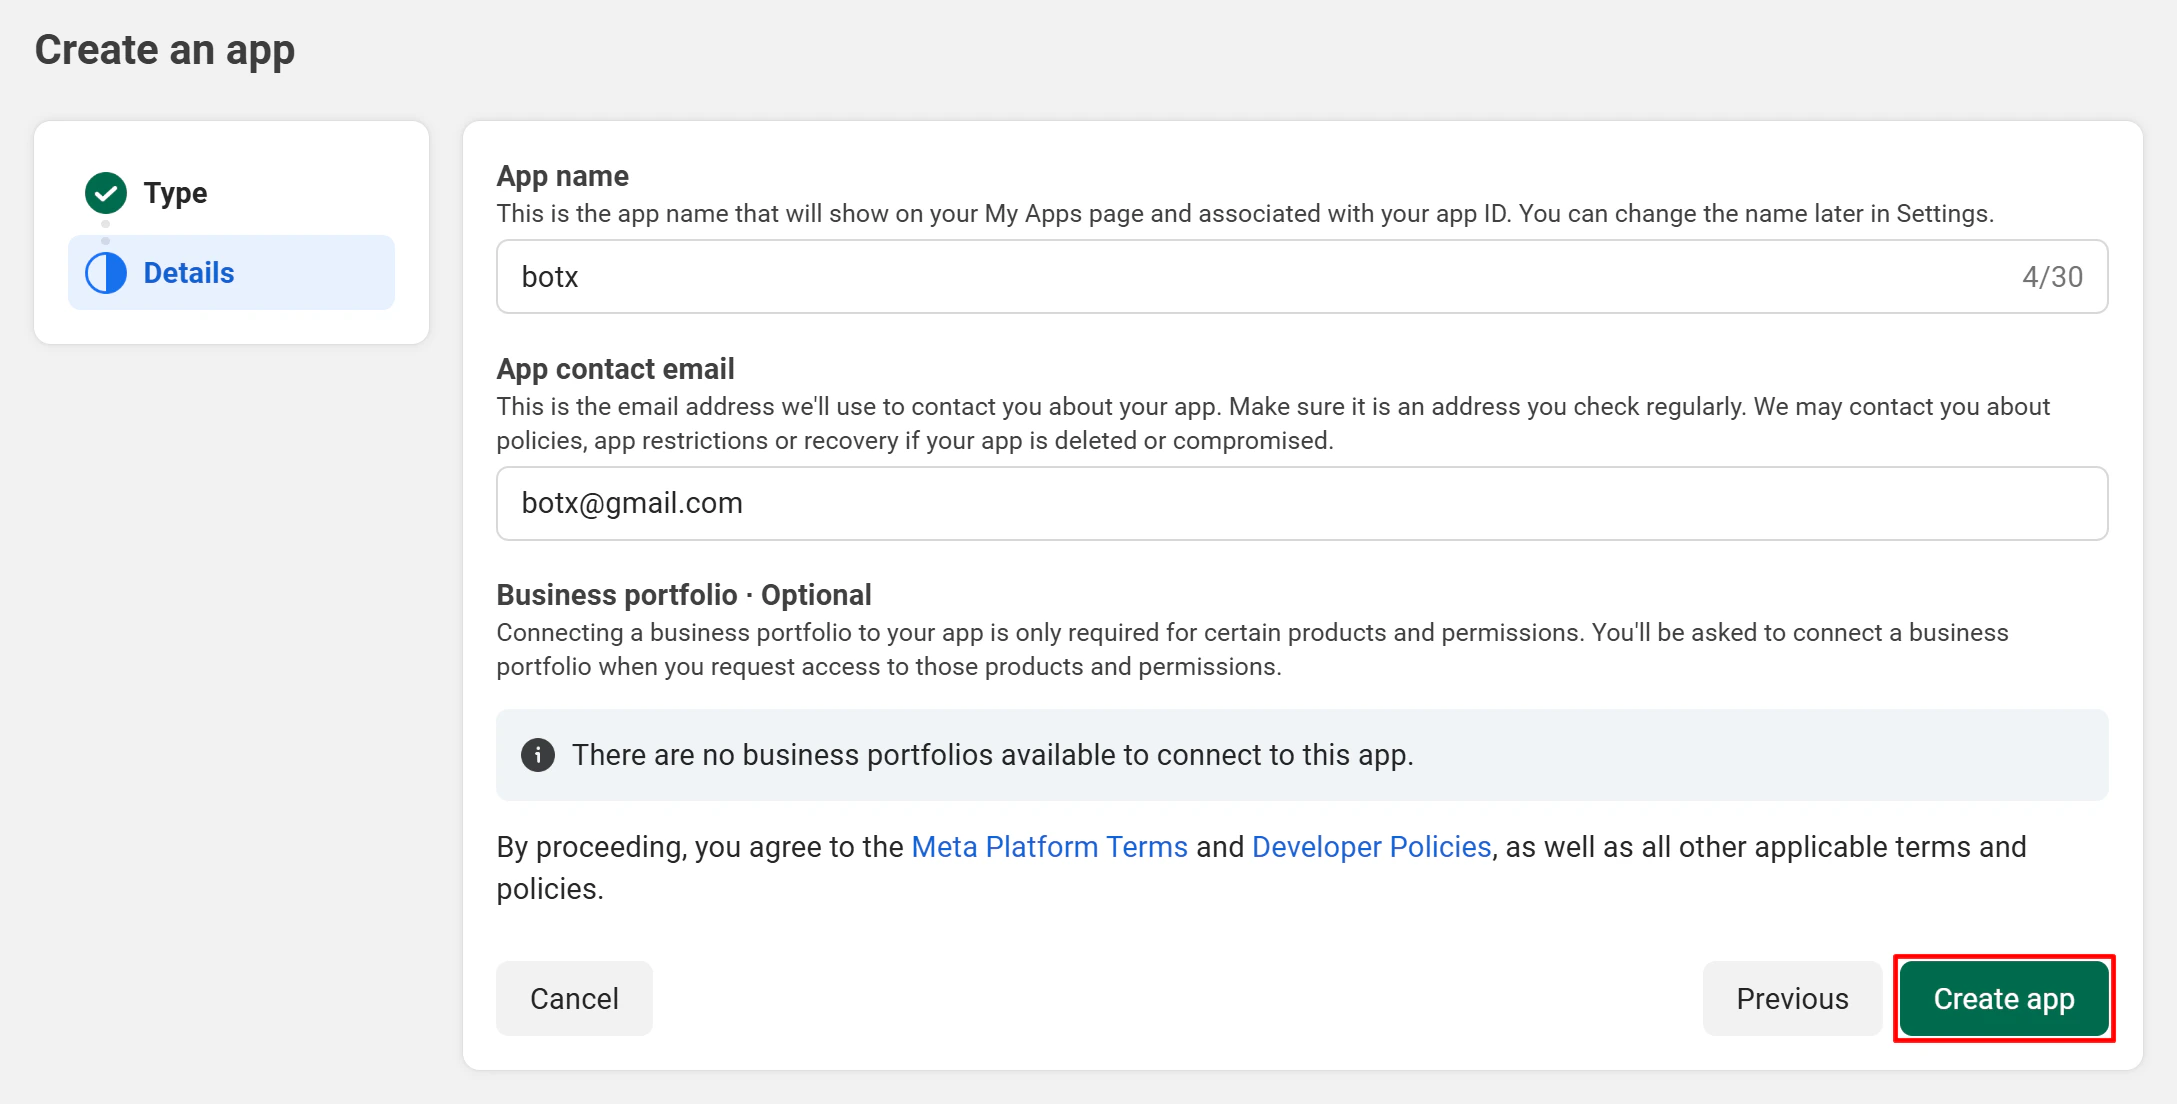
Step 1: Create a Facebook App
If you already have a Facebook App (for example, from your Messenger channel setup), you can reuse it and skip directly to Step 2.Create a new app


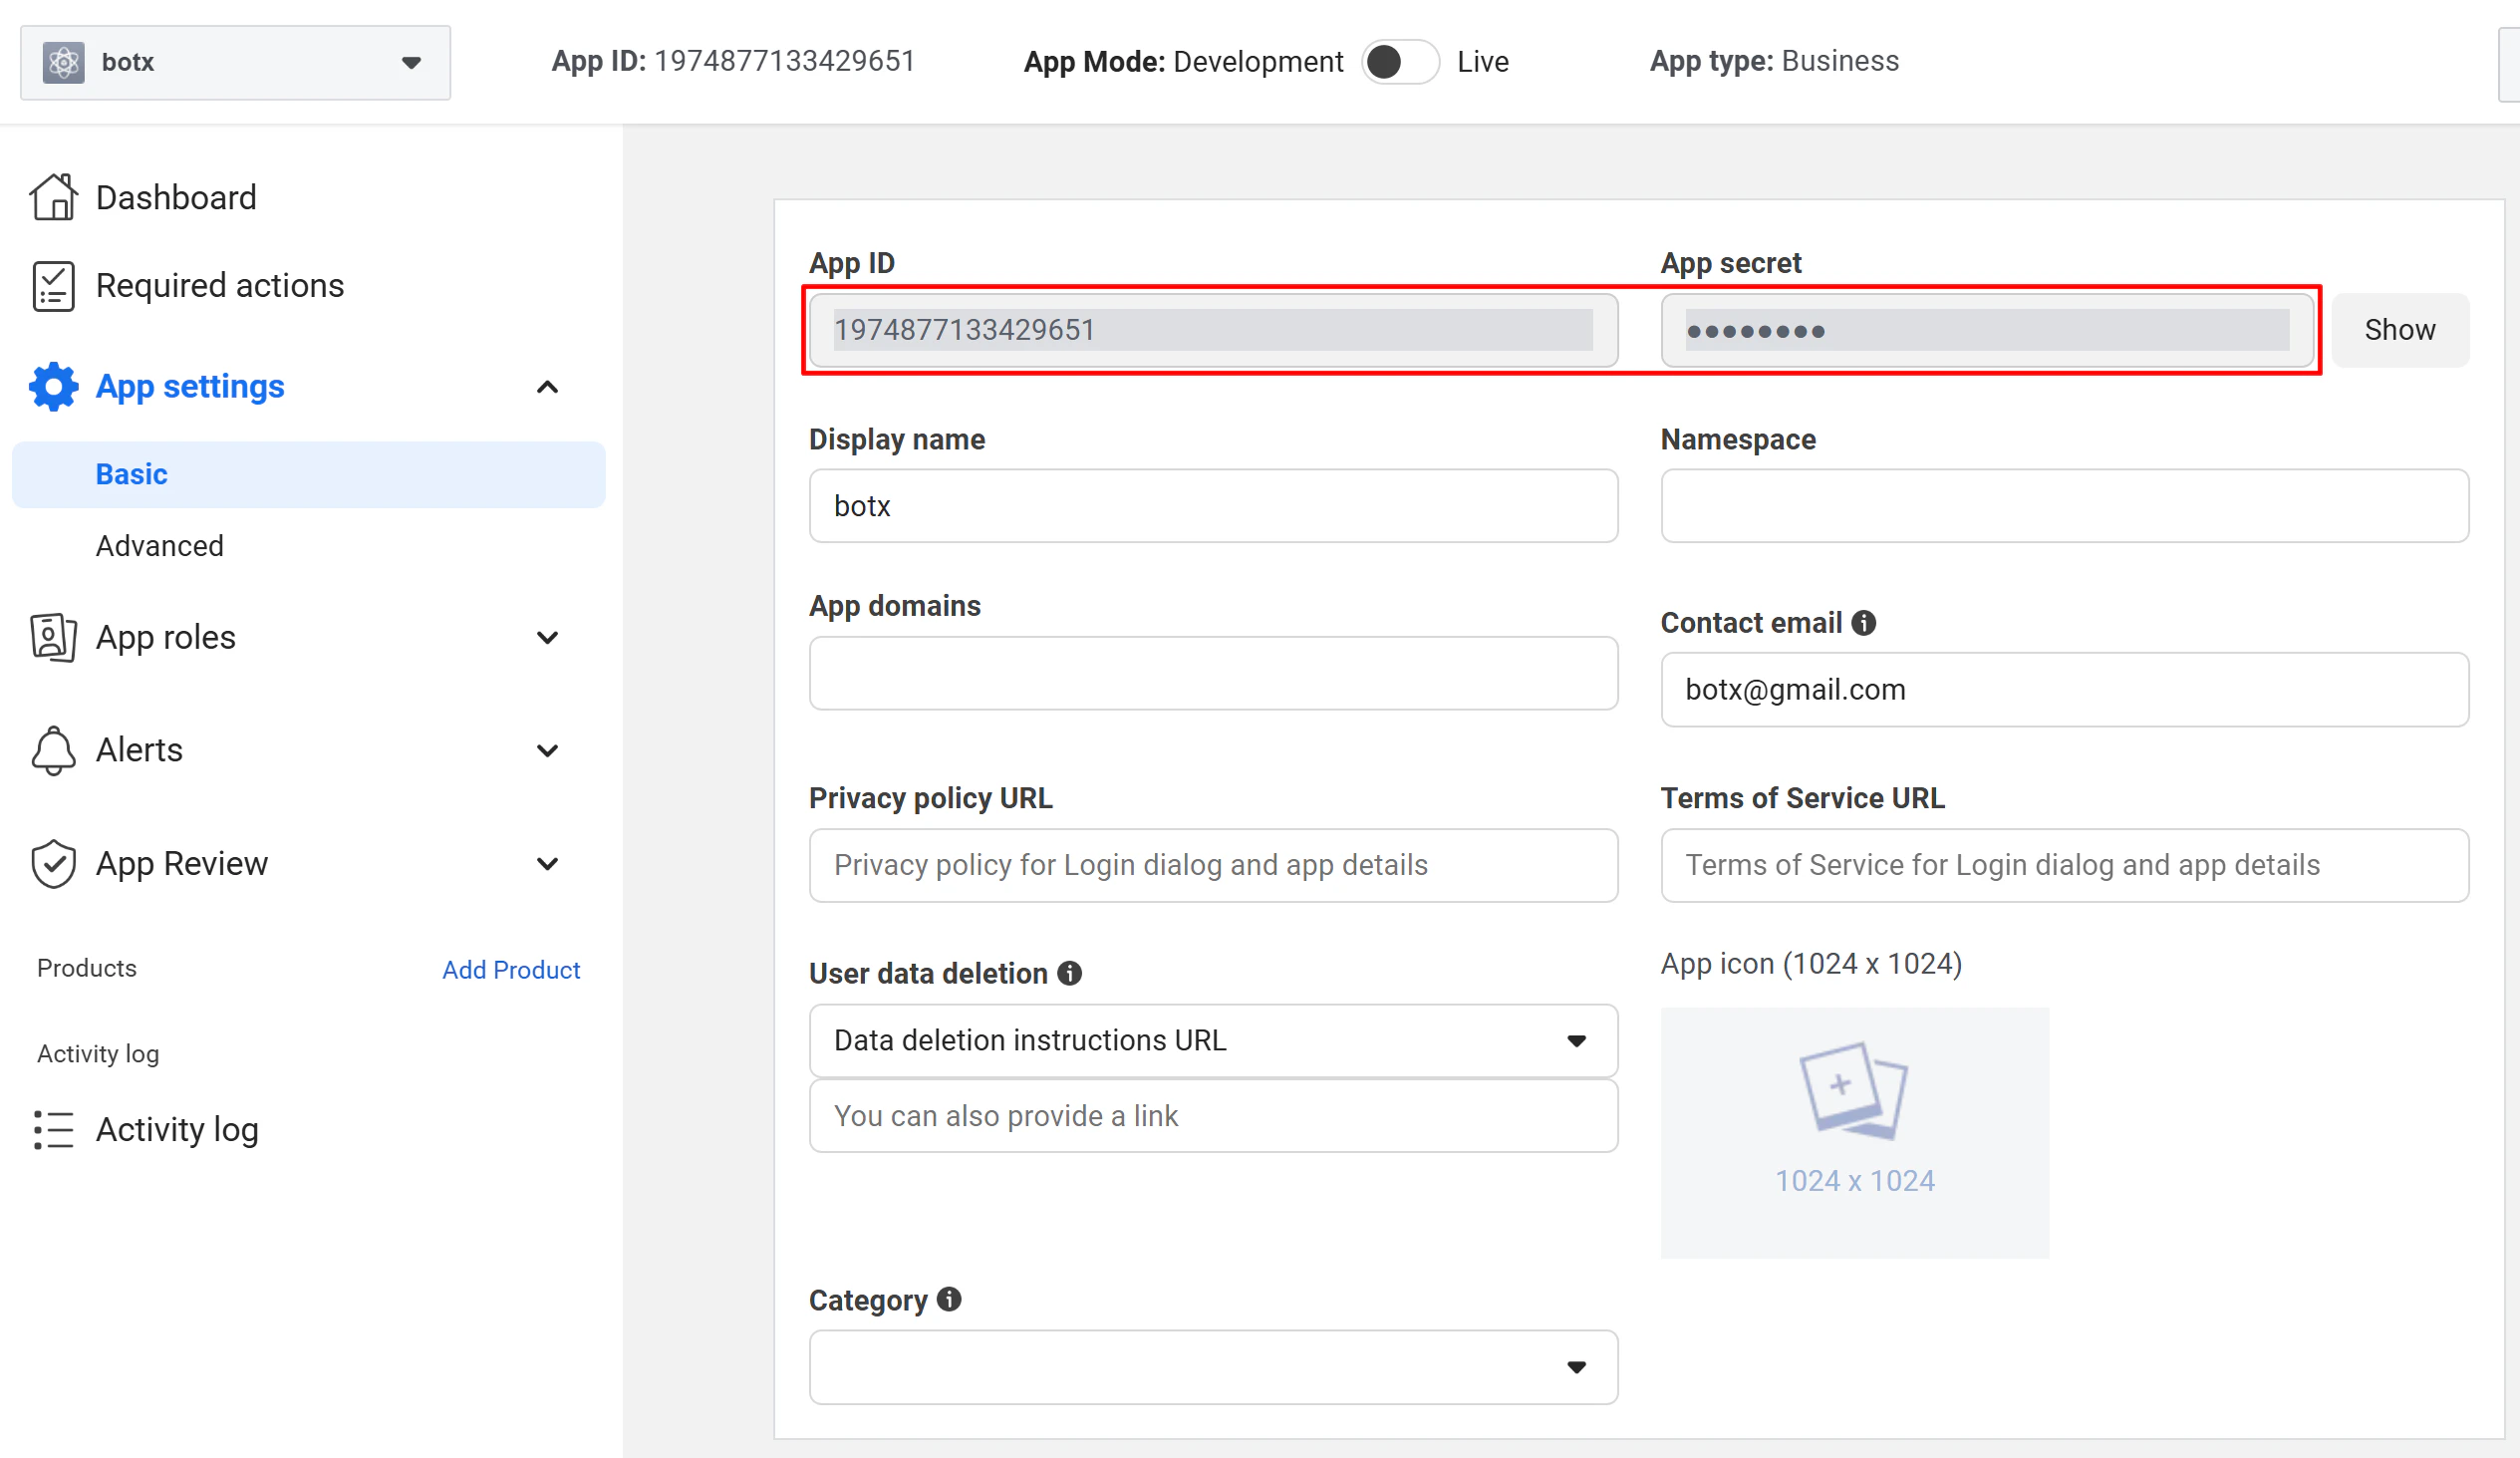
Step 2: Configure Credentials in ChatbotX
A Super Admin must enter the WhatsApp credentials in ChatbotX before the integration can work. Complete this step immediately after obtaining your App ID and App Secret.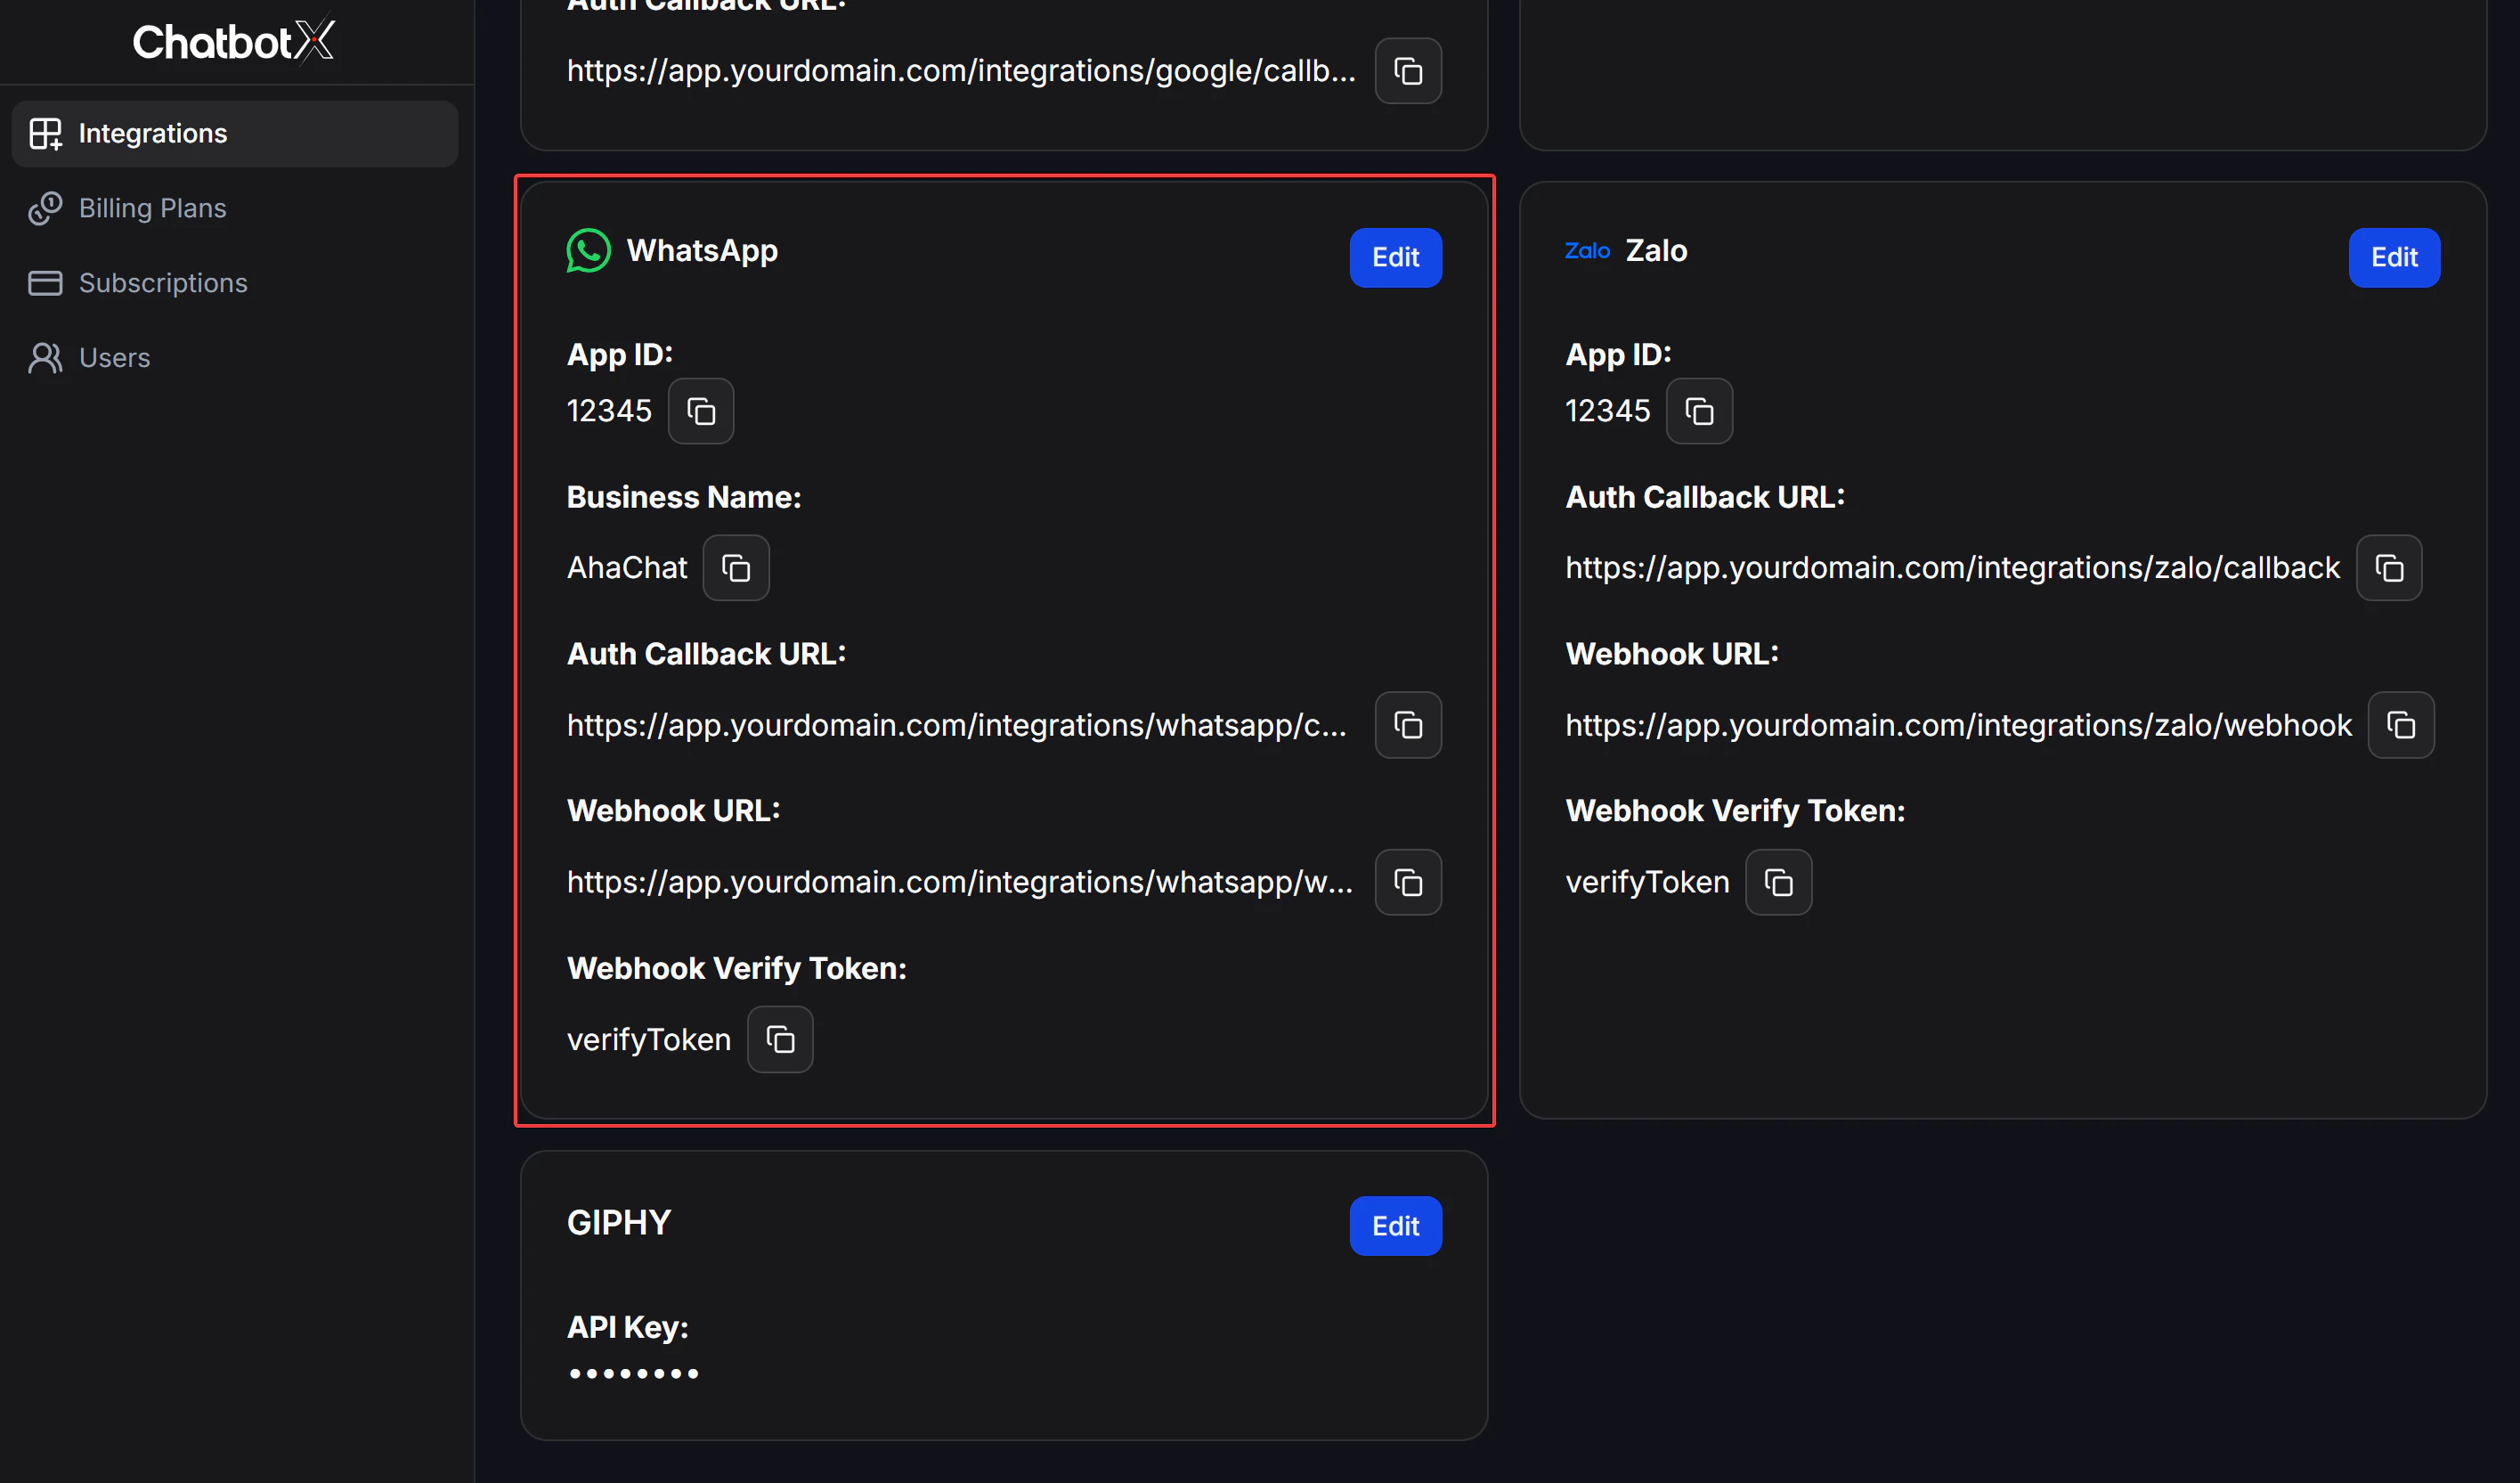
Open the WhatsApp configuration
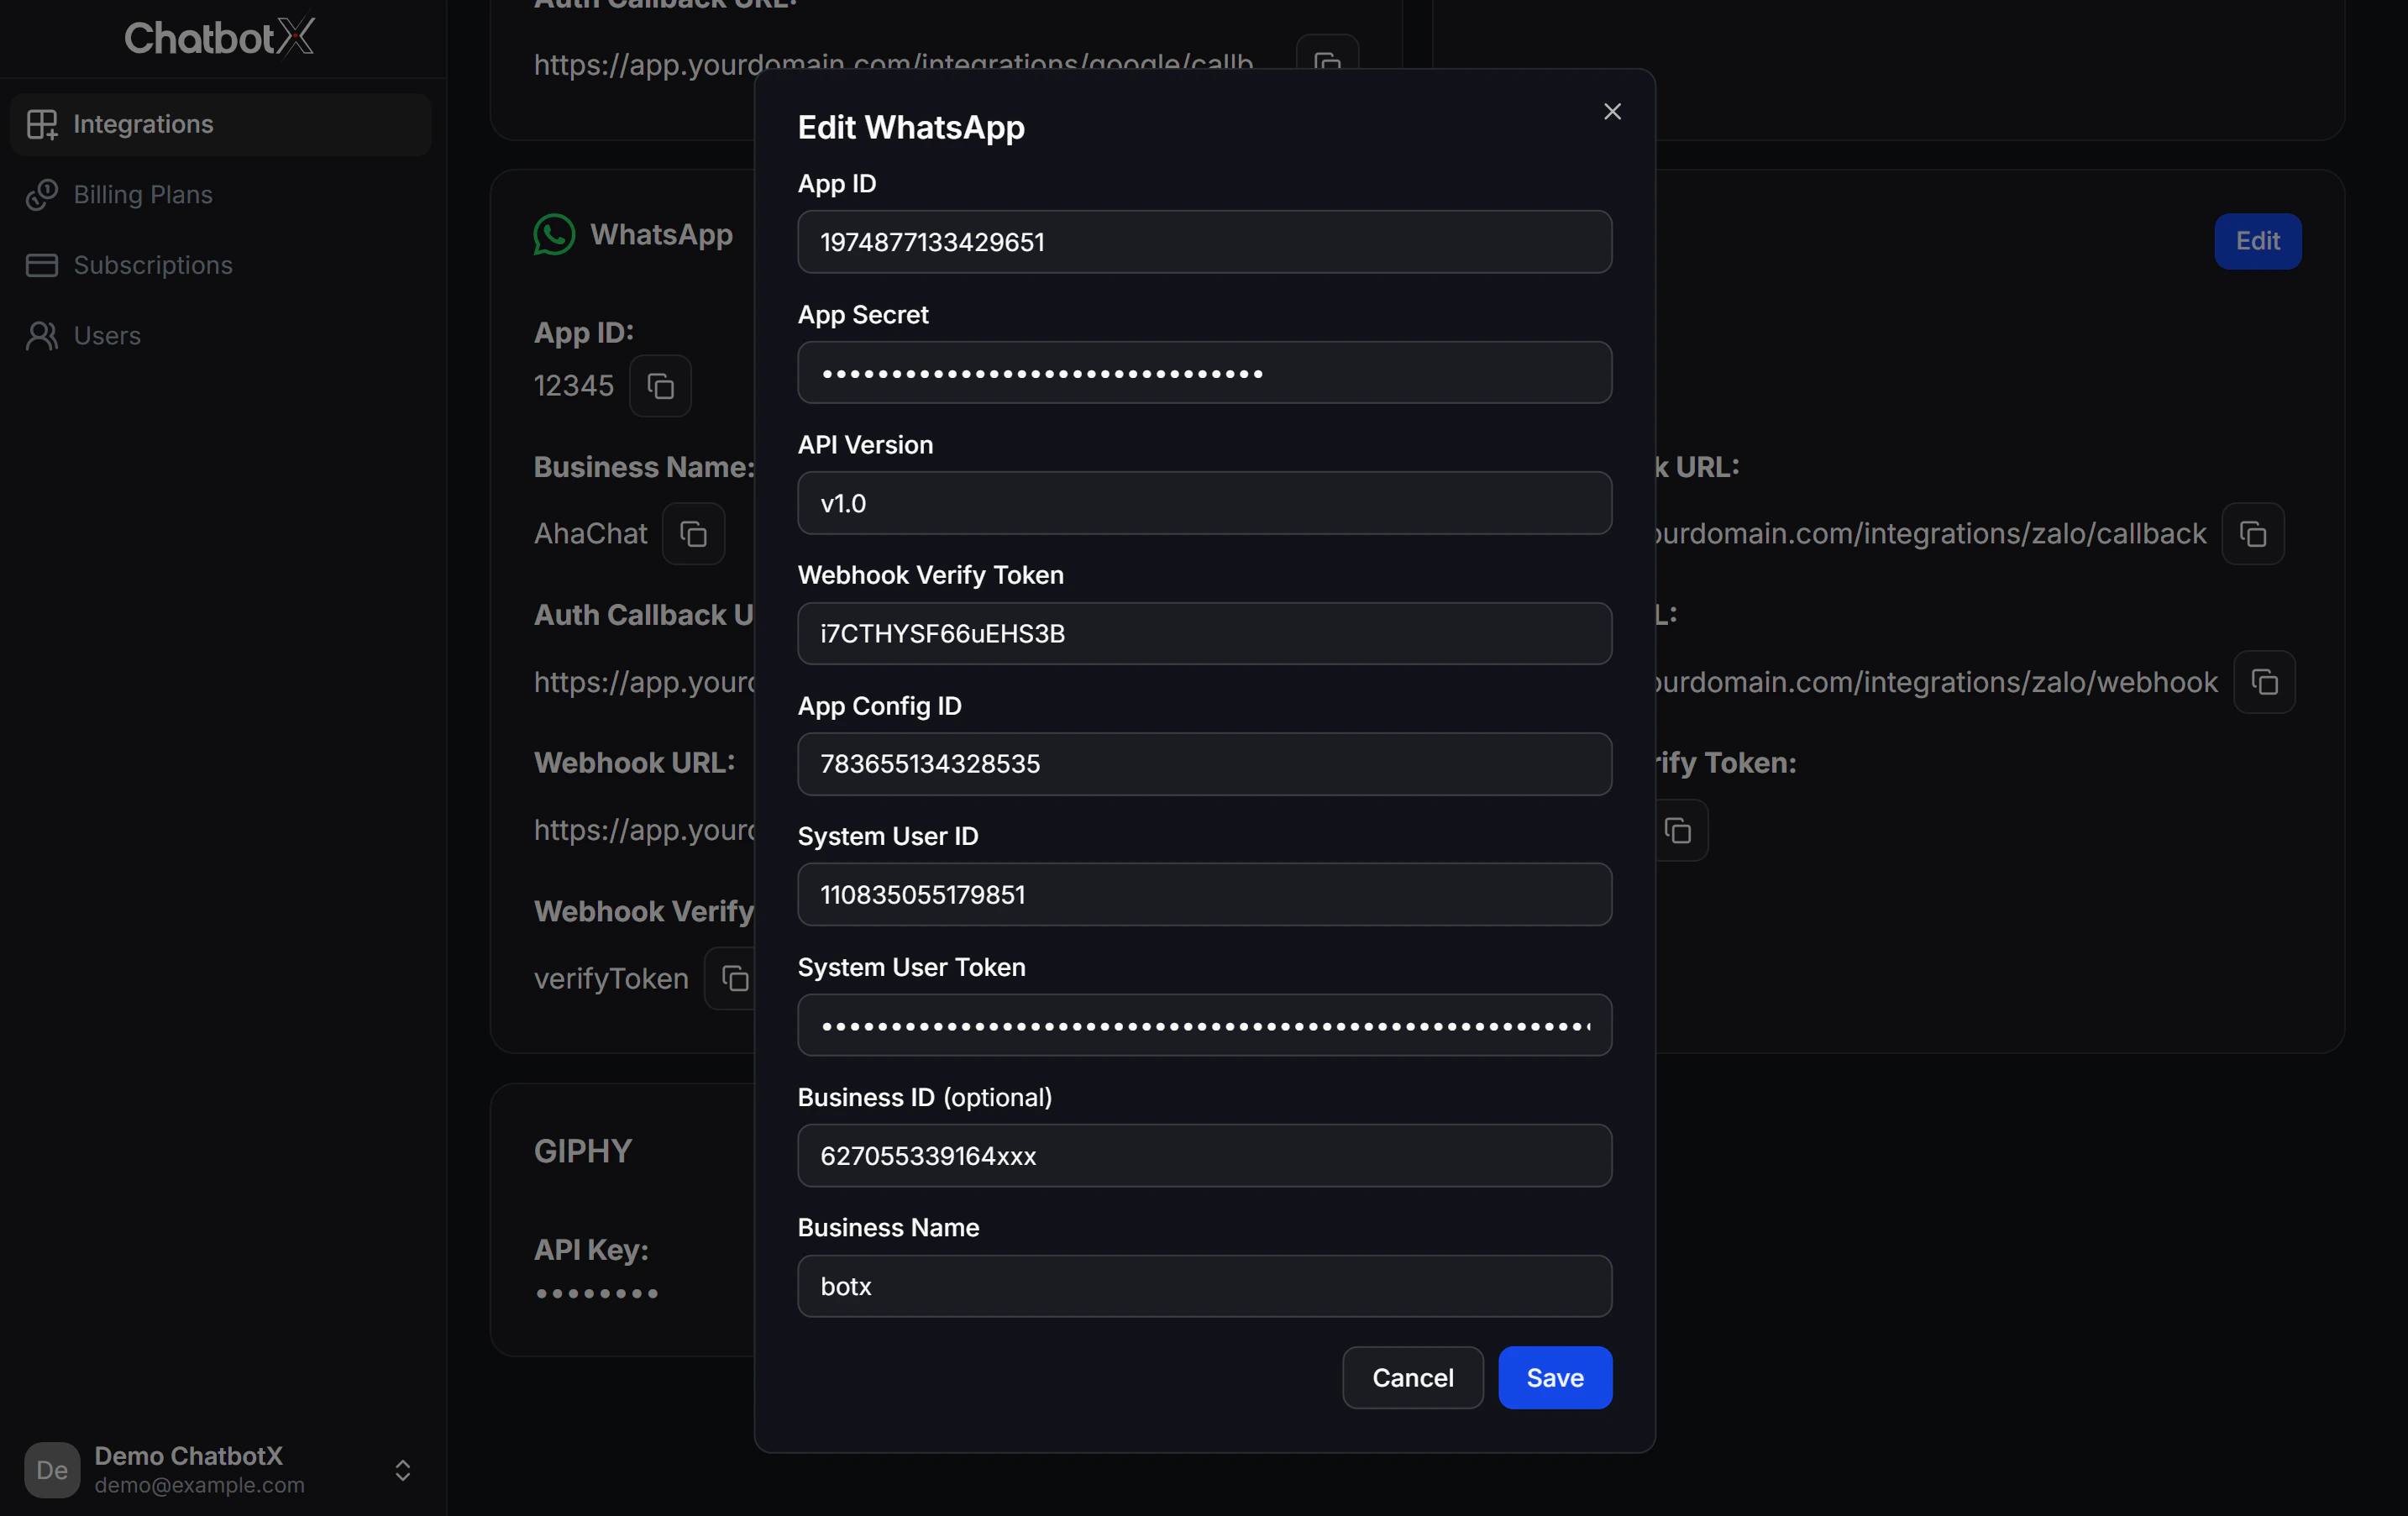
Fill in the WhatsApp credentials
| Field | Description | Where to find | Example |
|---|---|---|---|
| Client ID | Facebook App ID | Meta Developer Portal → App → Settings → Basic | 1974877133429651 |
| Client Secret | Facebook App Secret | Same page → click Show | ●●●●●●●●●● |
| API Version | Graph API version | App → Settings → Advanced → API Version | v1.0 |
| Webhook Verify Token | Random string for webhook verification | Self-generated | i7CTHYSF66uEHS3B |
| App Config ID | Configuration ID from the Embedded Signup wizard | Facebook Login for Business → Configurations. See Step 4 | 783655134328535 |
| System User ID | System User’s ID, obtained via Graph API Explorer | Graph API Explorer. See Step 5 | 110835055179851 |
| System User Token | Access token generated for your System User | Meta Business Settings. See Step 5 | EAACanps... |
| Business ID*(optional)* | Meta Business Portfolio ID | Meta Business Settings → Business Info | 627055339164xxx |
| Business Name | Your business display name in ChatbotX | Your own business name | botx |
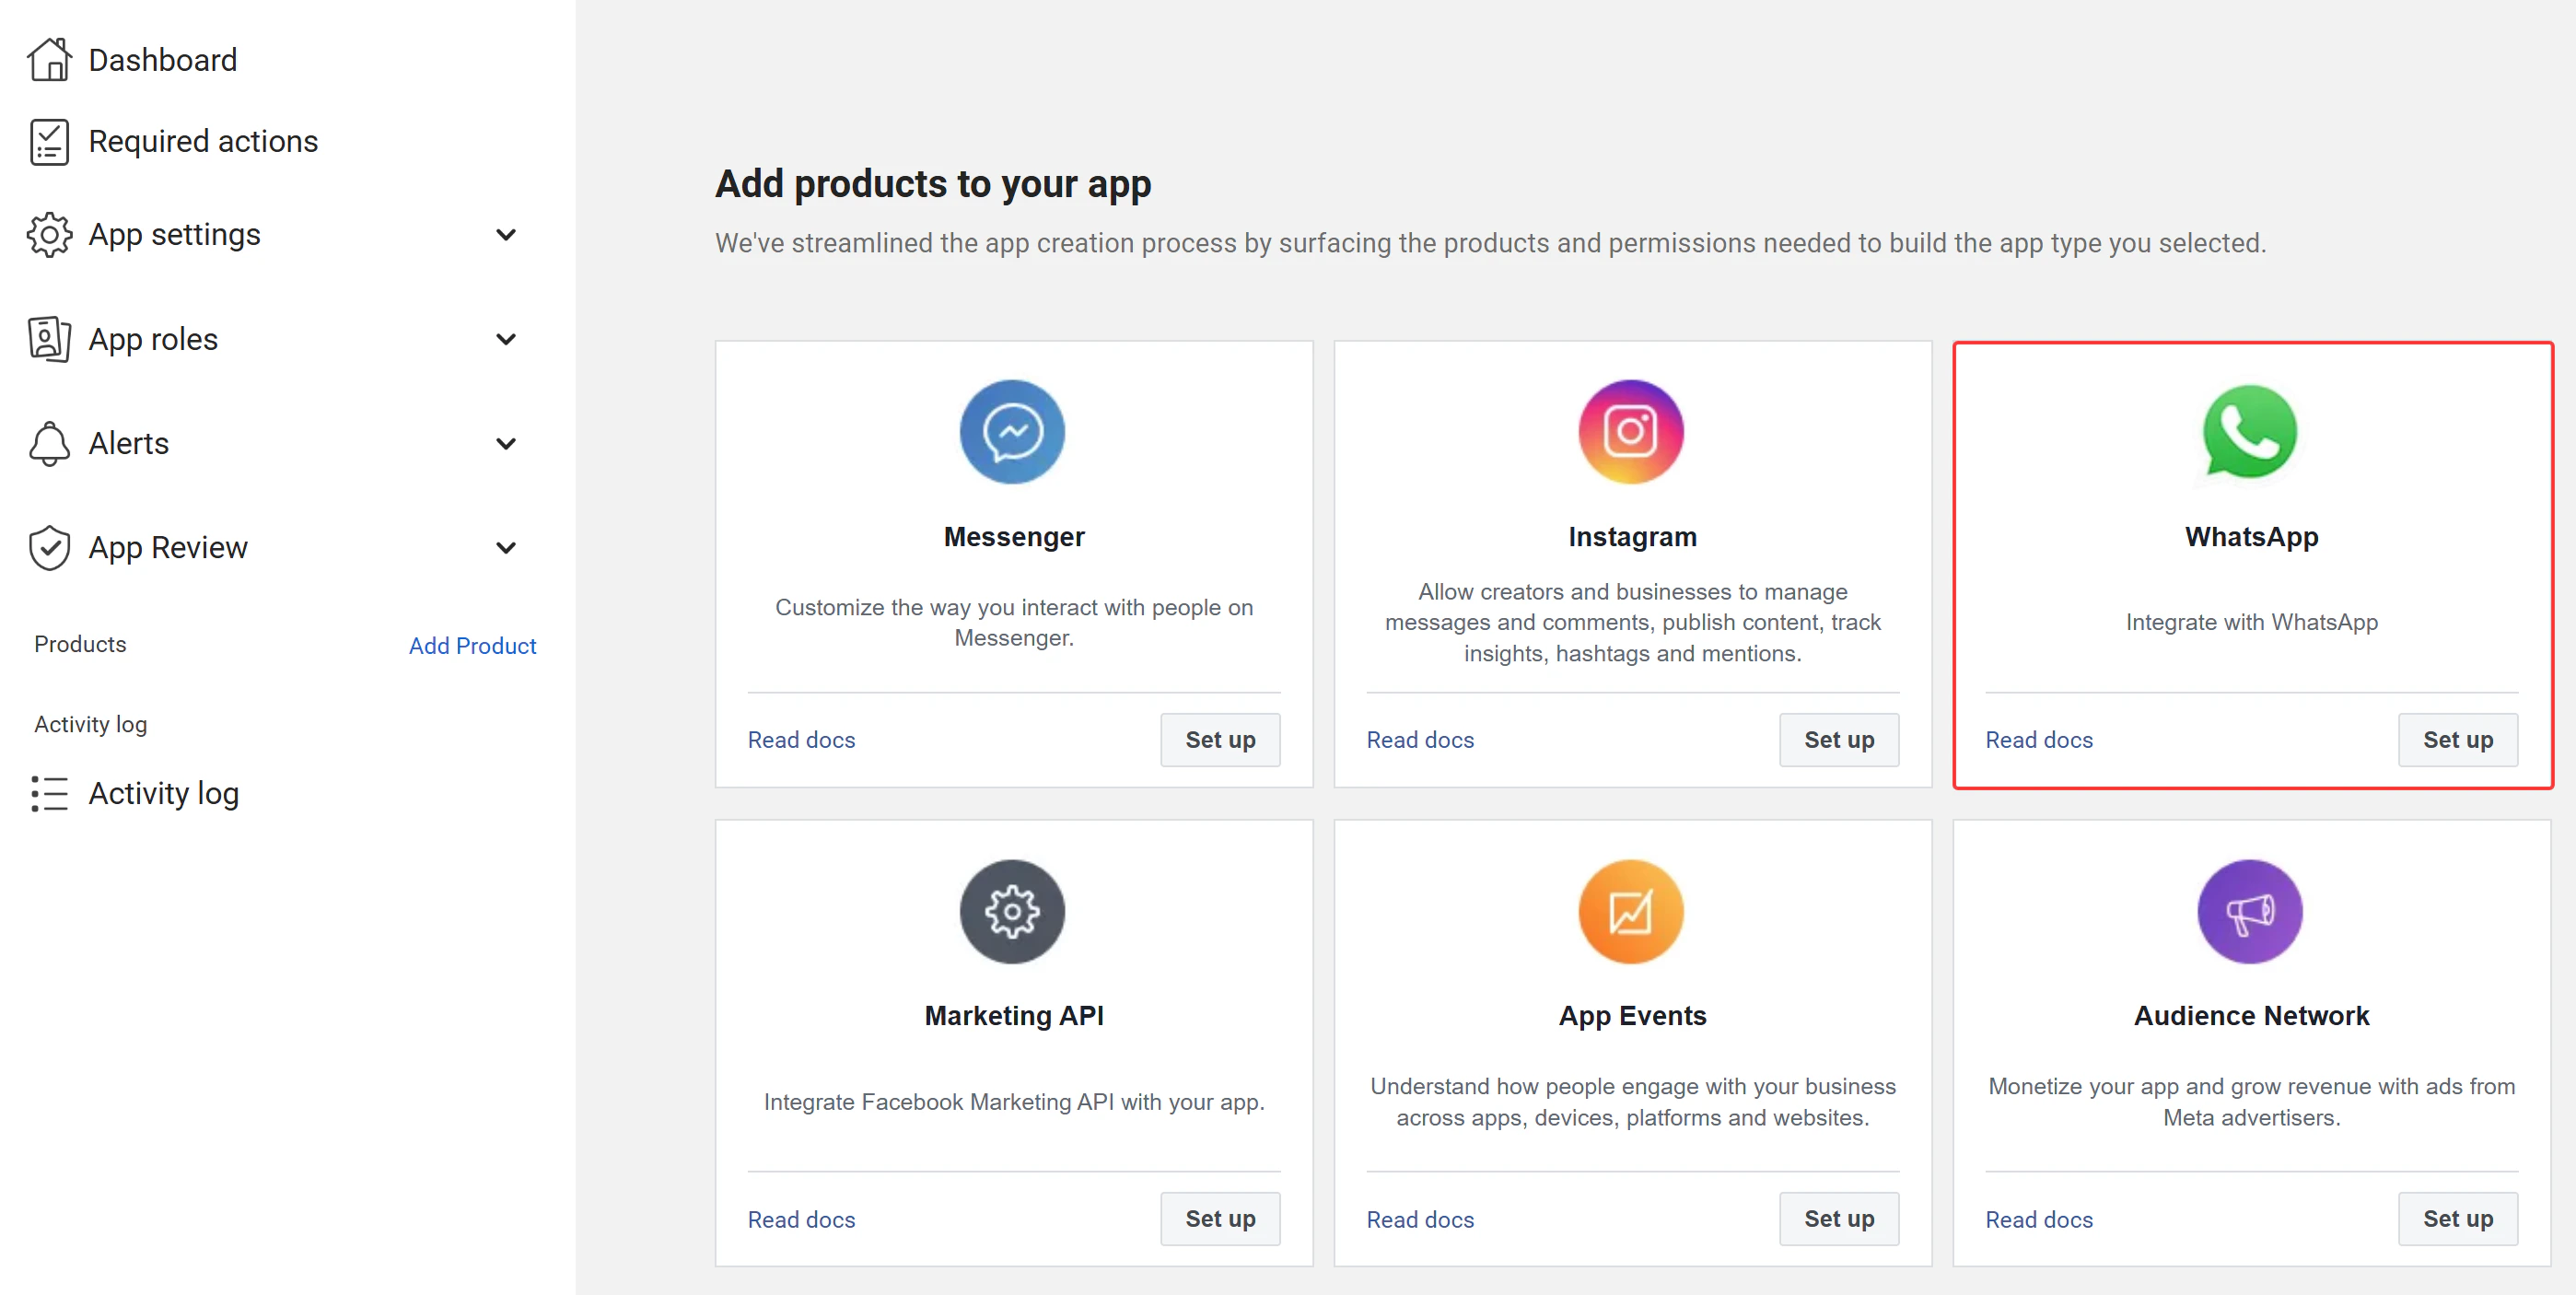
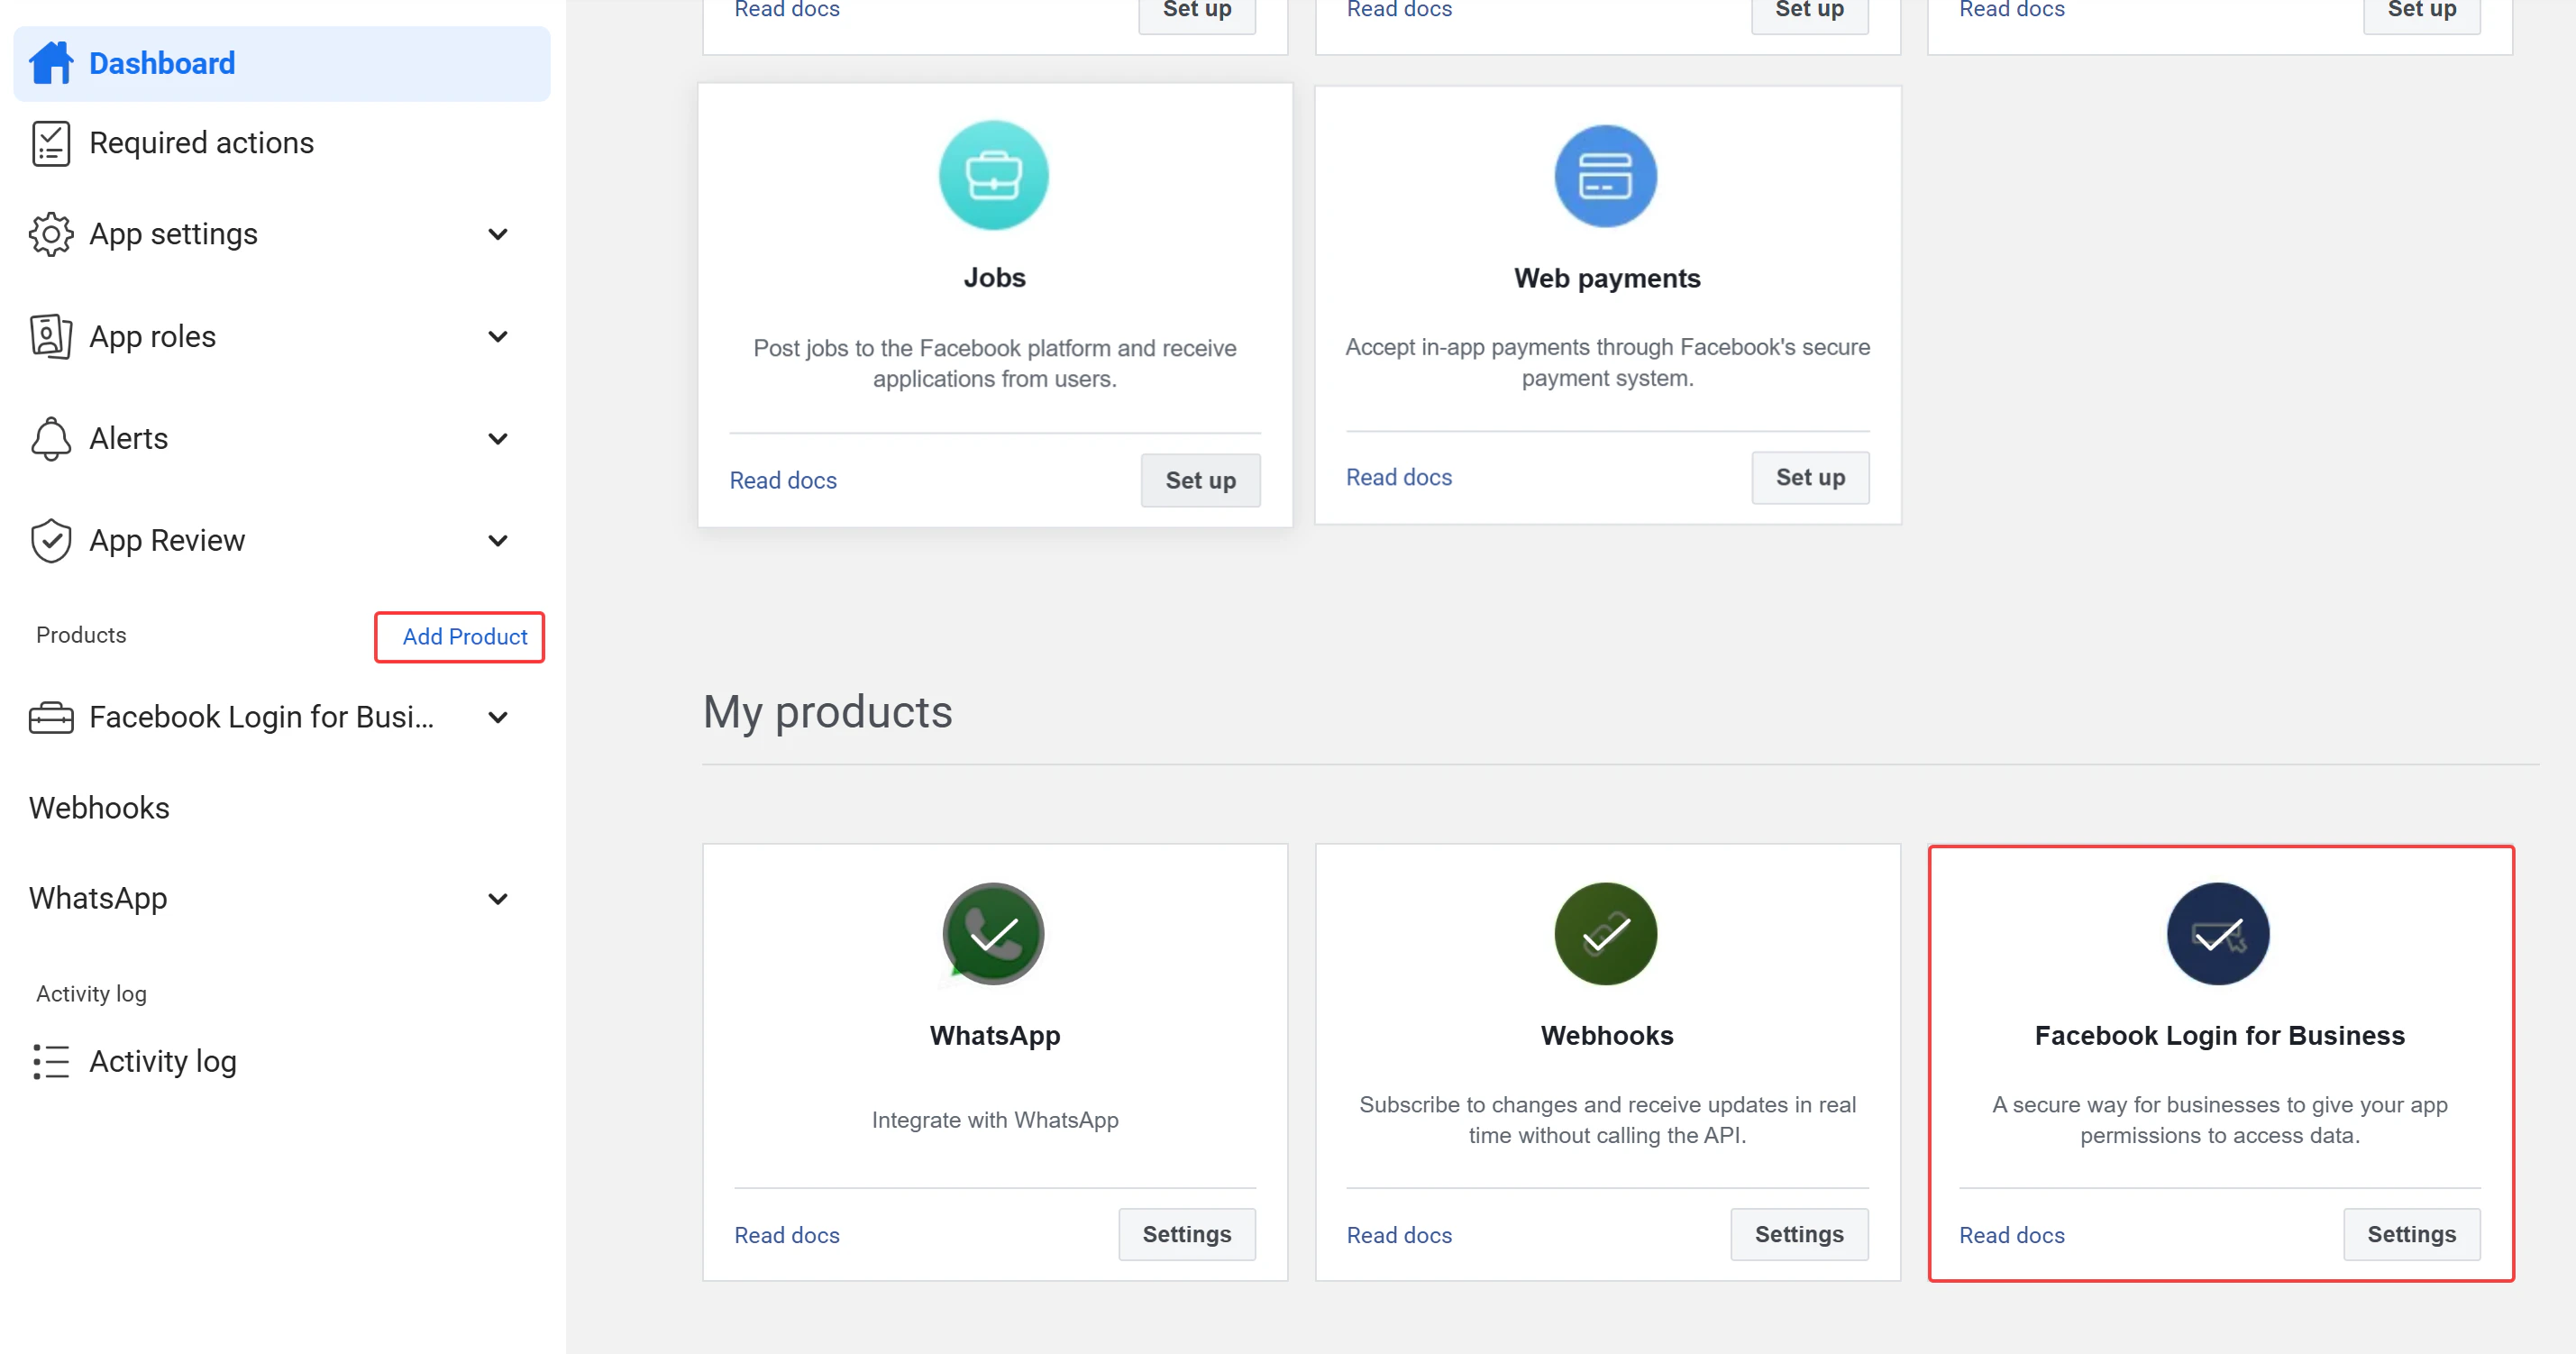
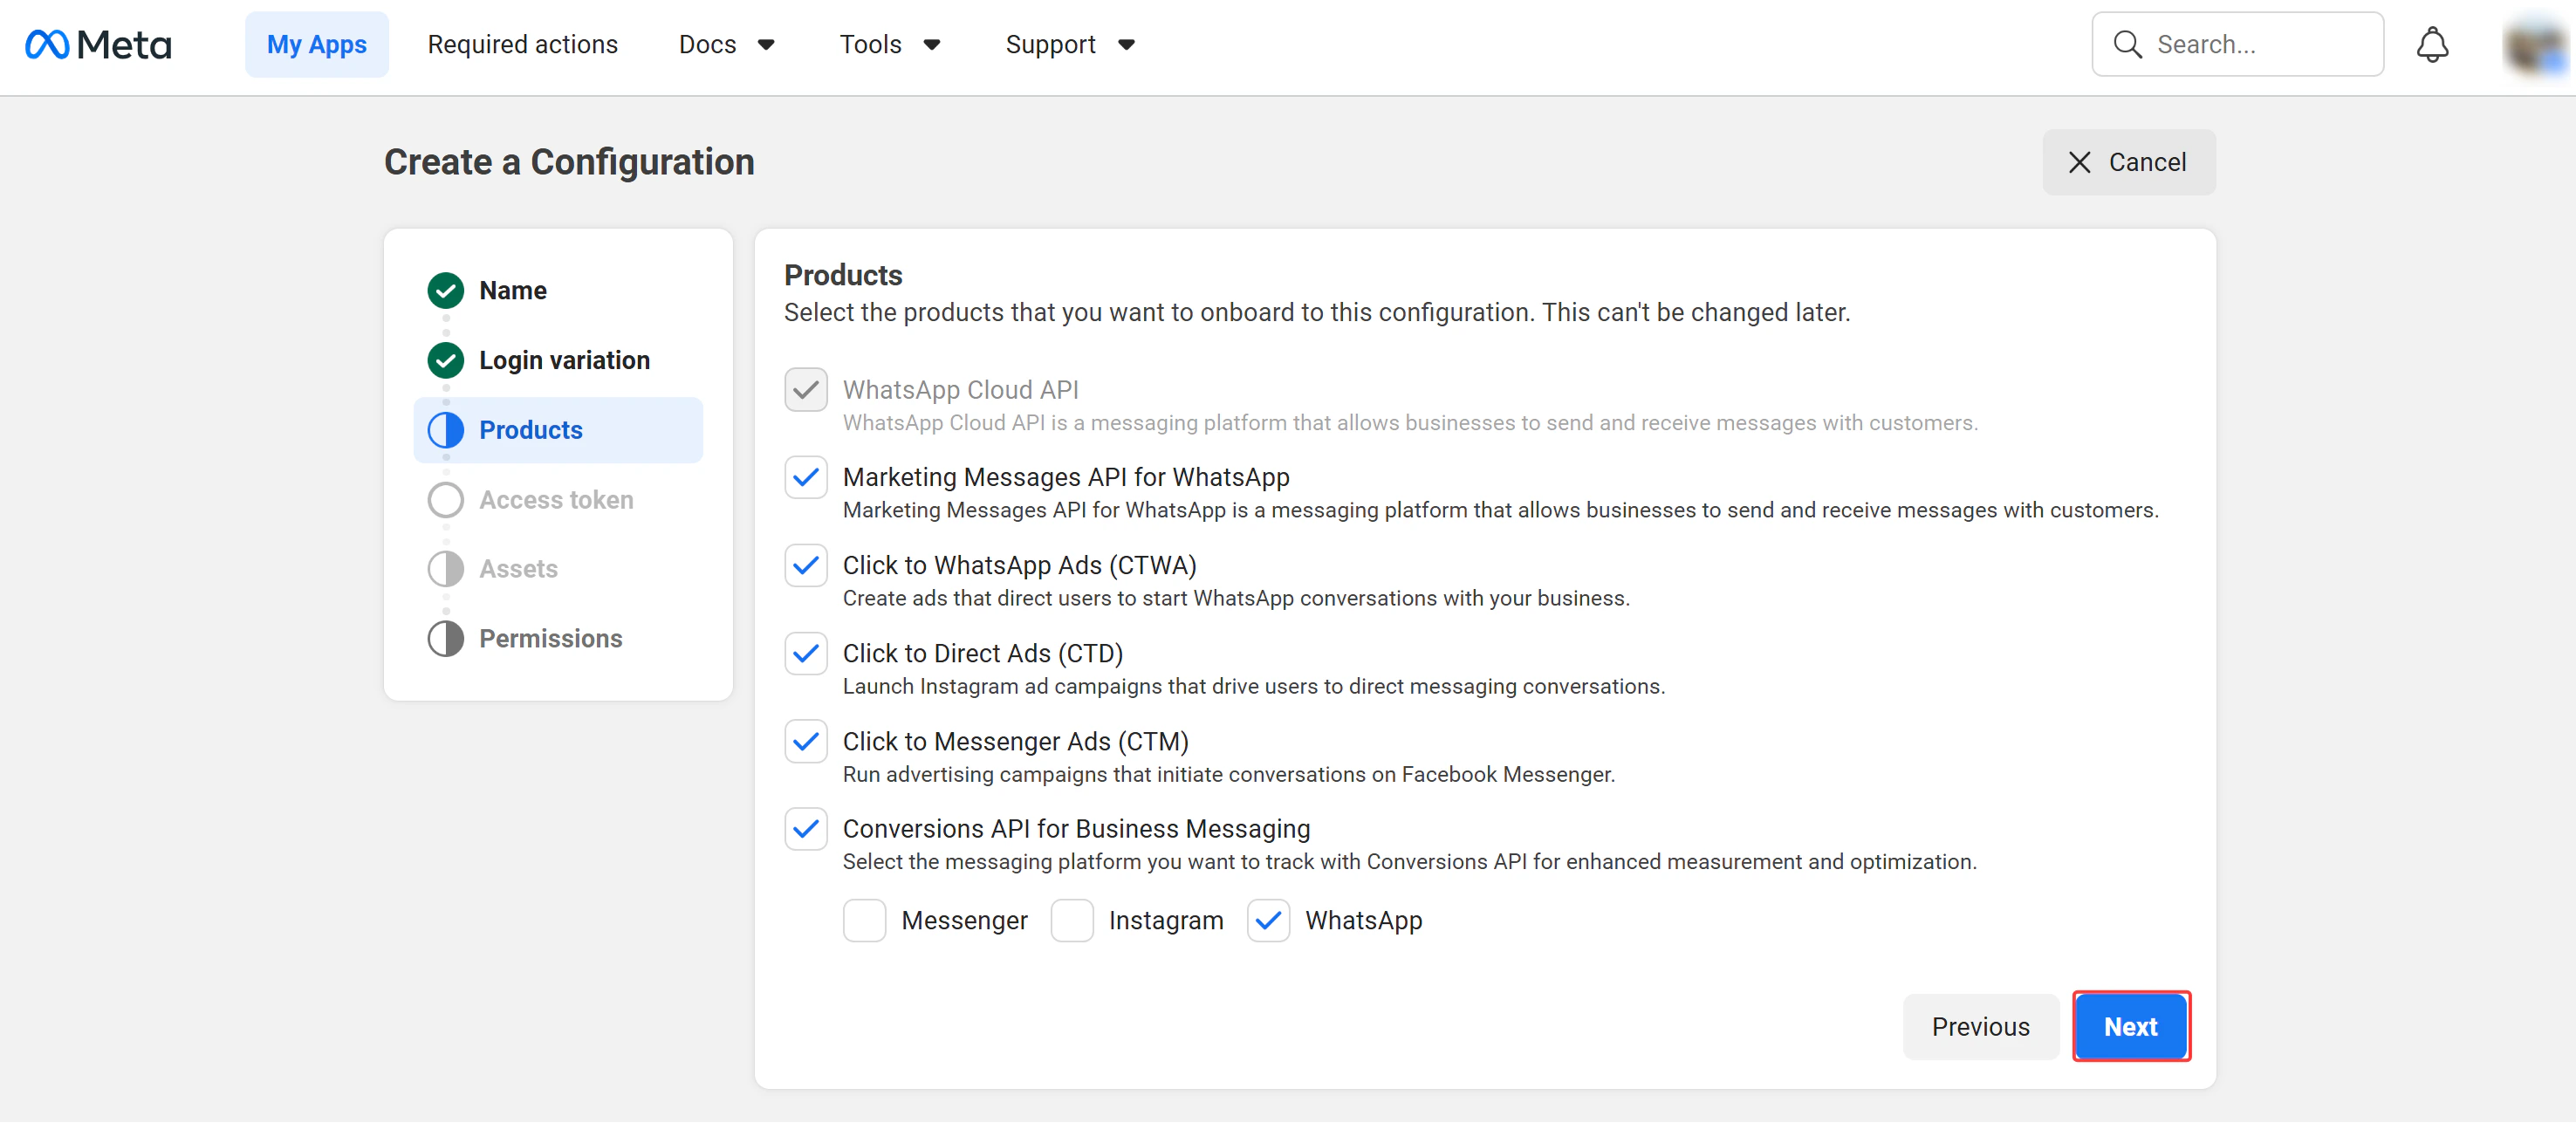
Step 3: Configure the WhatsApp Product
Add WhatsApp product to your app
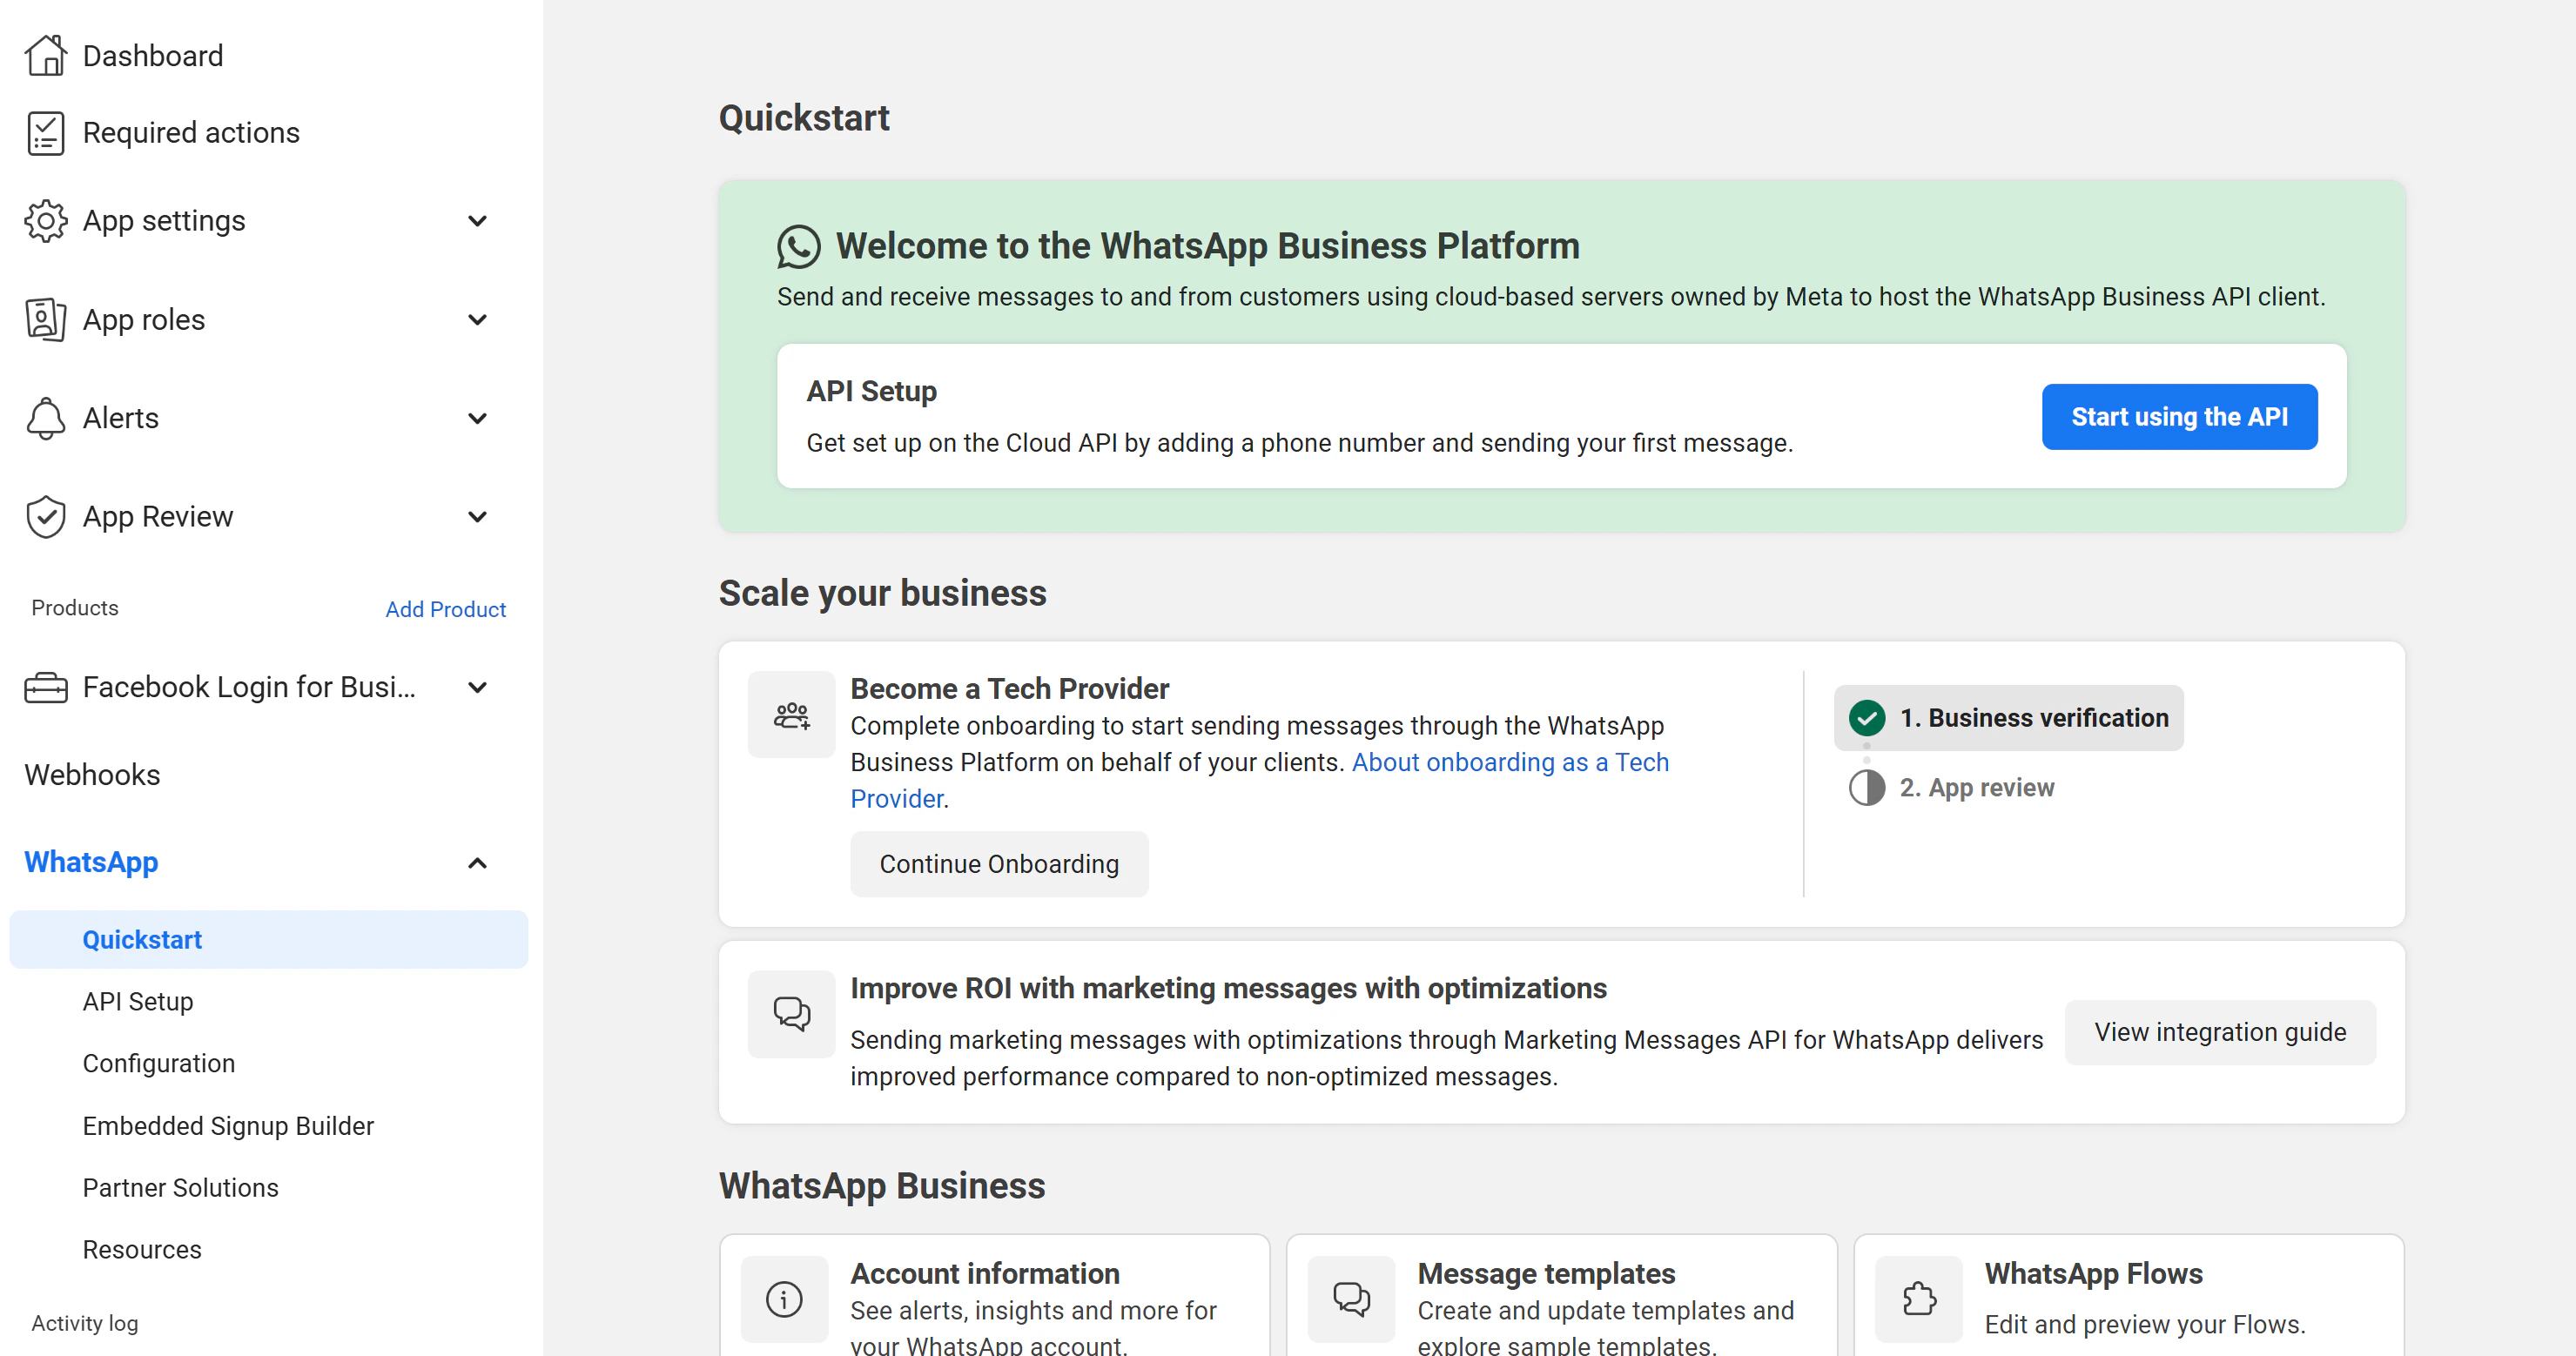
Confirm the WhatsApp Quickstart dashboard
Add Facebook Login for Business product
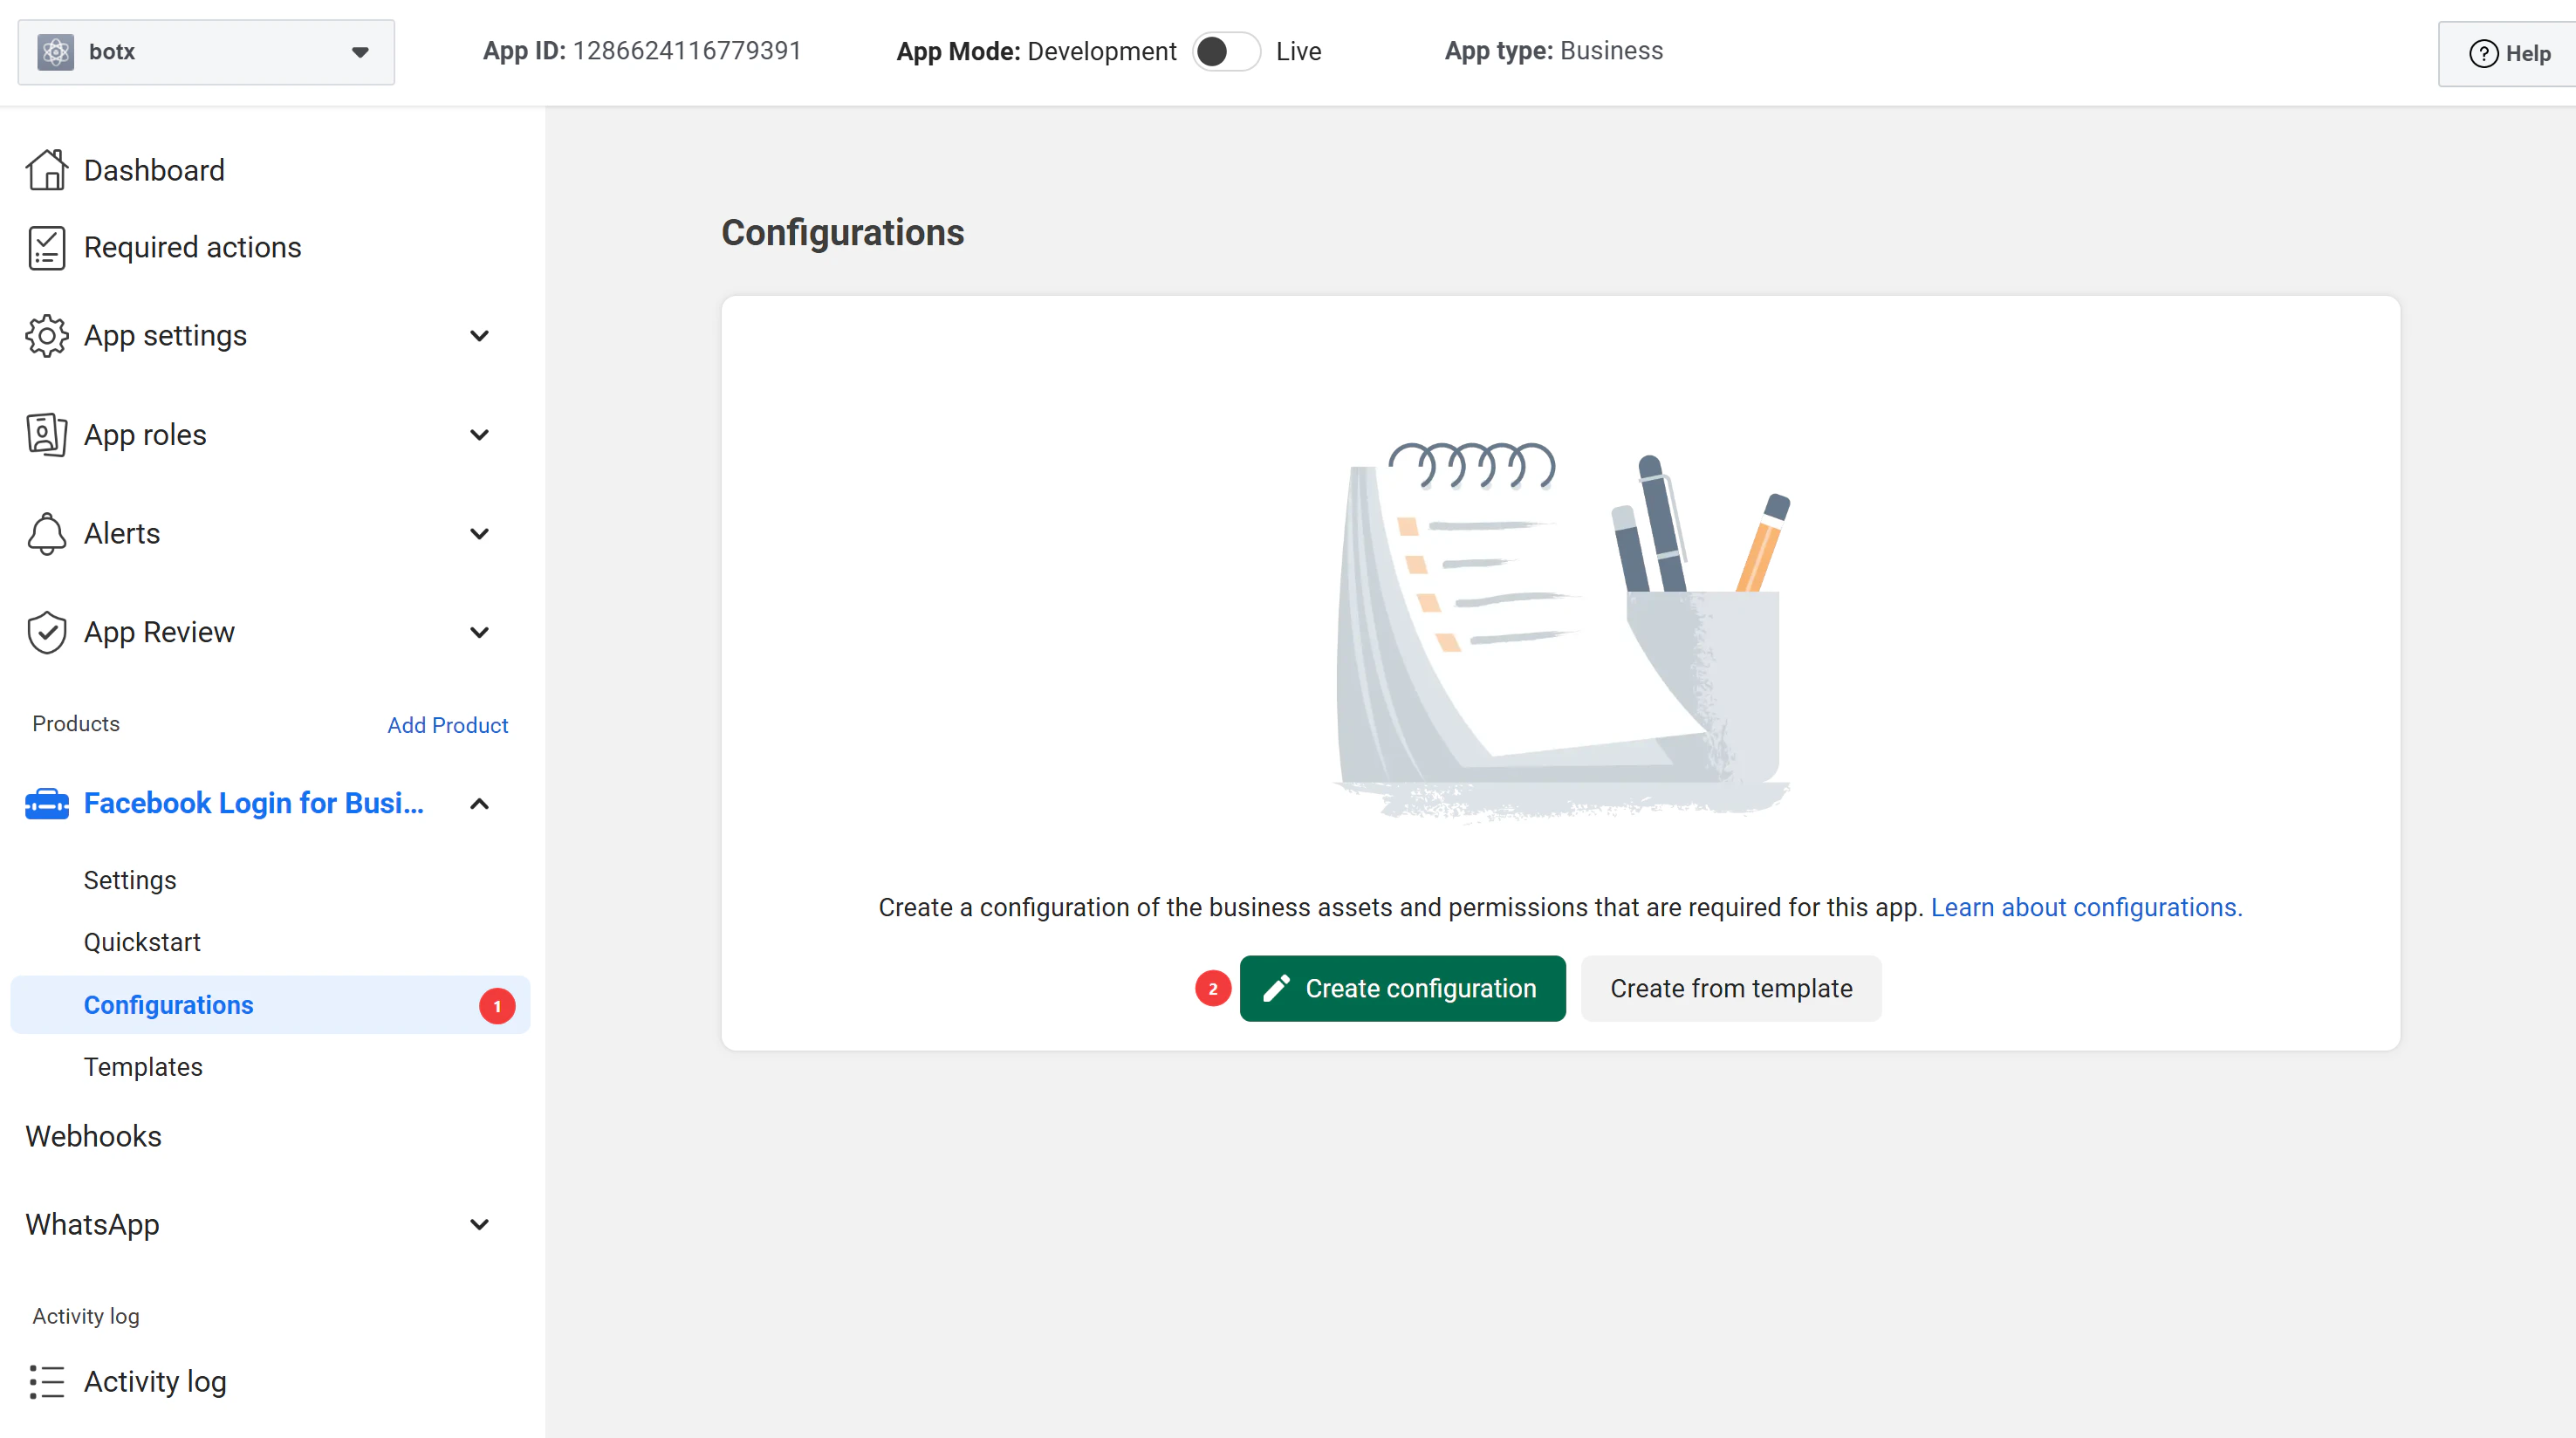
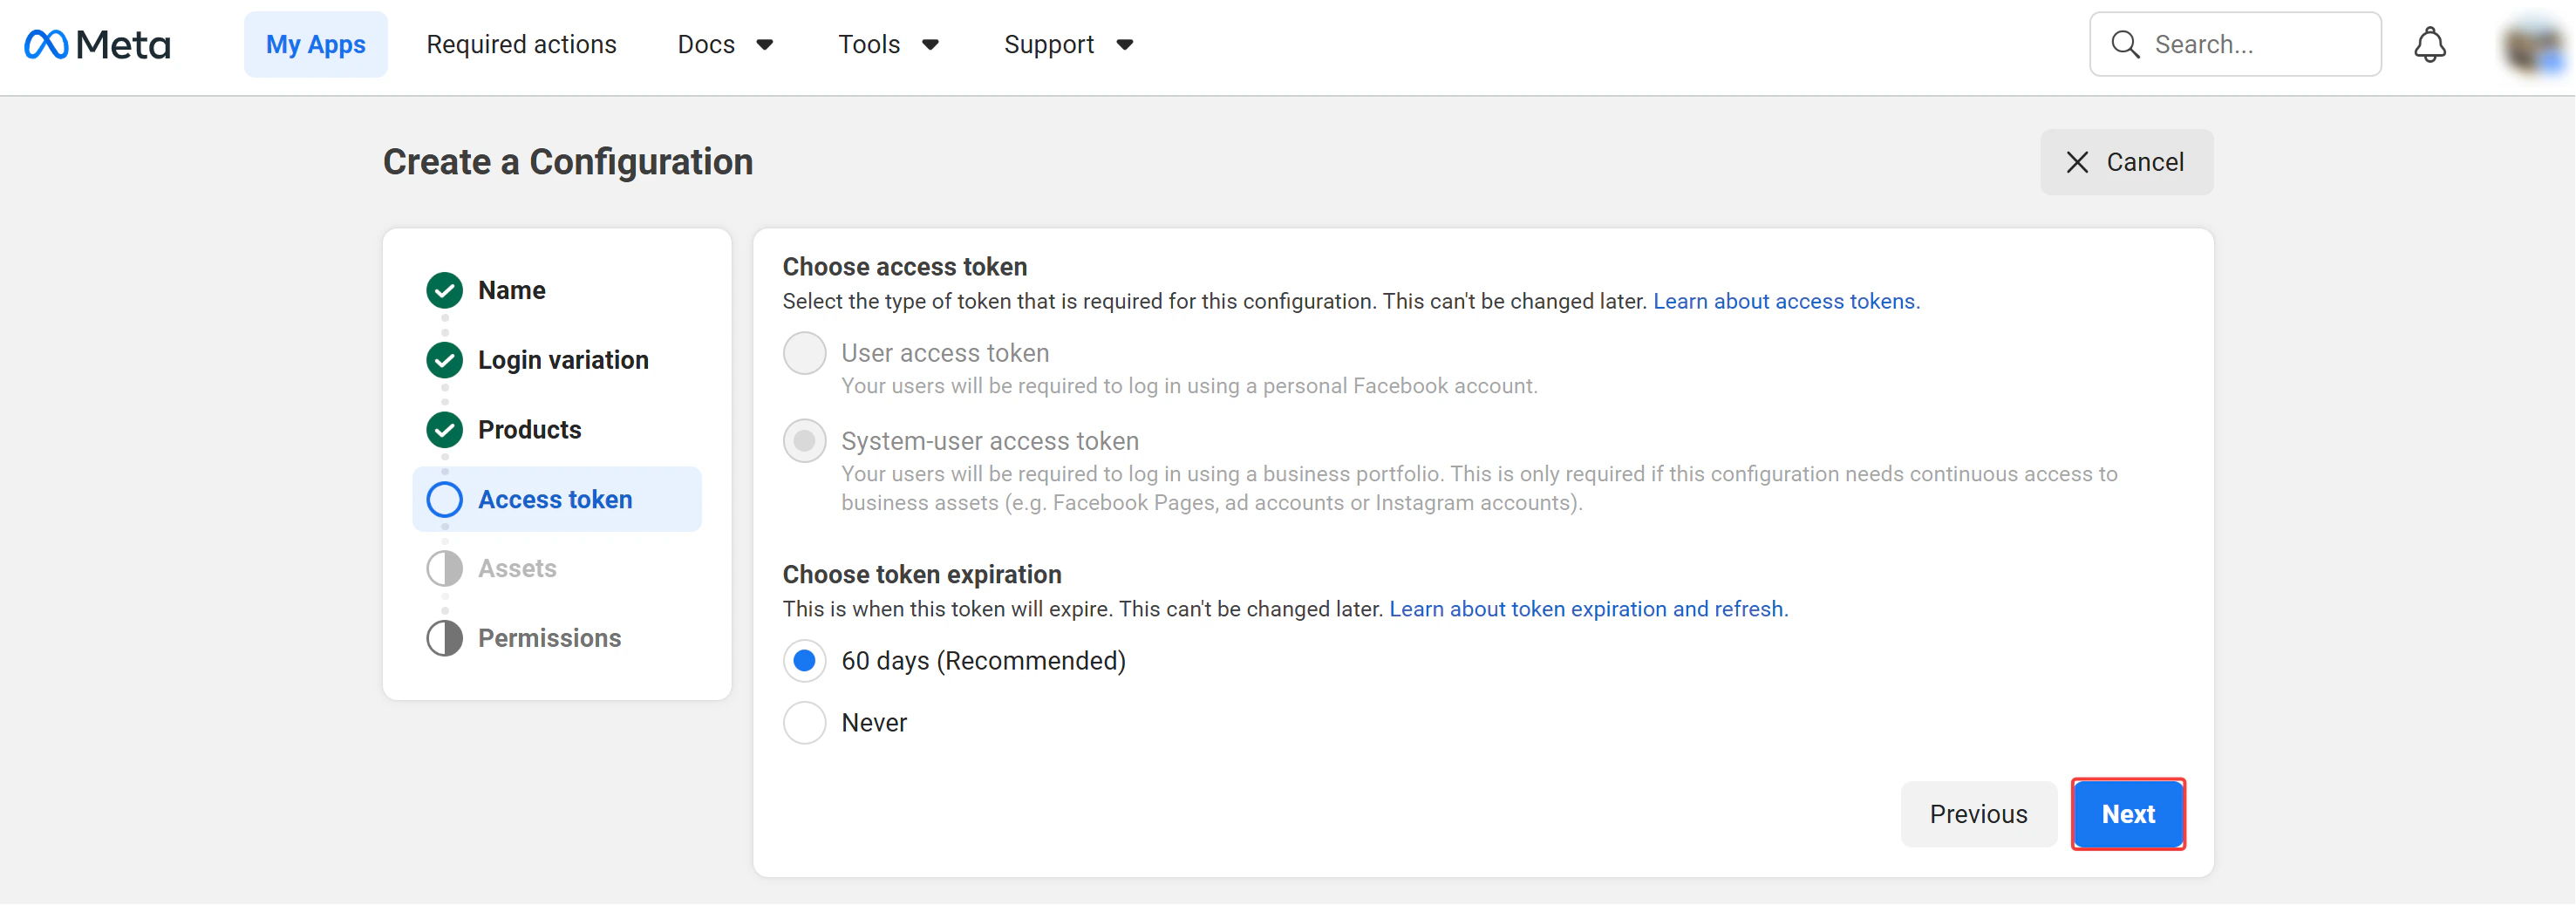
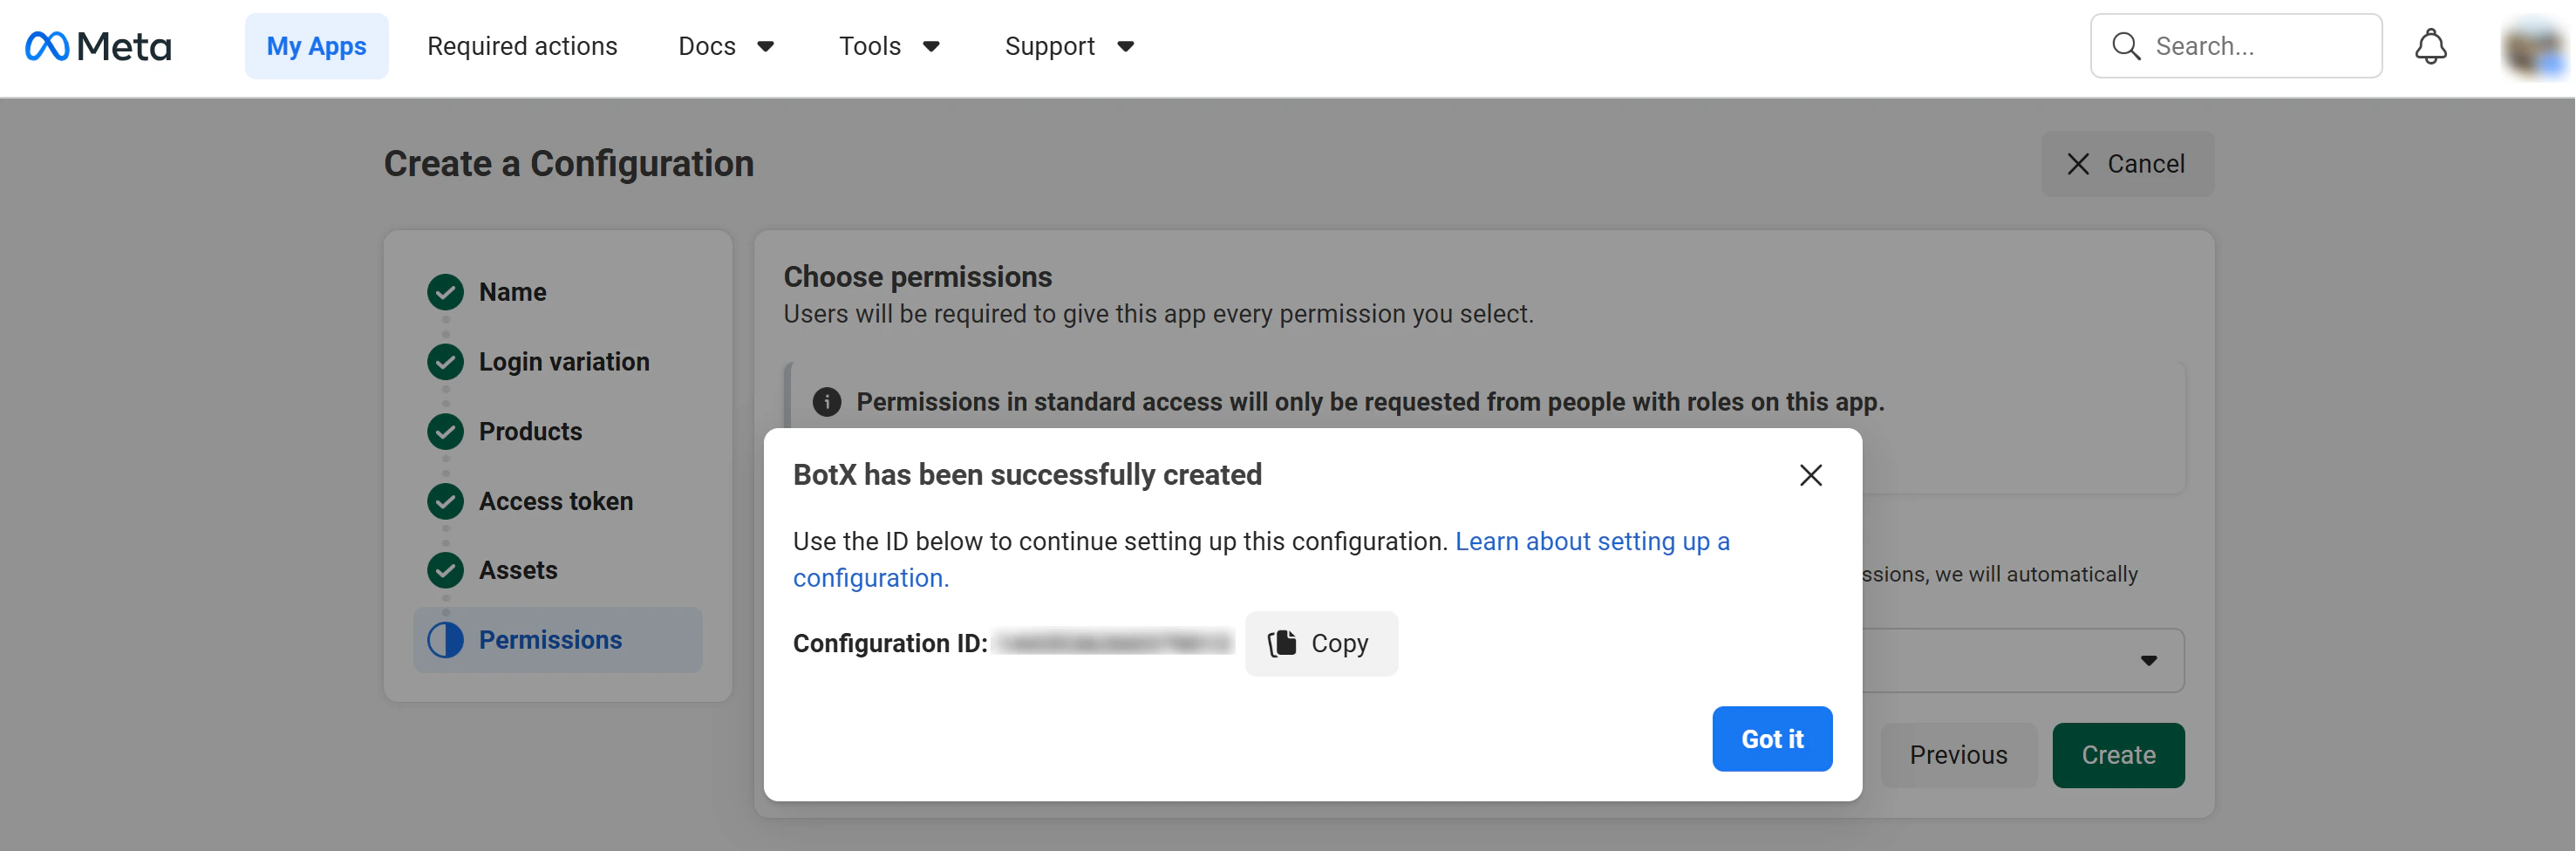
Step 4: Obtain Configuration ID
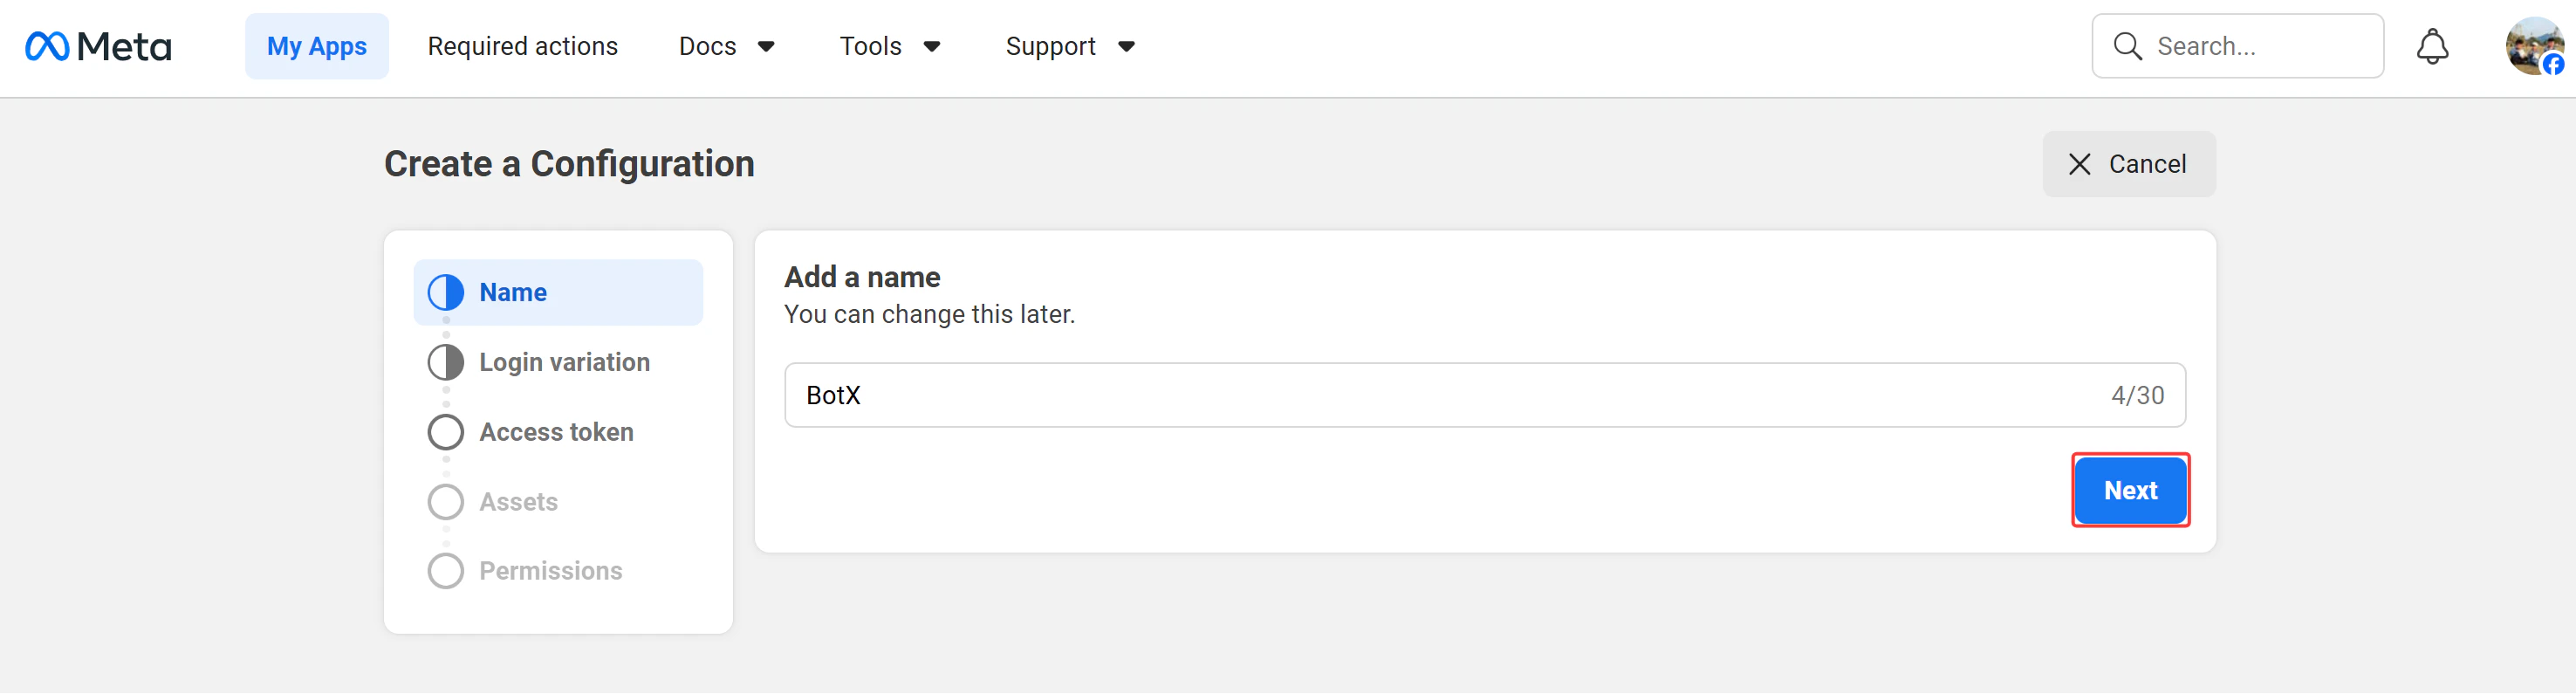
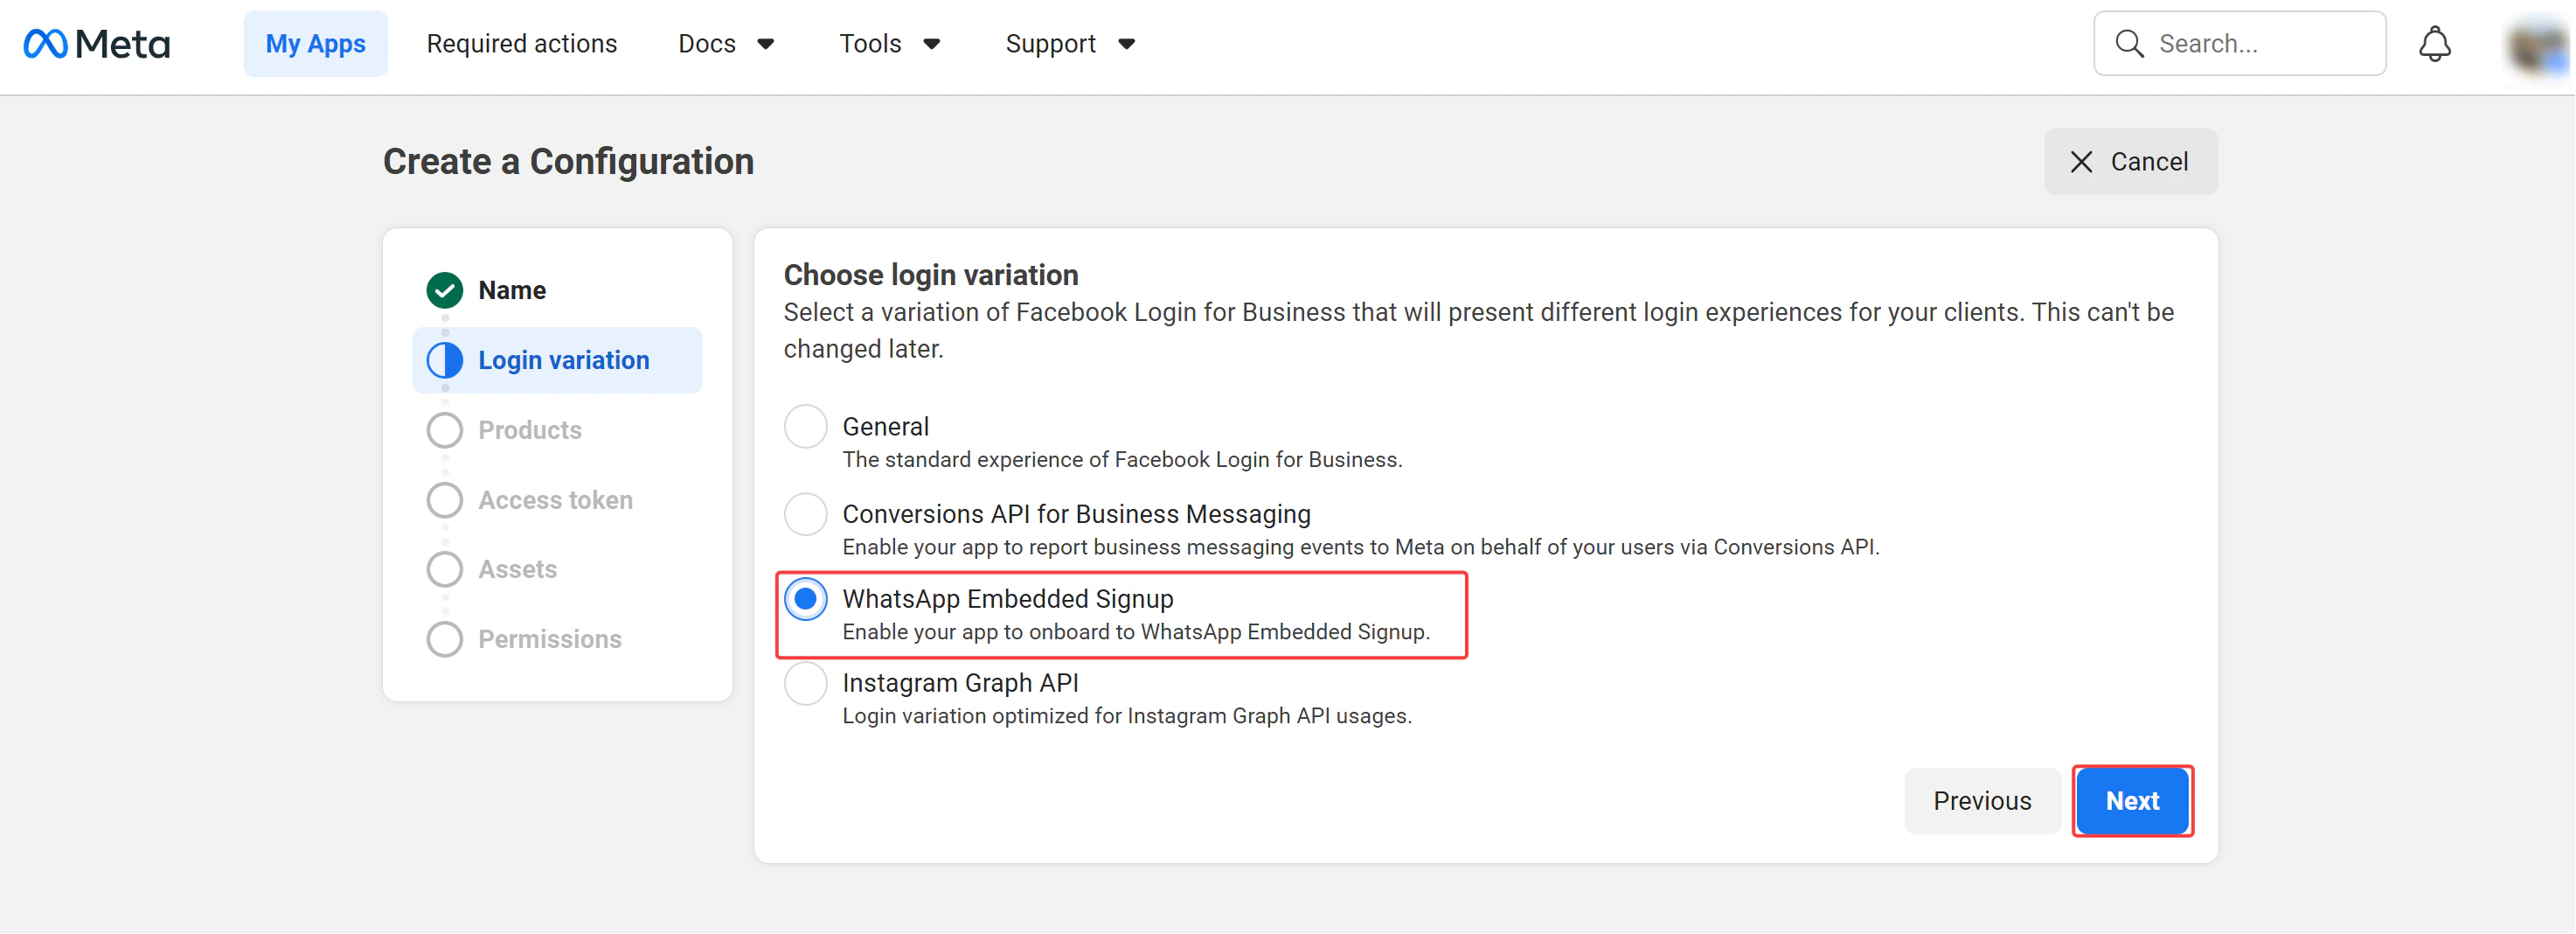
The Configuration ID is the critical value that enables the WhatsApp Embedded Signup flow in ChatbotX. You obtain it from the Facebook Login for Business product settings through a 6-step configuration wizard.Navigate to Facebook Login for Business configurations
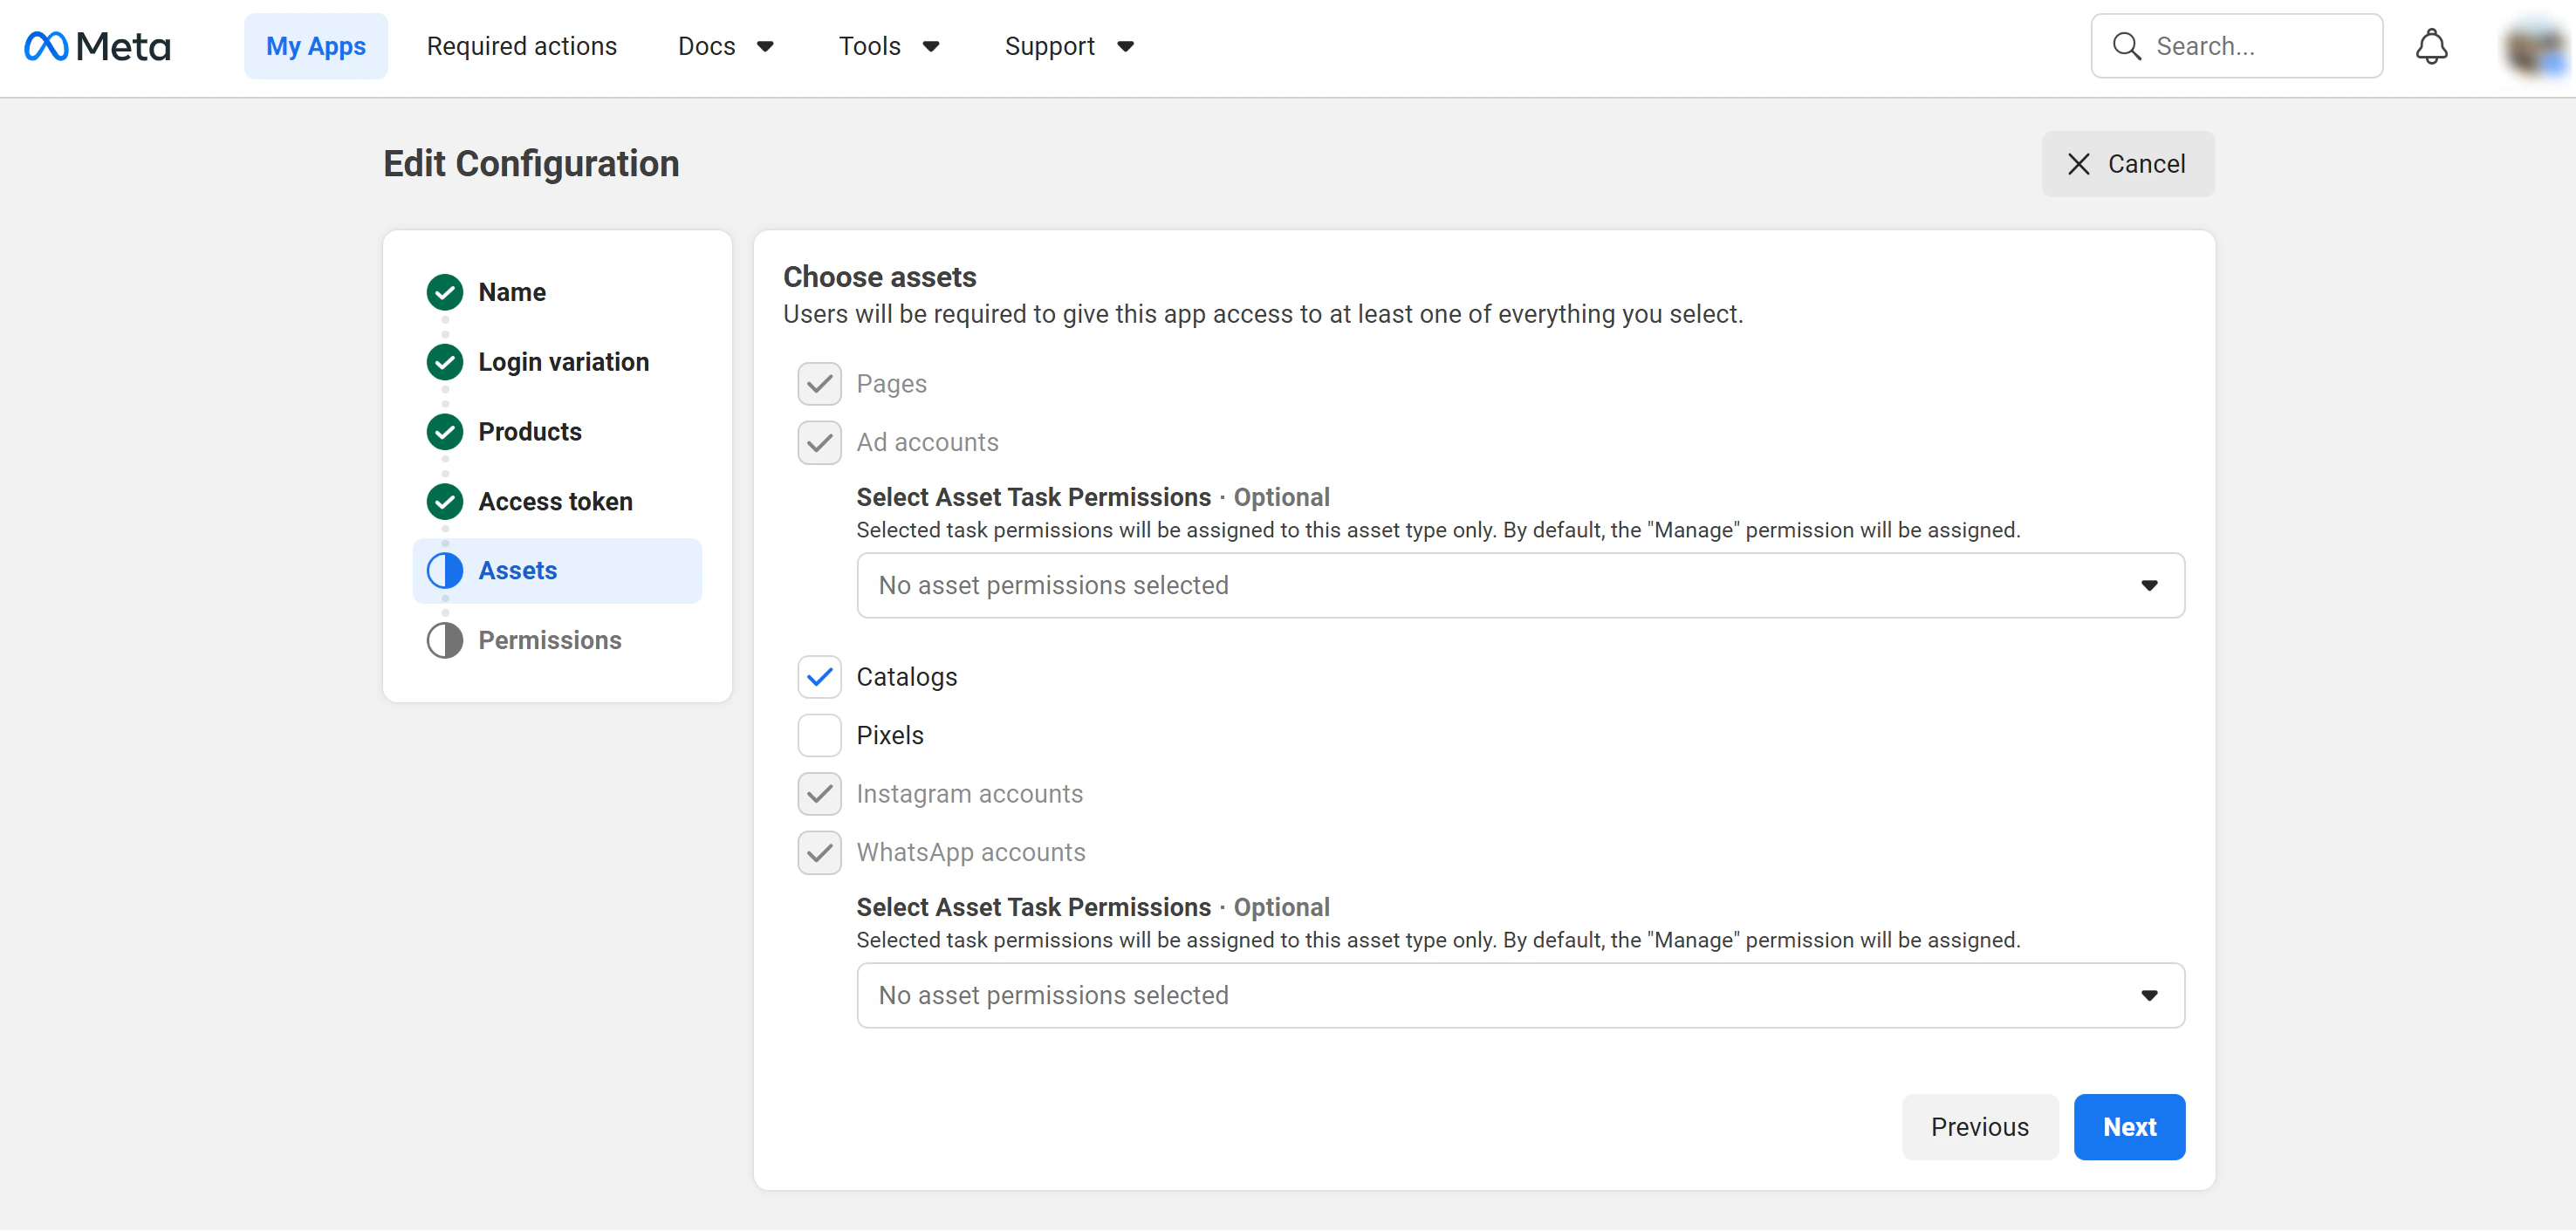
Assets
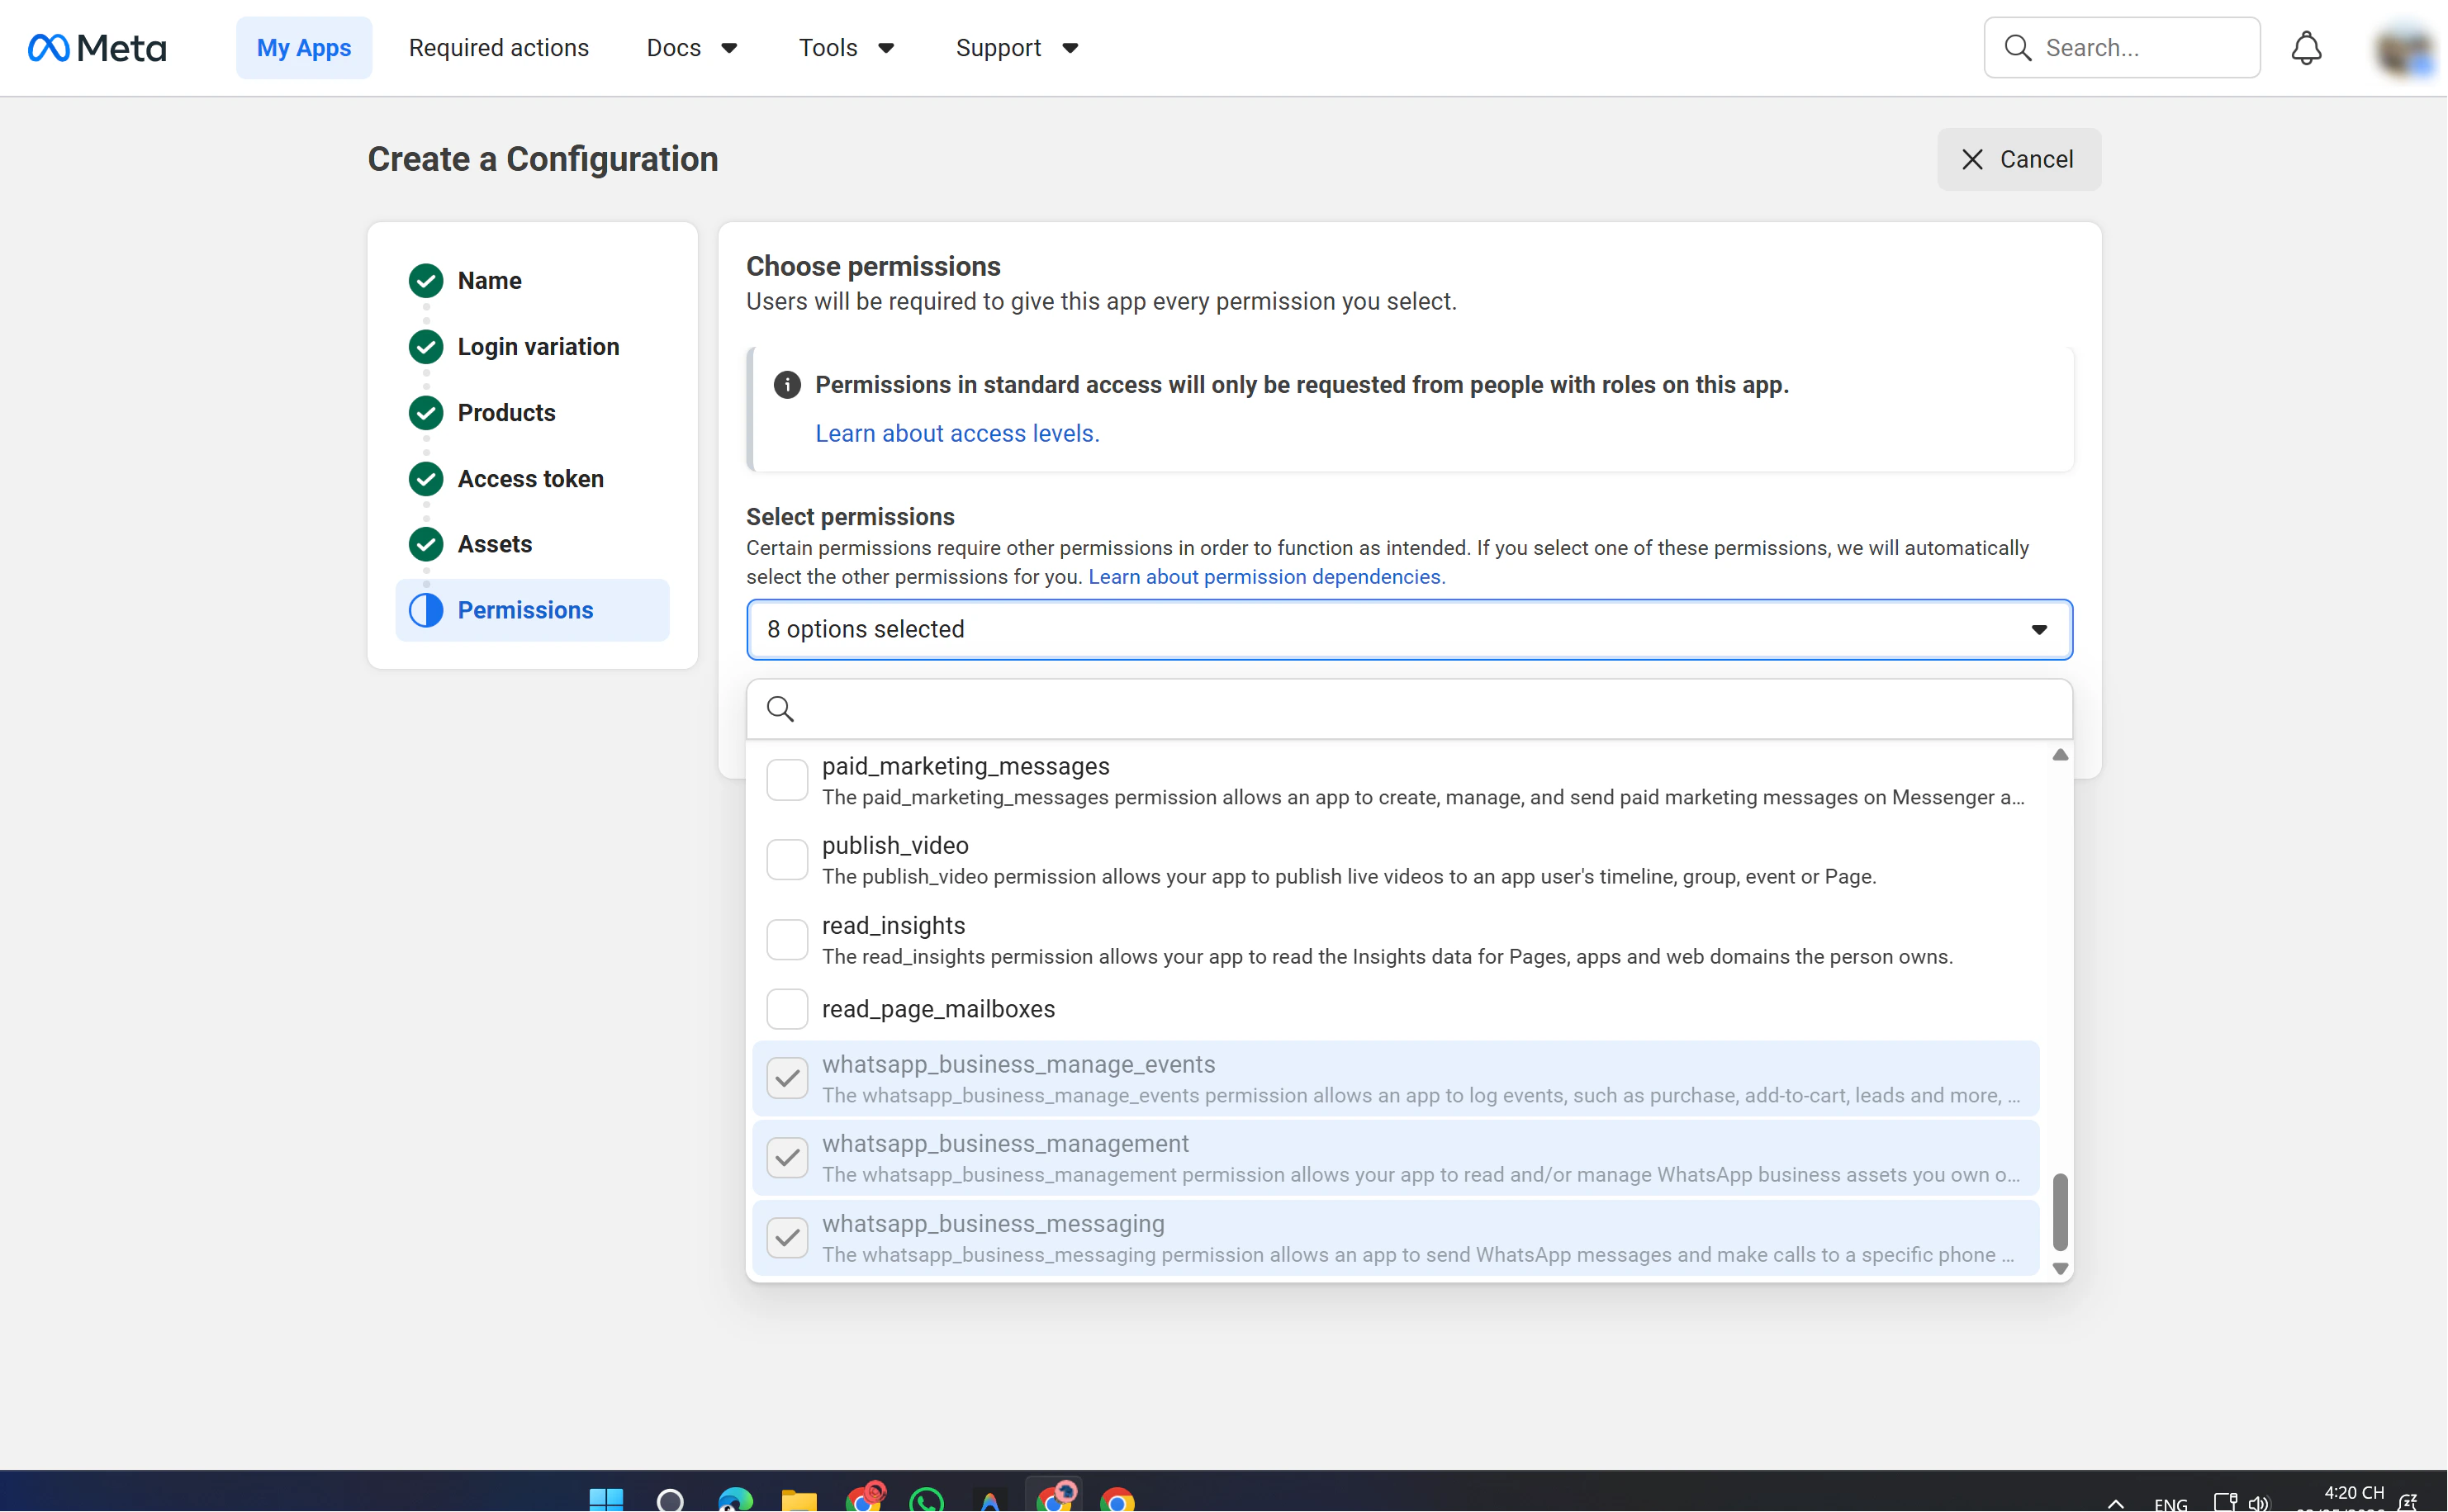
Permissions
| Permission | Purpose |
|---|---|
whatsapp_business_management | Read and manage WhatsApp Business assets (phone numbers, profiles) |
whatsapp_business_messaging | Send and receive WhatsApp messages and make calls |
whatsapp_business_manage_events | Log events such as purchases, add-to-cart, and leads |
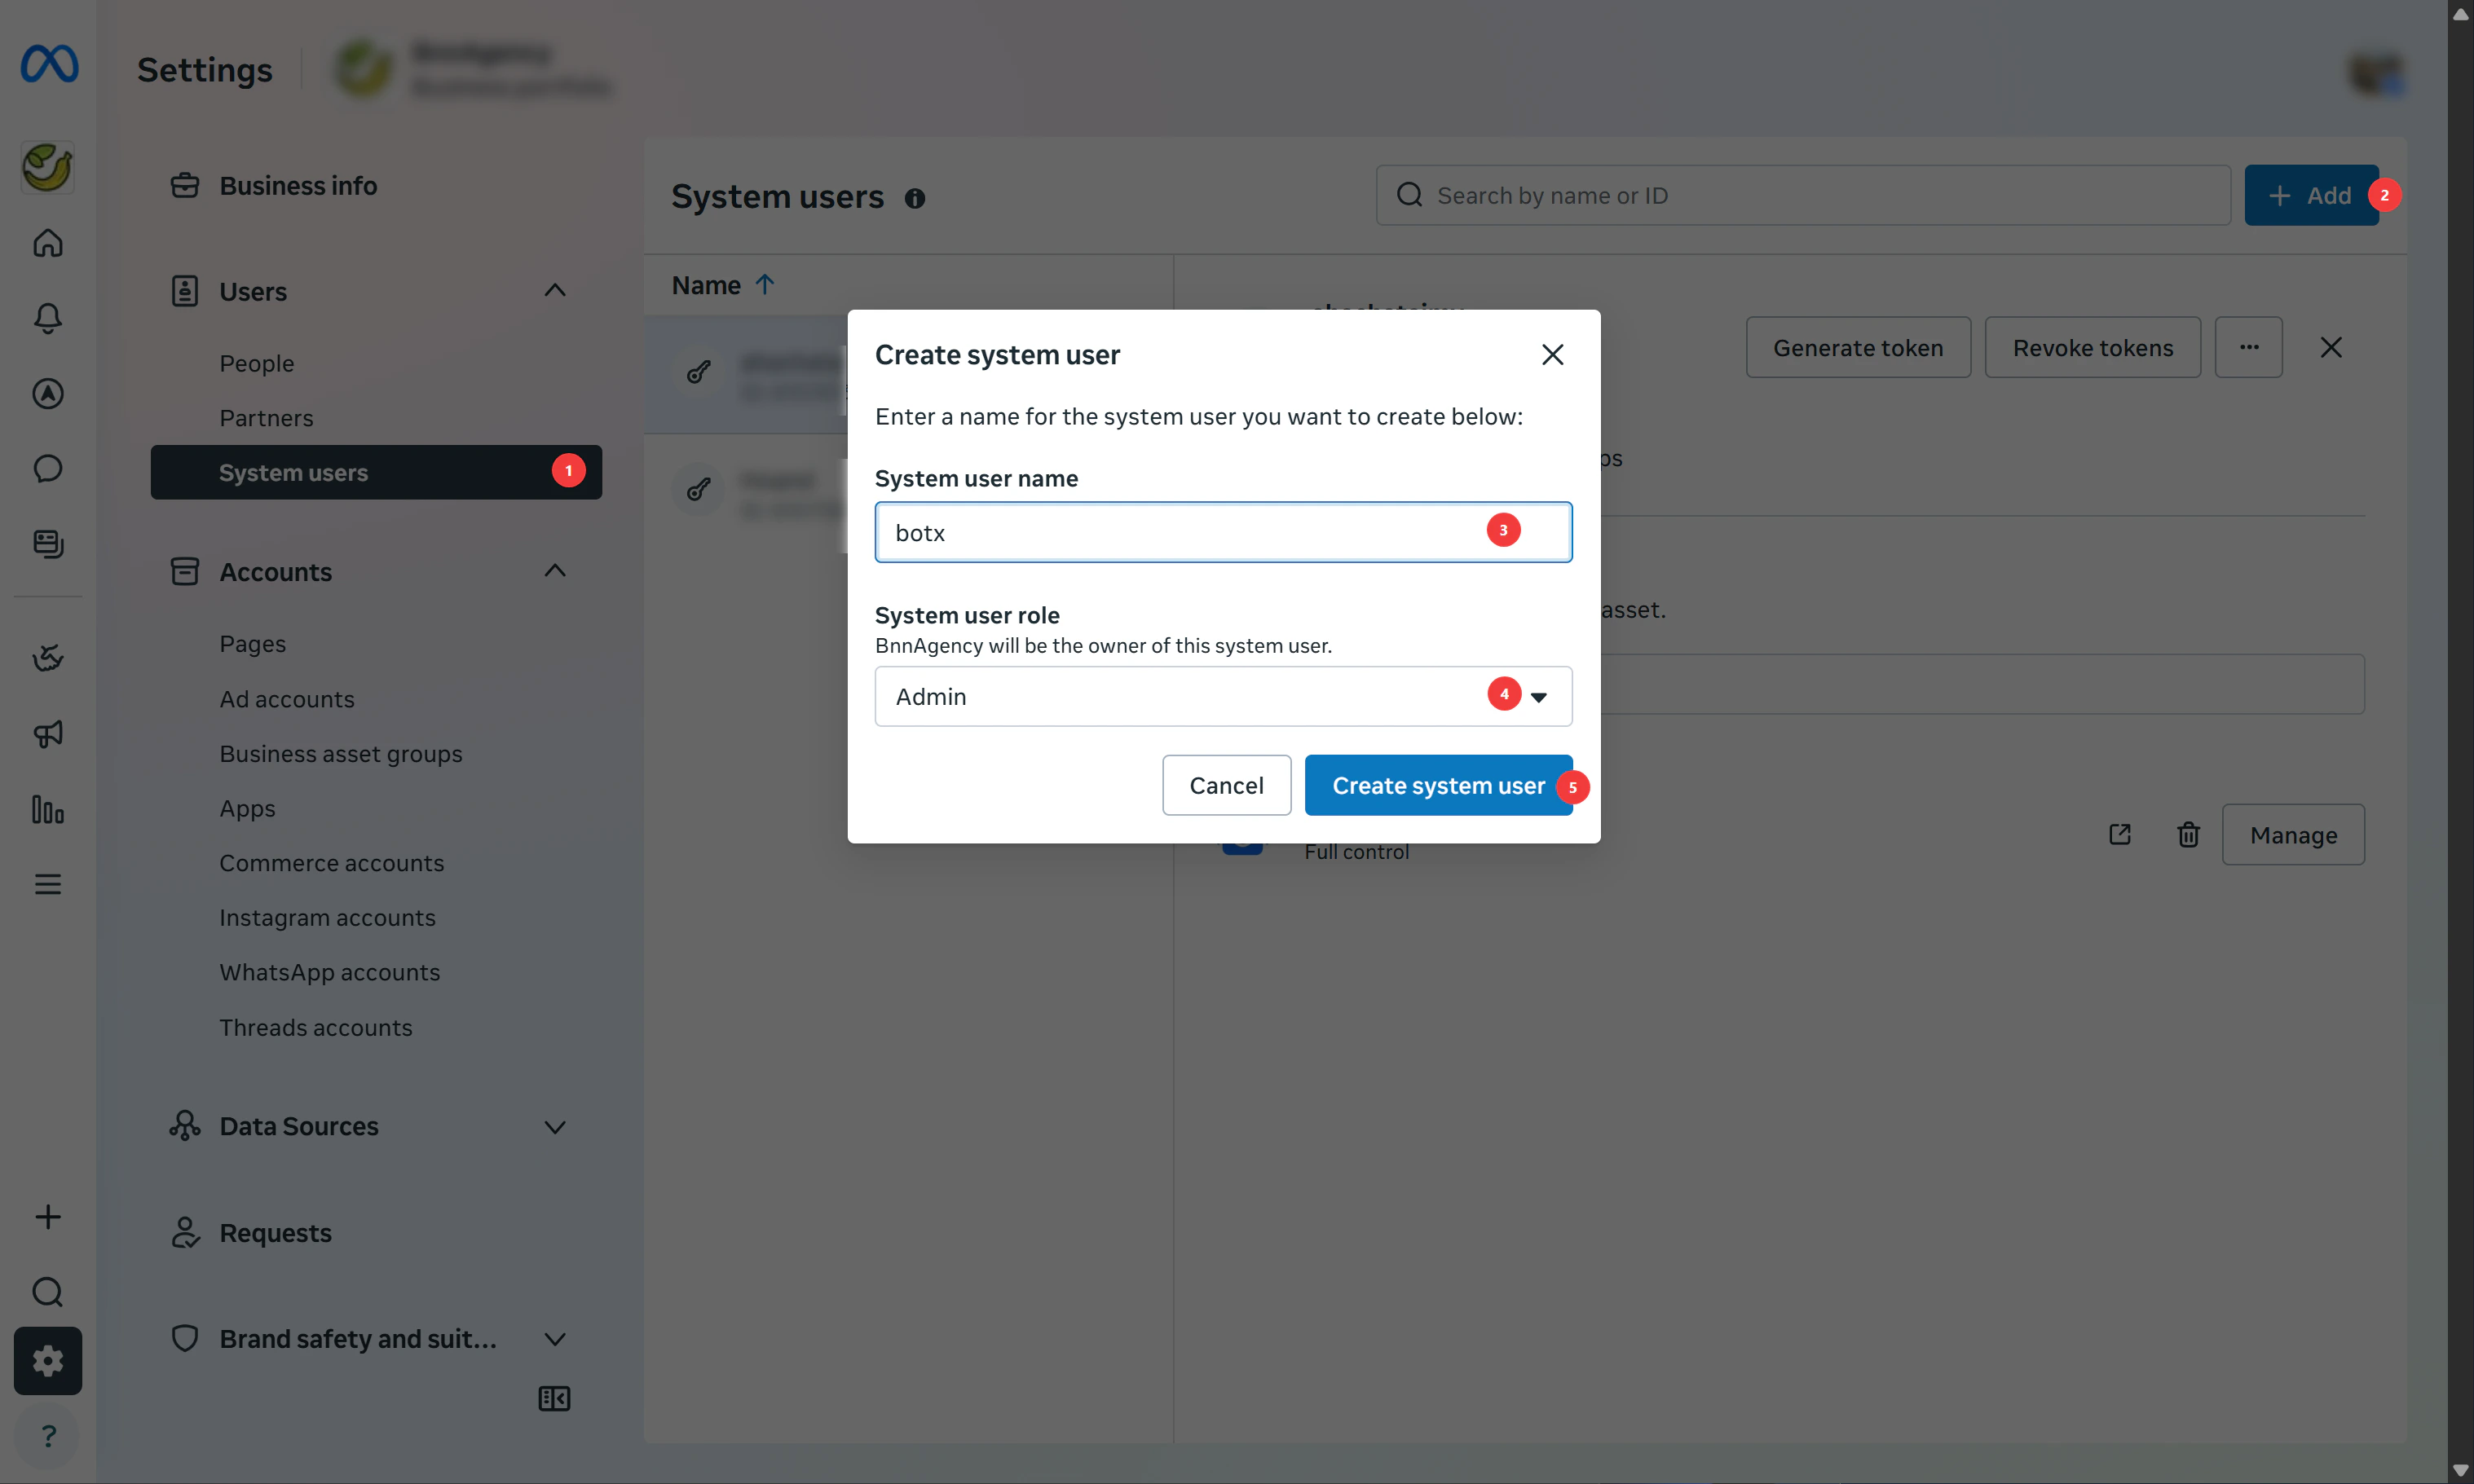
Step 5: Obtain System User ID and Token
Navigate to System Users
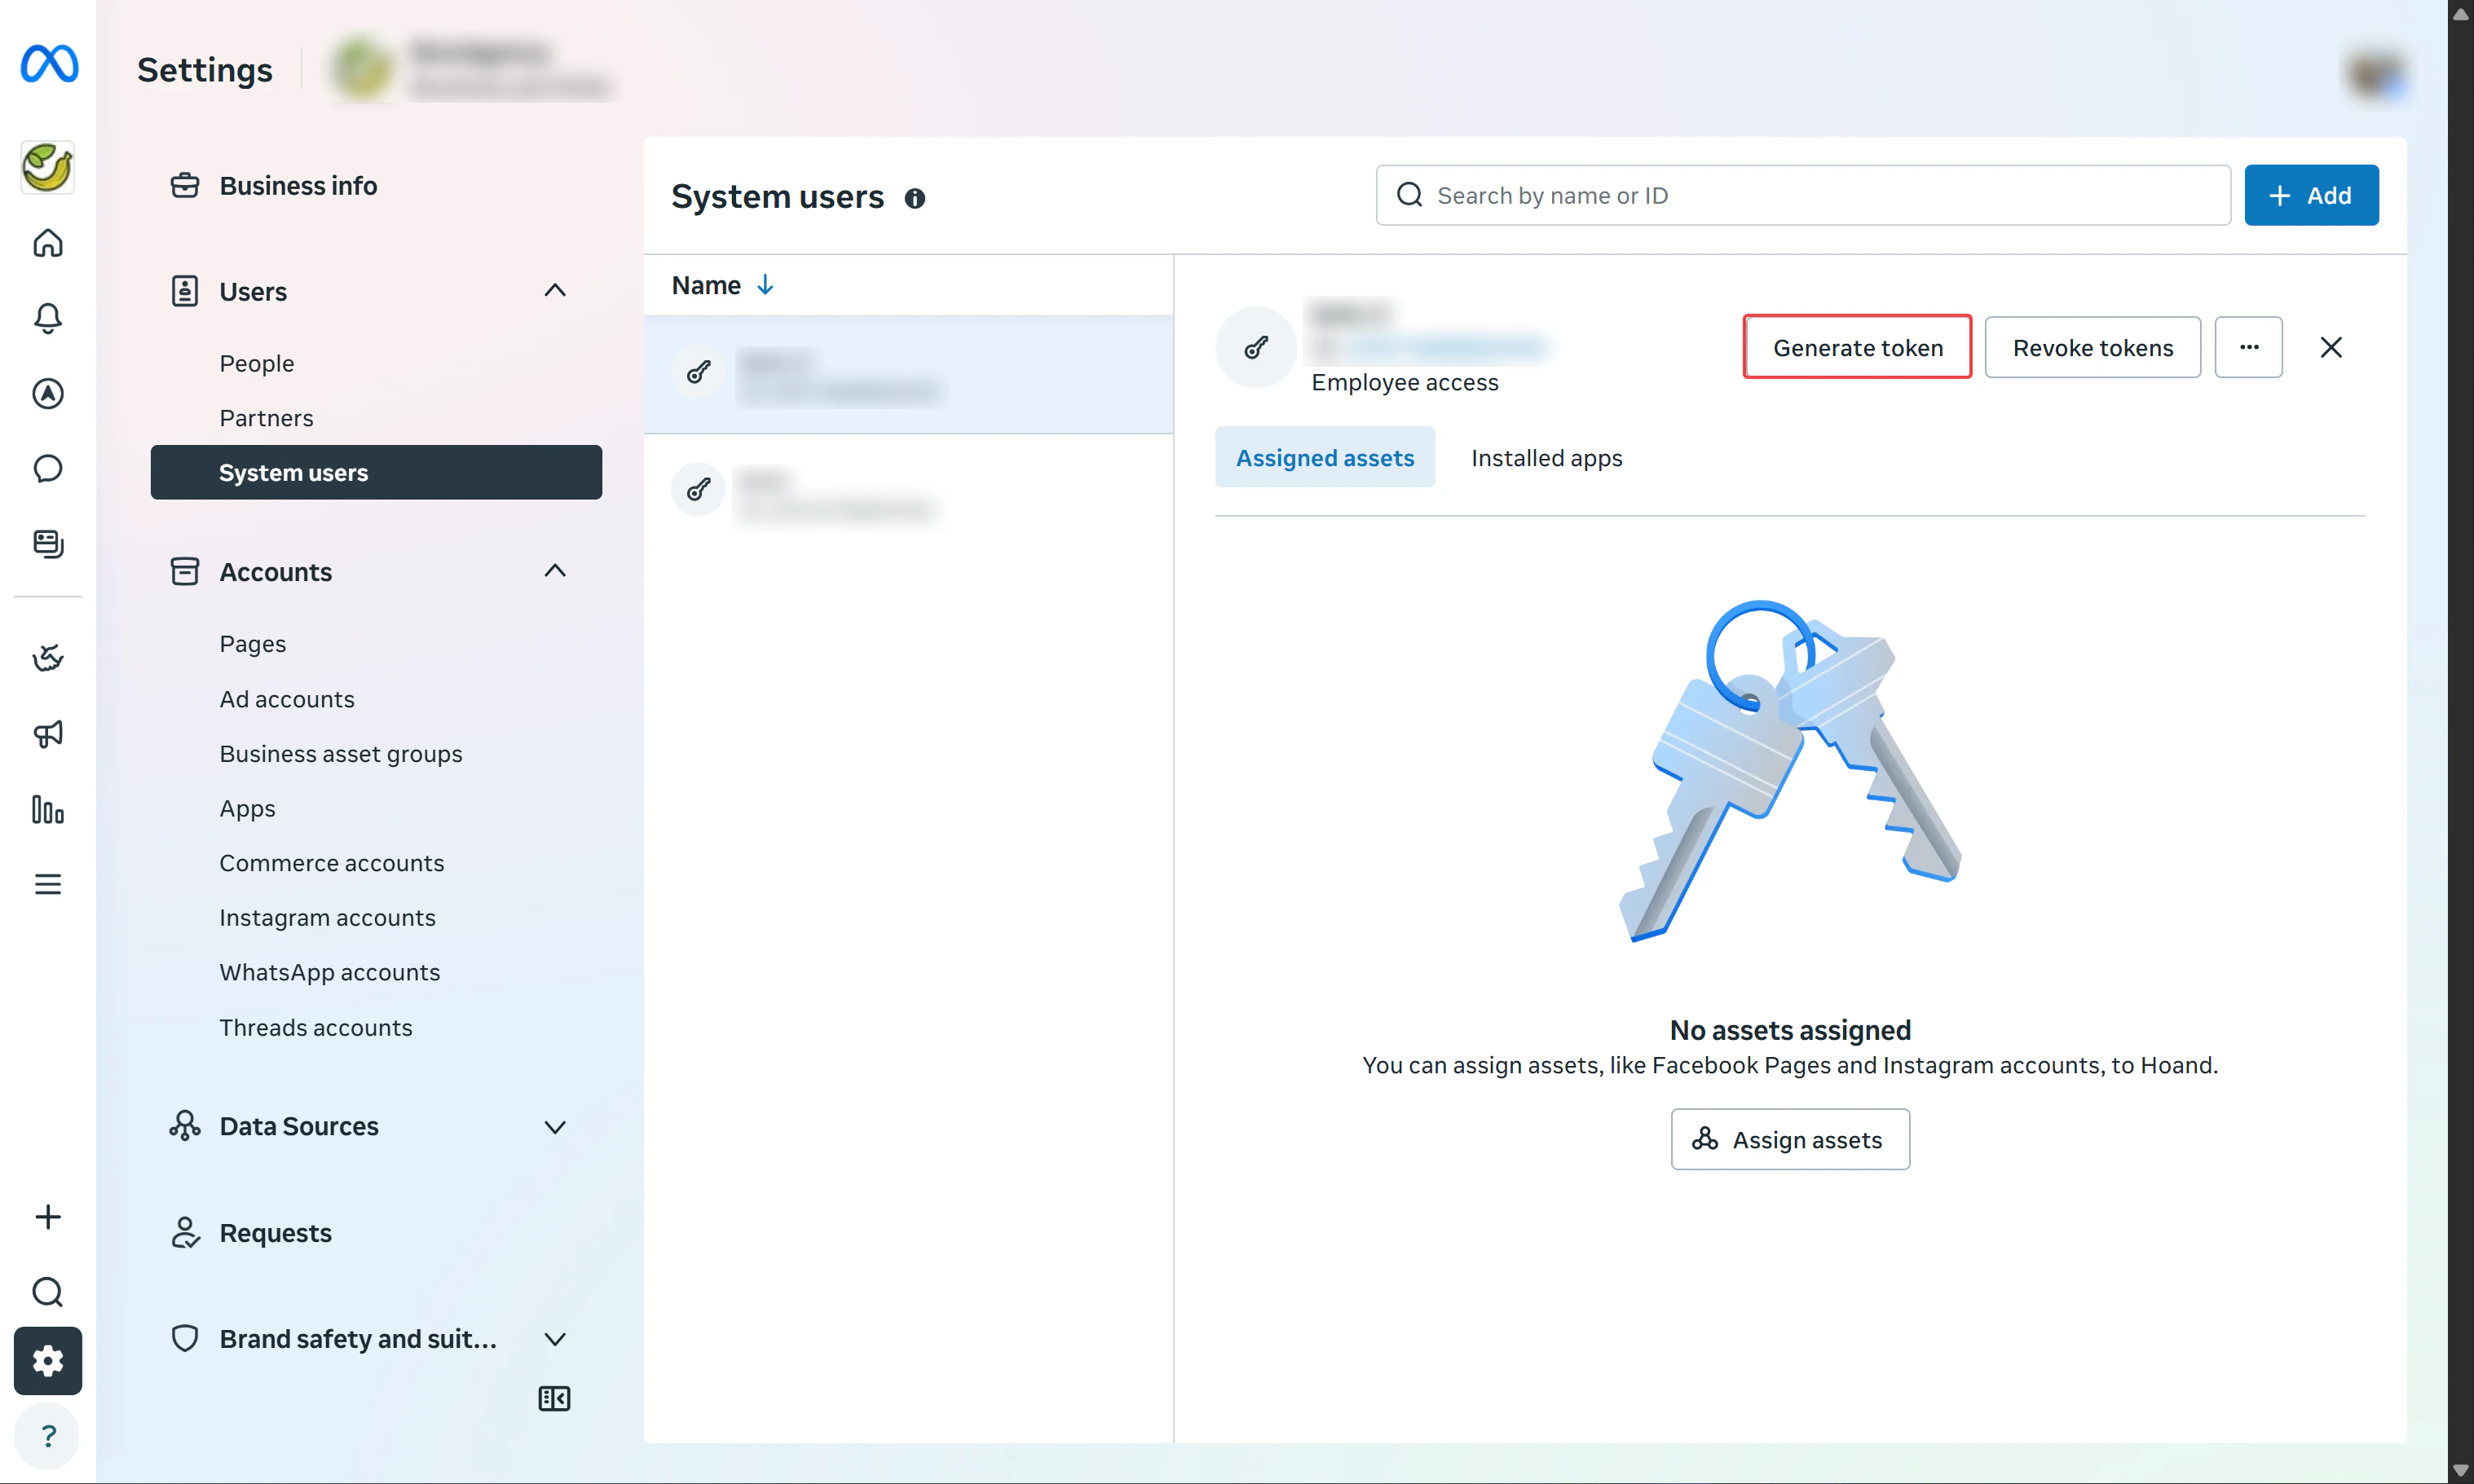
Generate Access Token
- Select App: choose your Facebook App
- Token Expiration: select Never to avoid disruptions
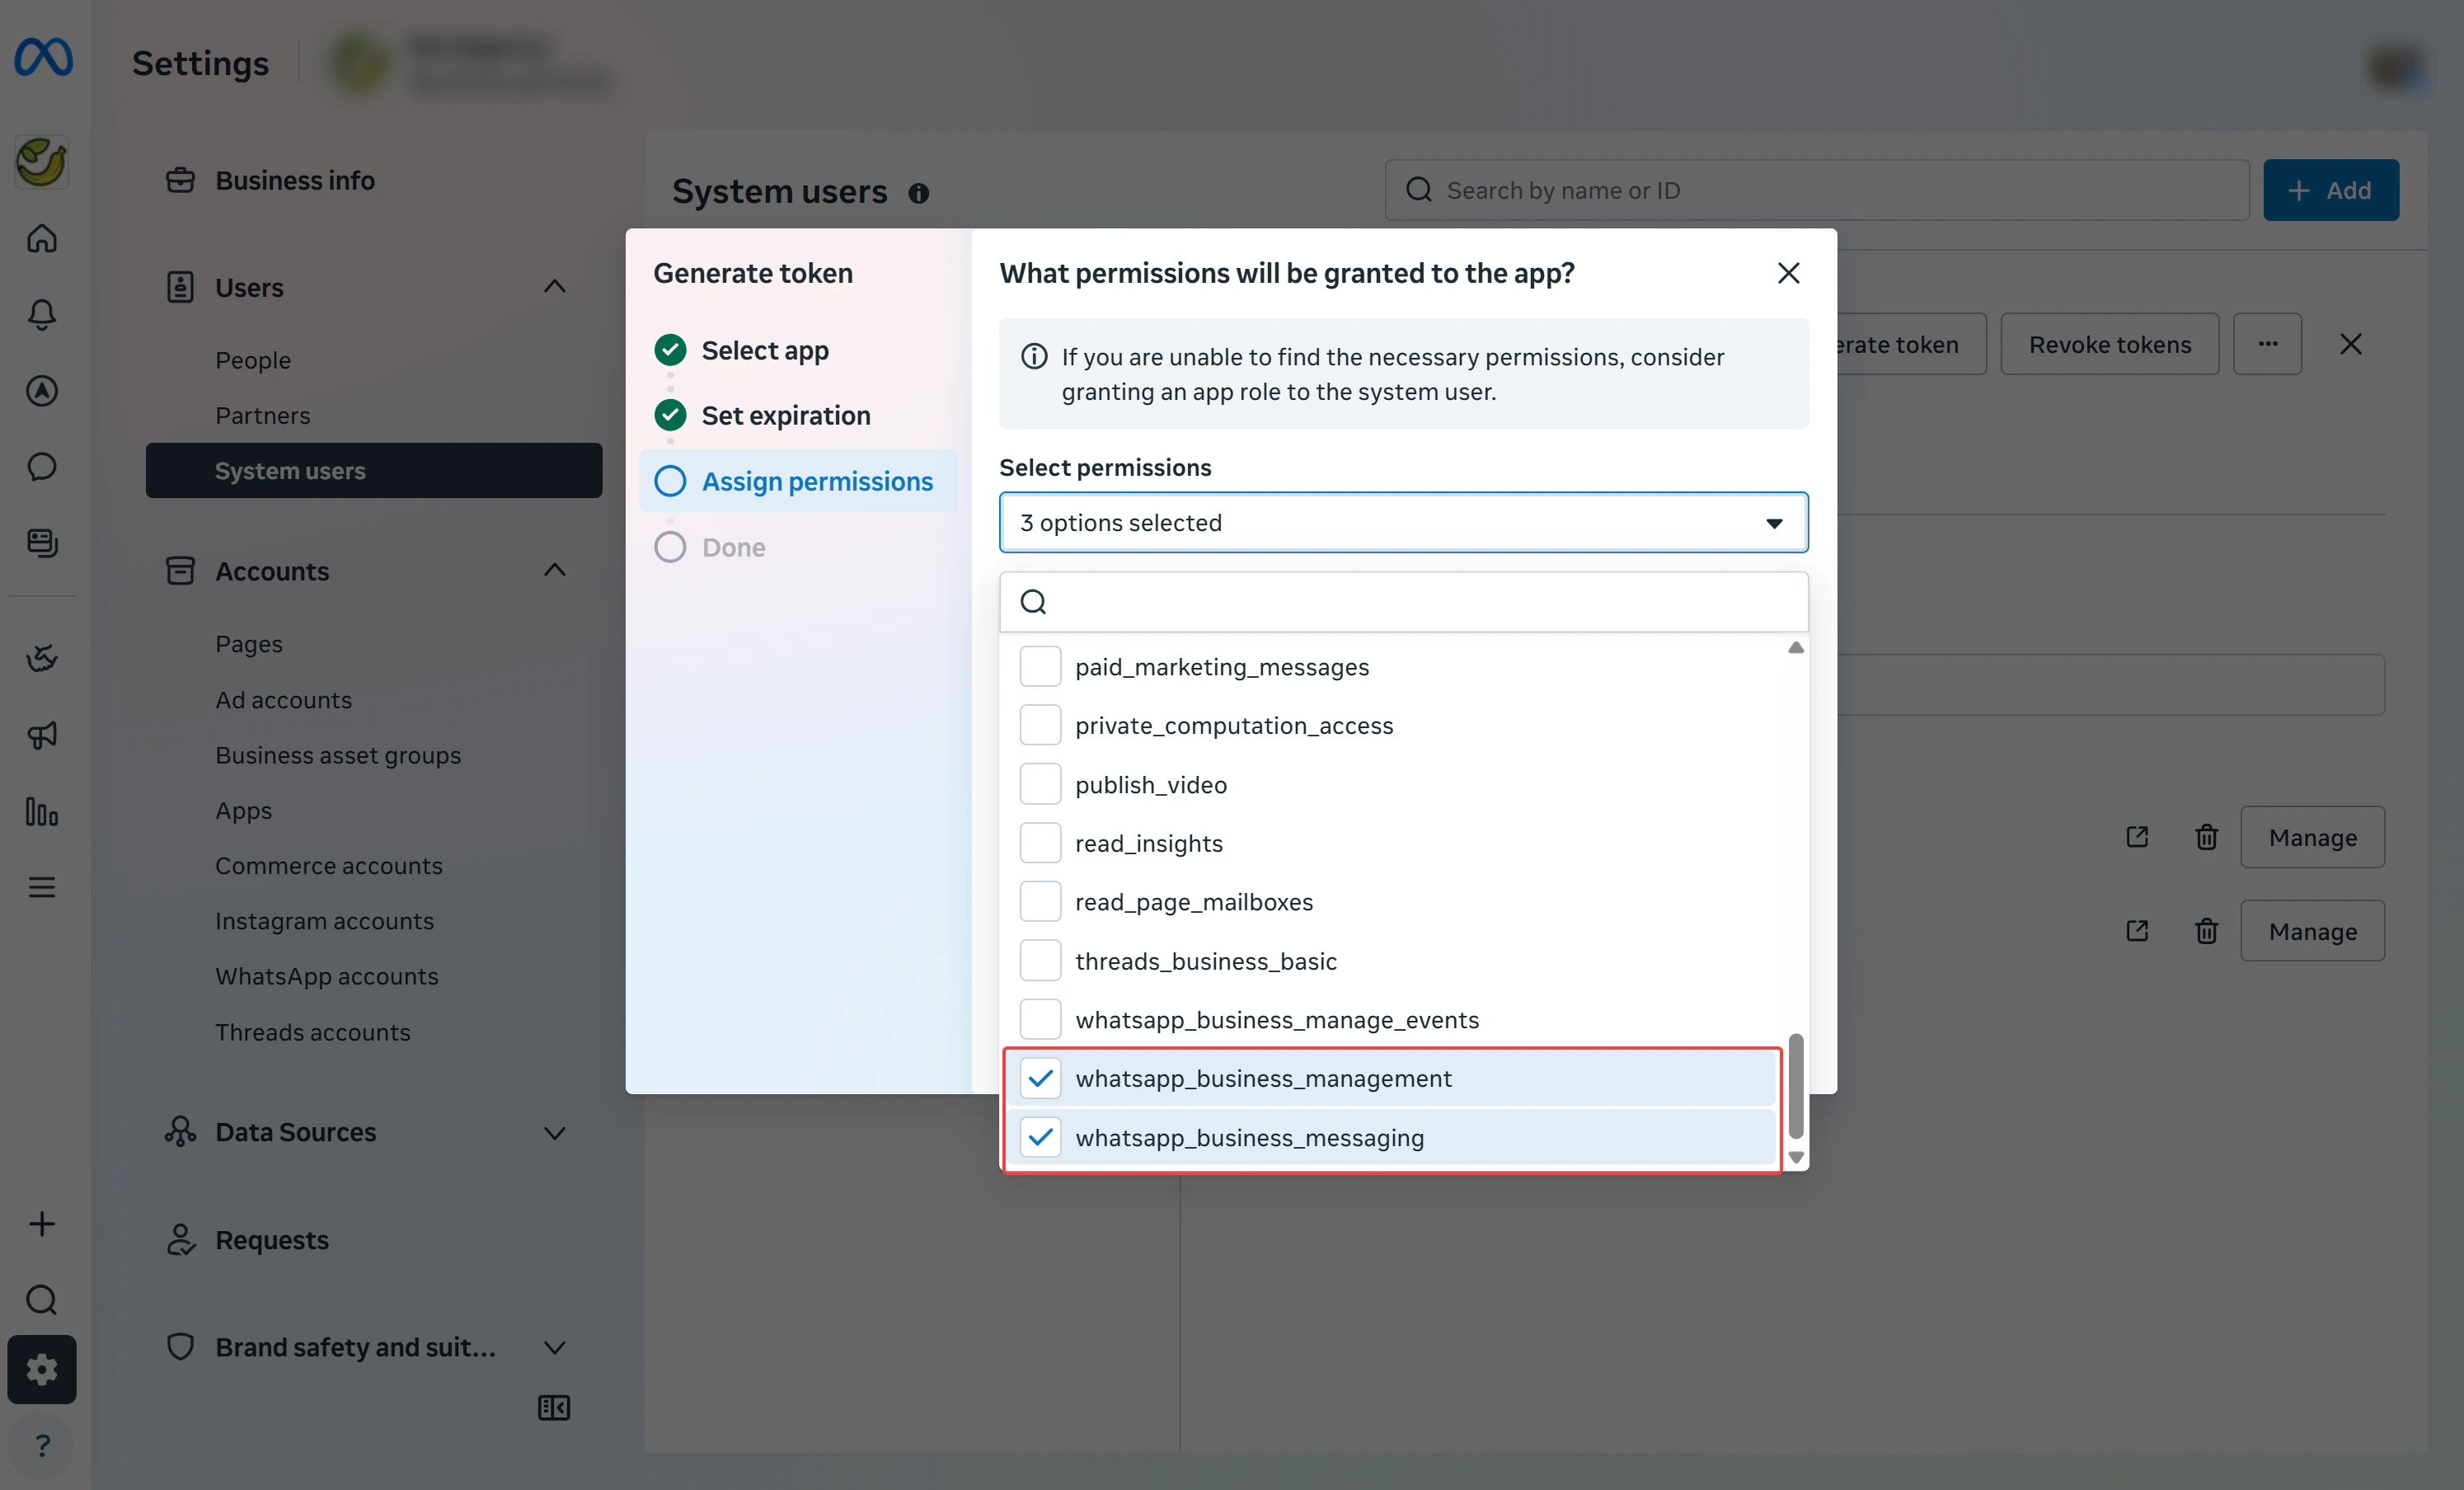
- Select Permissions: check these 3 permissions:
| Permission | Purpose |
|---|---|
business_management | Manage business assets and settings |
whatsapp_business_management | Read and manage WhatsApp Business assets |
whatsapp_business_messaging | Send and receive WhatsApp messages |
Get System User ID via Graph API Explorer
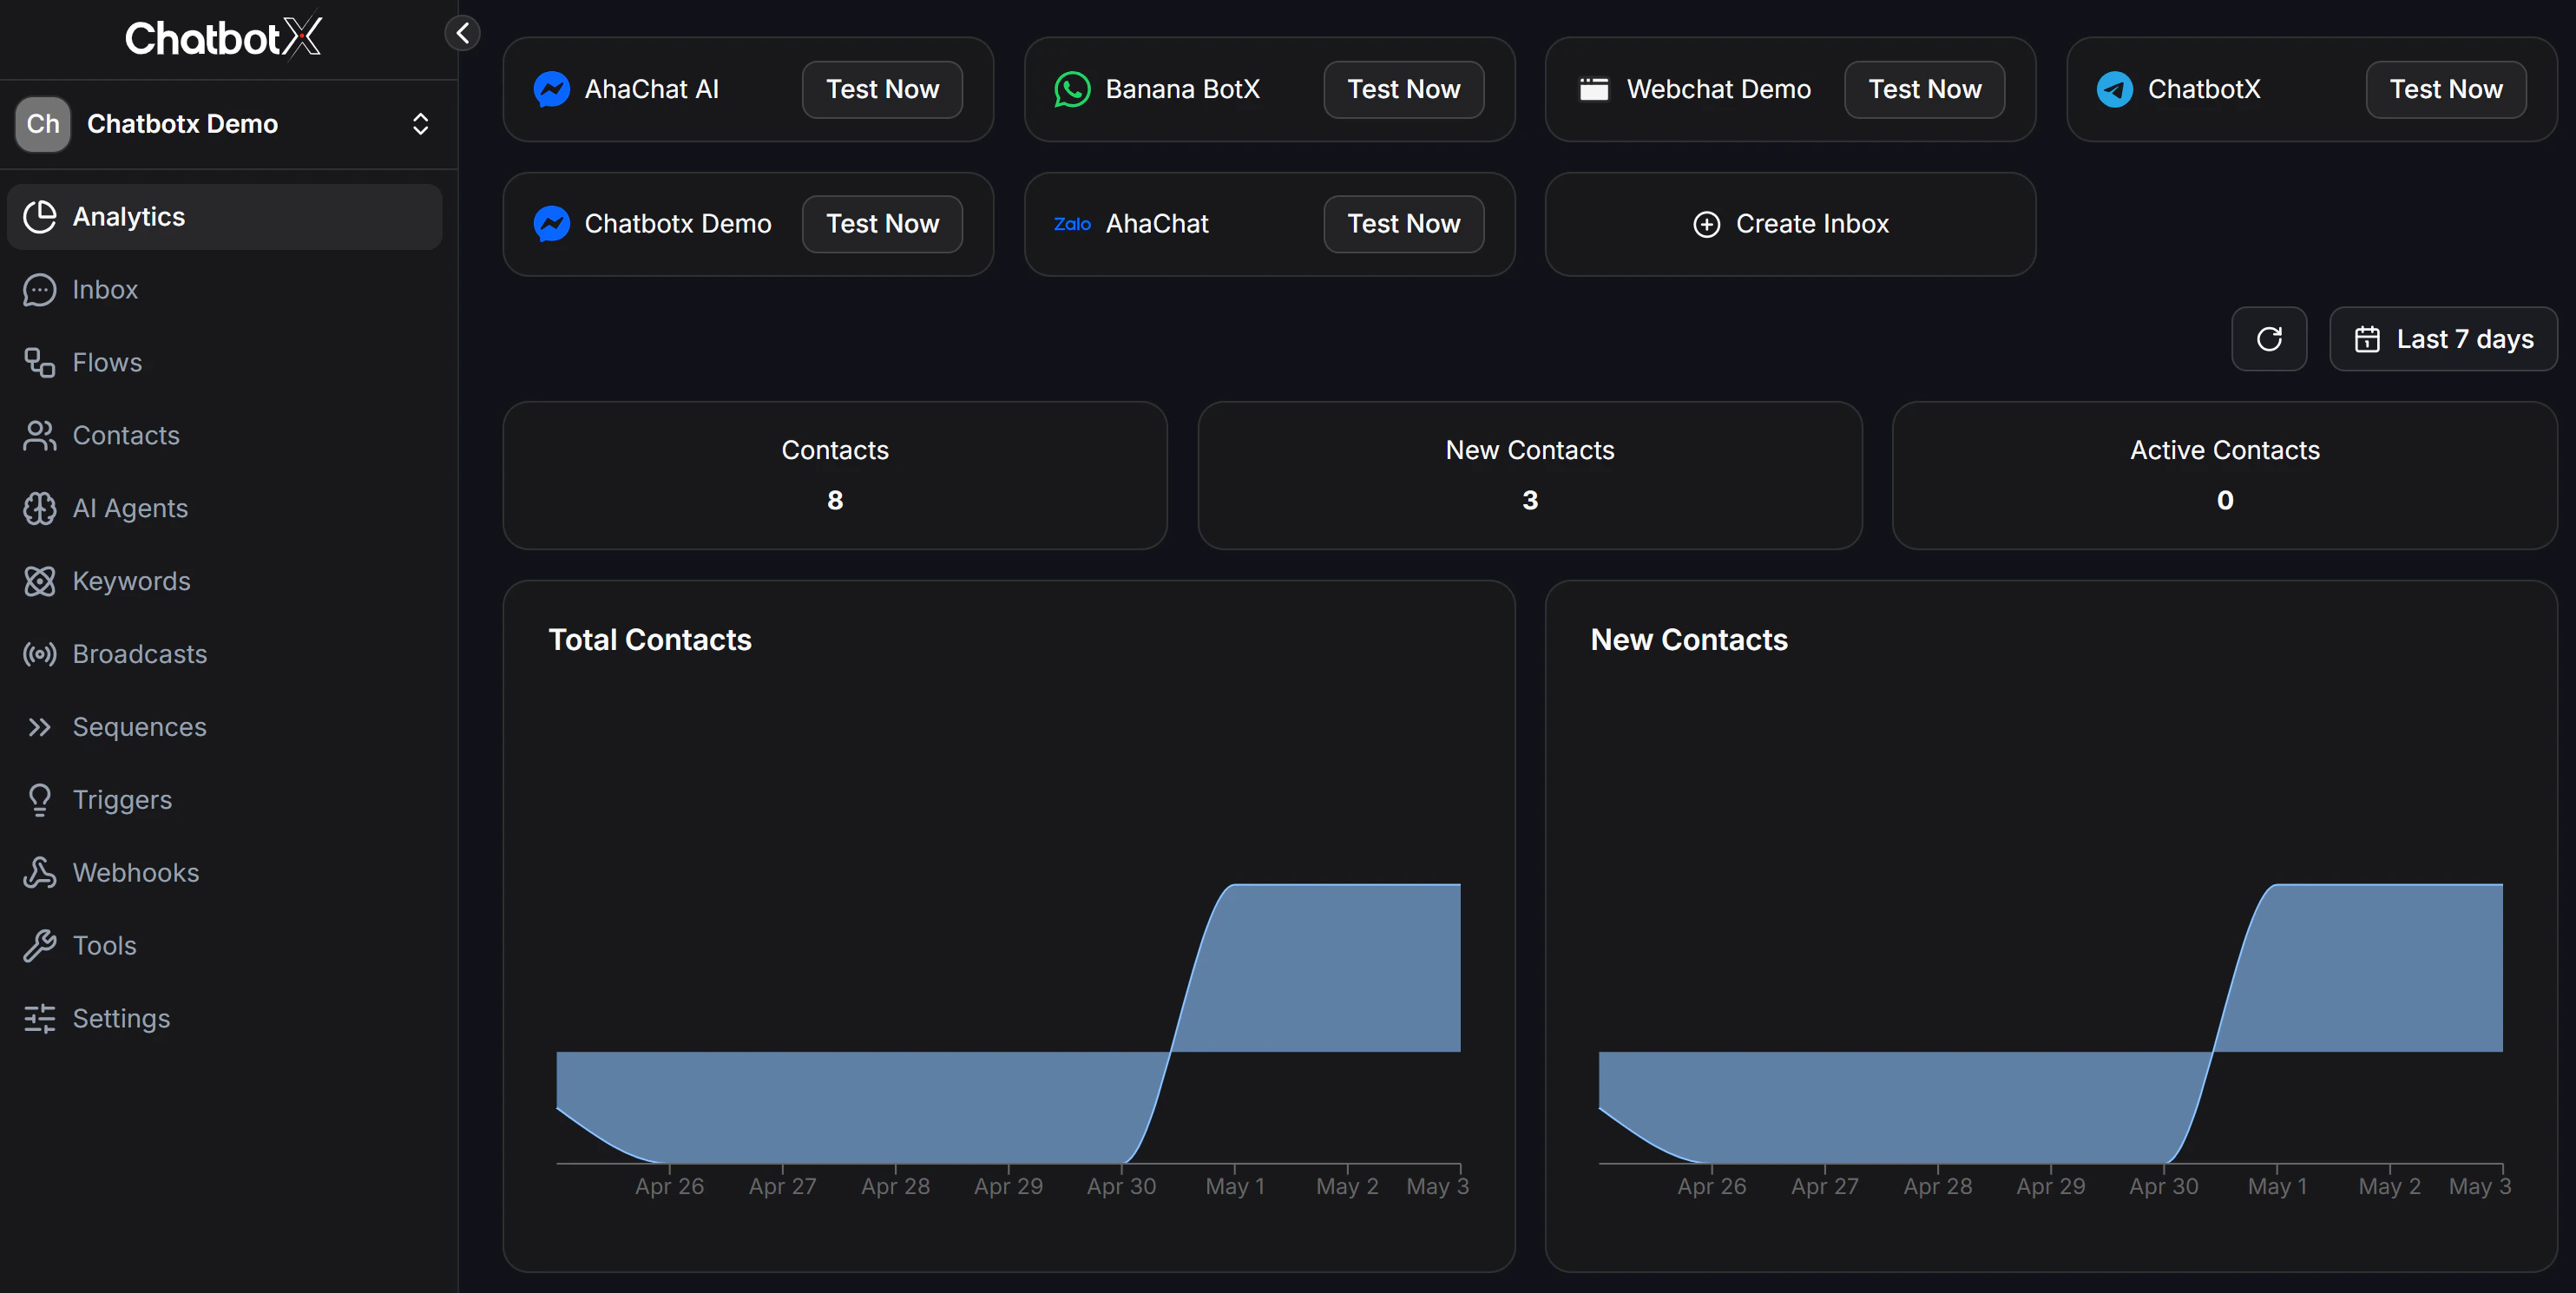
GET /me, and click Submit. Copy the id value from the response, this is your System User ID.Step 6: Create a WhatsApp Channel
Once the Super Admin has configured the integration credentials, users can connect their WhatsApp Business accounts through the Embedded Signup flow.
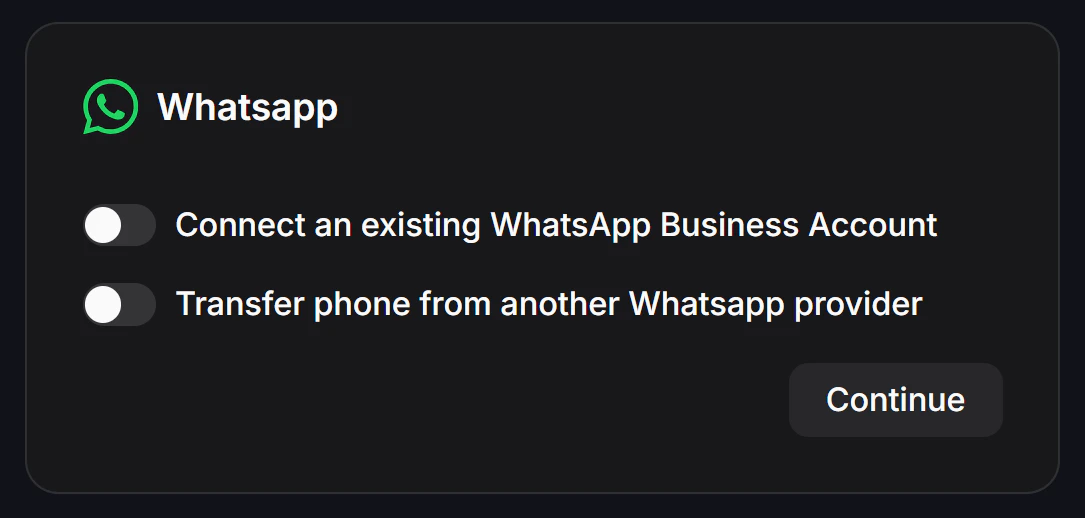
Choose your WhatsApp connection
- Connect an existing WhatsApp Business Account: use if you already have a Meta Business account set up
- Transfer phone from another WhatsApp provider: migrate your current number from a different BSP
- Marketing Message Lite: for a marketing messaging setup
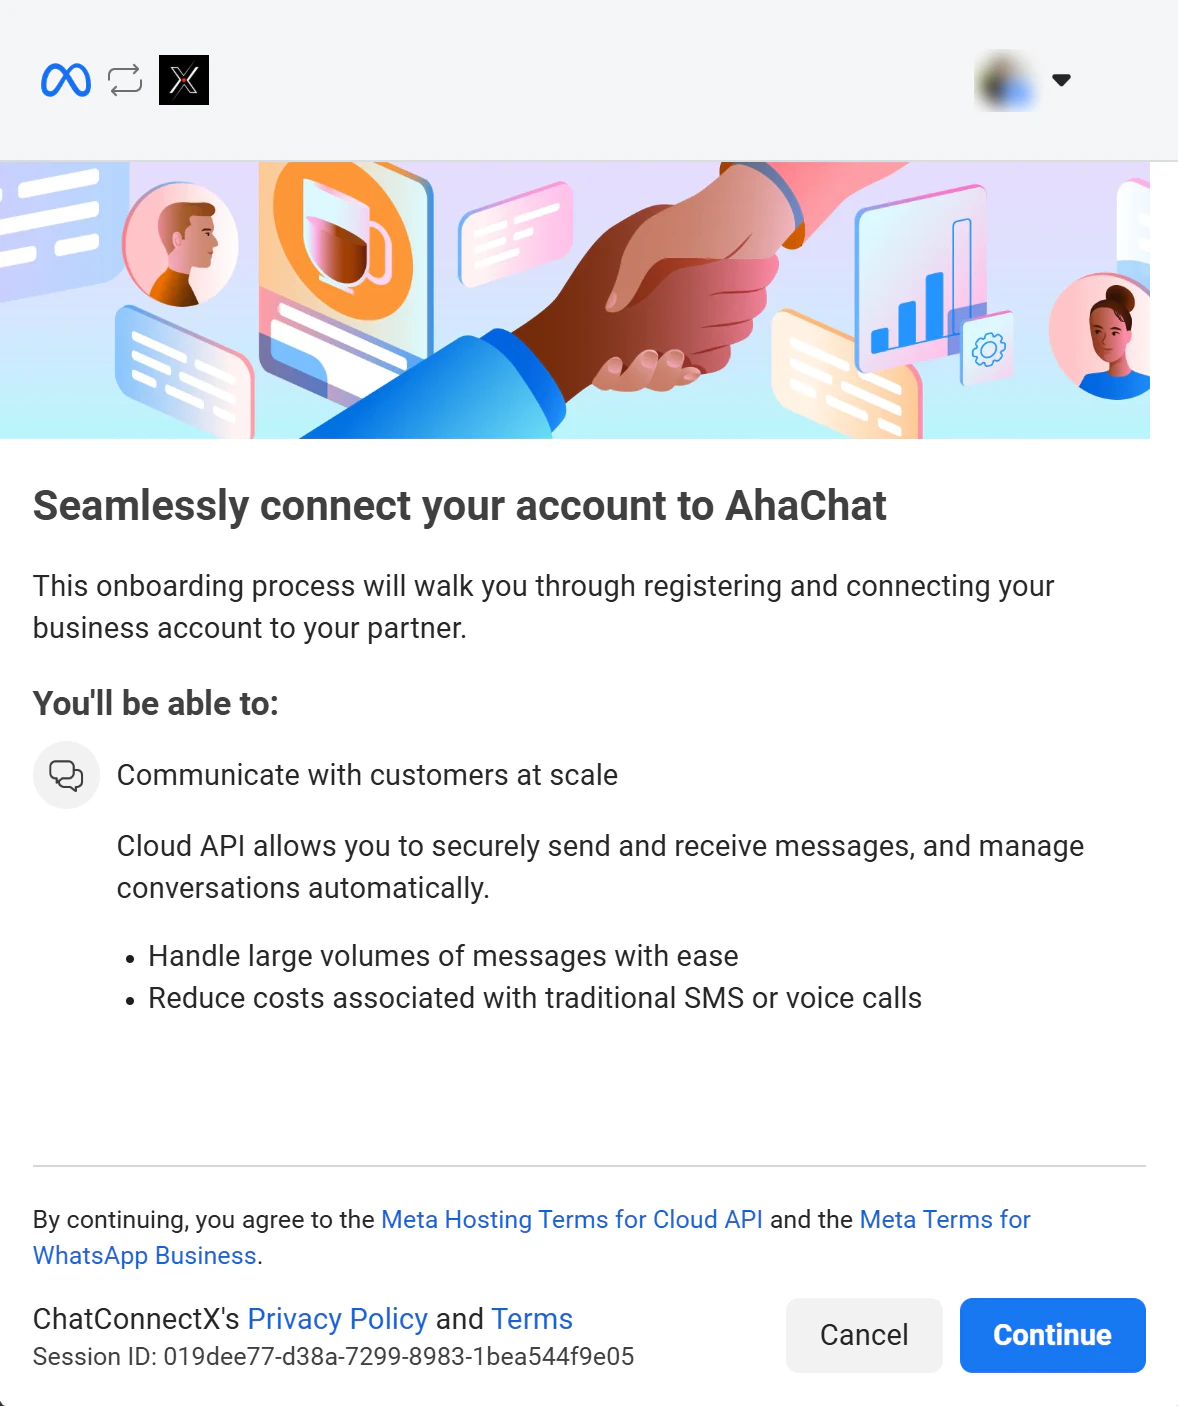
Connect your account
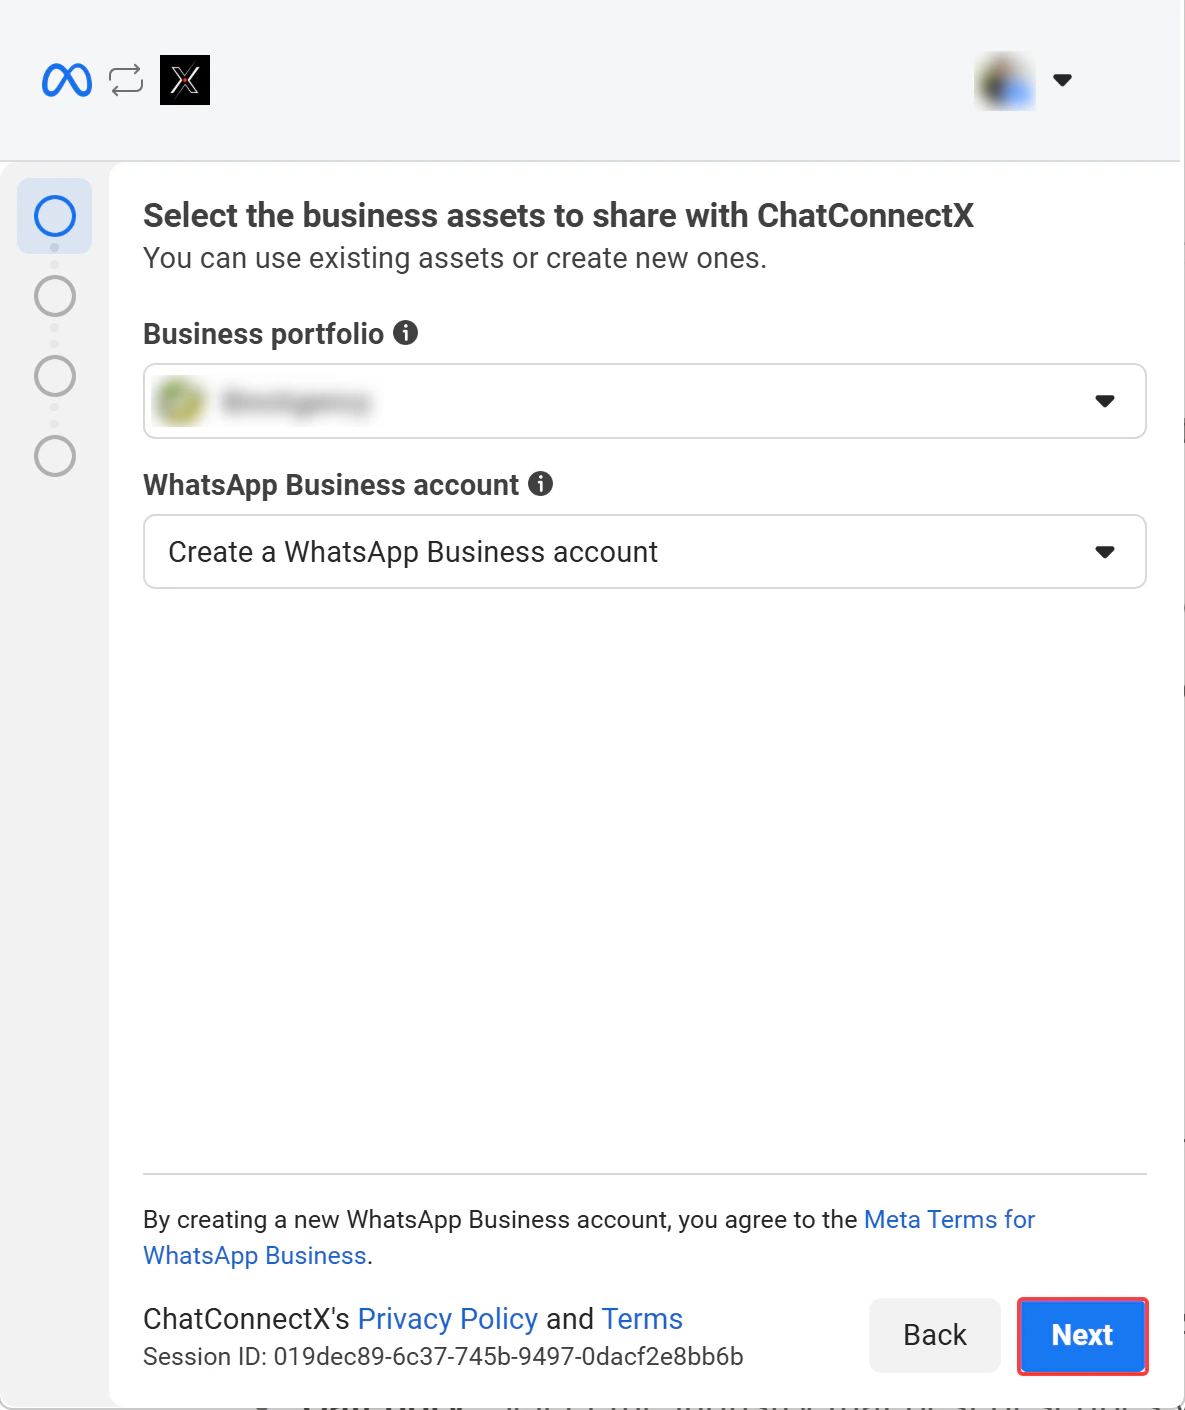
Select Business Assets
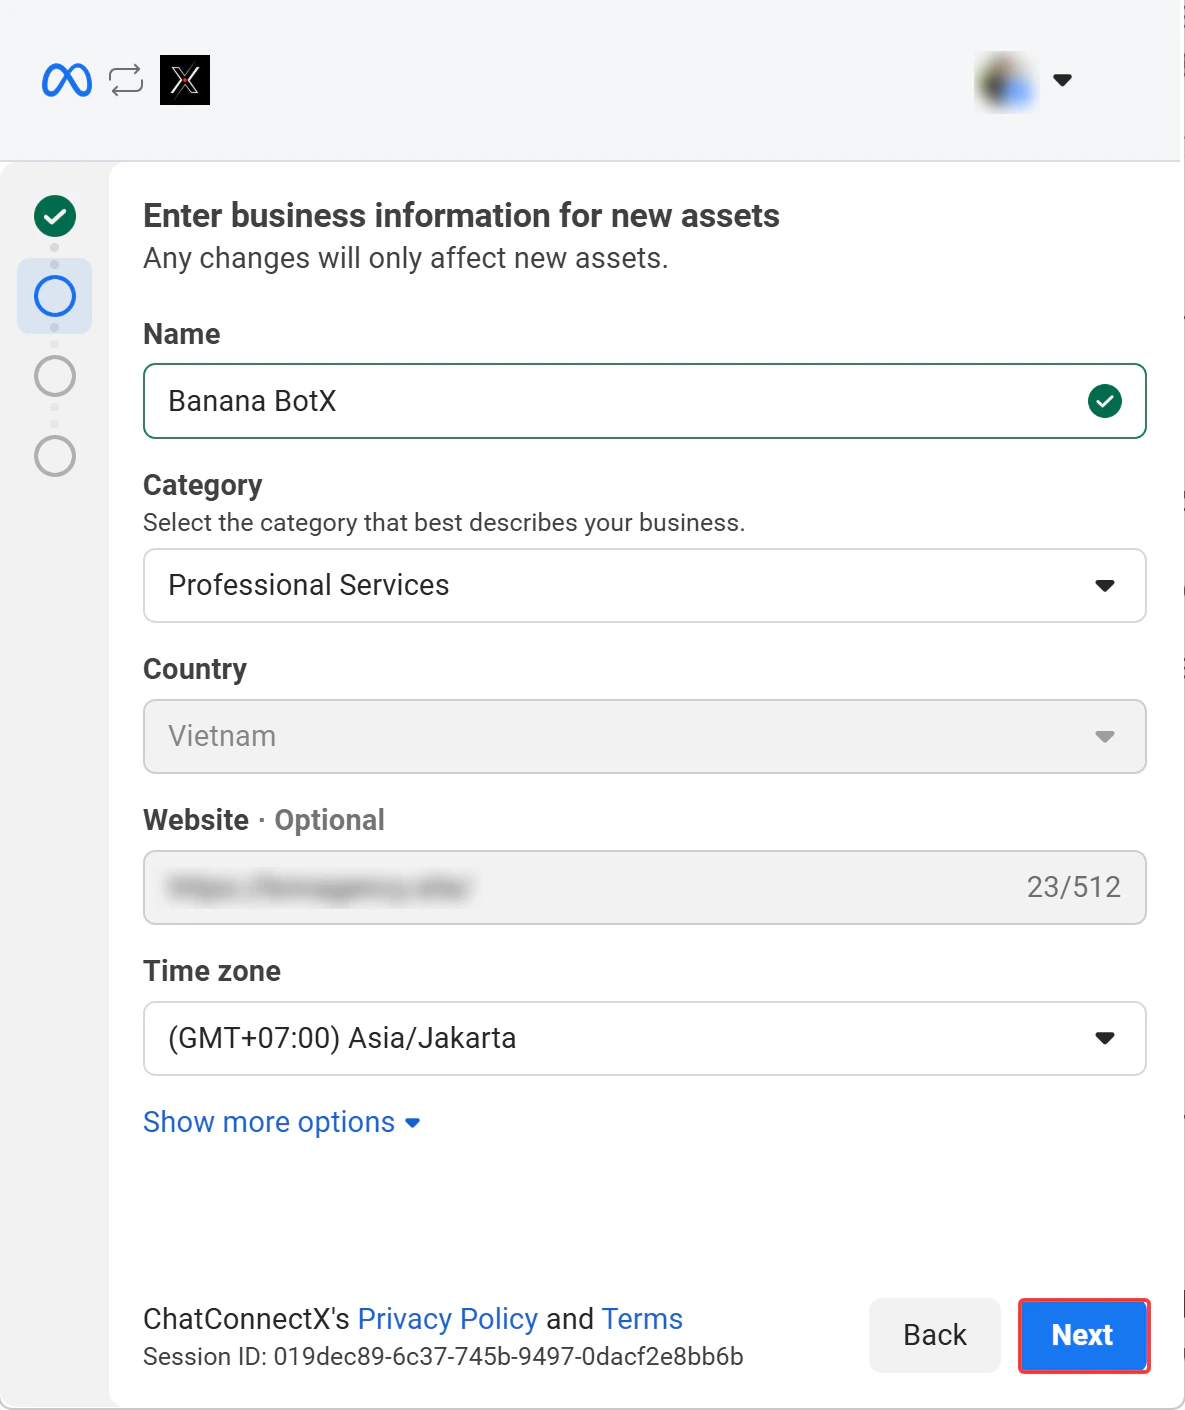
Fill Business Information
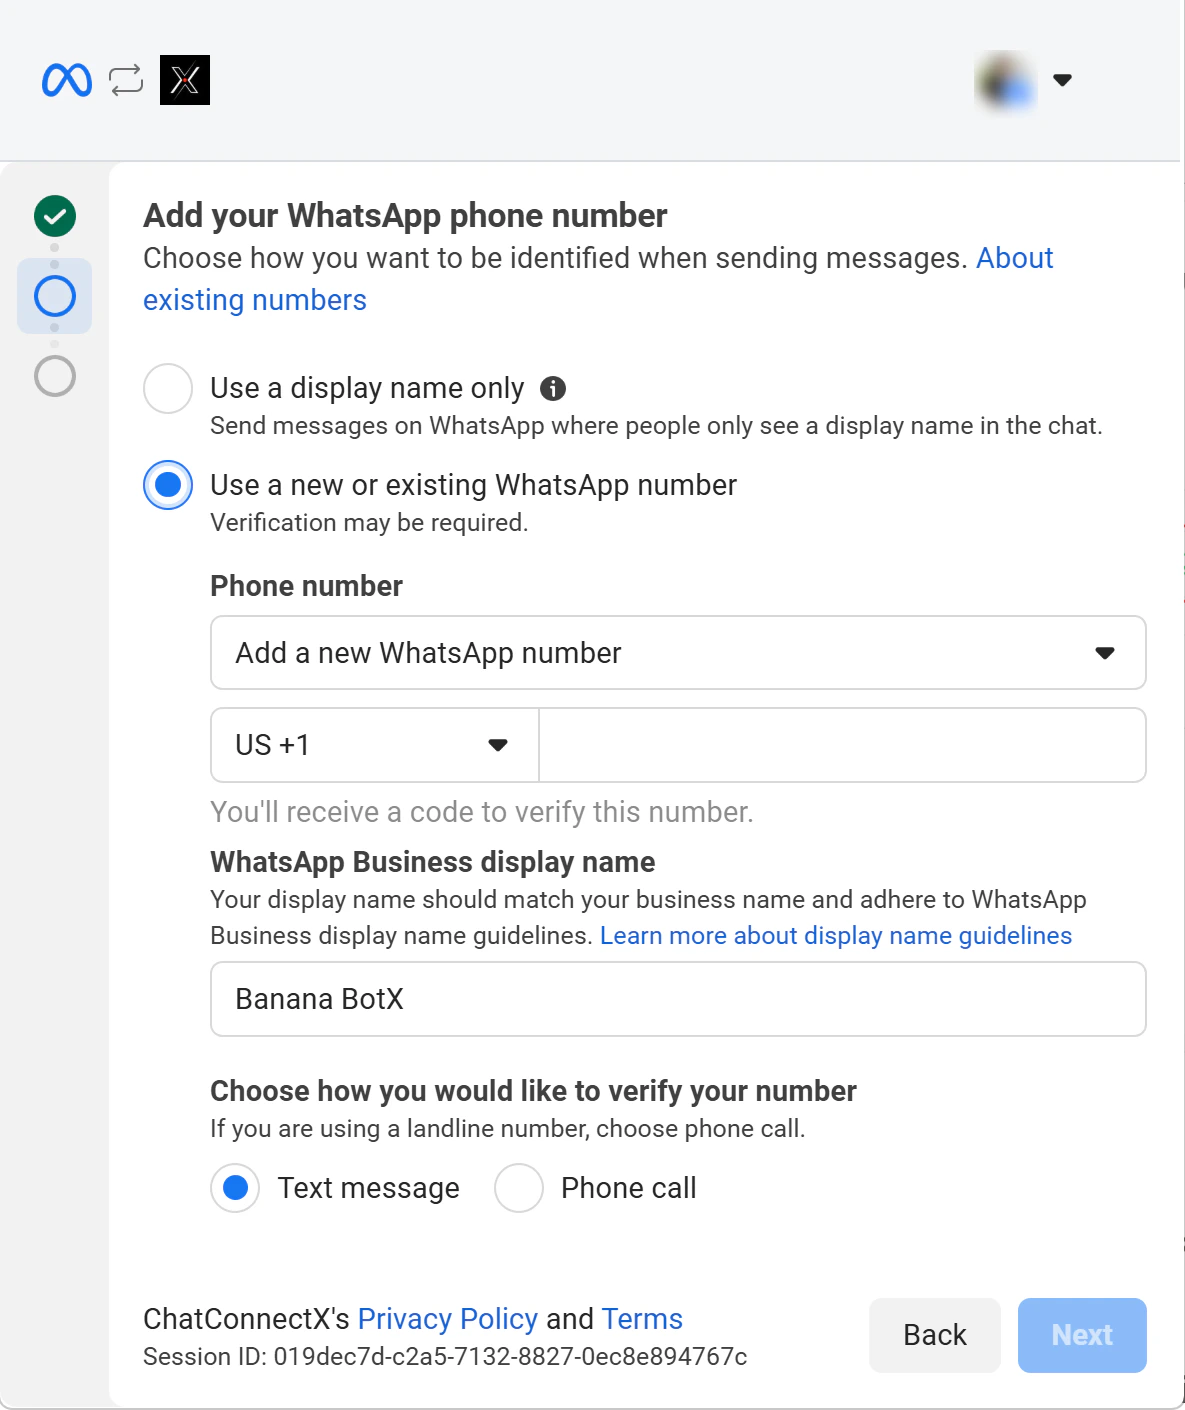
Add your WhatsApp phone number
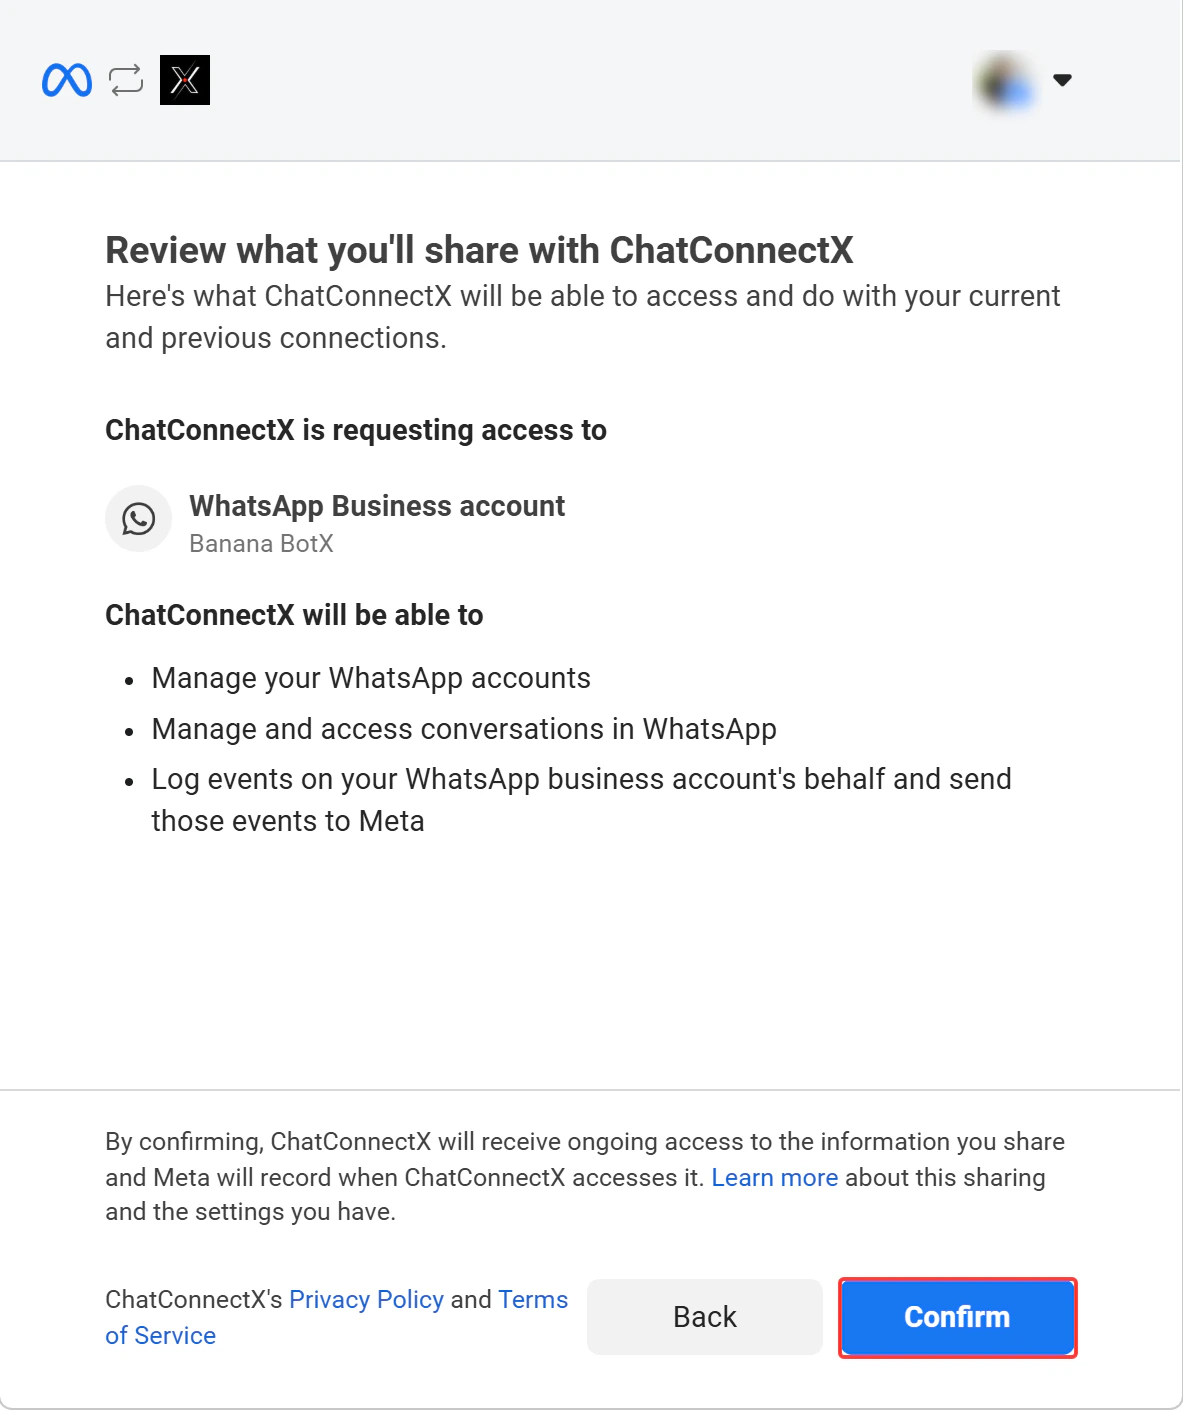
Review and Confirm Permissions

Commerce Policy Compliance
Meta will review your business to ensure it complies with WhatsApp’s Commerce Policy and will reach out within 24 hours if there’s an issue.Troubleshooting
WhatsApp Embedded Signup option is not available
WhatsApp Embedded Signup option is not available
- Confirm the Super Admin has entered all required credentials (App ID, App Secret, Configuration ID) at
/manage/integrations
Error (#100) during webhook configuration
Error (#100) during webhook configuration
- Go to your Facebook app in the Meta Developer Portal
- In the left sidebar, navigate to WhatsApp → Configuration
- Under Webhooks, subscribe to the
messagesfield for WhatsApp Business Account - Retry the Embedded Signup flow
Authentication errors during Embedded Signup
Authentication errors during Embedded Signup
- Ensure you are logged into a Facebook account with admin access to the Meta Business Portfolio
- Verify your app has the required permissions:
whatsapp_business_management,whatsapp_business_messaging,whatsapp_business_manage_events - Confirm the App ID and App Secret in the Super Admin panel match the values in Settings → Basic of the Meta Developer Portal
Business verification is pending or rejected
Business verification is pending or rejected
- Ensure your business information is accurate and complete (legal name, website, address)
- Check that your business complies with WhatsApp’s Commerce Policy
- New accounts have a temporary message limit until verification is completed
- Verification typically takes up to 1 business day
App Review submission was rejected
App Review submission was rejected
- Open the rejected submission in the Meta Developer Dashboard
- Review the rejection reason and feedback provided by the review team
- Use the Messenger support icon (bottom right corner) to contact the review team for clarification
- Provide clear documentation of your use case, test credentials, and step-by-step instructions for the reviewer
- Resubmit after addressing all feedback
How do I get help if the issue persists?
How do I get help if the issue persists?
- Check ChatbotX logs: Look for error messages in both
railsandsidekiqservice logs - Verify Facebook/WhatsApp accounts: Confirm all prerequisites (business verification, permissions, billing) are met
- Contact Community Support: Visit the ChatbotX Community with specific error messages and screenshots