Prerequisites
Before starting the setup, ensure you have:- A valid Facebook account.
- A valid Instagram Professional account (either Business or Creator type).
- A publicly accessible ChatbotX installation with an HTTPS URL.
If you are running your instance locally, you need a tunneling tool like ngrok to expose your local port to the internet. This allows Meta’s servers to reach your webhook callback URL.
Step 1: Create a Meta Developer App
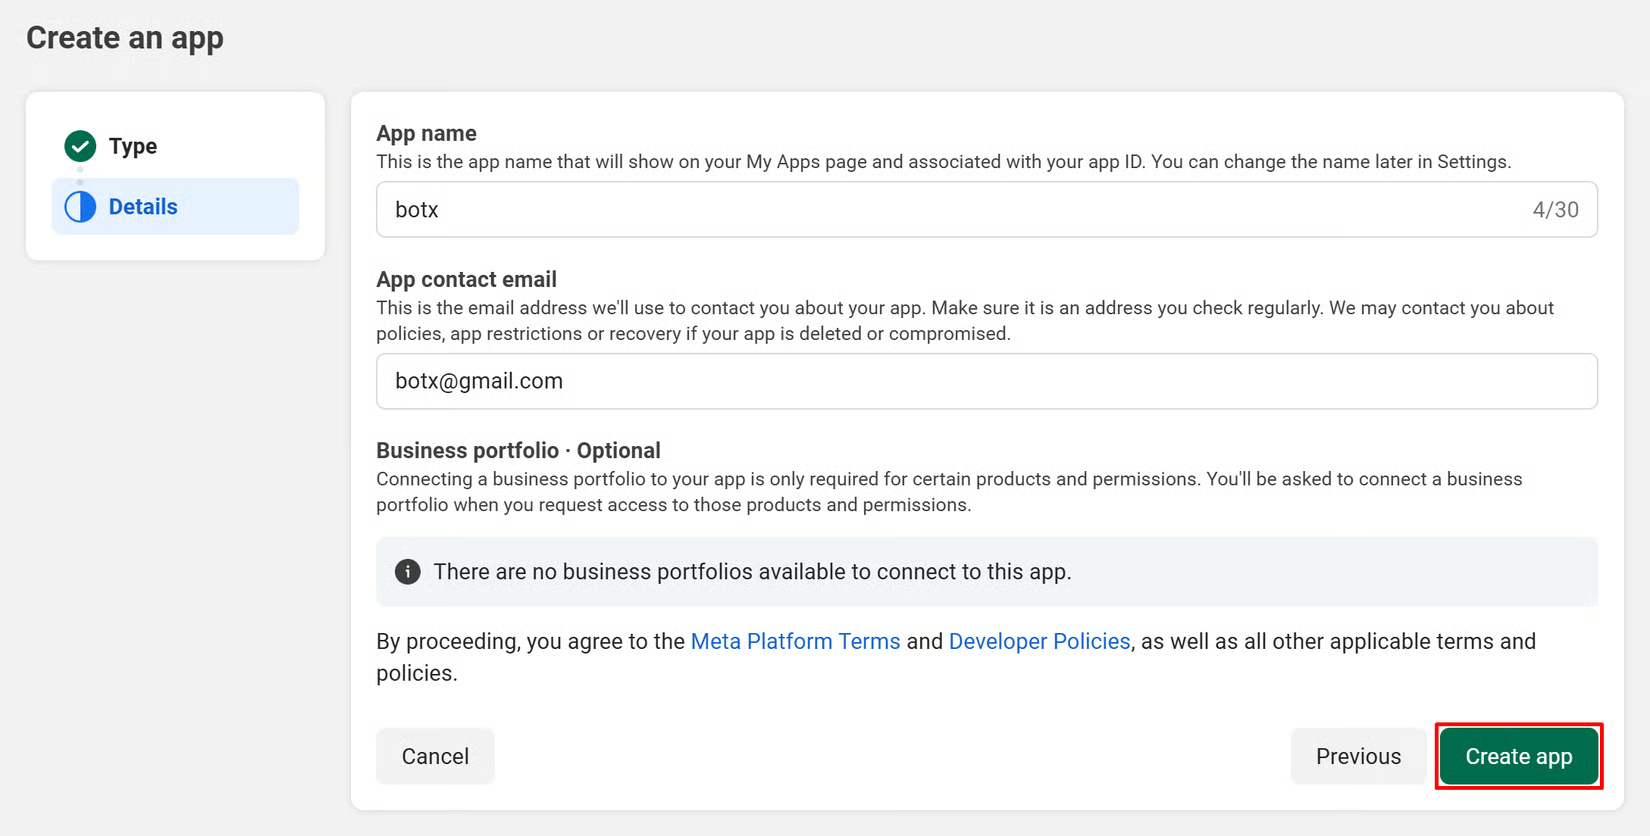
To connect your Instagram account, you first need to create a developer application on Meta’s platform. This app acts as a secure bridge that allows ChatbotX and Instagram to share message data safely.Create a new app
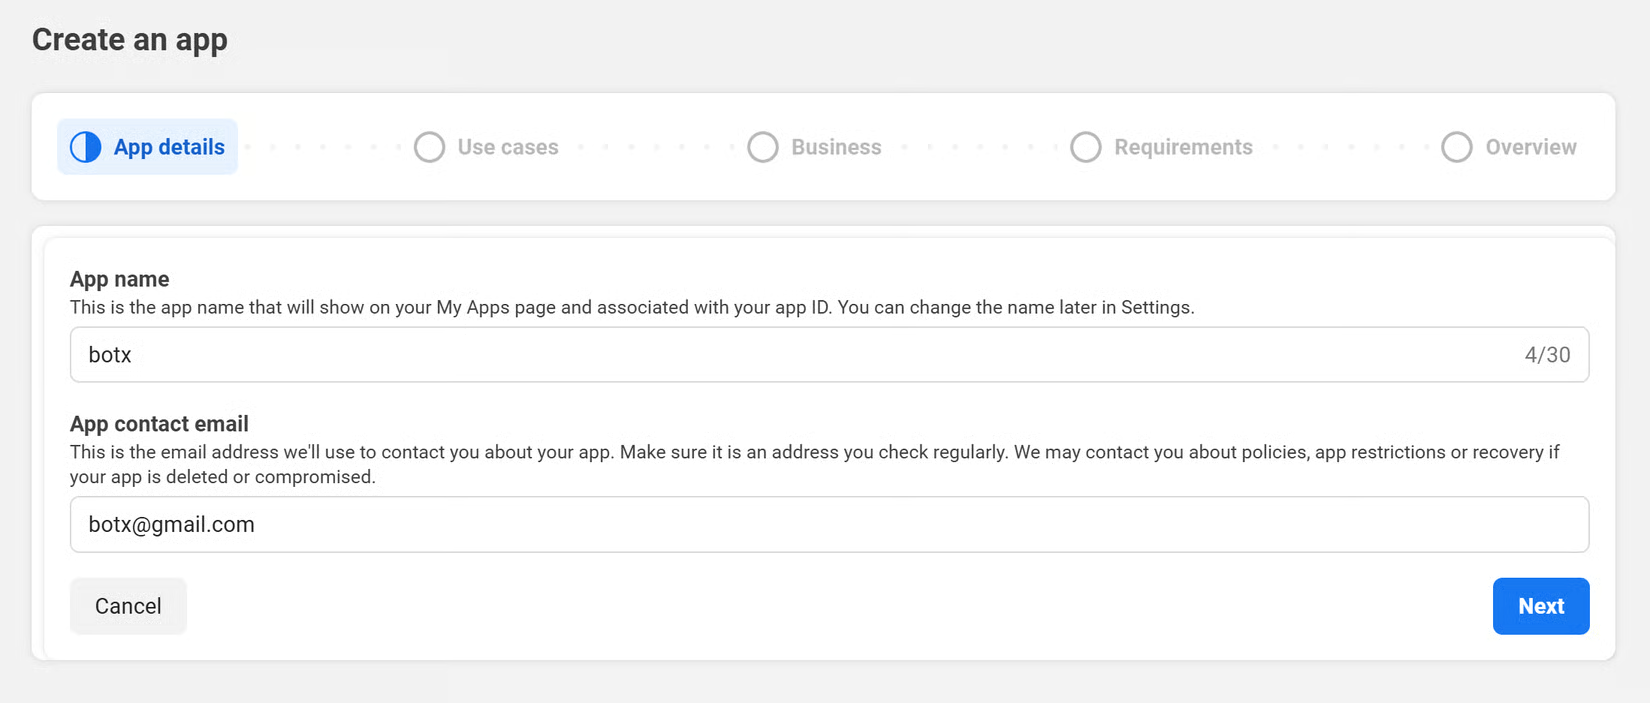
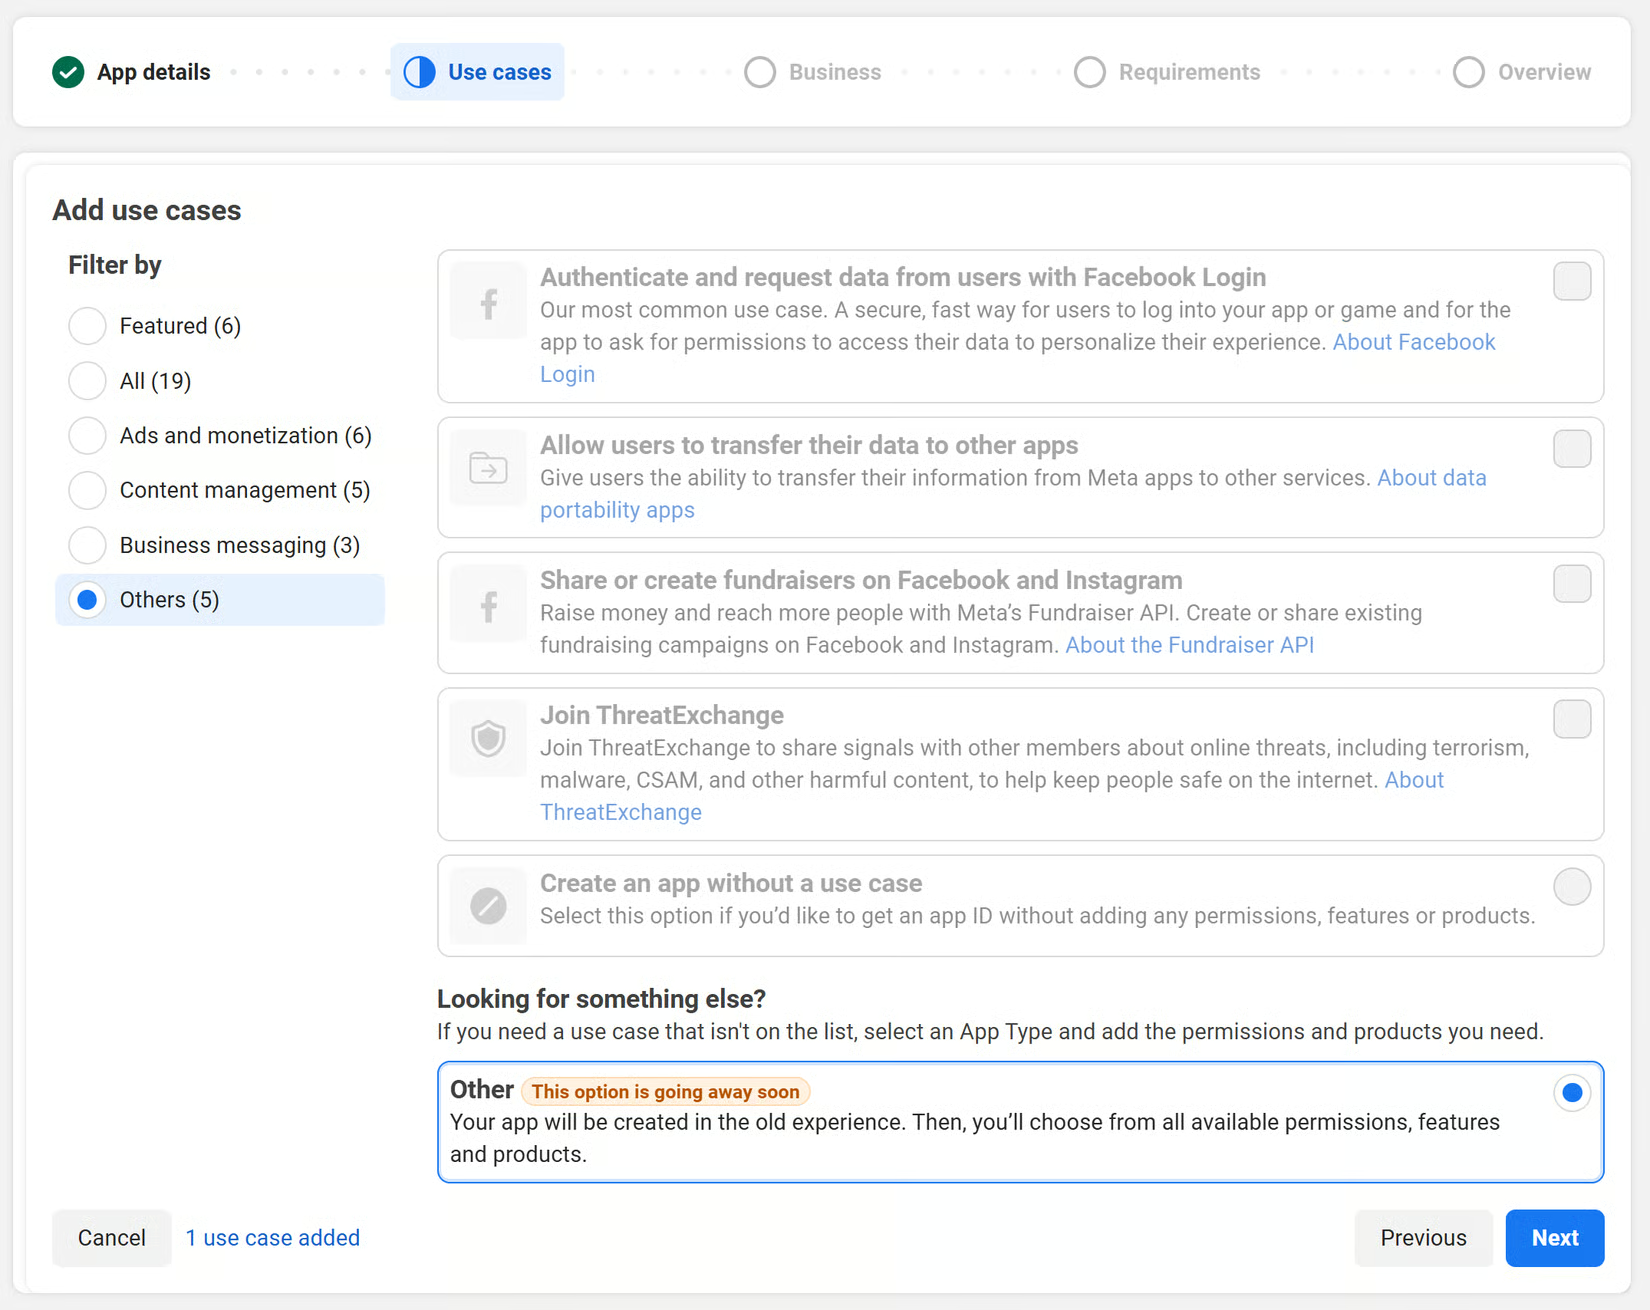
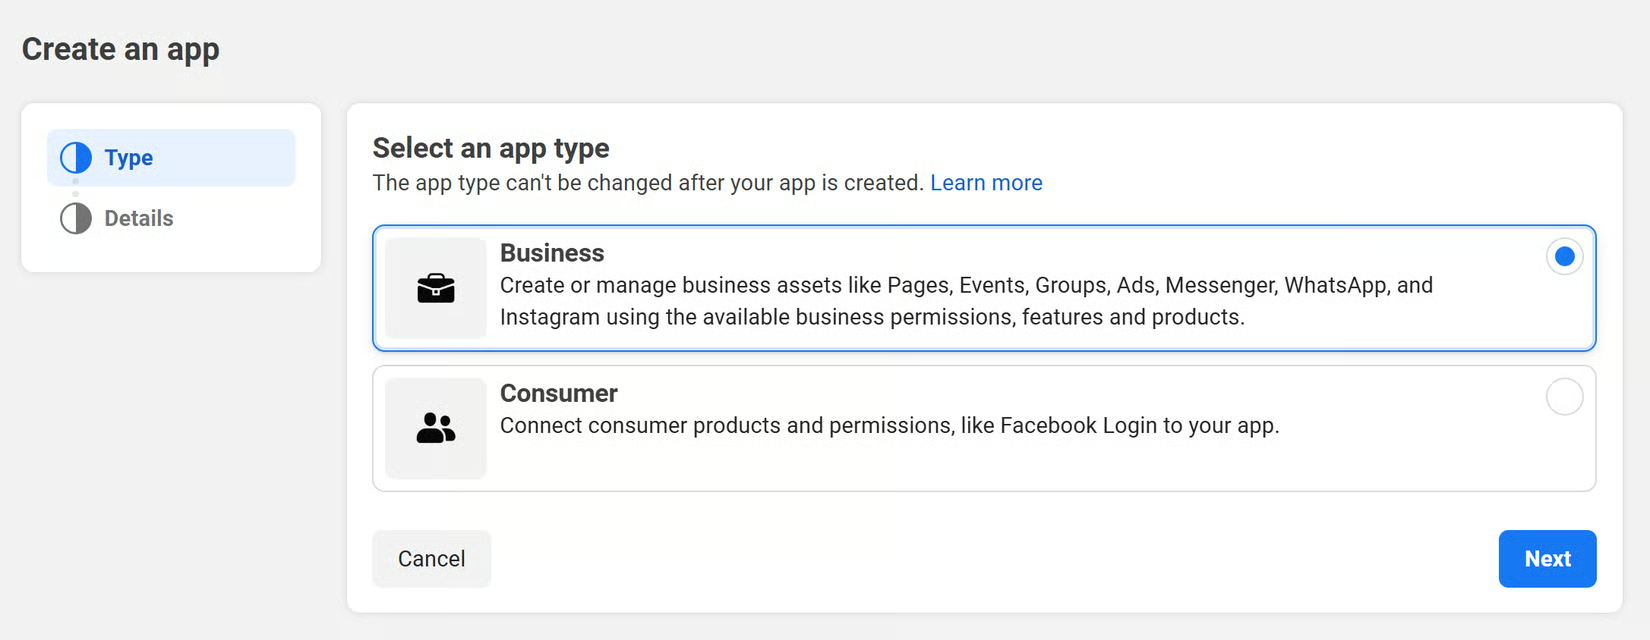
Go to the Facebook Developer Portal and click Create App.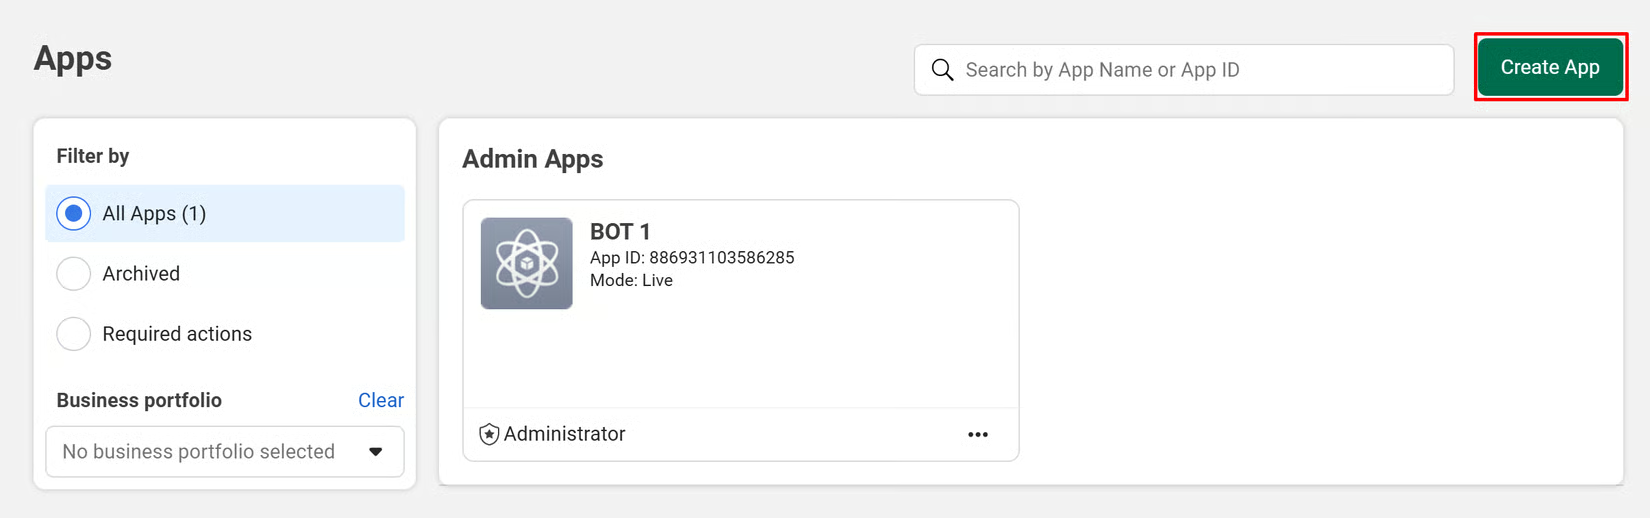
Add the Instagram product
From your Meta Developer App dashboard, locate the Instagram card and click Set up.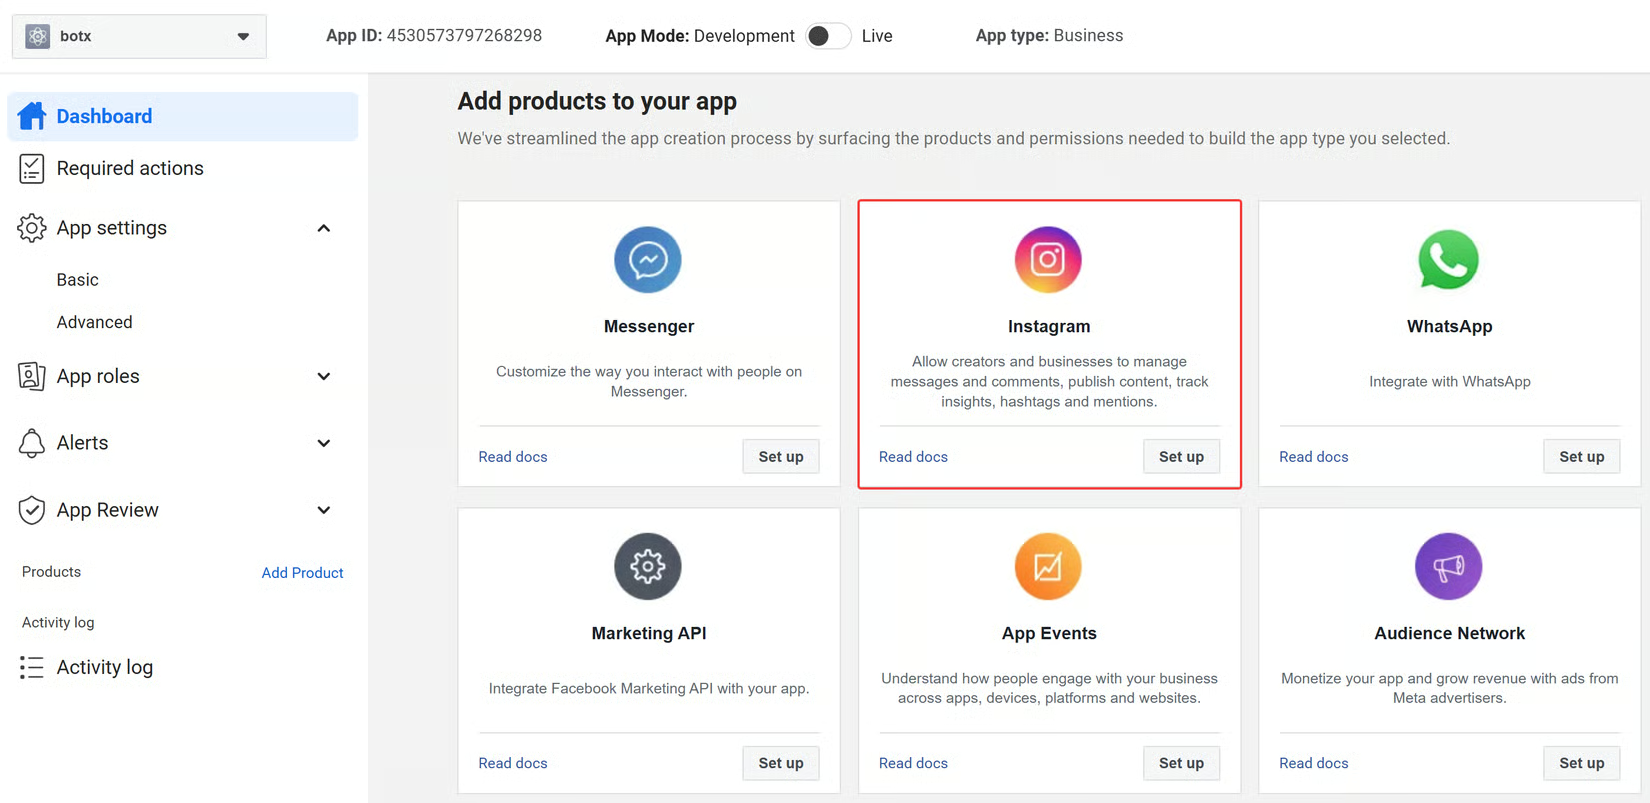
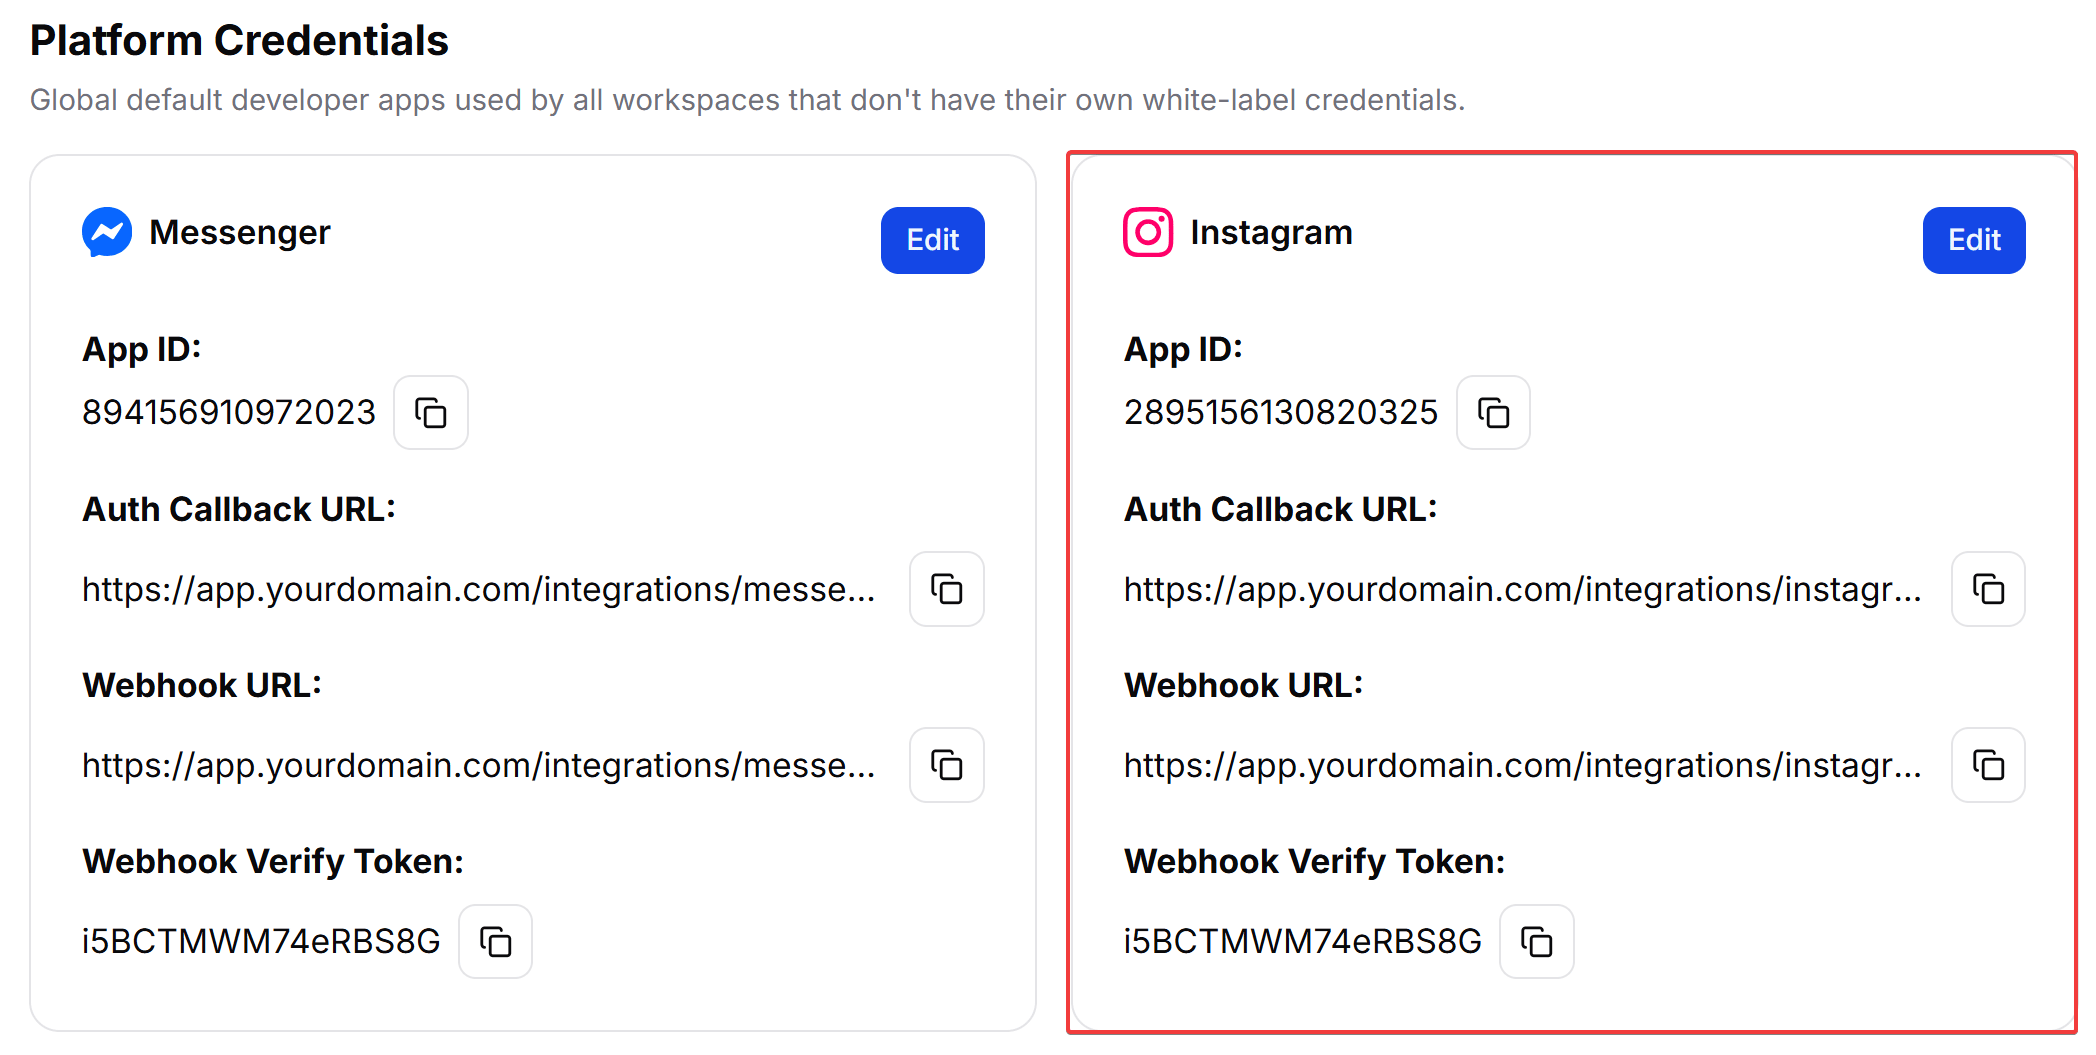
Step 2: Configure Credentials in ChatbotX
With your Instagram credentials generated and Webhooks configured in Meta, save these settings in ChatbotX to link the integration.Open the Instagram configuration
Click the Edit button on the Instagram card to open the configuration modal.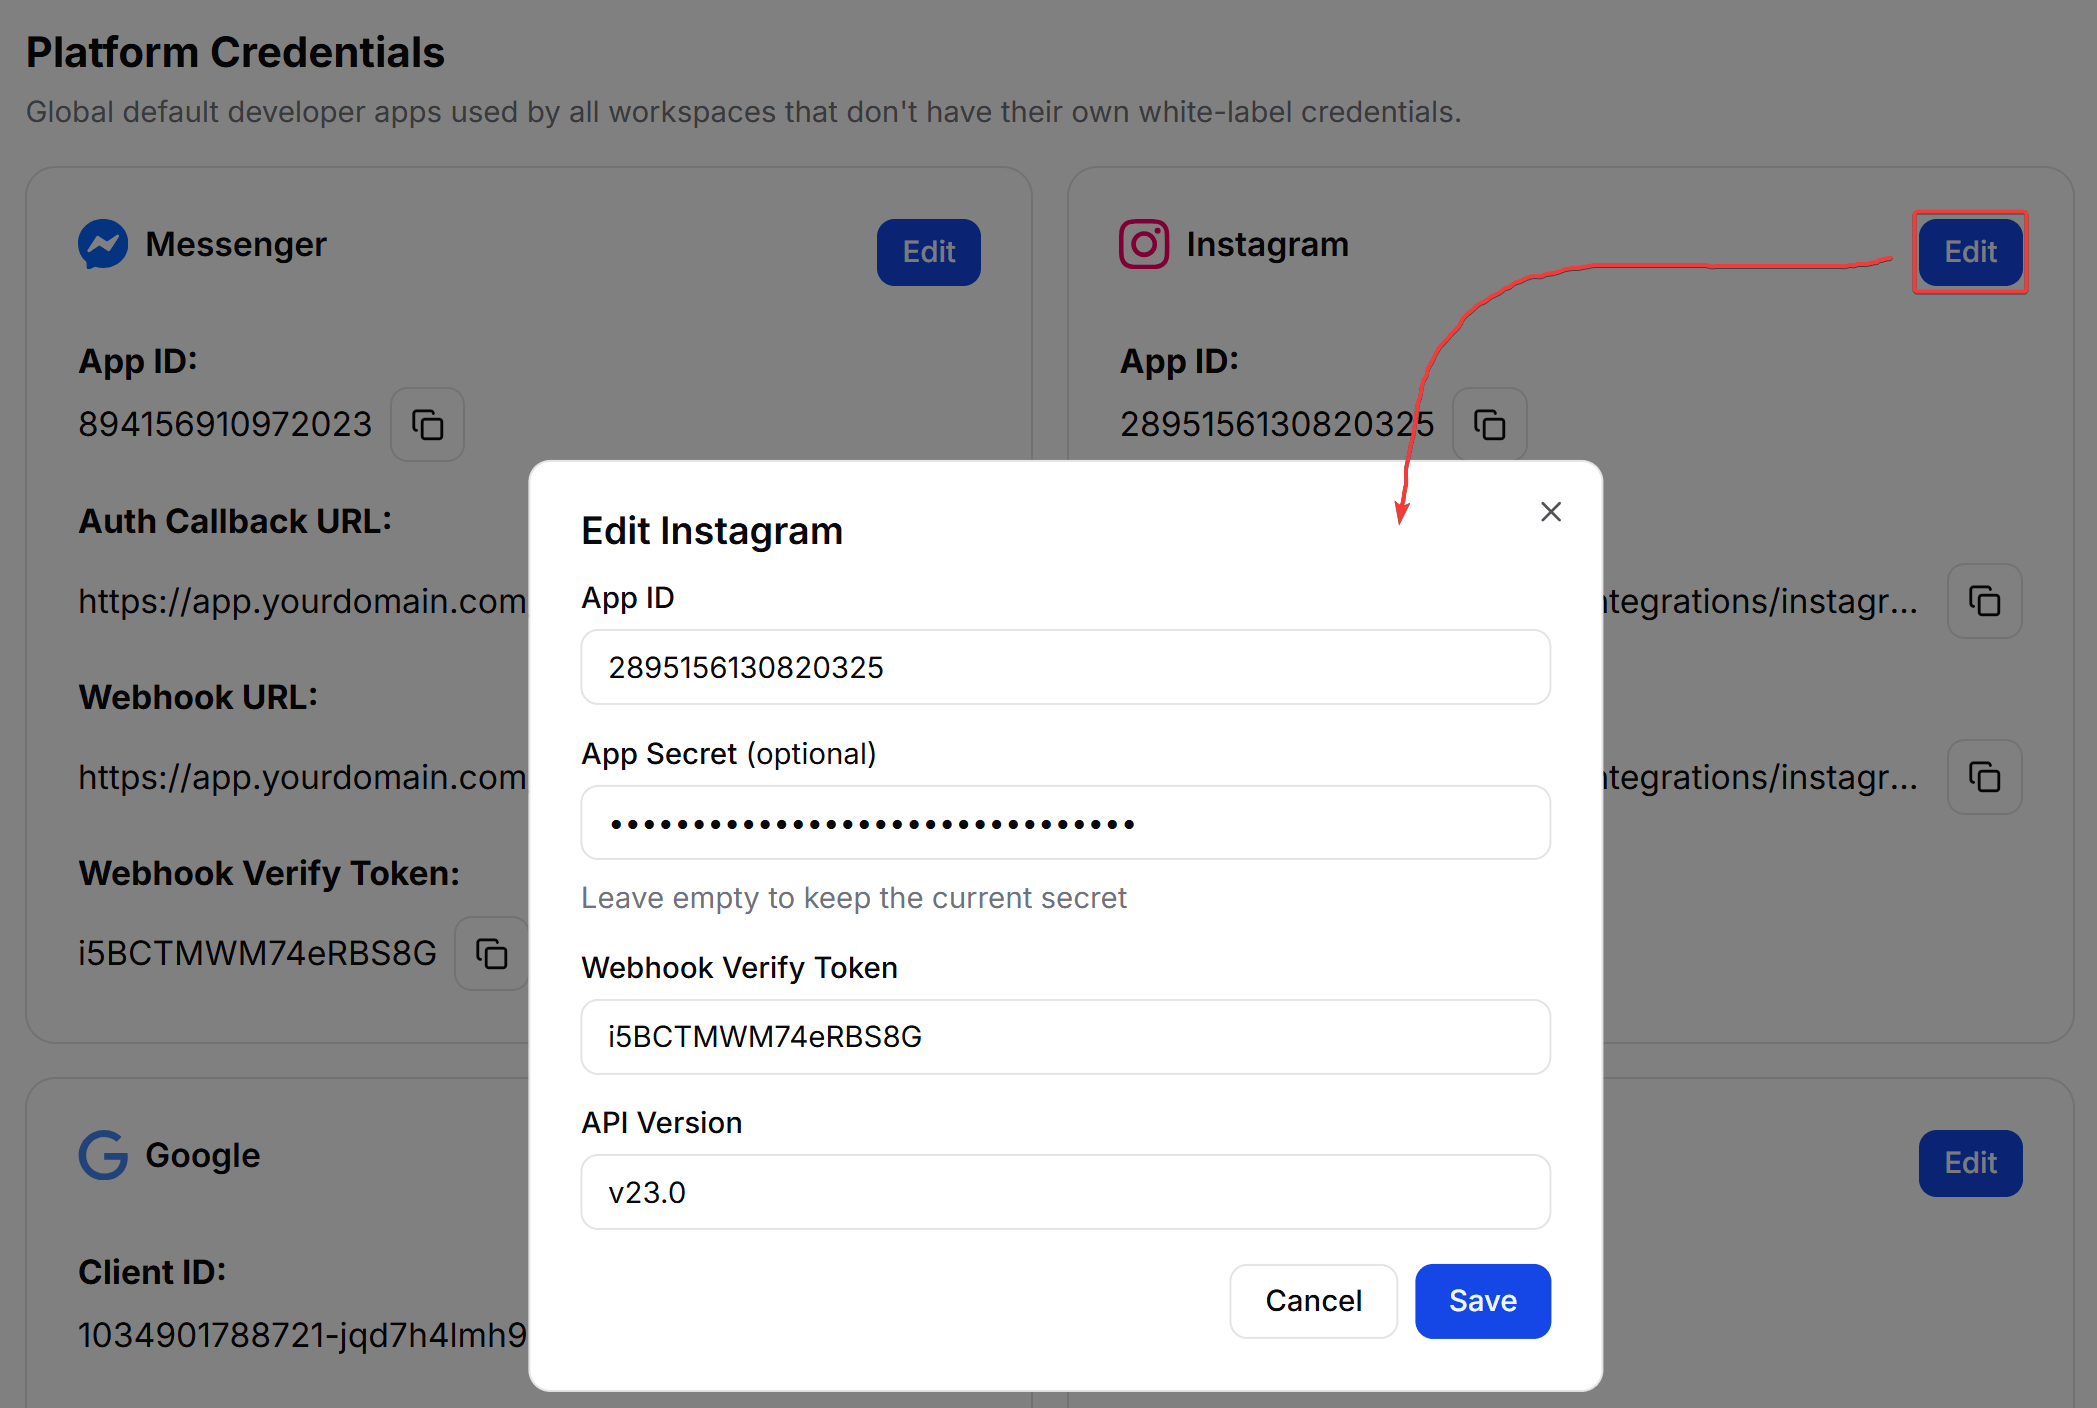
Enter your credentials
Provide the details from your Meta Developer Portal configuration:
- Client ID: Paste your Instagram App ID (copied in Step 1-7).
- Client Secret: Paste your Instagram App Secret (copied in Step 1-7).
- API Version: Select v23.0 or higher.
- Webhook Verify Token: A secret string used to validate incoming webhook requests, choose your own value, for example, a random string
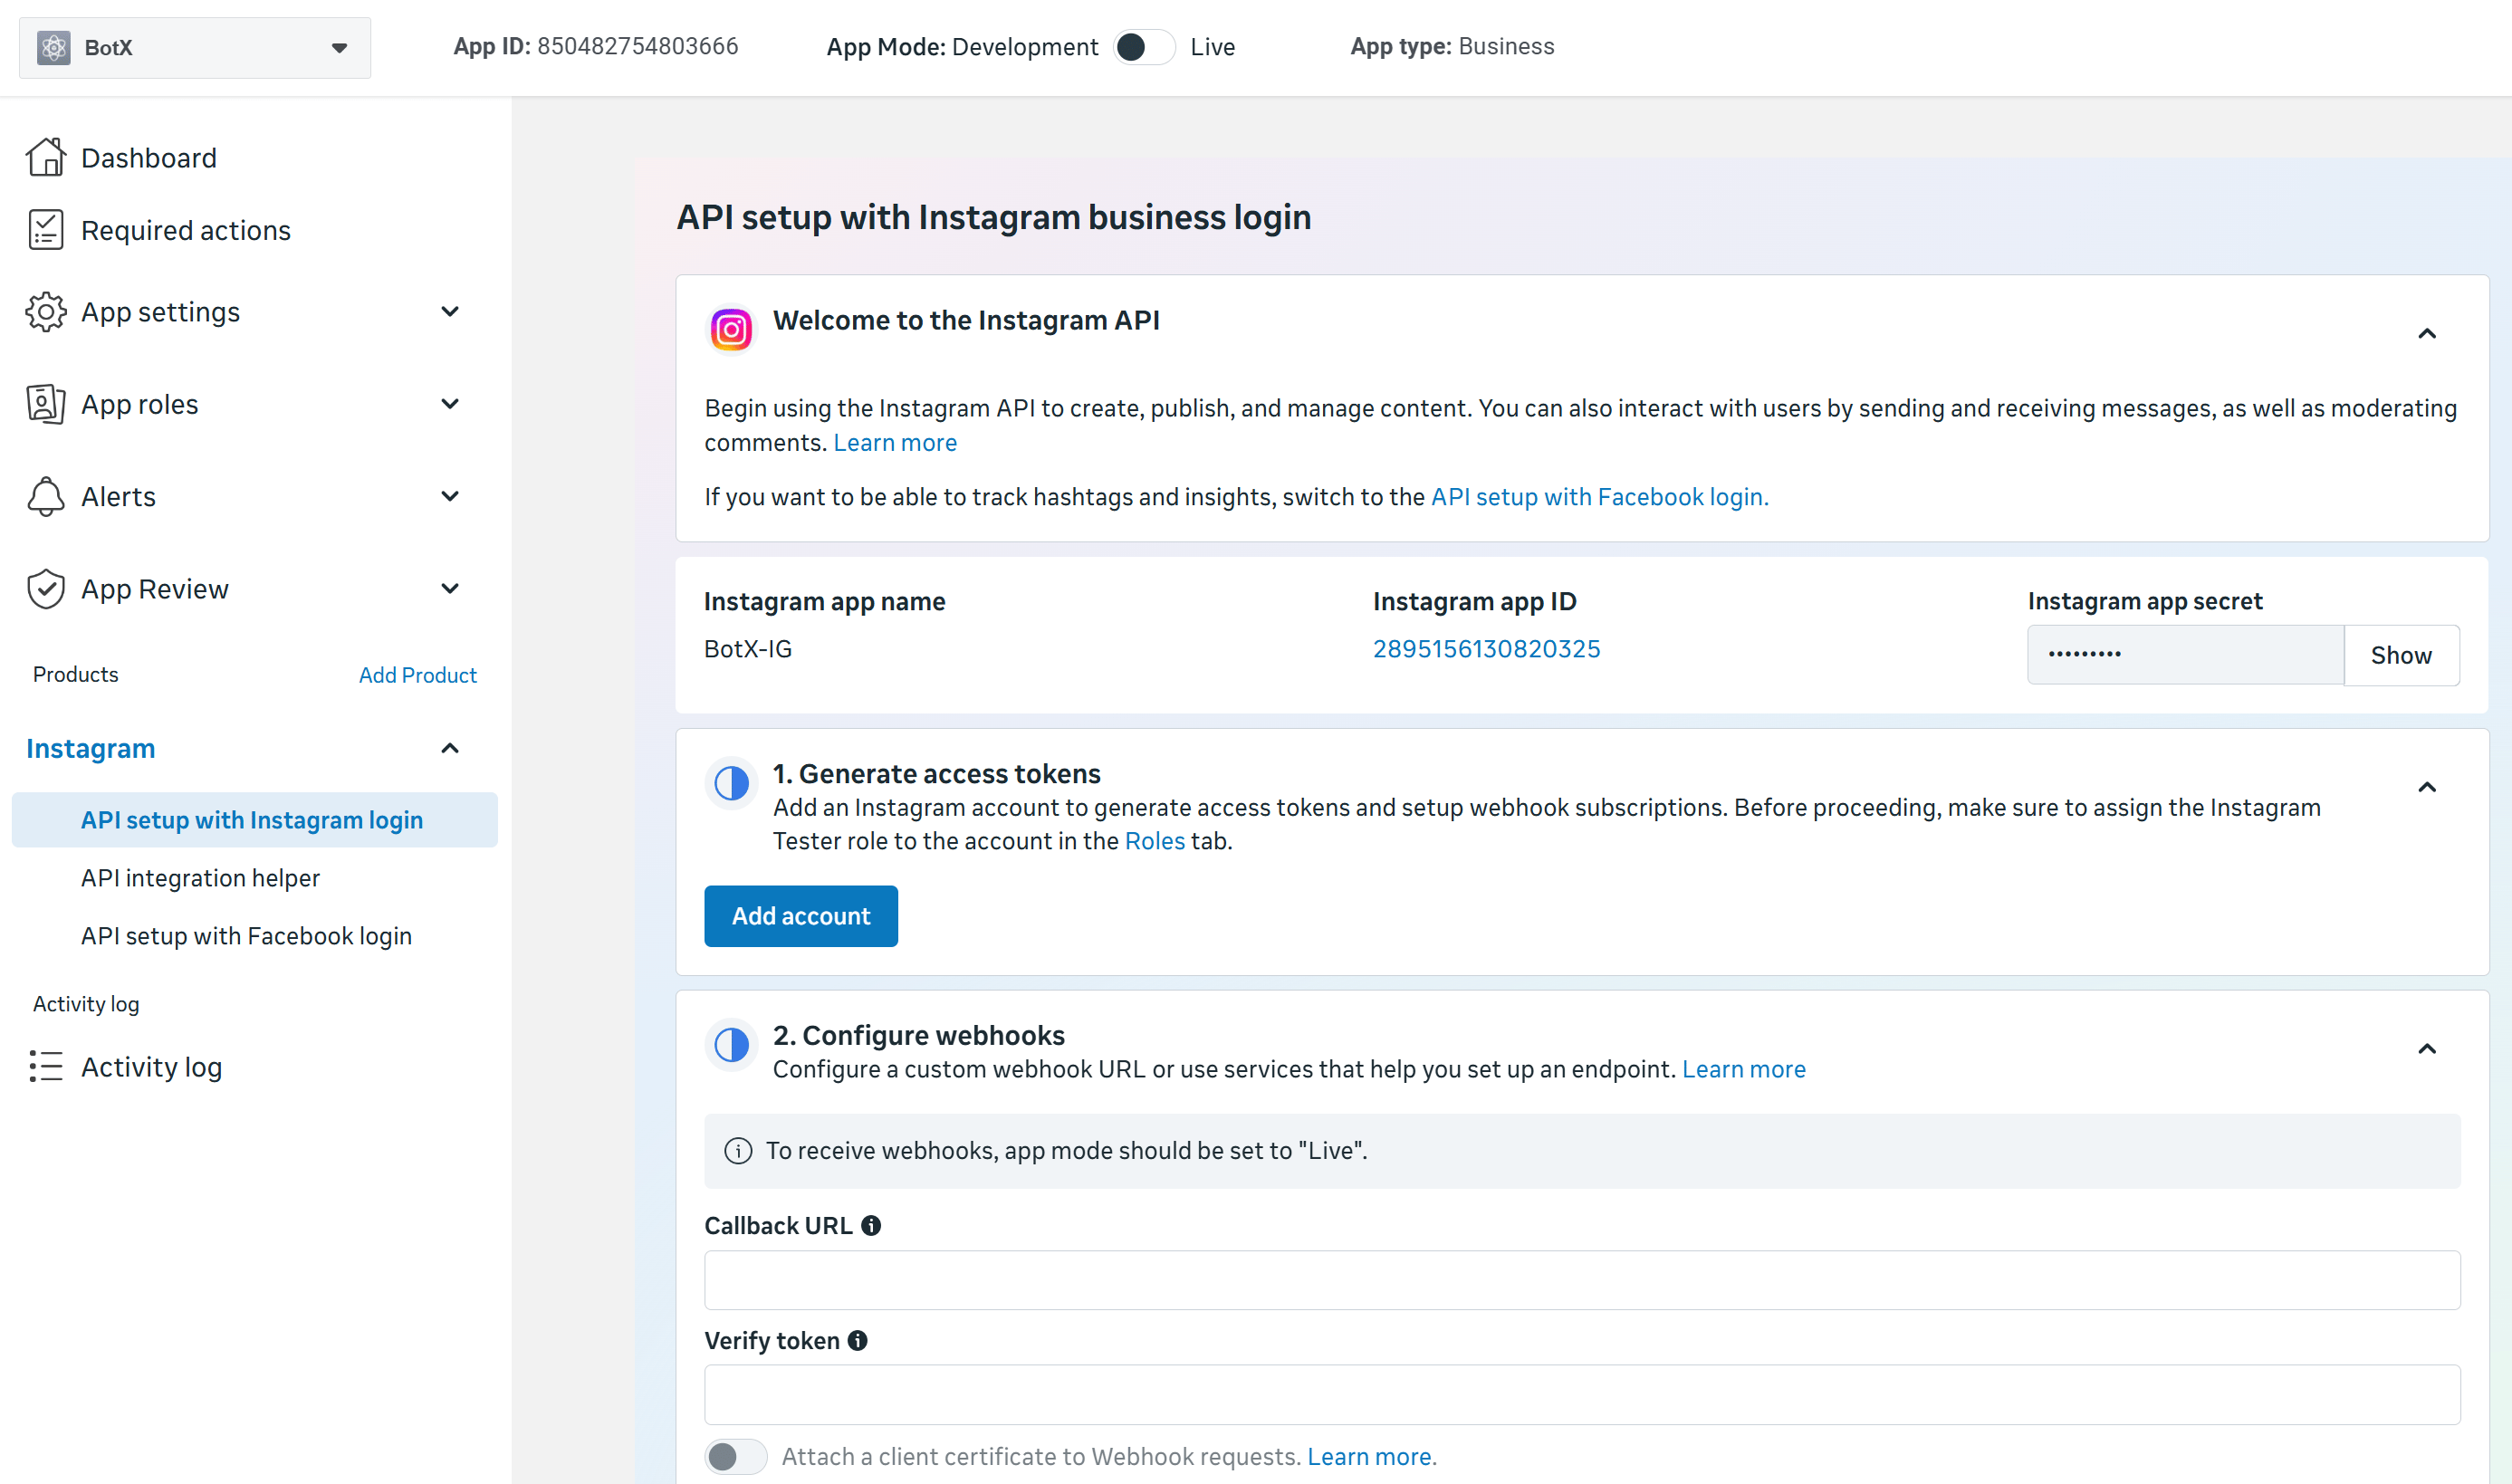
Step 3: Configure Instagram Business Login Settings in Meta
Before saving settings in ChatbotX, you must set up the Instagram product in the Meta Developer Portal to retrieve your Instagram credentials and establish the webhook connection.Configure Webhooks
Under Instagram: Webhooks in the Meta portal: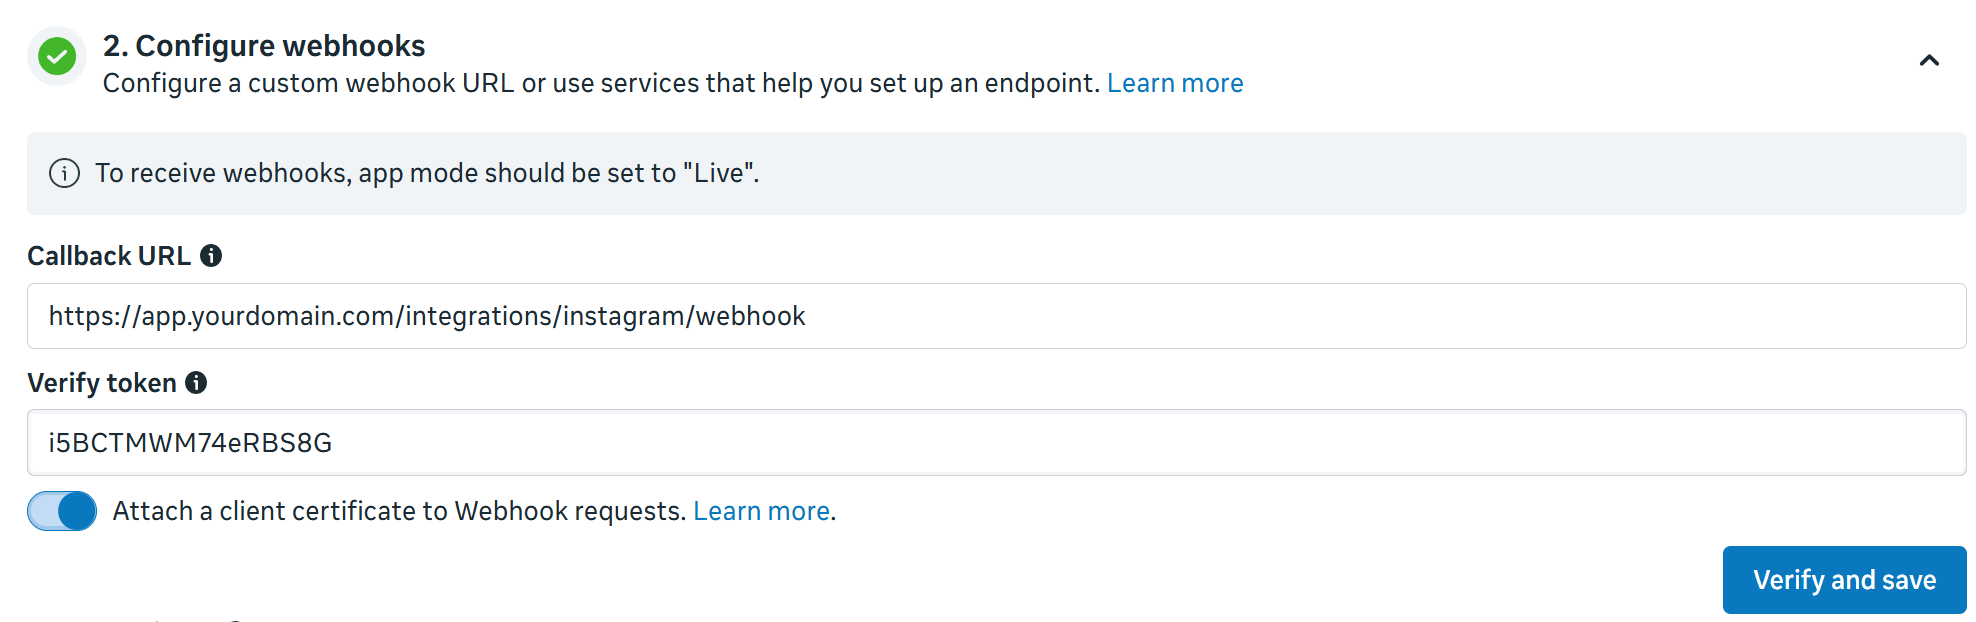
- Callback URL: Paste
https://app.yourdomain.com/integrations/instagram/webhook. - Verify Token: Enter a secure random string of your choice (e.g.
INSTAGRAM_VERIFY_TOKEN).
Configure Redirect URL
In the Client OAuth settings on the same page, enter your Redirect URL: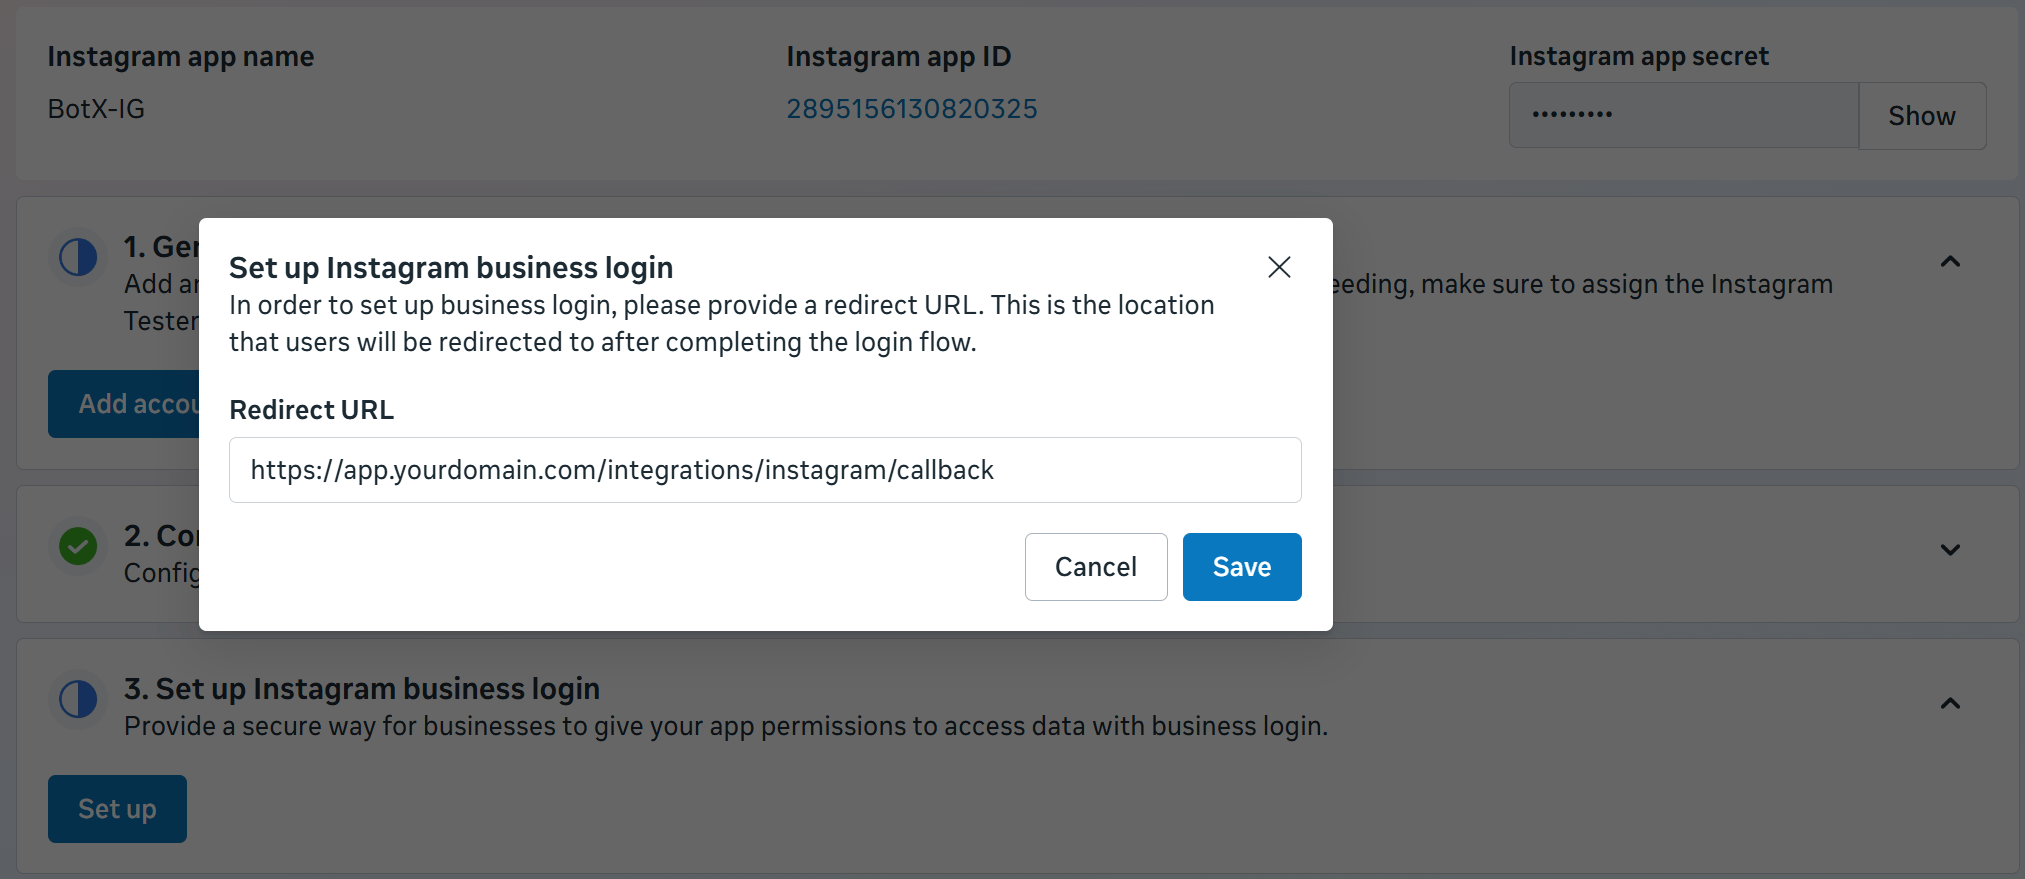
- Valid OAuth Redirect URIs: Paste
https://app.yourdomain.com/integrations/instagram/callback.
Subscribe to webhook events
Once verified, subscribe to the following fields:
messagesmessaging_seenmessage_reactions
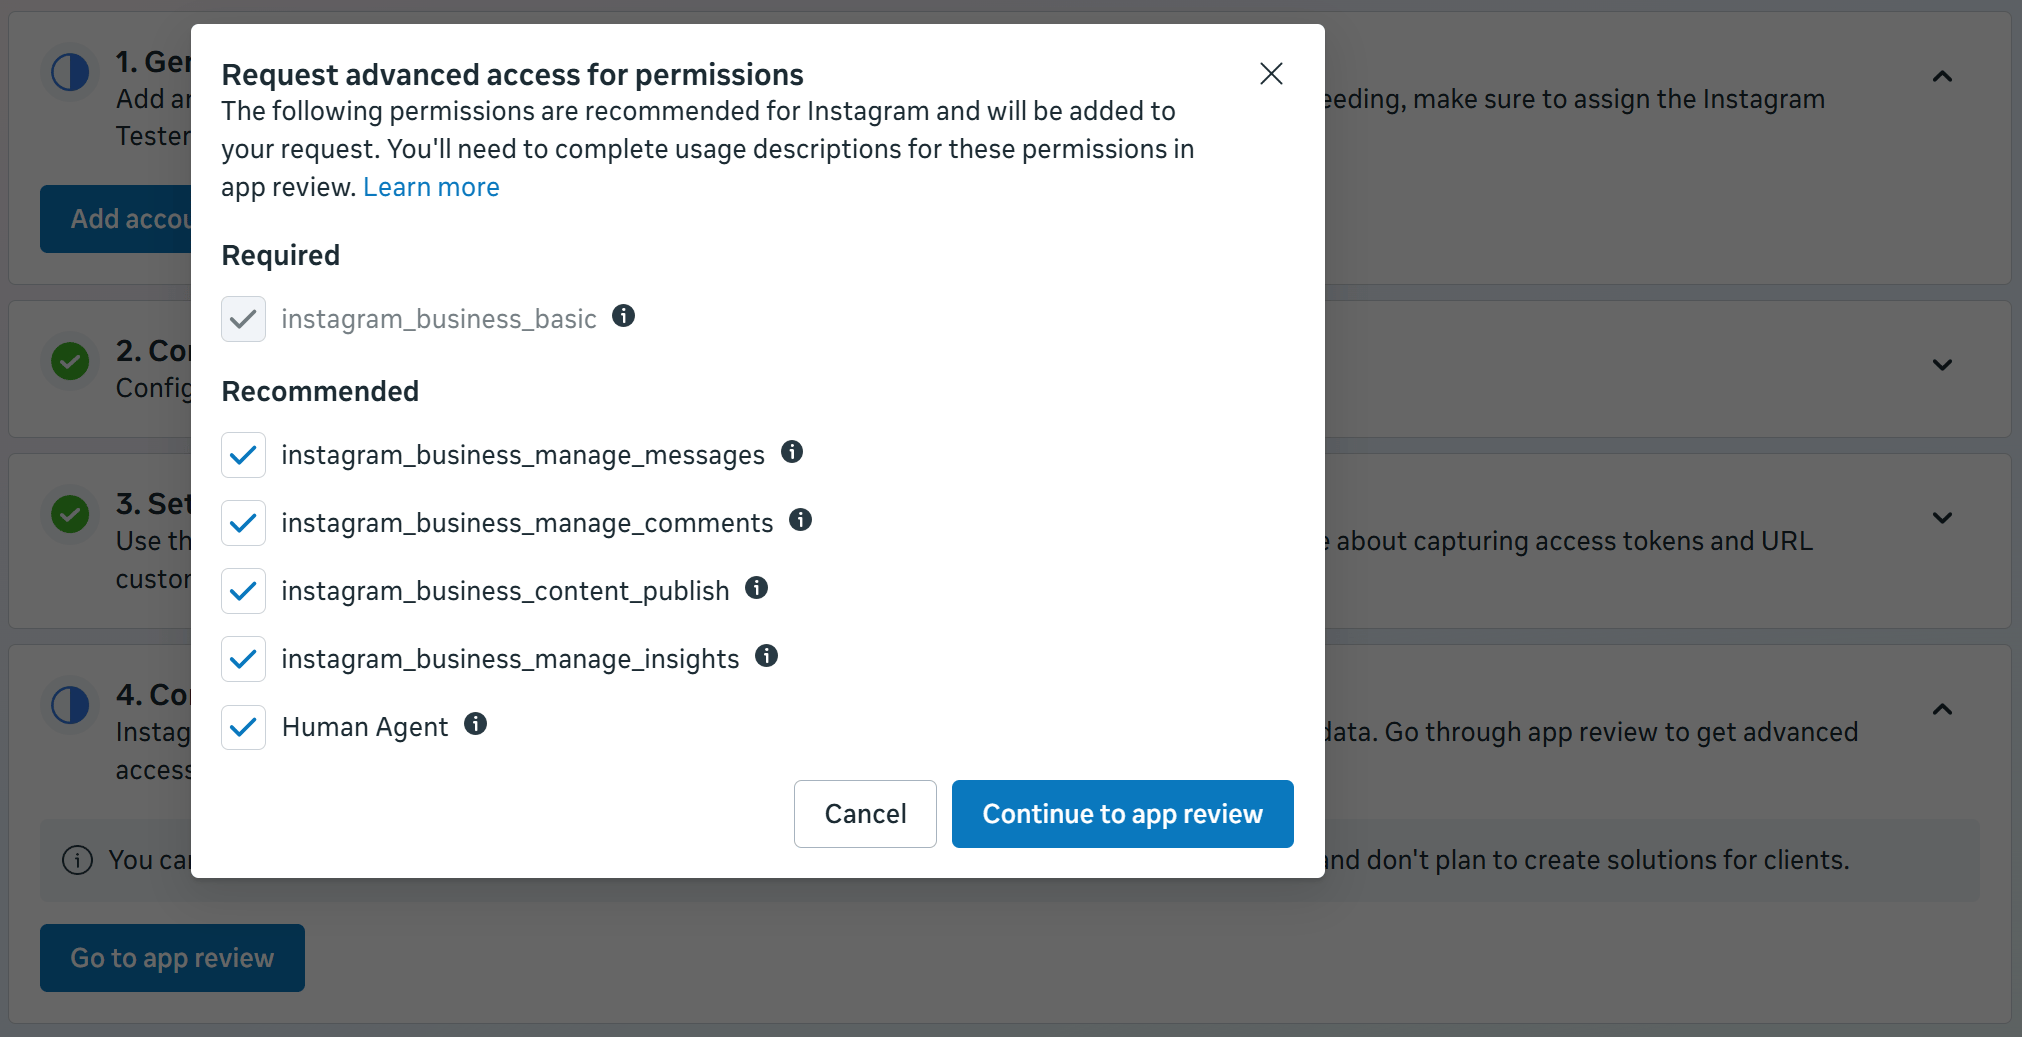
Complete app review
To receive messages from the general public, Meta requires your app to go through an App Review process. During this review, you must request specific permissions that allow the bot to read and reply to messages.Request Advanced Access for the following scopes:
| Permission | Description |
|---|---|
instagram_business_basic | Retrieve connected Instagram Business account metadata: username, ID, and profile picture. |
instagram_business_manage_messages | Receive and respond to Instagram Direct Messages. |
human_agent | Enable human agents to respond to messages outside the standard 24-hour window. |
Step 4: Test Your Connection
Before you open your chatbot to the public, it is best to test the connection using a test account. This ensures everything is set up correctly without affecting real customers.Register an Instagram Tester
In the Meta Developer Portal, go to App Roles: Roles and click Add Users.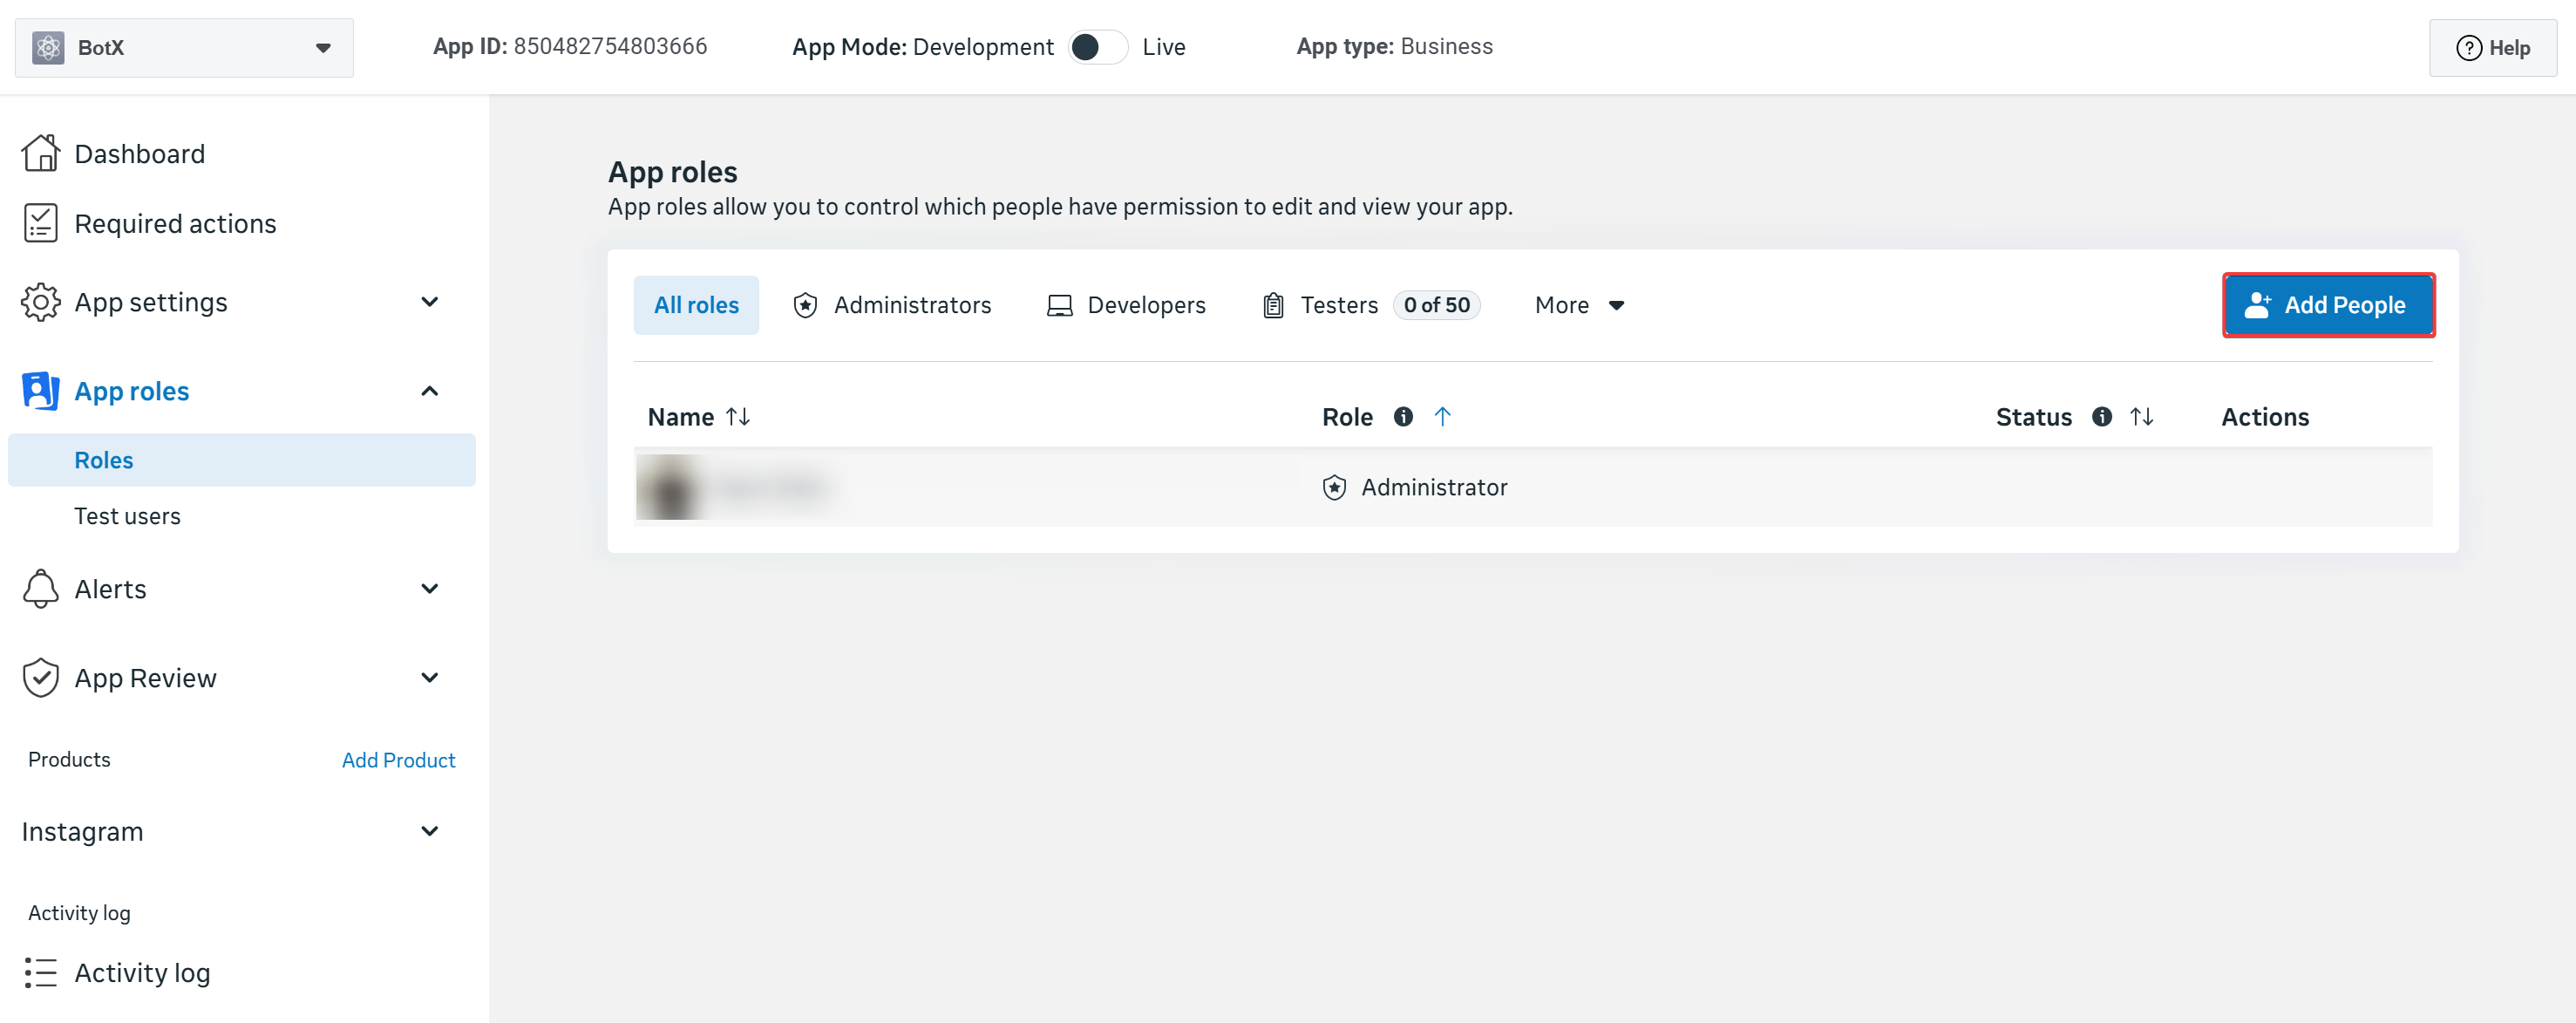
Select the Instagram Tester role
Choose the Instagram Tester role, enter the Instagram username of your test account, and click Submit.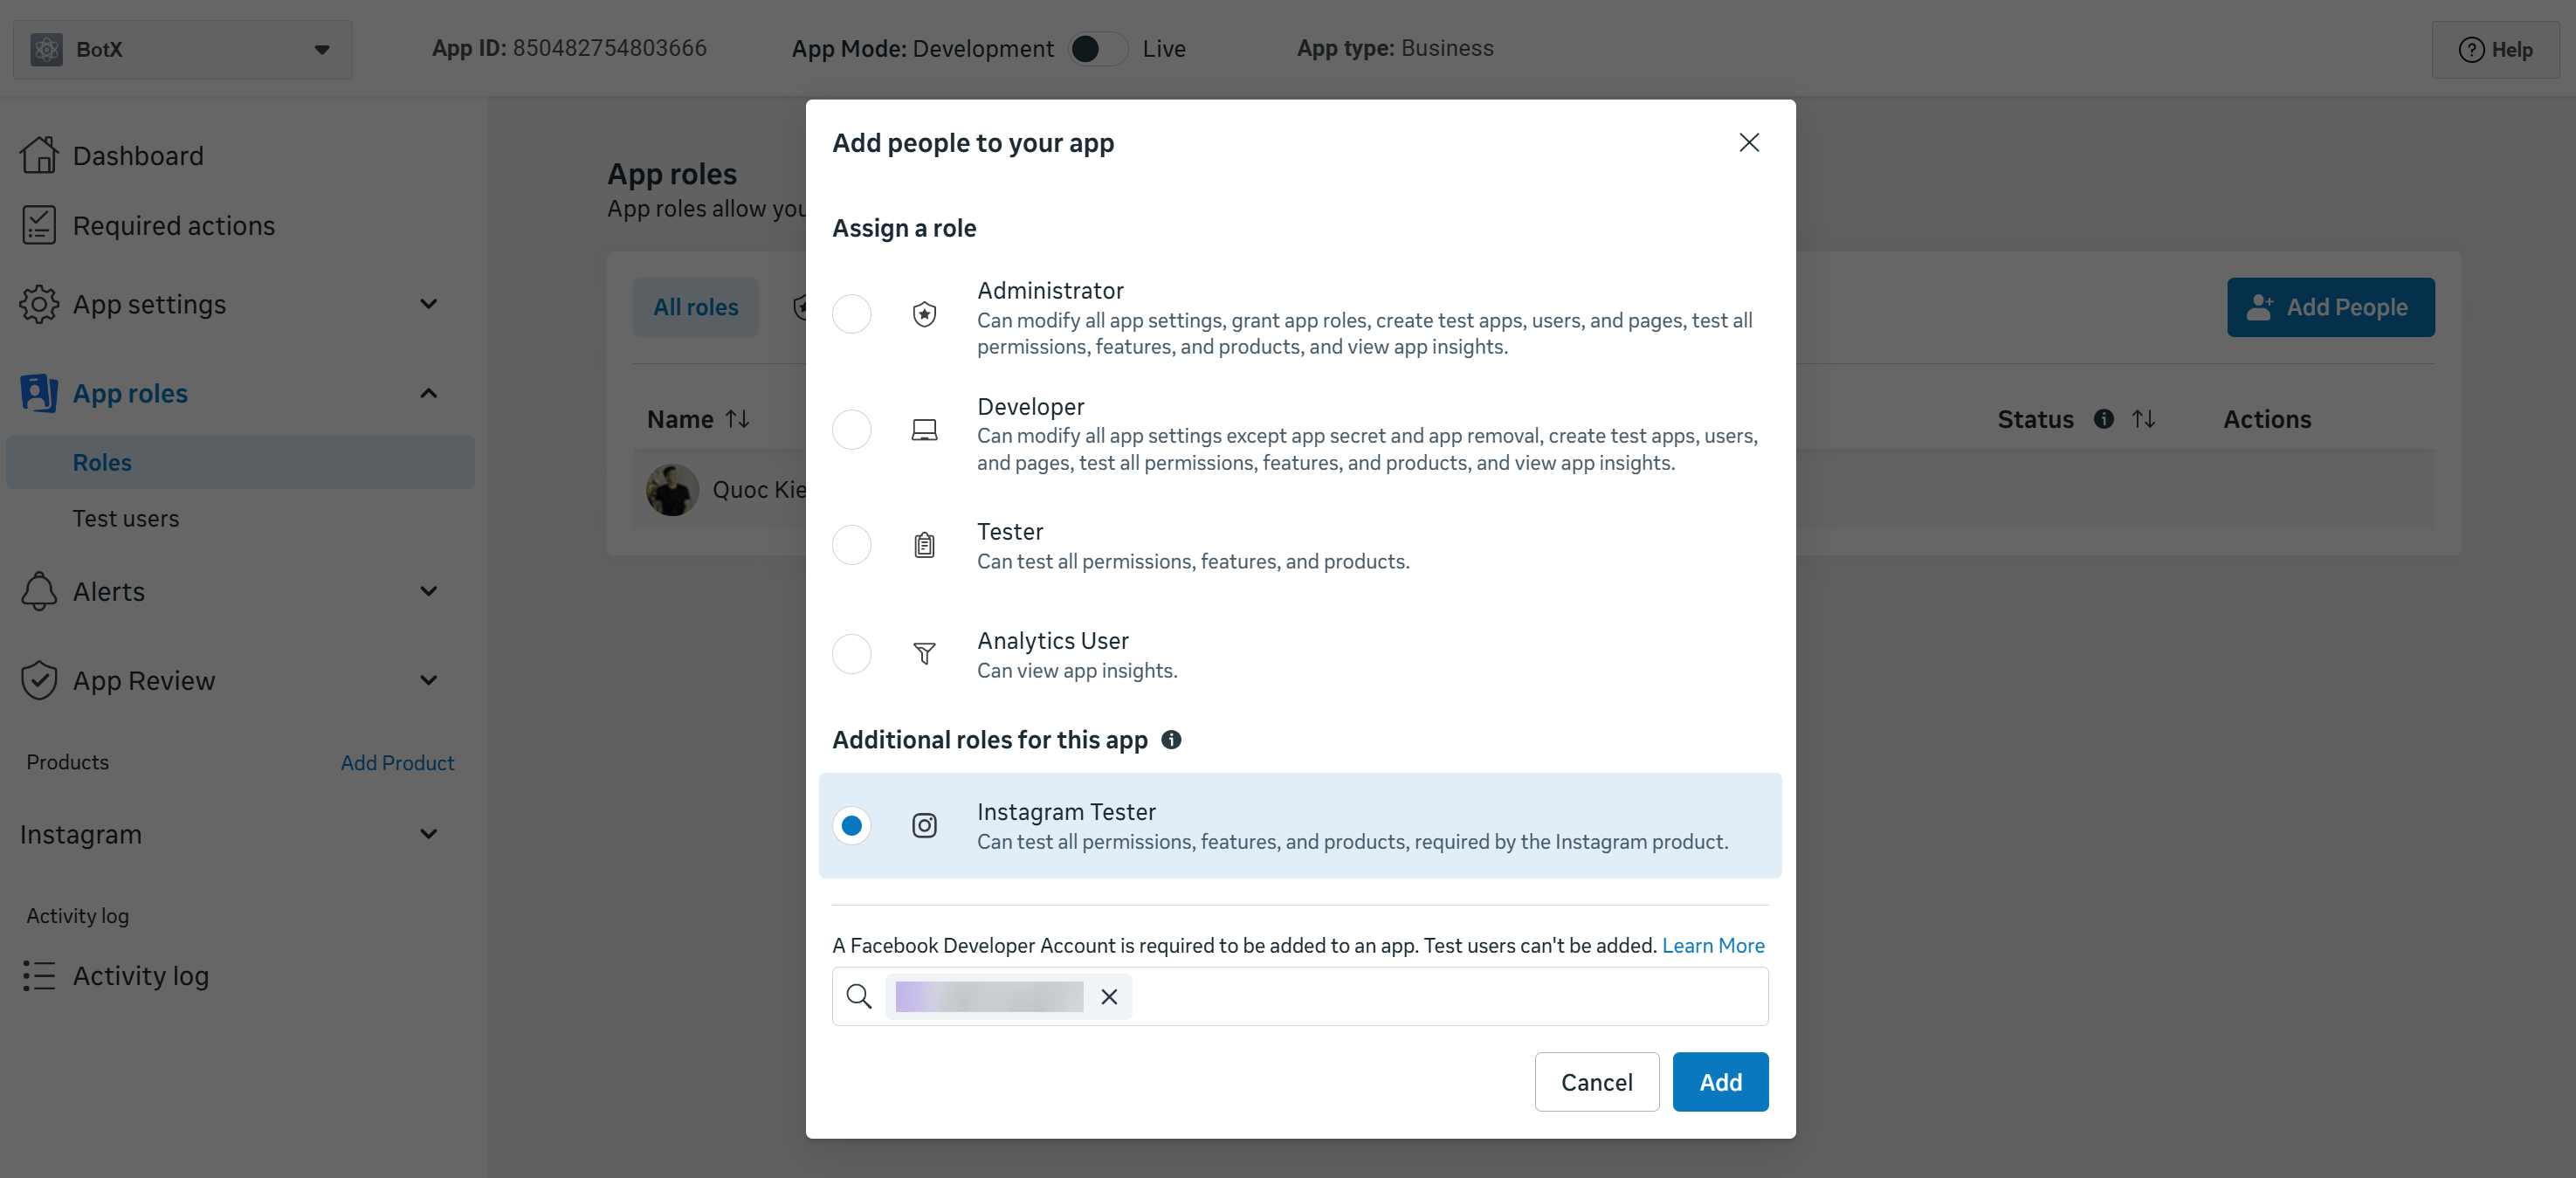
Accept the invitation
Log in to the test Instagram account, go to Settings: Apps and Websites: Tester Invites, and accept the pending invitation from your app.
Connect the Instagram channel in ChatbotX
Go to Settings: Channels in your ChatbotX dashboard. Click Add Instagram, select Connect, and follow the on-screen Meta authorization prompt. Select the test Instagram account to finalize the link.
Troubleshooting
Insufficient Developer Role Error
Insufficient Developer Role Error
Ensure the Instagram test user has accepted the Instagram Tester role invitation under Settings: Apps and Websites: Tester Invites on their Instagram account.
API Access Deactivated Error
API Access Deactivated Error
Verify that your Meta app has a valid and reachable Privacy Policy URL configured in Settings: Basic.
Invalid redirect_uri Error
Invalid redirect_uri Error
Check that the Valid OAuth Redirect URI in the Instagram Business Login settings matches your ChatbotX installation URL callback format exactly.
Token Exchange Failure
Token Exchange Failure
Verify that the Meta App is in Live mode and all permissions have been correctly approved or the test user is properly linked to the app.