Prerequisites
Before starting the setup, ensure you have:- A self-hosted ChatbotX instance accessible via a public HTTPS URL.
- A TikTok Business Account registered in a supported region (personal TikTok accounts are not supported).
- Direct messages set to Everyone in your TikTok app settings (otherwise, you will need to manually accept new message requests).
- A TikTok Developer Account created at developers.tiktok.com.
- Super Admin access to your ChatbotX instance.
Step 1: Create a TikTok Developer Account
To get started, you must register a developer account on TikTok. This account lets you manage and configure the messaging link between TikTok and ChatbotX.Register as a developer
Go to developers.tiktok.com and sign up.
Step 2: Register Your App
Registering your application in the developer portal provides you with the key credentials (App ID and App Secret) needed to securely link ChatbotX to TikTok.Create a new app
Navigate to business-api.tiktok.com/portal/apps and click Create App.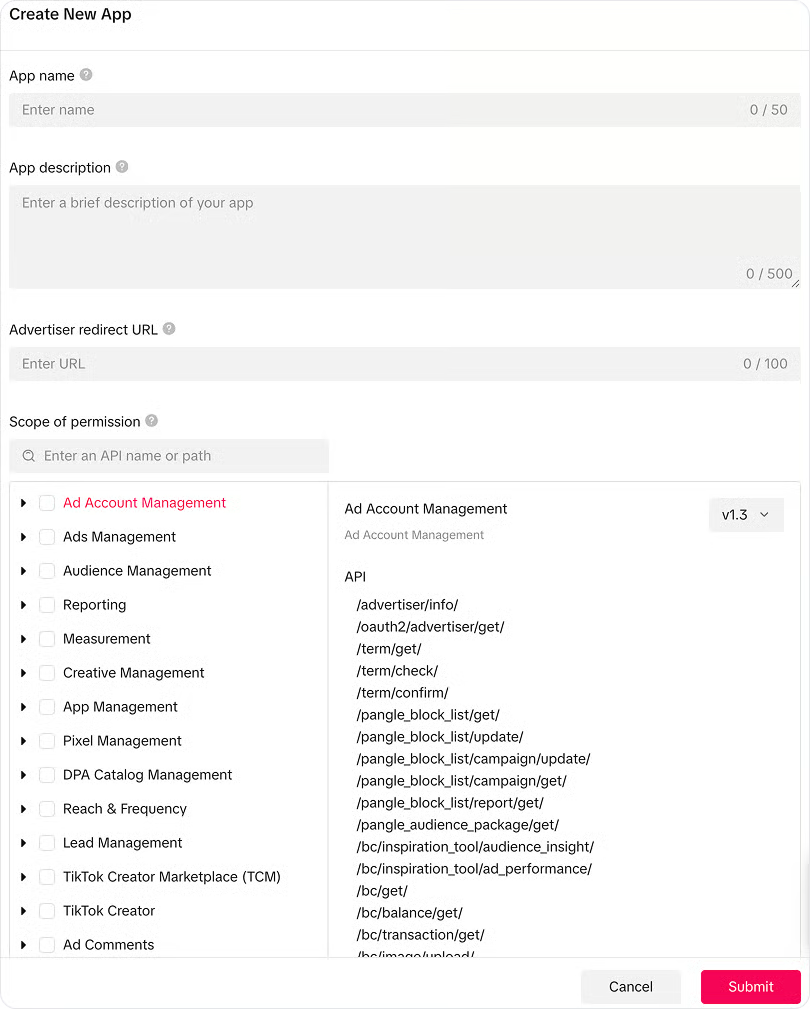
Fill in app details
Provide the required details:
- App Name: e.g.,
Your Company - ChatbotX - App Description: Explain your messaging and support use case.
- App Icon: Upload your company logo.
- Terms of Service URL: Your company’s ToS page.
- Privacy Policy URL: Your company’s privacy policy page.
Step 3: Apply for Business Messaging API Access
TikTok requires you to request access to the messaging endpoints. This is a security review step to ensure data is handled safely.Request Business Messaging product
Open your app in the TikTok Developer Portal and find the Business Messaging API product.
Submit the access application
Fill out the application form with:
- Your use case (e.g., providing automated customer support).
- Details on how you handle user data.
- Your business/organization details.
Step 4: Configure ChatbotX Credentials
With your TikTok credentials generated and Webhooks configured in Meta, save these settings in ChatbotX to link the integration.Configure via Super Admin Panel
Log in to ChatbotX as a Super Admin, then navigate to:Enter your TikTok App ID and TikTok App Secret
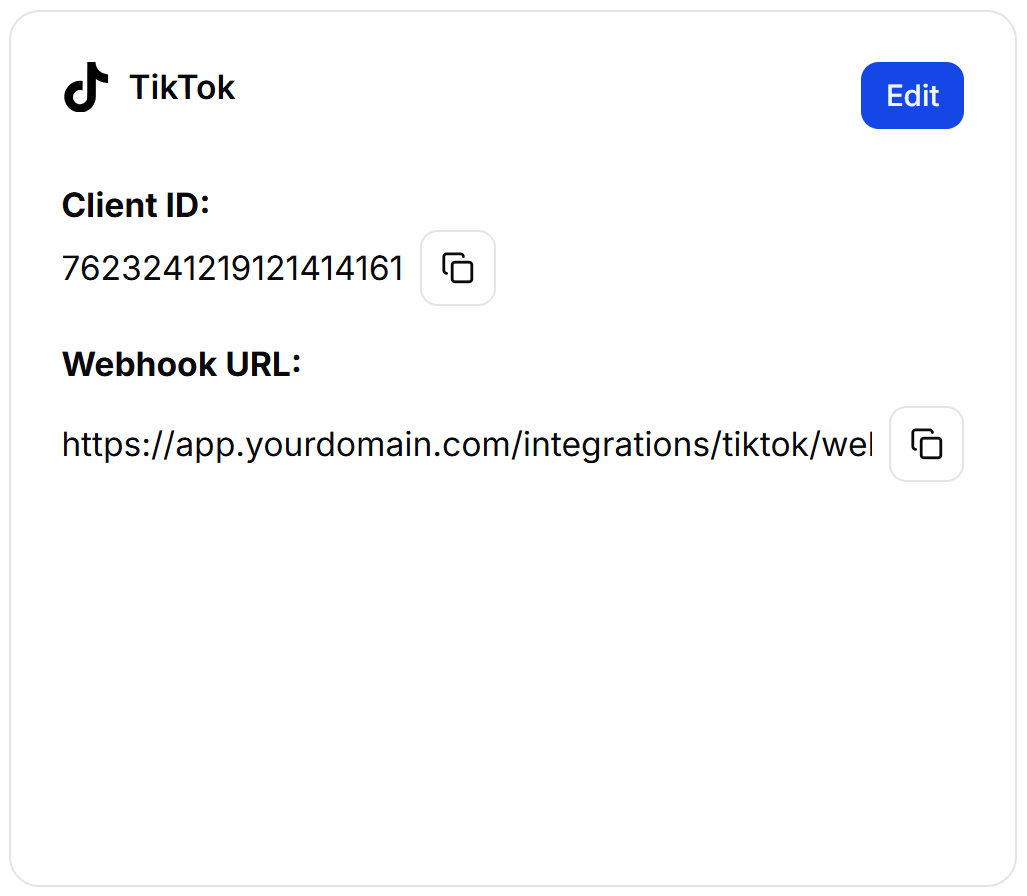
Open the TikTok configuration
Click the Edit button on the TikTok card to open the configuration modal. Enter your Client ID and App Secret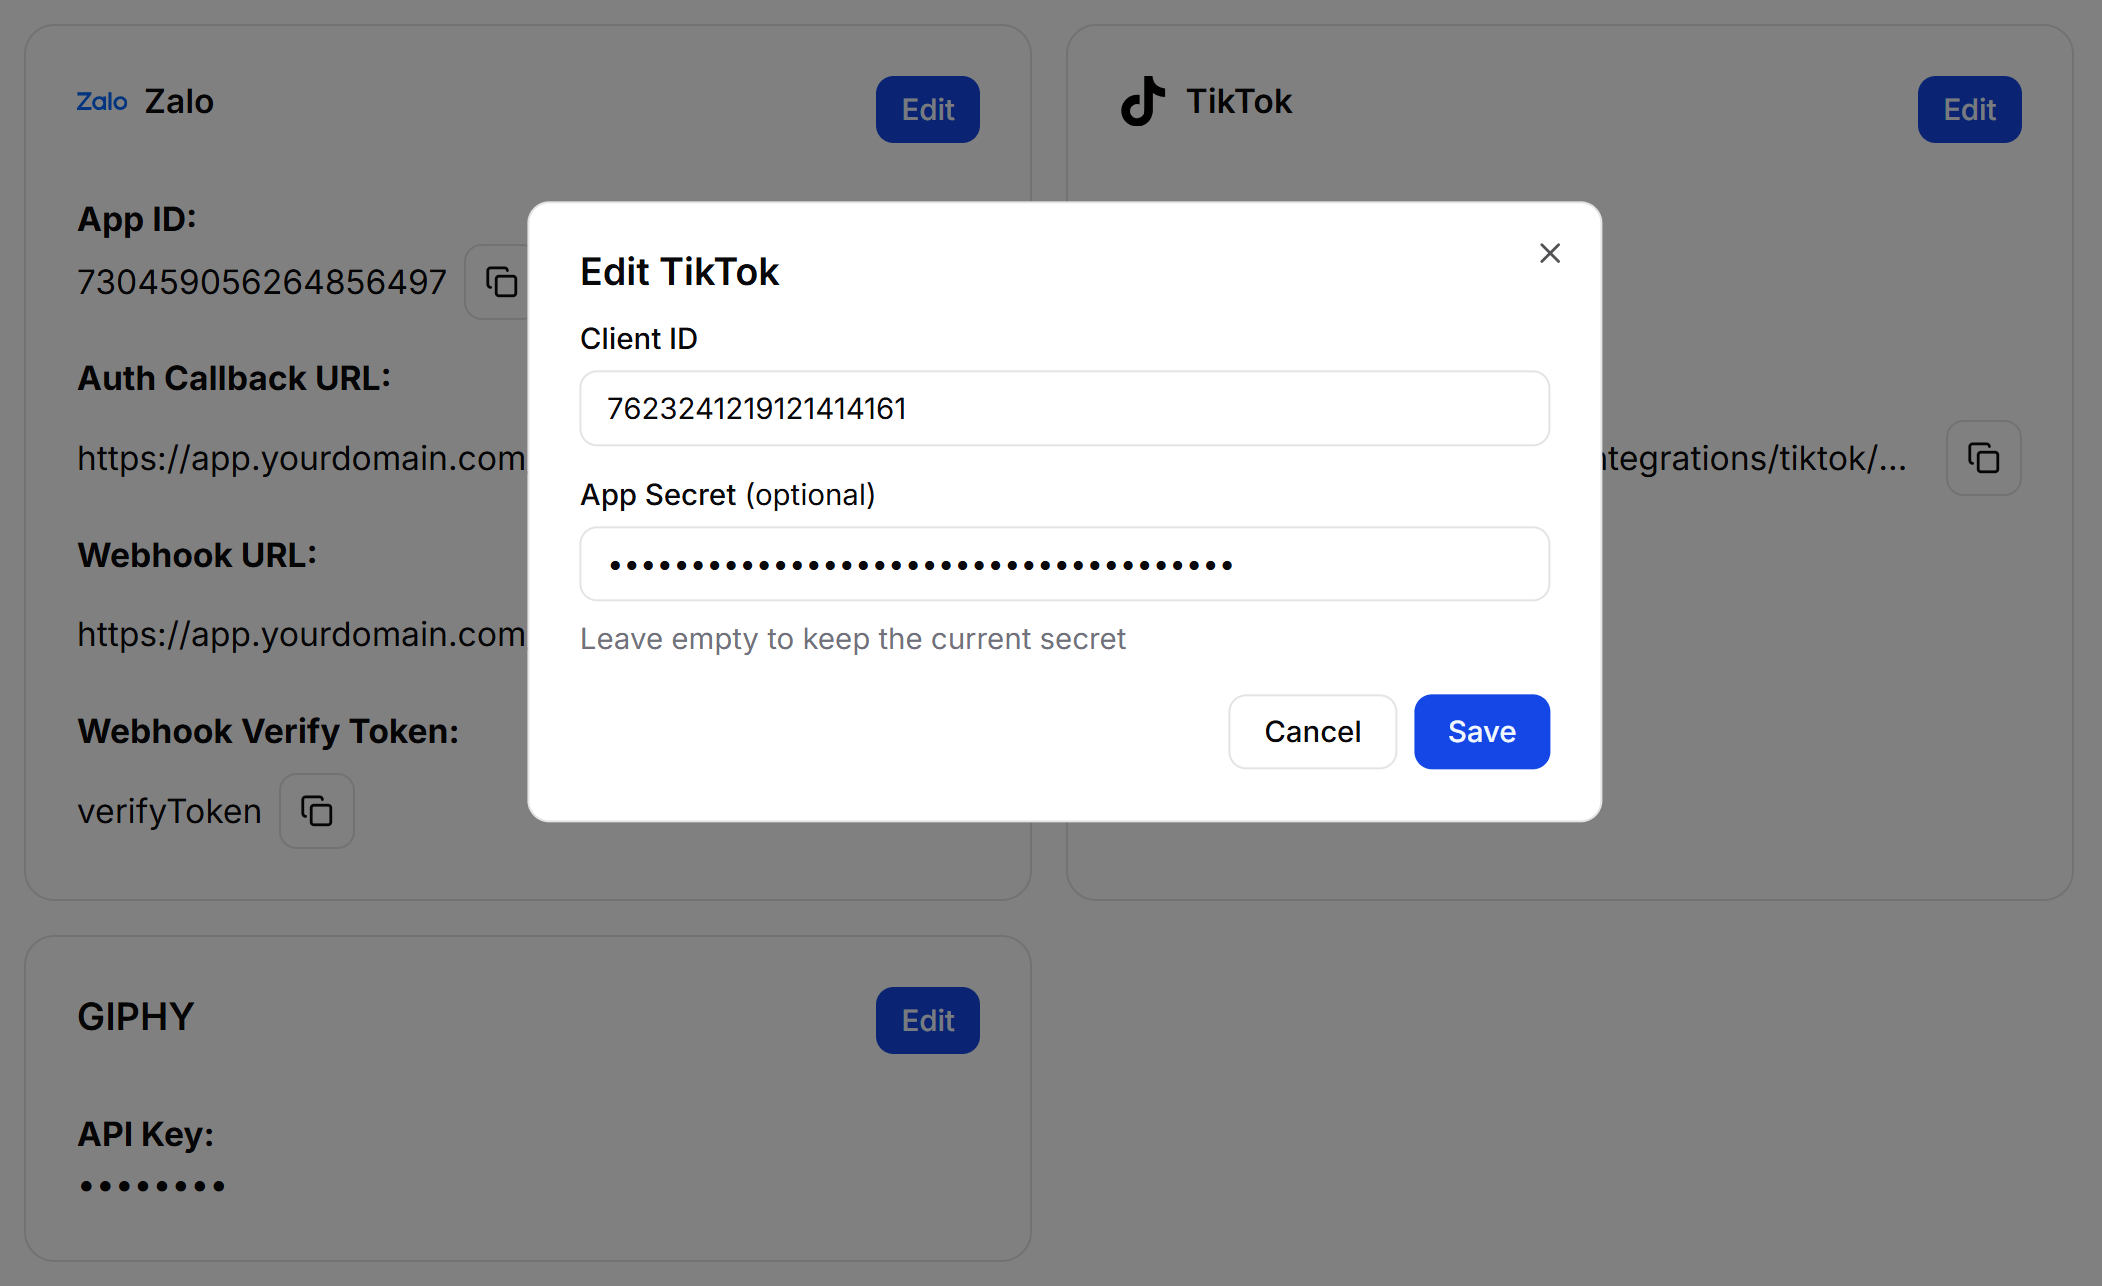
Step 5: Configure App Permissions and Redirect URLs
Once approved, you need to enable the specific account permissions and tell TikTok where to send users after they log in (Redirect URL).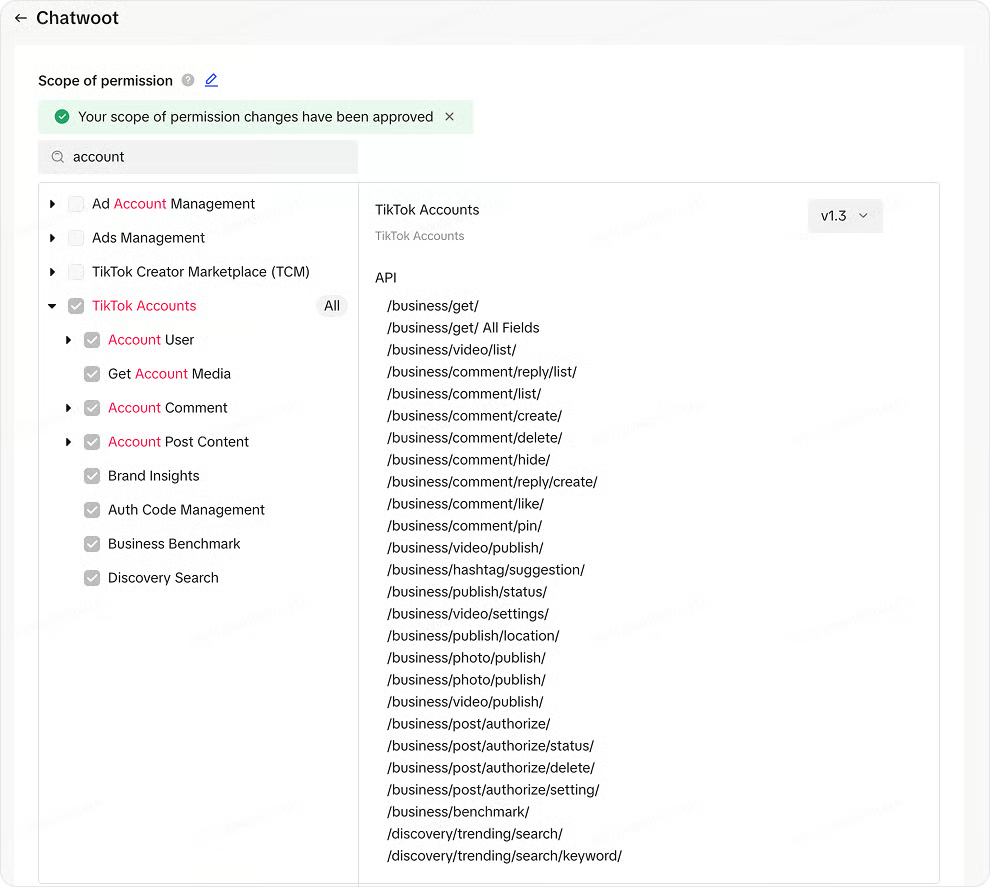
Step 6: Connect Your TikTok Account
With the technical setup finished, you can now link your actual TikTok Business account to ChatbotX.Open Channels Settings
In your ChatbotX dashboard, go to Settings -> Channels, expand the TikTok section, and click + Add TikTok.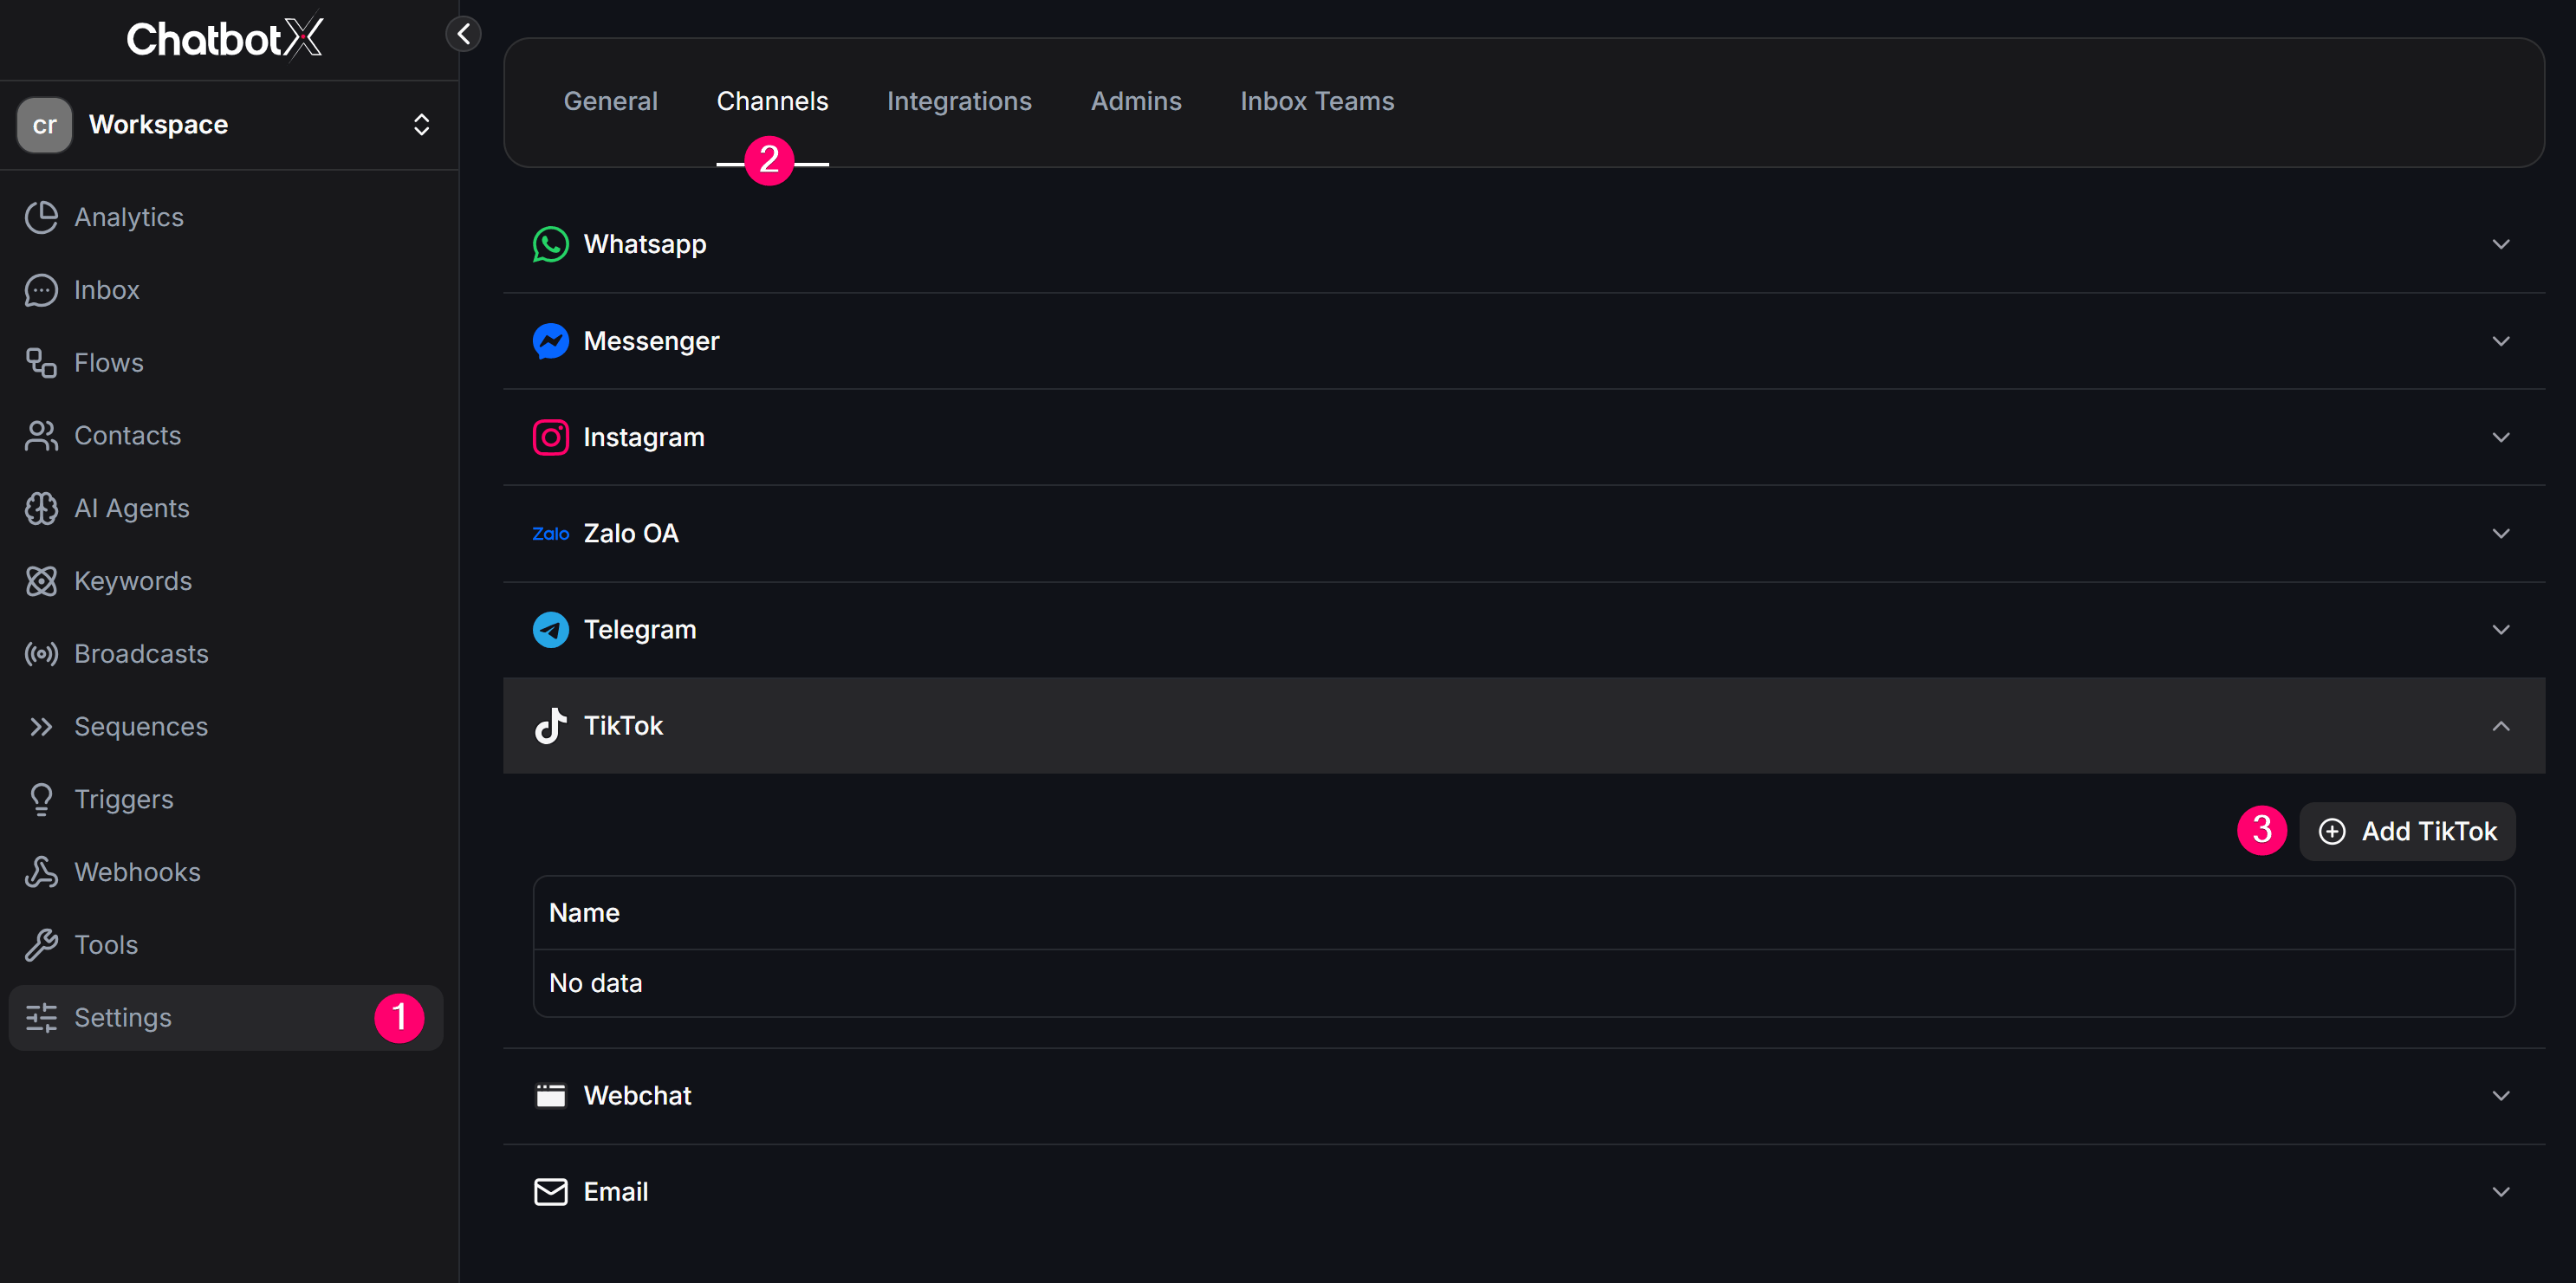
Authorize ChatbotX on TikTok
On the TikTok authorization screen, review the requested permissions and click Tiếp tục (Continue) to authorize the integration.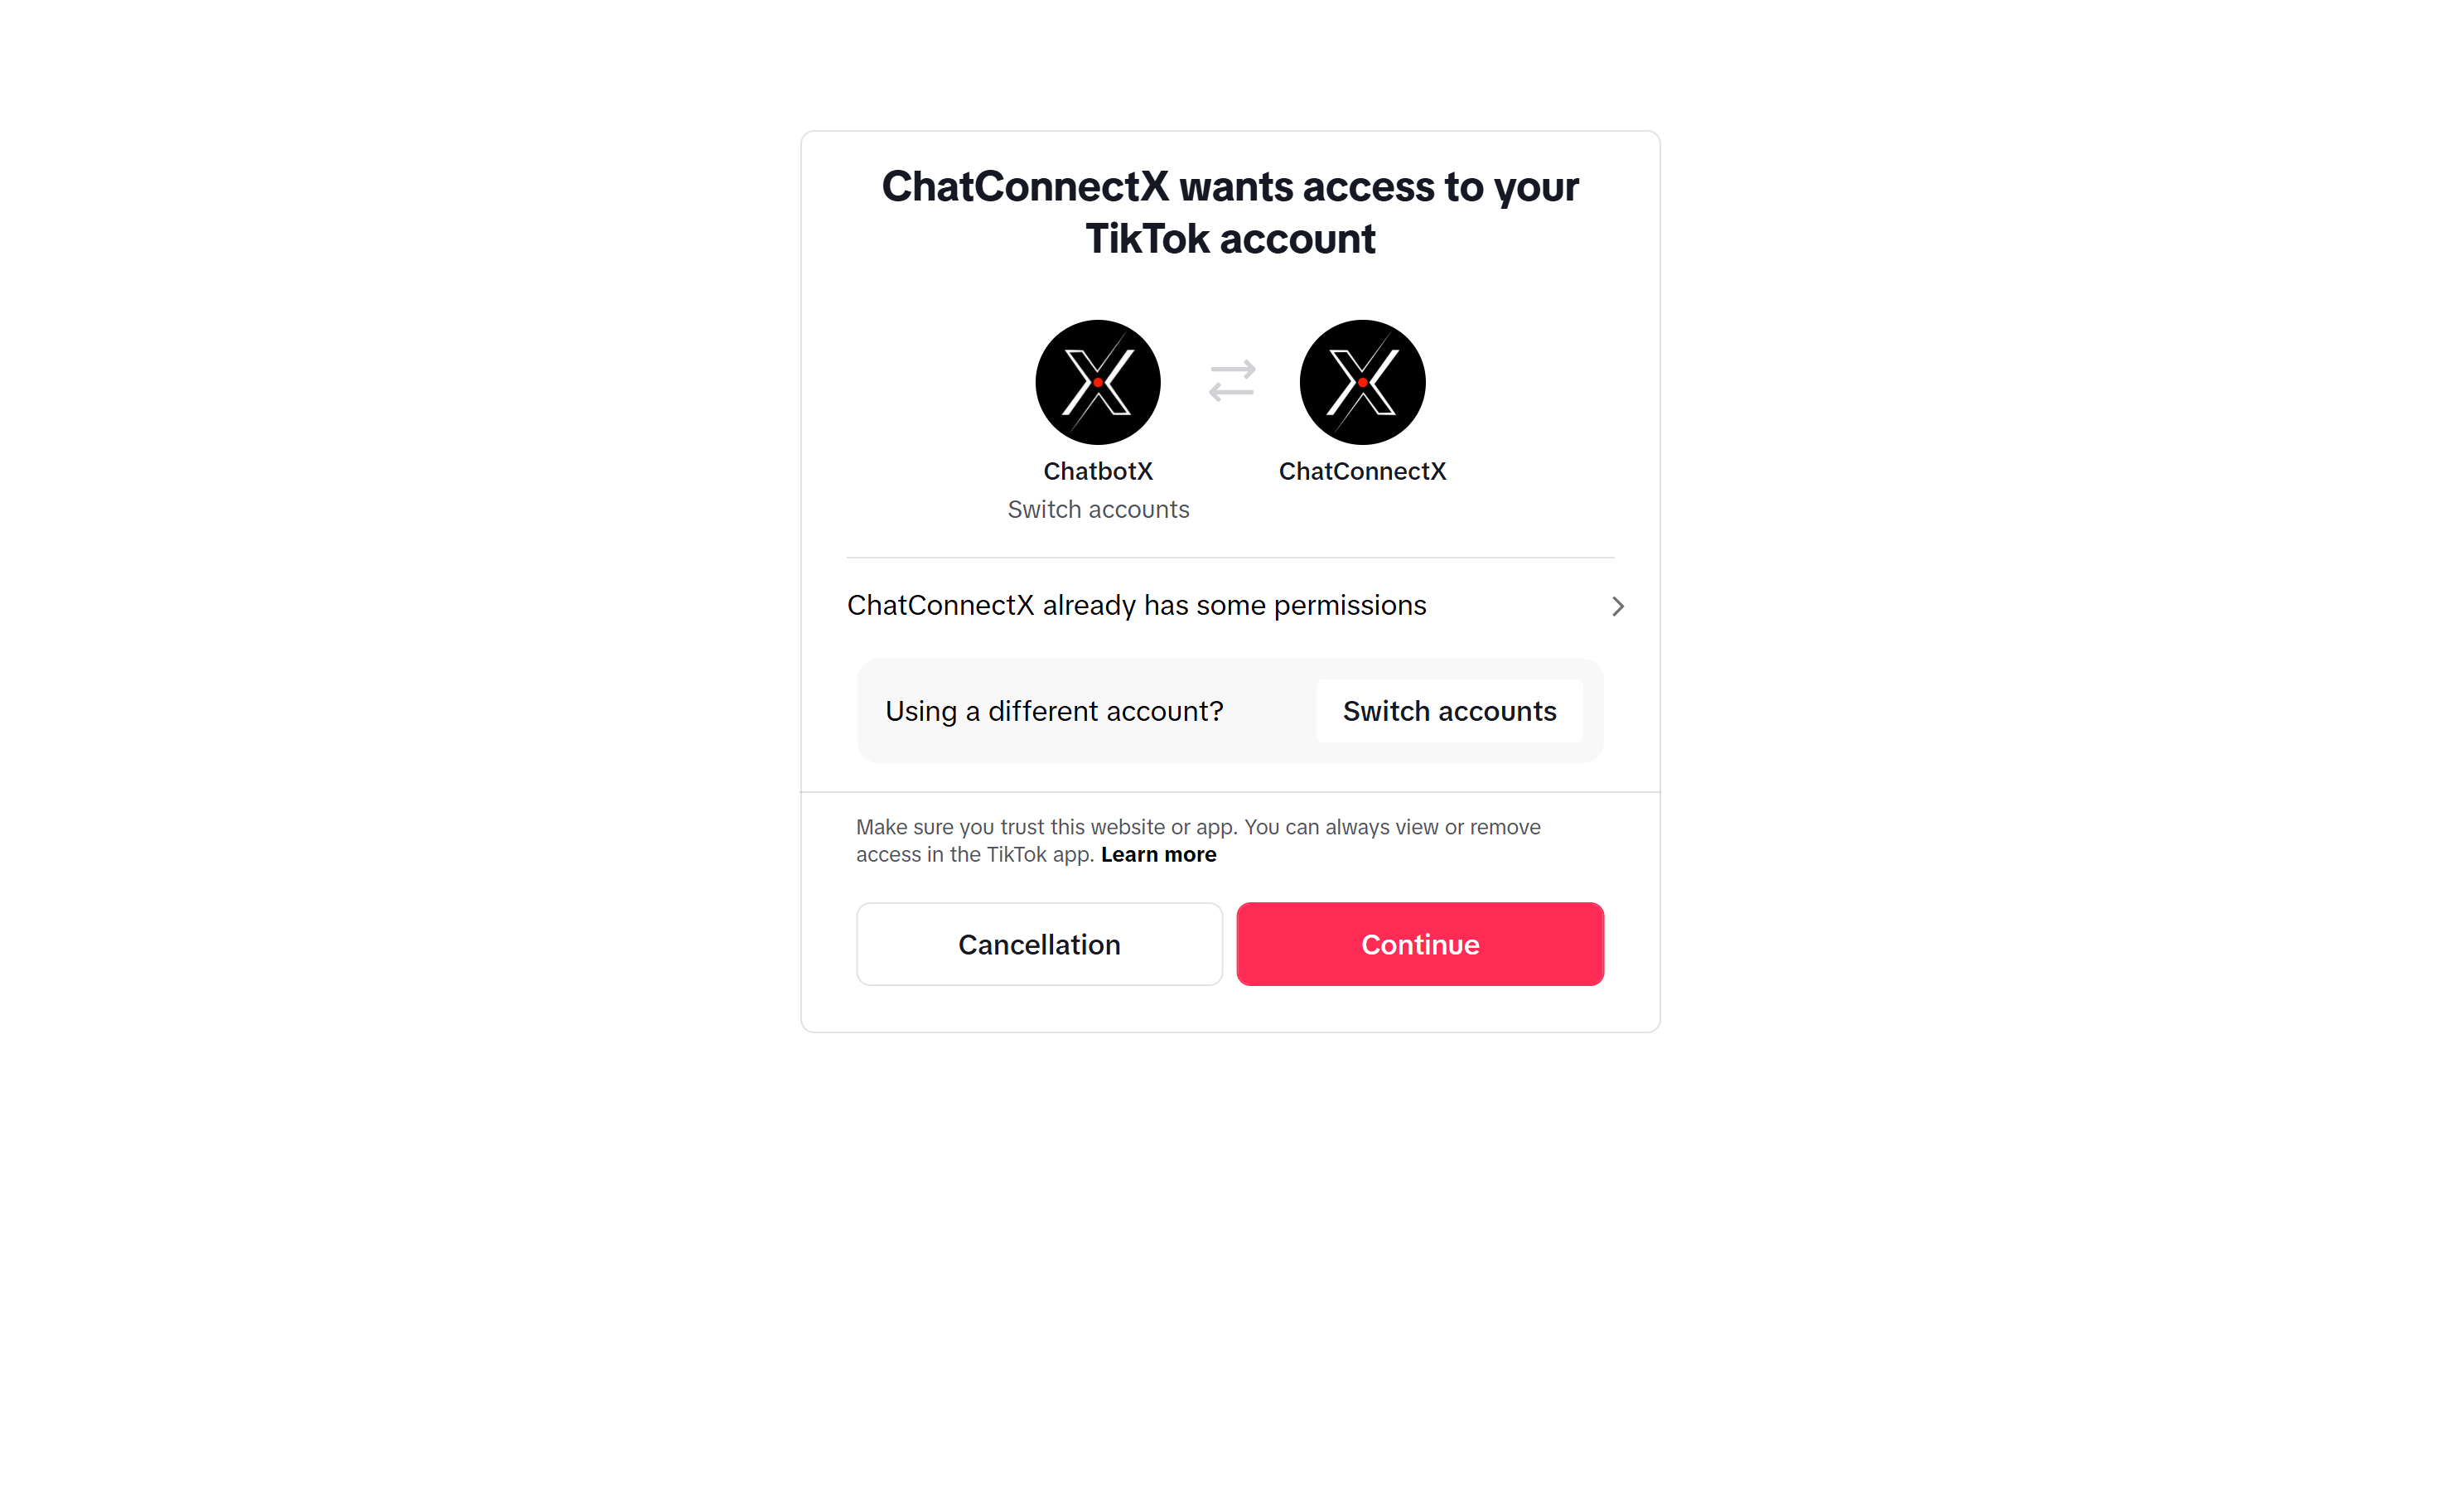
Troubleshooting
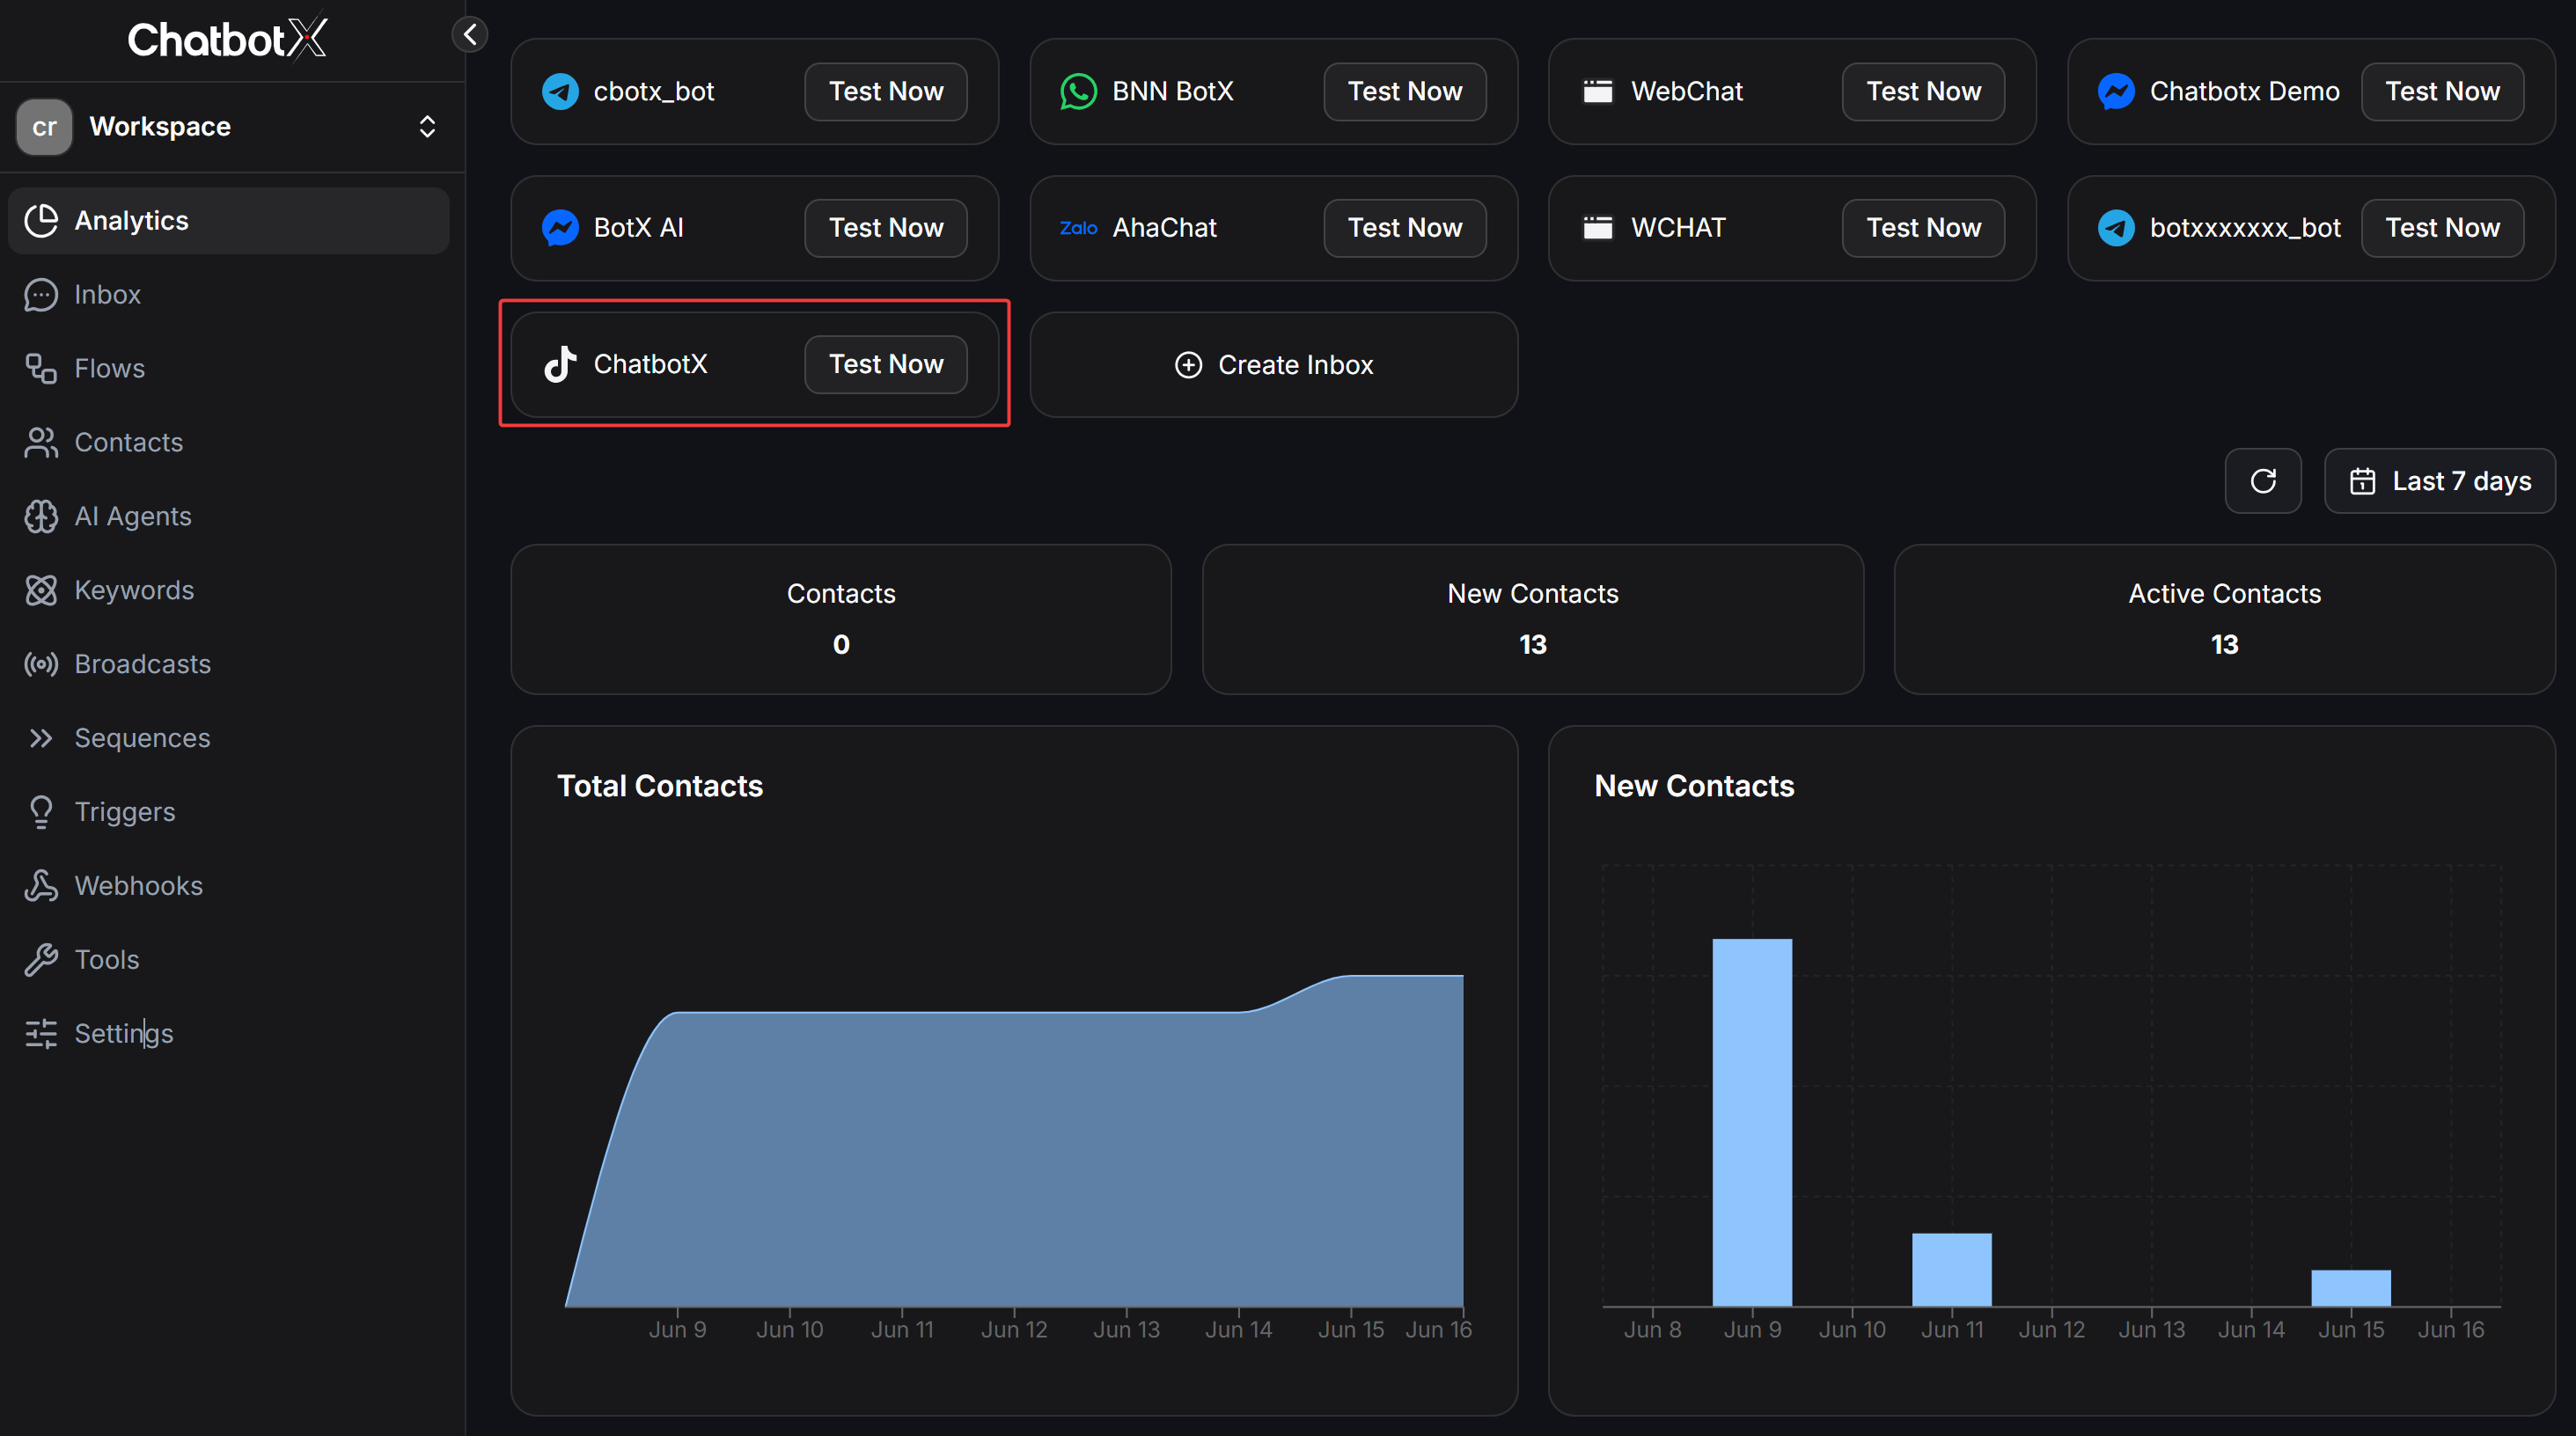
TikTok Channel not appearing in dashboard
TikTok Channel not appearing in dashboard
Verify that you have enabled the TikTok feature for your account in the Super Admin panel, and confirm that the environment variables are saved and the server has been restarted.
OAuth authorization fails
OAuth authorization fails
Not receiving incoming messages
Not receiving incoming messages
Run
Tiktok::AuthClient.webhook_callback in the Rails console to verify that the webhook is registered. Check that your server can receive public HTTPS requests and that your business account is registered in a supported region.Messages failing to send
Messages failing to send
Ensure you are replying within the standard 48-hour window. Verify the channel is not requesting reauthorization due to expired access tokens.
Channel requires Reauthorization
Channel requires Reauthorization