How to Retrieve the Secret Key and Connect Stripe
To enable automated billing, you need to connect your Stripe account to your portal using a secret API key.Retrieve Secret Key from Stripe
To obtain your API key, perform the following steps: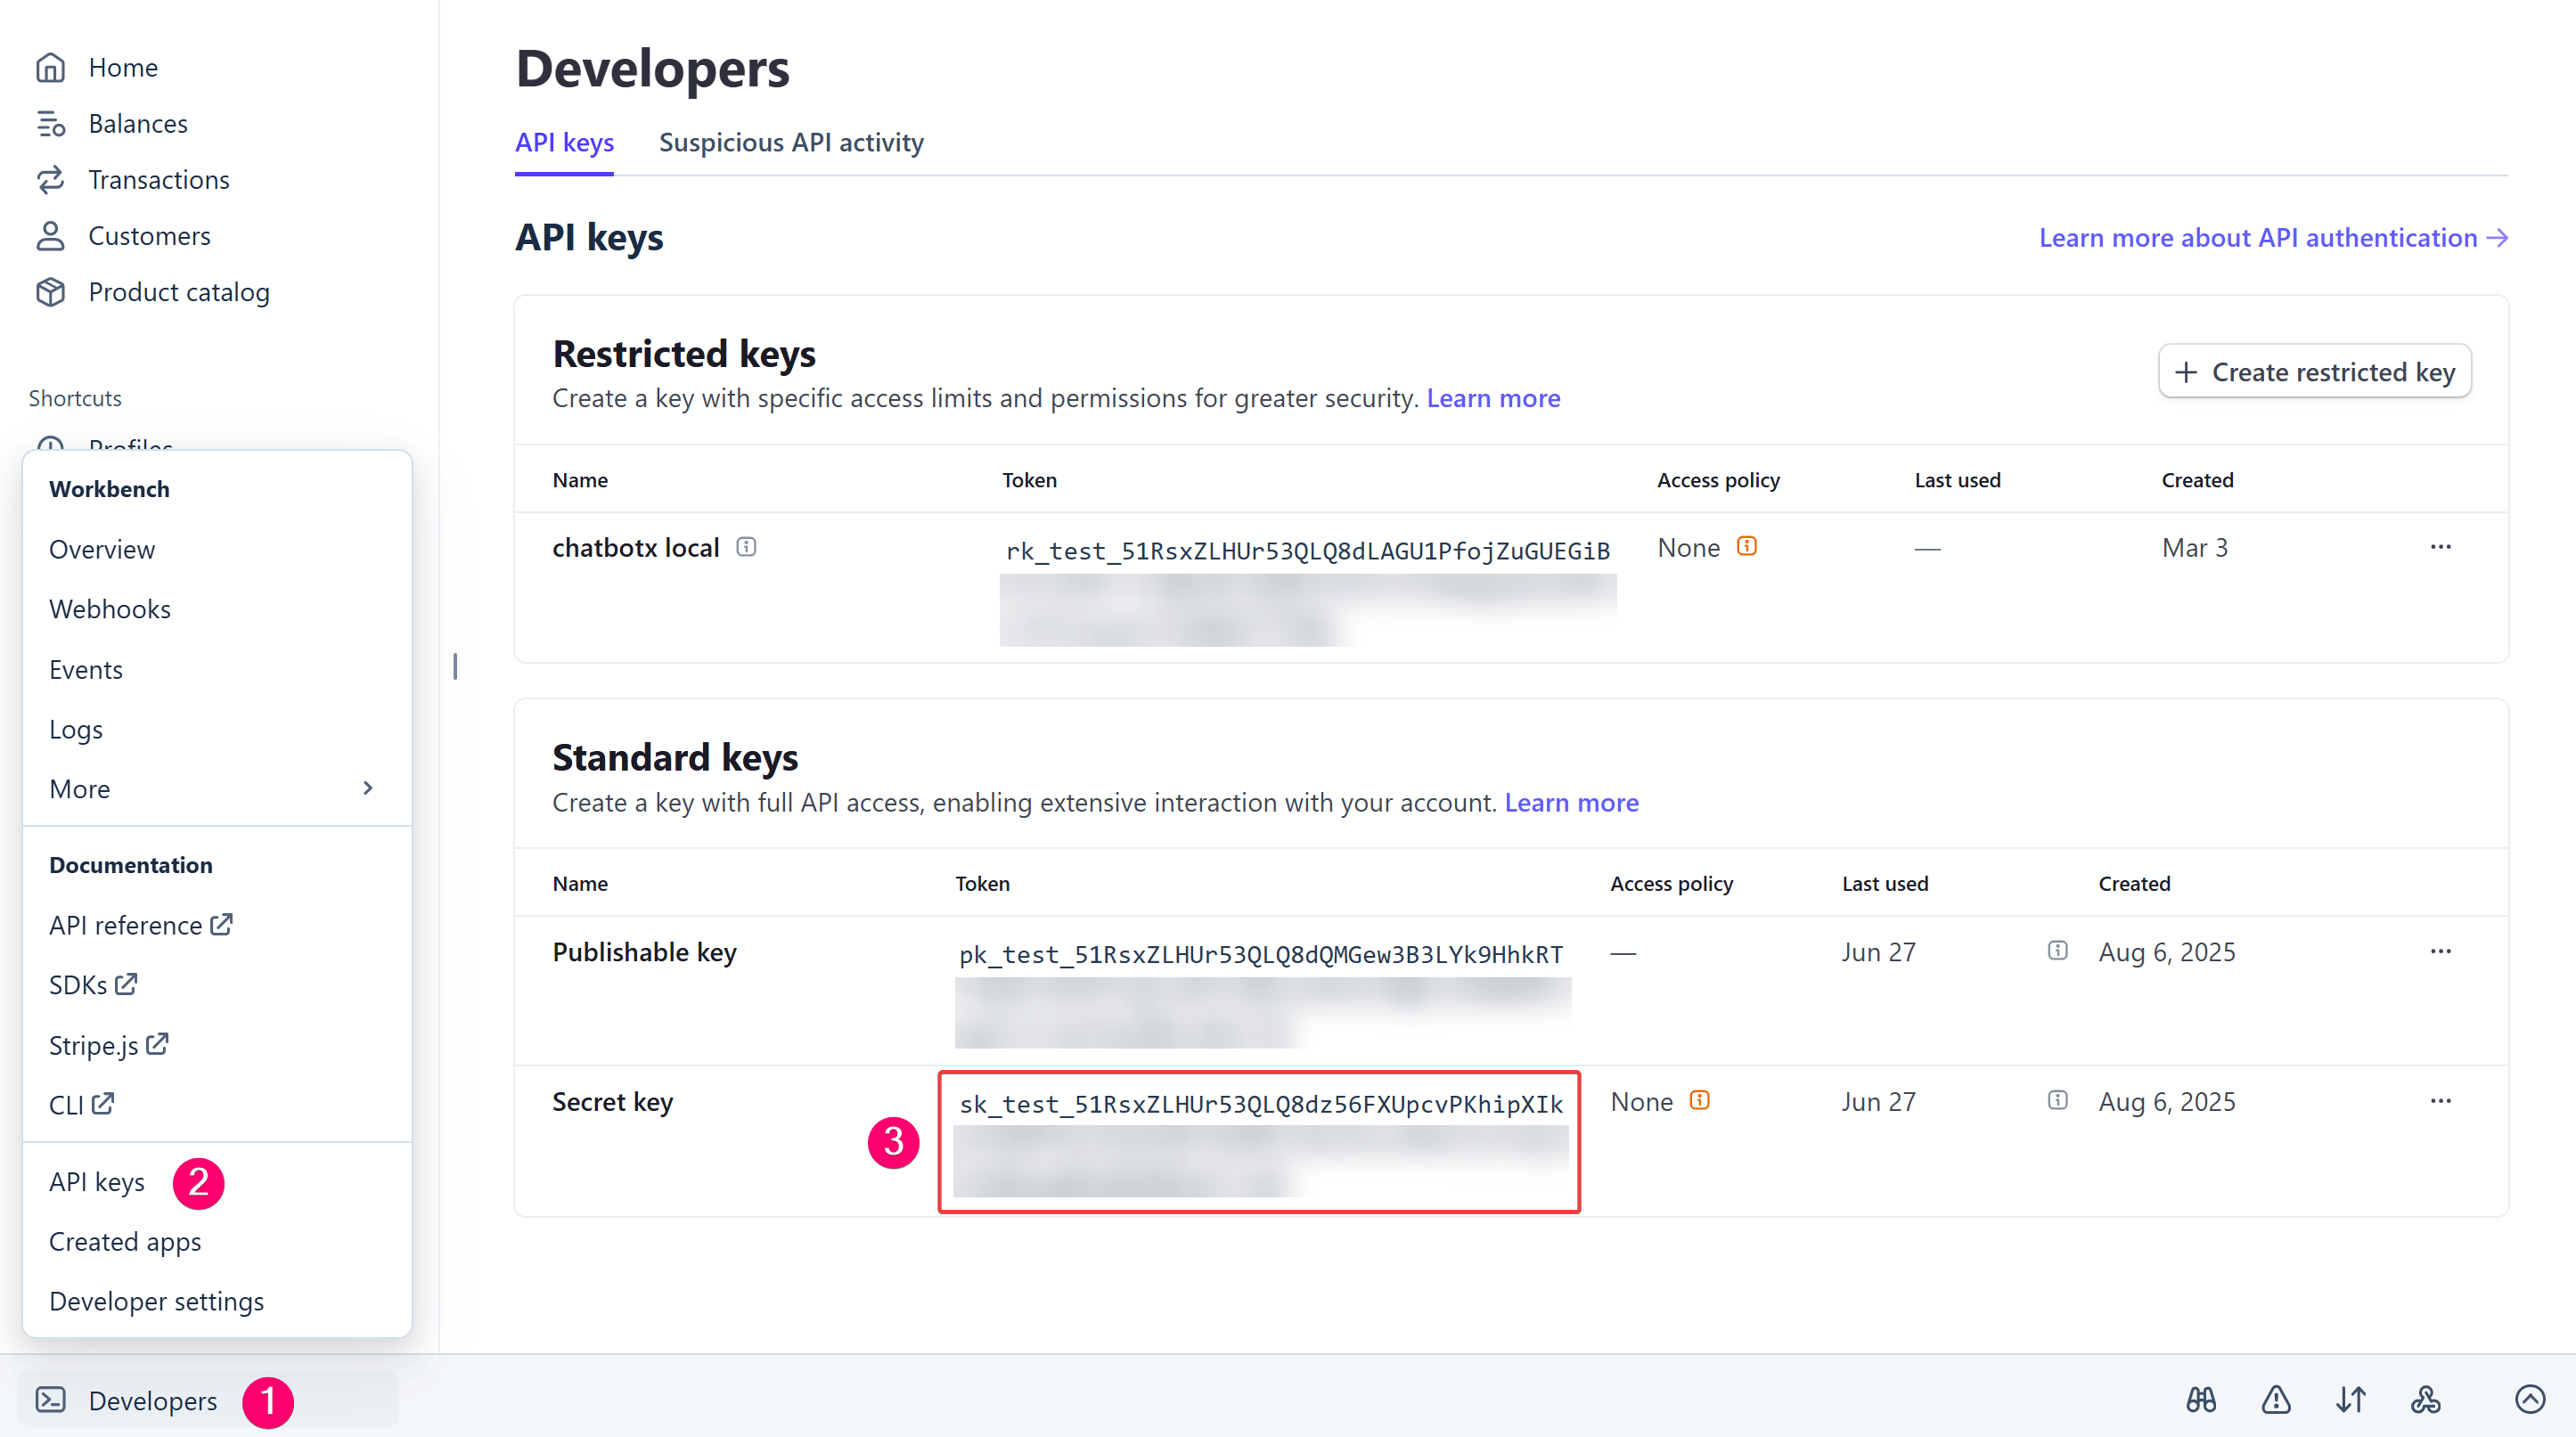
- Log in to your Stripe dashboard.
- Click the Developers menu in the top-right corner, then select the API keys tab.
- Under the Standard keys section, locate the key named Secret key.
- Click the button to reveal the key and copy the entire string (the string starts with the prefix
sk_live_for live environments orsk_test_for test environments).
Open payment processor configuration
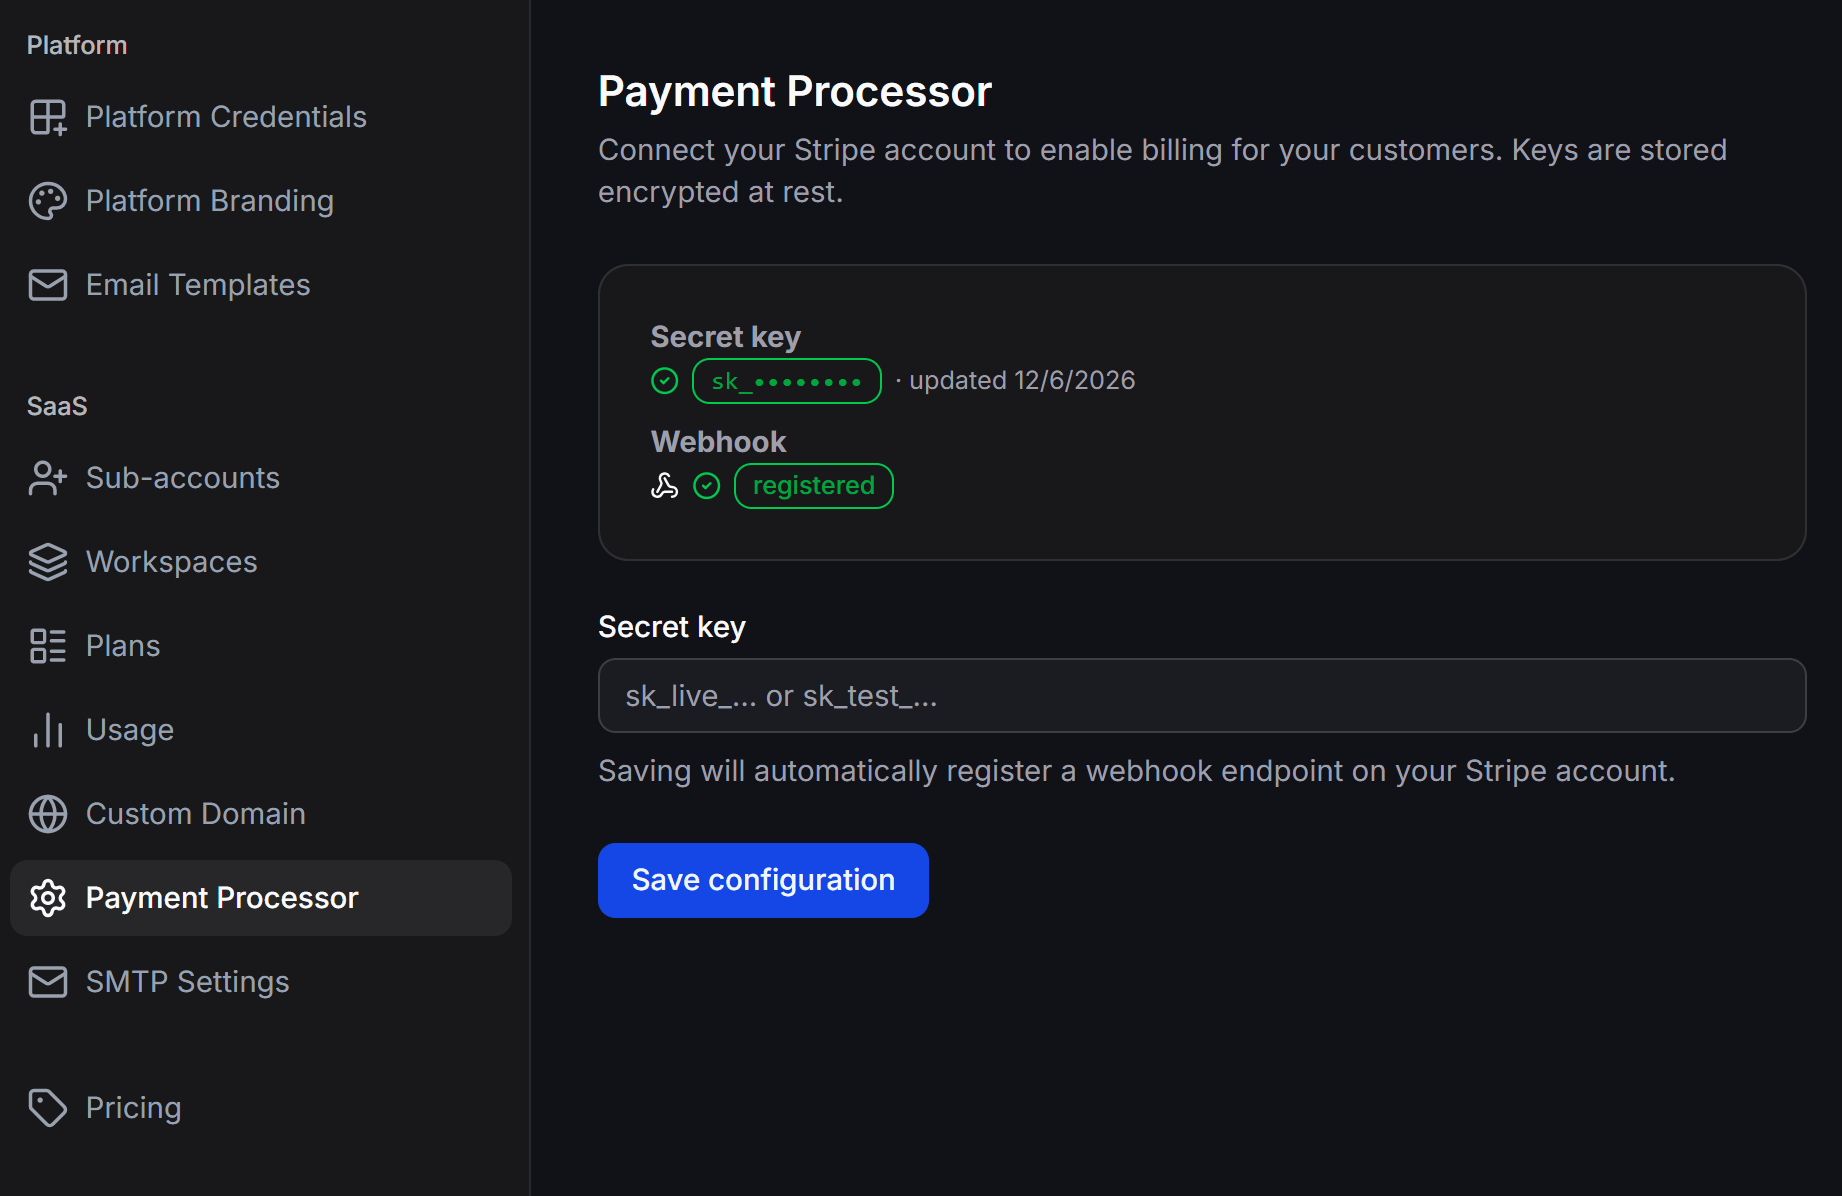
Log in to your Portal admin dashboard, locate the SaaS section on the left navigation menu, and select Payment Processor.
Paste key and activate connection
- Paste the copied secret key into the Secret key field on the Payment Processor page.
- Click Save configuration to complete the connection.
Create Products and Recurring Pricing in Stripe
To sell subscription plans, you must create products and configure pricing on your Stripe account:Open Product catalog
In the Stripe dashboard, open the Product catalog menu on the left sidebar and click the + Create product button in the top-right corner.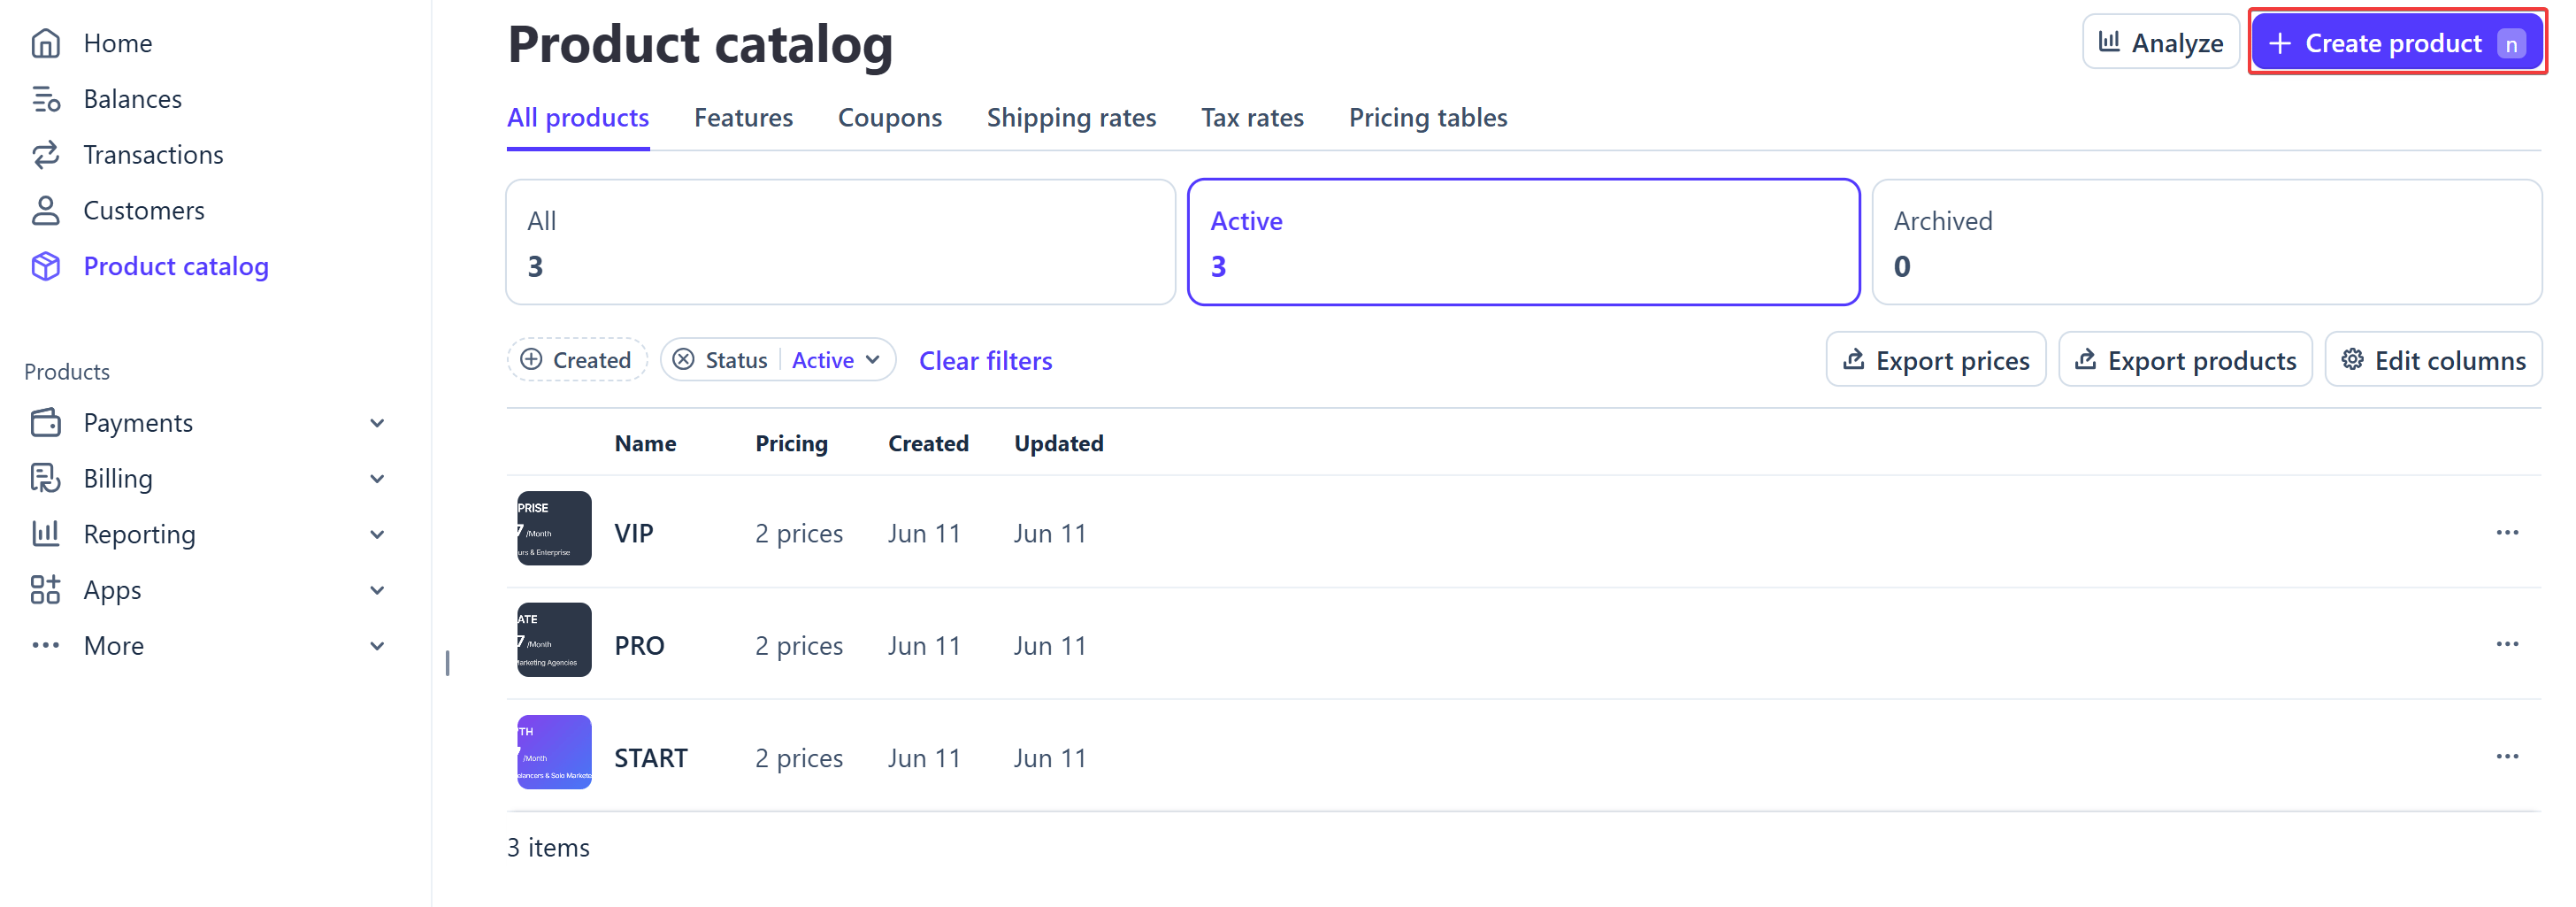
Enter basic product and pricing info
In the Add a product form, fill in the following details: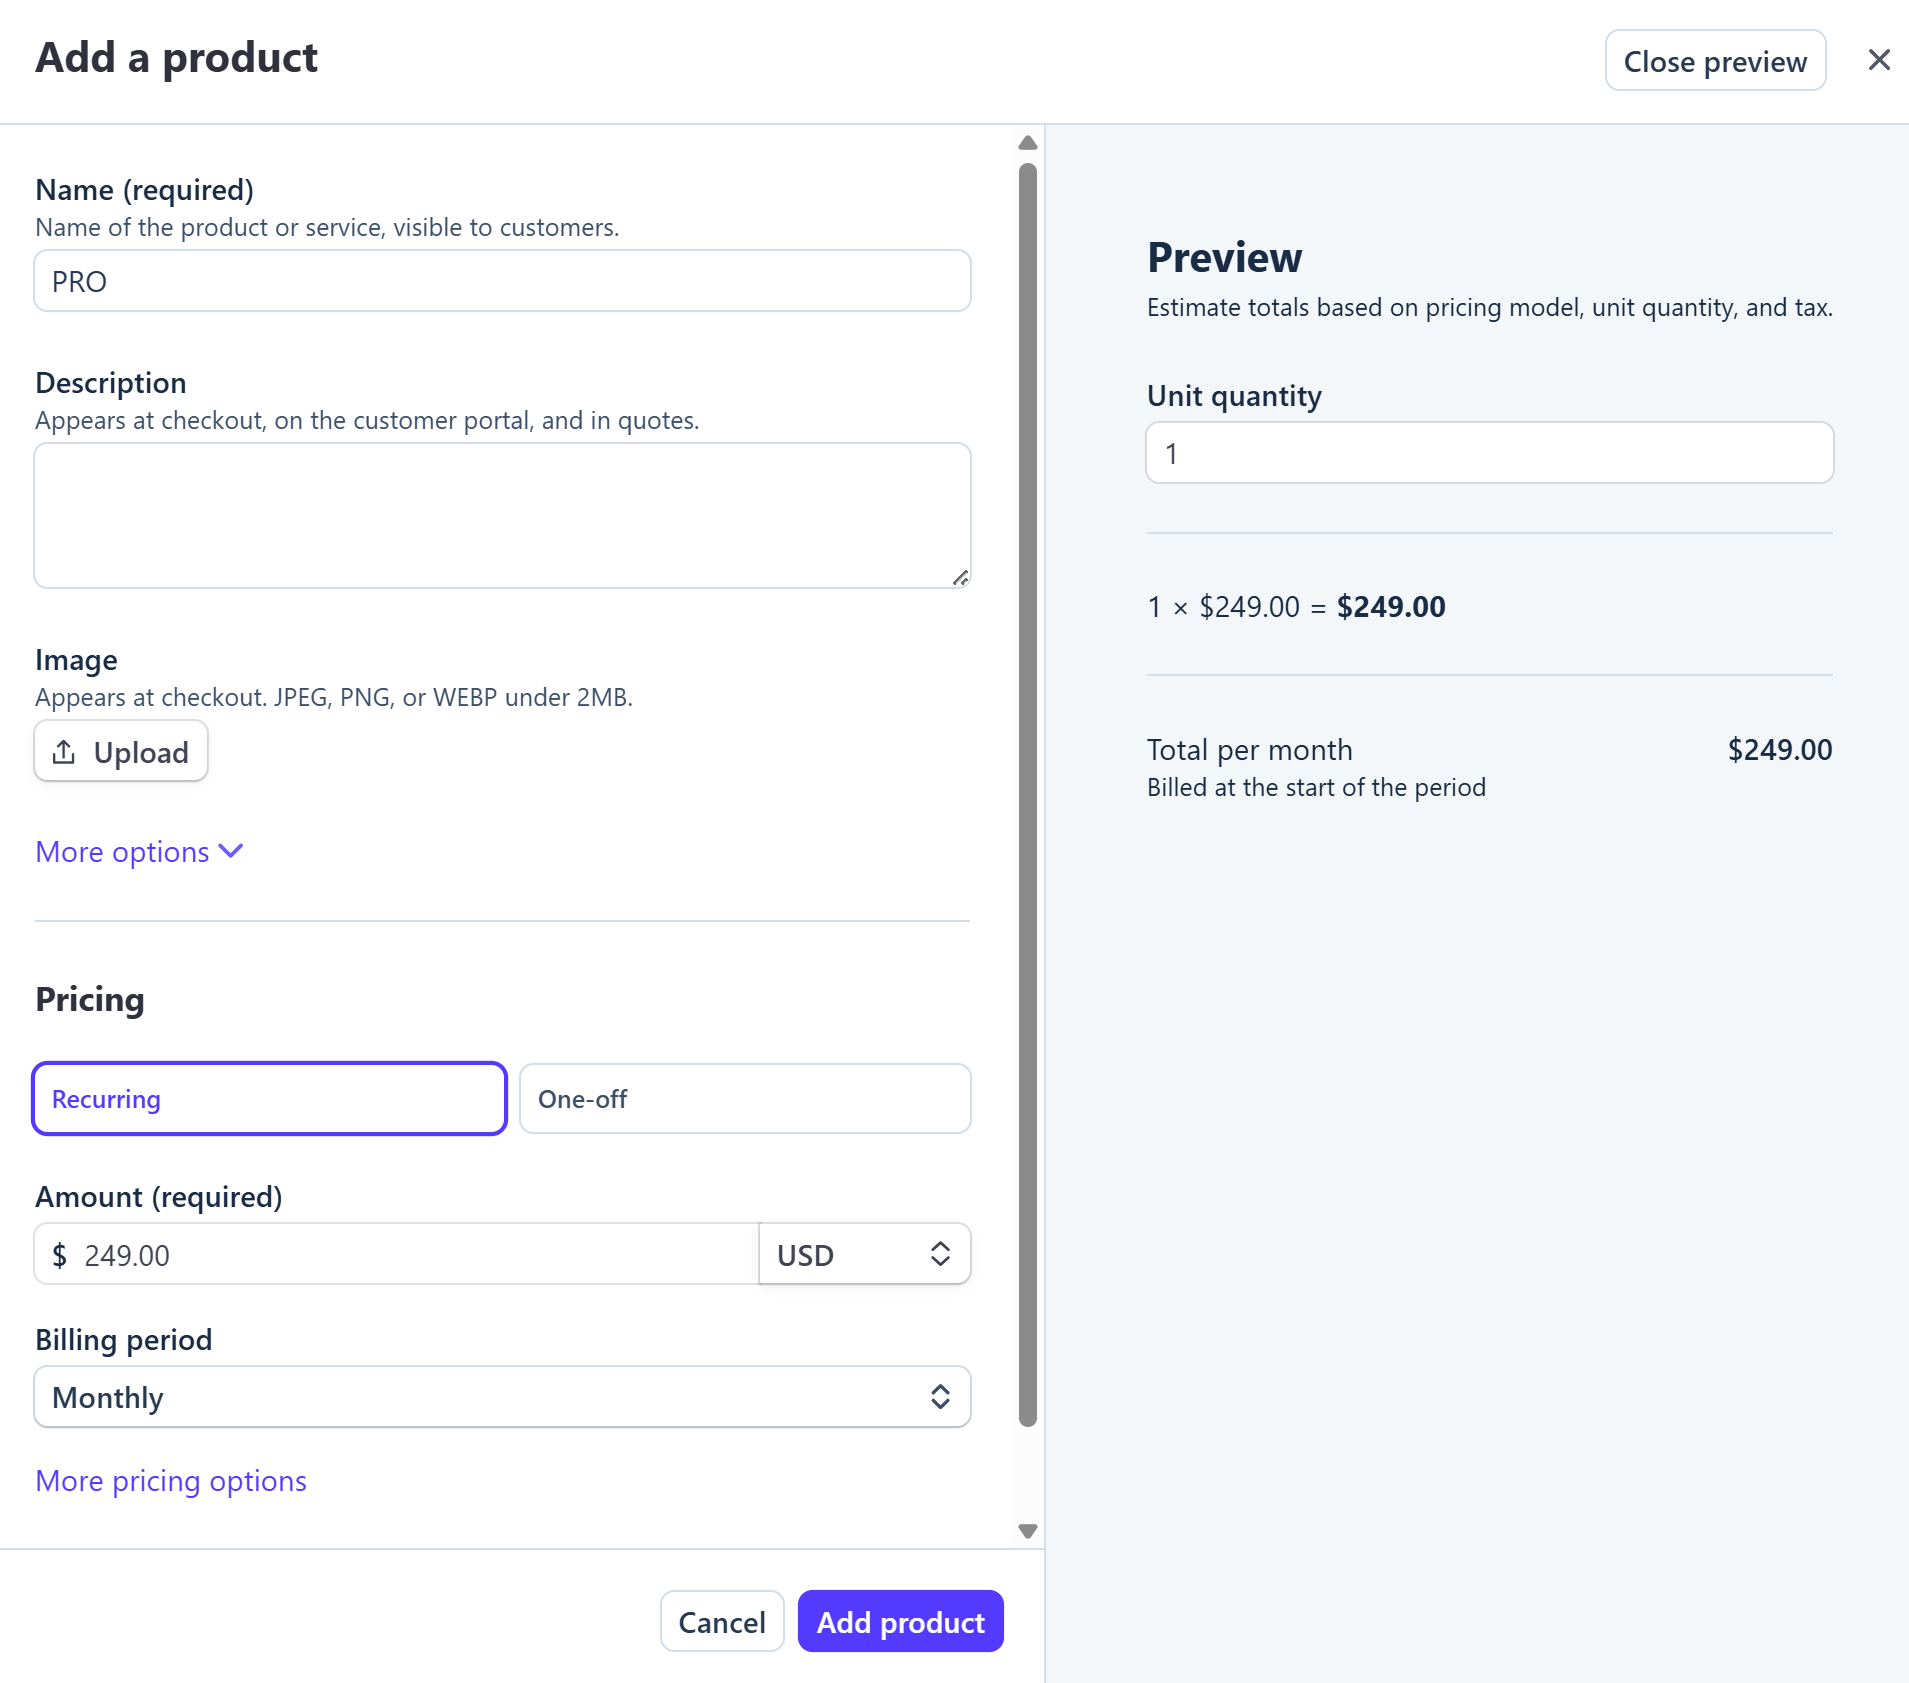
- Name (required): The subscription plan name.
- Description: A short description of the plan.
- Pricing: Select Recurring to configure subscription pricing. Enter the cost in the Amount field and select your currency.
Configure billing period
In the Billing period field, select your desired billing cycle (such as Monthly to charge users every month or Yearly to charge annually).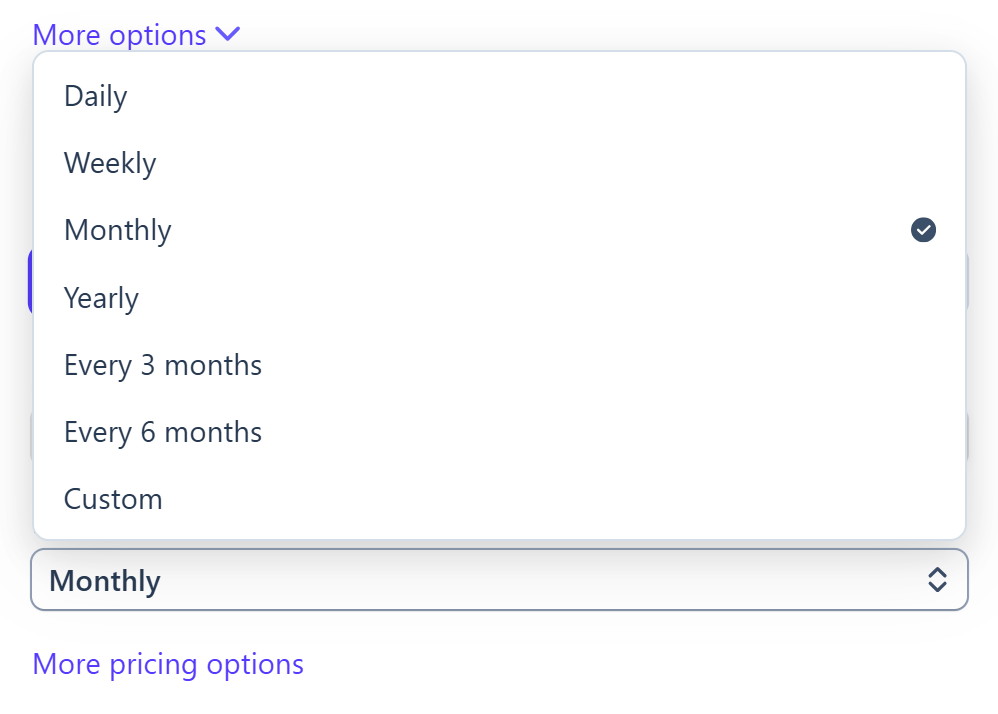
Select pricing model
Under the advanced pricing options, locate the Choose your pricing model section: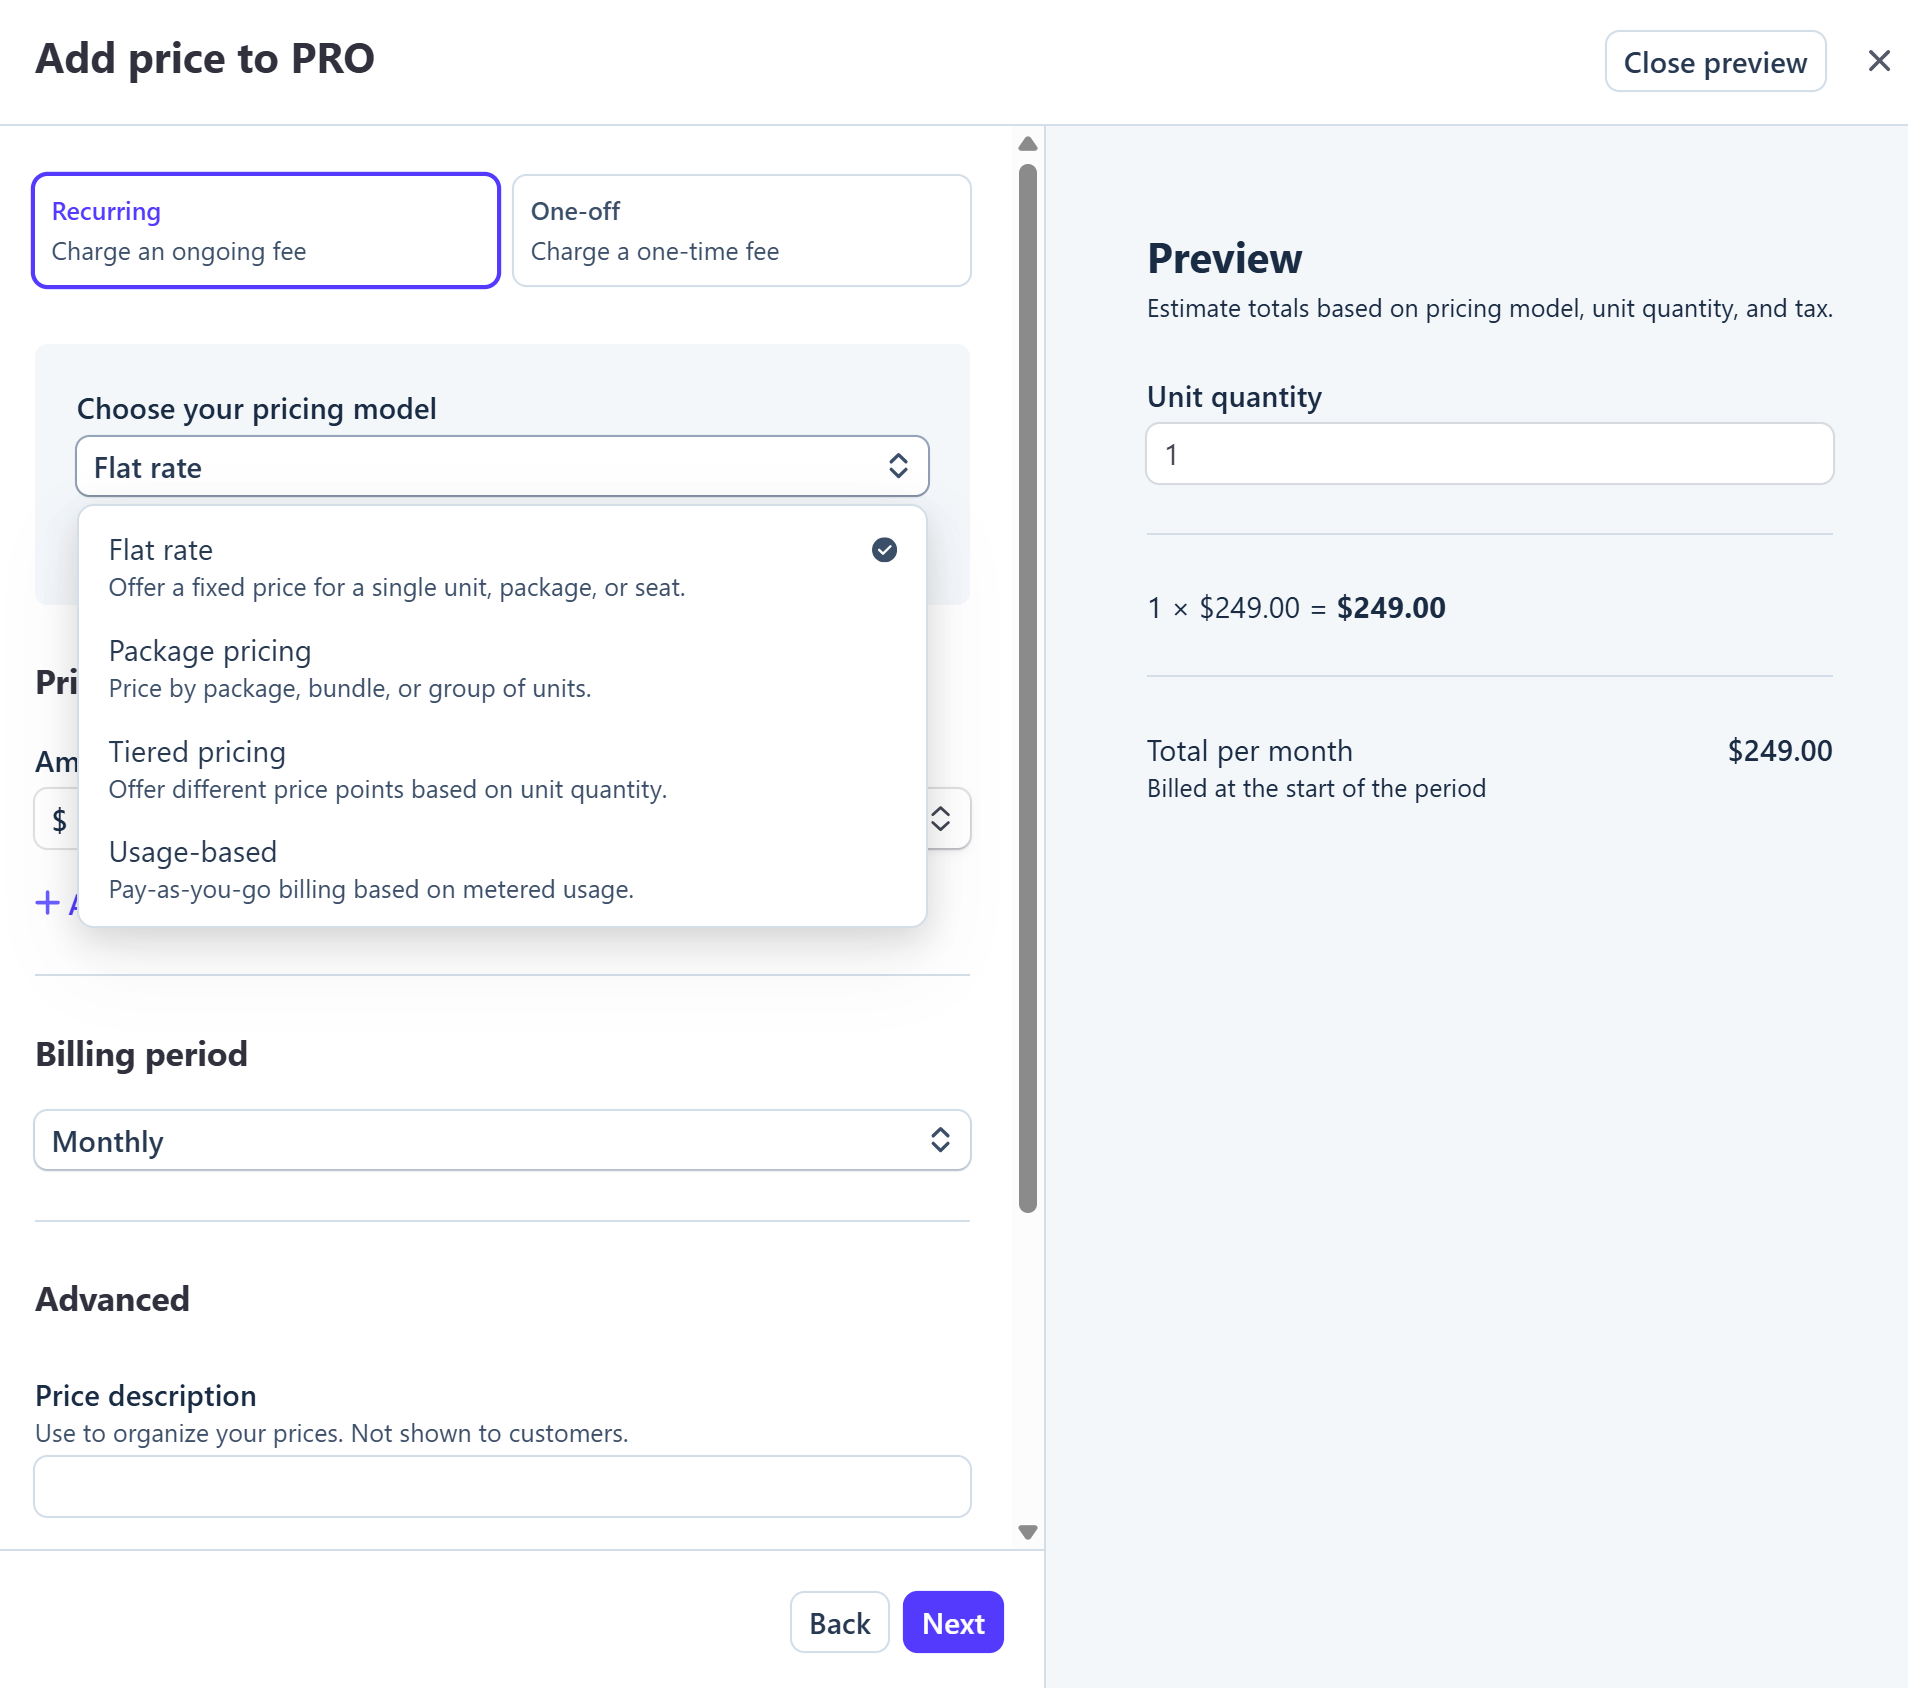
- Flat rate: Apply a fixed price for the entire plan.
- Tiered pricing: Price based on resource quantity thresholds.
- Usage-based: Bill based on the actual resource consumption of the client.
Configure advanced pricing details
- If you selected Tiered pricing, choose the tiering method:
- Volume: The price of all units is calculated based on the final tier reached (corresponding to the Volume pricing model supported by the portal).
- Graduated: The price is calculated progressively across each quantity threshold.
- If you selected Usage-based, choose the measurement unit:
- Per unit: Bill per user or unit used.
- Per package: Bill per package unit.
- Per tier: Bill based on quantity thresholds.
Configure usage meter
For the Usage-based model, declare your usage meter: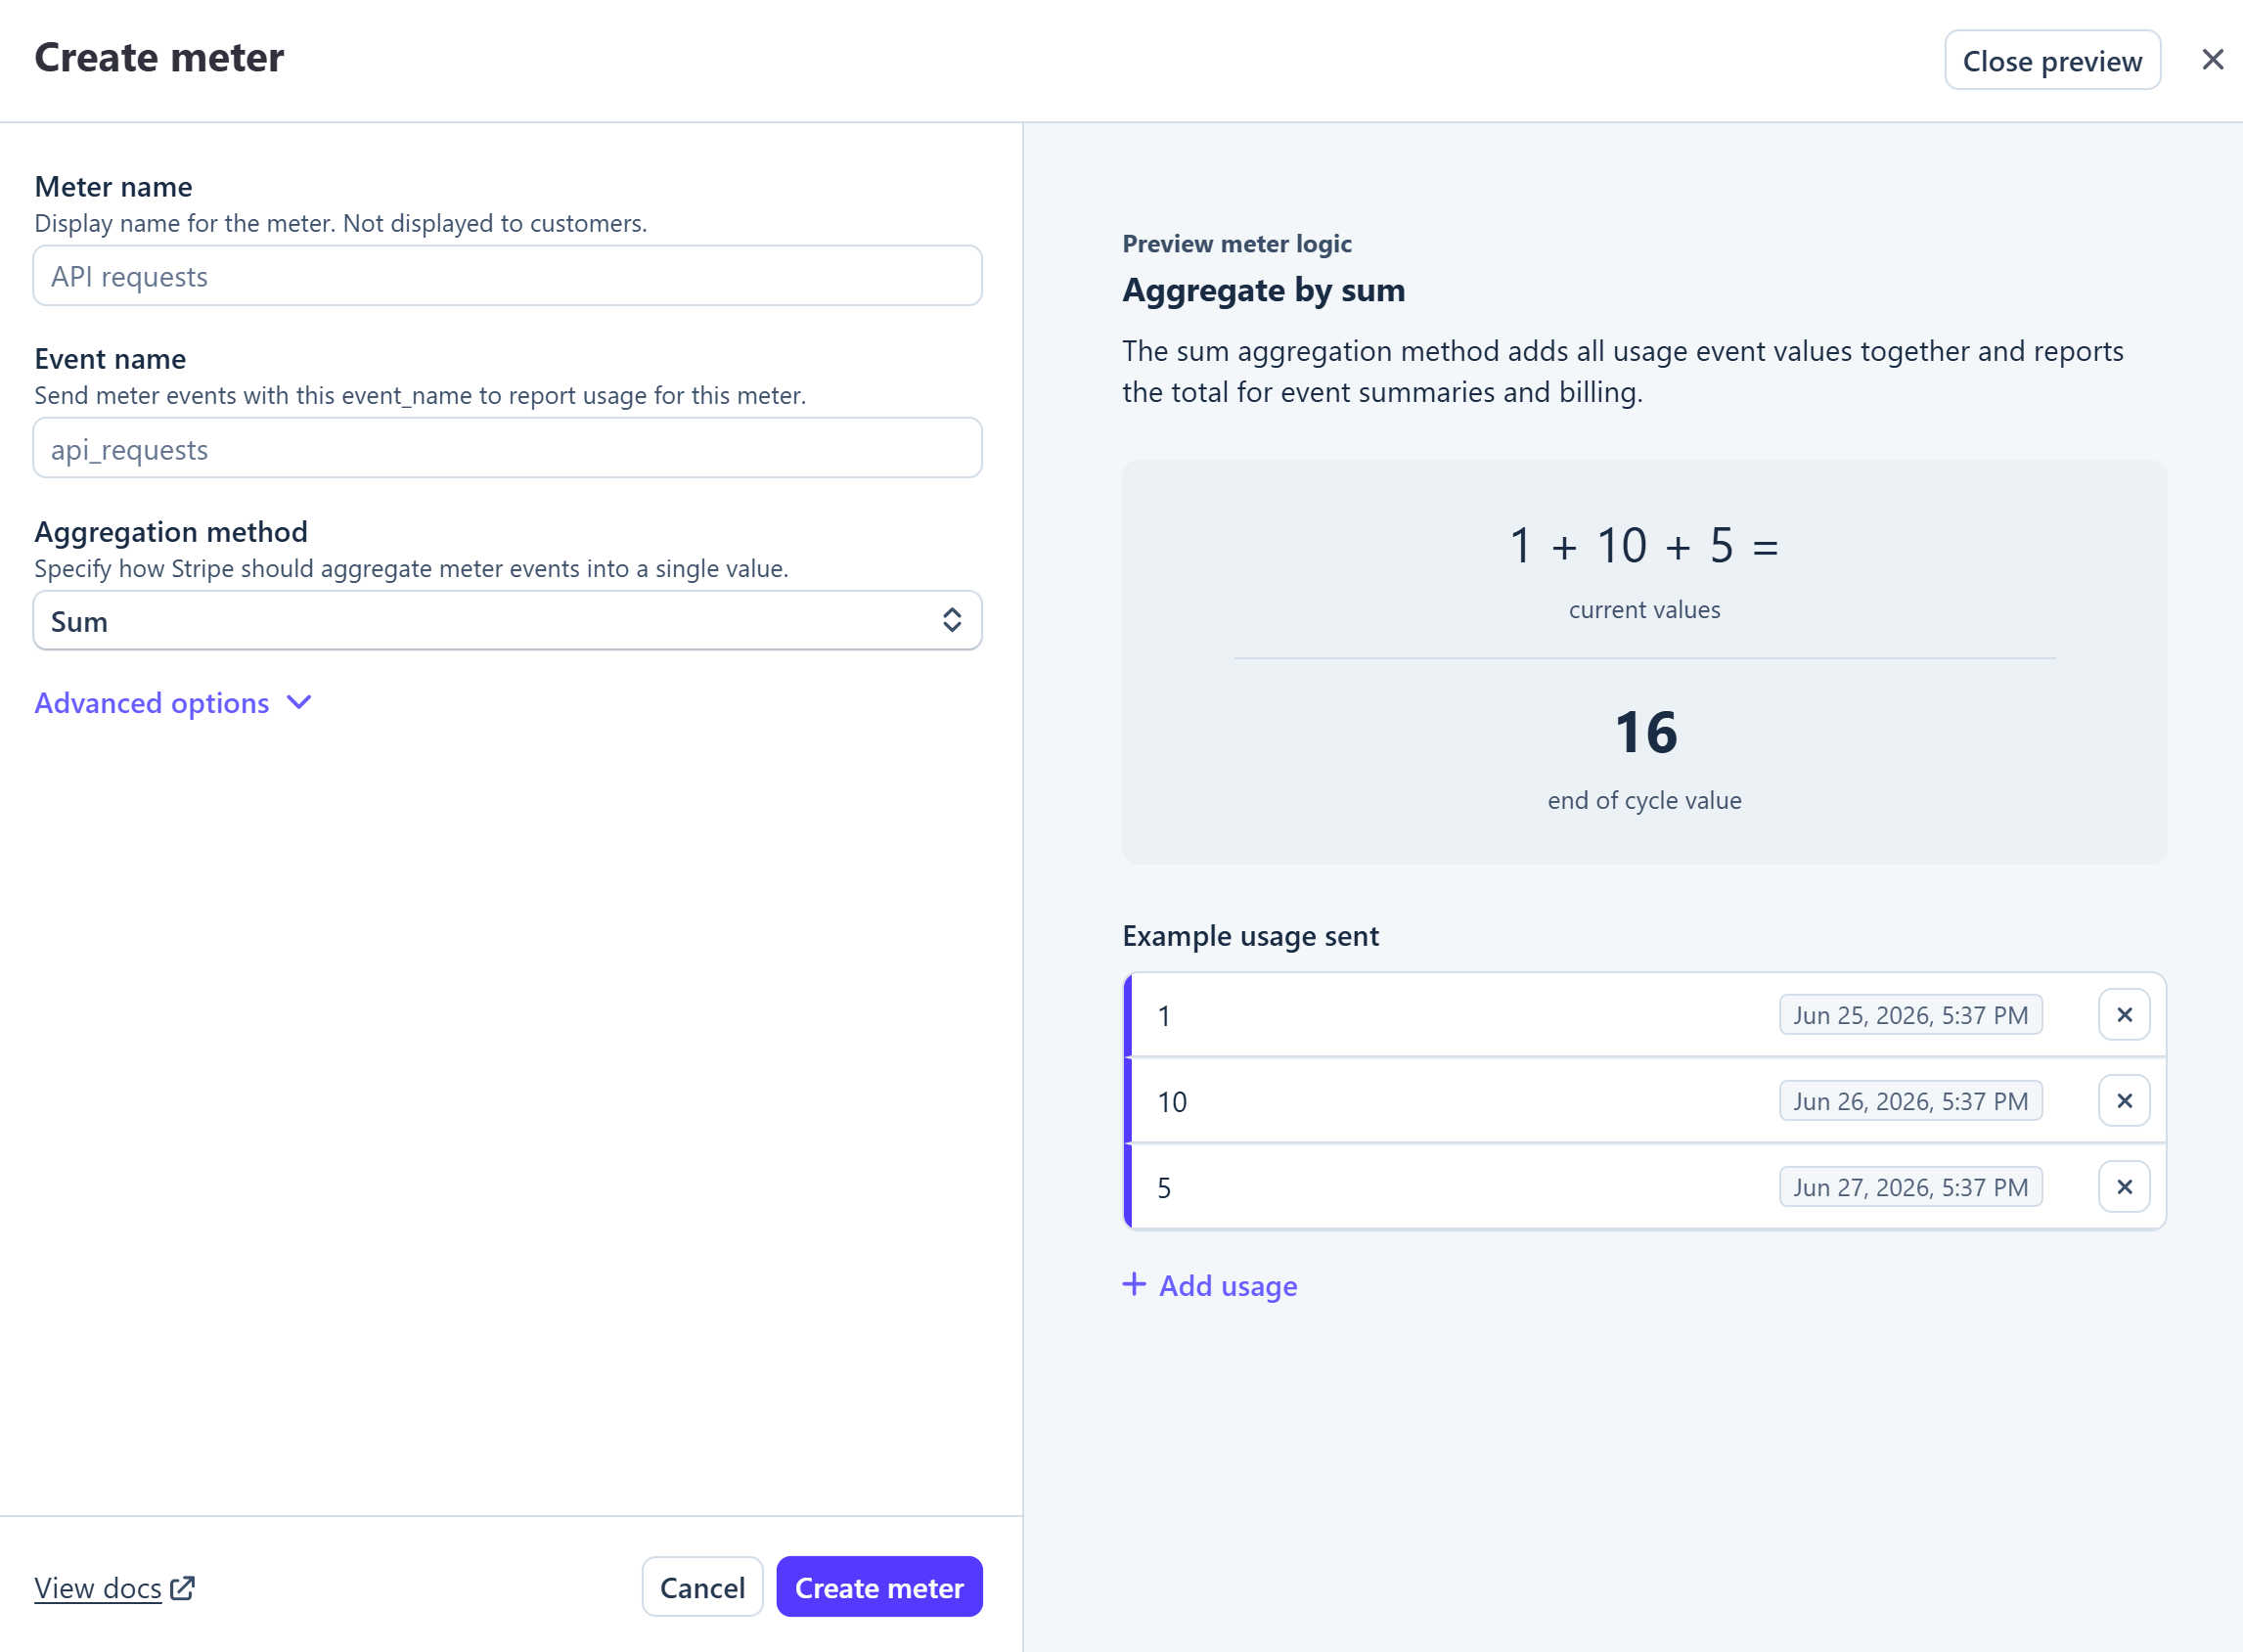
- Meter: Select a meter under Choose a meter or click + Create meter to track client usage data.
- Billing period: Select the billing cycle (typically Monthly).
- Lookup key: Enter a unique lookup key in the Advanced section (e.g.,
standard_monthly) to easily manage the pricing via the API.
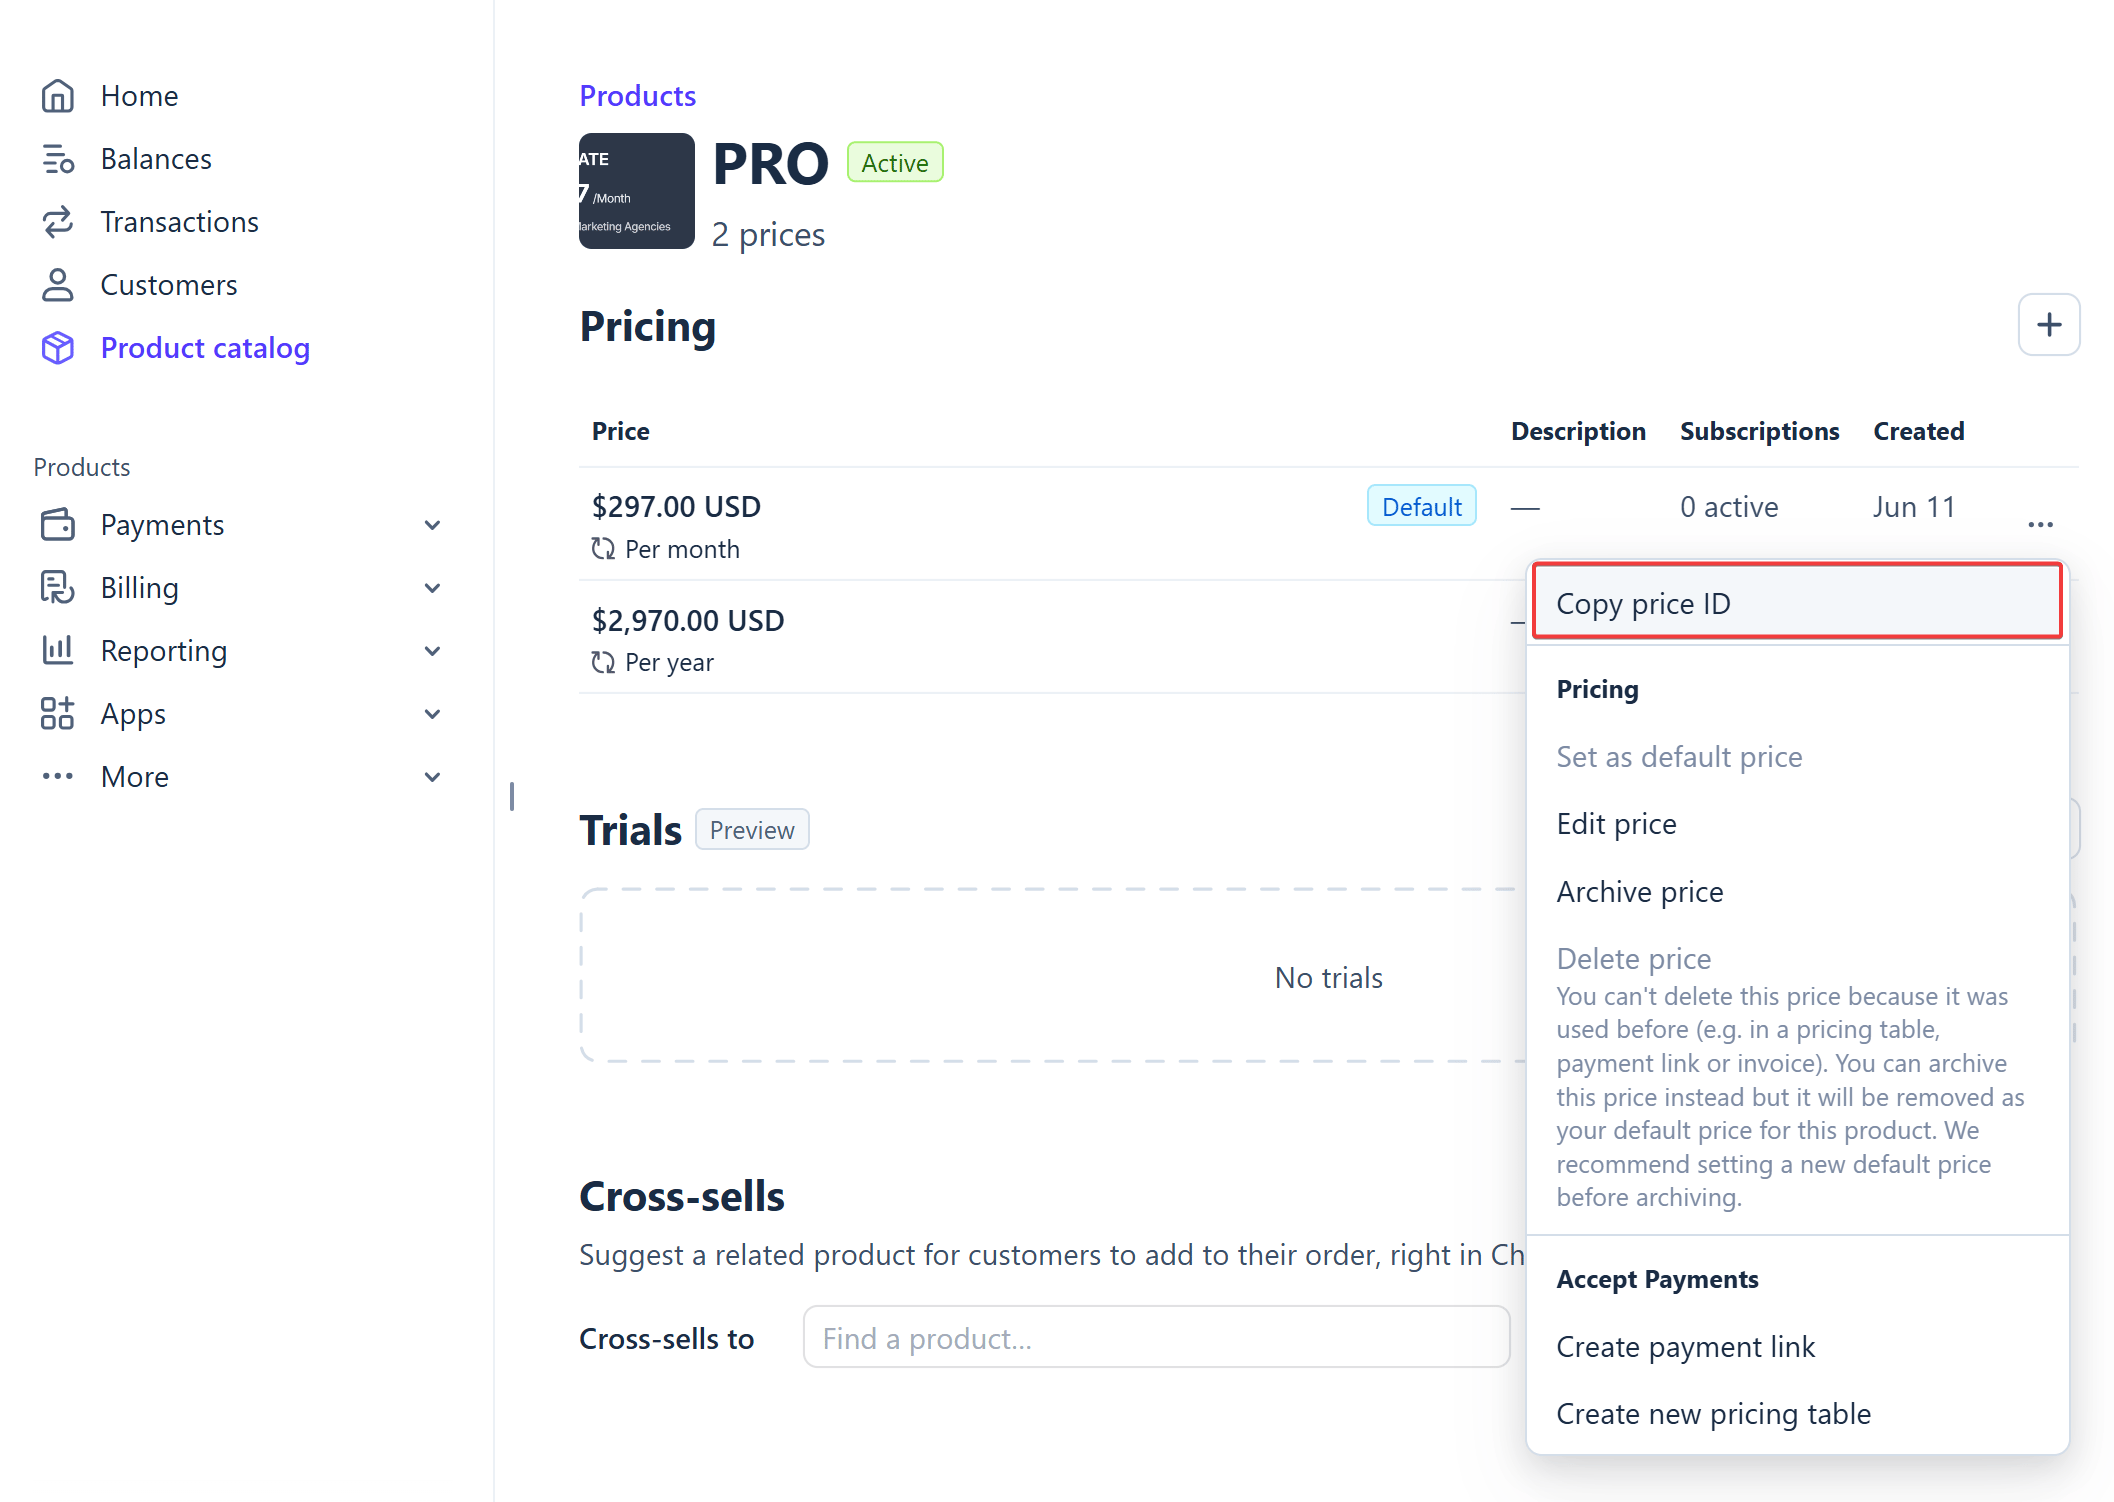
Retrieve the Price ID from Stripe
After creating the product on Stripe, locate and copy the Price ID to link it to your portal. Click the product action menu and select Copy price ID. The ID starts with the prefixprice_.
Next Steps
After copying the Price ID from Stripe, return to your Portal admin dashboard to configure resource quotas and link this Price ID to the corresponding plan. Follow the instructions in the Configure and Manage Plans guide to complete setting up plans for your clients.Before launching payments live, perform tests using trial cards in Stripe’s Test Mode to verify that invoices and resource quotas are applied correctly.