

Accessing Help Links Configuration
To access the Help Links configuration page: From the Admin Dashboard, select Help Links under the Platform section on the left sidebar.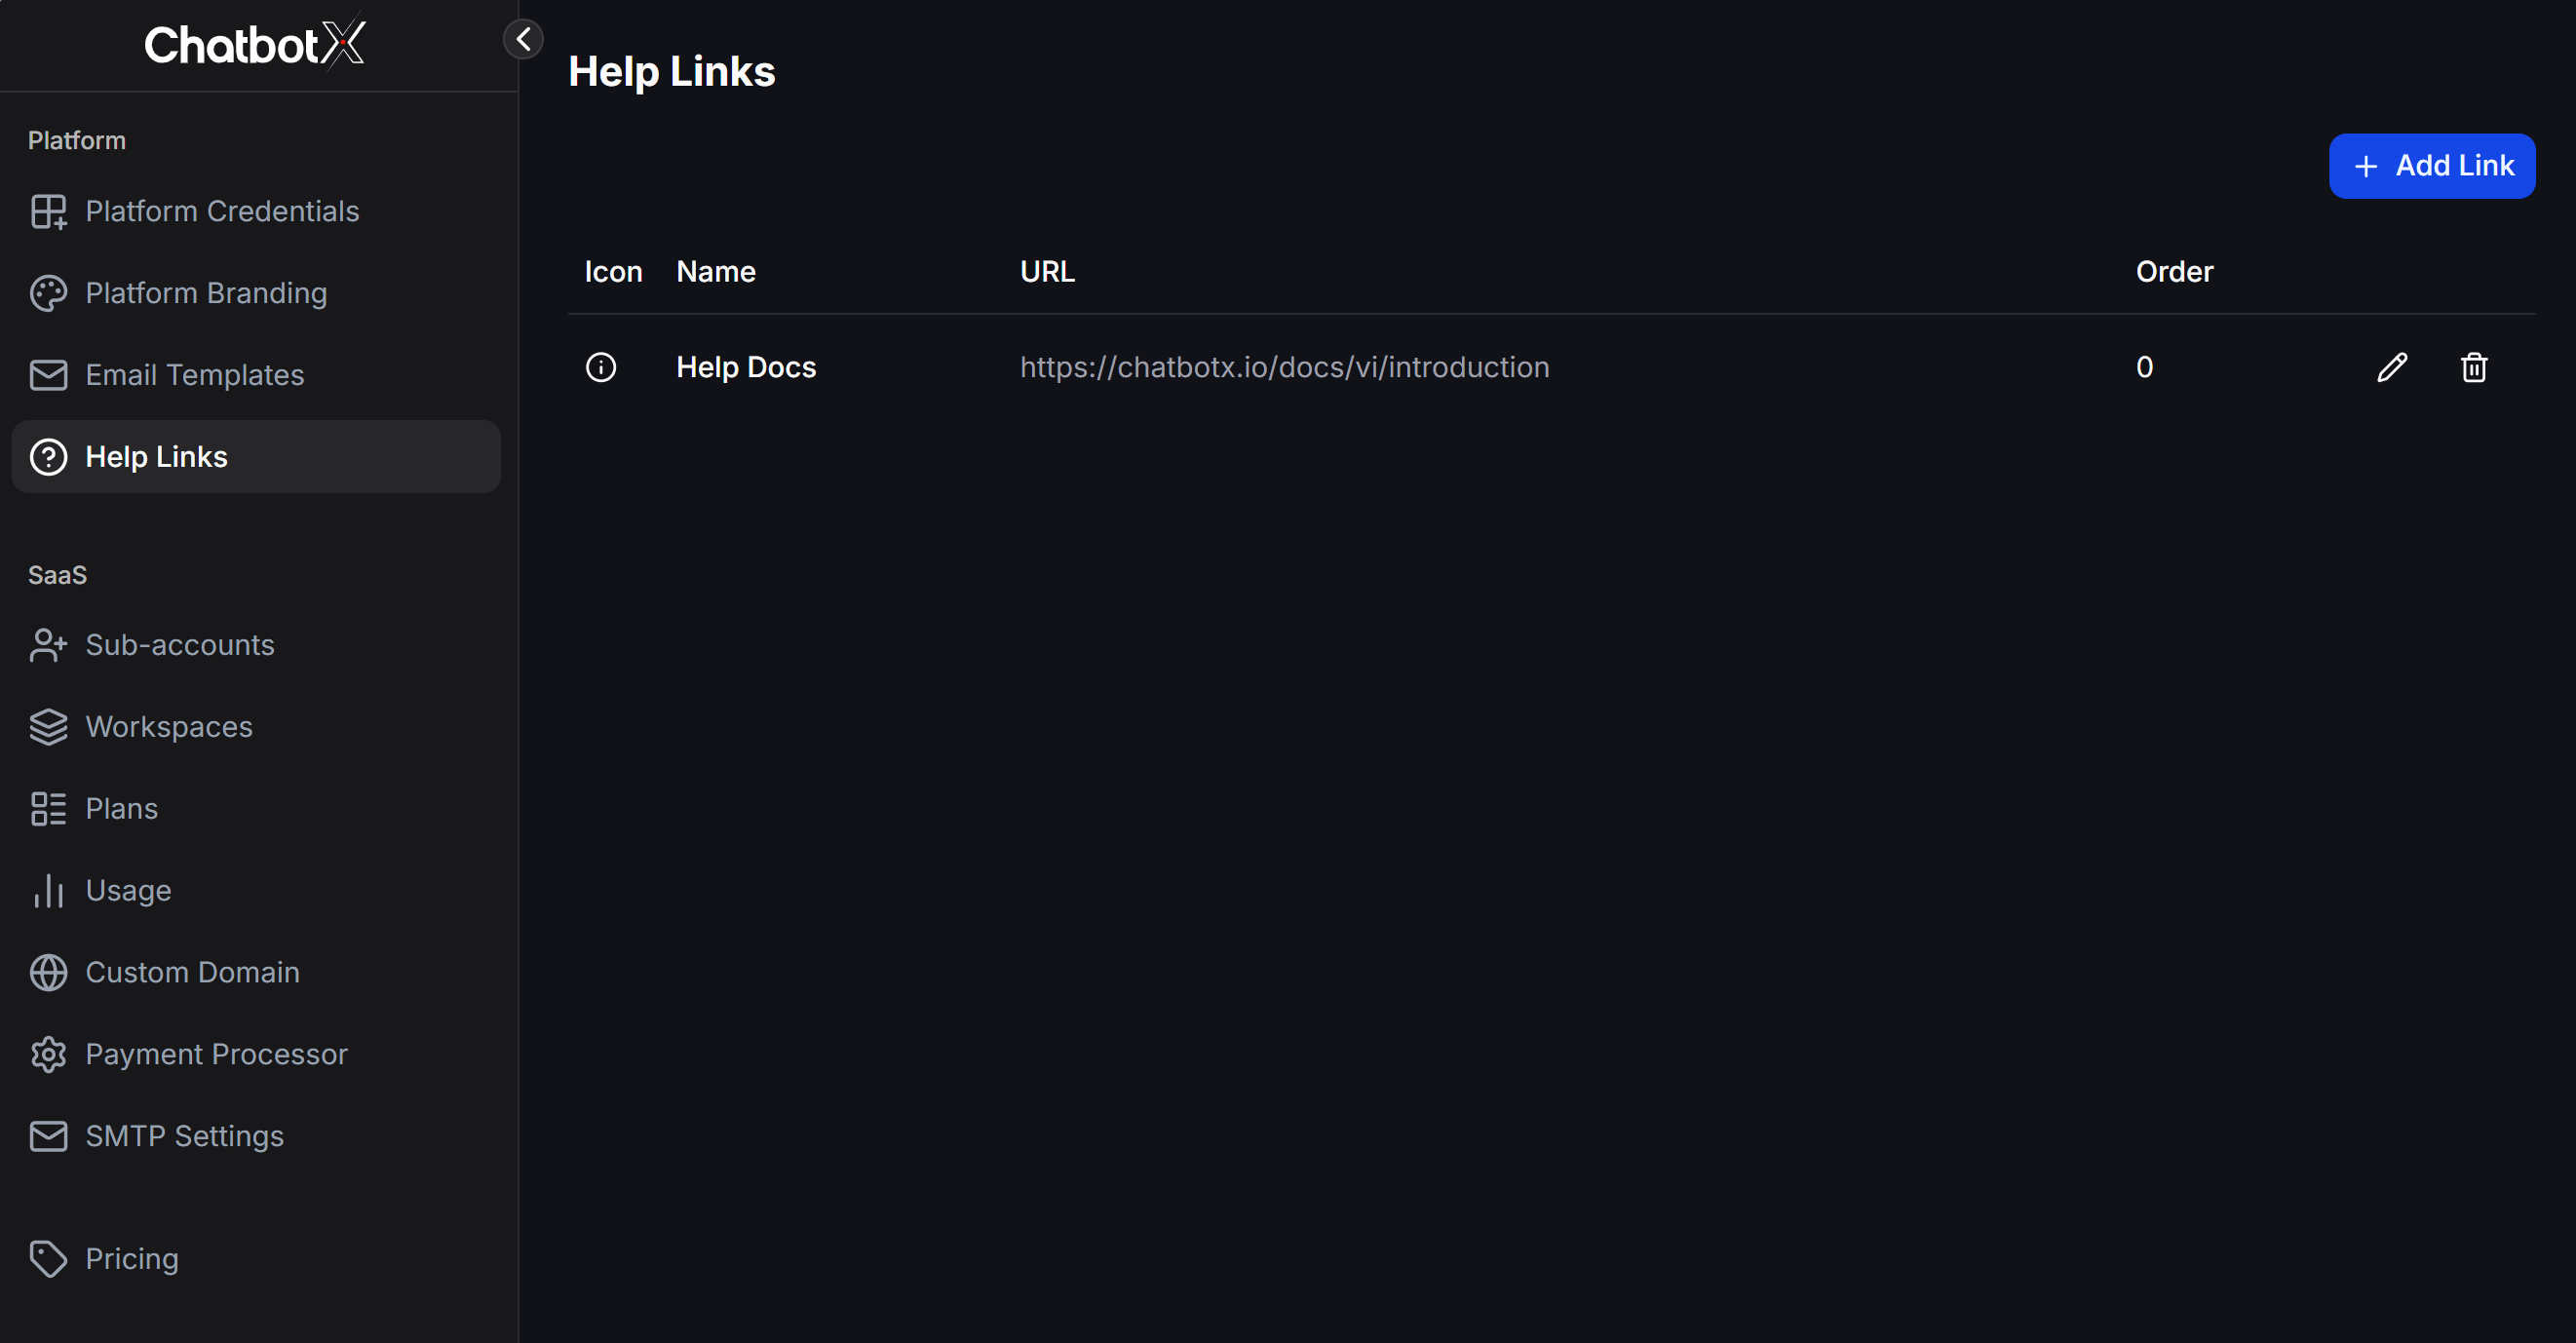
How to Add a Help Link
Open the Add Link Form
In the Help Links management dashboard, click the + Add Link button at the top right.
Configure Link Information
In the Add Help Link modal, set up the following fields: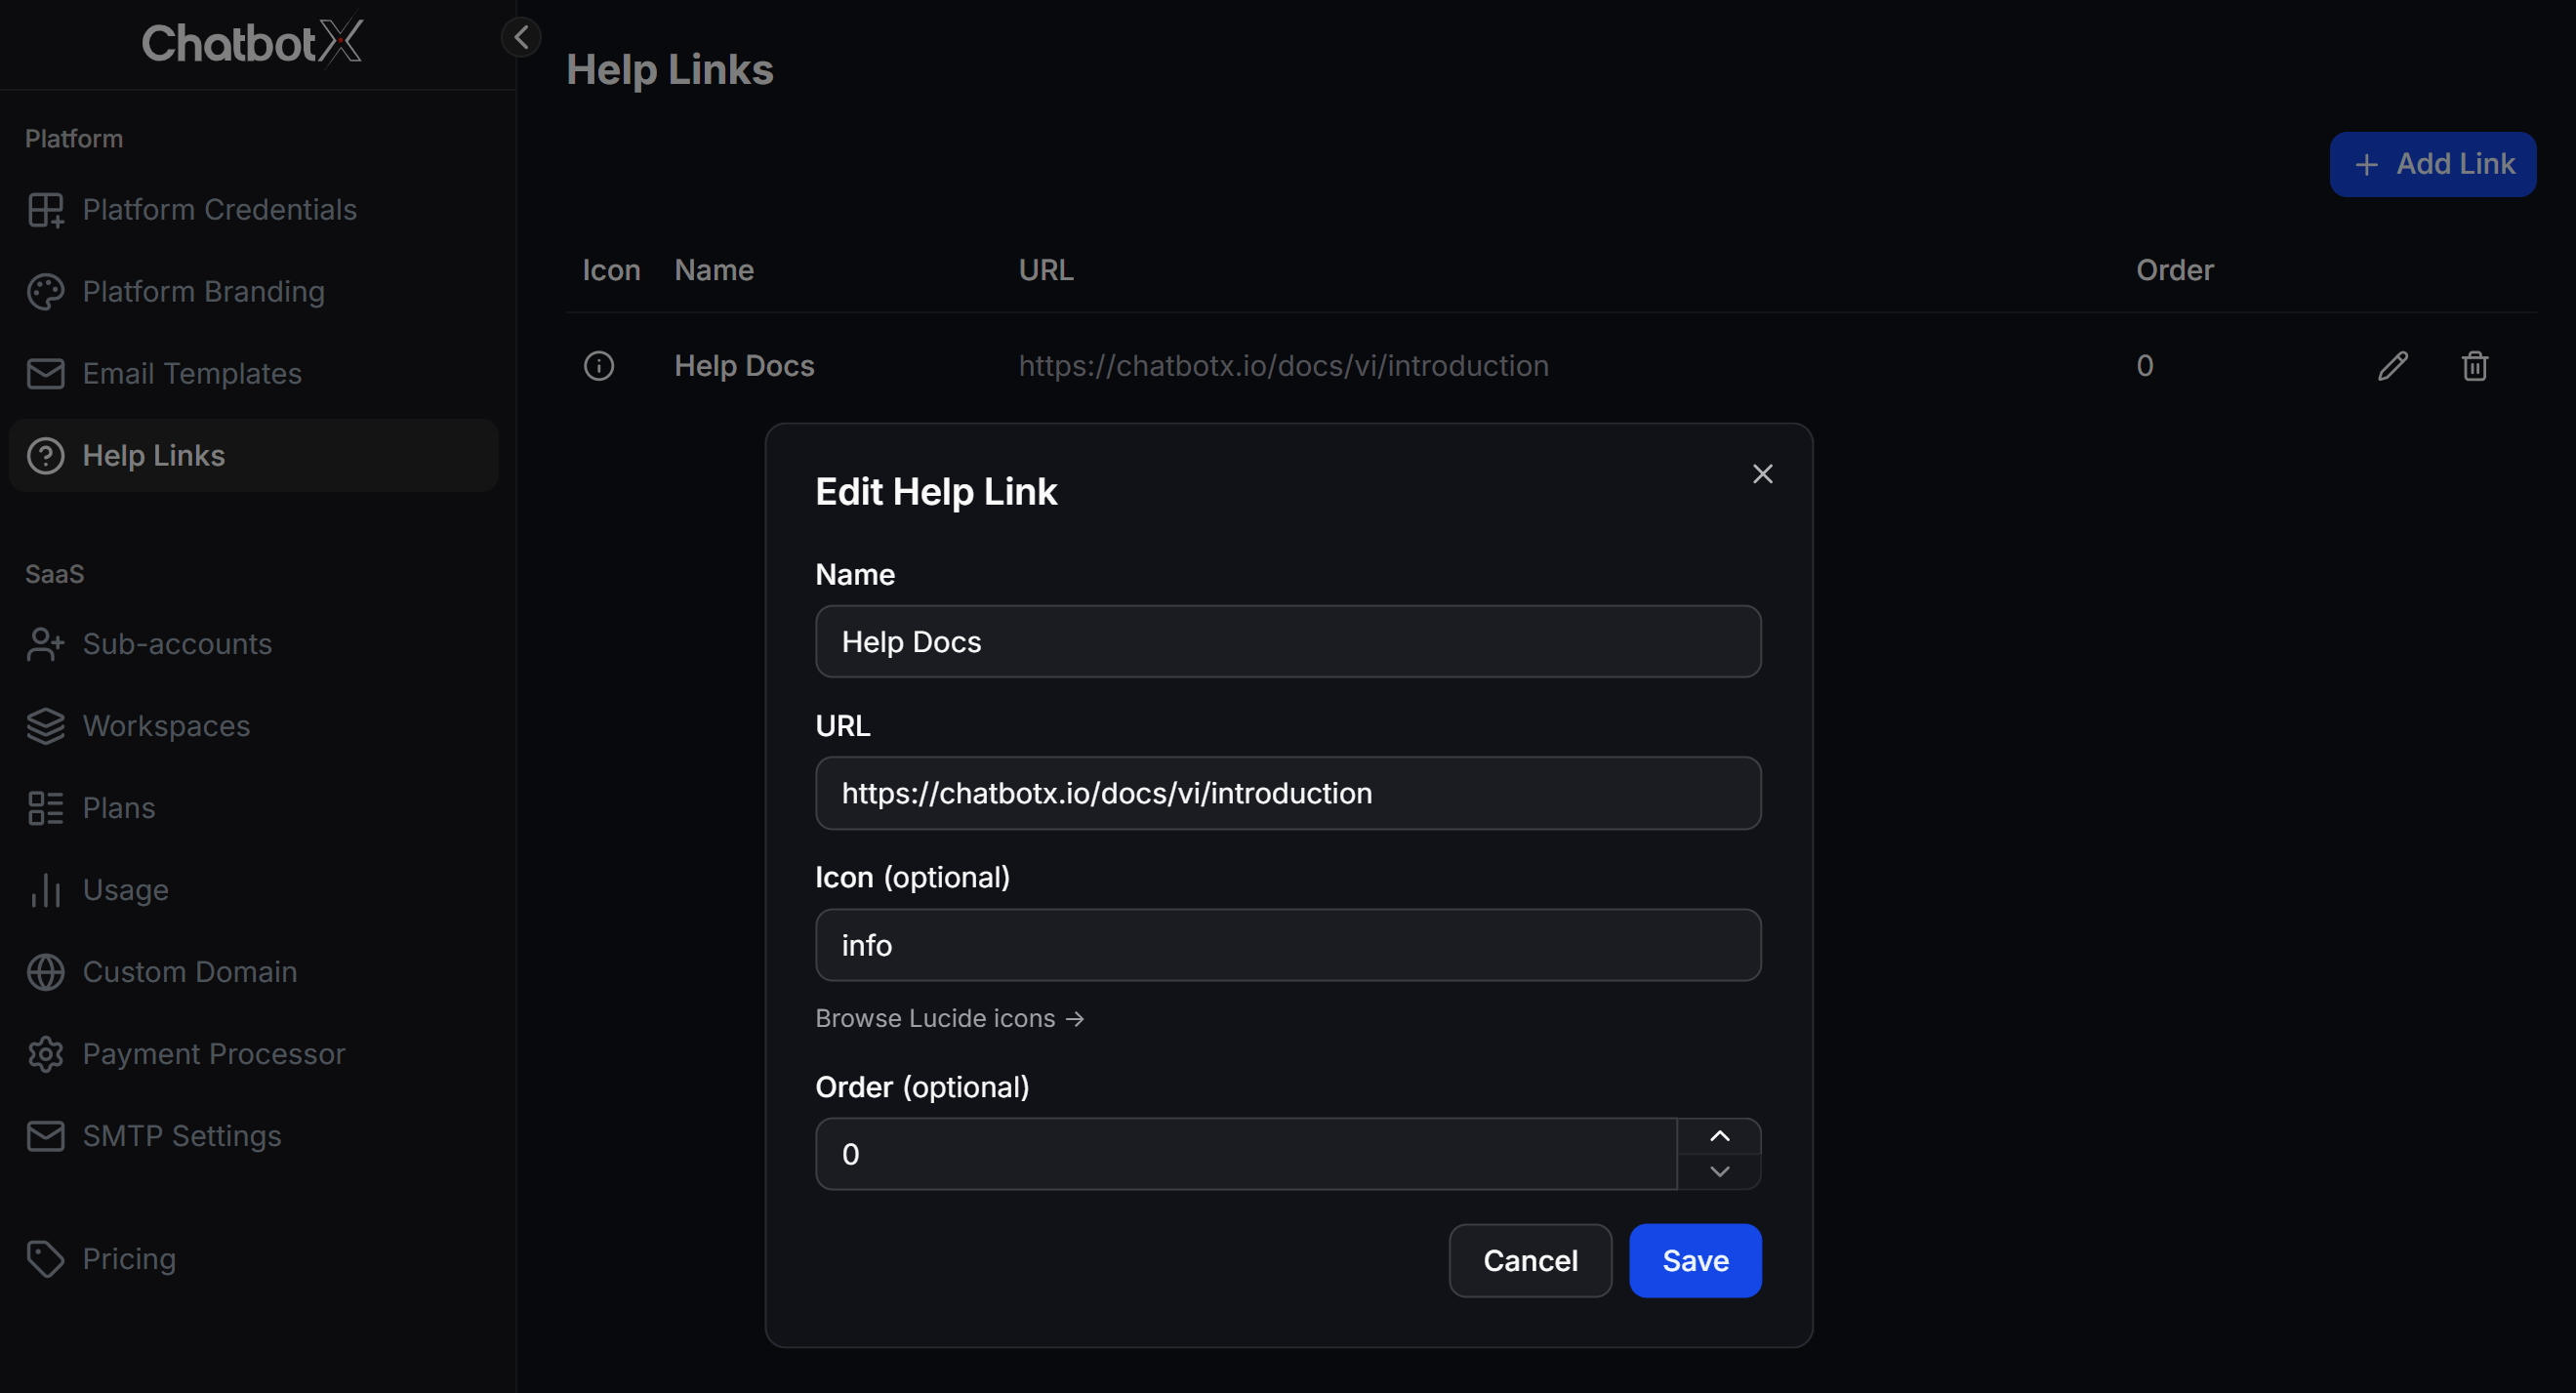
- Name: Enter the display name for the help link (e.g.,
Help Docs,Technical Support,User Community). - URL: Enter the destination URL where customers will be redirected when clicking the link (e.g.,
https://chatbotx.io/docs/vi/introduction). - Icon (optional): Enter the icon name from the Lucide Icons library to show in front of the link name (e.g.,
circle-info,book-open,star,help-circle). You can click the Browse Lucide icons link to search for suitable icons. - Order (optional): Enter a number to set the display order (smaller numbers will display on top).
Display Position on Client Workspaces
After successfully configuring and saving the link, when clients log in to their workspace (sub-account), they will see these help links appear directly at the bottom of the left sidebar (just below the Settings menu). Clients can simply click these links to quickly open the support portal you configured in a new browser tab.Best Practices and Notes
You can create multiple Help Links to categorize different support channels (e.g., one link for the User Guide and another link pointing to a live support chat or error reporting form).