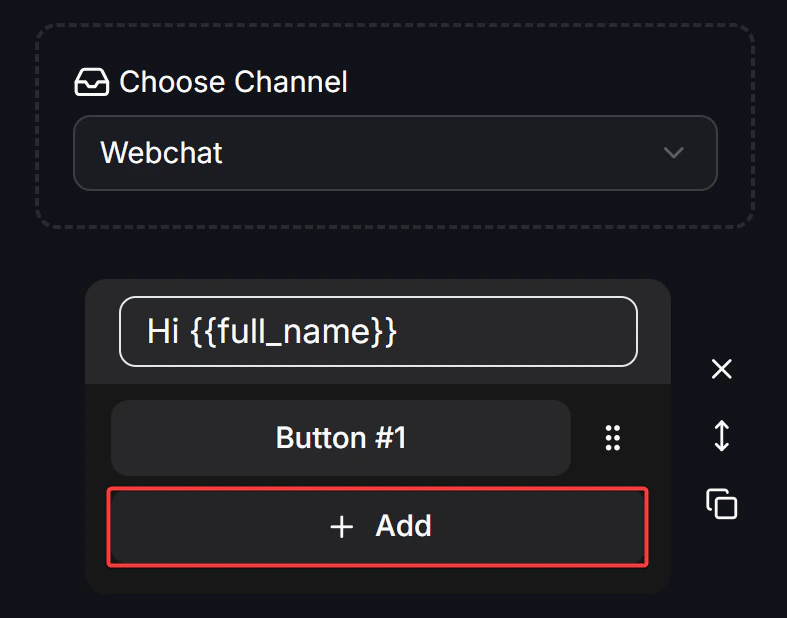
How to add a button to a message block
Buttons are attached directly to message blocks. Customers can always see them and can scroll back to press them again later. You can add Buttons inside these content blocks:- Text blocks: The most common option across channels.
- Card and Carousel blocks: Especially effective for product catalogs.
When pressed
After creating a button, you configure what should happen when the customer clicks it.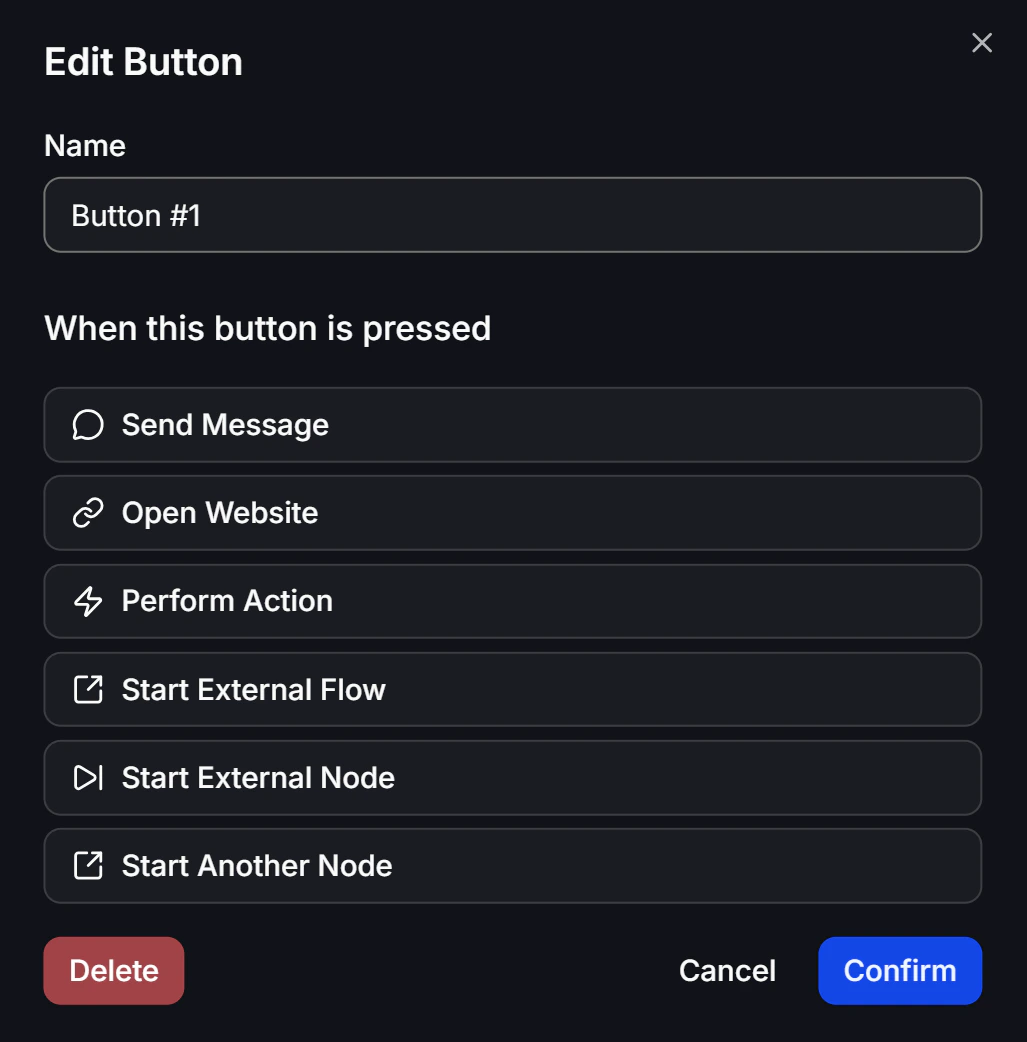
1. Send Message
This is the most common option. When the customer clicks the button, a new Node or message block, such as Text, Image, or Carousel, is shown as the next reply. In Flow Builder, the button connects directly to the next content block.2. Open Website
Use this to send customers to a link. When they click the button, they leave the chat window and open your destination page, such as a website, landing page, or marketplace listing, in their default browser.3. Perform Action
Instead of showing another visible message, this option sends the customer through a background system action. For example, a button labeled “Talk to sales” can trigger Add Tag “Interested” and Transfer to Human at the same time. (See the full Actions guide here)4. Start Another Node
This helps reduce messy connections in large Flows. The button works like a teleport gate and jumps directly to another Node somewhere else in the same Flow.5. Start External Flow
This is useful when you want a more modular setup. Instead of building hundreds of Nodes inside one heavy Flow, you can let a button jump to a second Flow, such as a separate “Membership Registration” Flow.6. Start External Node
This is an advanced version of Start External Flow. Instead of starting from the beginning of the second Flow, the system jumps to a specific Node that you choose inside that Flow.7. Channel-specific actions
Some channels support additional actions. For example, on Messenger you may also see:- Call Number: Lets the contact place a phone call directly to your hotline. This is especially useful for sales teams.