Basic Search and Sort Operations
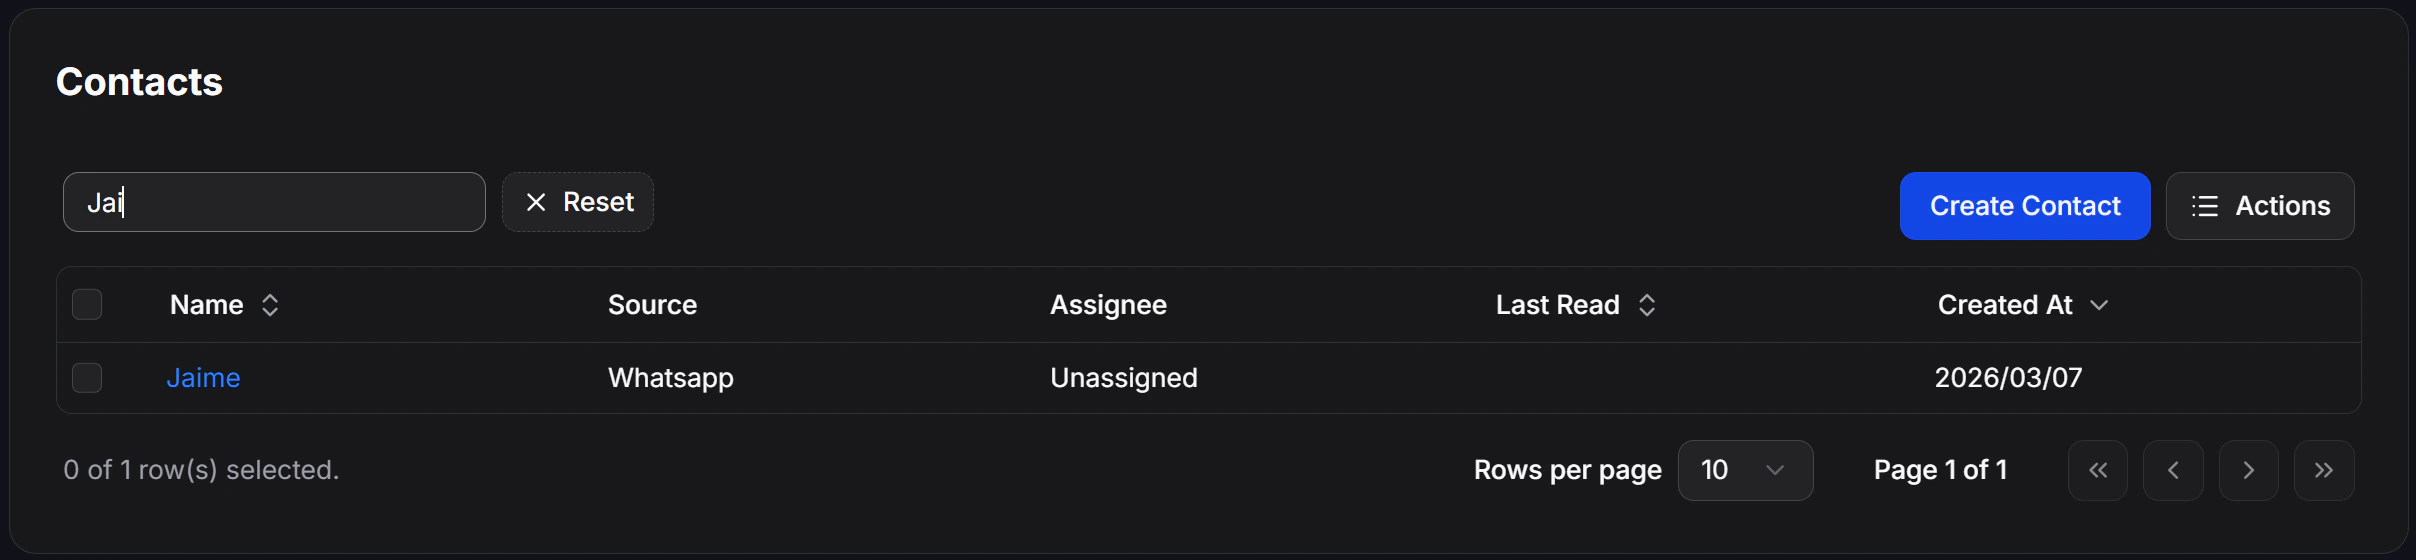
Search contacts by name
To quickly locate a specific contact when you already know their name:- Navigate to the Contacts page from the left menu.
- Enter the contact’s name into the Enter name search box located at the top-left corner.
- The system will automatically filter the list and display matching results instantly.
Sort the list by column
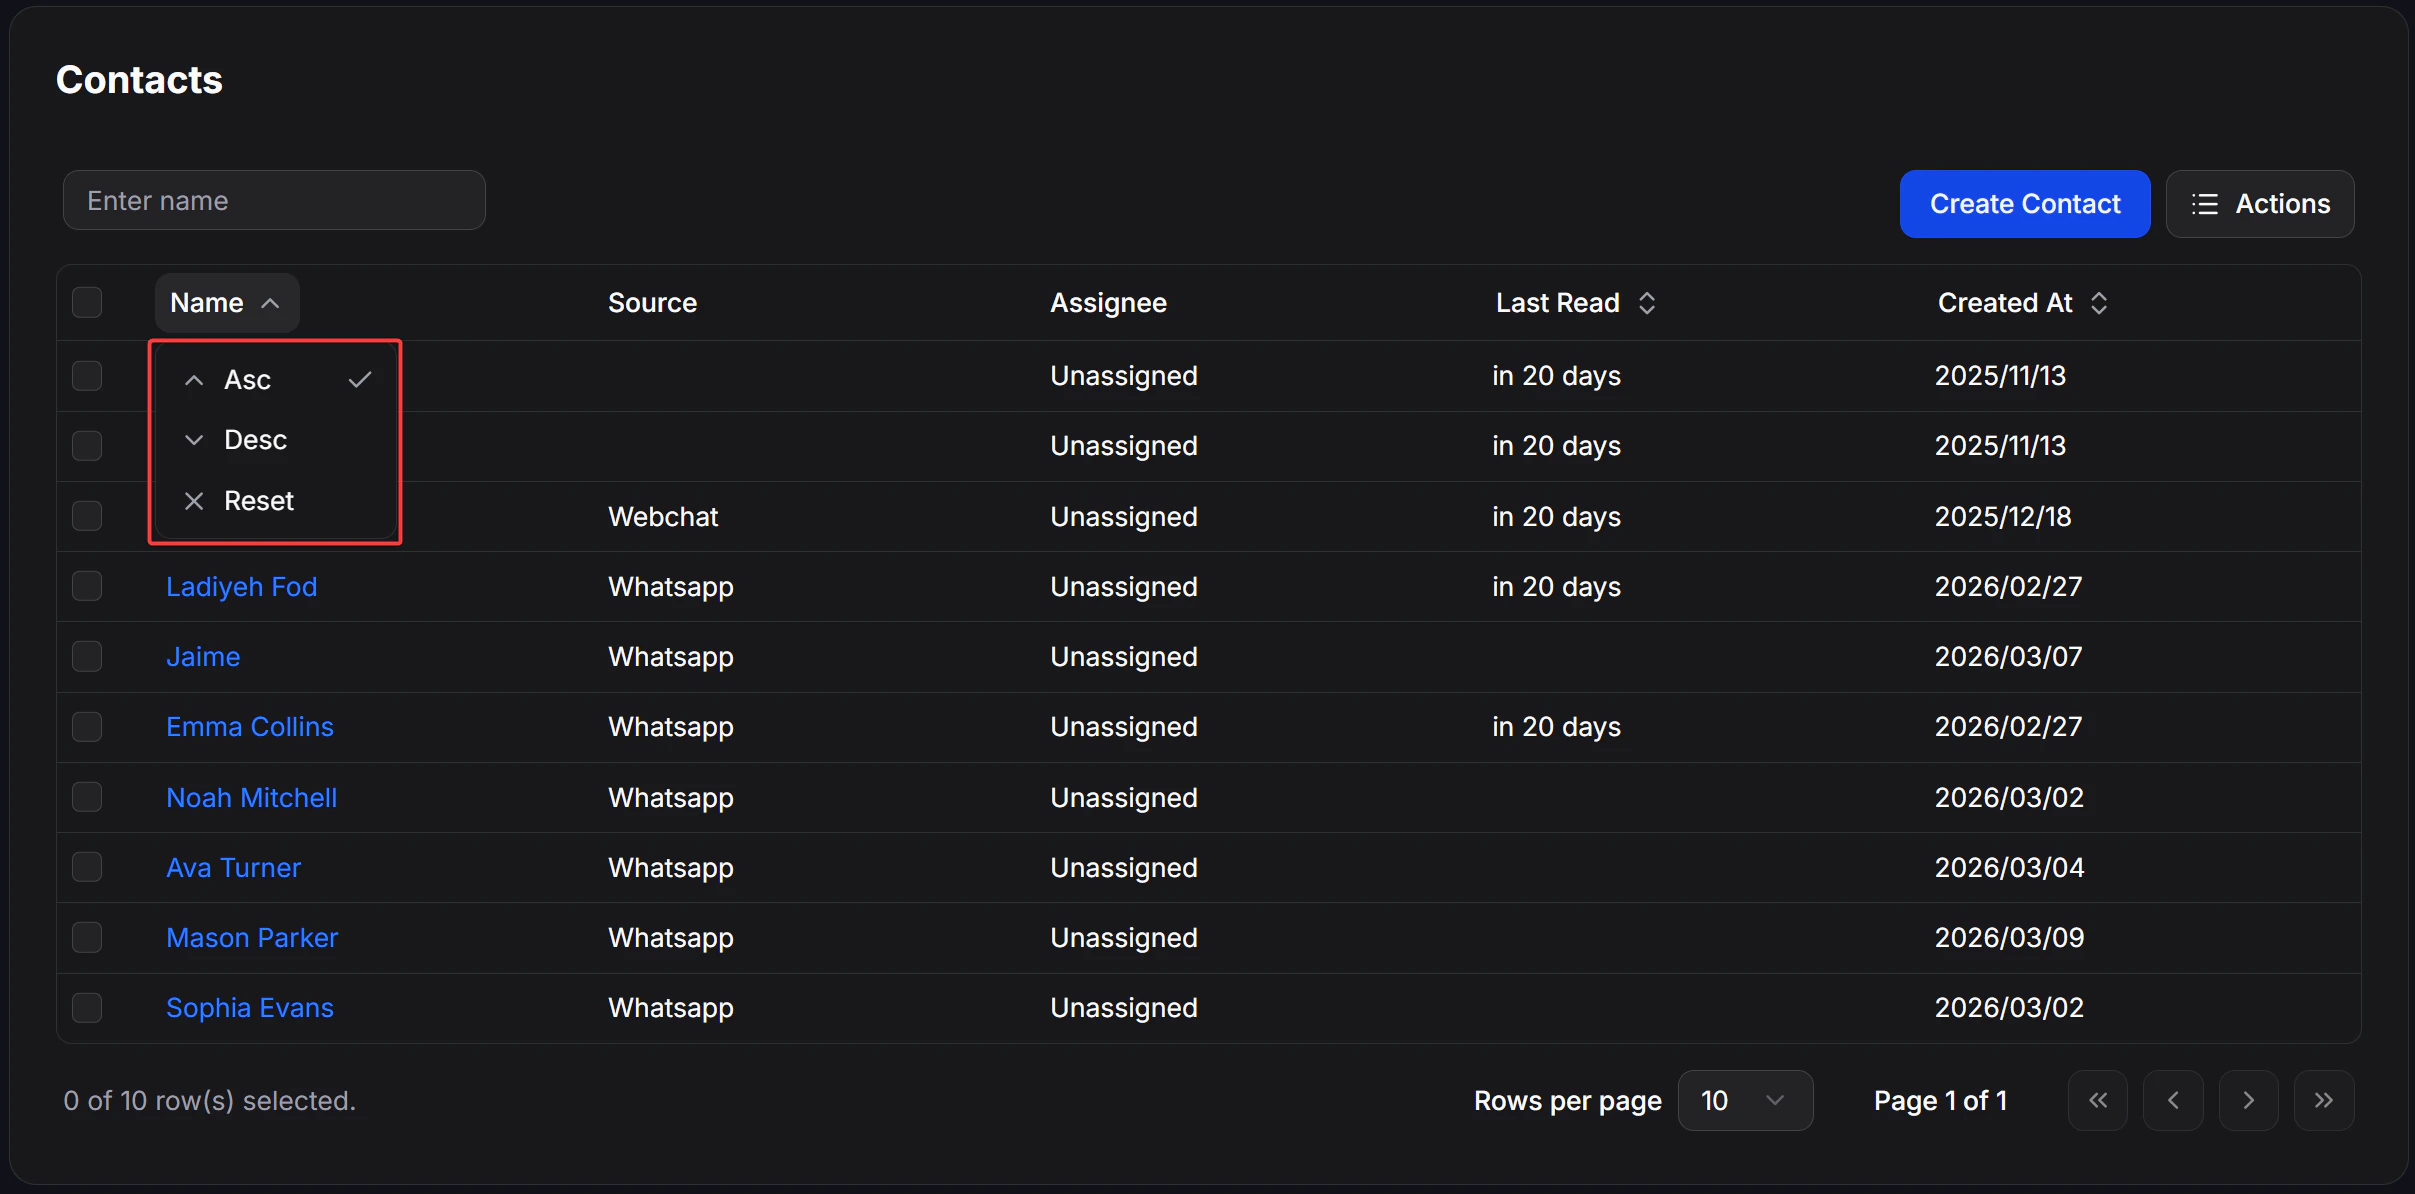
You can sort the display order of the contact list based on specific column headers in the table (such as Name, Last Read, or Created At):- Click directly on the column header you want to use as your sorting criteria in the Contacts table.
- An arrow icon will appear next to the column header indicating the sort order:
- Upward Arrow (Asc): Sorts in ascending order or from A to Z.
- Downward Arrow (Desc): Sorts in descending order or from Z to A.
Select multiple contacts
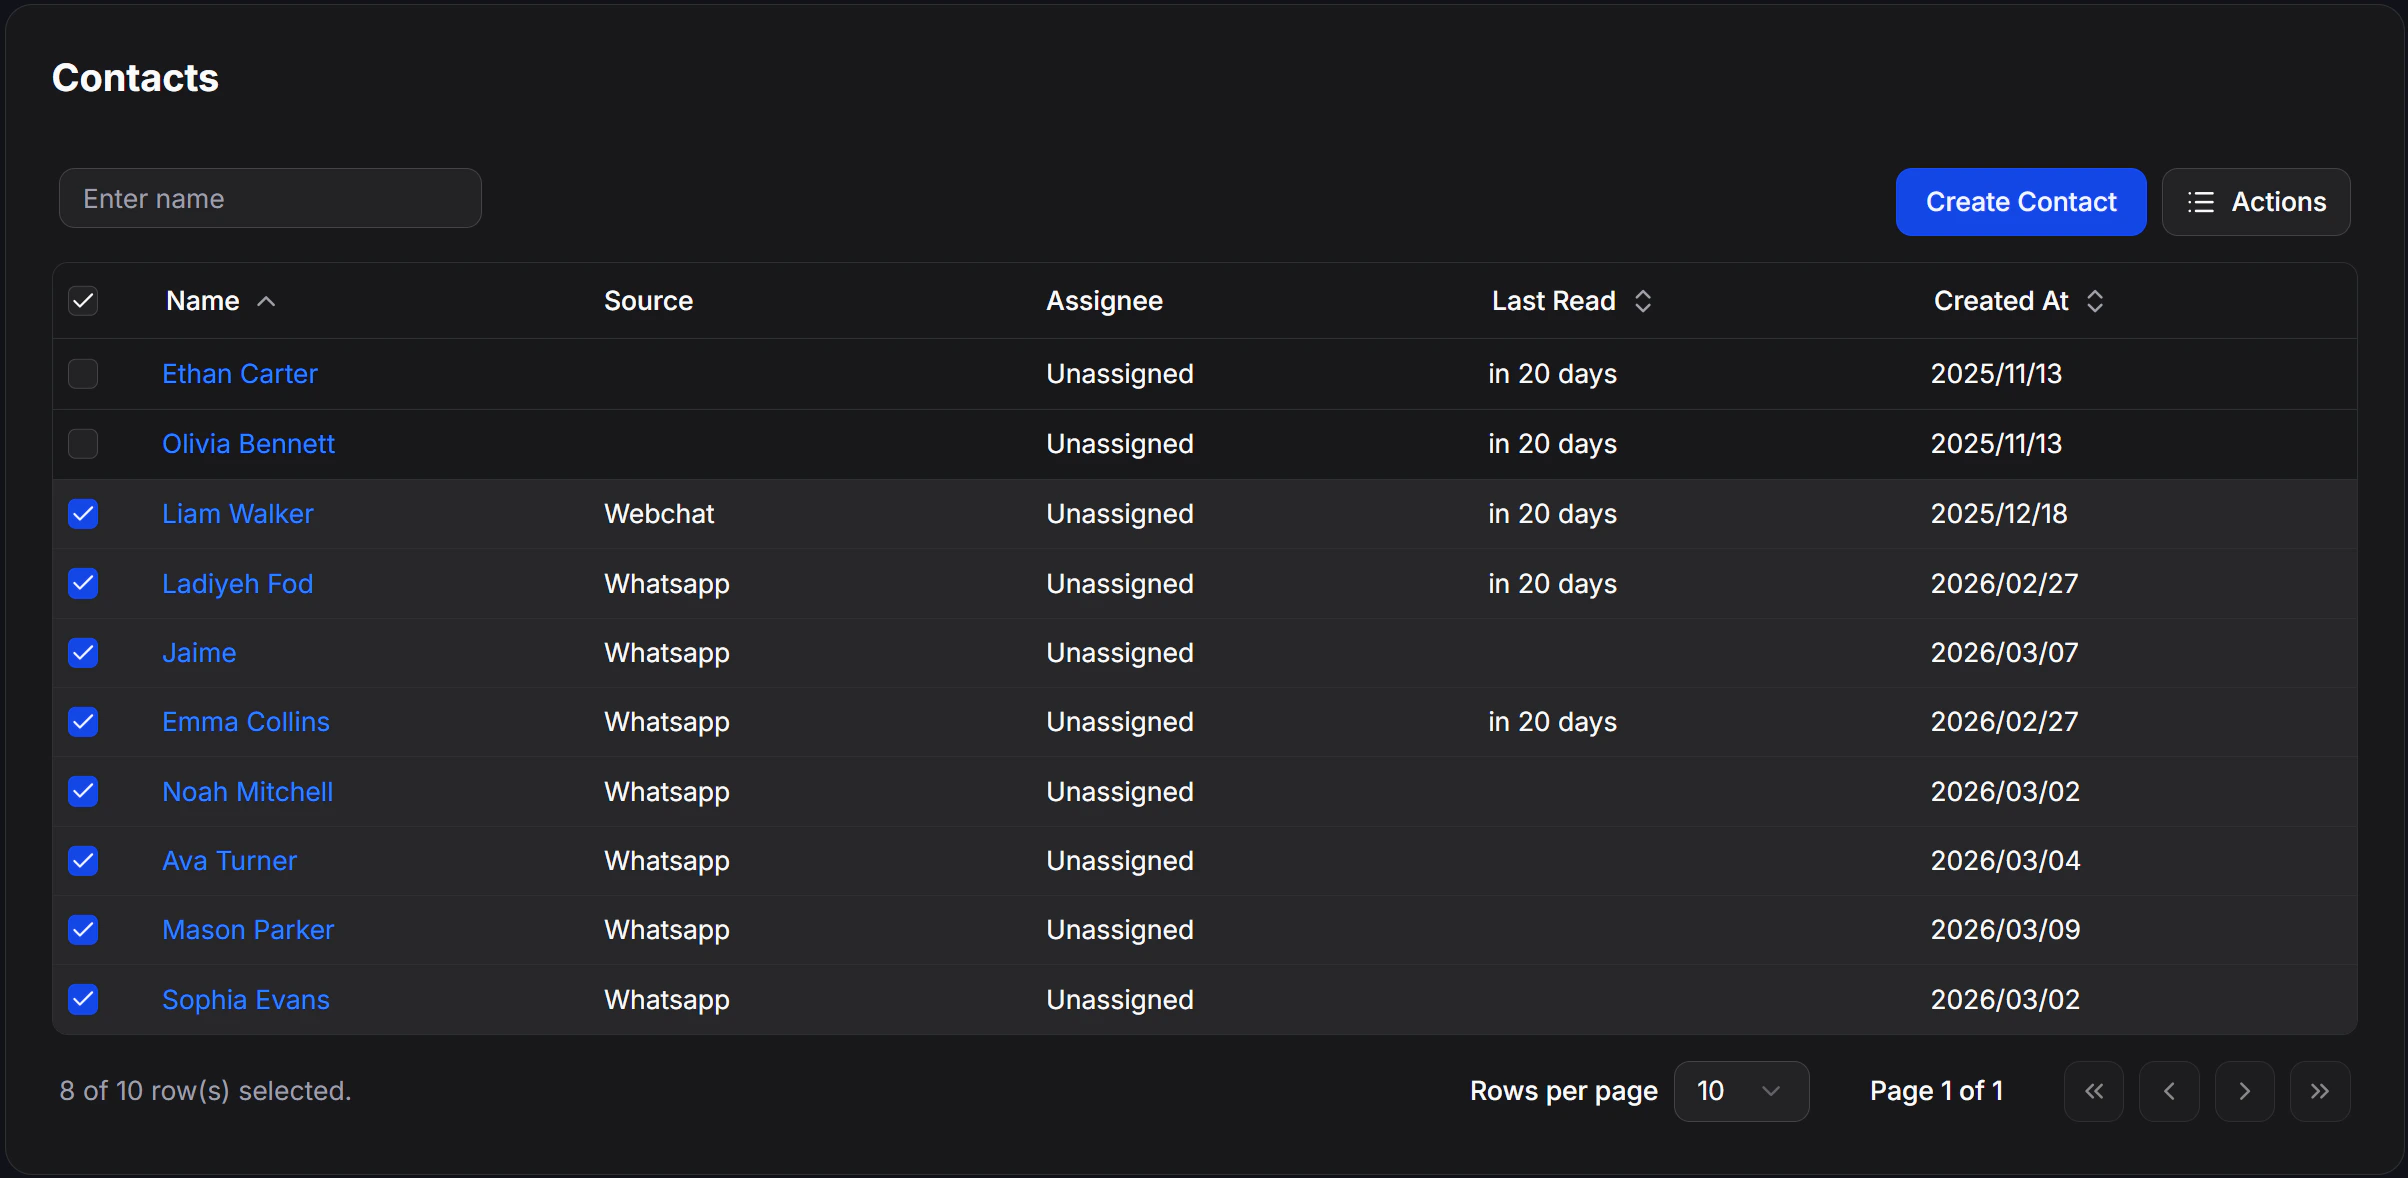
This feature allows you to select contacts in bulk to execute group actions (Bulk Actions) such as tagging, deleting, or exporting data:- Use the search bar or filter options to bring the targeted contacts to the top of the list.
- Check the box at the start of each contact row you want to select. You can also tick the checkbox in the table header to quickly select all contacts currently displayed on the page.
- Verify the number of selected contacts shown at the bottom-left corner of the table before proceeding with group actions.
Advanced Condition Filters (Advanced Filter)
Advanced filters allow you to maximize the value of your contact data by combining multiple detailed search criteria using logical operators.How to configure advanced filters
1
Open the filter interface
On the Contacts page, click the Filter button (funnel icon) in the upper-right corner.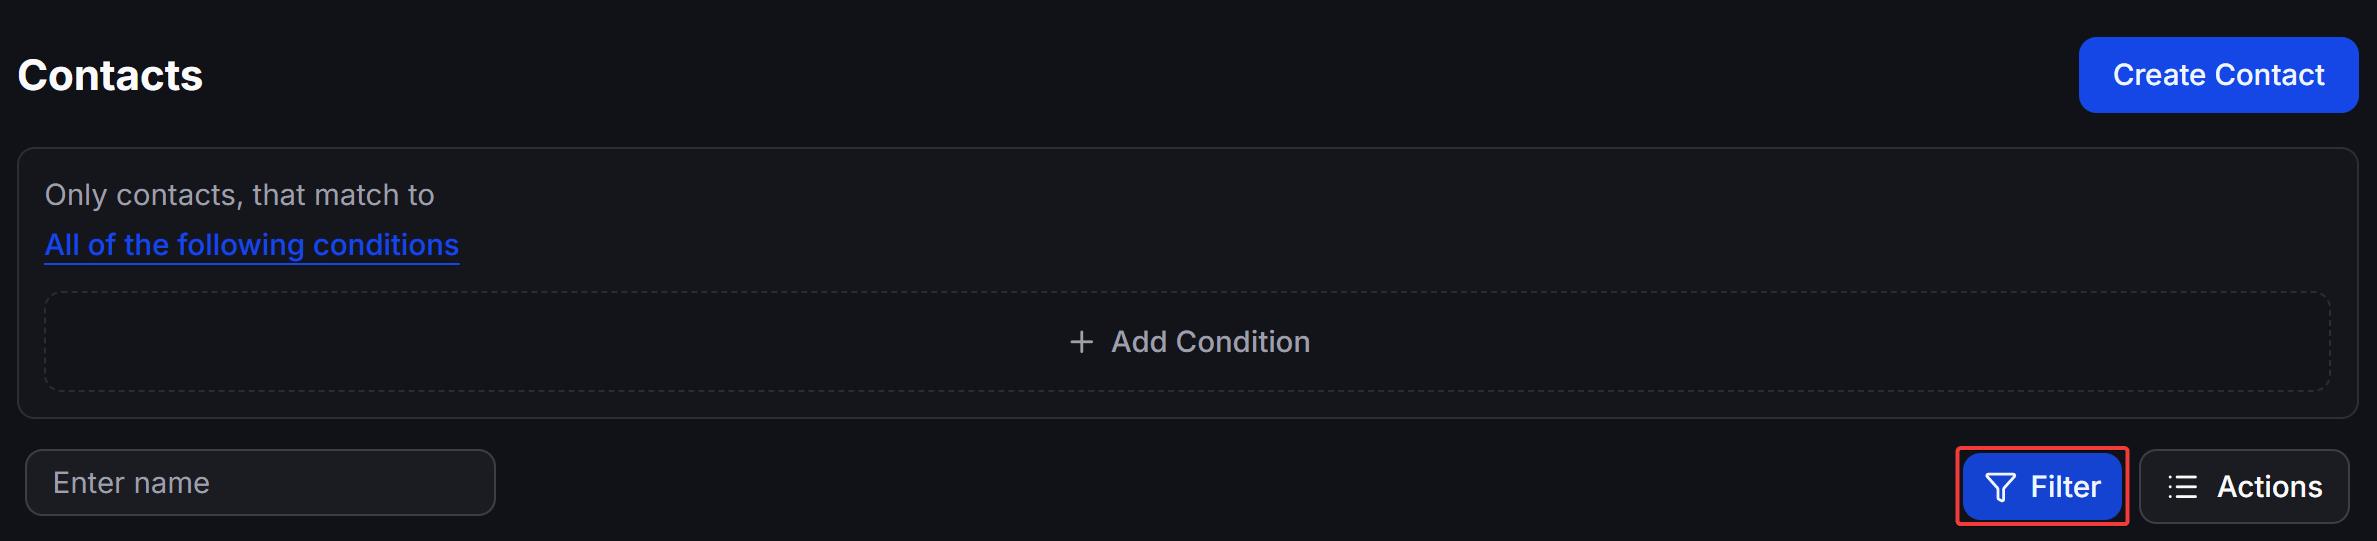
2
Select logical operator
Before adding specific criteria, choose how the system combines your filter conditions by clicking the blue text link:
- All of the following conditions (AND operator): Only displays contacts that simultaneously satisfy all established conditions below.

- Any of the below conditions (OR operator): Displays contacts that satisfy at least one of the established conditions below.

3
Add and configure conditions
Click the + Add Condition button to create a new filter rule. For each rule, configure 3 parameters on the popup:
- Field: Select the data field you want to filter (e.g., Language, Tags, Email…).
- Operator: Select the comparison method (e.g., Is, Contains, Has any value…).
- Value: Enter or select the corresponding value (e.g., English, hot-lead…).
4
Apply the filter
Click the confirm button to execute the filter query and view the updated, narrowed list of contacts.
Configuration Example
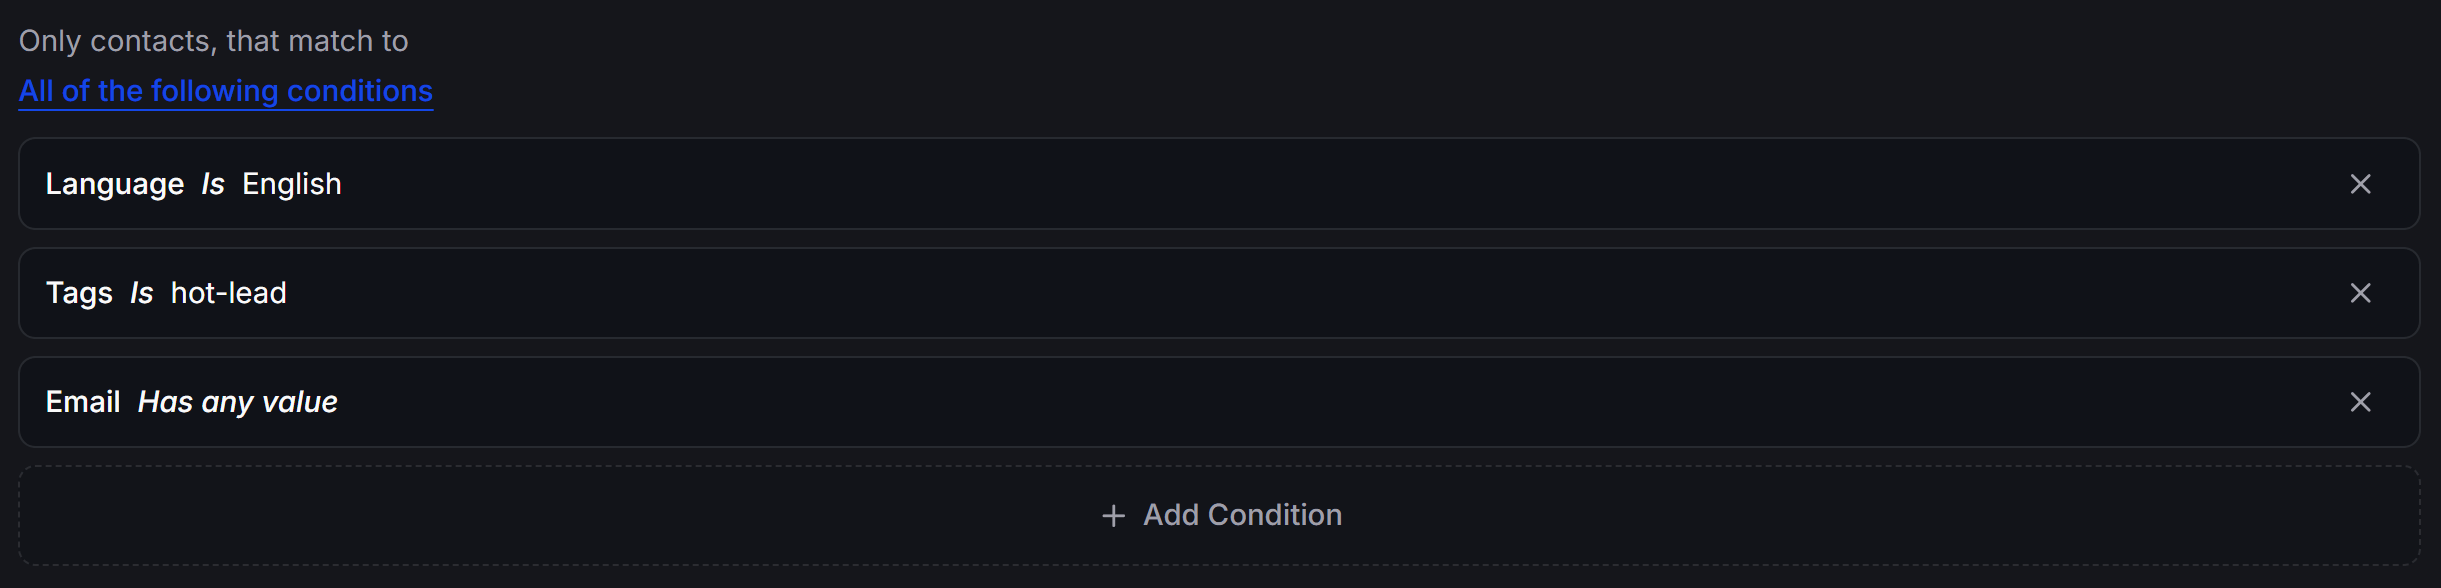
Use Case: You want to filter out English-speaking contacts who are qualified as prospective leads (hot-lead) and have provided their email addresses, in order to prepare for a targeted Email Marketing discount campaign.
To configure this, select the All of the following conditions logical operator and add the following 3 filter rules:
- Language Is English (Language used is English)
- Tags Is hot-lead (Assigned Tag is hot-lead)
- Email Has any value (Email address field is populated and not empty)