1. Flow Management Interface
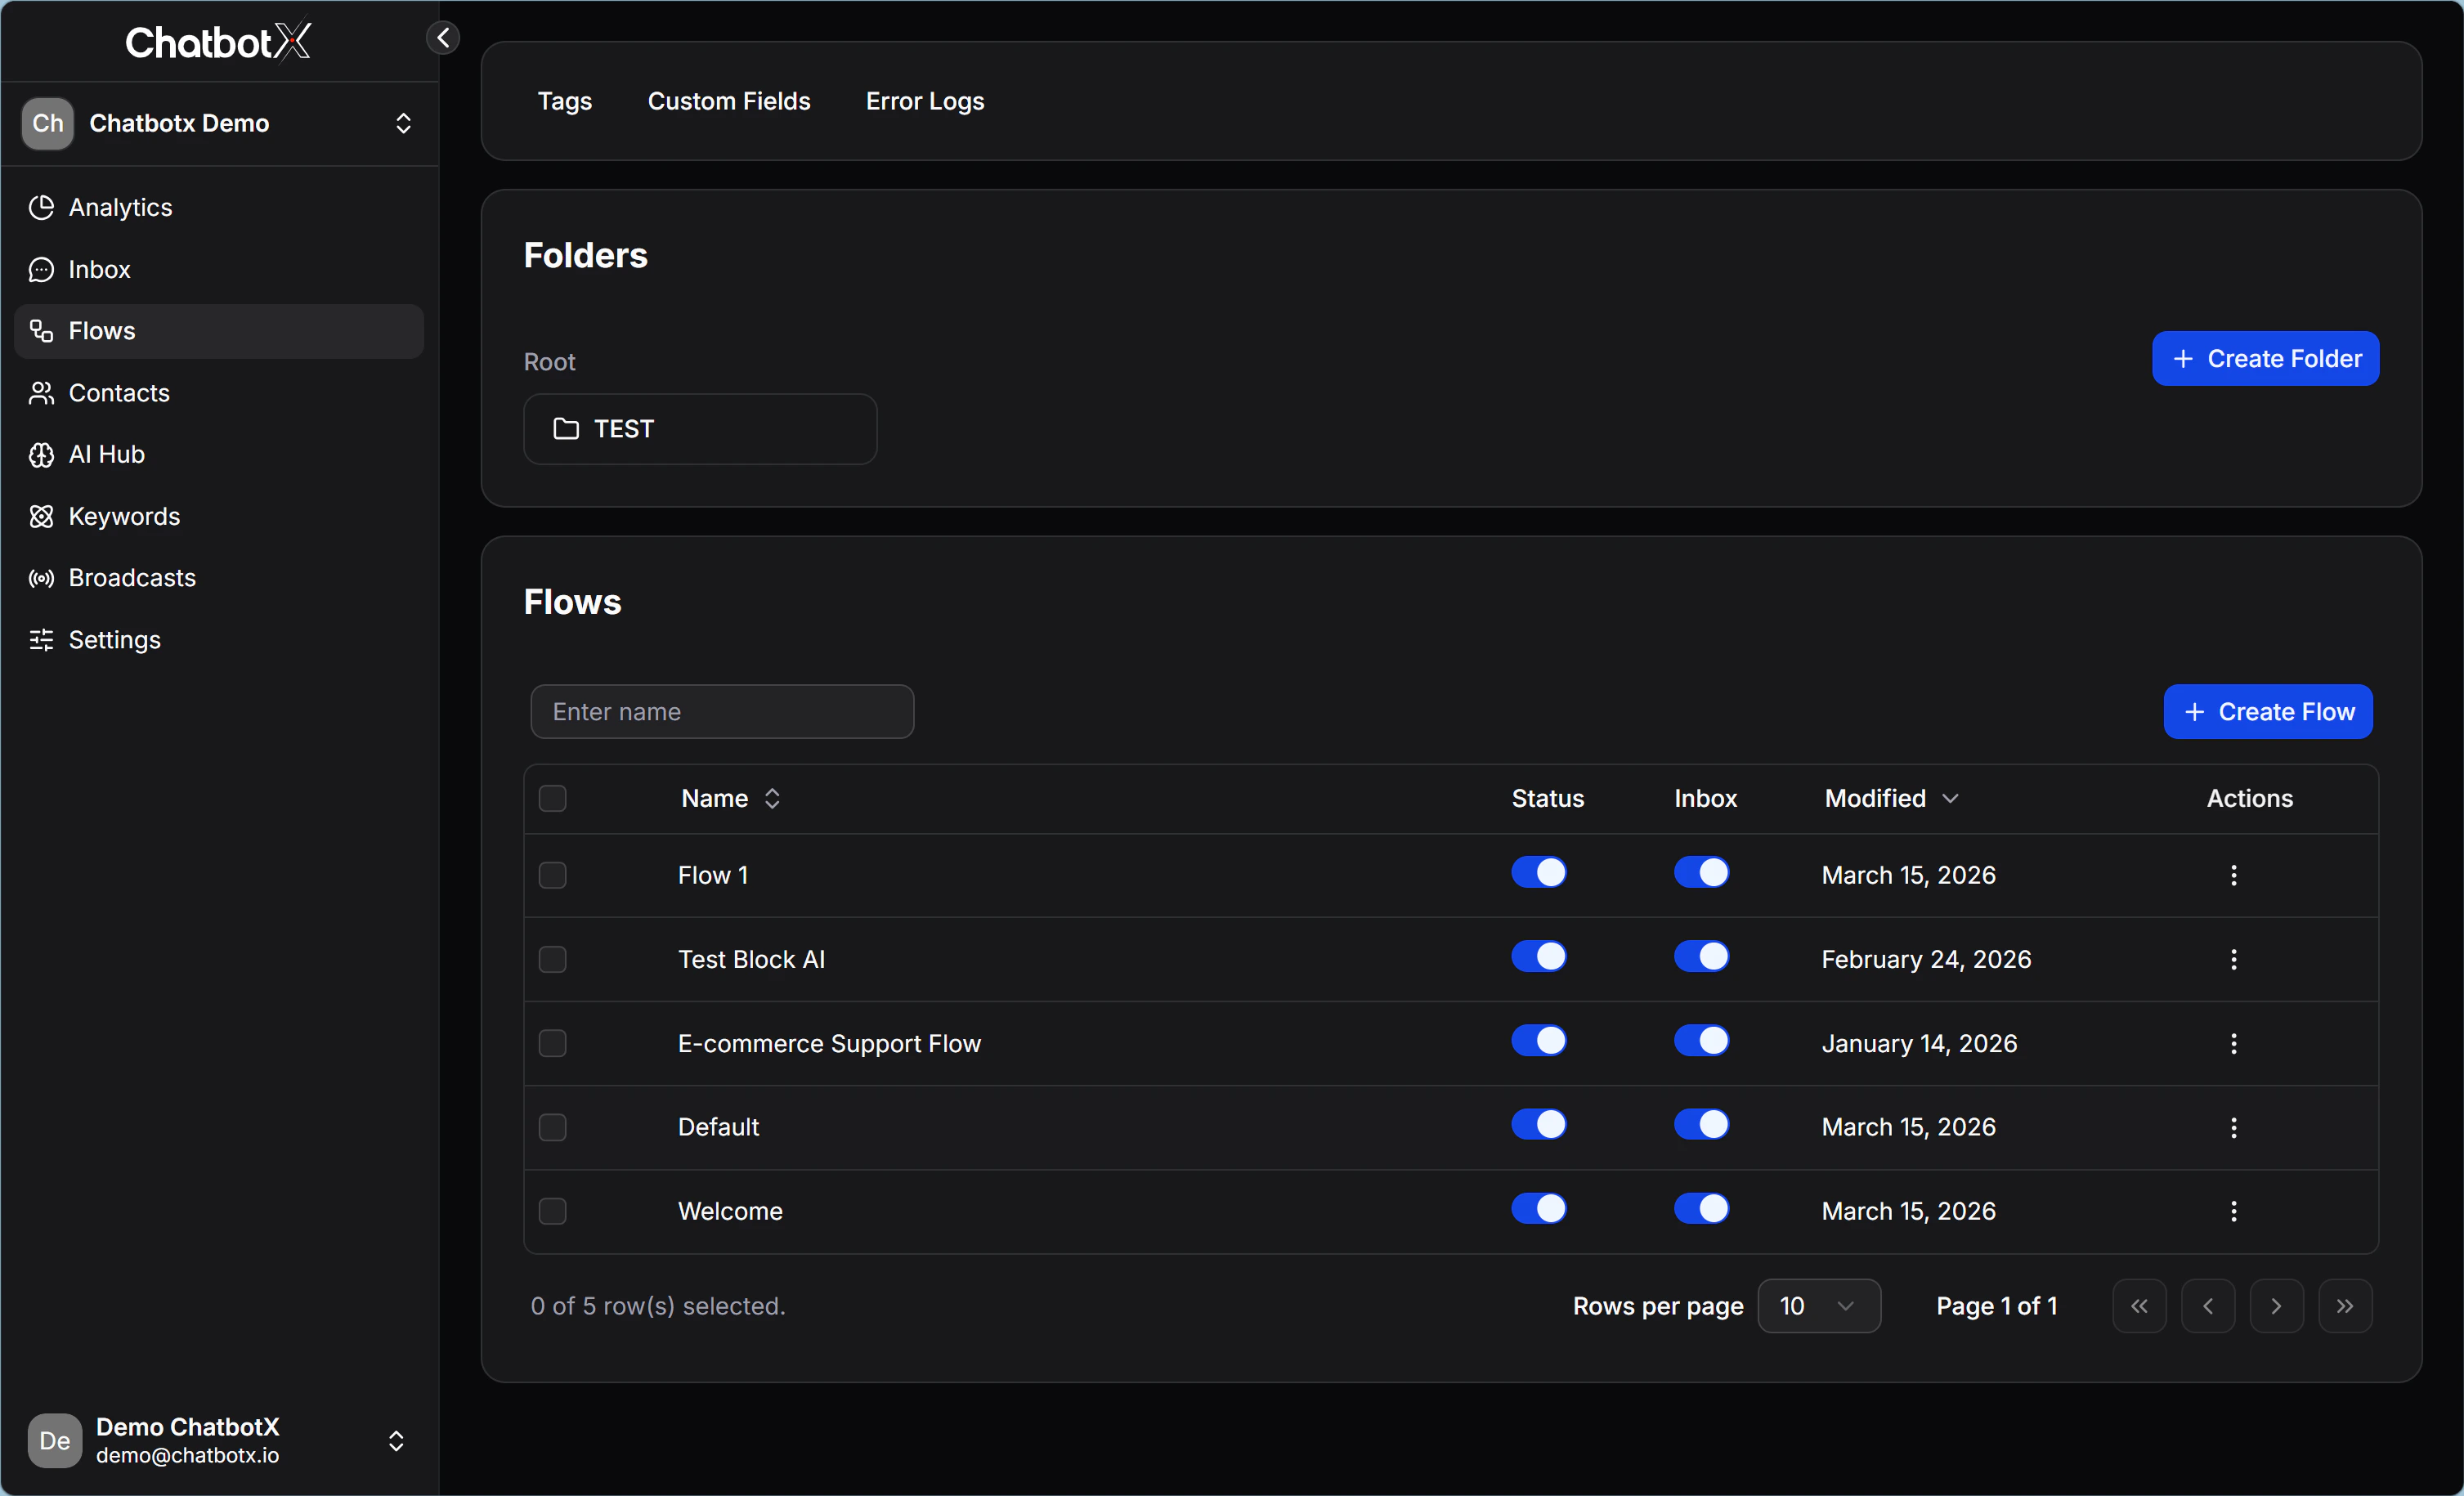
When you open Flows from the left menu, you will work inside the management dashboard. The interface is designed with a clear hierarchy, so you can manage a large number of Flows in a structured and readable way:- Folders: A tree-style storage structure. Use + Create Folder to group related Flows into one category, such as
Tet Campaign,New Customers, orPost-purchase Care. - Flows List: The area that shows every Flow inside the selected folder, along with a search bar and the blue + Create Flow button in the top-right corner.
- Status and customization columns:
- Status: A simple toggle that lets you disable a Flow immediately without deleting it.
- Inbox: A status mode that controls whether the Flow appears inside the conversation Inbox for your team.
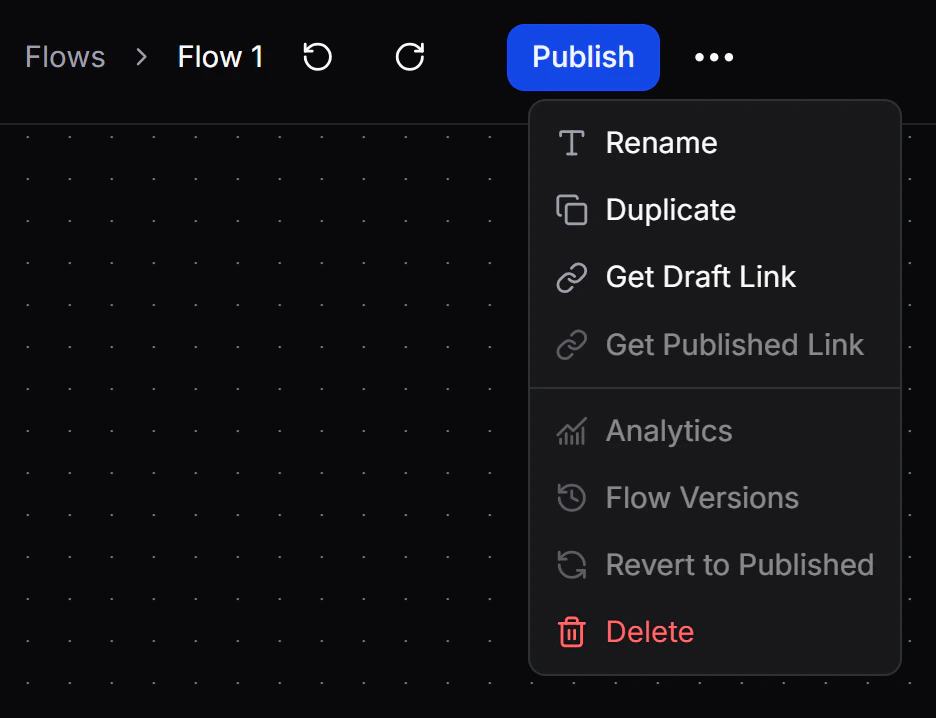
- Modified & Actions: Shows the last time you edited the Flow, along with an action menu where you can Rename, Duplicate, or Delete it.
2. Flow Builder Interface
Flow Builder is an open canvas workspace. Here, every message, data-processing action, or logic condition is packaged as a Node. Instead of forcing you to follow a dry list view, Flow Builder gives you a visual network-style layout with modern drag-and-connect behavior:- Zoom in and out to see the full Flow clearly.
- Visualize the relationship between messages, actions, and decision points.
- Follow the customer journey and touchpoints more easily throughout the funnel.
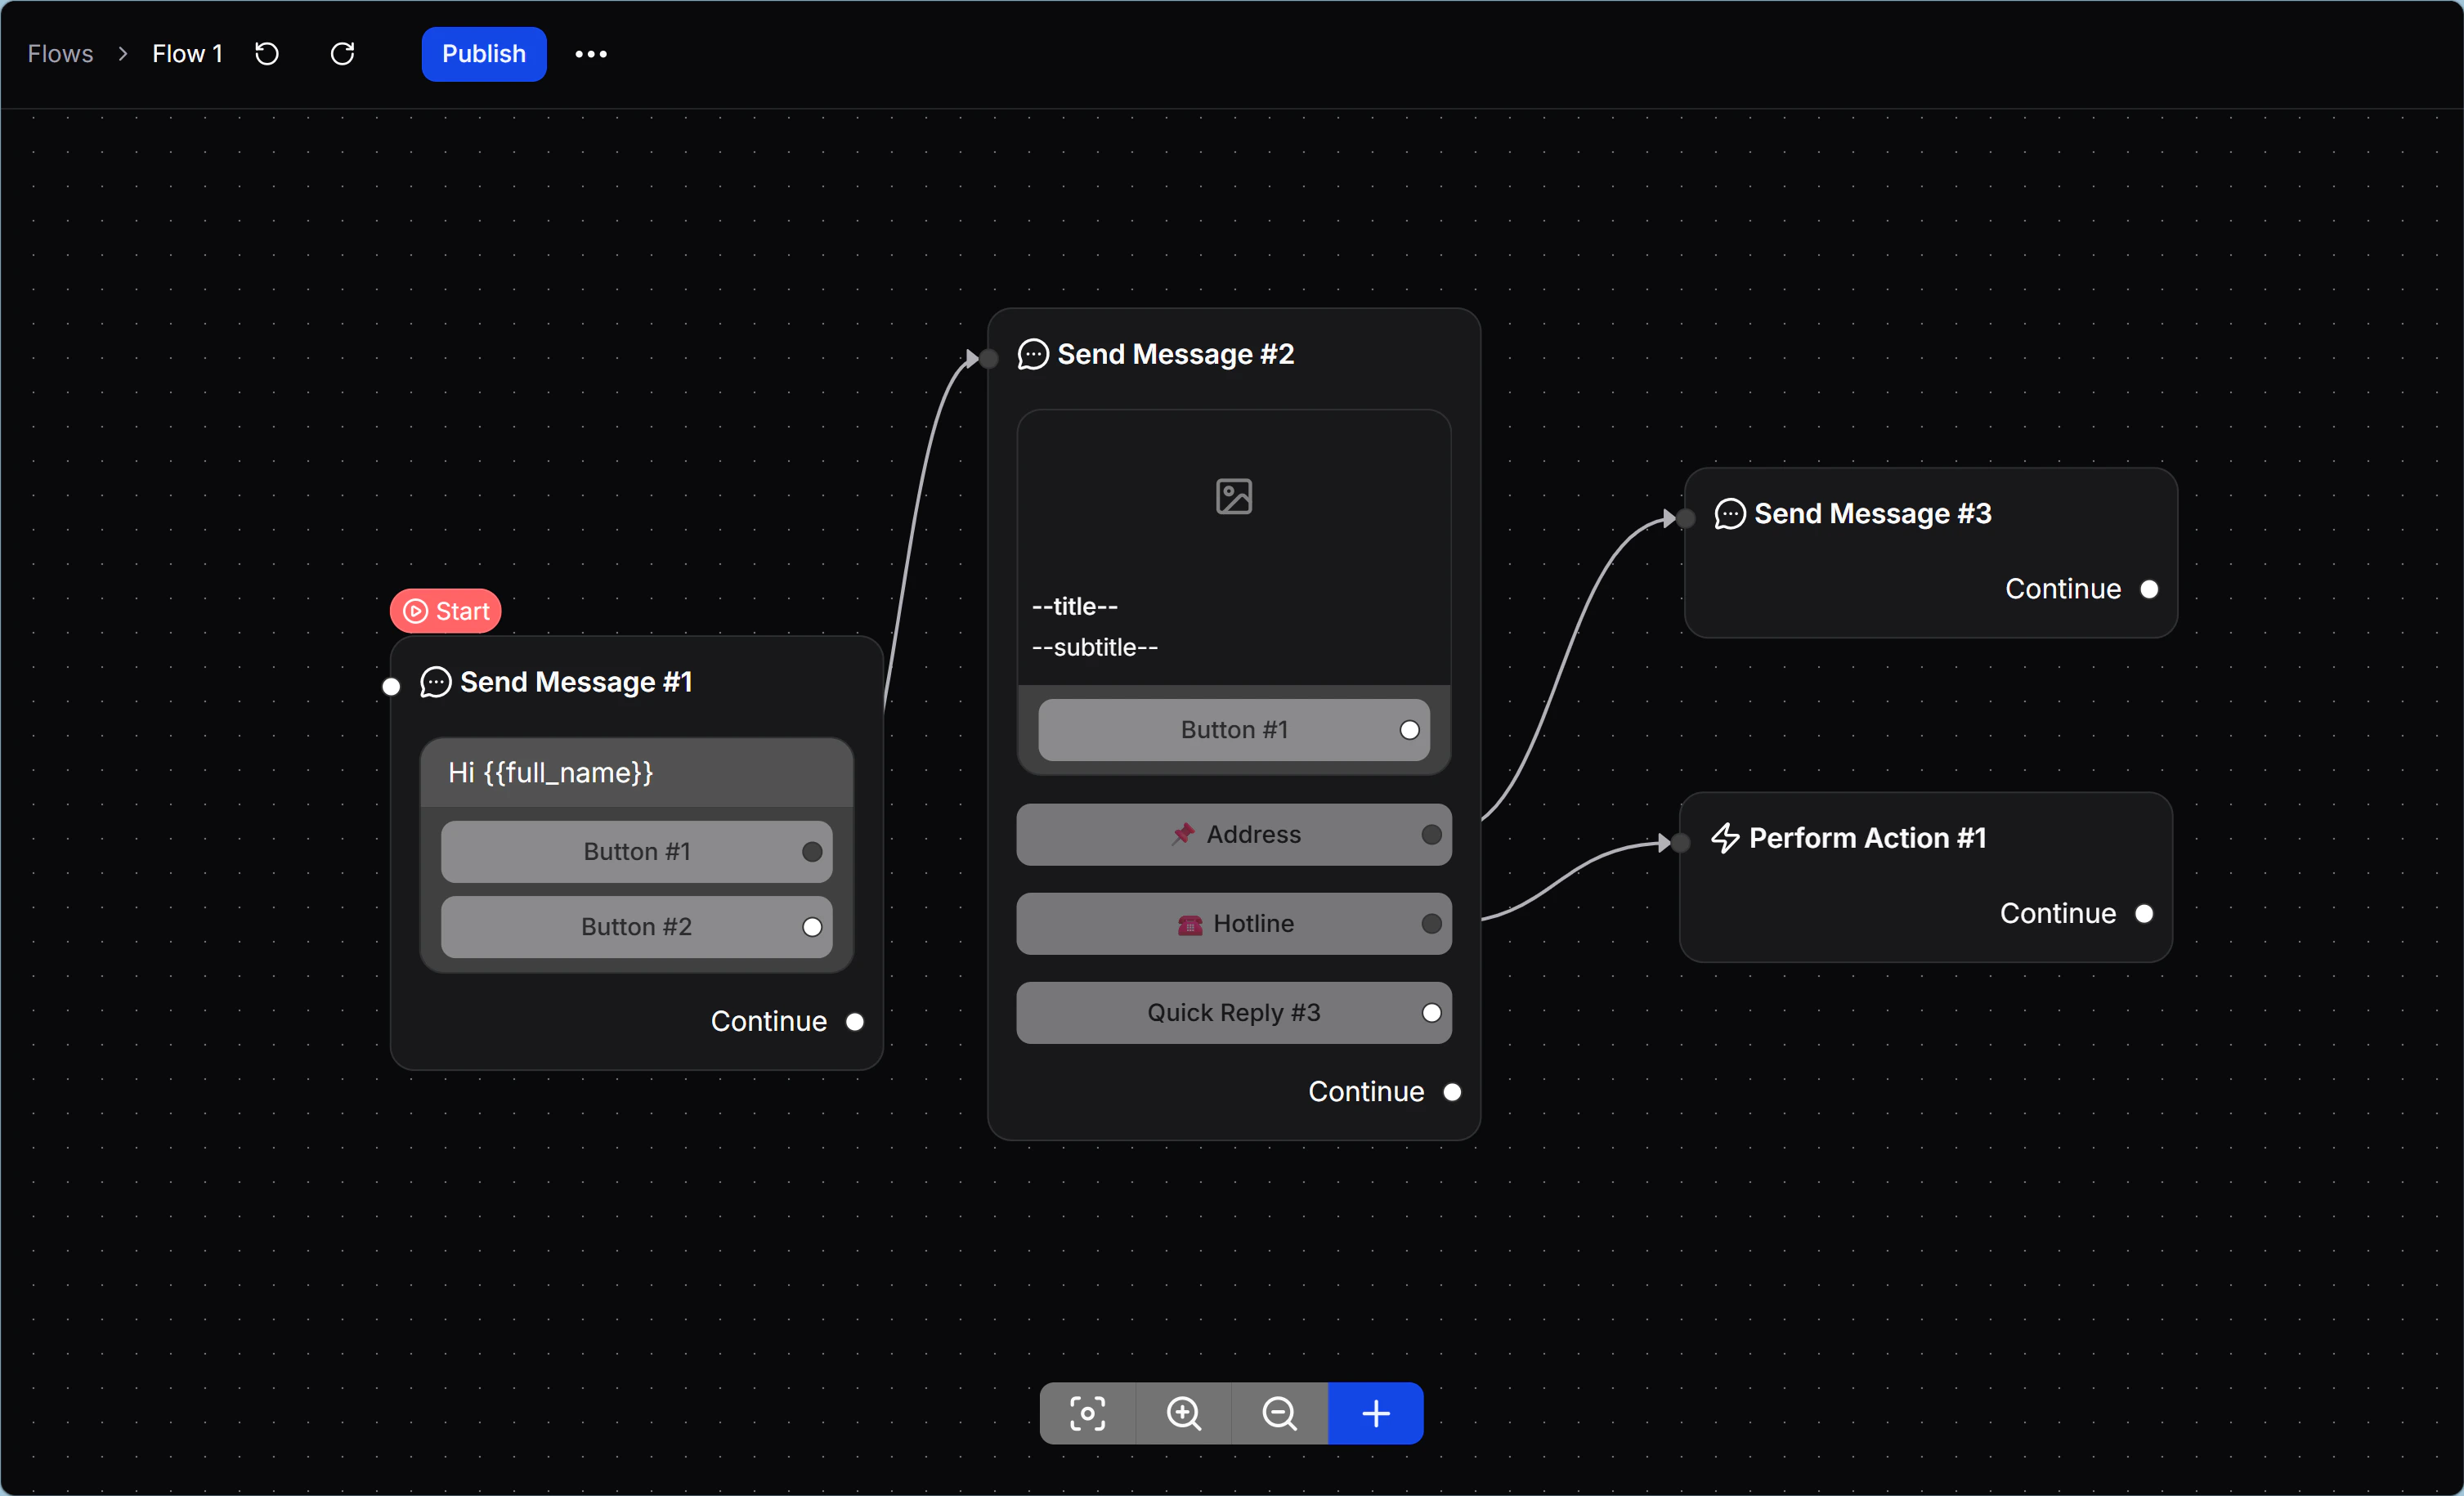
3. Starting Step
Every Flow must include a Starting Step, the green starting block that defines how the Flow begins. ChatbotX Flow Builder is optimized for omnichannel sales. Inside the Starting Step, you can set up the Flow in 2 ways:- Omnichannel: Build one Flow once, and the platform will automatically adapt the content structure for each supported channel, such as Messenger, WhatsApp, or Instagram.
- Channel-specific: Choose one platform when the Flow depends on a feature that only exists on that channel, such as a WhatsApp List Menu.
4. Components that make up a Flow
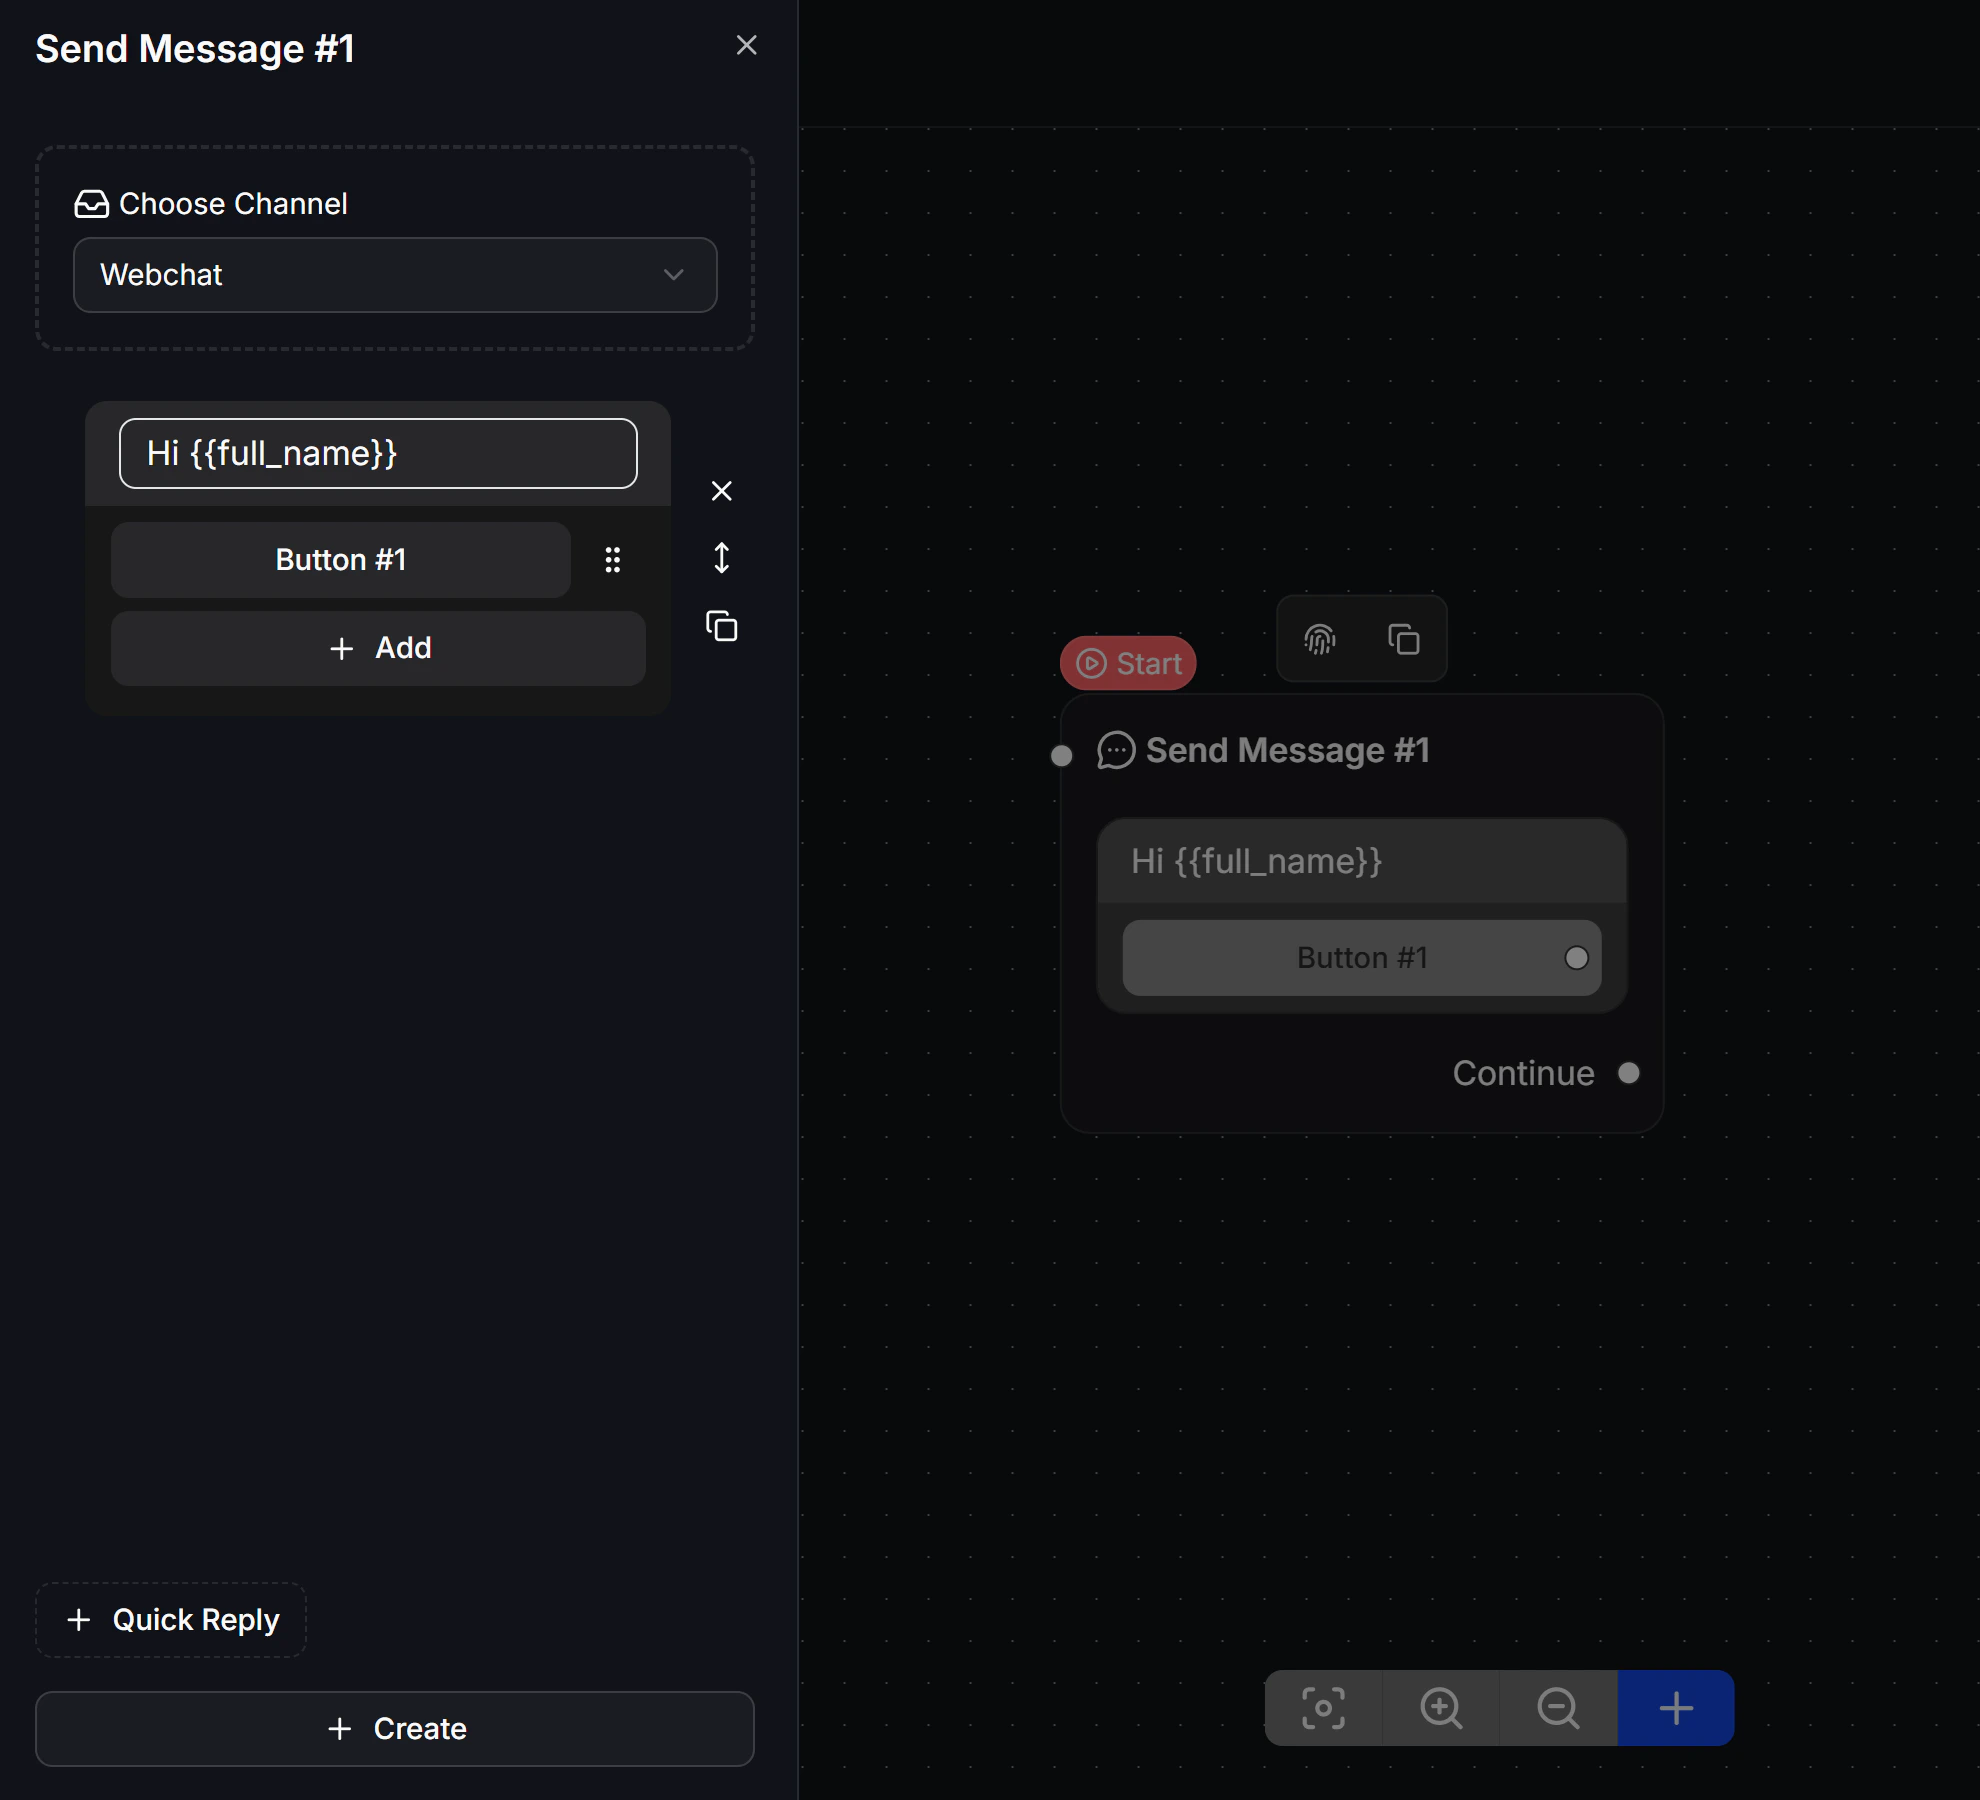
To build a complete Flow, you connect Nodes and Steps around 3 main groups of blocks:- Send Message & Content Blocks: Blocks that display content directly on the customer’s device, such as text, images, Carousel cards, and attached files. Configuration details are covered in Content Blocks.
- Interaction Elements: Buttons and Quick Replies that help customers interact, make choices, and move to the next step in the journey.
- Logic & System Nodes: Background system blocks that handle logic, such as conditions, Smart Wait delays, A/B traffic splits, and Actions that update CRM data.
5. Version management
ChatbotX includes a built-in protection layer with automatic draft saving before publishing:- Automatic draft: Every text edit, block update, and connection change is saved automatically as a Draft. At this stage, your edits do not affect the live customer experience.
- Publish: After you finish testing the Flow, click the green Publish button in the top-right corner to apply the latest version to future real-time conversations.
- Revert to Published: If your draft introduces a mistake, you can restore the last published version. This action discards all current draft changes and brings Flow Builder back to the latest live version.