1. Data Types
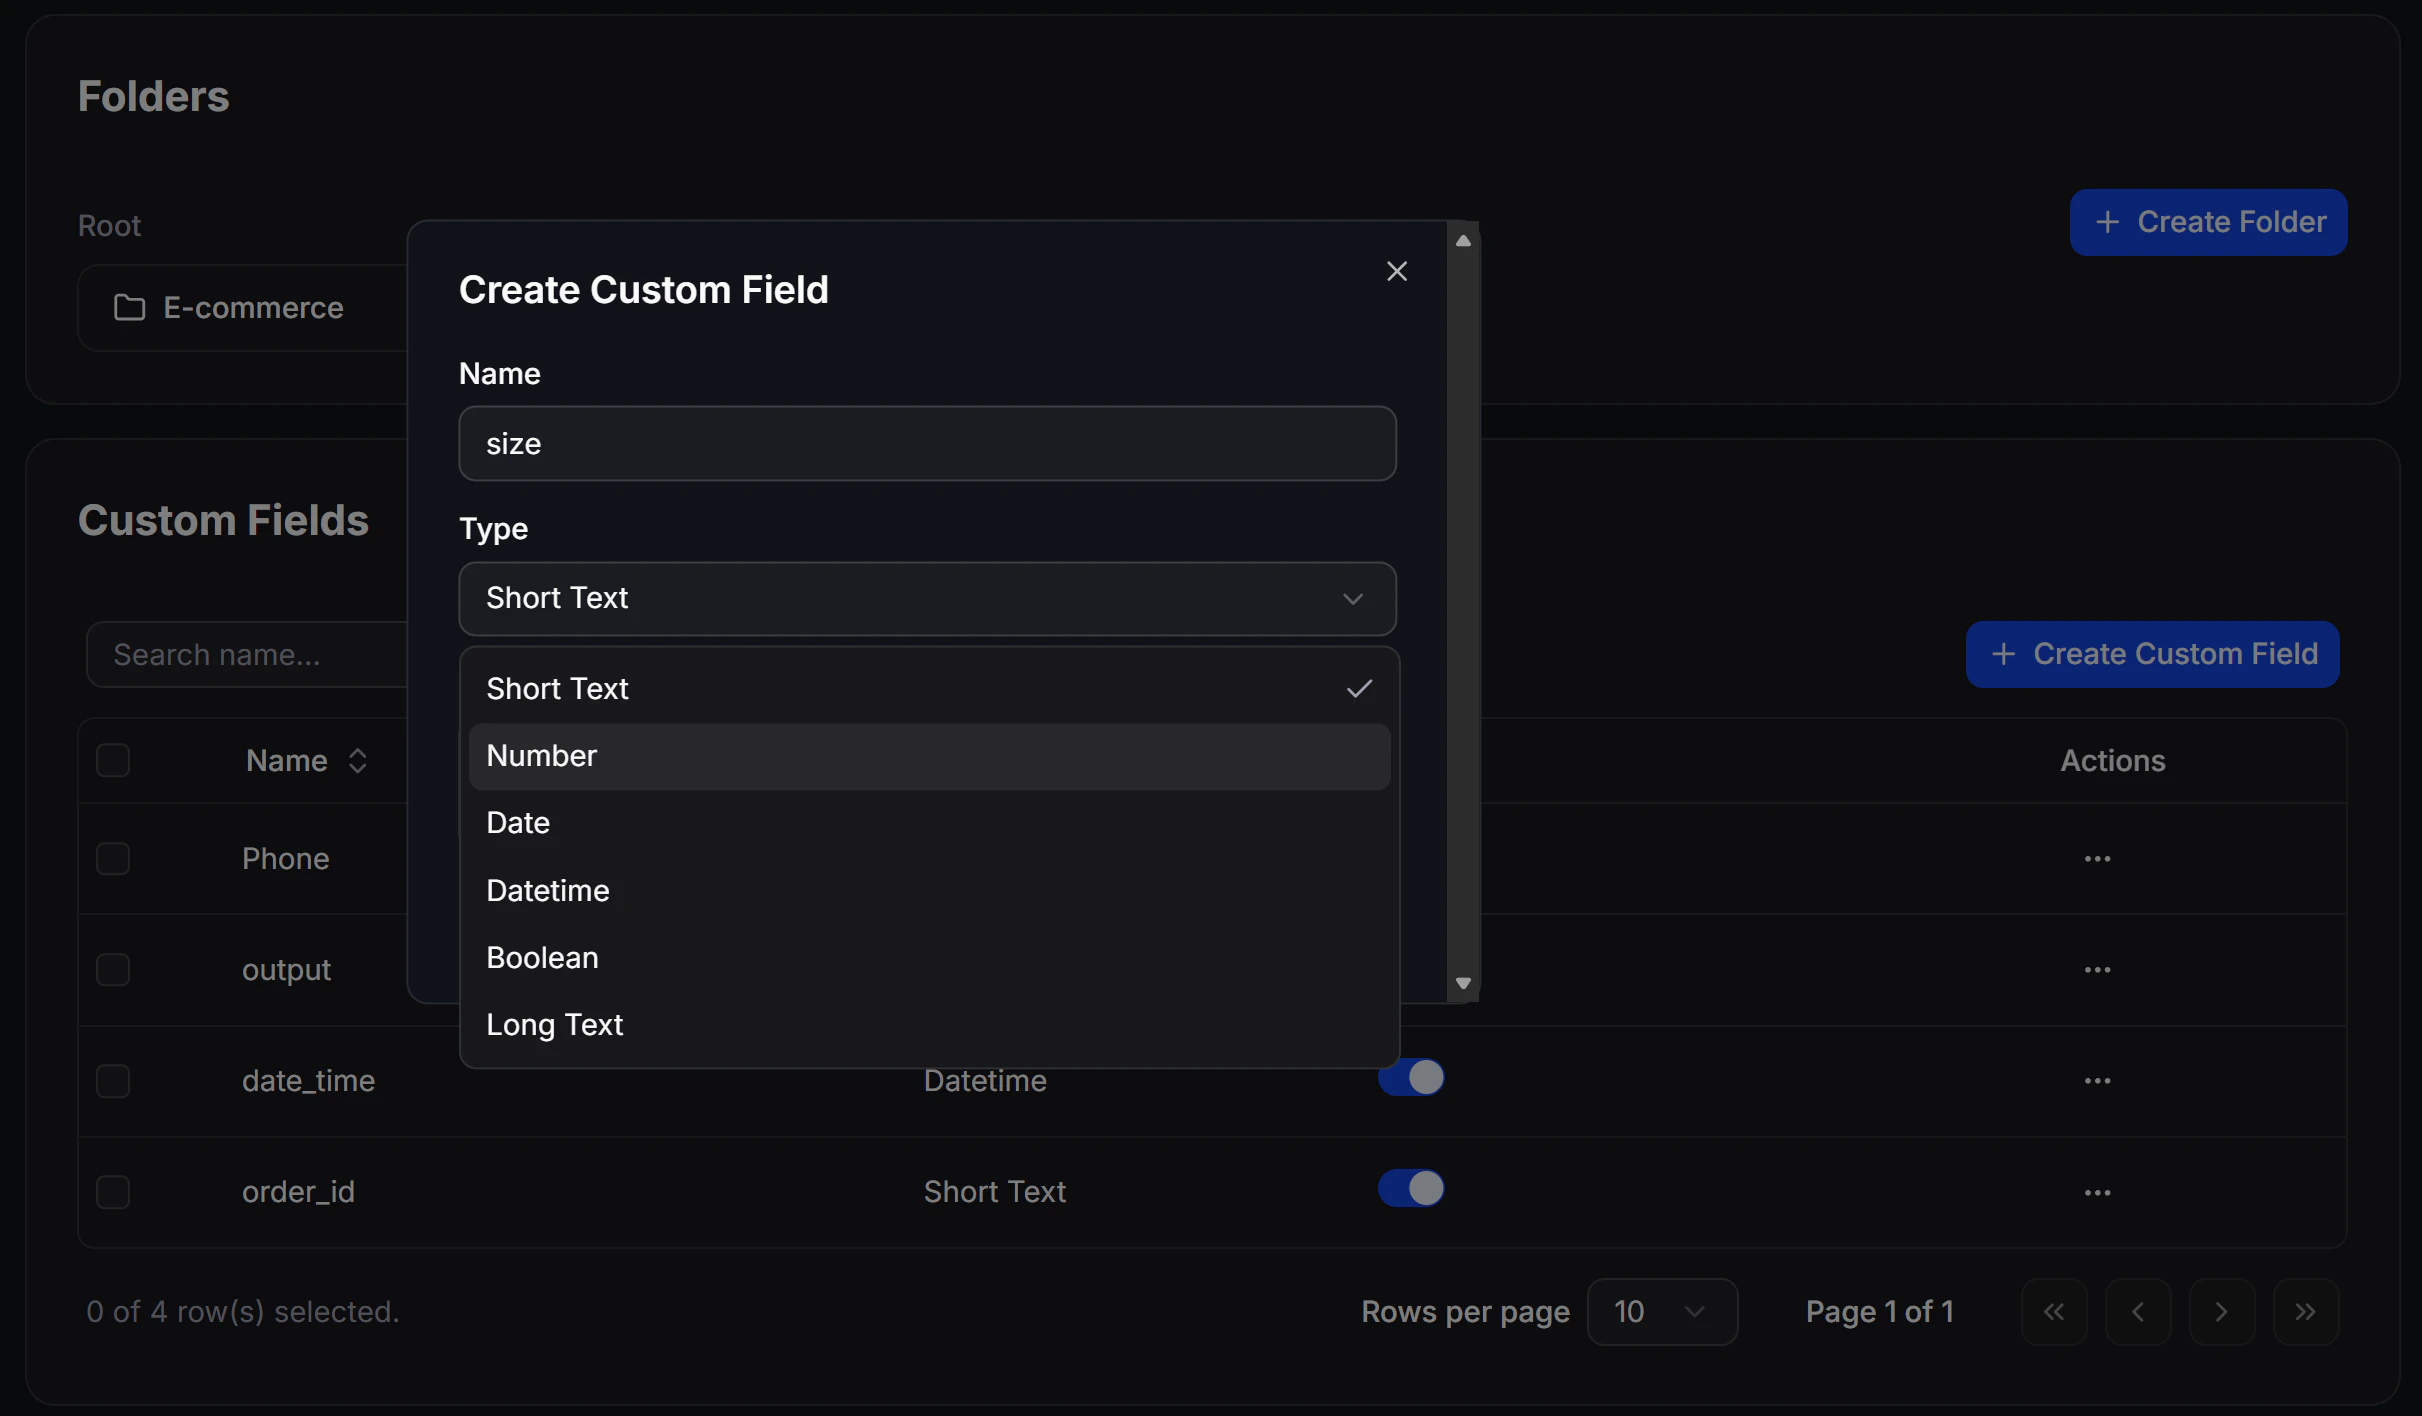
When creating a Custom Field, you need to choose the data type it will store so your logic and AI processing remain accurate:- Short Text: A short text value. Commonly used for job title, voucher code, or a short answer.
- Long Text: A longer text field with line breaks. Useful for detailed notes, customer feedback, or AI prompt context.
- Number: A numeric value. Used for quantities, loyalty points, or pricing values.
- Date: A date format. Often used for birthdays or anniversaries.
- Datetime: A date and time format. Useful for appointment schedules or expiration timestamps.
- Boolean: A true/false value. Used to mark states such as
Purchased,Interested, orRegistered.
2. Where to create and manage Custom Fields
ChatbotX lets you create Custom Fields in 2 main places, depending on whether you want to prepare them in advance or create them while working live.Location 1: Management dashboard (Flows -> Custom Fields)
This is the centralized management area, where you can organize and prepare your data fields before building chatbot Flows.- Open Flows from the left navigation.
- Select the Custom Fields tab next to Tags.
- Click the blue + Create Custom Field button in the top-right corner.
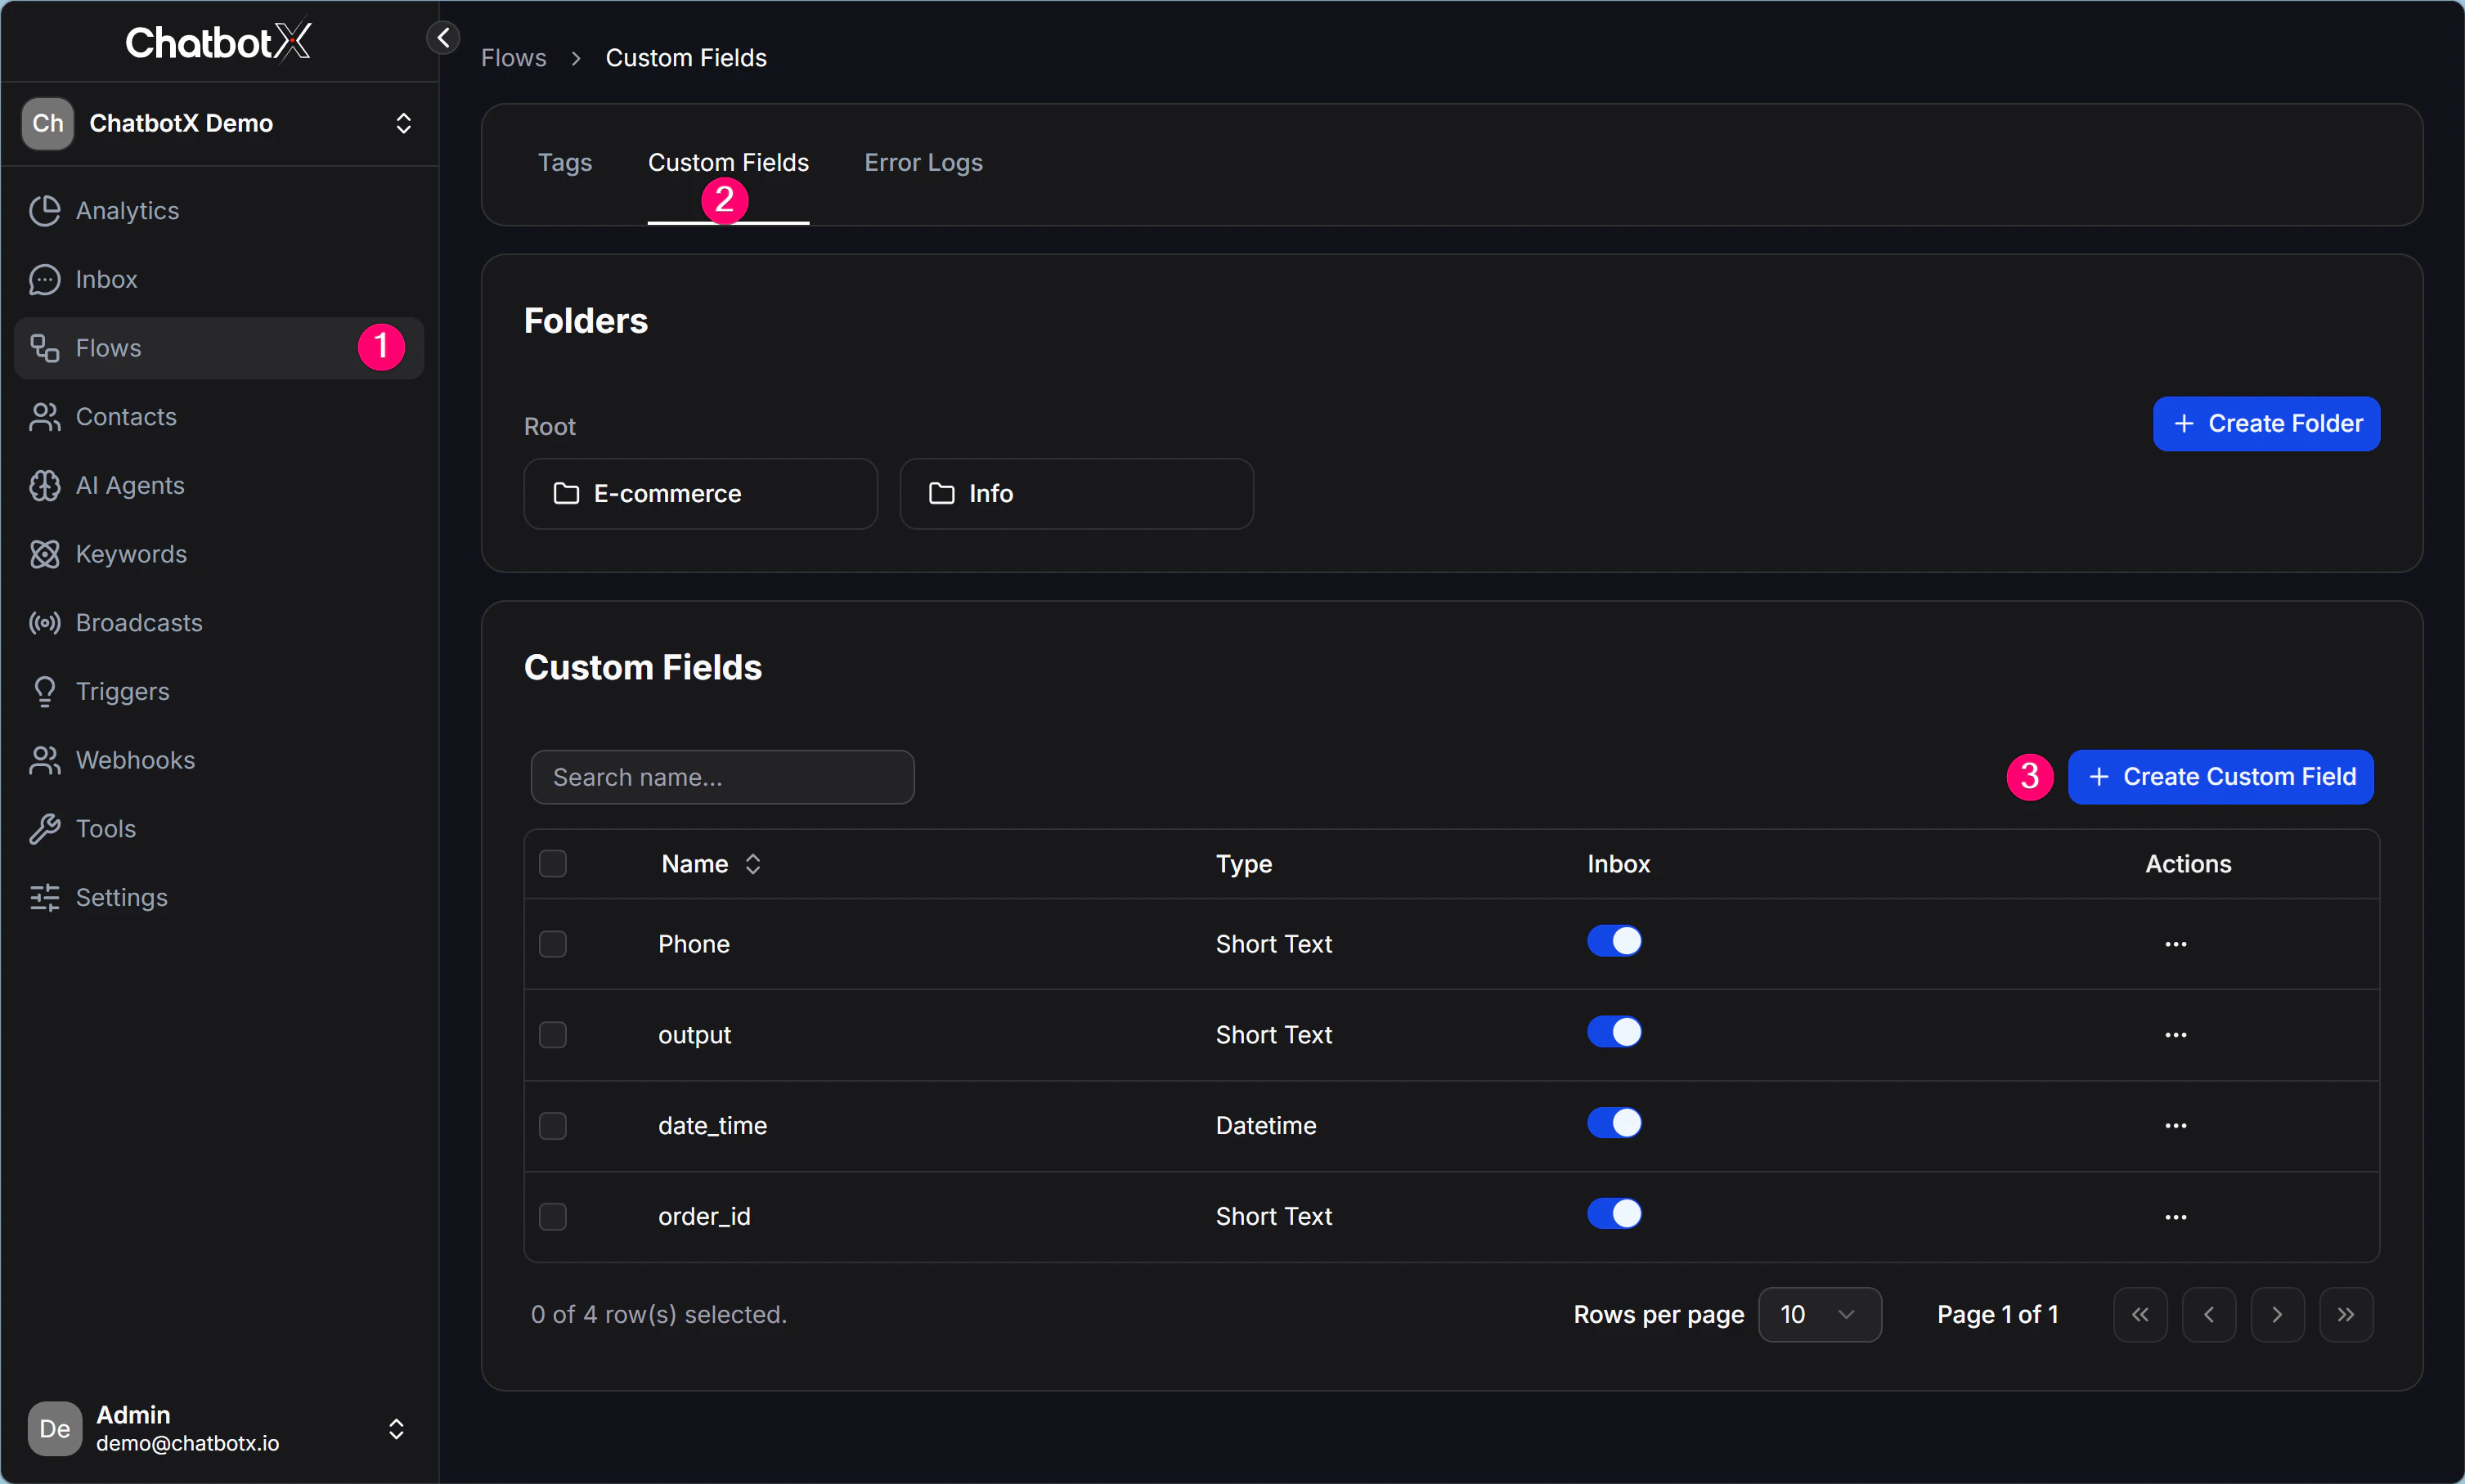
- Enter the Name and choose the Type from the dropdown.
Location 2: Create directly in Inbox
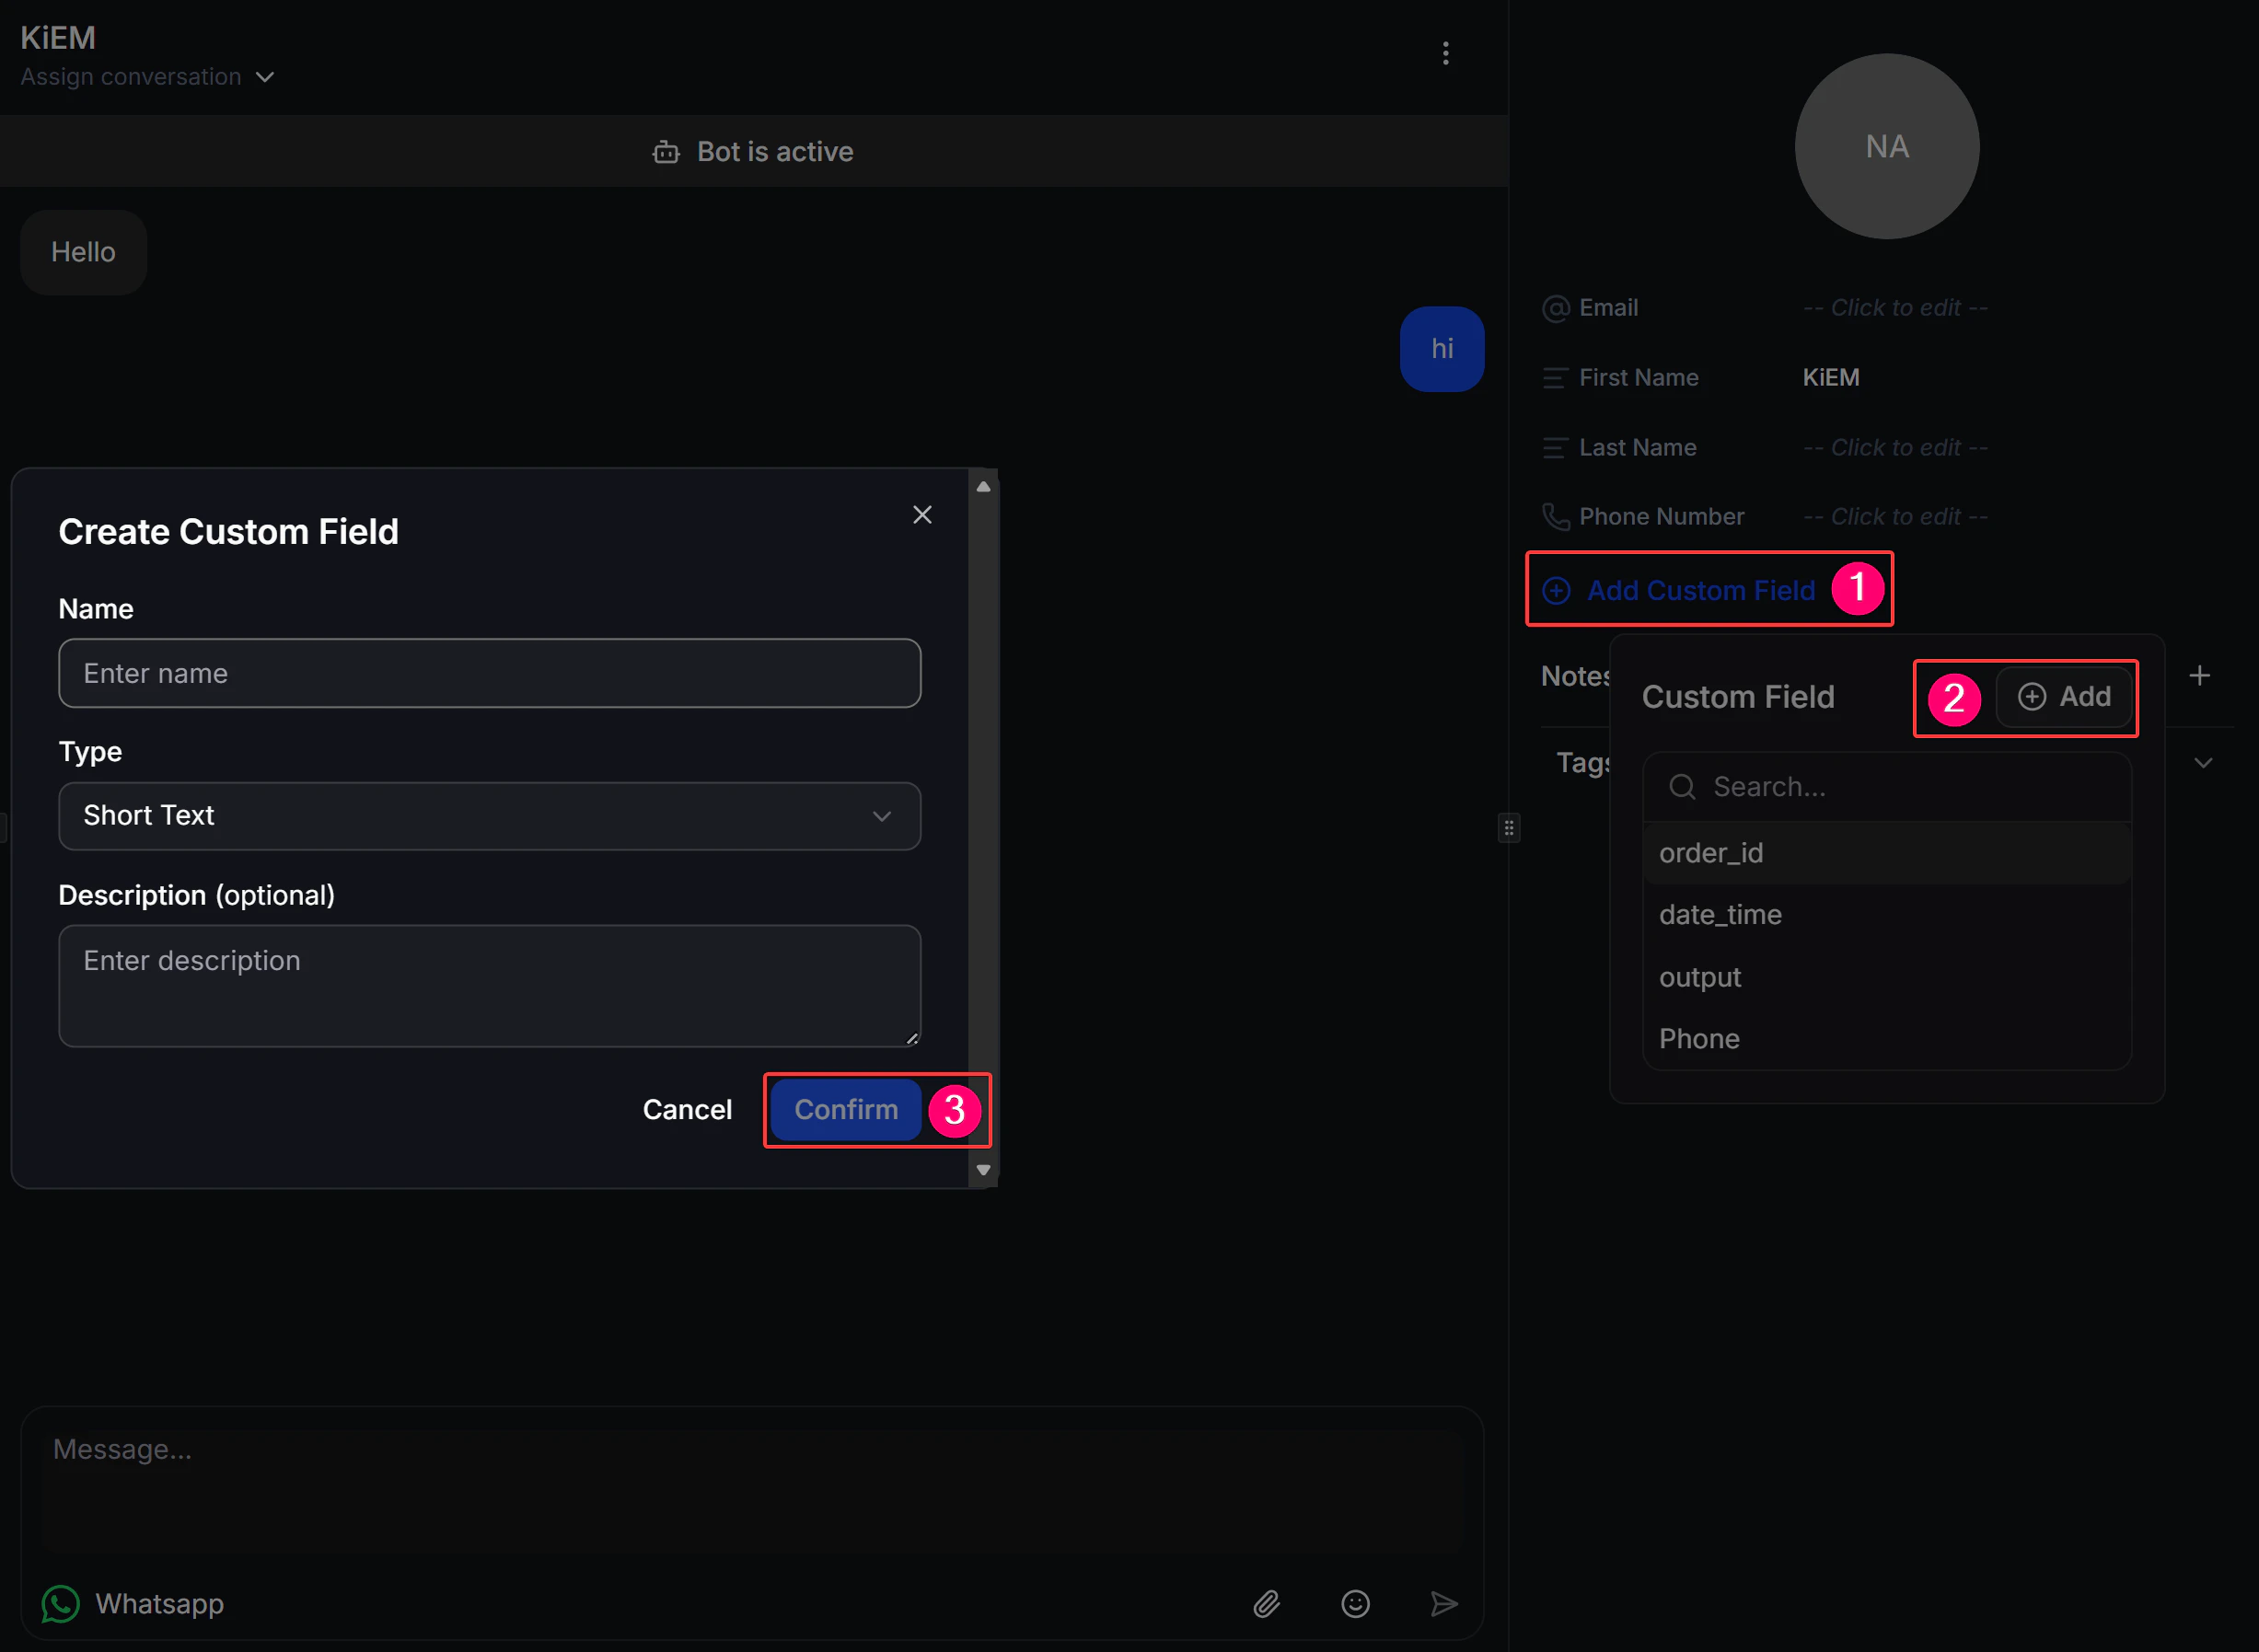
When an agent is chatting with a customer in Inbox and needs to save a new piece of information that does not already have a Custom Field, you can create it immediately without leaving the conversation:- In Inbox, look at the customer profile column on the right.
- Find the Custom Field section and click (+) Add to open the list of existing fields.
- If the field you need does not exist yet, click (+) Add Custom Field to create a new one and enter its value right away.
3. How to collect and store data in a Custom Field
Data can be updated manually by agents in Inbox or collected automatically through Flow Builder. Inside a Flow, there are 2 main ways to store data automatically:- Through a question (Get User Data / User Input): When you use a content block to ask the user for information, such as a phone number or a review, you can configure Save response to a custom field so the system stores the answer in the selected Custom Field automatically.
- Through an Action (Set Custom Field): You can assign a value to a Custom Field automatically when the customer passes a certain step in the Flow, such as clicking a specific Button. Action > Set Custom Field lets you update a value like
Viewed_Pricing = Truewithout requiring the customer to type anything.