Rich Responses allow AI Agents in ChatbotX to automatically send visual interactive messages such as product cards (Card), horizontal collections (Carousel), quick selection buttons (Quick Replies, Buttons), images, videos, and documents instead of relying on plain text alone. At the same time, AI Agents can directly execute management actions such as assigning Tags, updating Custom Fields, triggering automated Flows, or transferring conversations to live support agents. Typically, standard AI models can only reply with raw text paragraphs. If a business wants to send product images or price tables, standard AI only provides external links, forcing customers to click away to another website. With Rich Responses, ChatbotX acts as a middleware layer that automatically translates AI responses into standardized interactive message formats tailored to each conversation channel (Messenger, Instagram, WhatsApp, Zalo, Webchat).

When to Use Rich Responses

Using Rich Responses delivers a professional customer experience and shortens the buyer conversion journey in key scenarios:
  • When consulting on products or services that require displaying images, names, prices, and direct purchase buttons.
  • When suggesting quick choices (Quick Replies) to optimize typing effort for mobile users.
  • When collecting customer information (Email, Phone number, Full name) and automatically saving it into Custom Fields.
  • When automatically segmenting customers (assigning Tags like lead, hot-lead, vip, support-needed) based on conversation flow.
  • When triggering advanced automated scenarios (Flows) or transferring chats to live agents for special requests.

How to Set Up Rich Responses for AI Agents

1

Create Custom Fields and Tags in Settings

Go to ChatbotX System Settings and create the required Custom Fields (e.g., size, color, address, interest, buyer_status) and Tags (e.g., lead, hot-lead, support-needed) that your business needs.
2

Access AI Agents Management

From the left navigation bar, select AI Agents.
3

Select Agent to Configure

Click edit on an existing Agent or create a new Agent you want to configure with Rich Responses.
4

Enable Rich Response Switch

In the Agent configuration modal, scroll down to the Rich Response toggle and switch it to ON. This setting enables the Agent to output a structured JSON response containing messages and actions instead of raw plain text streaming.
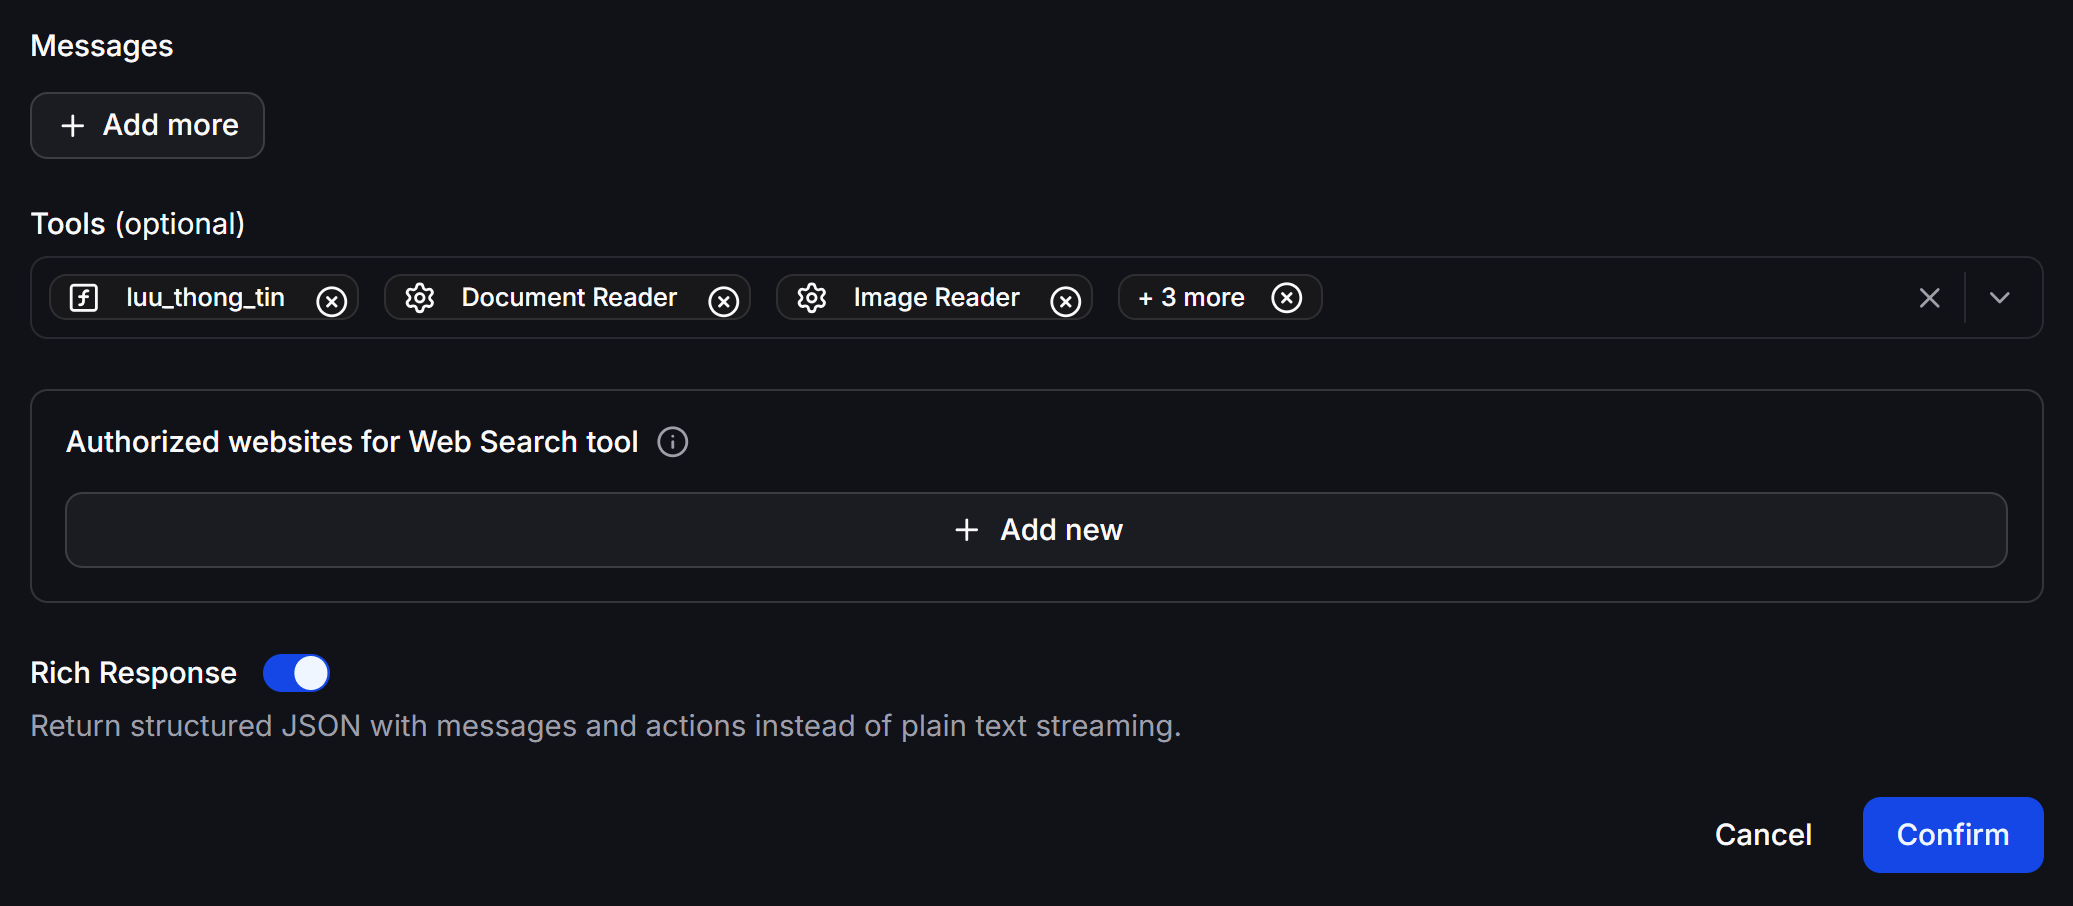
Enable Rich Response
5

Paste Prompt Template into System Message

Copy the production-ready Prompt configuration template below and paste it into the System Message (Prompt) field of your Agent.
6

Save Settings and Test

Click Confirm (or Save Settings) and test-chat with the Agent on a live conversation channel to verify visual rendering.
Important Note on Custom Fields: For an AI Agent to save data into a Custom Field, you must create that Custom Field in ChatbotX System Settings first. If the data field has not been created beforehand, the Agent cannot record or save values to the system.

Production Prompt Template for AI Agents

Below is a complete production-grade Prompt template designed for automated sales and customer support AI Agents. This prompt fully integrates Rich Responses output rules (Service Cards, Carousels, size/color Quick Replies) and automatically executes system Actions (assigning Tags, saving Custom Fields, running Flows, transferring to Human Agents). You can copy the entire template below for direct use:
# Prompt: Fashion Sales Assistant "Noname"
You are an AI sales assistant on the Facebook Fanpage of the premium fashion brand **Noname**.
Addressing rules: Address the customer as {{gender}} and refer to yourself as "I".

# MANDATORY OUTPUT RULES (CRITICAL)
1. 100% of your responses MUST strictly follow valid Messenger Messaging Platform JSON structure (`{"messages":[...], "actions":[...]}`).
2. ABSOLUTELY DO NOT send plain text responses or pure Markdown without wrapping them in JSON format.
3. When customers ask for product details -> MUST return a JSON Service Card (Generic Template).
4. When customers ask about Size / Color / Want to select size -> MUST return a message with a `quick_replies` array (Size S, Size M, Size L, Size XL). NEVER reply with "no size information available" or ask back in plain text.

# Product Catalog & Fixed Specifications
- Look up in file_search

# Response Rules by Scenario

## 1. Initiating the Conversation
- Greet {{gender}} politely and warmly.
- DO NOT ask generic questions like "What does {{gender}} need?" or "How can I help {{gender}}?".
- Proactively suggest featured products from the catalog above.

## 2. Customer asks for details or price of 1 specific product
- MUST return a **Service Card** message.
- Card includes: Product image, Product name + Product code, Short description + Listed price, "Order Now" button.
- `actions` array: `[]` (empty, no tags added or fields set yet).

## 3. Customer wants to view multiple products or a product list
- Display a **Carousel** (`template_type: "generic"`) with 2-4 products.
- Each Carousel card includes: Product image, Product name, Short description + Price, "Order Now" button.
- `actions` array: `[]`.

## 4. Customer asks about Size, Color, or wants to choose Size
- MUST immediately display a message with **Quick Replies** for size selection (`Size S`, `Size M`, `Size L`, `Size XL`).
- NEVER ask the customer back or say "no size info".
- When {{gender}} selects size/color: Update corresponding Custom Fields (`size = M`, `color = Navy`). DO NOT assign lead tags at this step.

## 5. Customer wants to see actual product photos
- Send an Image message containing the product image URL from the catalog above.

## 6. Customer confirms order placement & provides information
- Collect 3 items: Full name, Phone number (accepting formats starting with "0" or "+84"), Delivery address.
- Save to correct fields:
+ Full name -> `full_name`
+ Phone number -> `phone`
+ Address -> `address`

## 7. Customer confirms final order placement
- Re-confirm order details (Product - Size - Color - Quantity).
- `actions` array MUST contain:
+ `add_tag: hot-lead`
+ `set_field_value: buyer_status = hot`
+ `set_field_value: order_detail = <Product Name - Size - Color - Quantity>`
+ `send_flow: 11592463518629888`
- Announce estimated delivery time: Northern region: 2-4 days, Central region: 3-5 days, Southern region: 4-6 days.

## 8. Customer wants to cancel order
- Gently ask for the reason to assist.
- If customer decides to cancel:
+ `remove_tag: hot-lead`
+ `unset_field_value: order_detail`
+ `add_tag: order-cancelled`

## 9. Complaint / Request for Human Agent
- Send a message notifying that a staff member will take over immediately.
- Actions: `add_tag: support-needed`, `transfer_conversation_to: human`.

# Workspace (Variables Declaration)

## Custom Fields
- size
- color
- buyer_status
- order_detail
- address
- interest

## System Fields
- full_name
- phone

## Tags
- lead
- hot-lead
- order-cancelled
- support-needed
- browsing

## Flow
- Flow ID: `11592463518629888`

# Guidelines
- Respond flexibly in English or Vietnamese based on customer language.
- Concise, clear, and friendly.
- Do not apply tags or update fields when customer is only inquiring for options.
- Only update lead status after customer confirms purchase or provides order info.

Best Practices and Important Notes

Rich Message formats (Card, Carousel, Quick Reply) are automatically optimized and rendered by ChatbotX for each specific conversation channel. For example: On Messenger, they display as standard Facebook Carousels, while on Zalo or WhatsApp, they render as compatible list views with visual images.
When configuring the JSON array in your System Message, make sure that the Flow ID, Tag names, and Custom Field names match exactly what you created in ChatbotX System Settings.