

- Enhanced Security: Only authorized users can edit critical message flows, reducing the risk of accidental configuration errors.
- Data Protection: Restrict standard agents from viewing phone numbers, emails, or exporting customer data.
- Focused Workloads: Assign agents so they only view and interact with the contacts explicitly allocated to them.
- Operational Transparency: Track the complete activity history of workspace administrators via the Audit Logs feature.
Inviting Members & Configuring Permissions
Follow the steps below to invite a new admin and set up their permissions:1
Access the Admins Dashboard
Log in to your admin portal and select Settings from the left navigation menu. Then, click the Admins tab on the top toolbar.Here, you will find a list of current administrators along with their active permissions. To add a new member, click the + Invite Member button.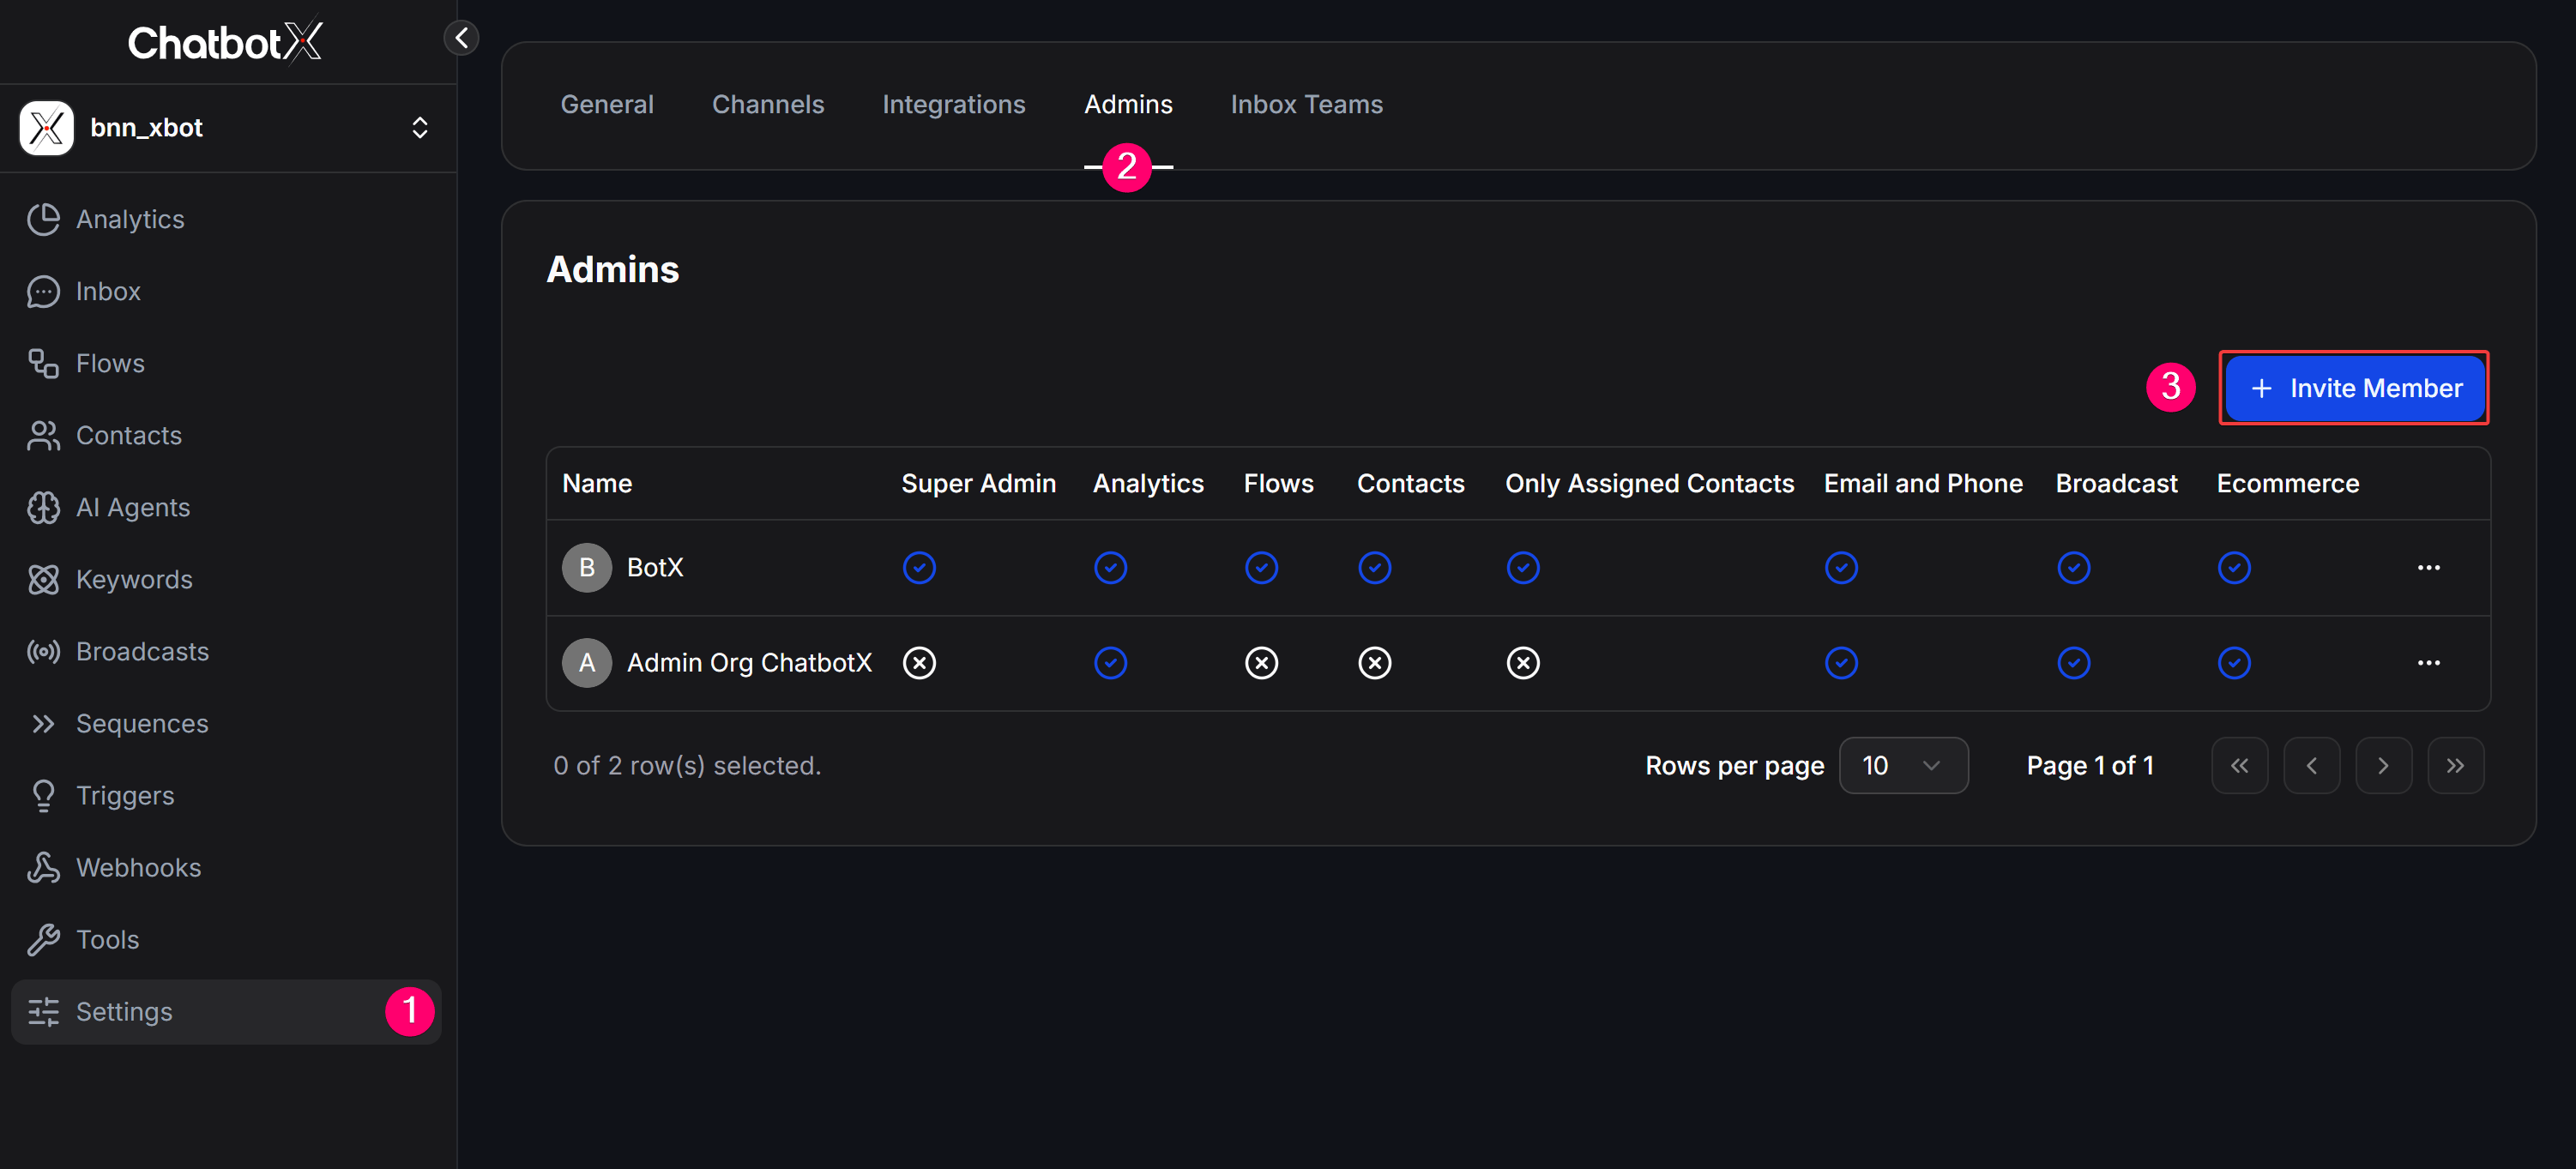
2
Configure Member Permissions
When the Invite Member popup appears, customize the permissions for the new user based on their role:
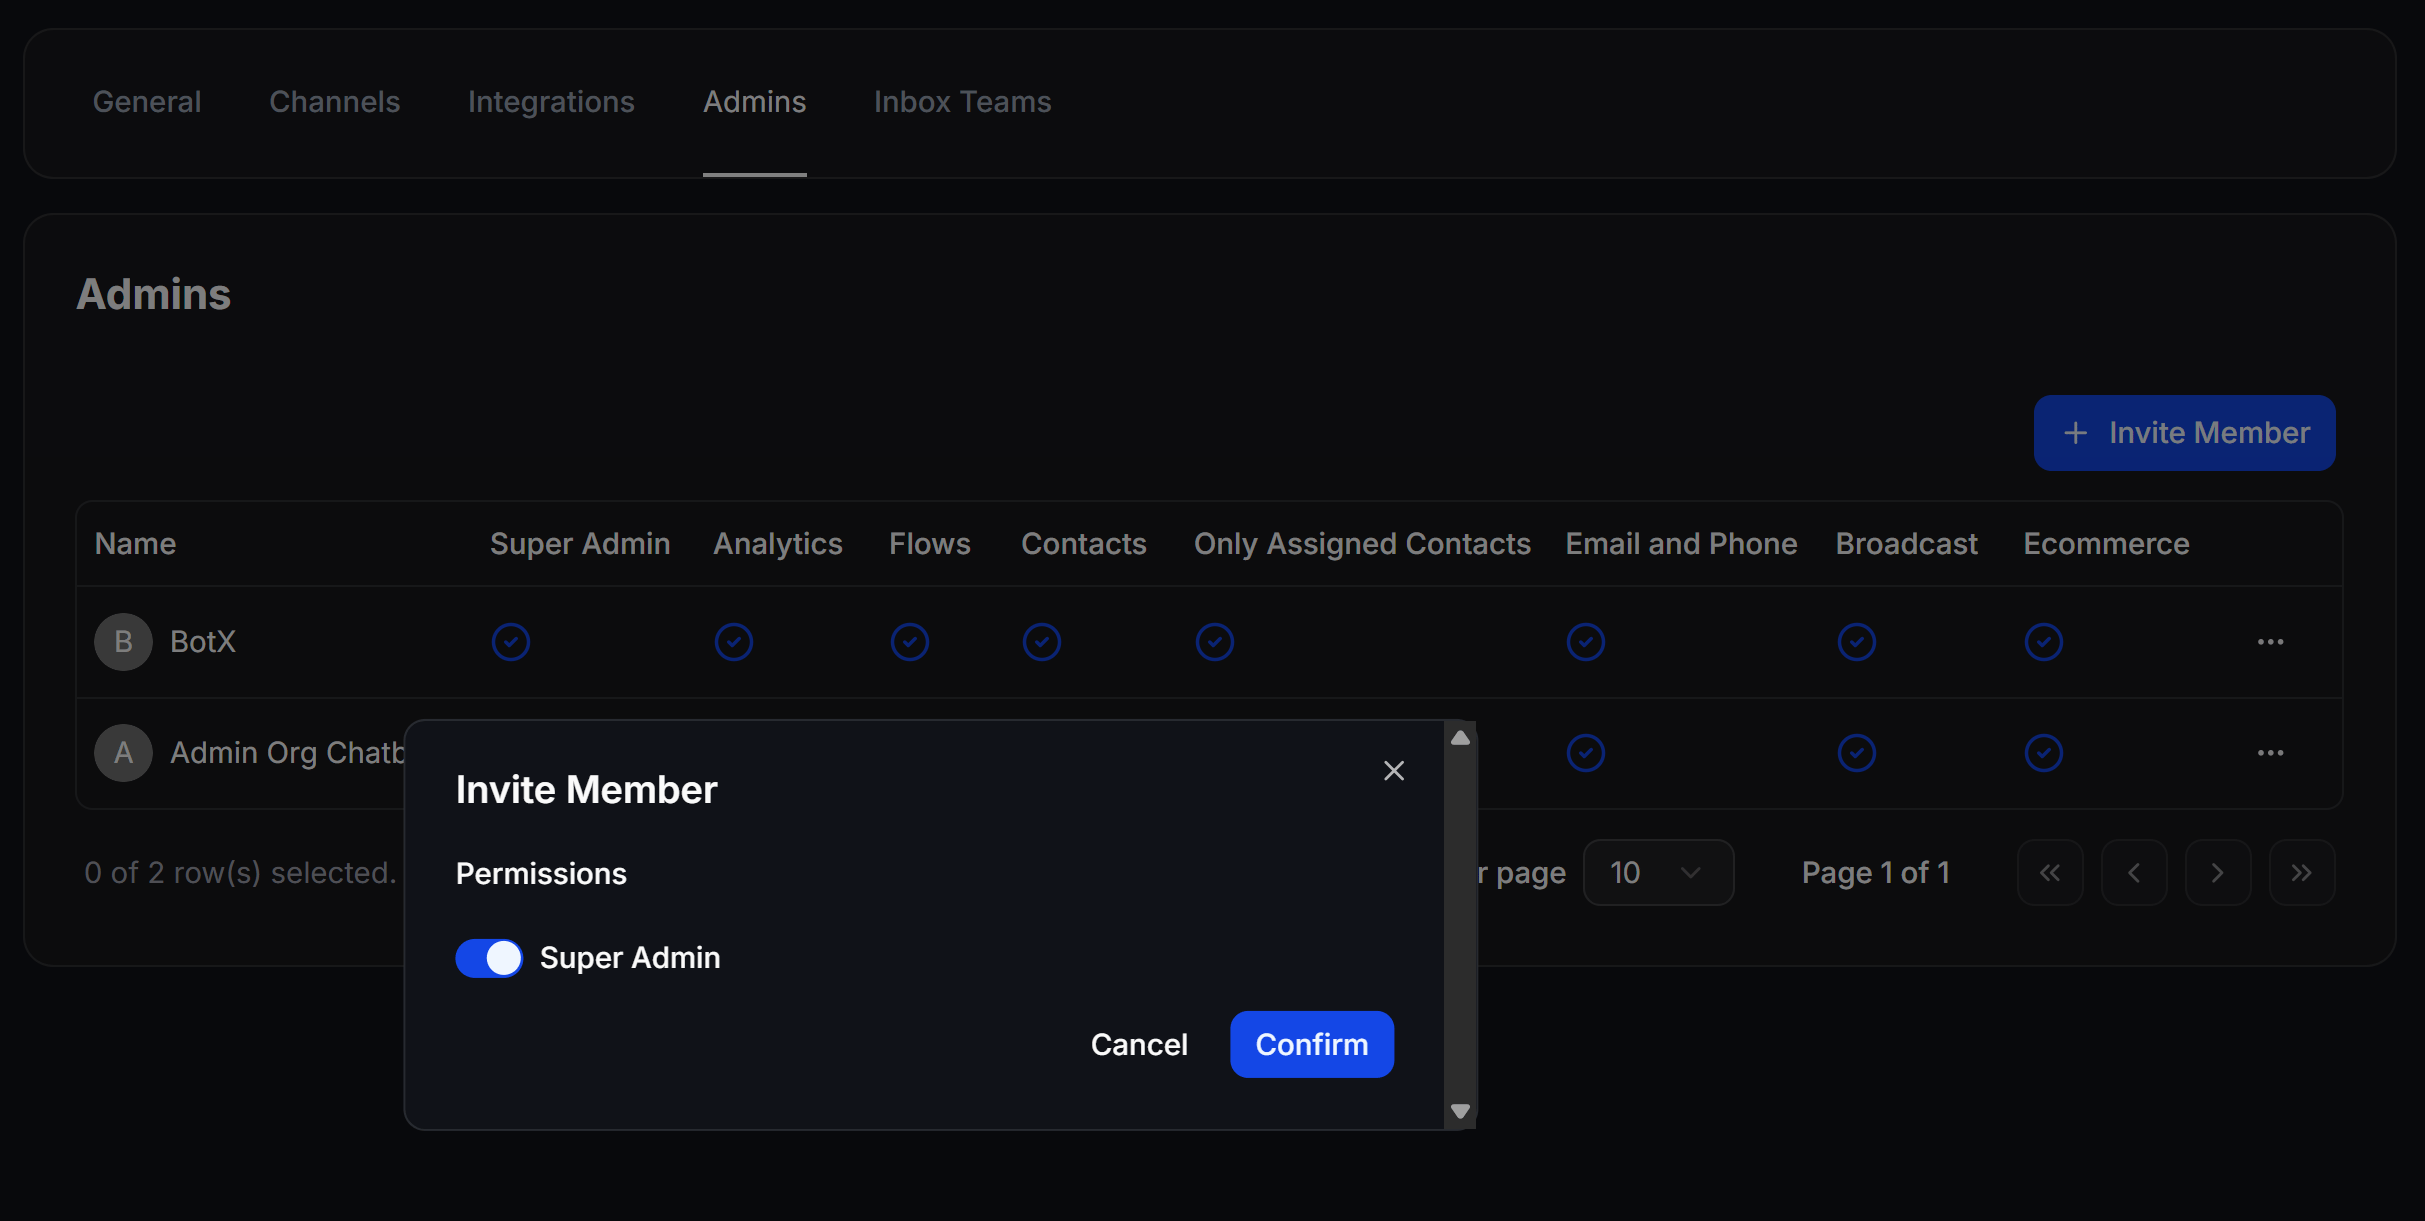
- Option 1: Grant Super Admin Rights
- Toggle the Super Admin switch to active (blue).
- The invited member will have full administrative access to the chatbot, matching the owner’s capabilities (including inviting or removing other admins). The system will automatically hide the sub-permission options below.
- Option 2: Grant Custom Permissions
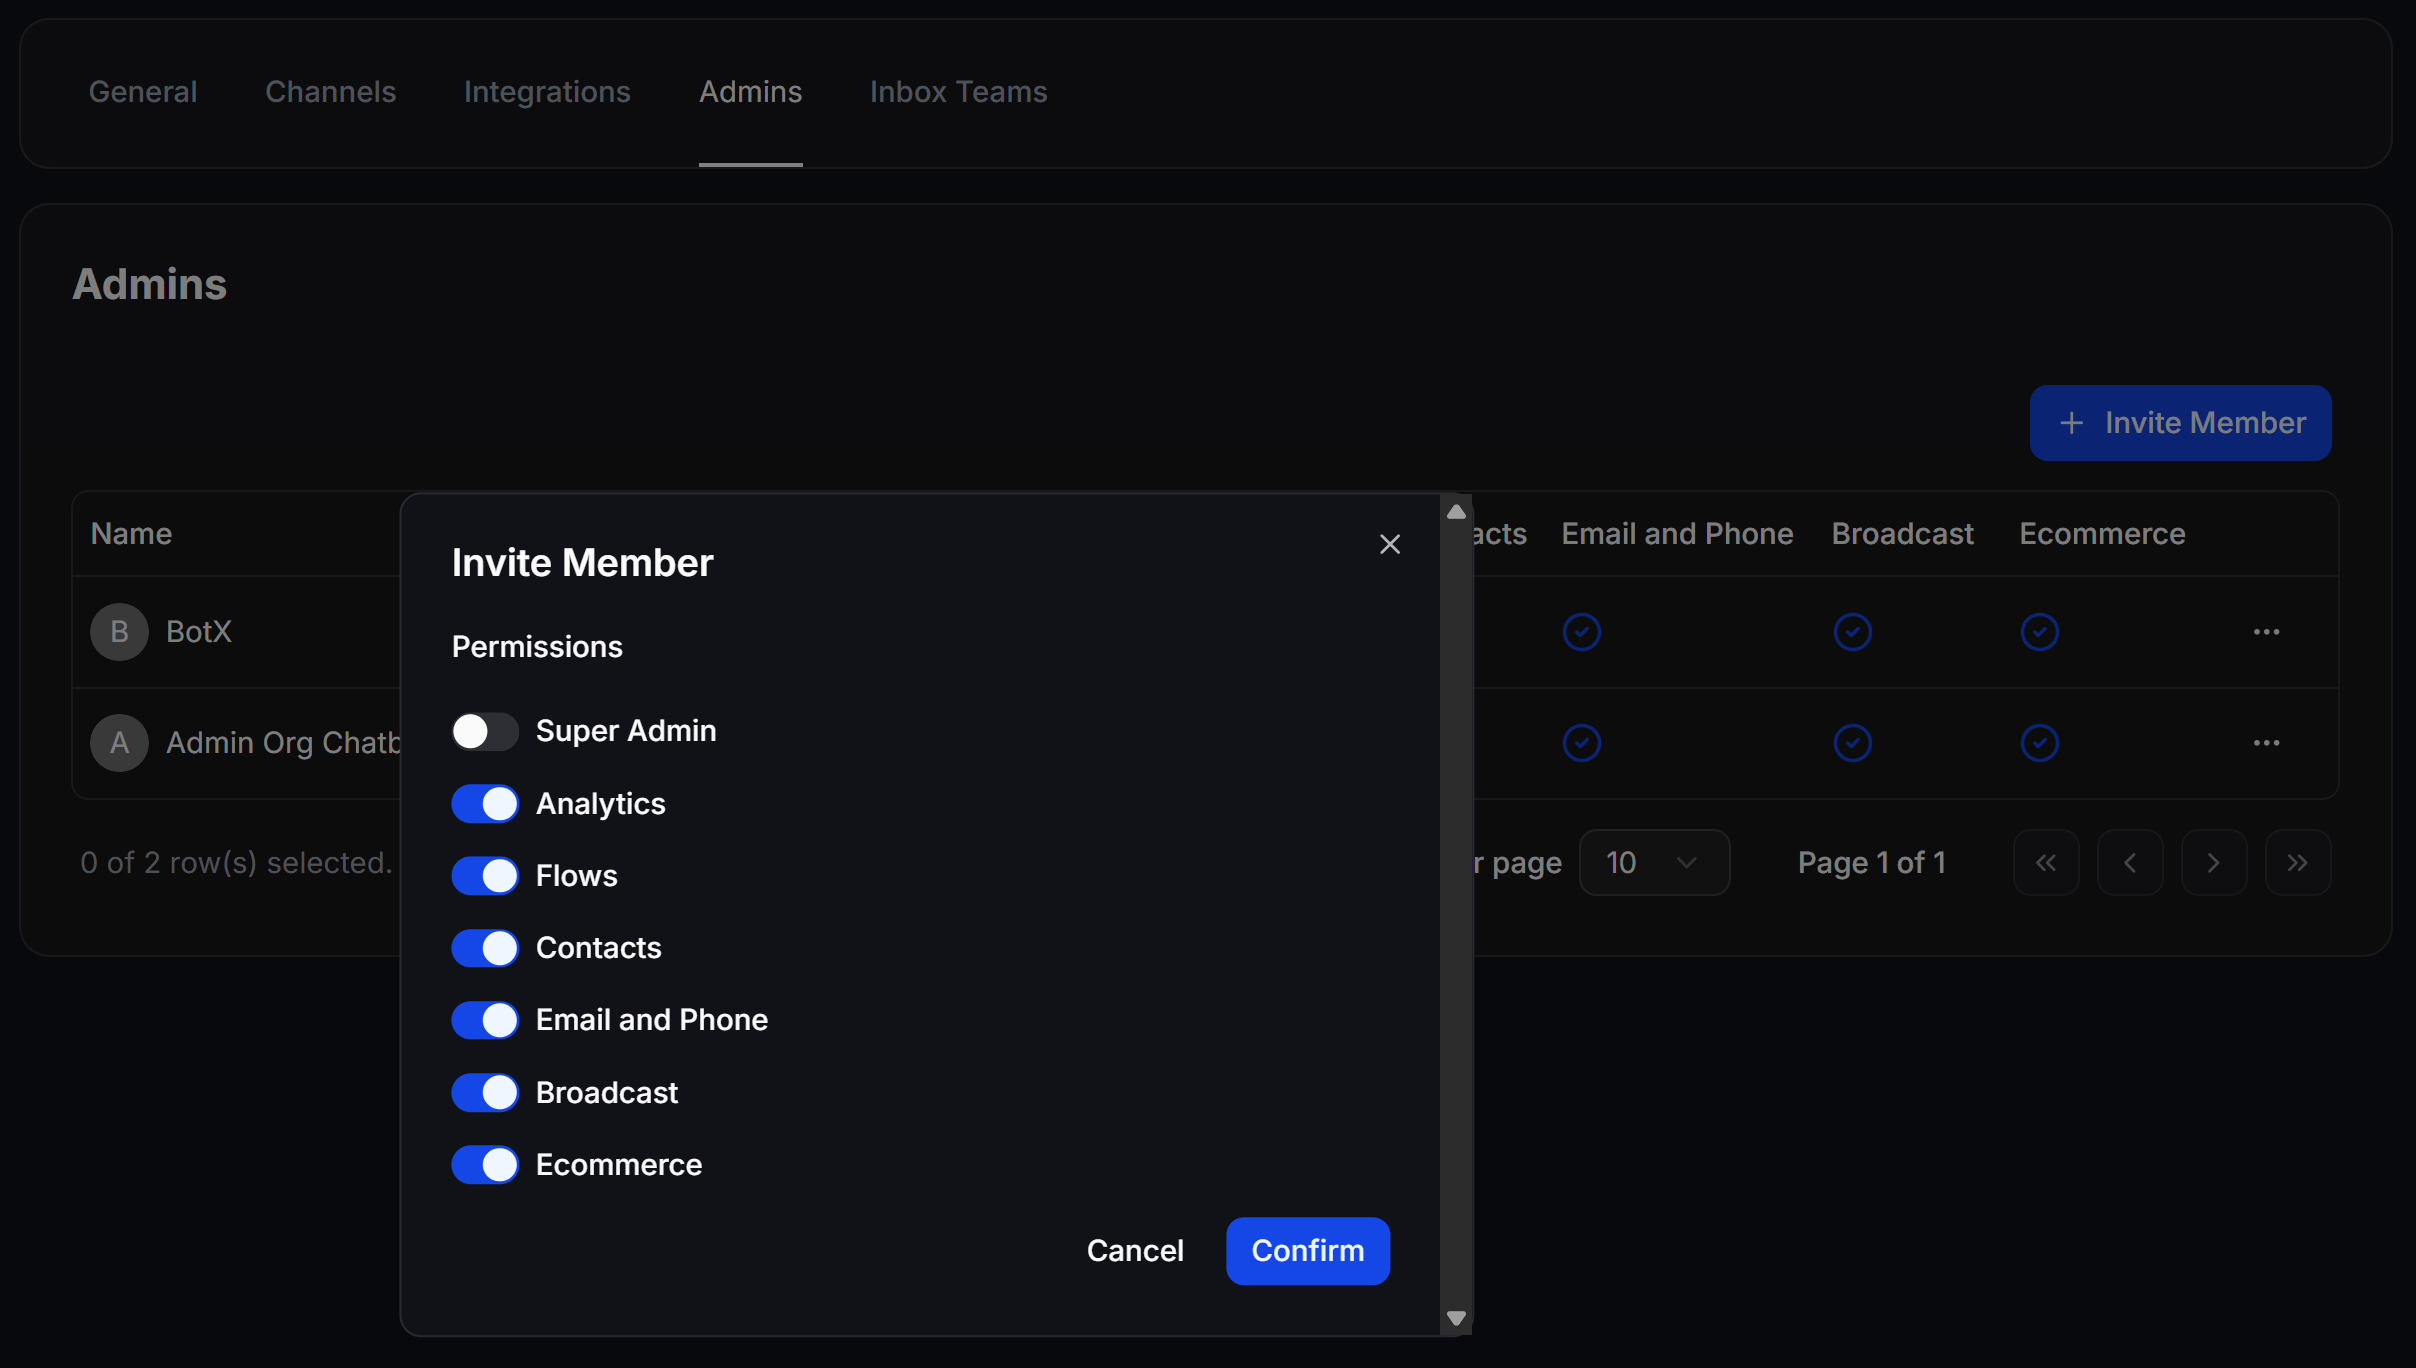
- Toggle the Super Admin switch off (grey) to display individual permission settings. You can manually enable or disable specific rights:
- Analytics: Allows access to view performance charts and statistics for the chatbot.
- Flows: Allows creating, editing, and managing message scripts inside the Flow Builder.
- Contacts: Allows viewing and managing the customer database.
- Only Assigned Contacts: Restricts the admin to only viewing, searching, and chatting with contacts that have been explicitly assigned to them.
- Email and Phone: Allows viewing customer phone numbers and email addresses. If disabled, sensitive contact details will be masked for security.
- Broadcast: Allows creating and sending mass messaging campaigns to customers.
- Ecommerce: Allows managing products, orders, and shop configurations.
- Toggle the Super Admin switch off (grey) to display individual permission settings. You can manually enable or disable specific rights:
3
Copy the Invitation Link
After clicking Confirm, the system automatically generates a unique invitation link formatted as 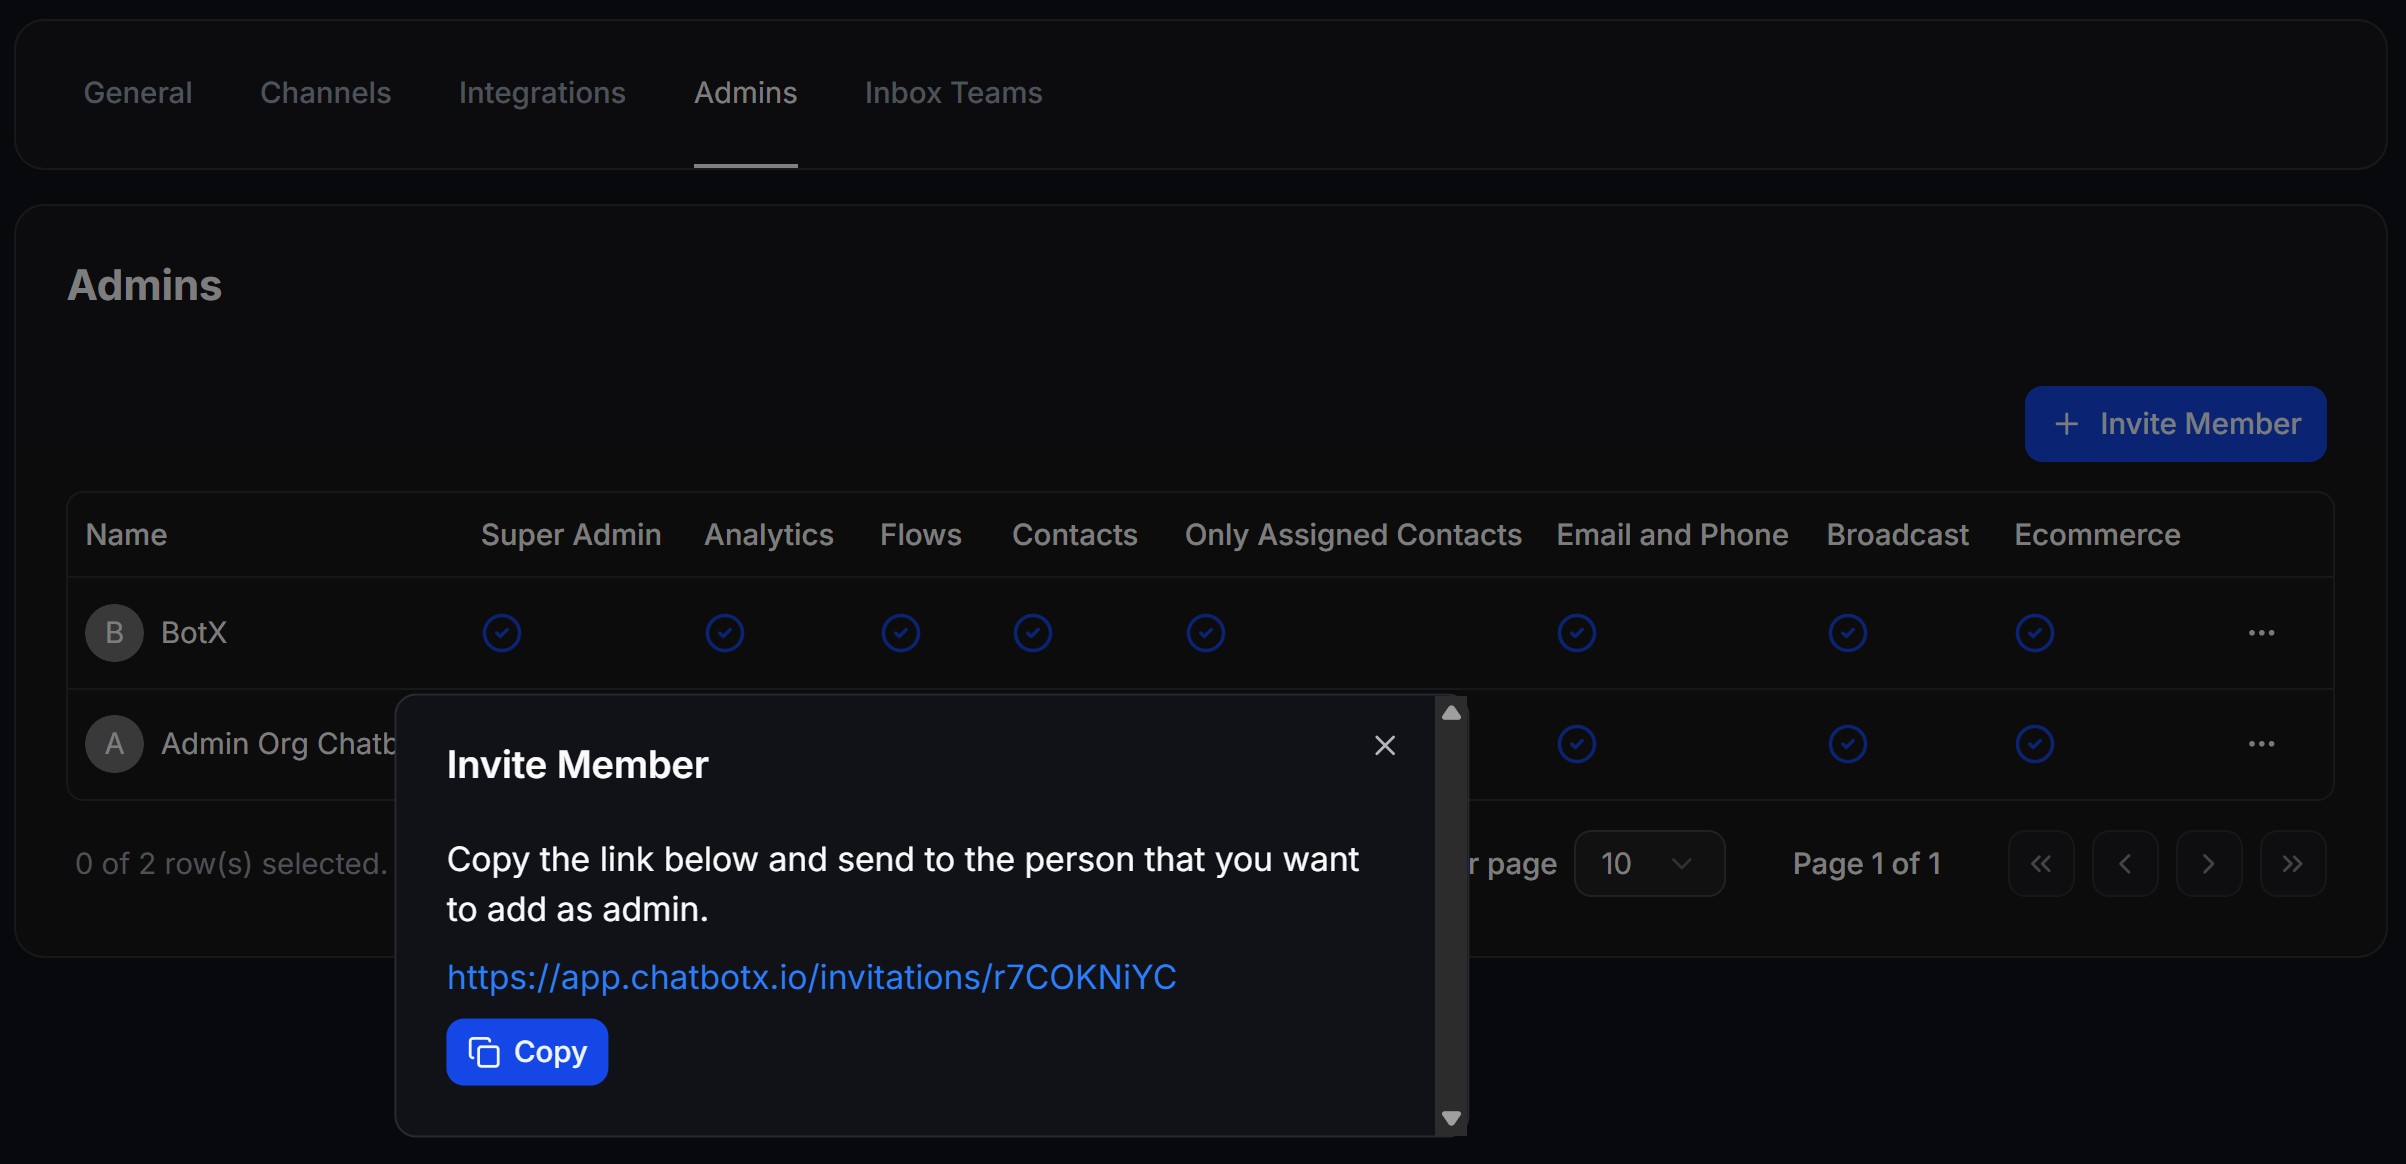
https://app.chatbotx.io/invitations/....Click the Copy button to copy this link and send it directly to the invitee via your preferred communication channel (such as Messenger, Zalo, Email, or Telegram).4
Accepting the Invitation (Invitee Action)
When the recipient clicks your invitation link, a welcome page will display showing the project name and the inviter’s details.They simply need to click the Join the team button to confirm. Once clicked, their account will be linked, granting them access to the ChatbotX workspace with the permissions you configured.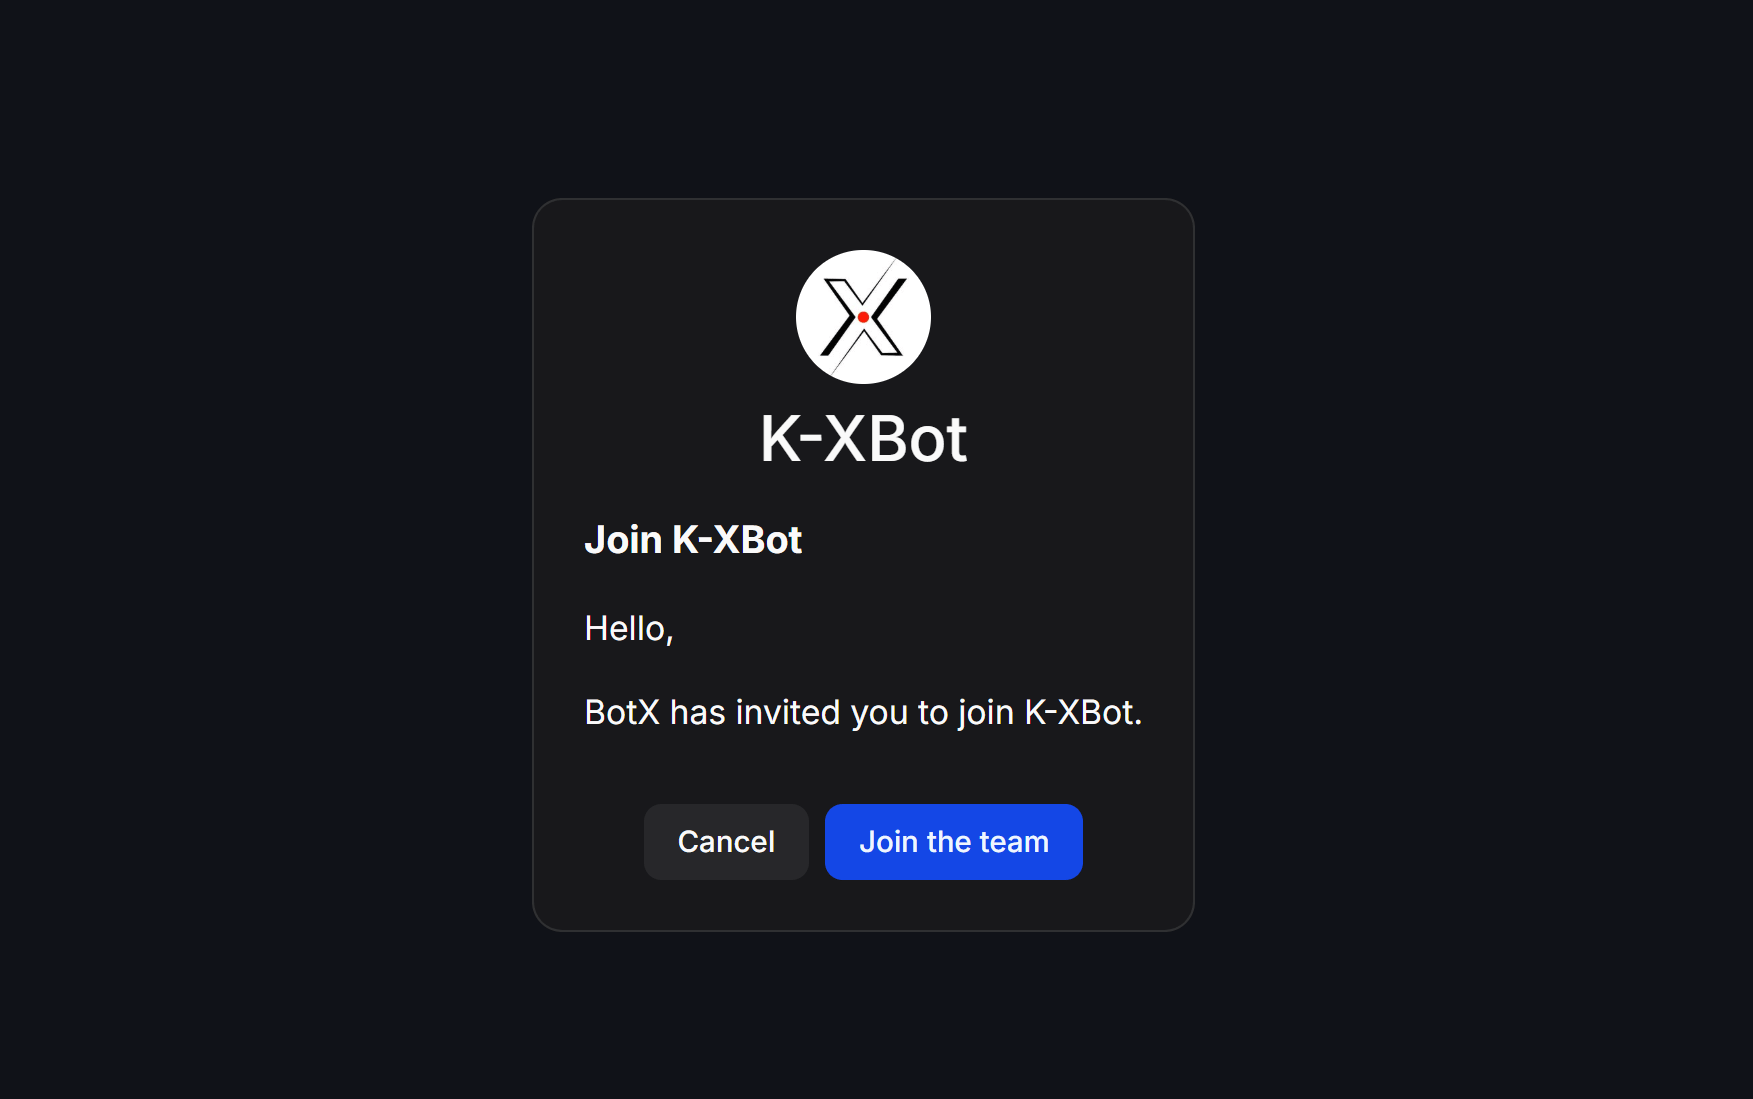
Managing & Revoking Admin Permissions
Once a member successfully joins, they will appear in the Admins list. You can manage or revoke their access at any time:- Quick Permissions Check: Blue checkmarks in the table allow you to quickly verify which permissions are active for each member.
- Edit Permissions: Click the three dots
...in the Actions column next to the admin’s name > select Edit to modify or revoke their permissions. - Remove Member: Click the three dots
...> select Delete to instantly remove the admin from your chatbot system (ideal for staff offboarding).
Tracking Activity with Audit Logs
Audit Logs is an advanced security feature that records all administrative actions performed by workspace members as well as automated background system tasks. This enables workspace owners to audit operations, track configuration changes, and maintain security compliance.How to Access Audit Logs
From the Settings > Admins table, scroll to the bottom of the member list and click the Admin Activity Logs button.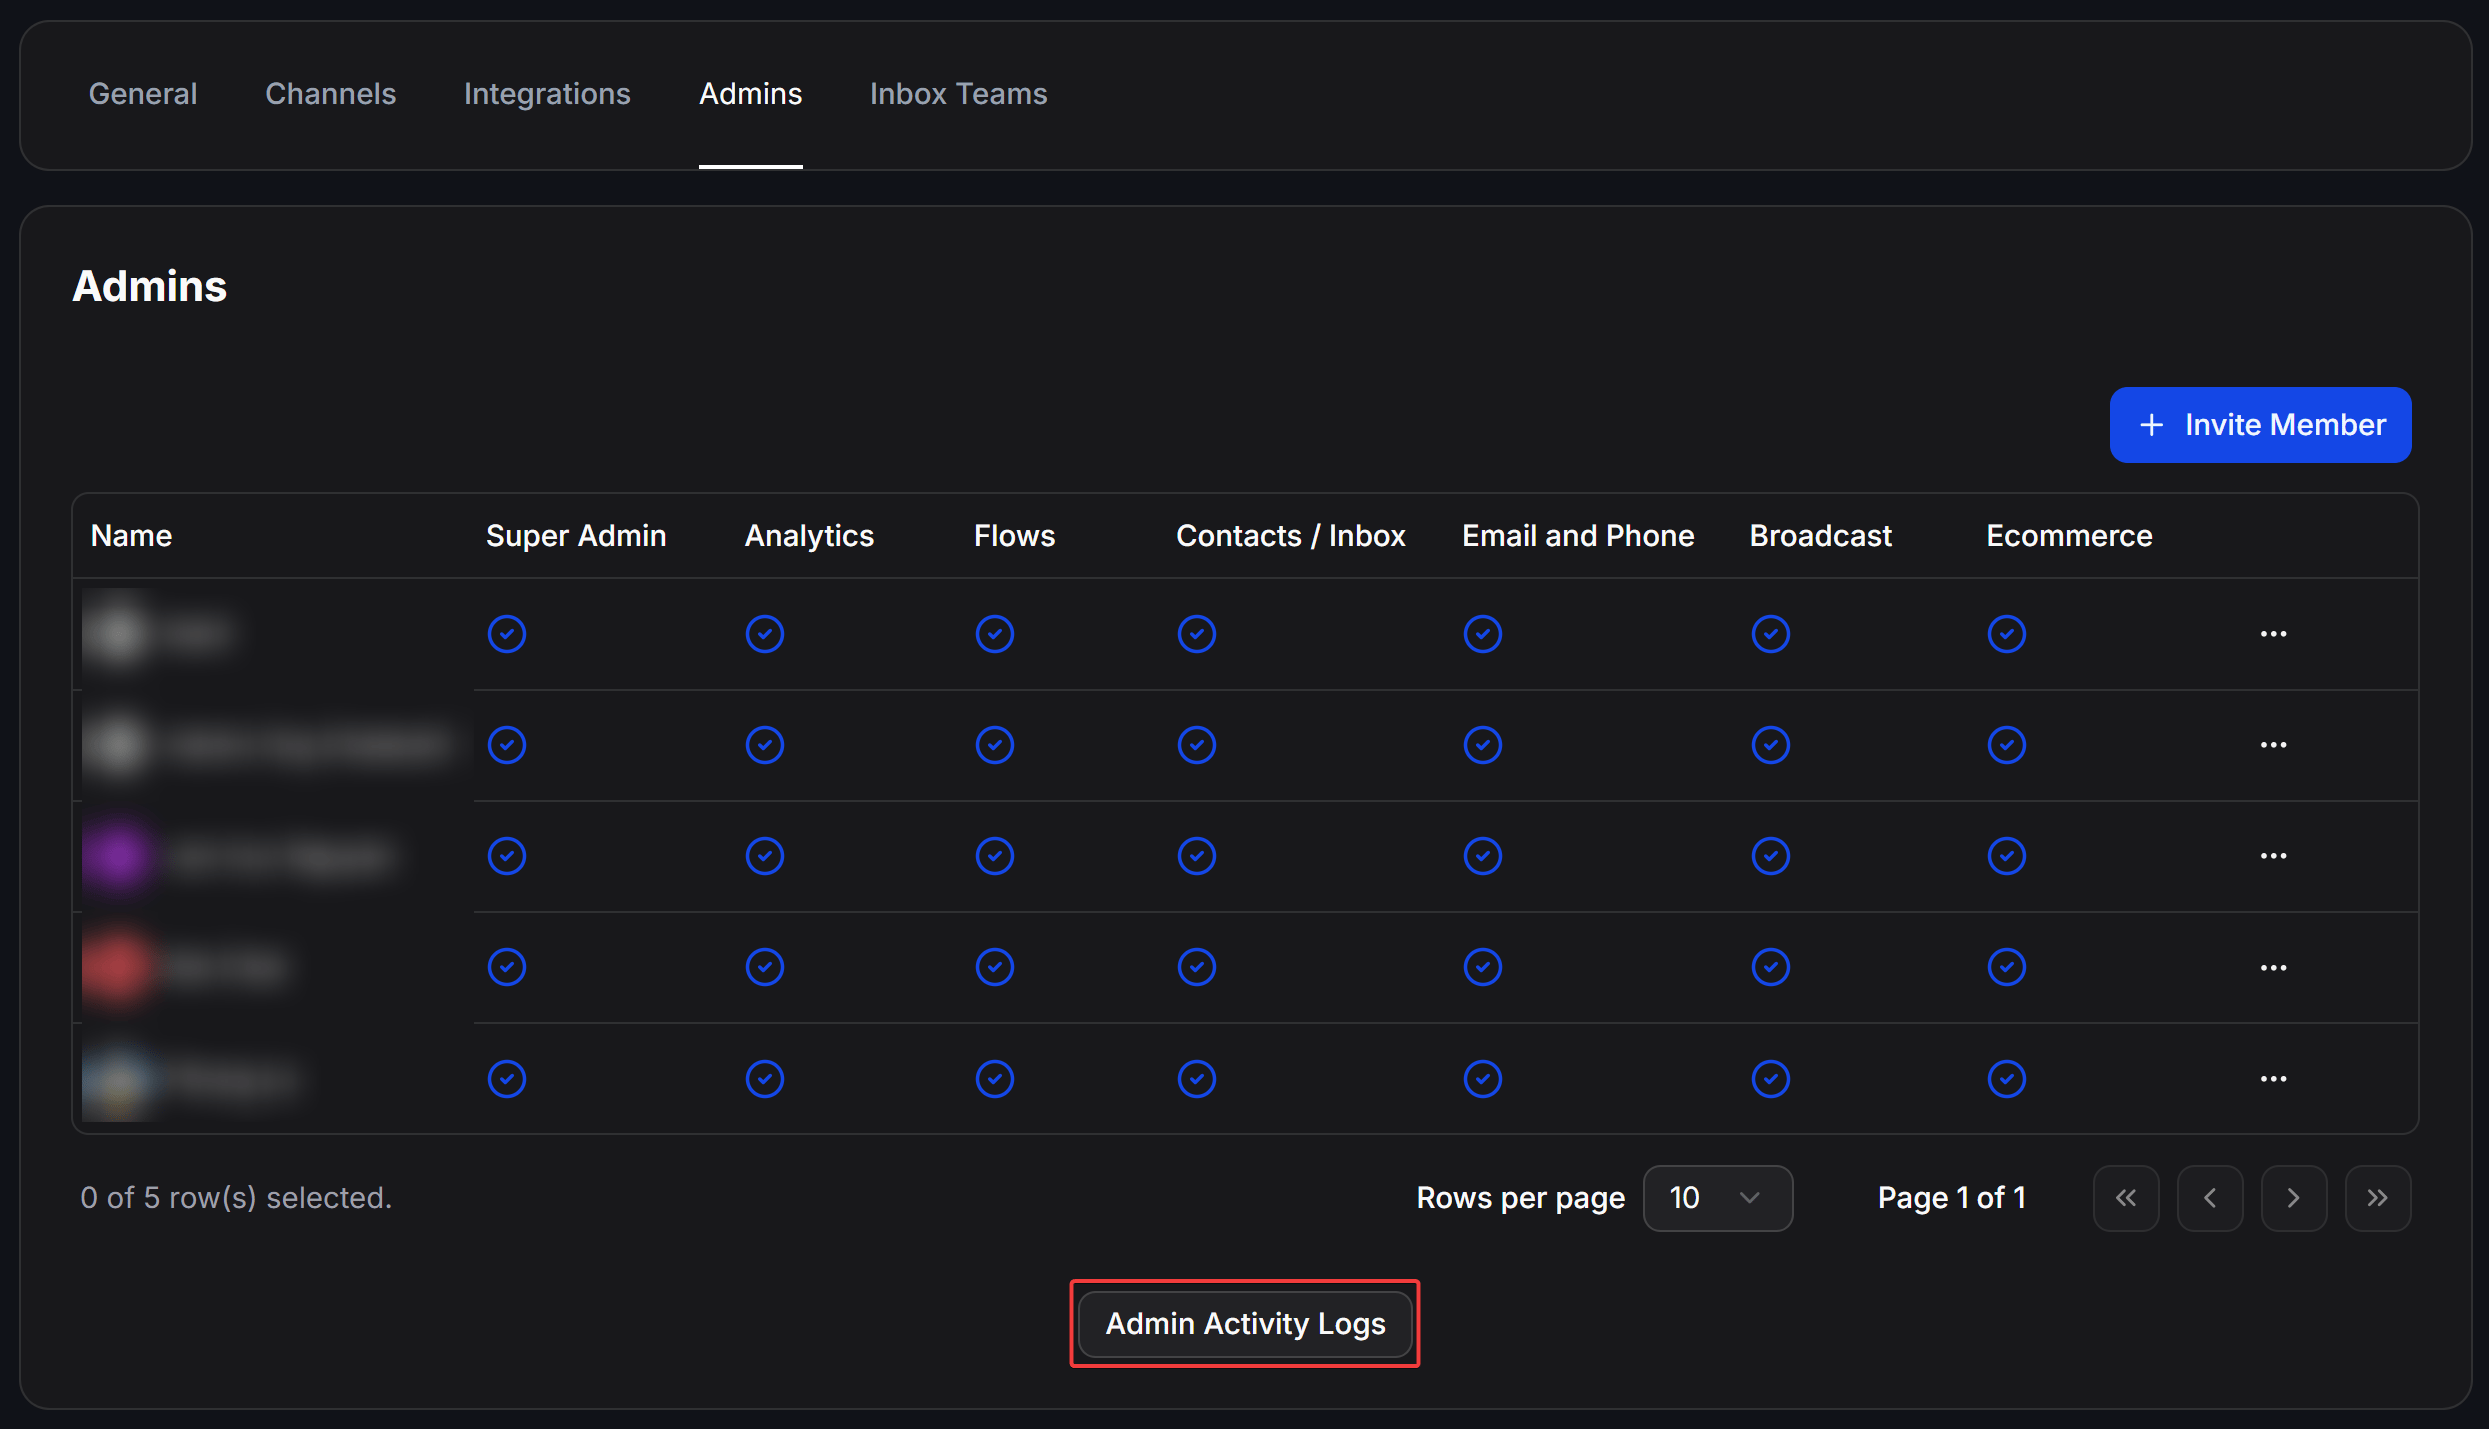
Filtering and Searching Logs
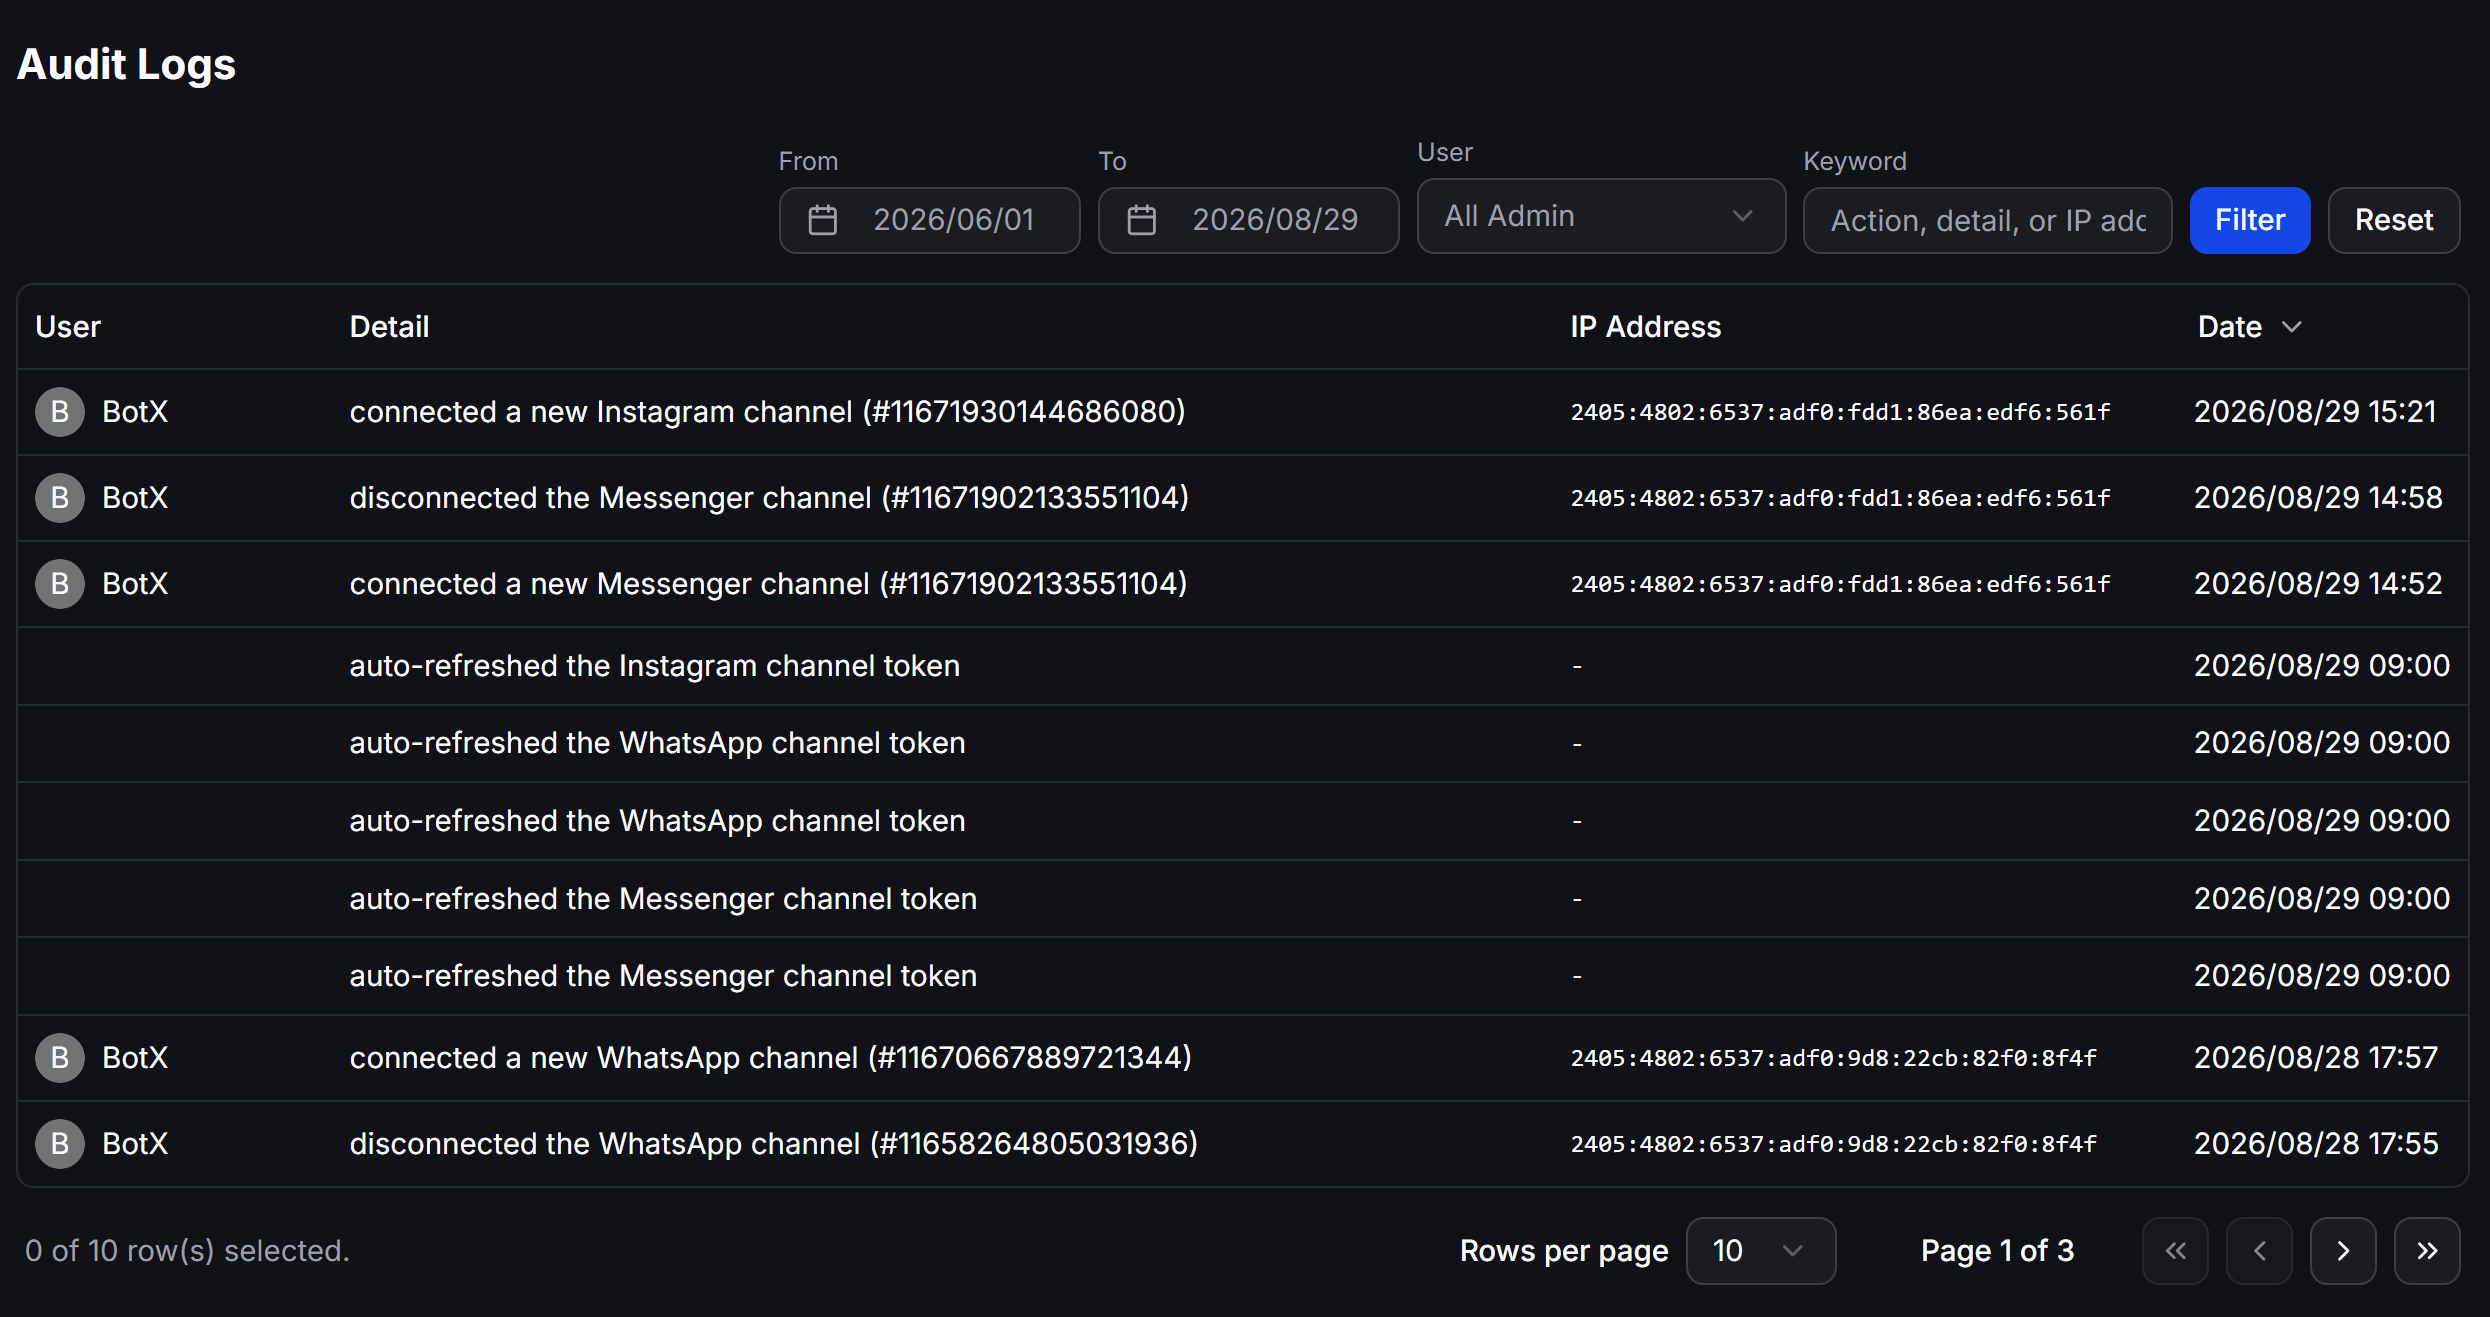
The Audit Logs dashboard provides flexible filtering tools to search historical operations:- Date Range (From / To): Set start and end dates to limit the search scope.
- User: Filter by a specific administrator or select
All Adminto view all user activities. - Keyword: Search by action name, detail description, or IP address.
- Filter / Reset Buttons: Click Filter to apply search parameters or Reset to return to the default view.
Recorded Event Details
The Audit Logs table records the following information:- User: The name of the administrator who performed the action (blank for automated system tasks).
- Detail: A specific description of the action, such as:
- Connecting or disconnecting messaging channels (
connected a new Instagram channel,disconnected the Messenger channel,connected a new WhatsApp channel). - Automated background token refreshes (
auto-refreshed the Instagram channel token,auto-refreshed the WhatsApp channel token). - Editing permissions, adding new members, or removing workspace admins.
- Connecting or disconnecting messaging channels (
- IP Address: The network IP address of the device used when performing the action, helping detect anomalous access. For automated background system events, this displays a short hyphen
-. - Date: The exact timestamp (year/month/day hour:minute) when the action occurred, ordered with the most recent events on top.