

- Optimize Responses: Reach customers instantly when they show interest in your products or services.
- Increase Conversion Rates: Move customers from public comments into personalized consultations in their Inbox.
- Protect Customer Information: Automatically hide comments containing phone numbers or sensitive information to prevent competitor hijacking.
- Save Time: Automate repetitive replies such as pricing inquiries or requests for details.
Set Up Comment Automation
You can create and configure your comment automation campaign by following these steps:1
Access the Tool
Log in to your admin portal and select Tools from the left navigation menu. Then, click on the Facebook Comment Automation card.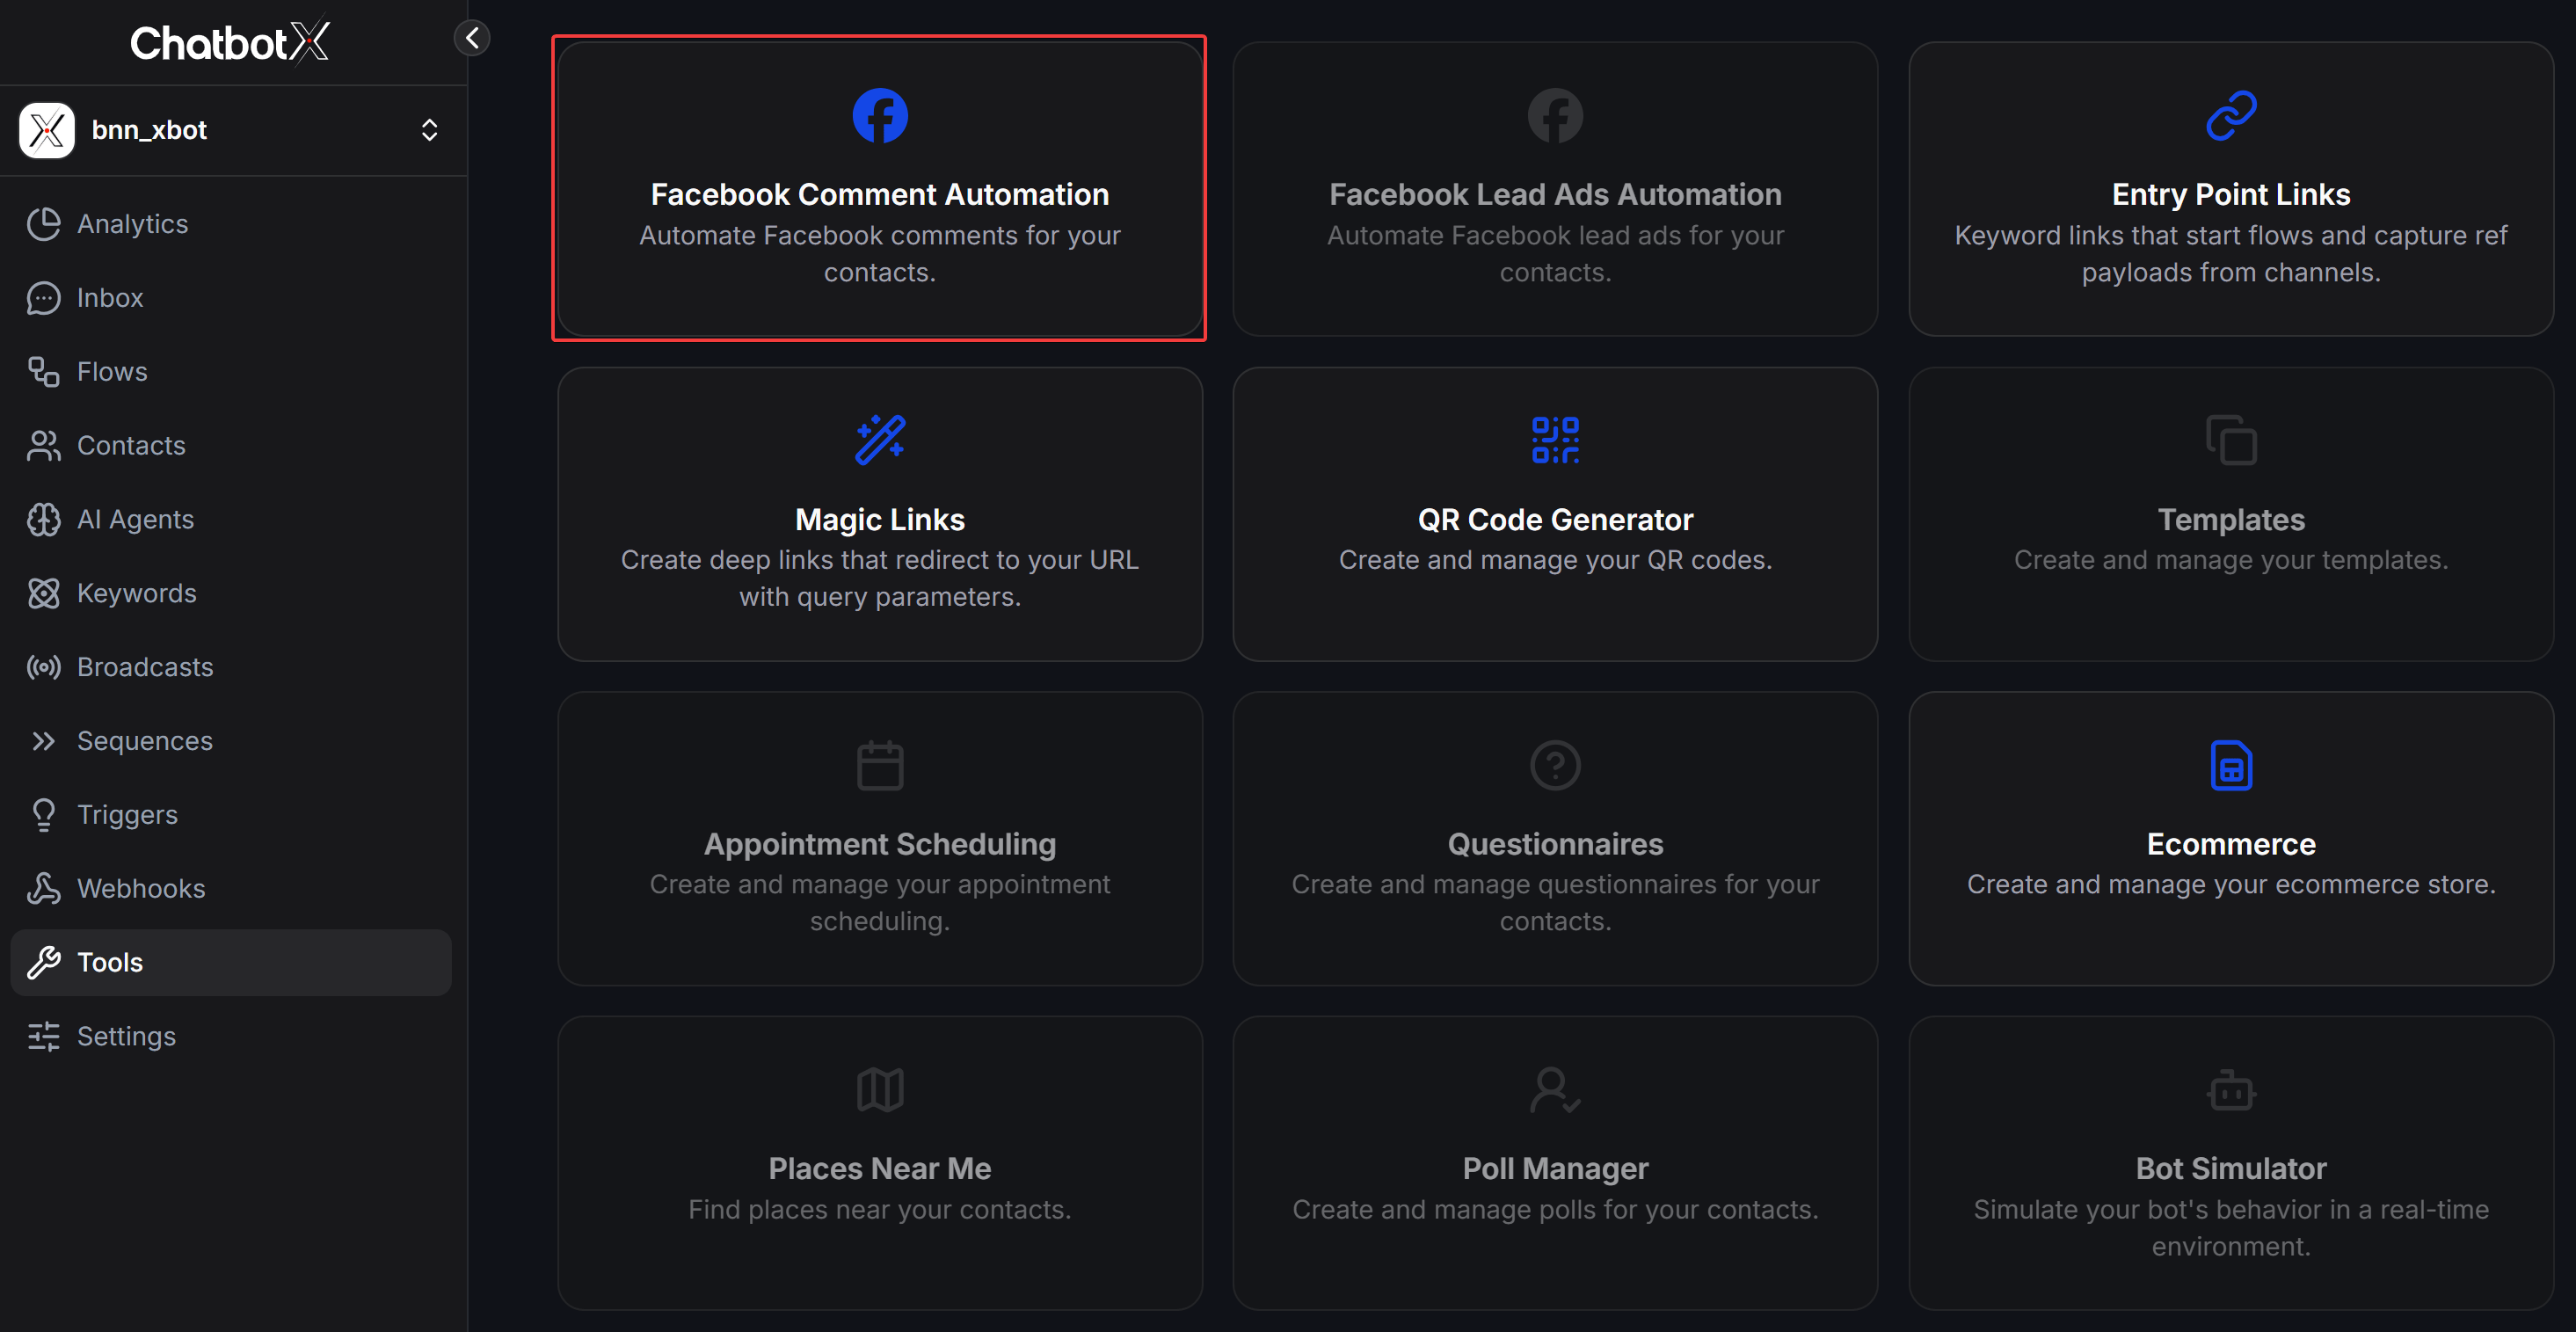
2
Create a New Automation
In the Facebook Comment Automation management interface, click the Create Automation button on the right side to start creating a new campaign.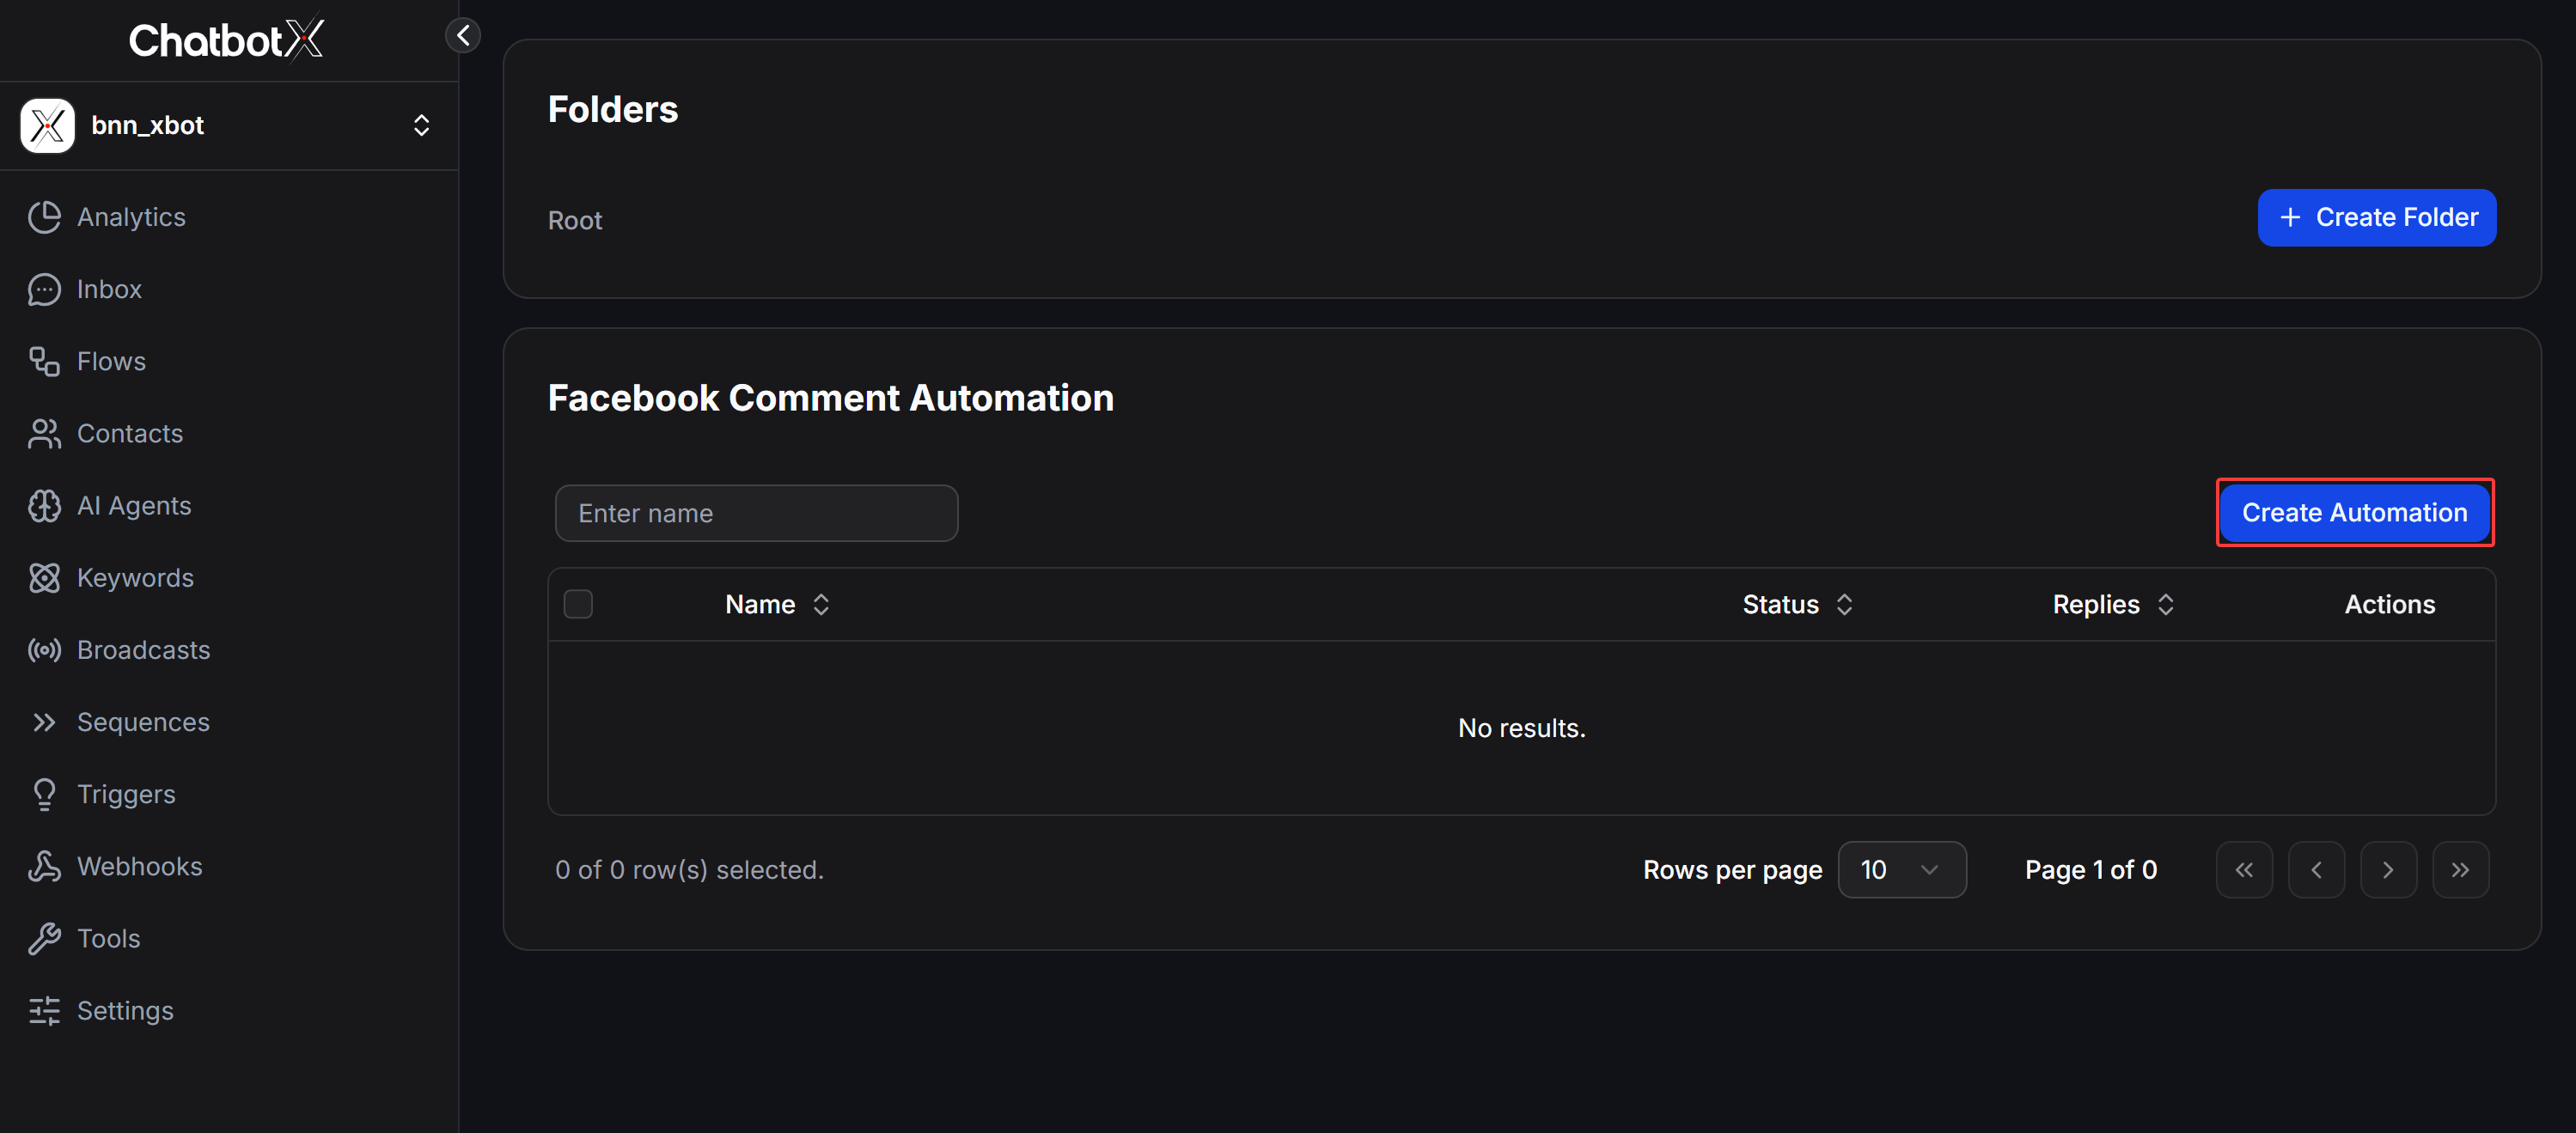
3
Configure Targeting & Reply
In the campaign configuration form, set up the following basic settings: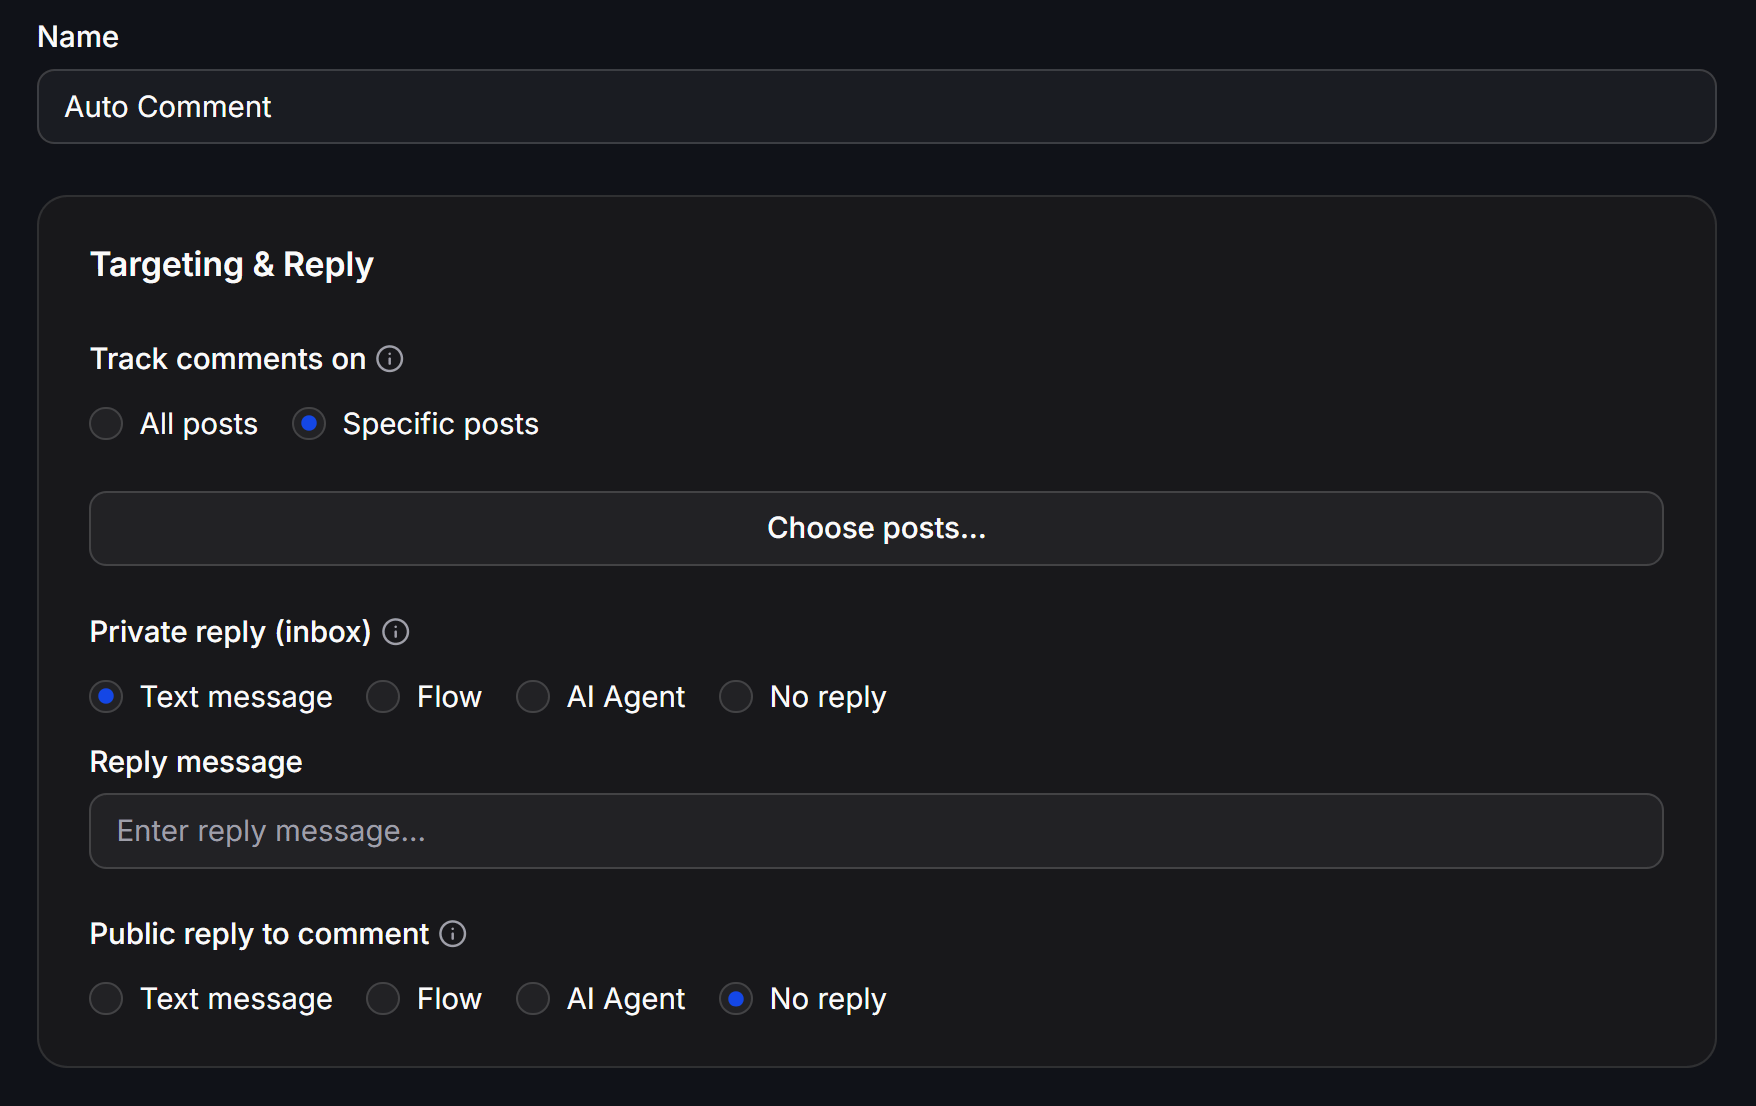
- Name: Enter a name to identify your campaign.
- Track comments on:
- All posts: Apply automatic replies to all current and future posts on the Fanpage.
- Specific posts: Apply only to one or more specified posts. When selecting this option, click the Choose posts… button to open the post selection dialog.
The post selector includes 4 filter tabs for easy searching: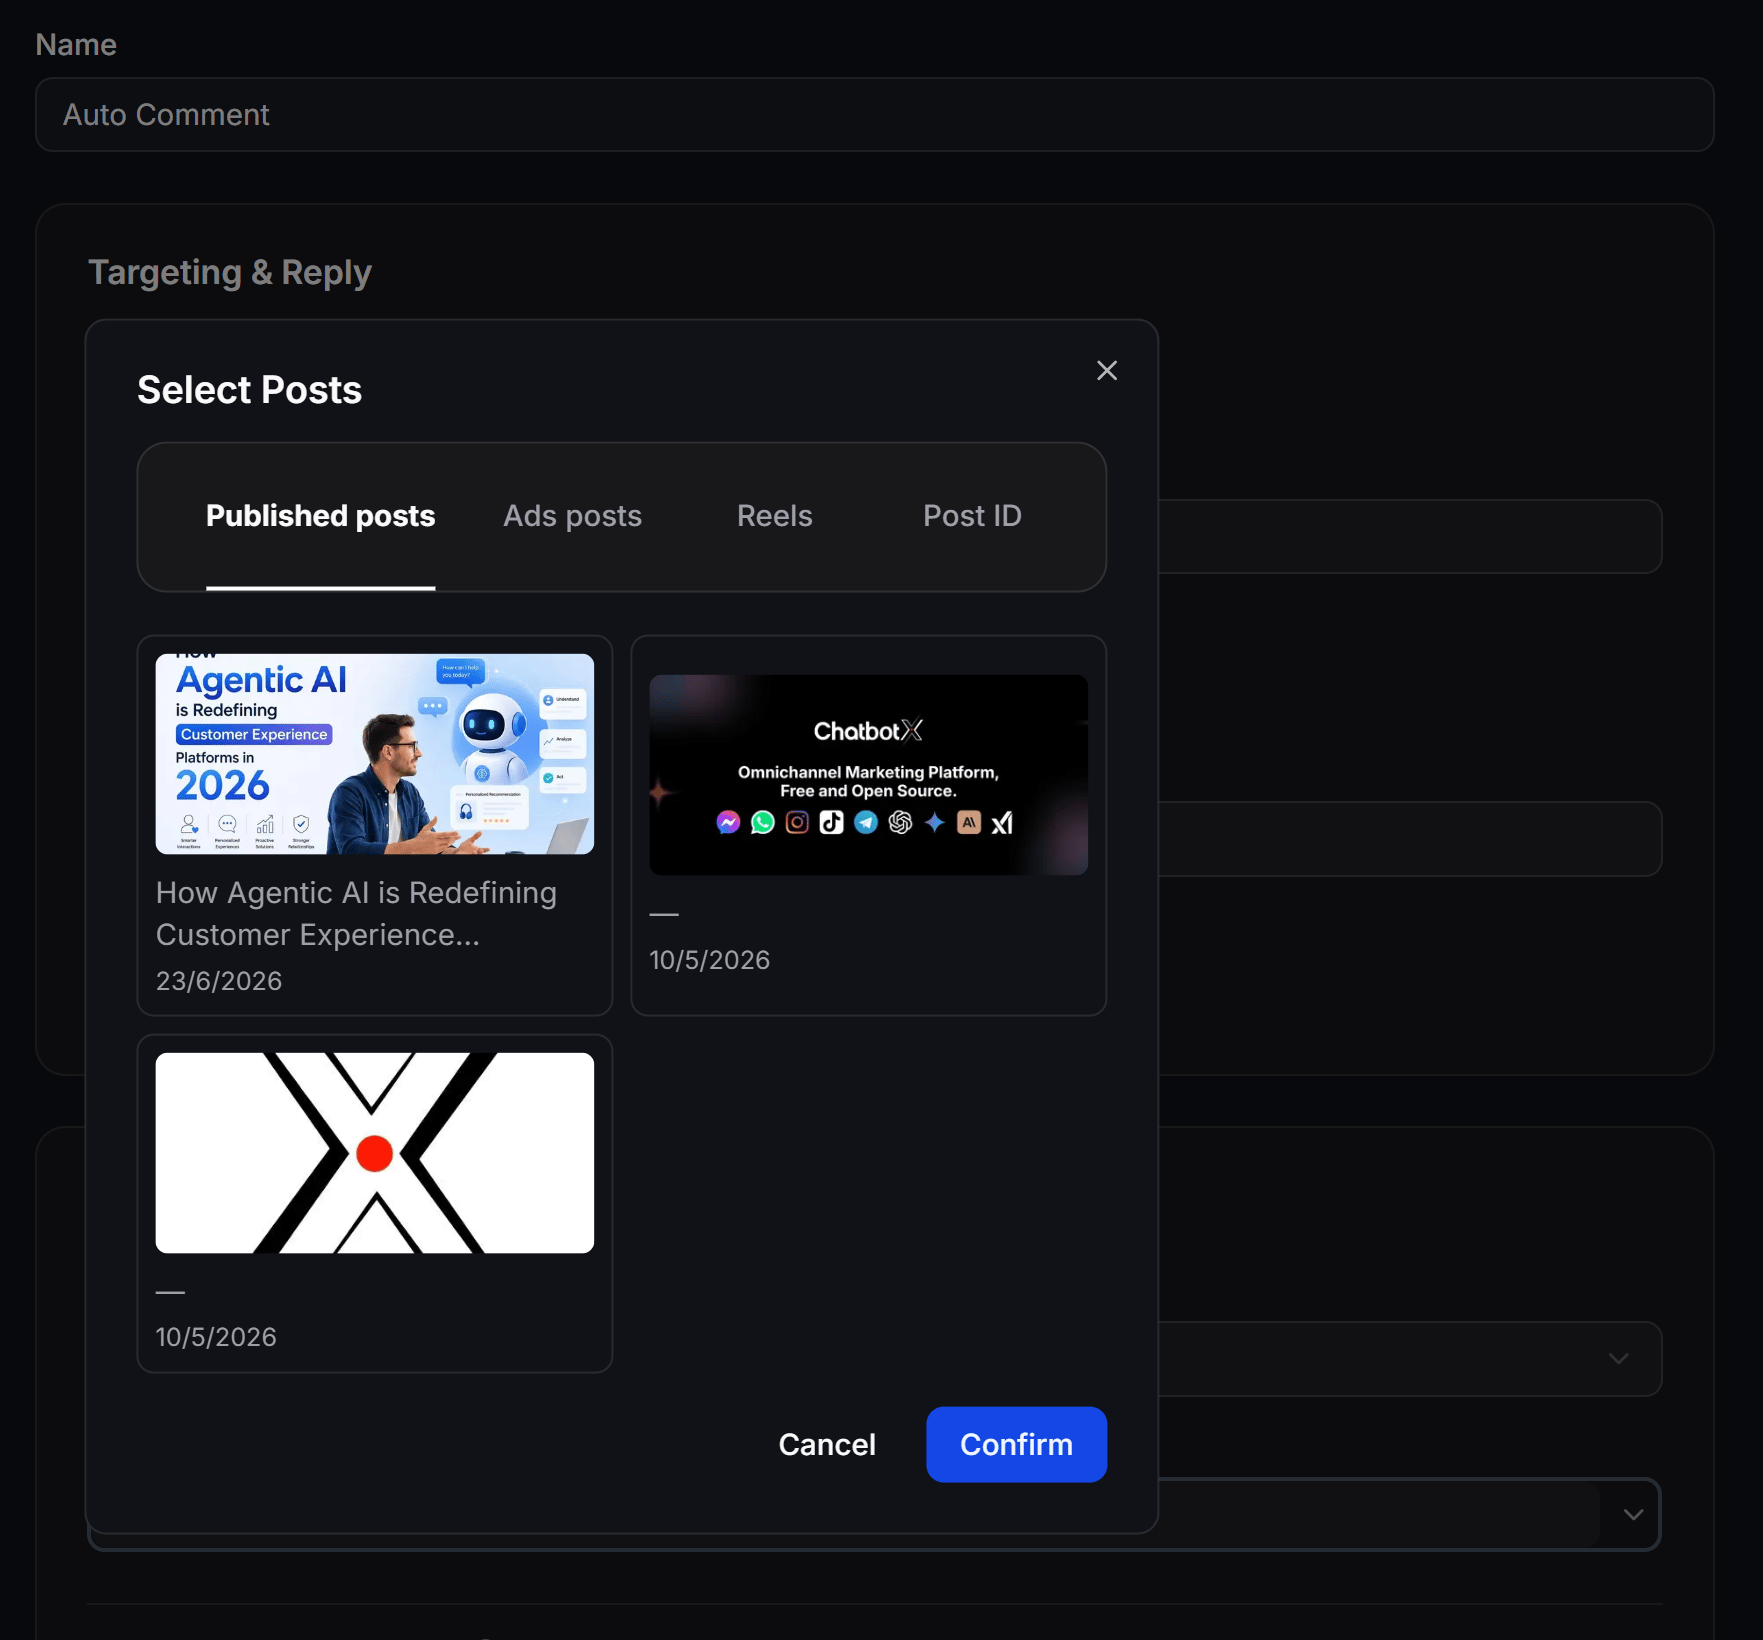
- Published posts: Posts publicly published on the page.
- Ads posts: Posts currently used for running ads.
- Reels: Short video reels on the Fanpage.
- Post ID: Directly enter the specific post ID from Facebook. After selecting the post(s), click Confirm to complete.
- Private reply (inbox): Choose the type of message automatically sent to the customer’s Inbox when they comment:
- Text message: Send a standard text message. Enter the message content in the Reply message field below.
- Flow: Send a pre-built message script (Flow) from Flow Builder.
- AI Agent: Hand over the conversation directly to an AI Agent to automate response handling using your knowledge base.
- No reply: Do not send a private Inbox message.
- Public reply to comment: Choose how to reply publicly directly under the customer’s comment. The options are similar: Text message, Flow, AI Agent, or No reply.
4
Configure Filters & Options
Set detailed conditions to ensure the bot only responds to your target audience: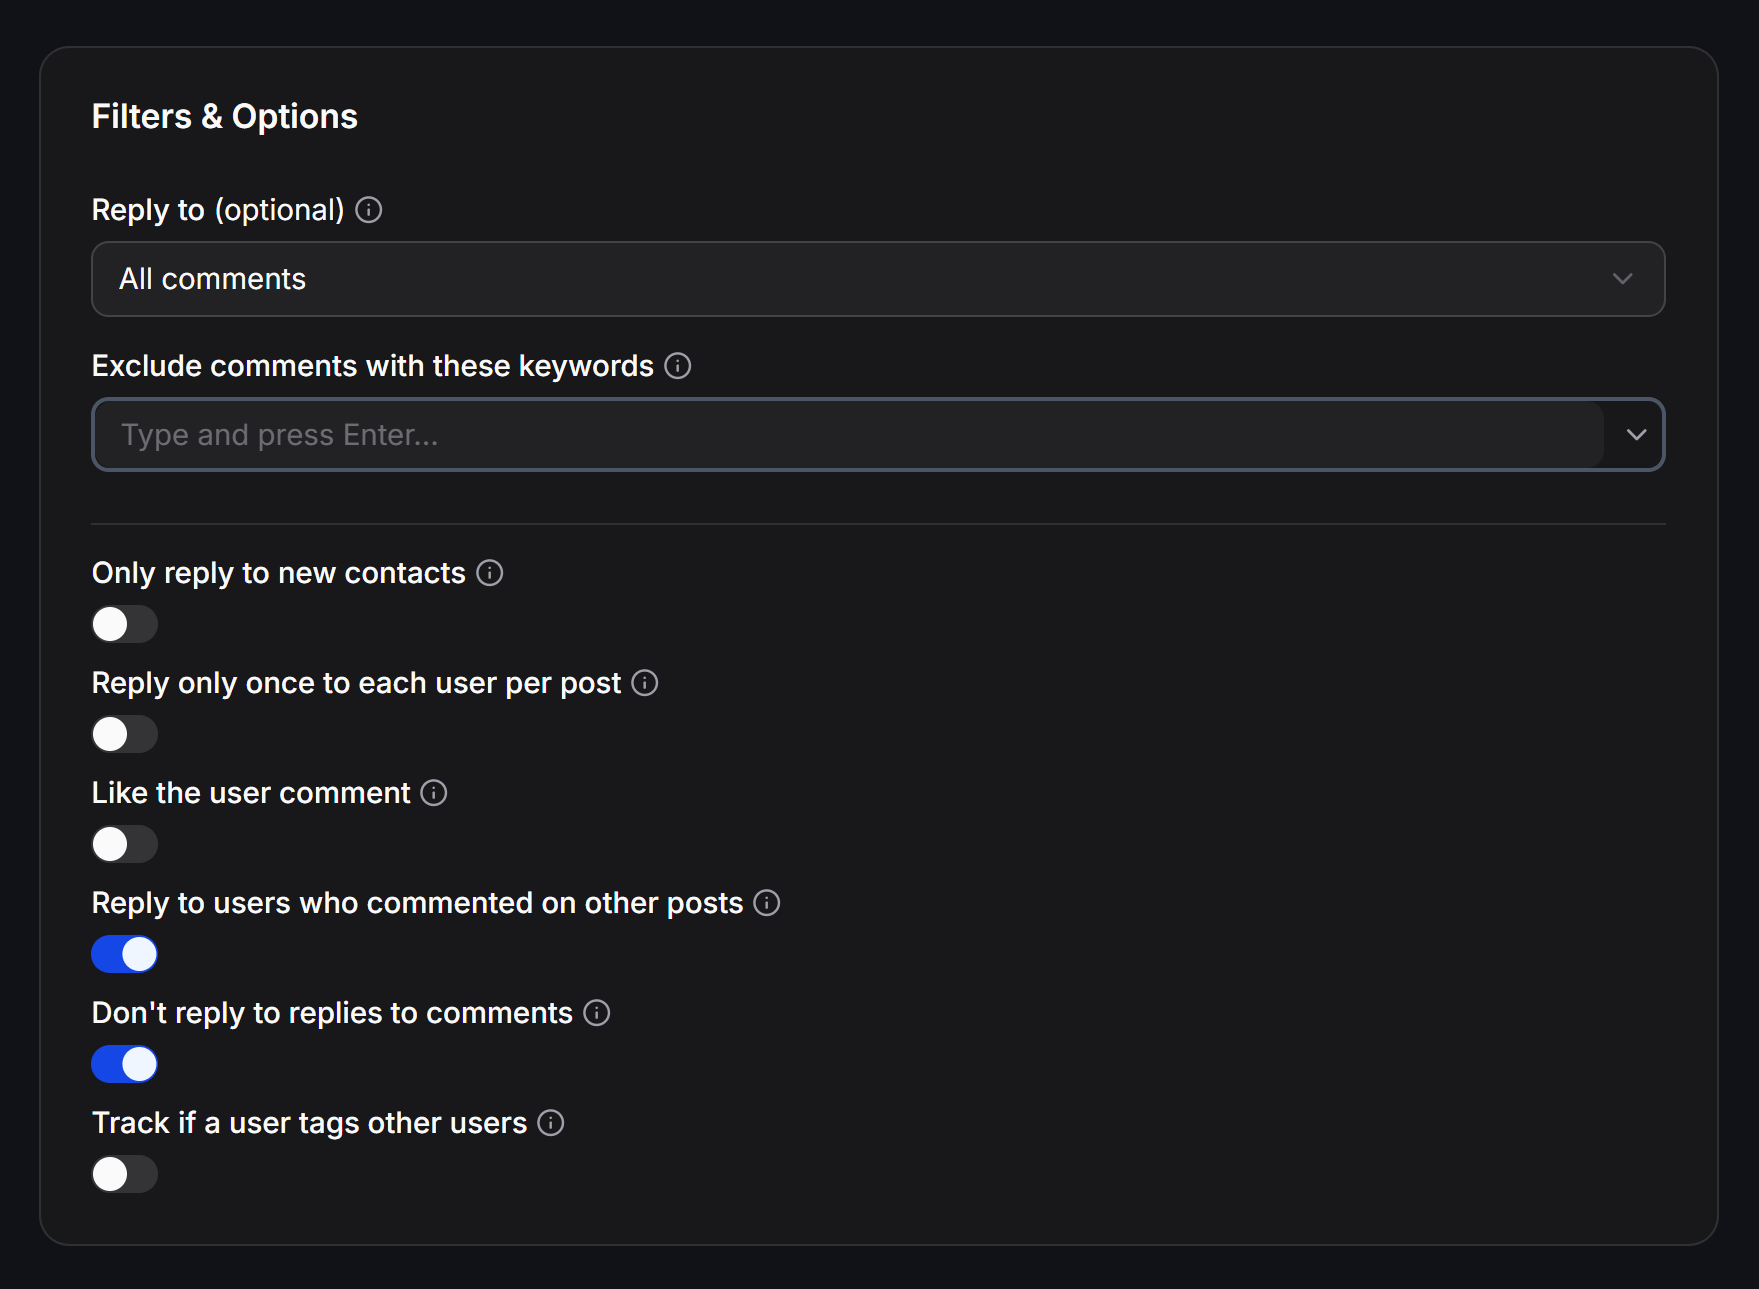
- Reply to (optional): Define comment conditions to trigger responses:
- All comments: Respond to all comments regardless of content.
- Exact match: Respond only when the comment matches the configured keywords exactly.
- Contains: Respond when the comment contains the configured keywords. Note: When choosing Exact match or Contains, enter the keywords in the Keywords to match field and press Enter to save.
- Comments when enough mentions: Respond only when the user tags/mentions at least the specified minimum count of friends.
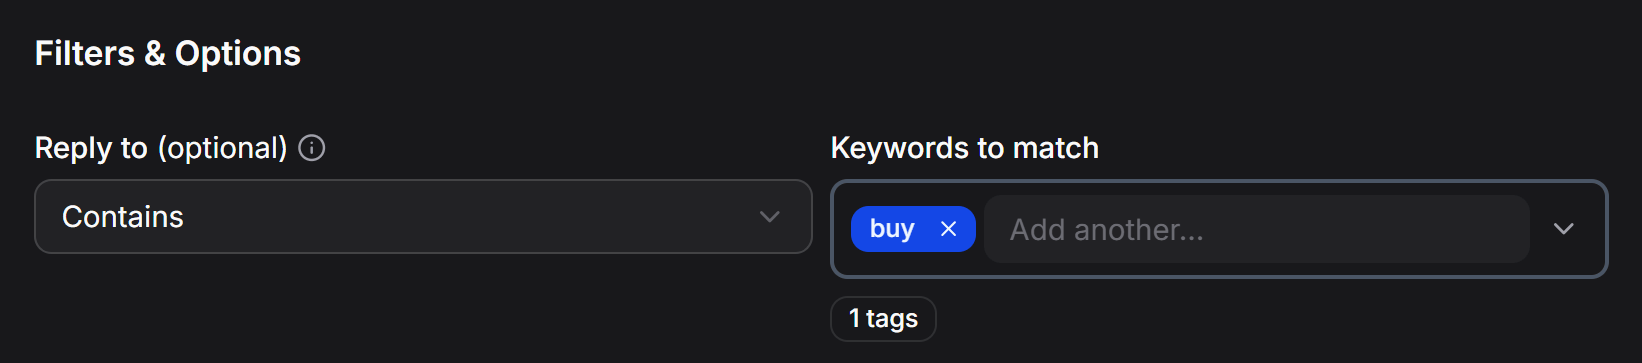
- Exclude comments containing (optional): Filter out unwanted comments using two flexible modes:
- Comments equal to: Skip comments that match the specified phrase exactly.
- Comments that contain: Skip comments containing specific keywords. Type each keyword and press Enter.
- Only reply to new contacts: When enabled, the system only replies to users who have never messaged or interacted with the Fanpage before.
- Reply only once to each user per post: When enabled, each customer receives an automatic reply at most once per post, preventing repetitive messages if they comment multiple times.
- Like the user comment: Automatically like the customer’s comment when replying.
- Reply to users who commented on other posts: When enabled, the bot still responds to customers who have previously commented on other Fanpage posts.
- Don’t reply to replies to comments: When enabled, the bot ignores sub-comments (replies within a main comment thread) to avoid replying to nested discussions.
- Track if a user tags other users: Detect whether customers tag their friends in the comments. This feature is ideal for organizing Mini-Games or Giveaways that require tagging friends to receive rewards.
5
Set Up Reply Timing
Configure the delay before the system sends a reply by selecting the dropdown under Reply after: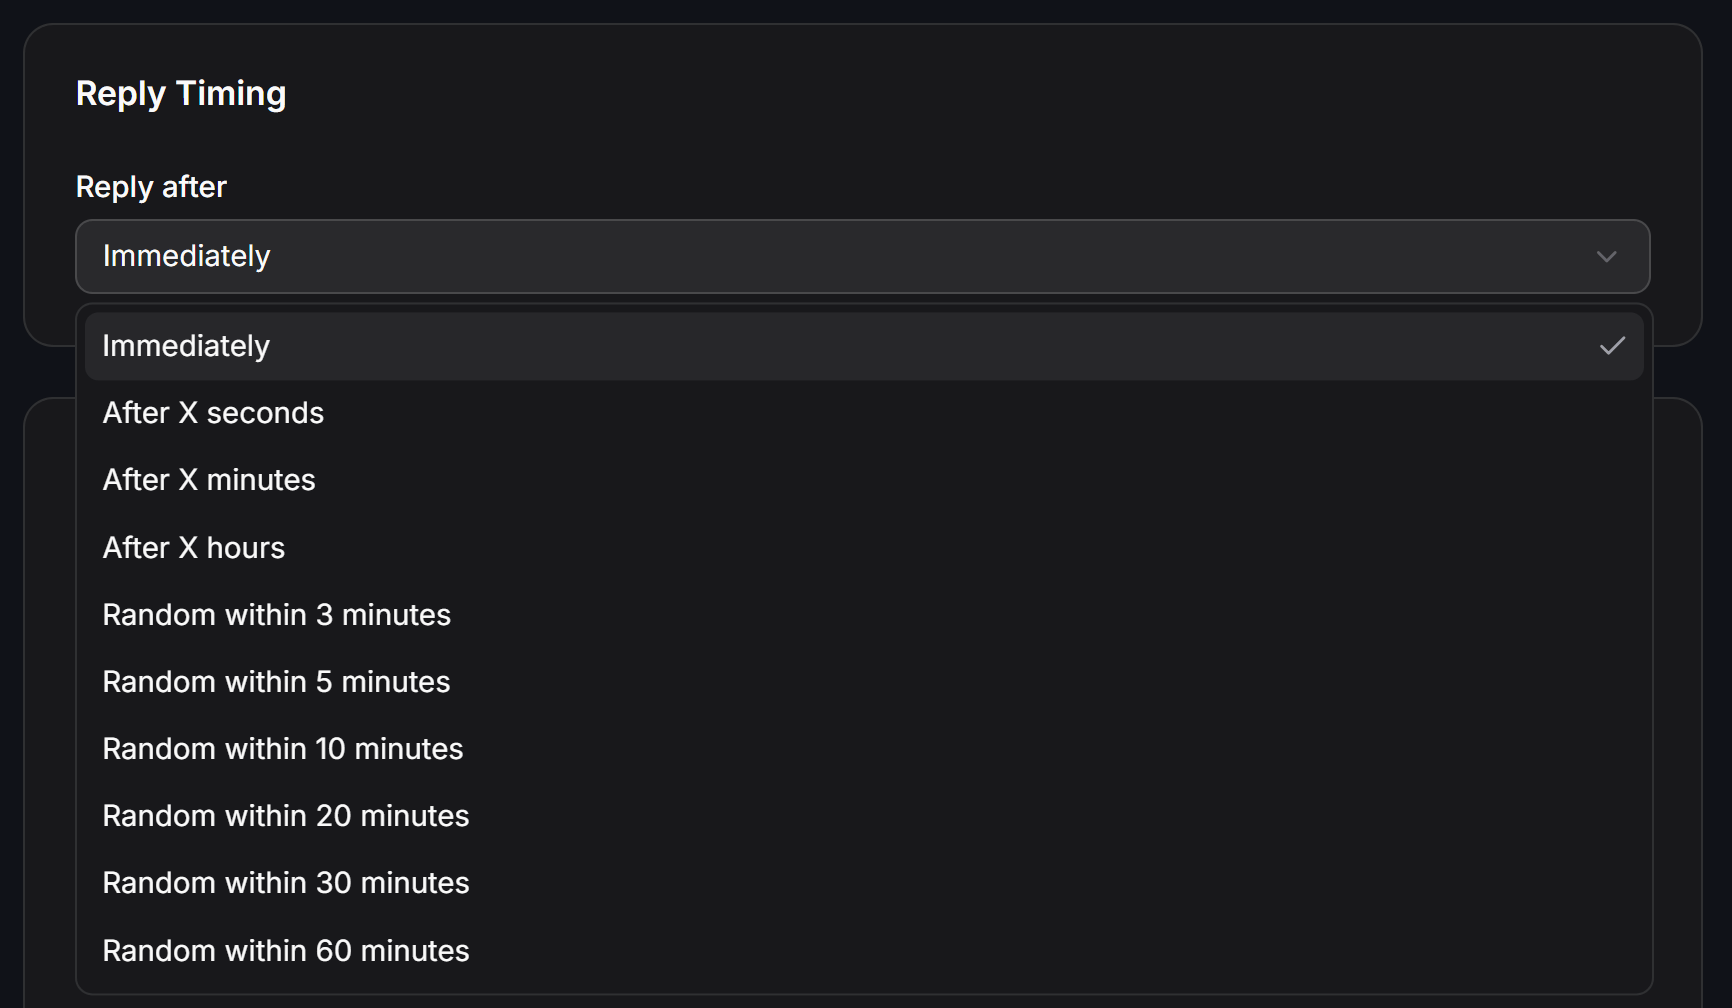
- Immediately: Reply immediately after a customer comments.
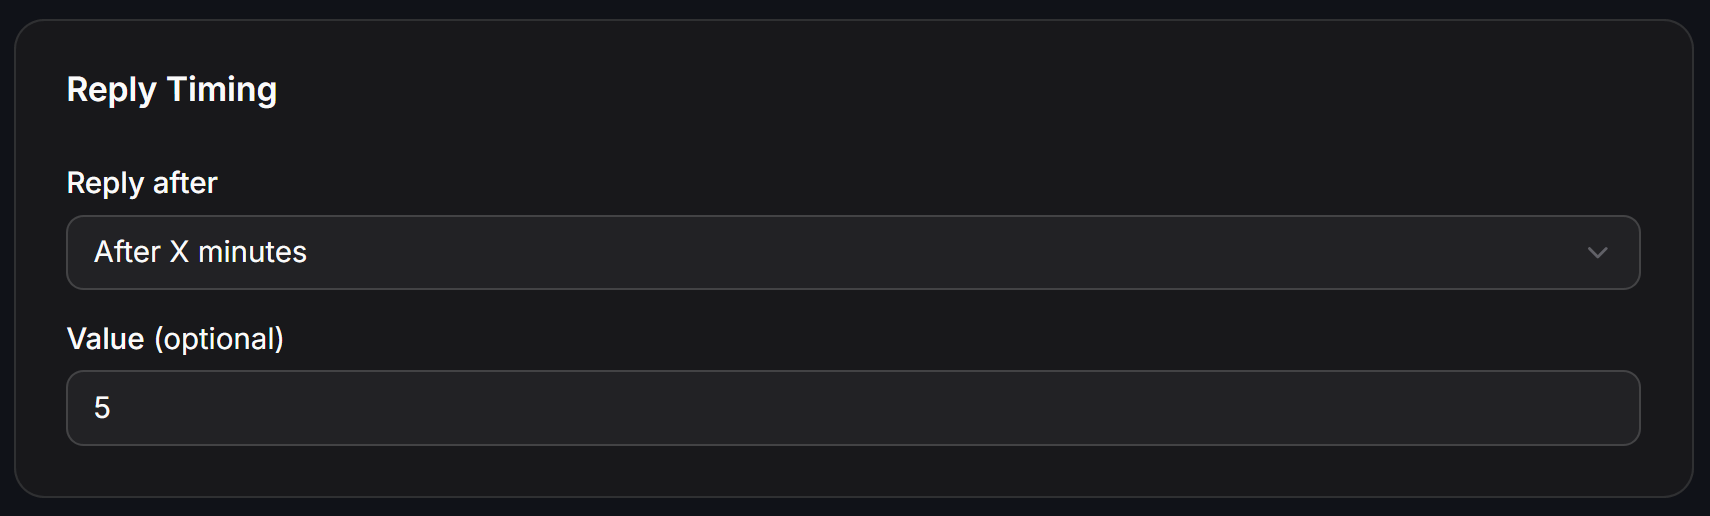
- After X seconds / minutes / hours: Delay the reply by a specific number of seconds, minutes, or hours. Enter the number in the Value (optional) field.
- Random within X minutes: The system replies randomly within the specified time range (from 3 to 60 minutes). Creating a random delay makes the bot’s behavior feel more natural (like a real person) and helps avoid Facebook spam flags.
6
Configure Hide Comment
Automatically hide customer comments on posts to protect their contact info or prevent competitors from hijacking your leads: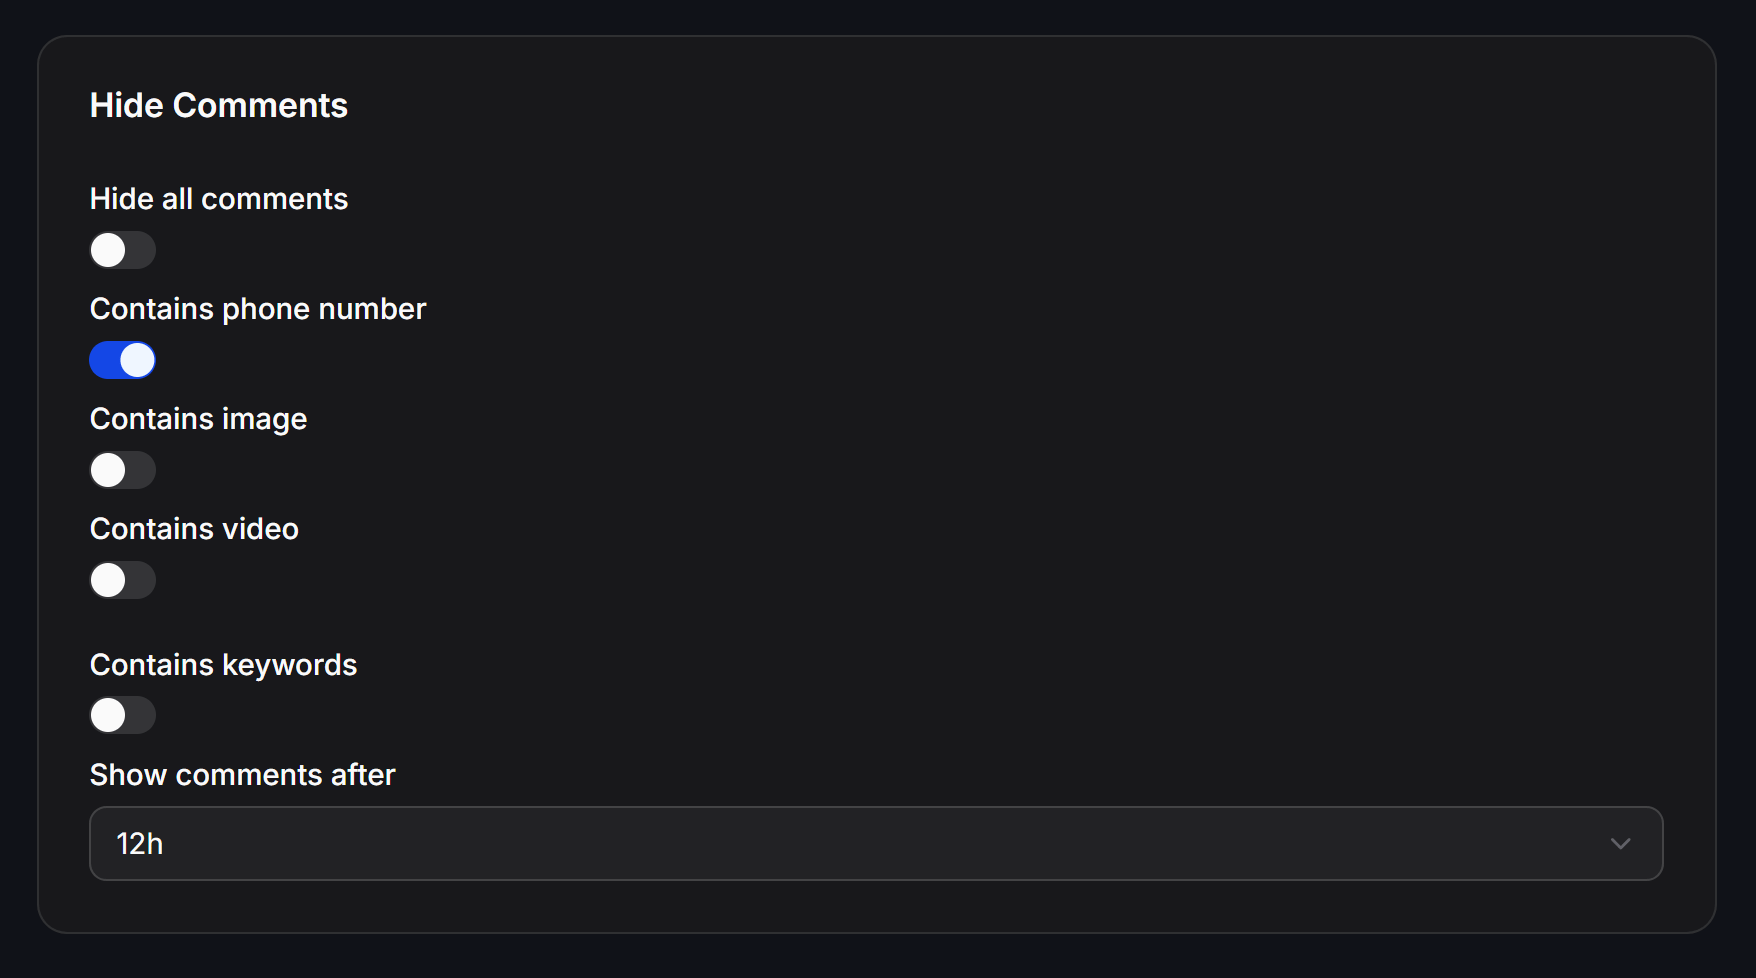
- Hide all comments: Automatically hide every comment on the post.
- Contains phone number: Automatically hide comments containing phone numbers.
- Contains link: Automatically hide comments containing website links.
- Contains GIF: Automatically hide comments that include animated GIF media.
- Contains Emoji: Automatically hide comments containing emoji characters.
- Contains keywords: Automatically hide comments containing flagged keywords.
- Show comments after: Choose whether to unhide comments automatically after a set duration (defaults to Never to keep them hidden permanently, or select from 6h, 12h, 1d to 10d).
- After completing the configuration, click Create in the bottom-right corner to save and activate the campaign.
Managing Facebook Comment Automation
Once successfully created, your automation campaigns will be listed on the main dashboard. From here, you can manage and track their performance: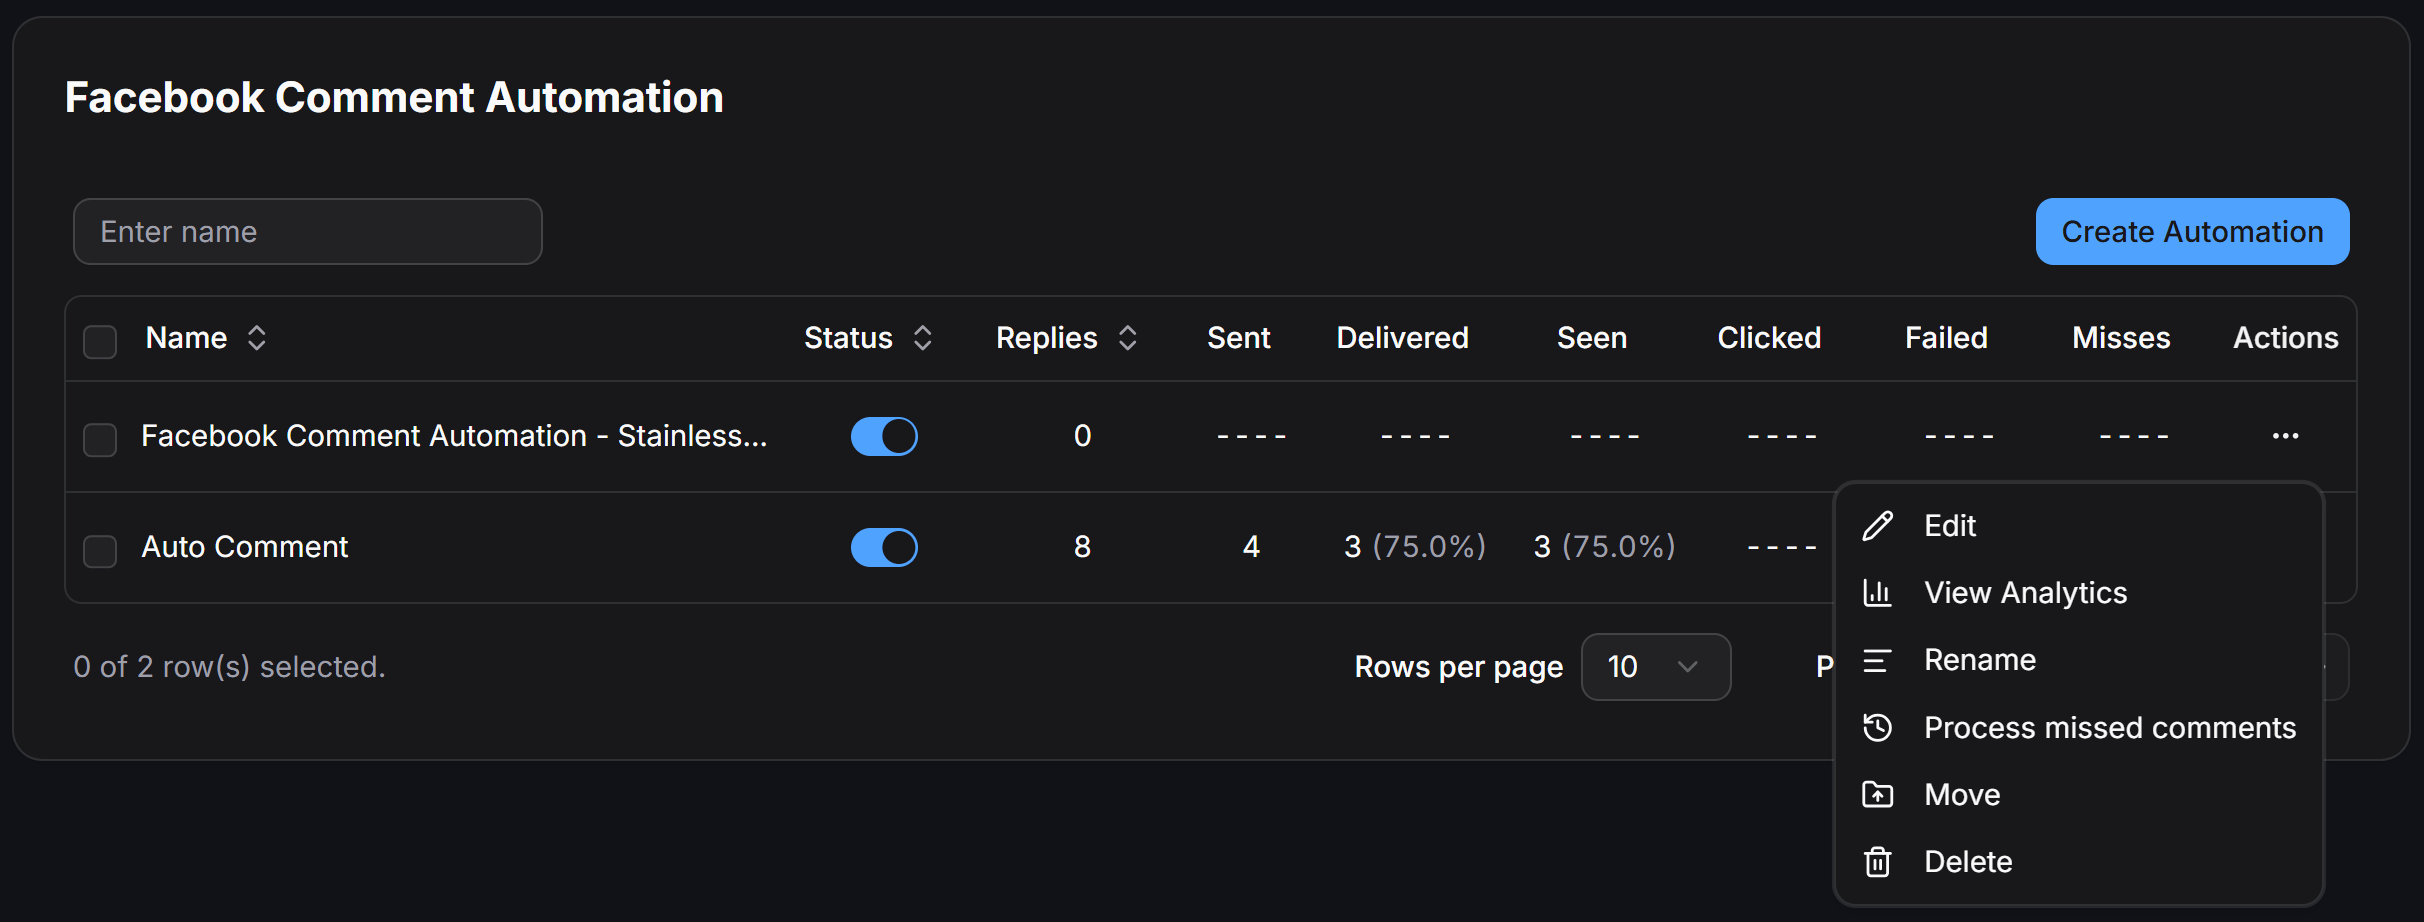
- Quick Toggle Status: Use the switch in the Status column to activate (green) or pause (gray) the bot on your posts at any time.
- Track Funnel Metrics: The table displays end-to-end metrics: Replies (public comments posted), Sent (private inbox messages sent), Delivered (delivery count and rate), Seen (read rate), Clicked (CTA clicks), Failed (failed attempts), and Misses (skipped comments).
- Quick Actions (Action menu): Click the three-dot icon
...in the Actions column to open advanced options:- Edit: Open the configuration editor to adjust settings and filters.
- View Analytics: Navigate to the Facebook & Instagram Comment Automation Analytics dashboard to inspect trend charts, user comment frequency, bot reply distribution, and real-time error logs.
- Rename: Quickly change the automation campaign’s name.
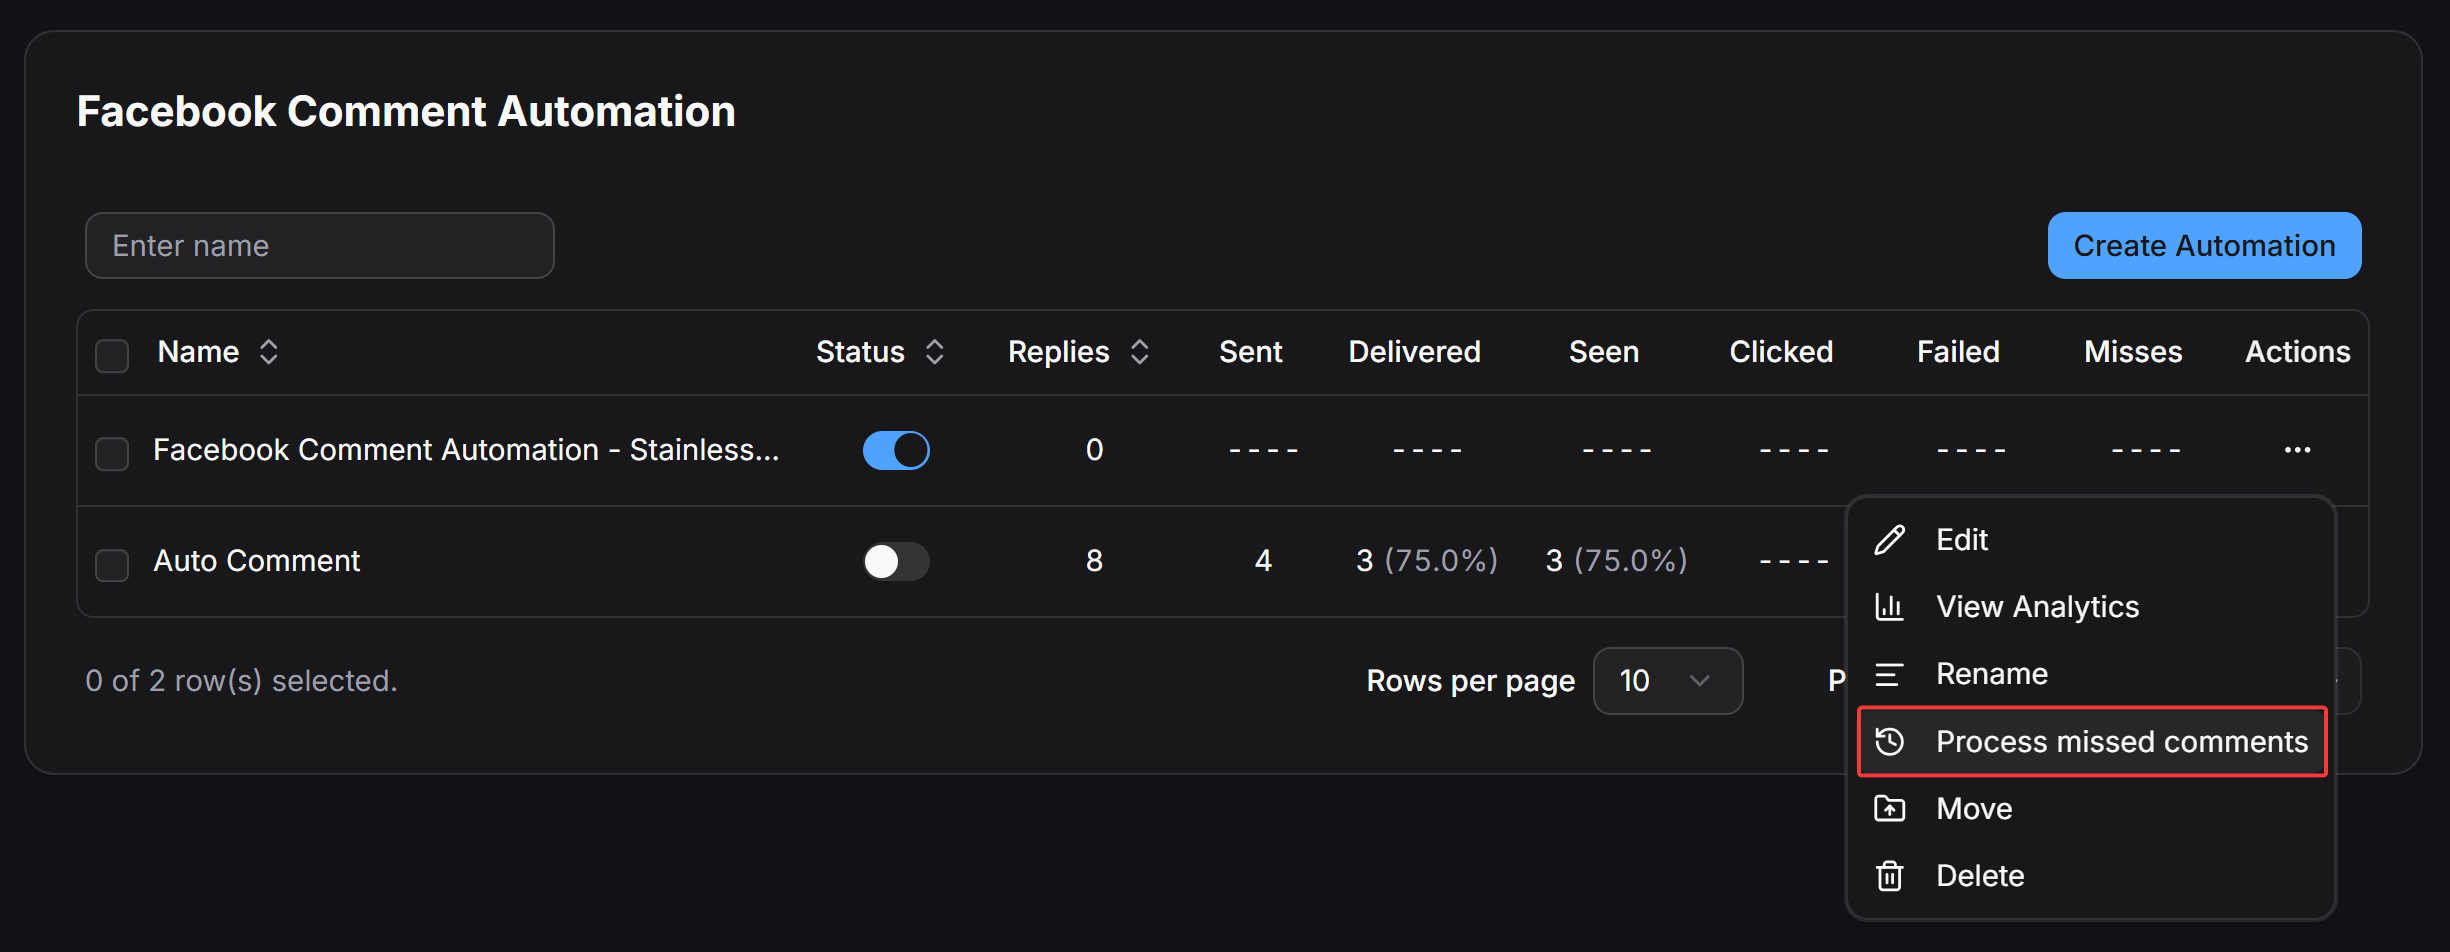
- Process missed comments: Retroactively scan and process comments from the past 7 days through this automation (available only when the automation is configured for a single specific post).
- Move: Move the campaign into different folders for organized resource management.
- Delete: Permanently remove the automation campaign from the system.
Process Missed Comments
The Process missed comments action allows you to retroactively scan comments left on the post over the past 7 days and process them through the automation rules.This feature only works when the Comment Automation is configured for a single specific post (the Specific posts option). It is not available for automations set to monitor All posts.
- You set up a new automation campaign for an already-published post and want to reach customers who commented over the last week.
- Platform connectivity or server interruptions temporarily prevented the bot from replying to recent comments.
- In the automation dashboard, click the three-dot icon
...in the Actions column of the target campaign and select Process missed comments.
- The Process missed comments confirmation modal appears. Review the details and click Confirm to start processing.
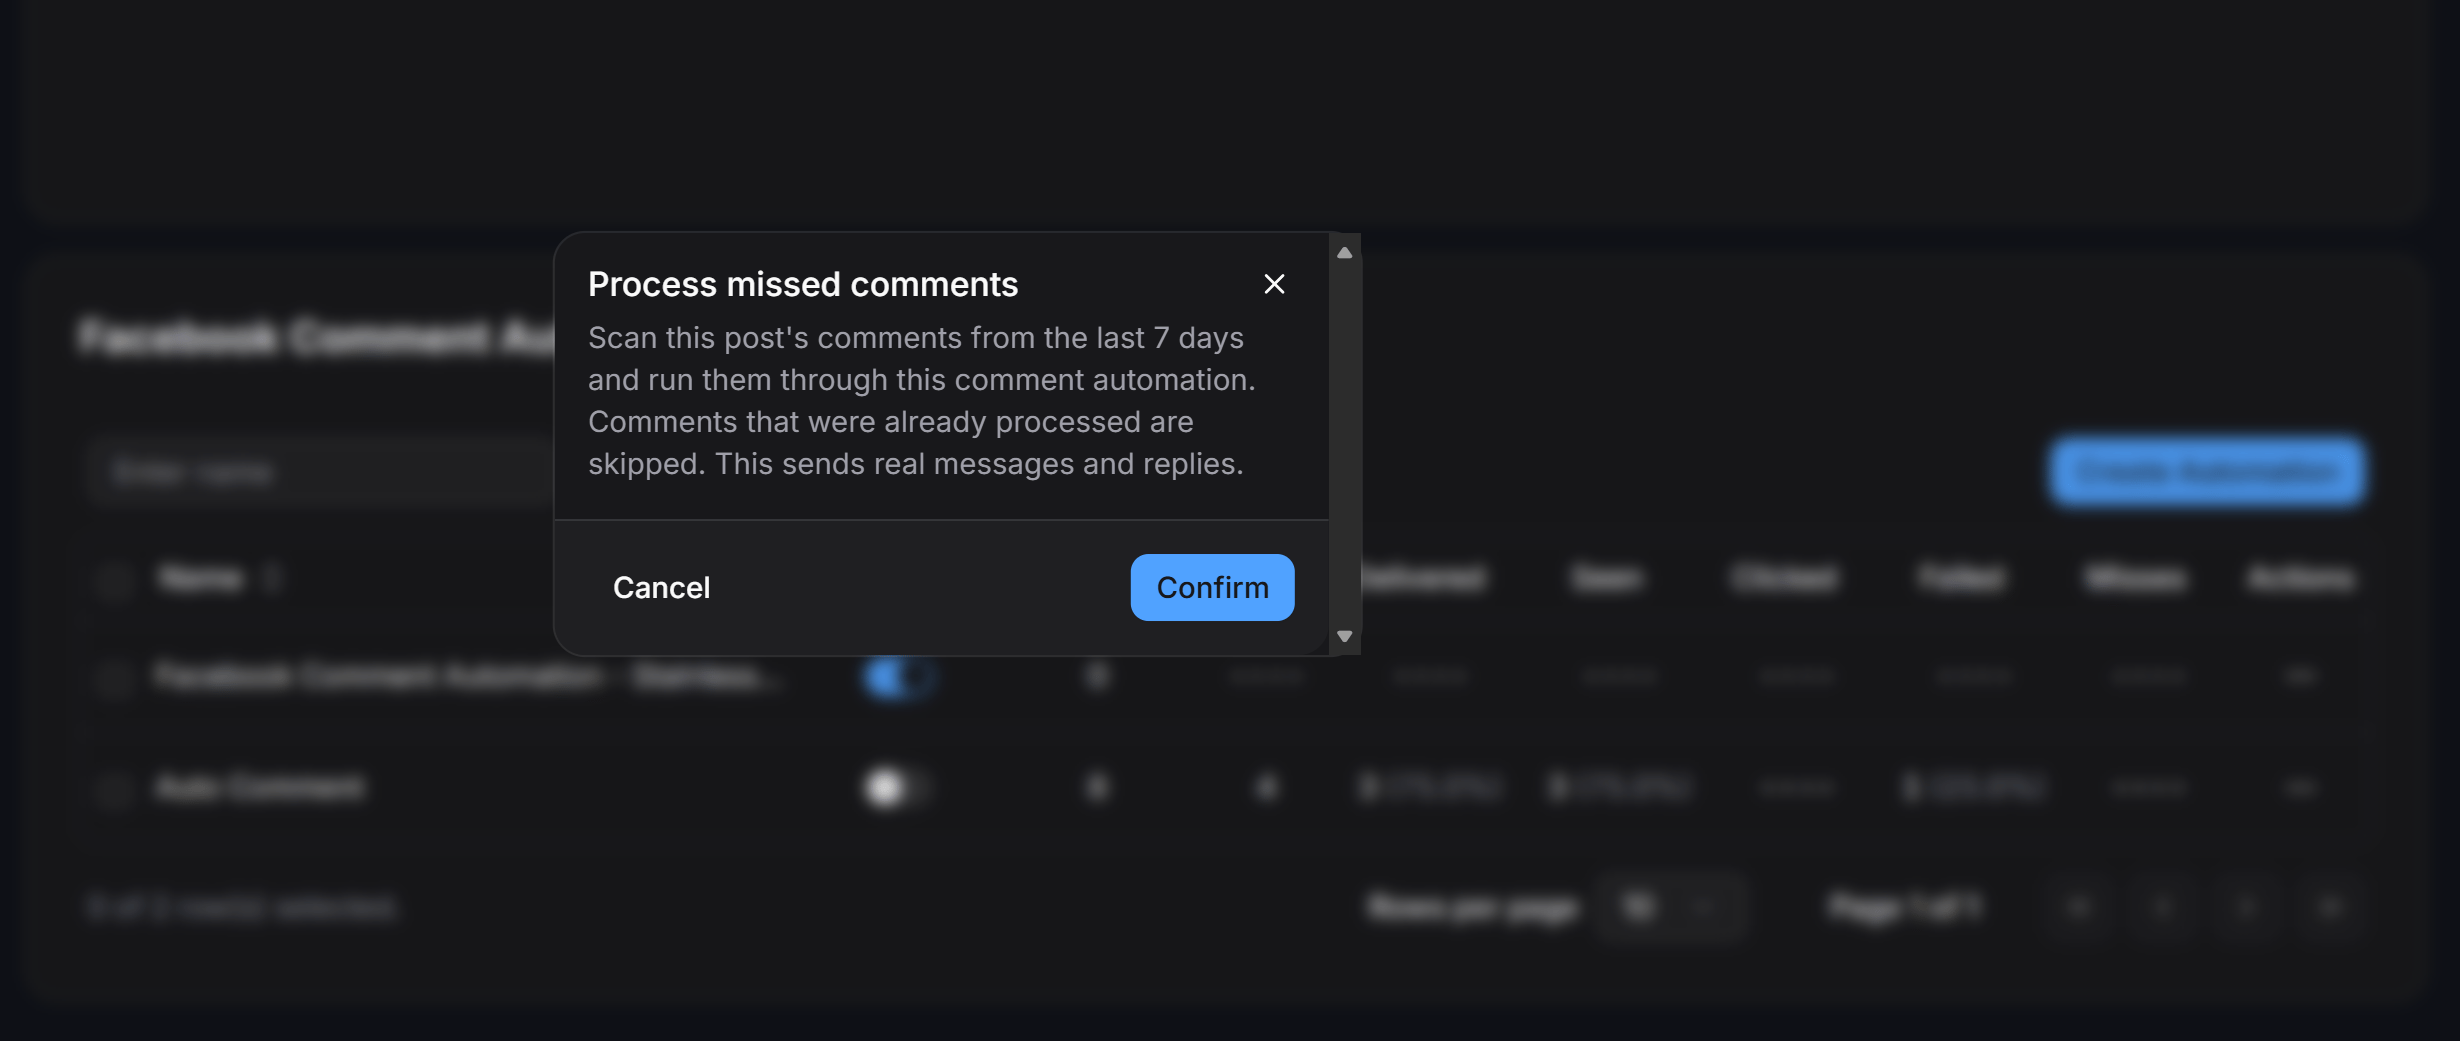
- Single post requirement: The system scans comments submitted within the last 7 days exclusively on the specific post assigned to the campaign.
- Automatic deduplication: Comments that were already processed previously are skipped automatically to prevent repetitive messages.
- Live delivery: Clicking Confirm triggers real public replies and private inbox messages directly to the commenters based on your campaign settings.