

- List Messages: Display a menu of up to 10 options for customers to select.
- Reply Buttons: Display up to 3 quick response buttons directly below the chat bubble.
Interactive messages are supported on iOS, Android, and WhatsApp Web. They do not require template approval if sent within the 24-hour customer service window (also known as a session). Outside this window, you must register them as a Message Template and wait for Meta’s approval.
List Messages
List Messages send a single button to the customer. When tapped, it opens a scrollable menu (Bottom Sheet) showing the options. Once a customer selects an option, the response is sent back to the chatbot automatically.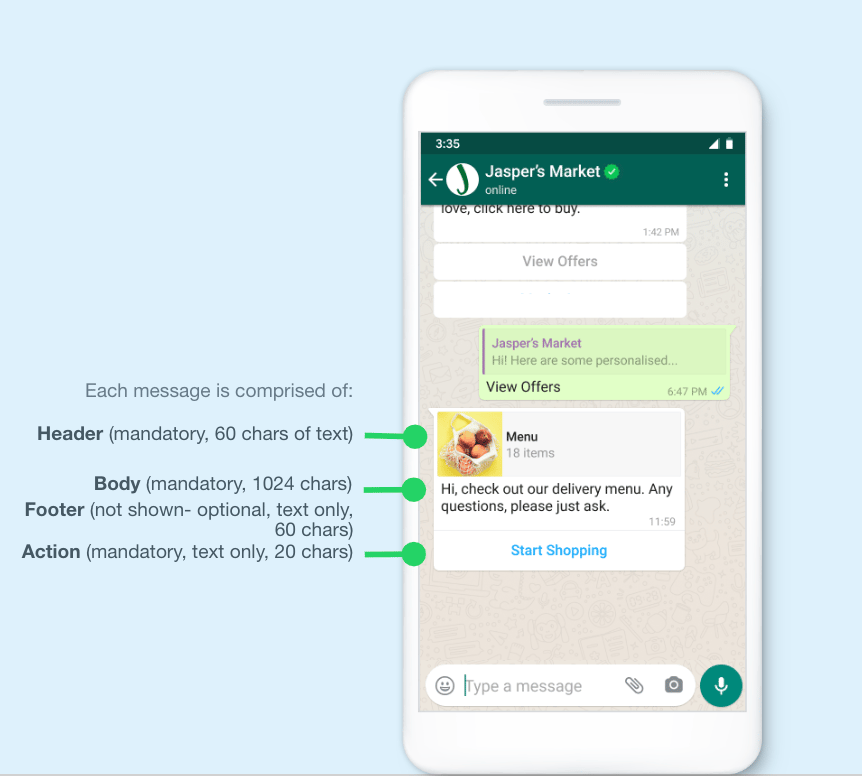
Structure and Limits
A List Message consists of the following components:
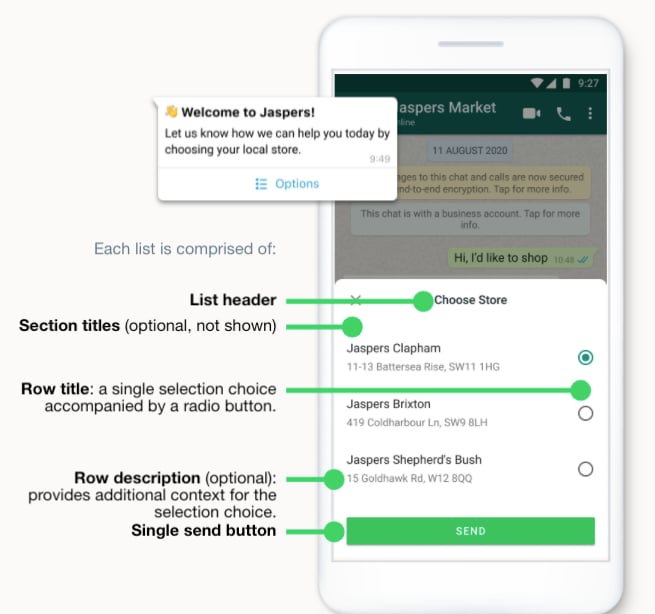
When the customer clicks the button, the list opens with the following options:
- Up to 10 rows (Rows), which can be grouped into up to 10 sections (Sections).
- Each row includes: Row Title (required, max 24 characters), Description (optional, max 72 characters), and a hidden Key/ID value used for bot logic or mapping to a Custom Field.
- Customers can only select 1 row at a time (though they can reopen the old message to choose another option).
When to Use?
Use List Messages when you need customers to choose from multiple options (4 or more):- Frequently Asked Questions (FAQ) menus or customer service options.
- Product catalogs, food/drink menus.
- Store locator list or nearest branches.
- Booking/appointment available time slots.
- Recent order lists or saved delivery addresses.
Reply Buttons (Quick Replies)
Unlike List Messages, Reply Buttons display up to 3 buttons directly below the chat bubble without requiring any extra taps. A key benefit is that the Header can attach an image, video, or PDF document to make the message more engaging.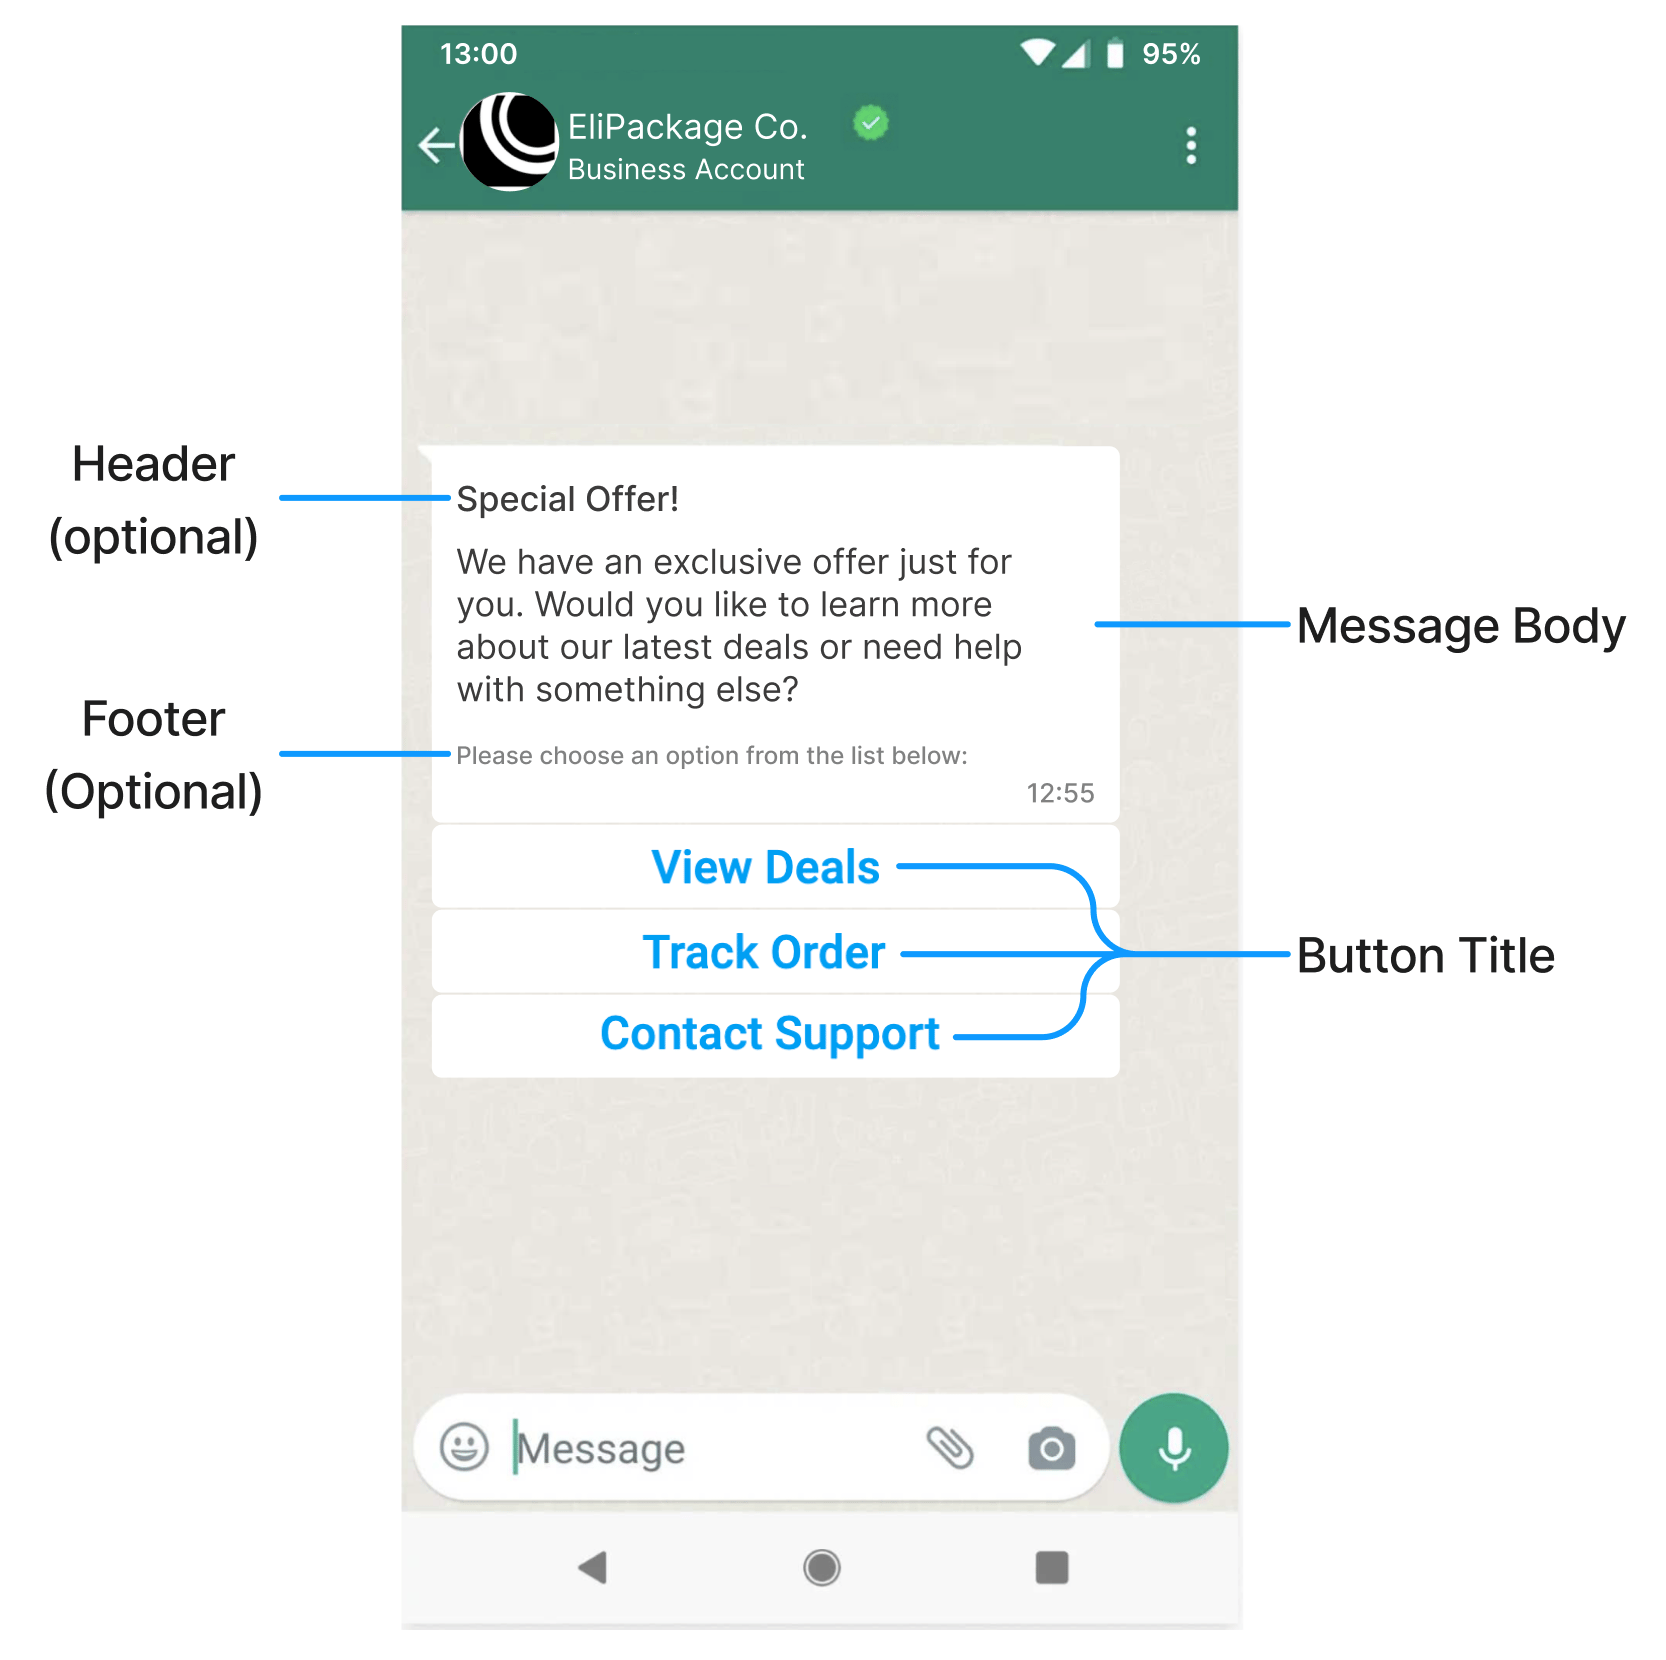
Structure and Limits
When to Use?
Use Reply Buttons for quick, binary, or low-choice decisions (2 or 3 options):- Appointment confirmation (Confirm / Cancel / Reschedule).
- Newsletter/promotion subscription (Opt-in / Opt-out).
- Quick feedback survey (Good / Average / Poor).
- Account authentication (Yes, it was me / No, it wasn’t me).
Which One to Choose?
Rule of thumb: If you have 4 or more options or need detailed descriptions for each item, use List Messages. If you have 2 or 3 simple choices, use Reply Buttons.
Setup on ChatbotX
Once you understand the difference, you can set them up inside your ChatbotX flow builder:Step 1: Select interactive message type
In Flow Builder, open the message block you want to configure. Click Create (or the+ icon), then select List Message or notes belonging to Content Blocks based on your requirement.
Step 2a: Configure List Messages
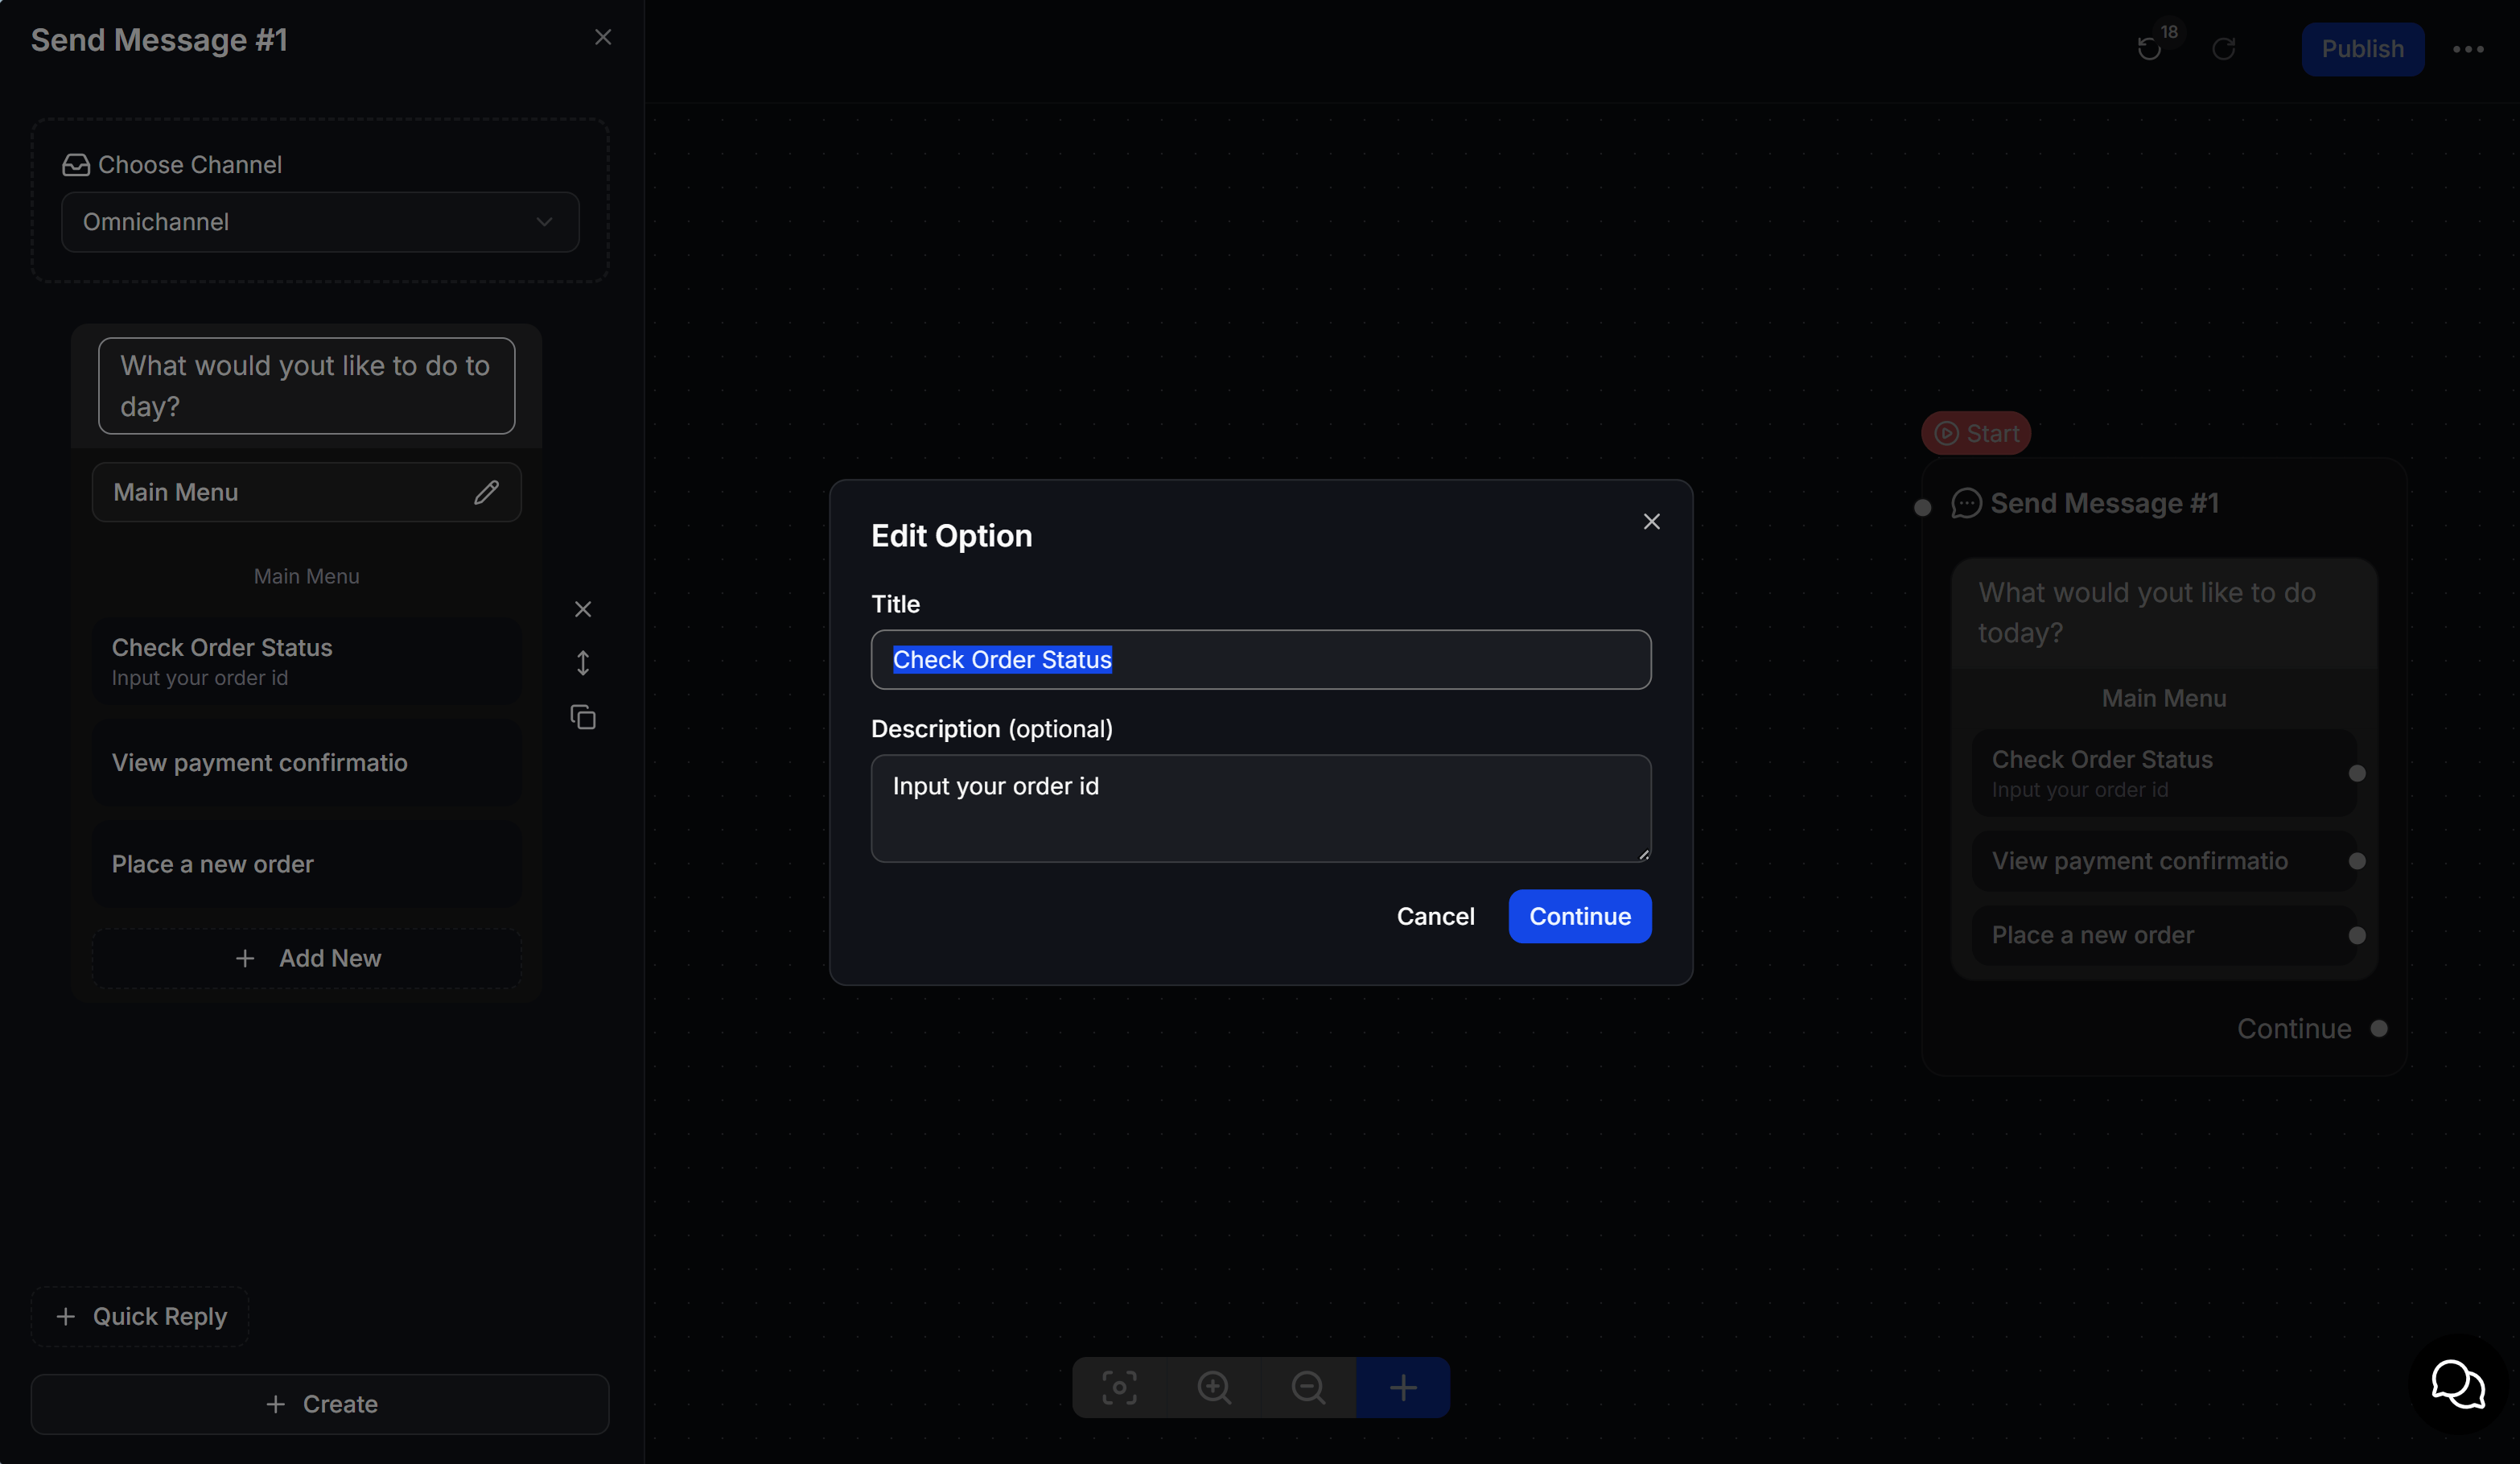
When the List Message configuration panel appears on the left sidebar:- Select your channel under Choose Channel (e.g., Omnichannel).
- Enter your message text in the textbox (Body).
- Name your List Button by clicking the pencil icon next to the default button label (e.g., “Main Menu”).
- Click + Add New to add option rows. The Edit Option window will pop up where you can set:
- Title: The display name of the option (e.g., “Check Order Status”).
- Description (optional): A short supporting description displayed below the title.
- Click Continue to save the option.
Step 2b: Configure Reply Buttons
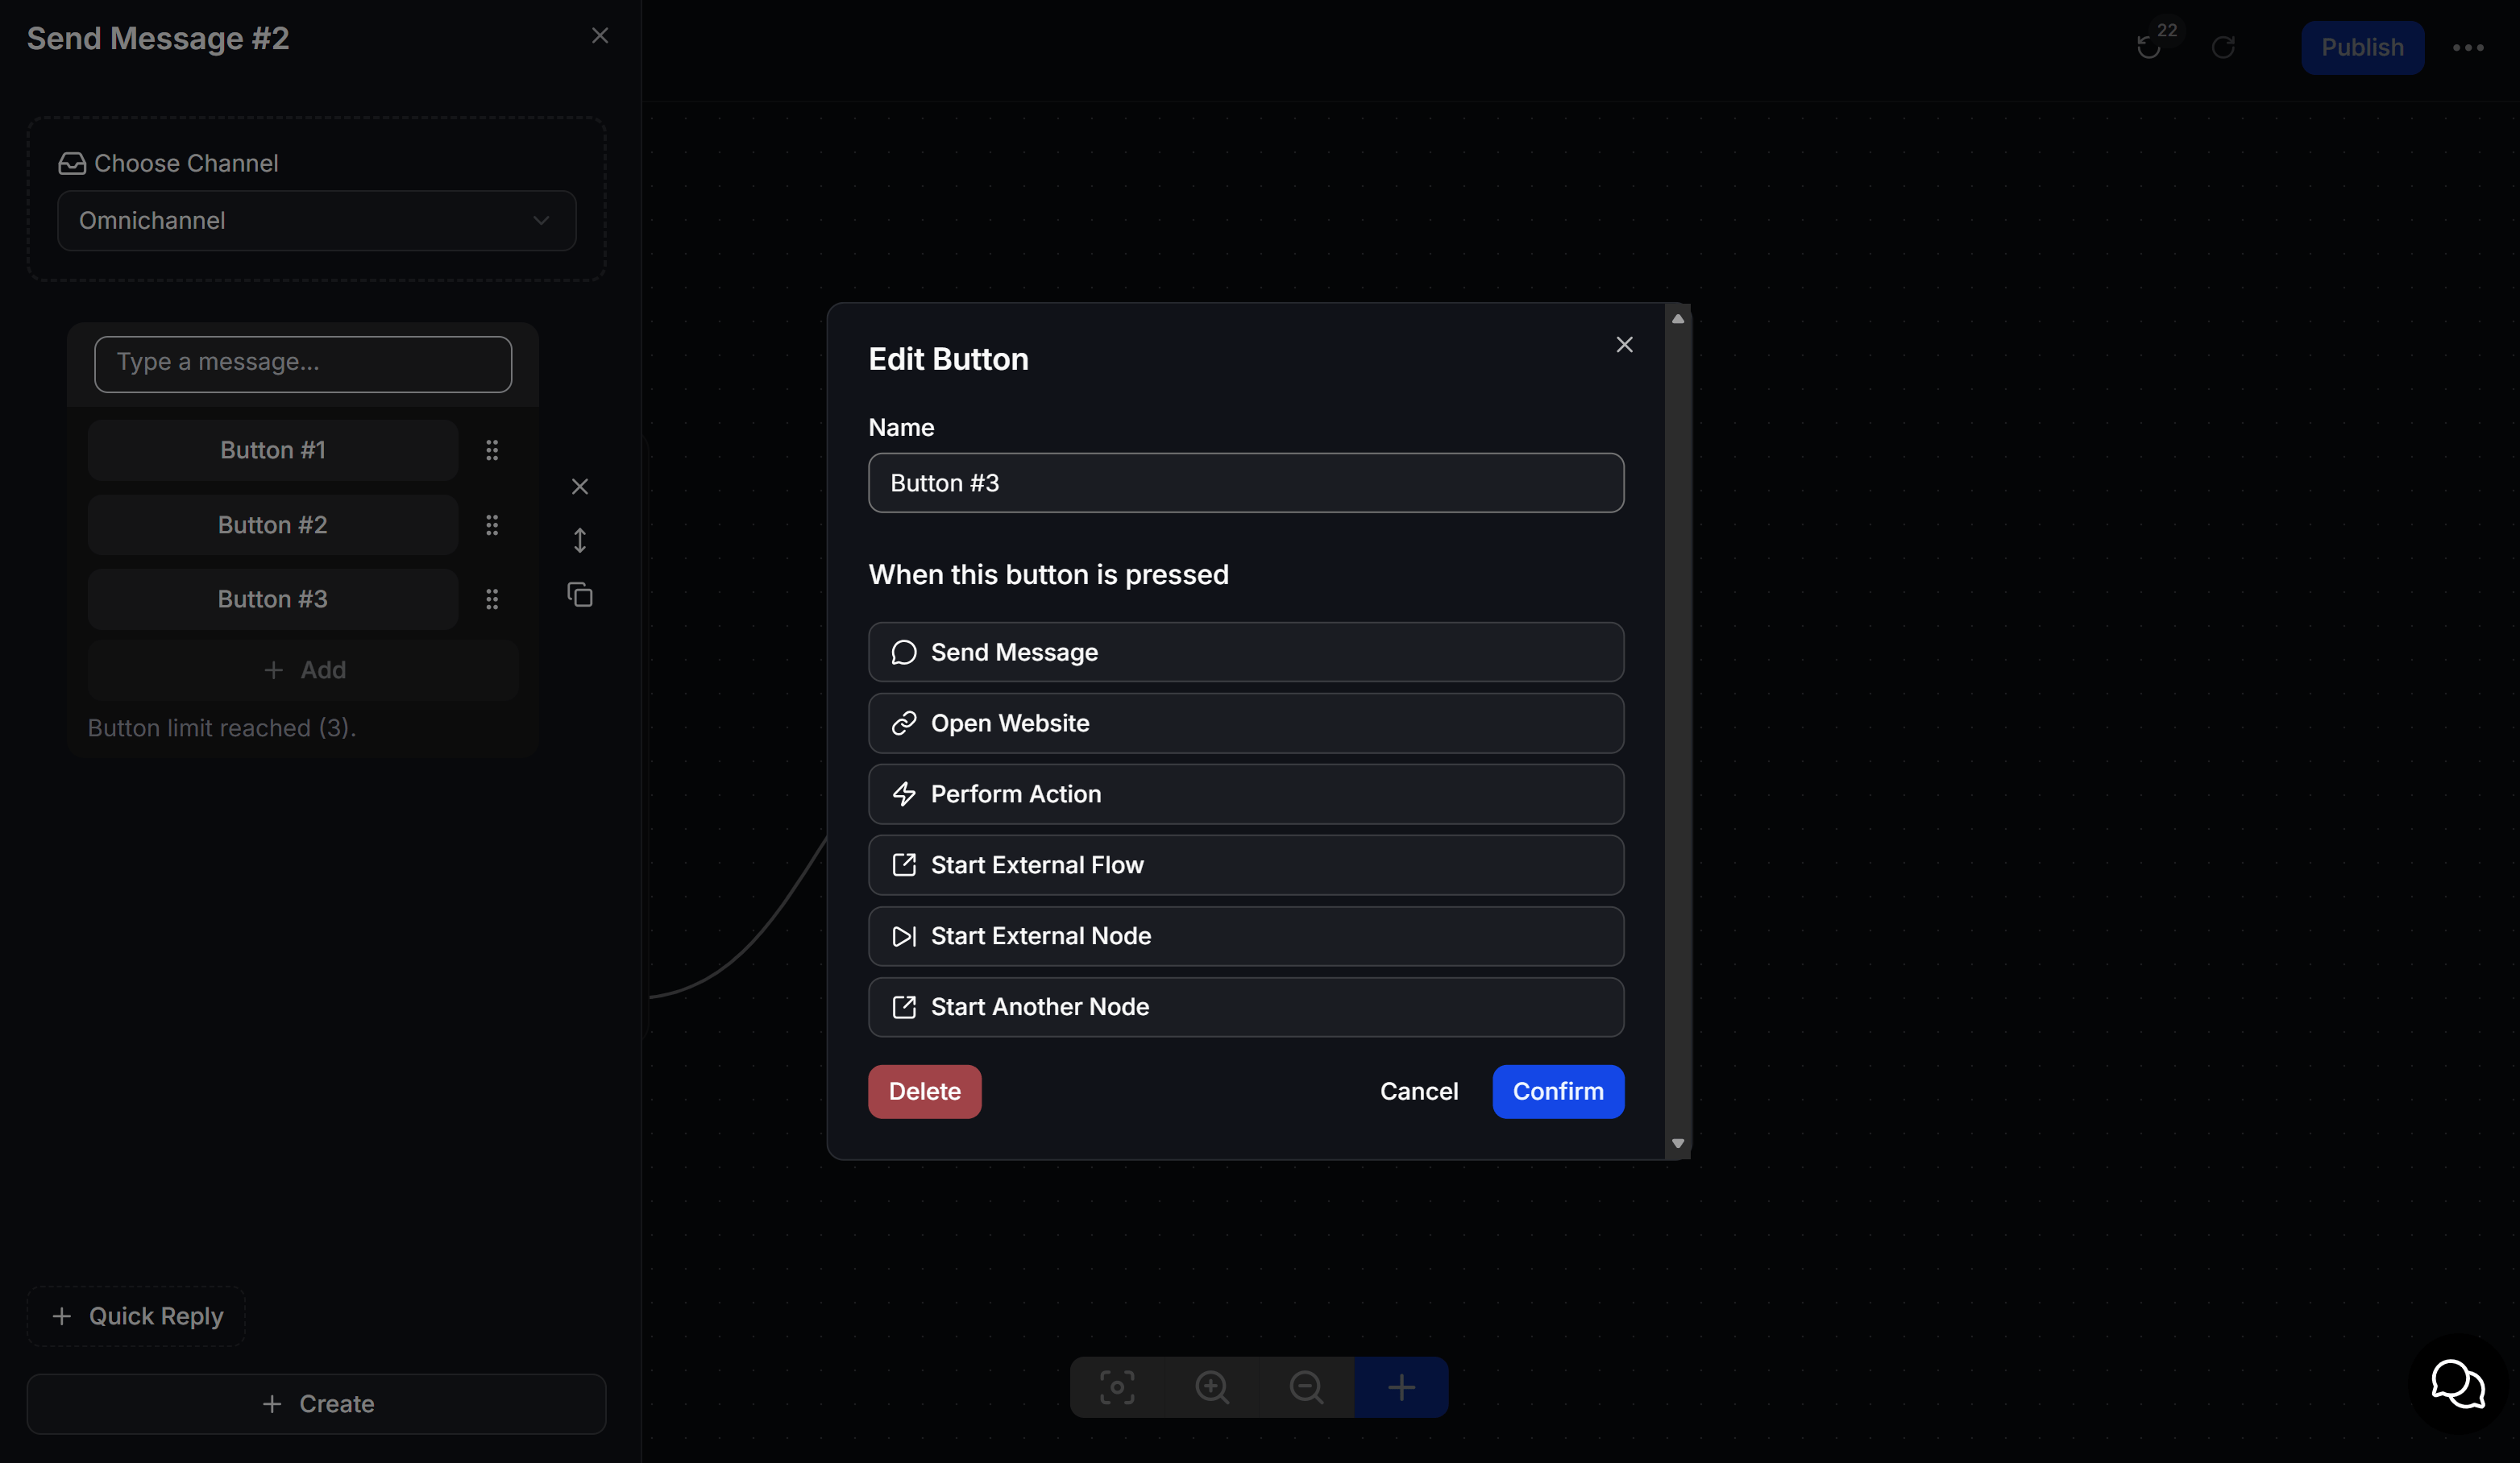
Before creating quick reply buttons, you must select or drag any block belonging to the Content Block group (e.g., “Send Text”, “Send Image”, etc.) onto the Flow Builder canvas, and then configure the buttons below it:- Enter your main message in the Type a message… field (Body) of that block.
- Click + Add to create buttons directly below the message (up to 3 buttons are supported).
- To configure actions for each button, click the 3-dots icon next to the button name to open the Edit Button window:
- Name: Set the button label.
- When this button is pressed: Choose a matching response action. For example, select Send Message to connect the button to a message block in the Content Block group (such as “Send Text”, “Send Image”, etc.) to continue the conversation flow. You can also select other actions like Open Website, Perform Action, or Start External Flow.
- Click Confirm to complete the button setup.
Step 3: Save and Test
Click Save to apply. After saving, send a test message to a test phone number to preview the formatting and ensure the conversational logic flows correctly before rolling it out to customers.FAQ
Can I send interactive messages outside the 24-hour window?
Can I send interactive messages outside the 24-hour window?
Yes, but you must register them as an Interactive Message Template in Meta Business Manager and wait for approval. For detailed guidance, see WhatsApp Message Template. Free-form interactive messages (which don’t require approval) can only be sent within the 24-hour session window since the customer’s last message.
Does using interactive messages increase WhatsApp API costs?
Does using interactive messages increase WhatsApp API costs?
No. Pricing follows Meta Cloud API’s standard conversation-based pricing (Utility, Marketing, or Service). There is no extra charge for including lists or buttons.
Can customers select multiple options at once?
Can customers select multiple options at once?
No. Each interactive message allows selecting only 1 option. However, customers can go back to the previous message bubble to select a different option if they wish to change their choice.