

Overview of WhatsApp Coexistence
With this integration, you can:- Use the WhatsApp Business mobile app and ChatbotX’s WhatsApp API simultaneously.
- Sync contacts and chat history from the mobile app to ChatbotX.
- Respond manually from your phone when needed.
- Unlock advanced WhatsApp API features in ChatbotX, such as template messages, automations, and centralized inbox management.
Note: This feature may not be available in all countries and territories. Support depends on your phone number’s country code and Meta’s current policies at the time of setup.
Automation
The WhatsApp Business mobile app includes basic automation features like greeting messages and away messages. If you are using these automations on your mobile app, ensure you turn them off before getting started with ChatbotX.Message Pricing
After setting up your business account on the Cloud API:- Messages sent directly from your WhatsApp Business mobile app remain free.
- Messages sent through ChatbotX follow Meta’s Cloud API pricing.
Before you begin
Prepare the following details before starting:- Your active WhatsApp Business phone number.
- A Meta Business Account (Business Portfolio) with management permissions for the number.
- Your business display name.
- Your website URL, business category, and timezone.
Step 1: Open the Channel Selection page
- Go to Settings → Channel.
- Click Add WhatsApp.
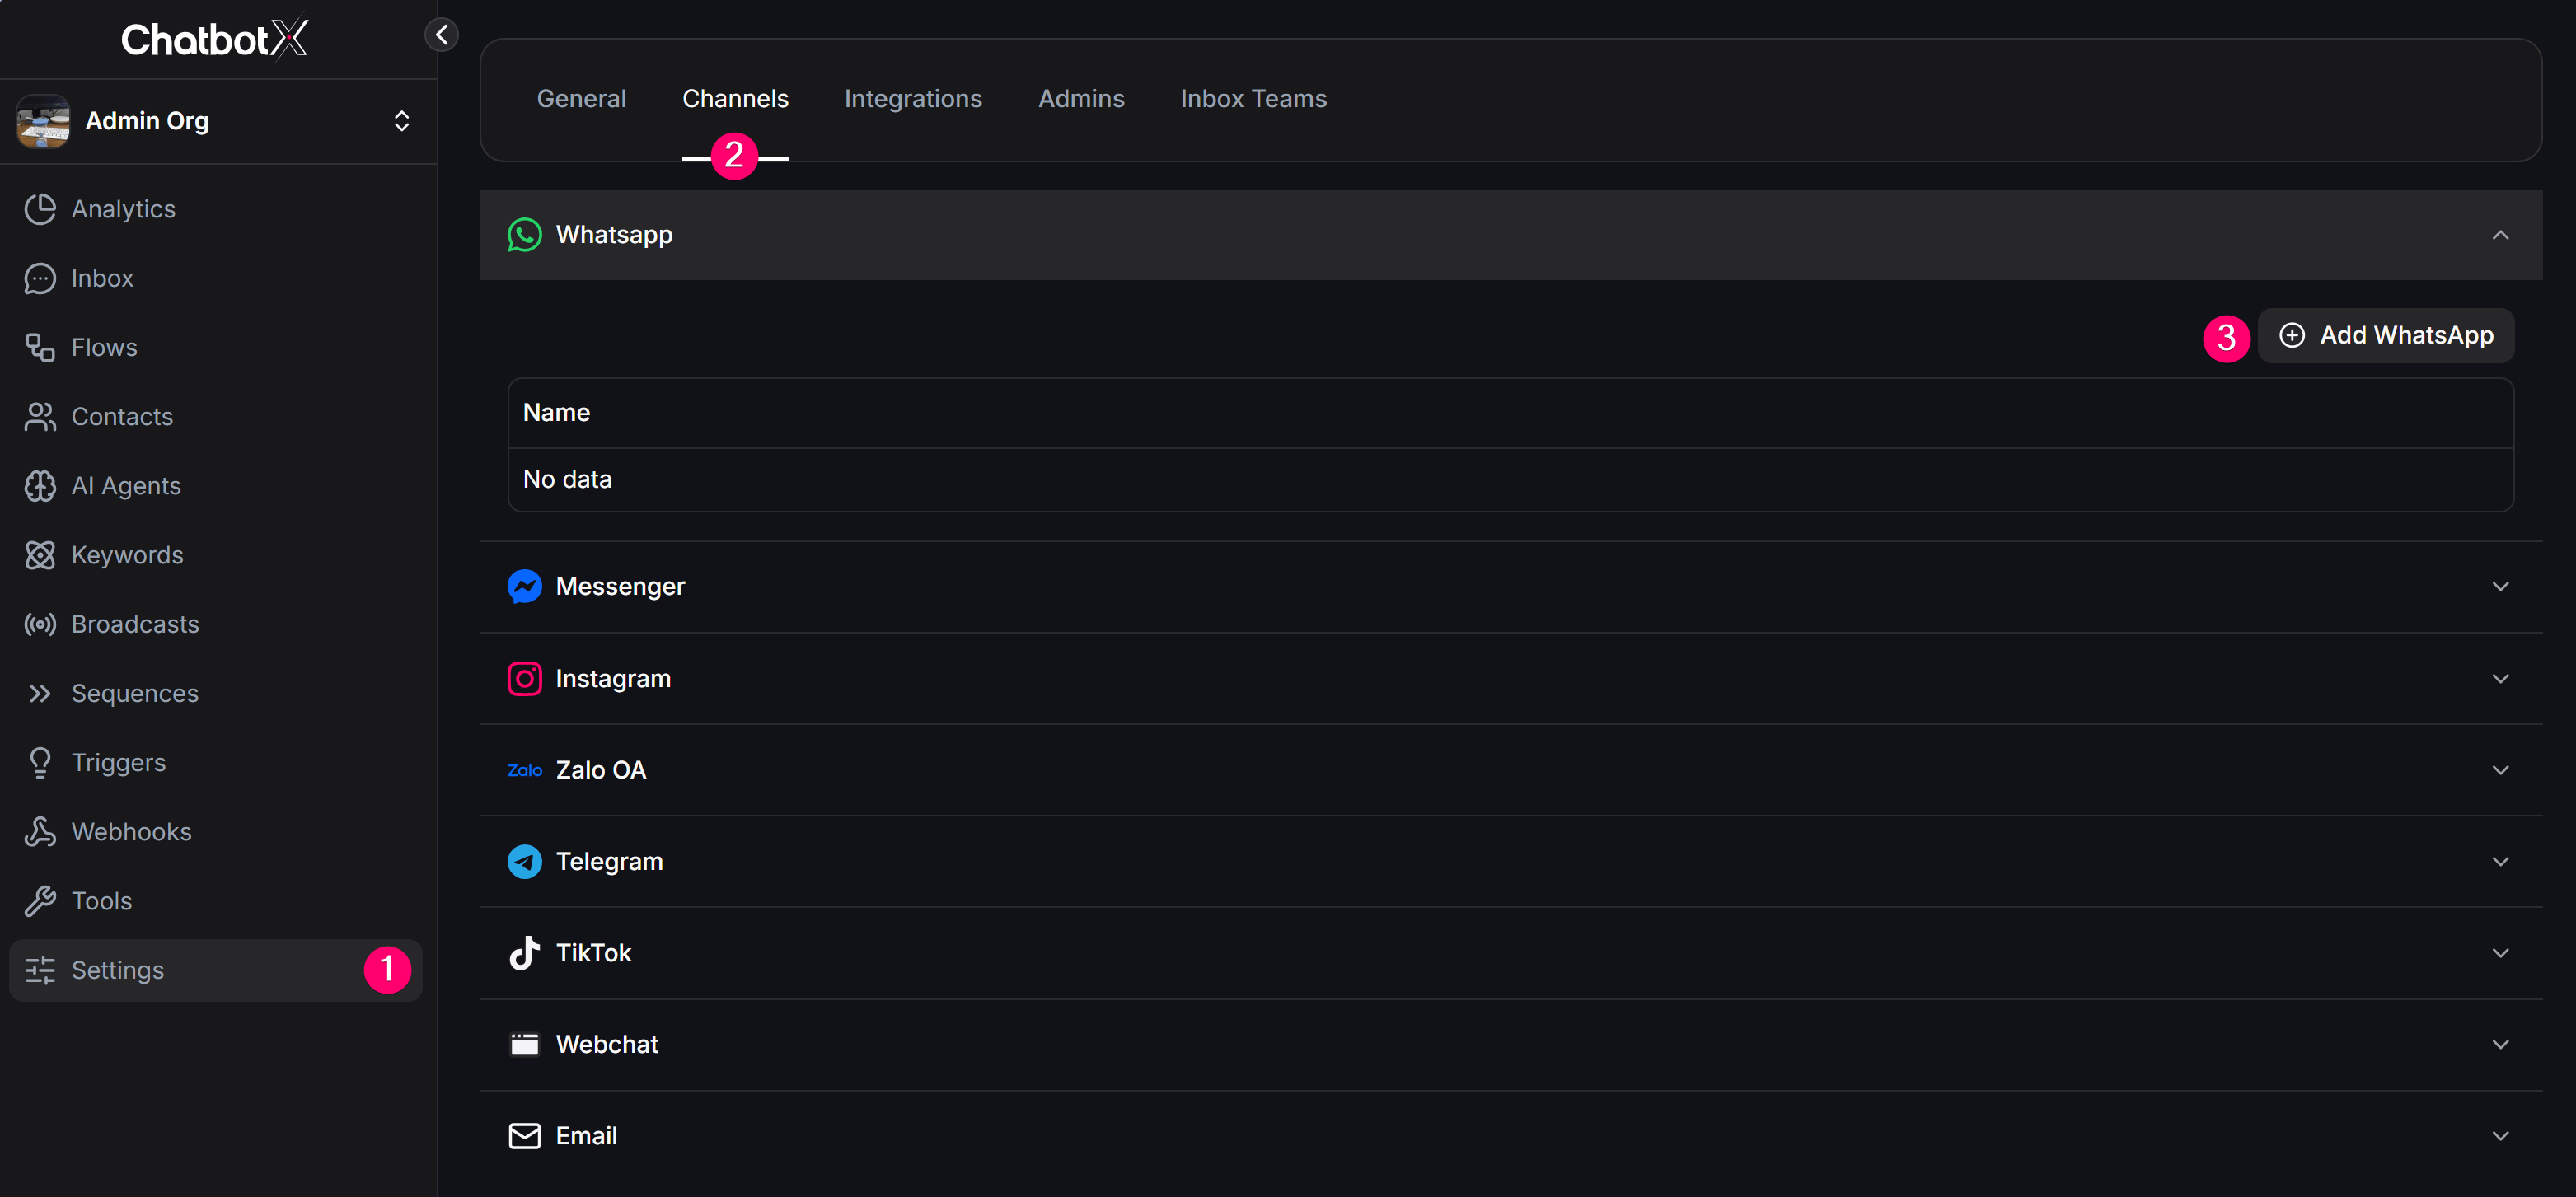
Step 2: Select WhatsApp in the Create Workspace menu
On the Create Workspace menu, click Continue next to the Whatsapp option.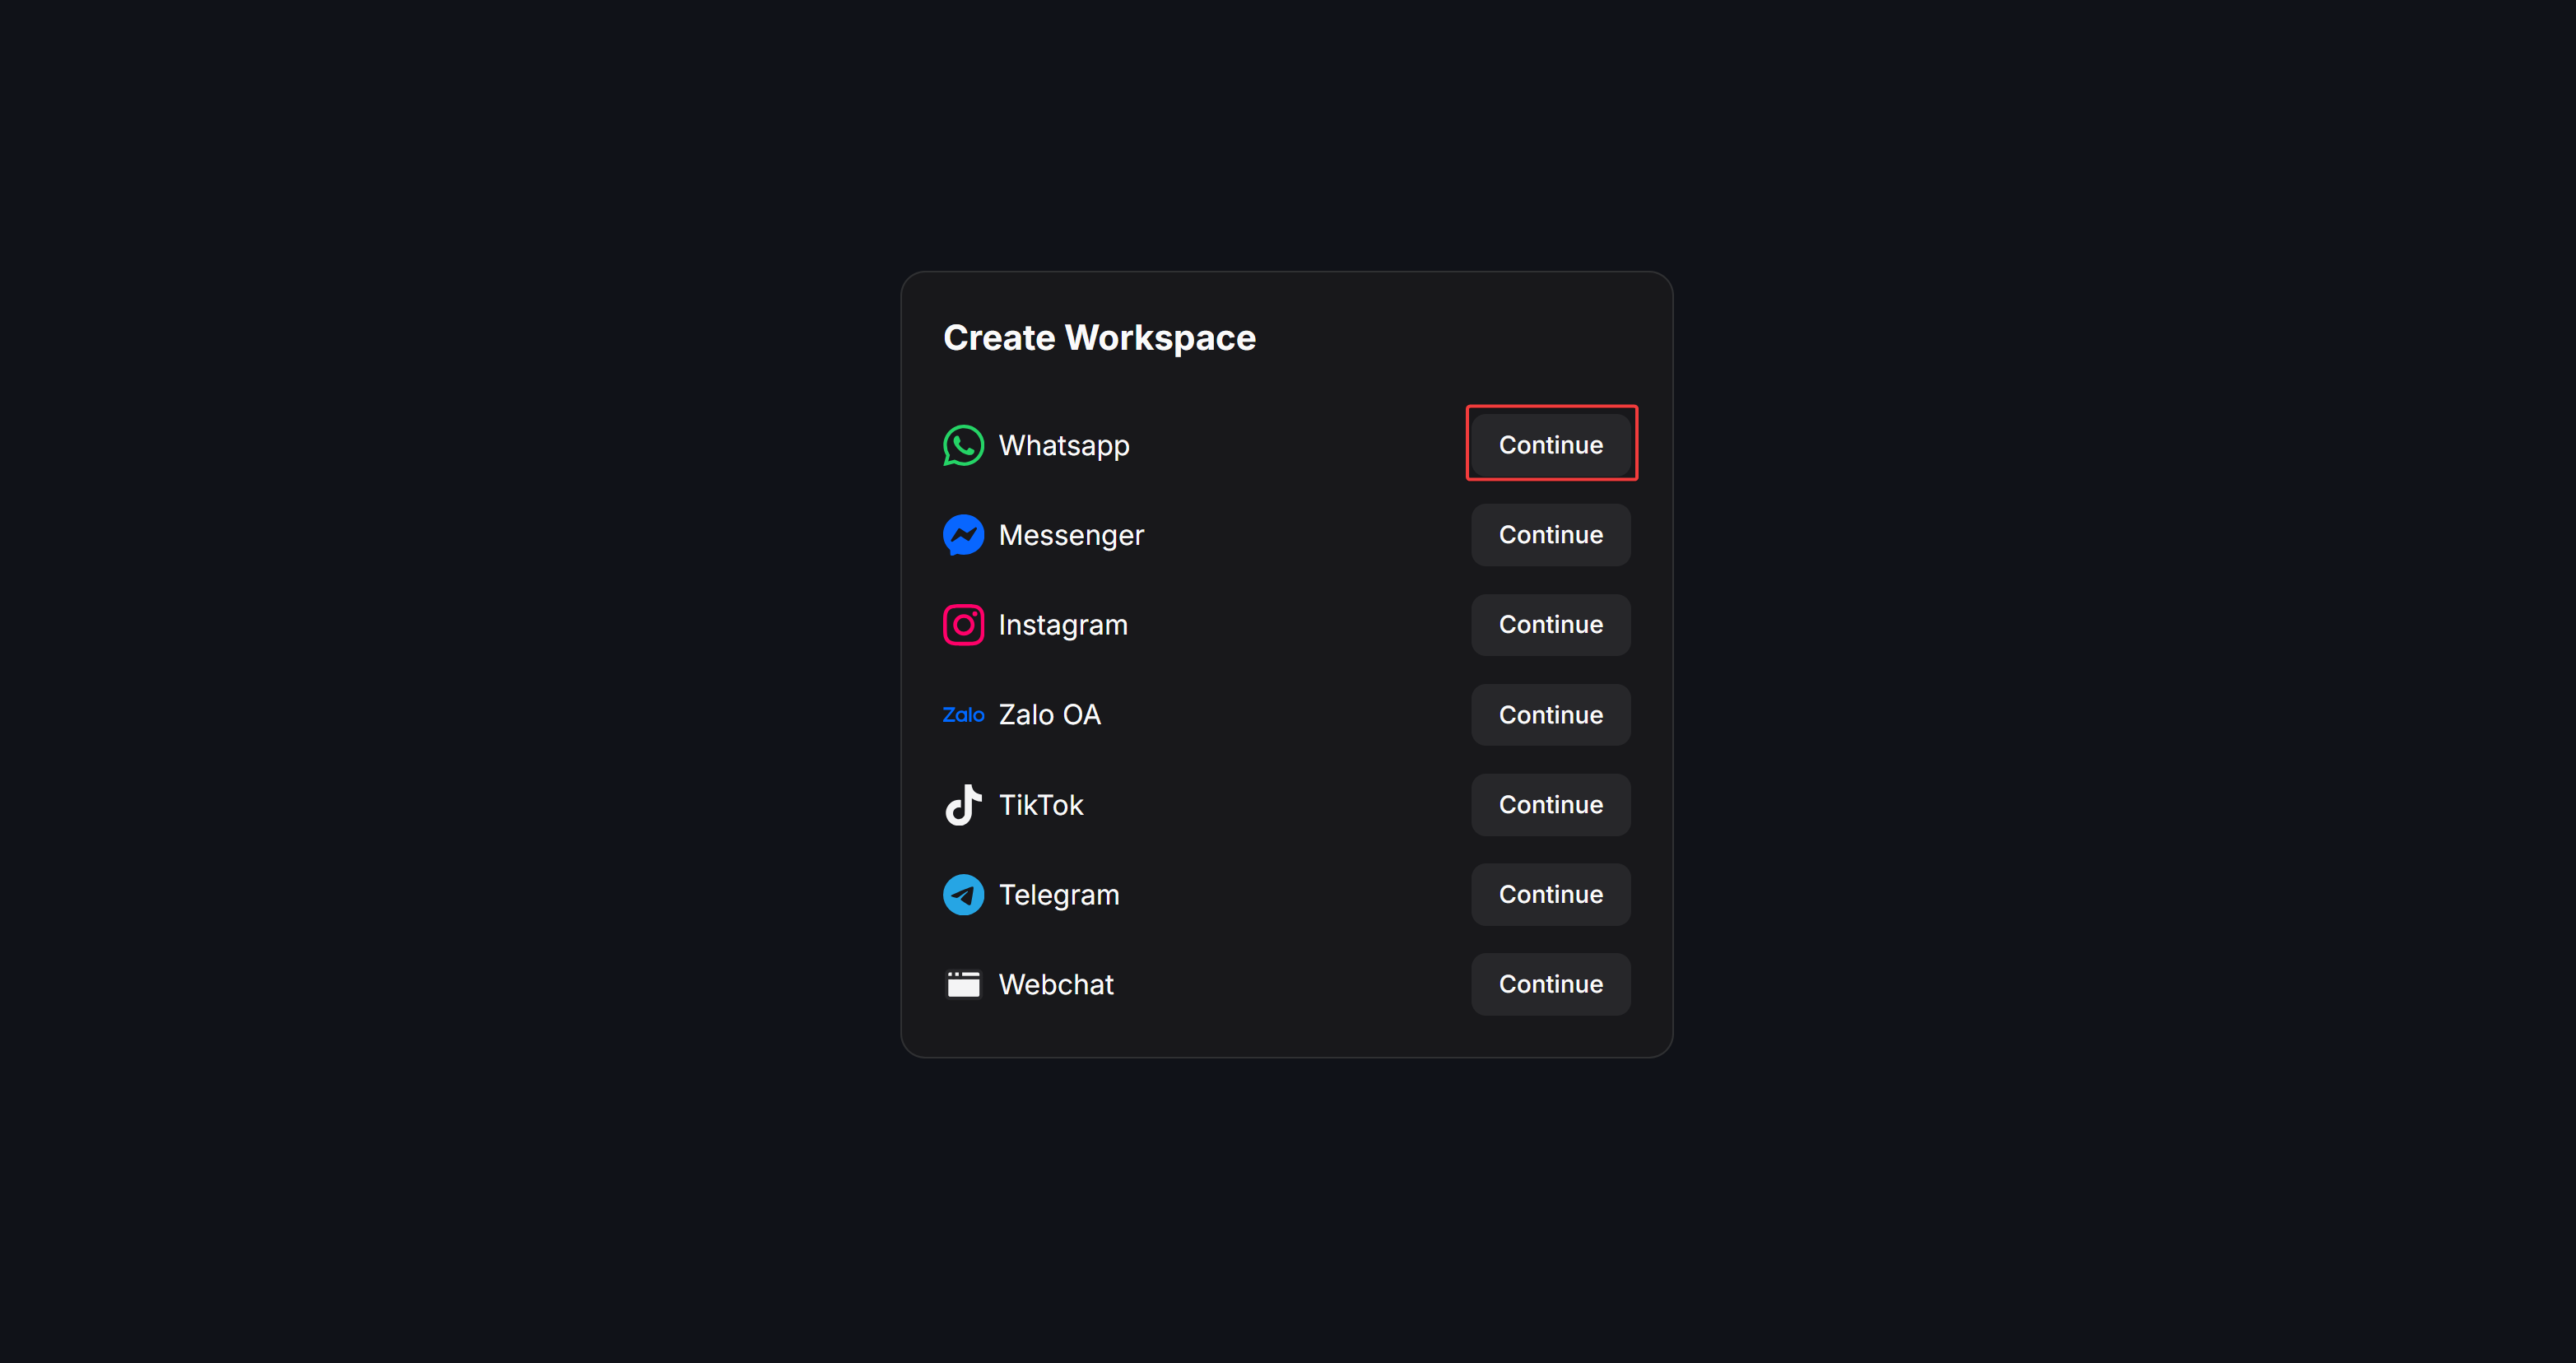
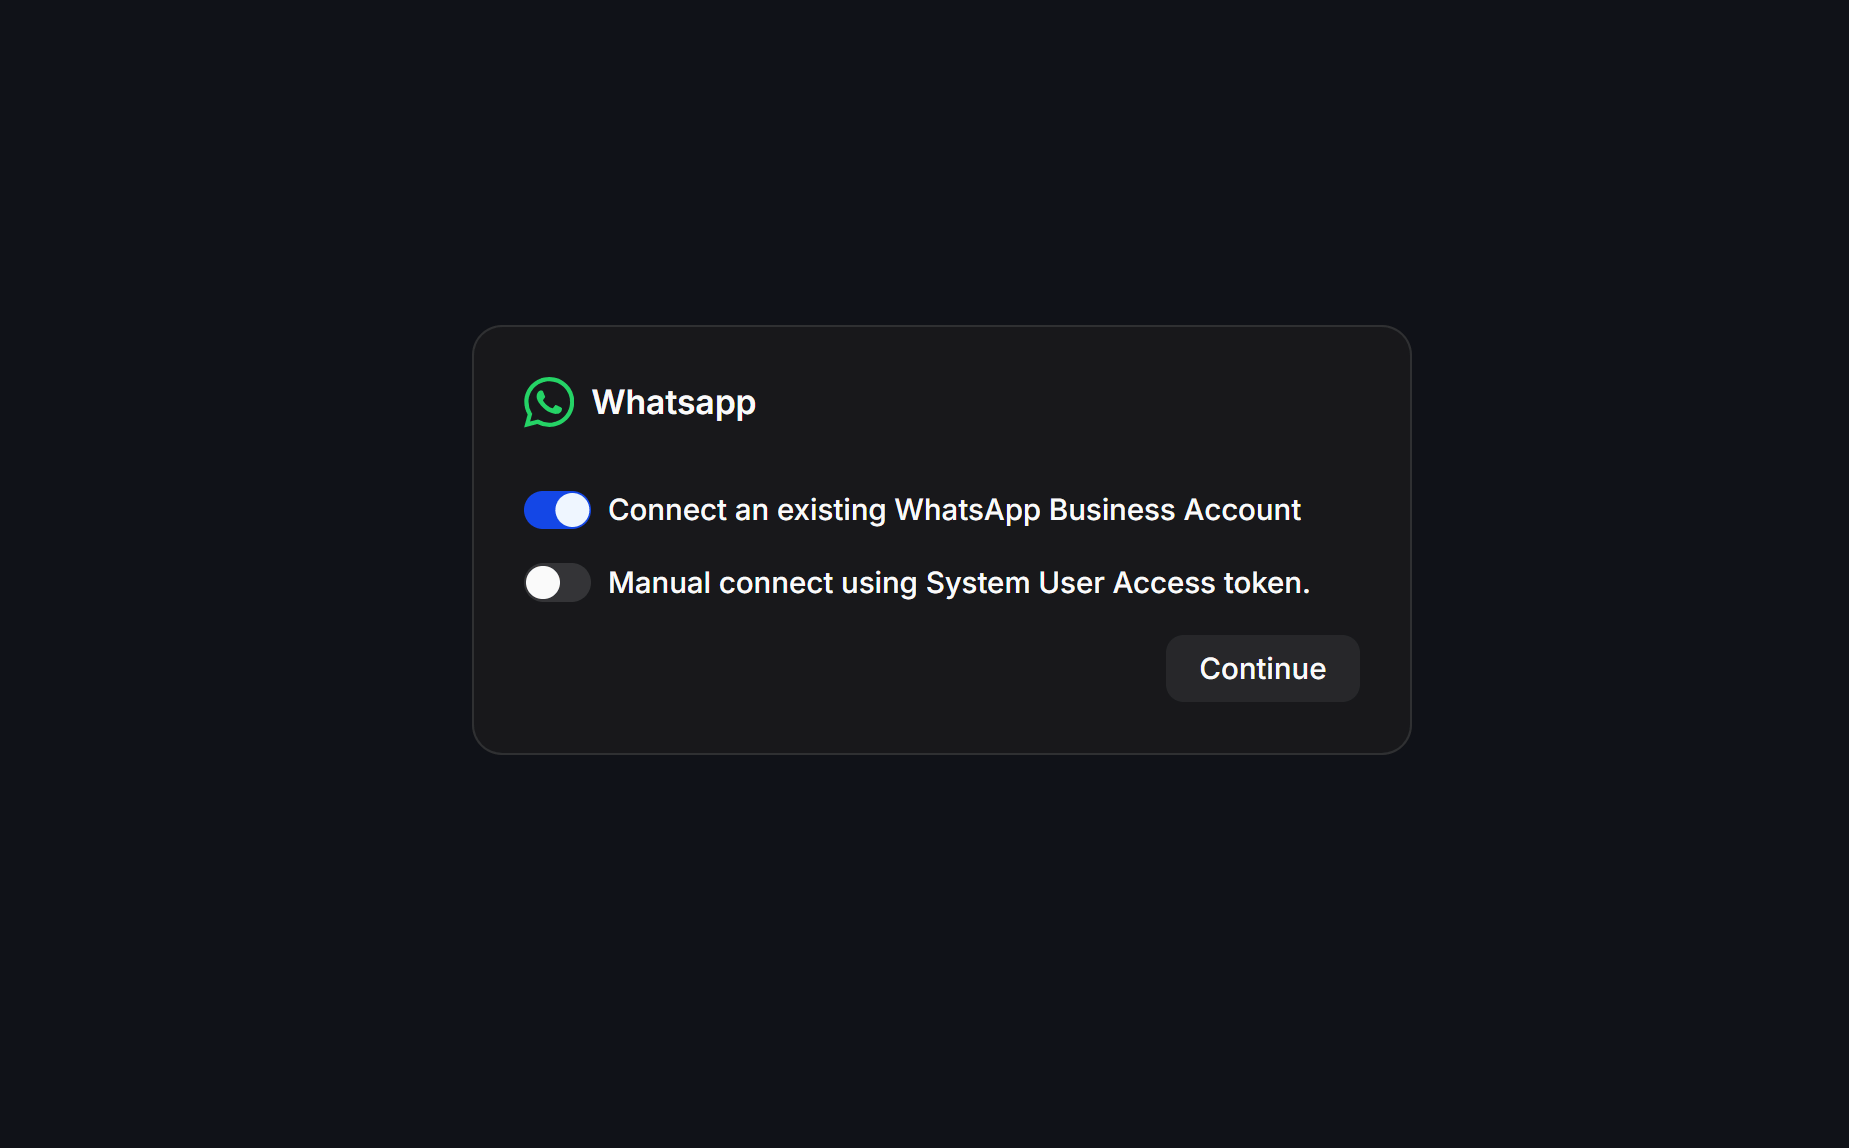
Step 3: Choose the WhatsApp connection type
- Turn on Connect an existing WhatsApp Business Account.
- Click Continue.
Step 4: Log in and confirm your Facebook account
Log in to the personal Facebook account that manages your Meta Business assets, then click Continue as [Your Name].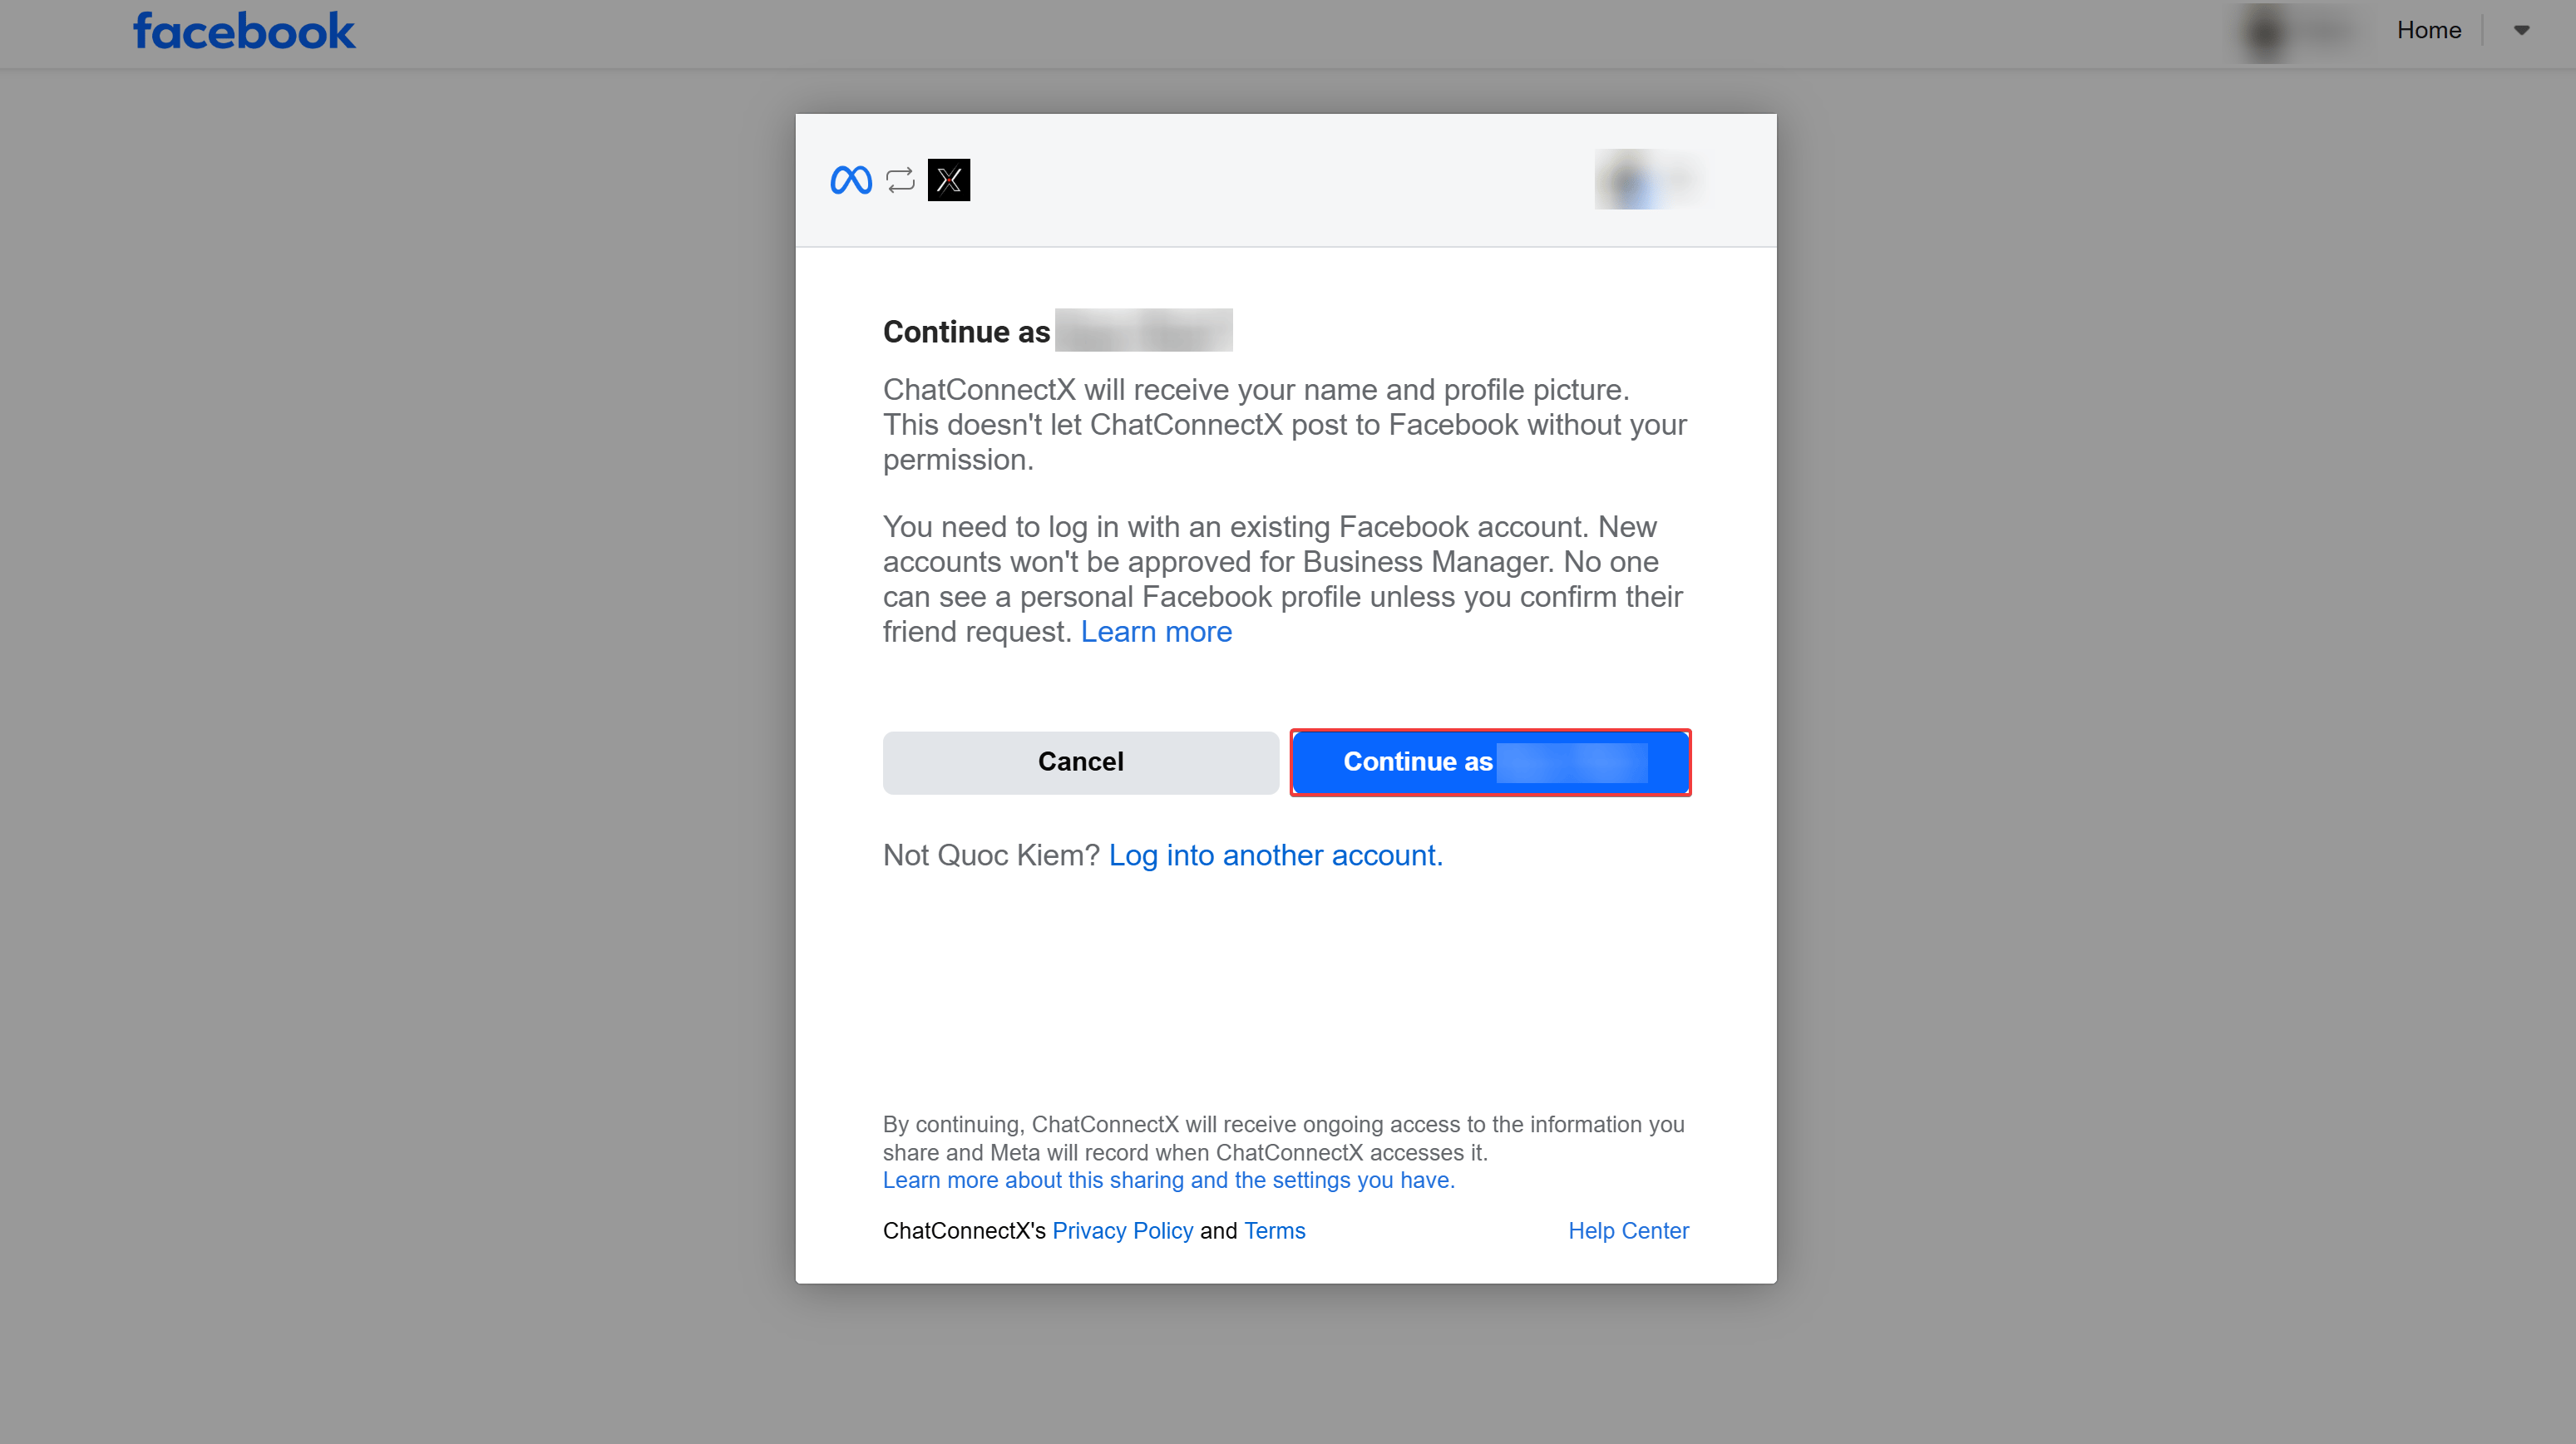
Step 5: Confirm access permissions
Review the permissions page showing “Seamlessly connect your account to…”, then click Continue.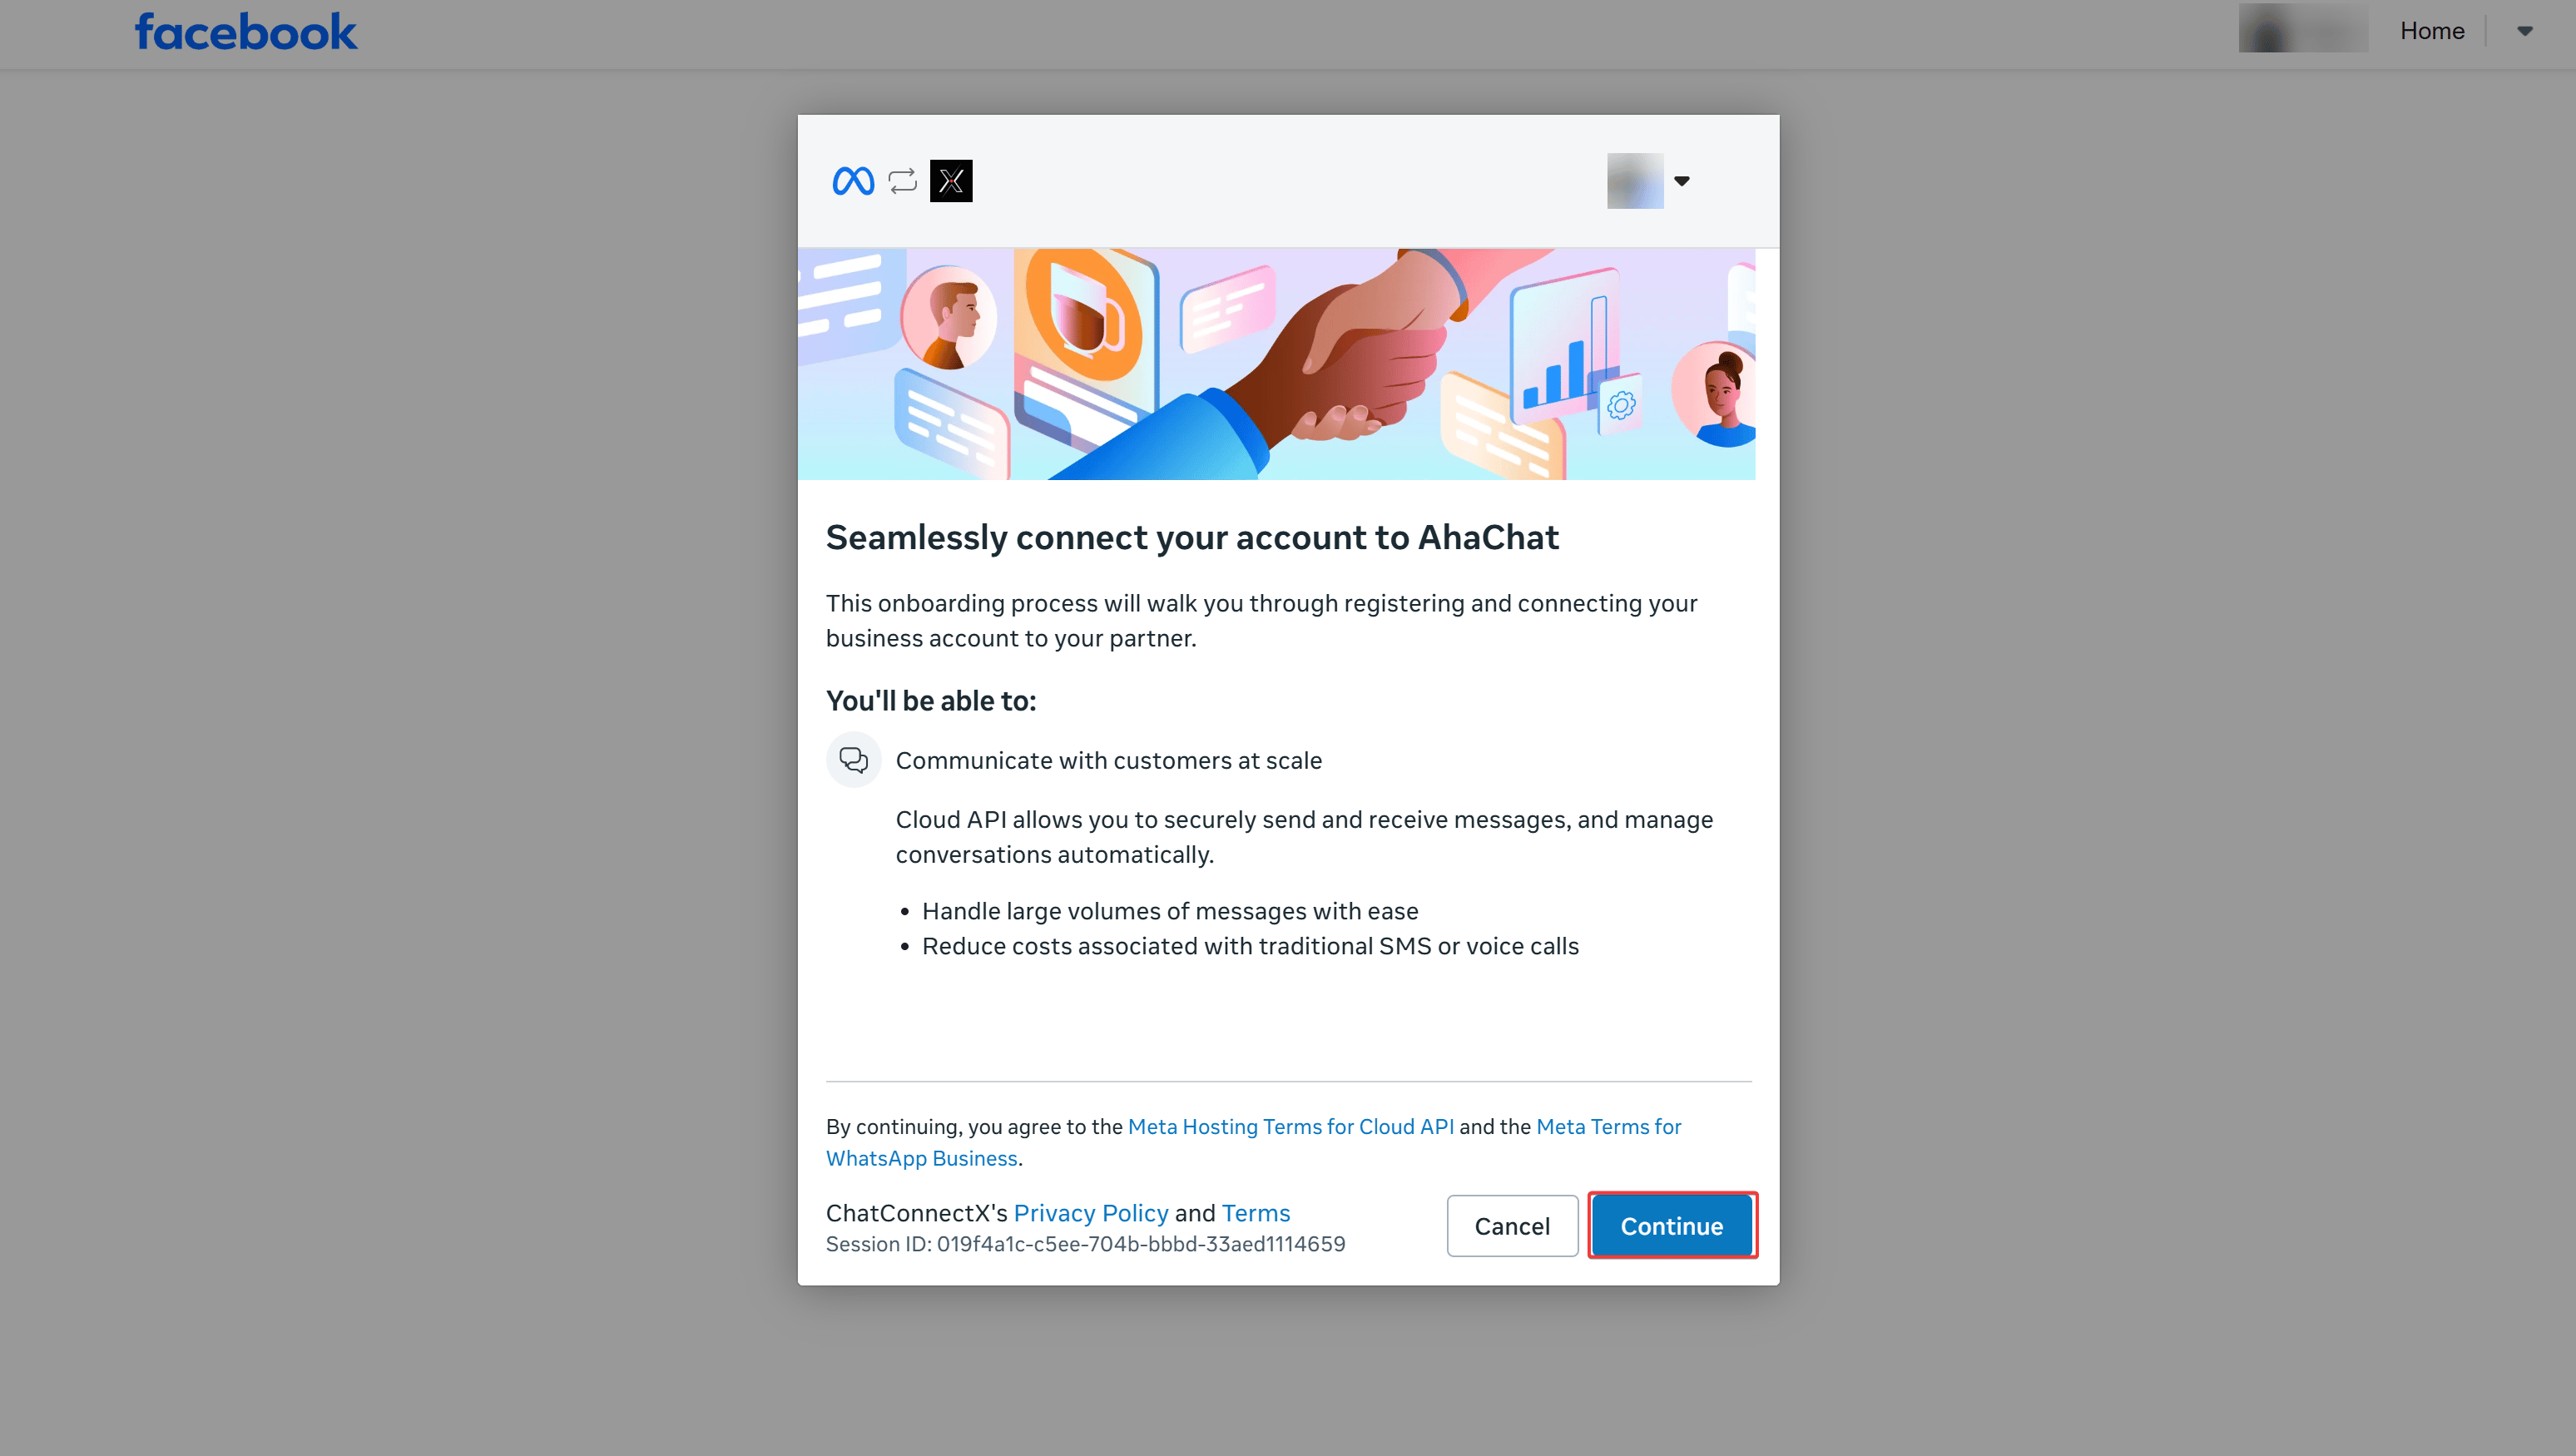
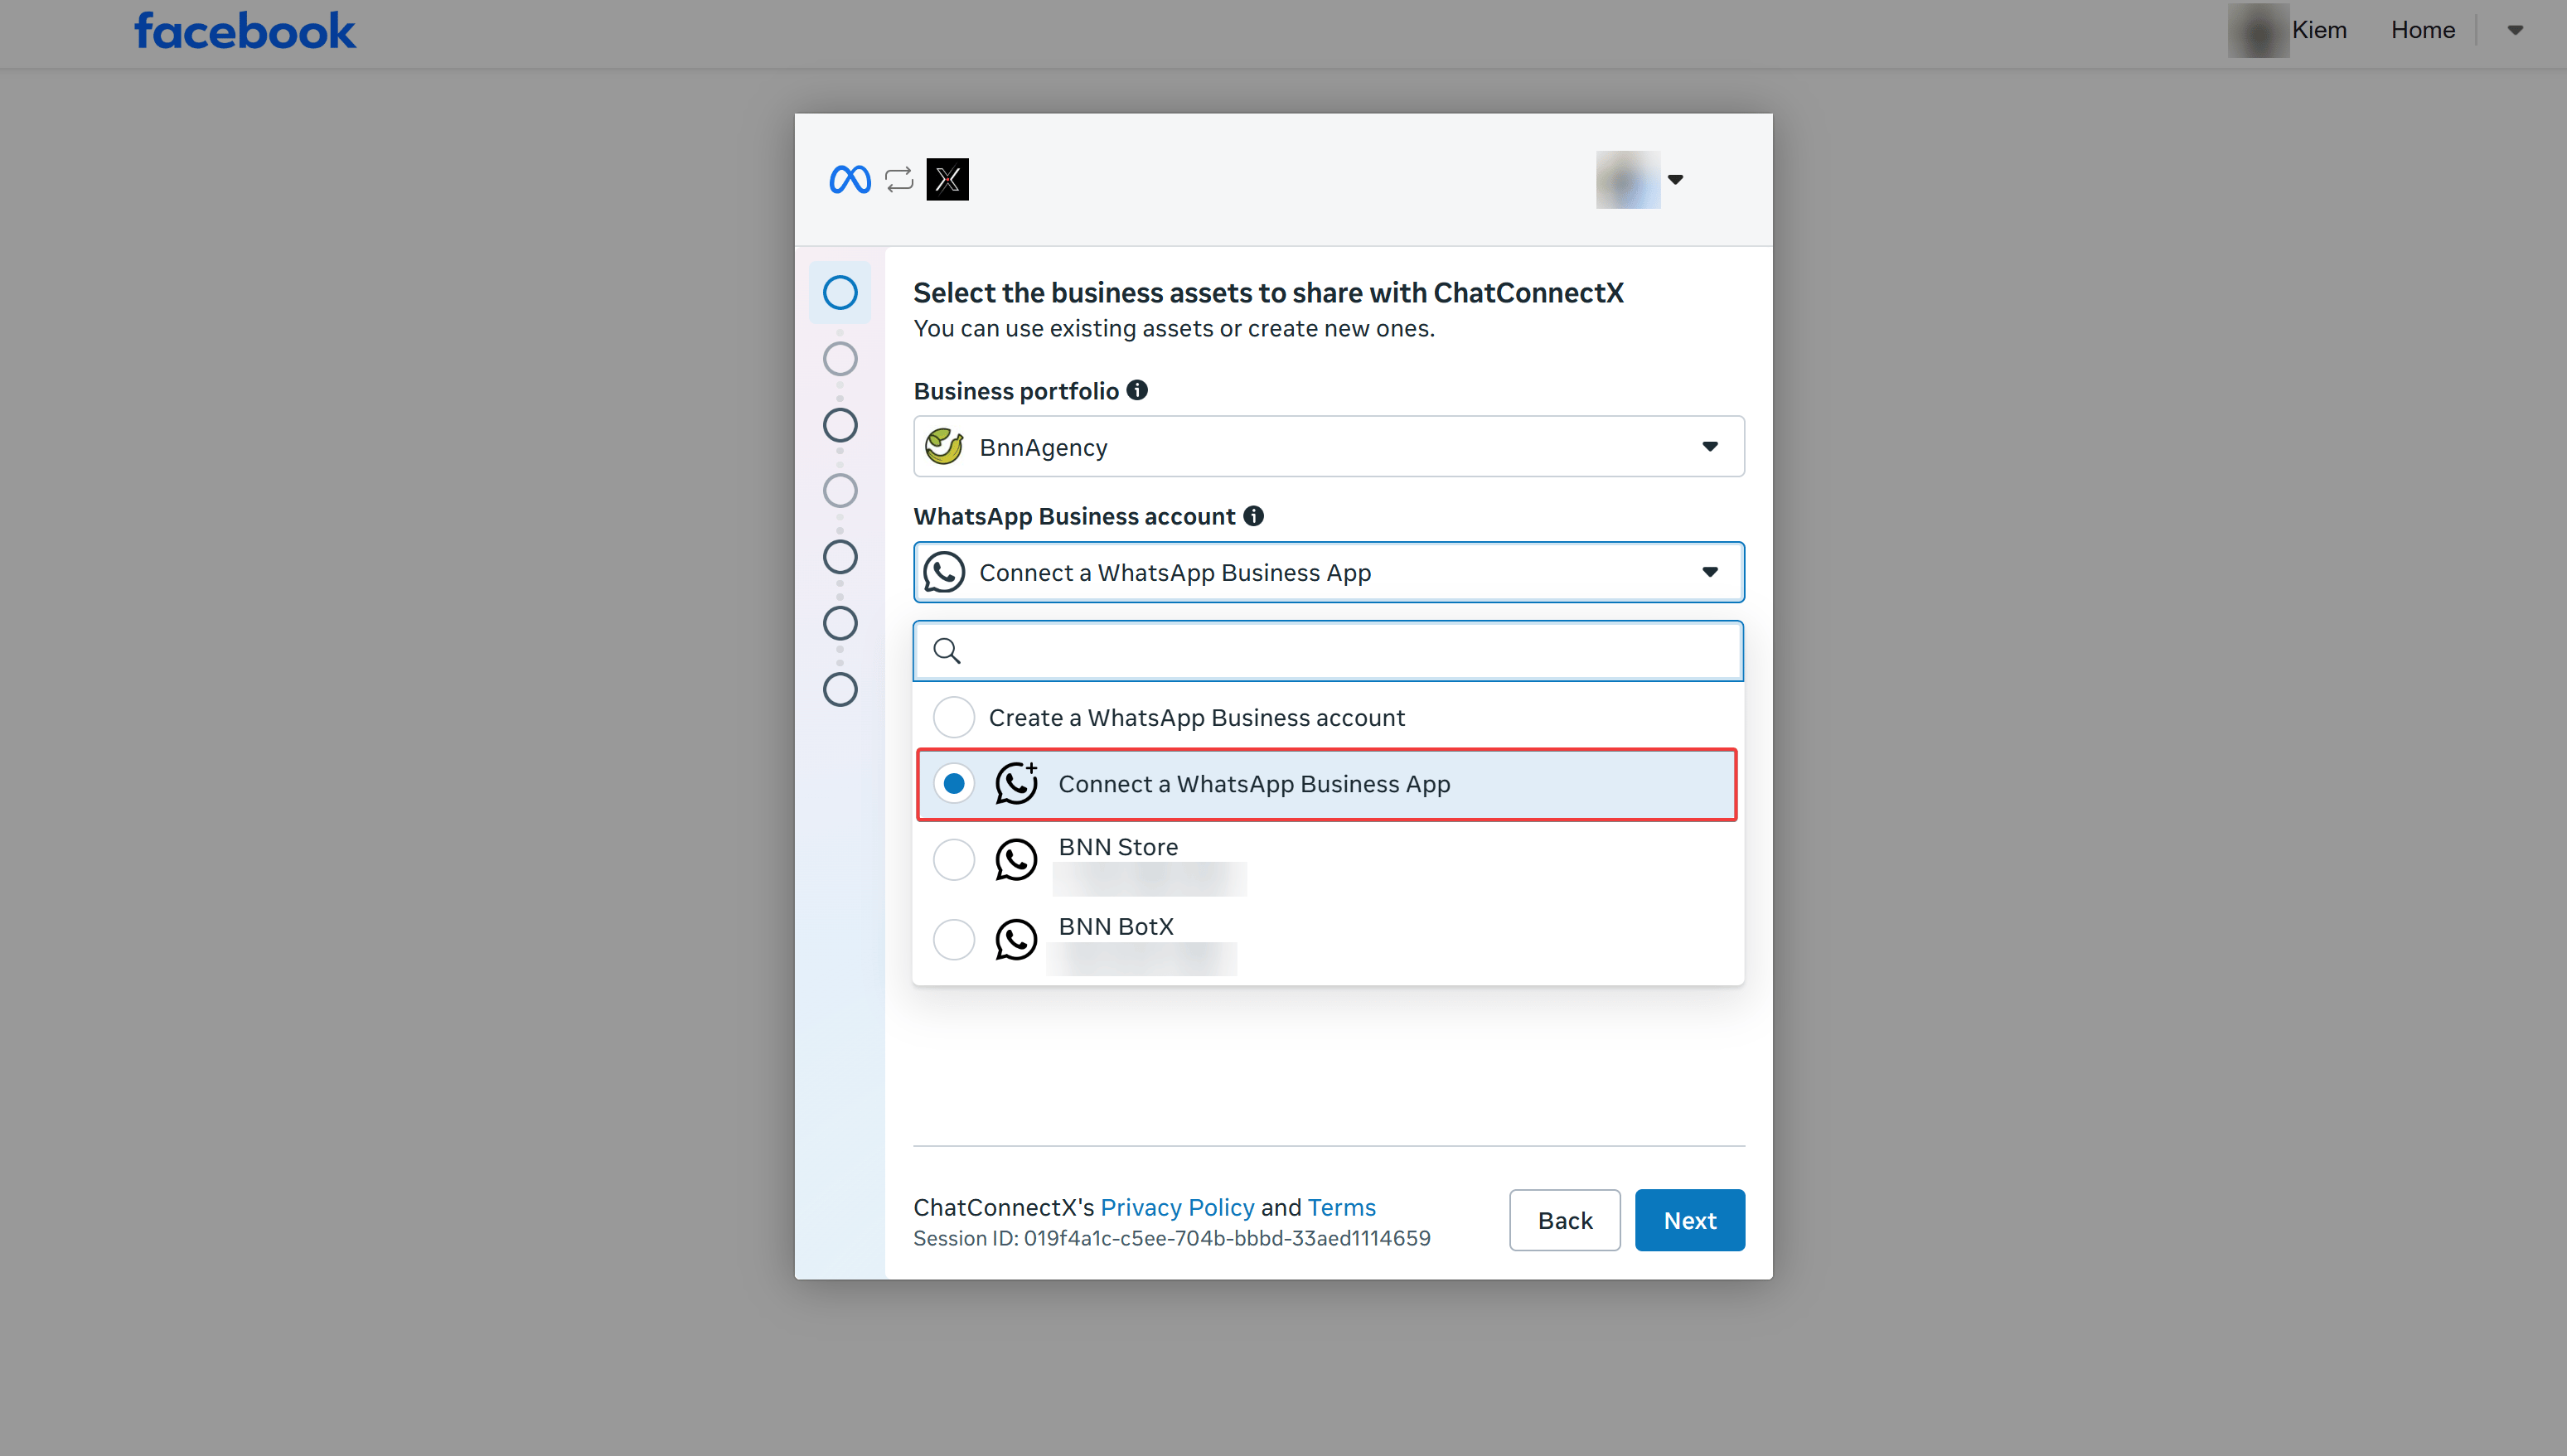
Step 6: Select Business Assets
- Under Business portfolio: Select the Meta Business Account that owns your assets.
- Under WhatsApp Business account: Click the dropdown and select Connect a WhatsApp Business App.
- Click Next to proceed.
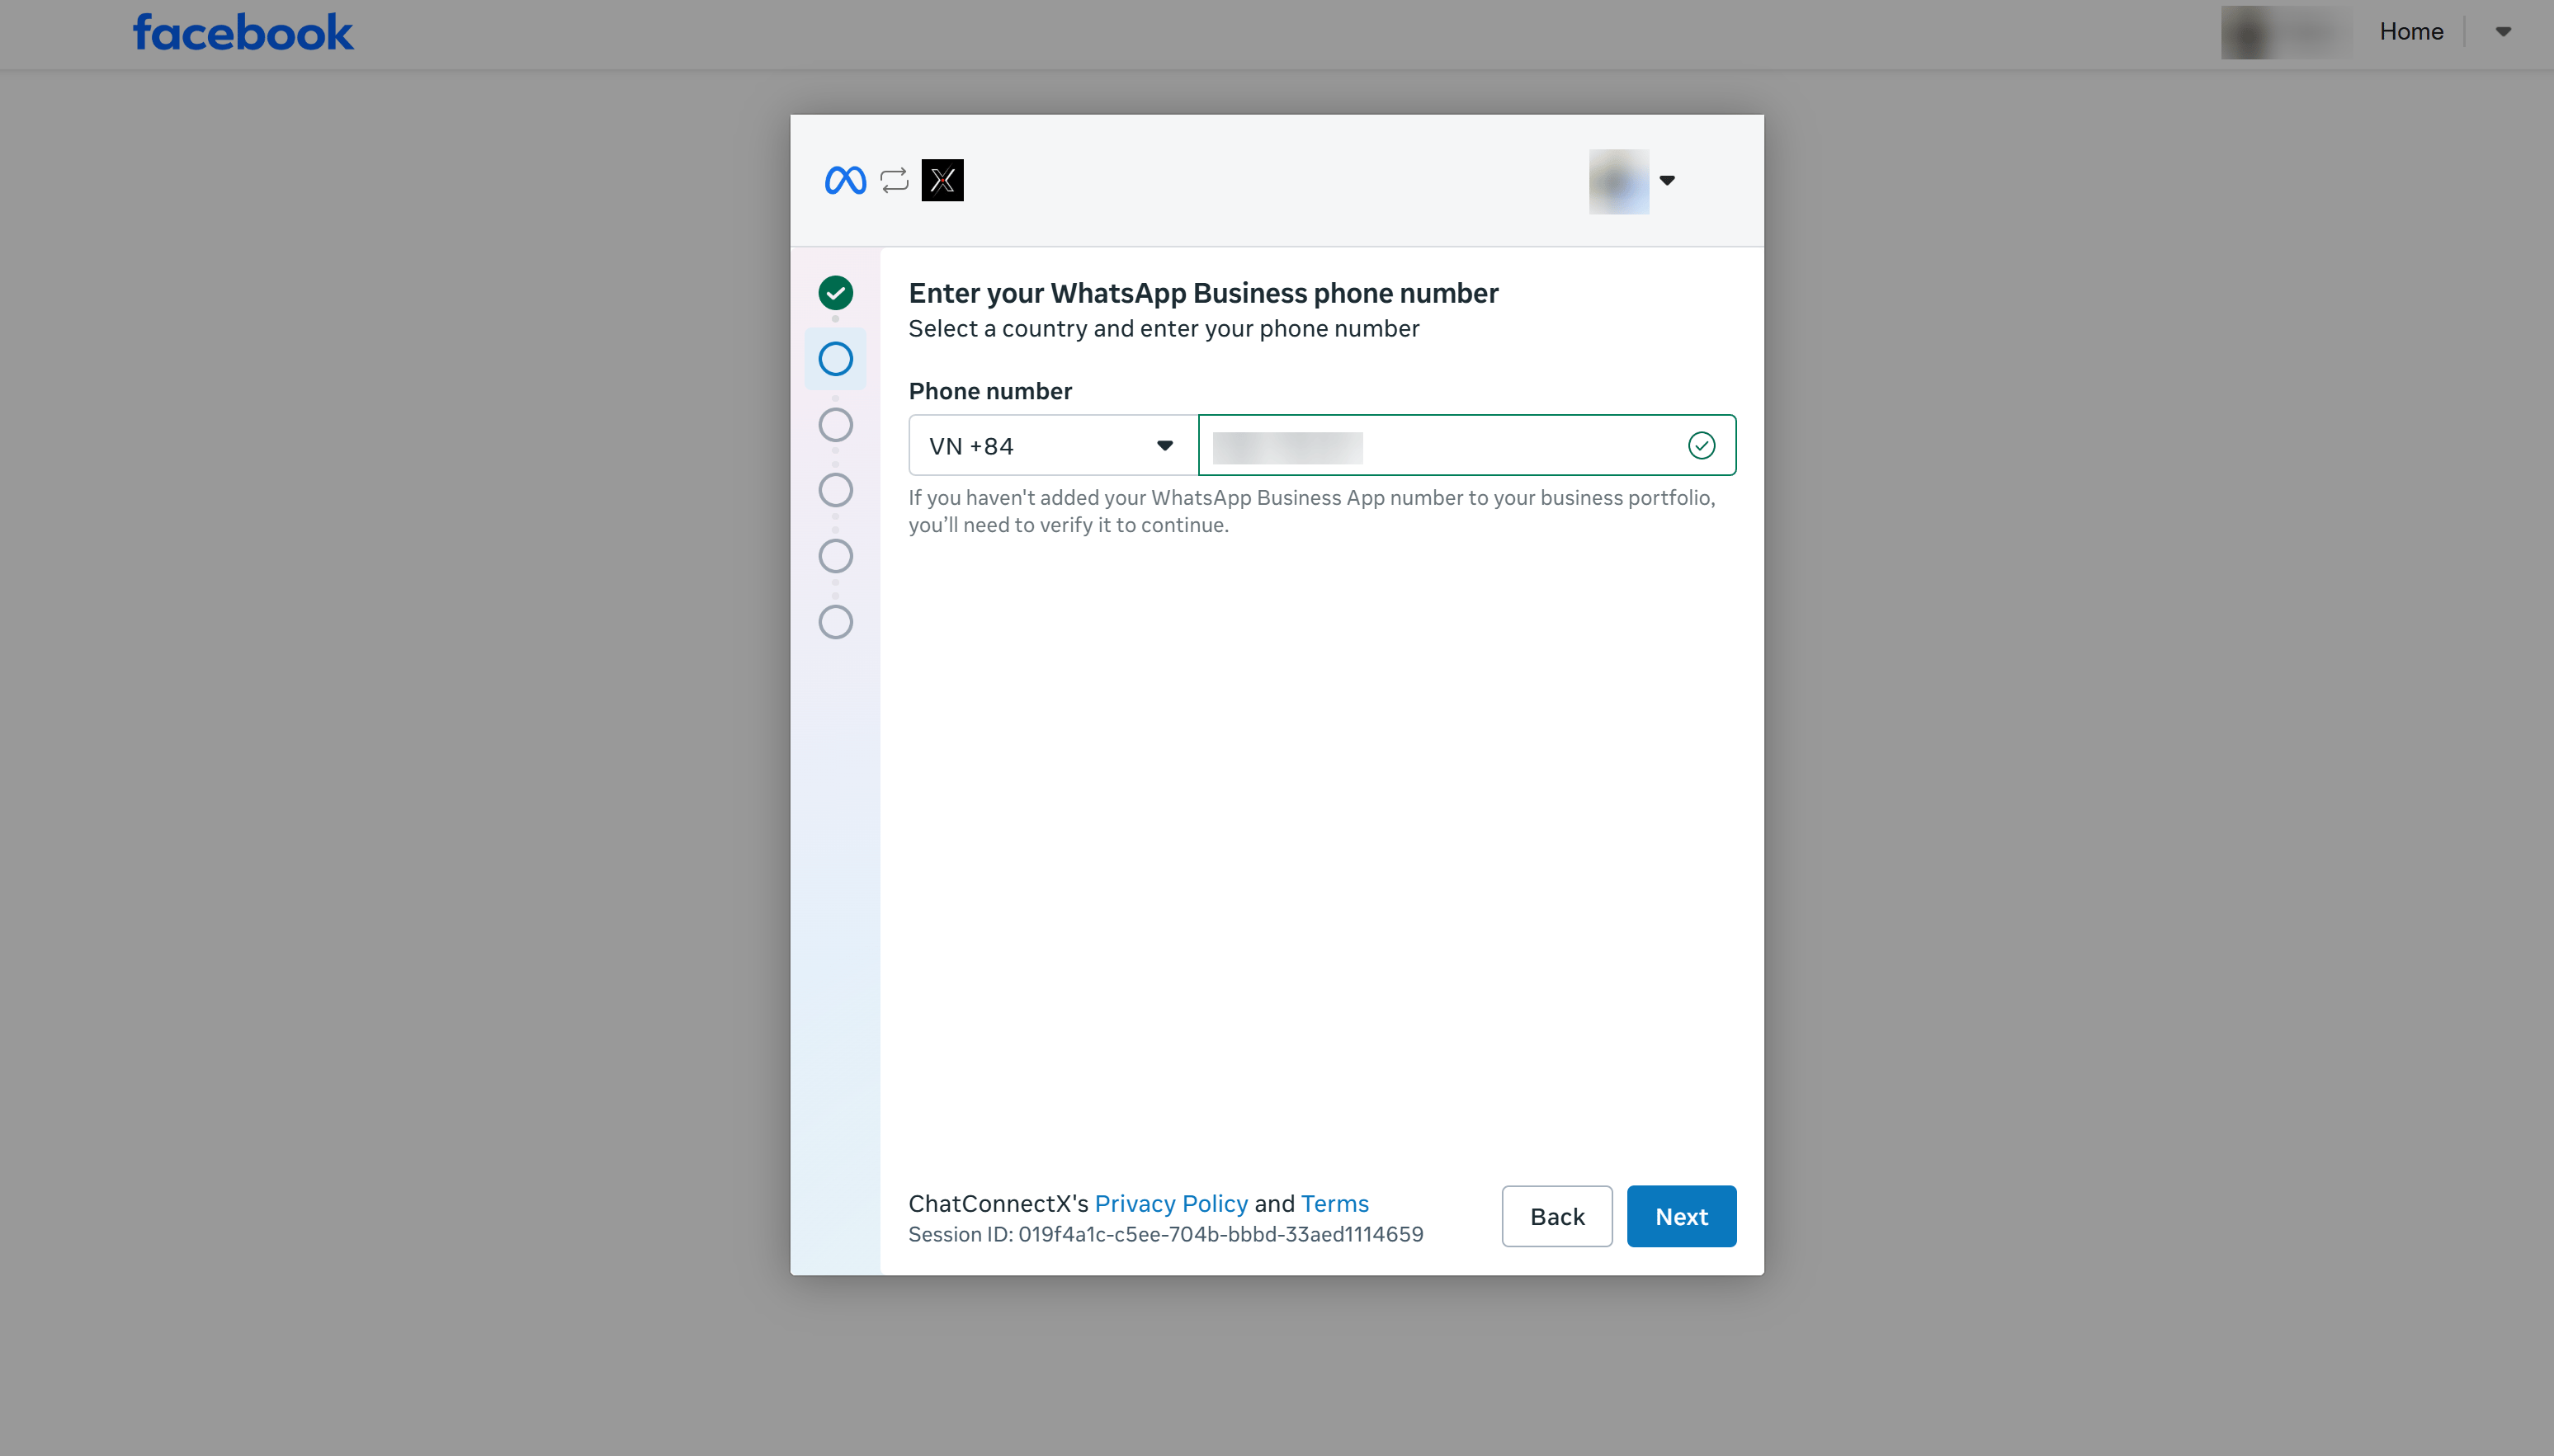
Step 7: Enter your WhatsApp Business phone number
- Select your country code (e.g.,
VN +84for Vietnam). - Enter the WhatsApp Business phone number currently active on your mobile app.
- Click Next.
Step 8: Read the existing app connection details
Review the information regarding Sharing Access and Protecting your data, then click Next to proceed to the QR code synchronization step.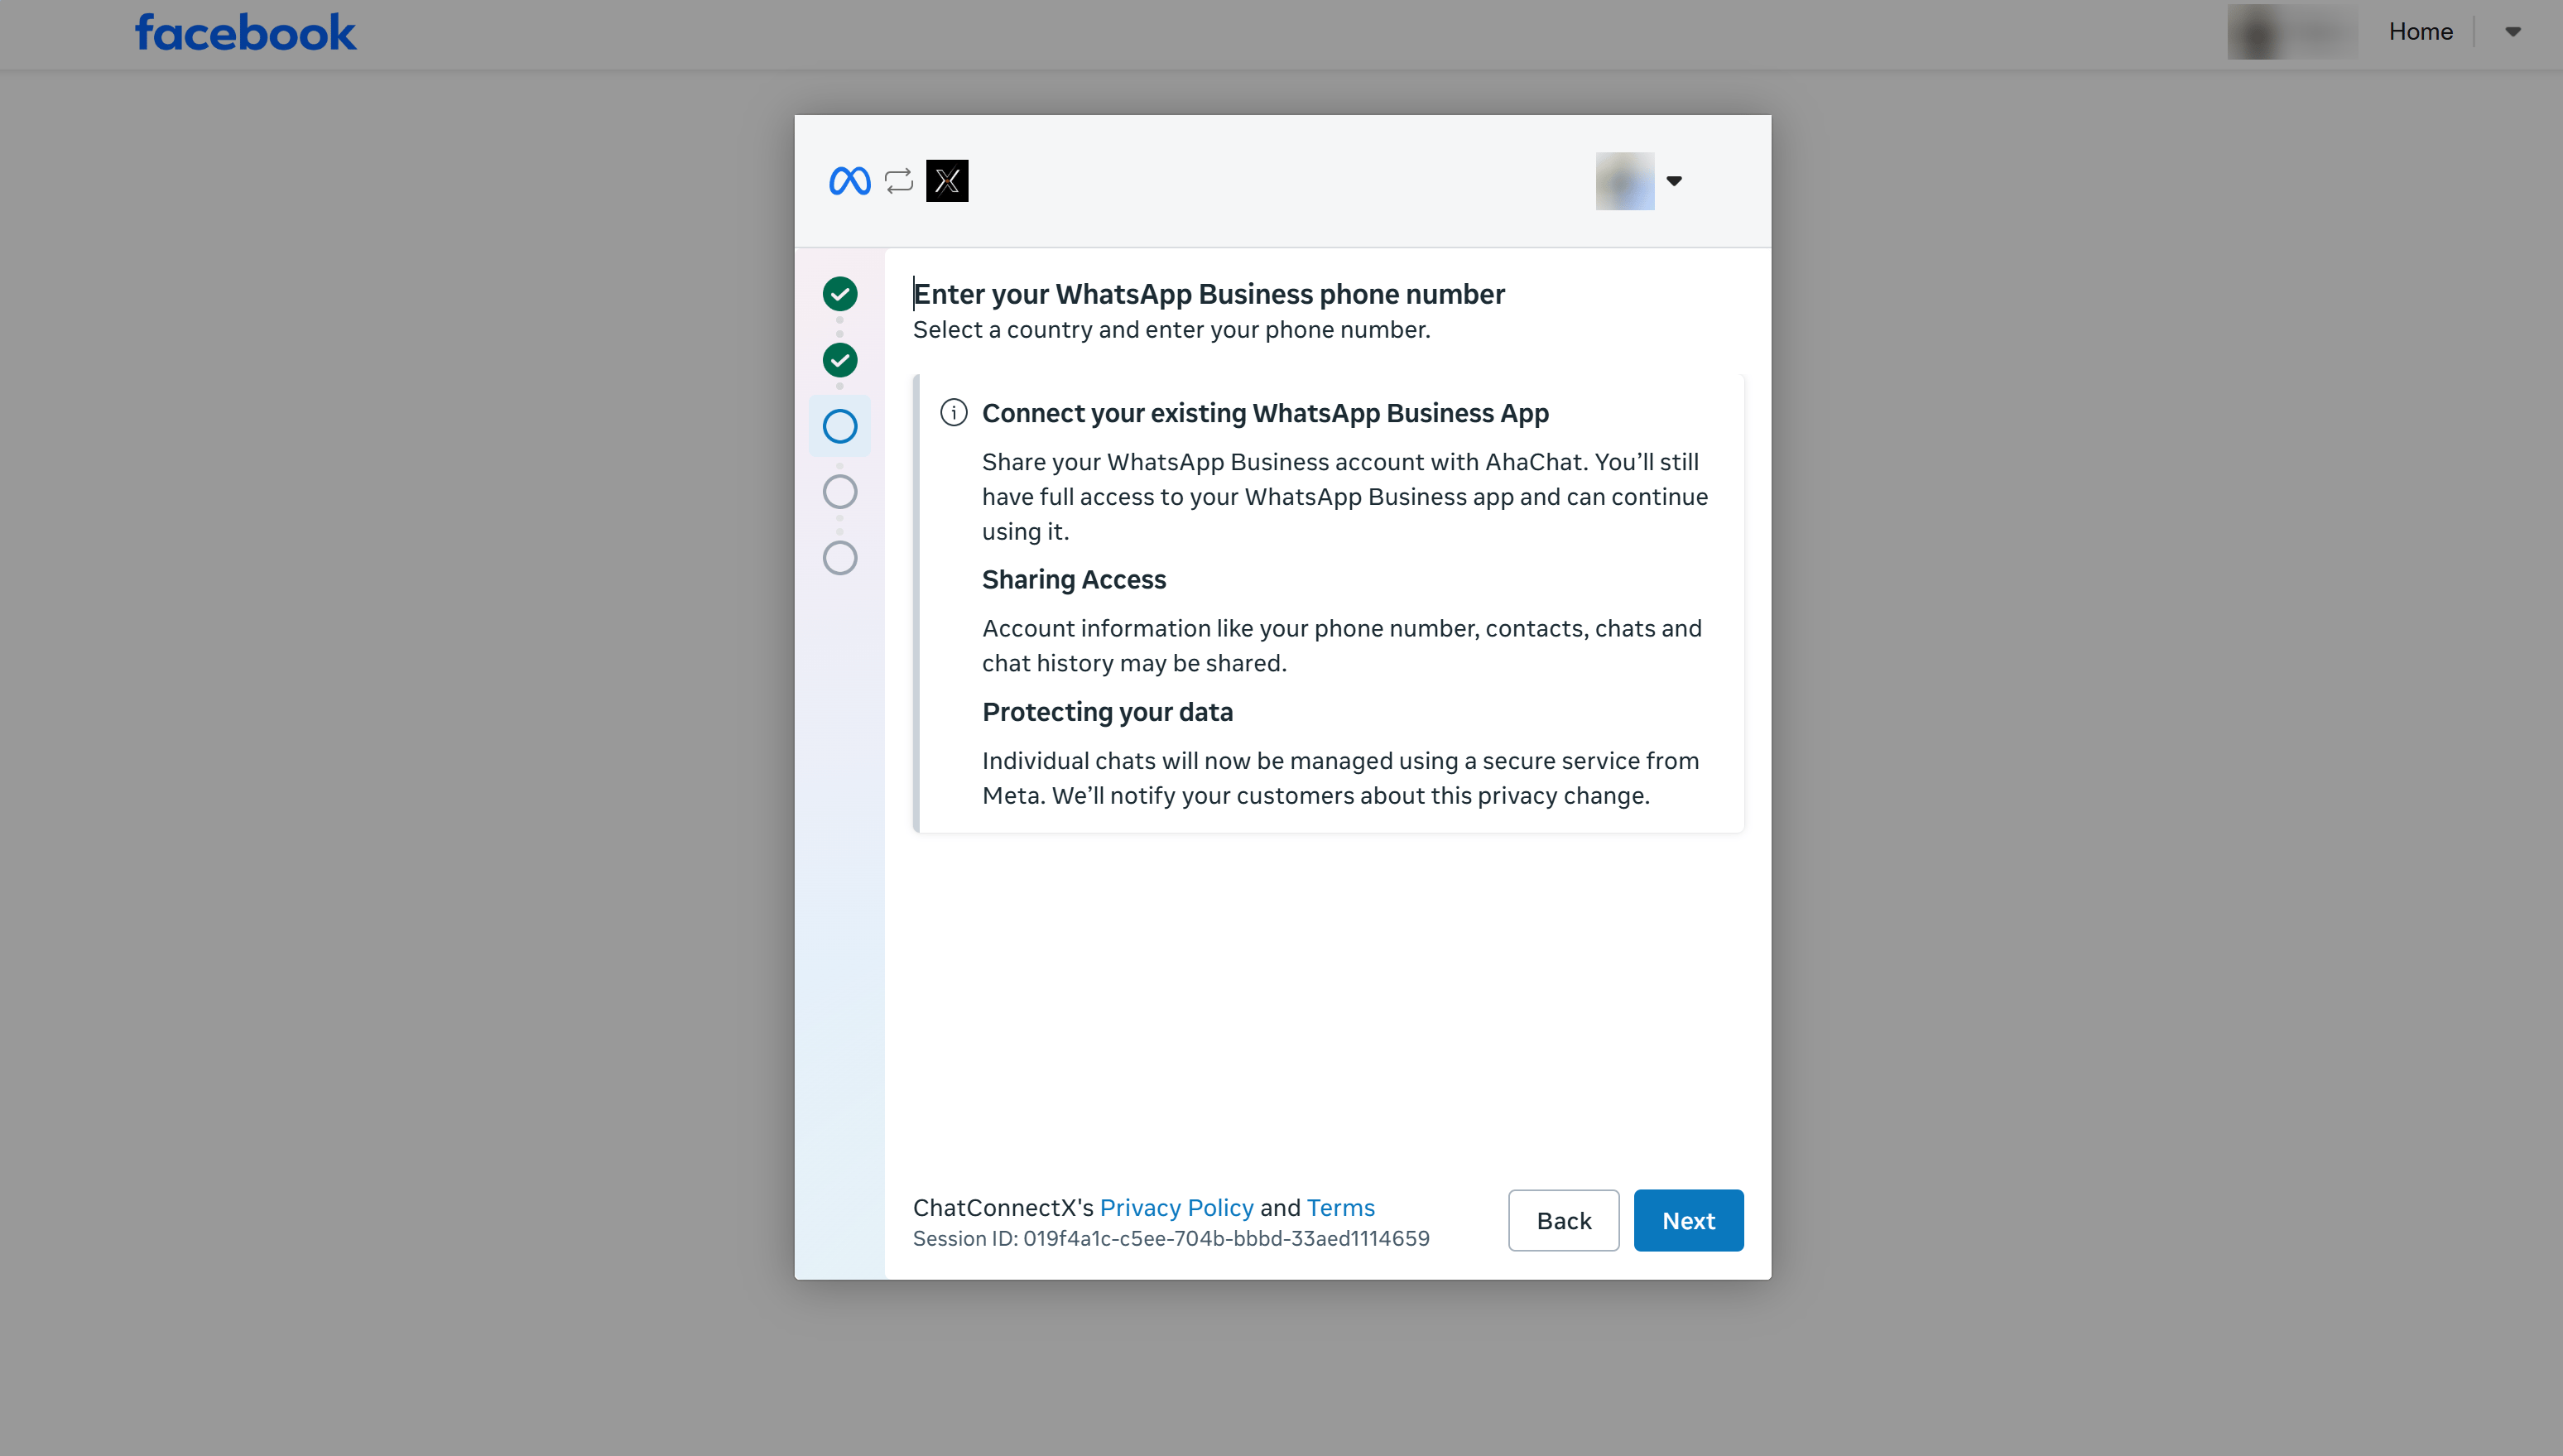
Step 9: Get the sync QR code on your computer
Your computer screen will display a QR code along with connection instructions. Keep this screen open; you will scan this QR code from your mobile phone in the next step.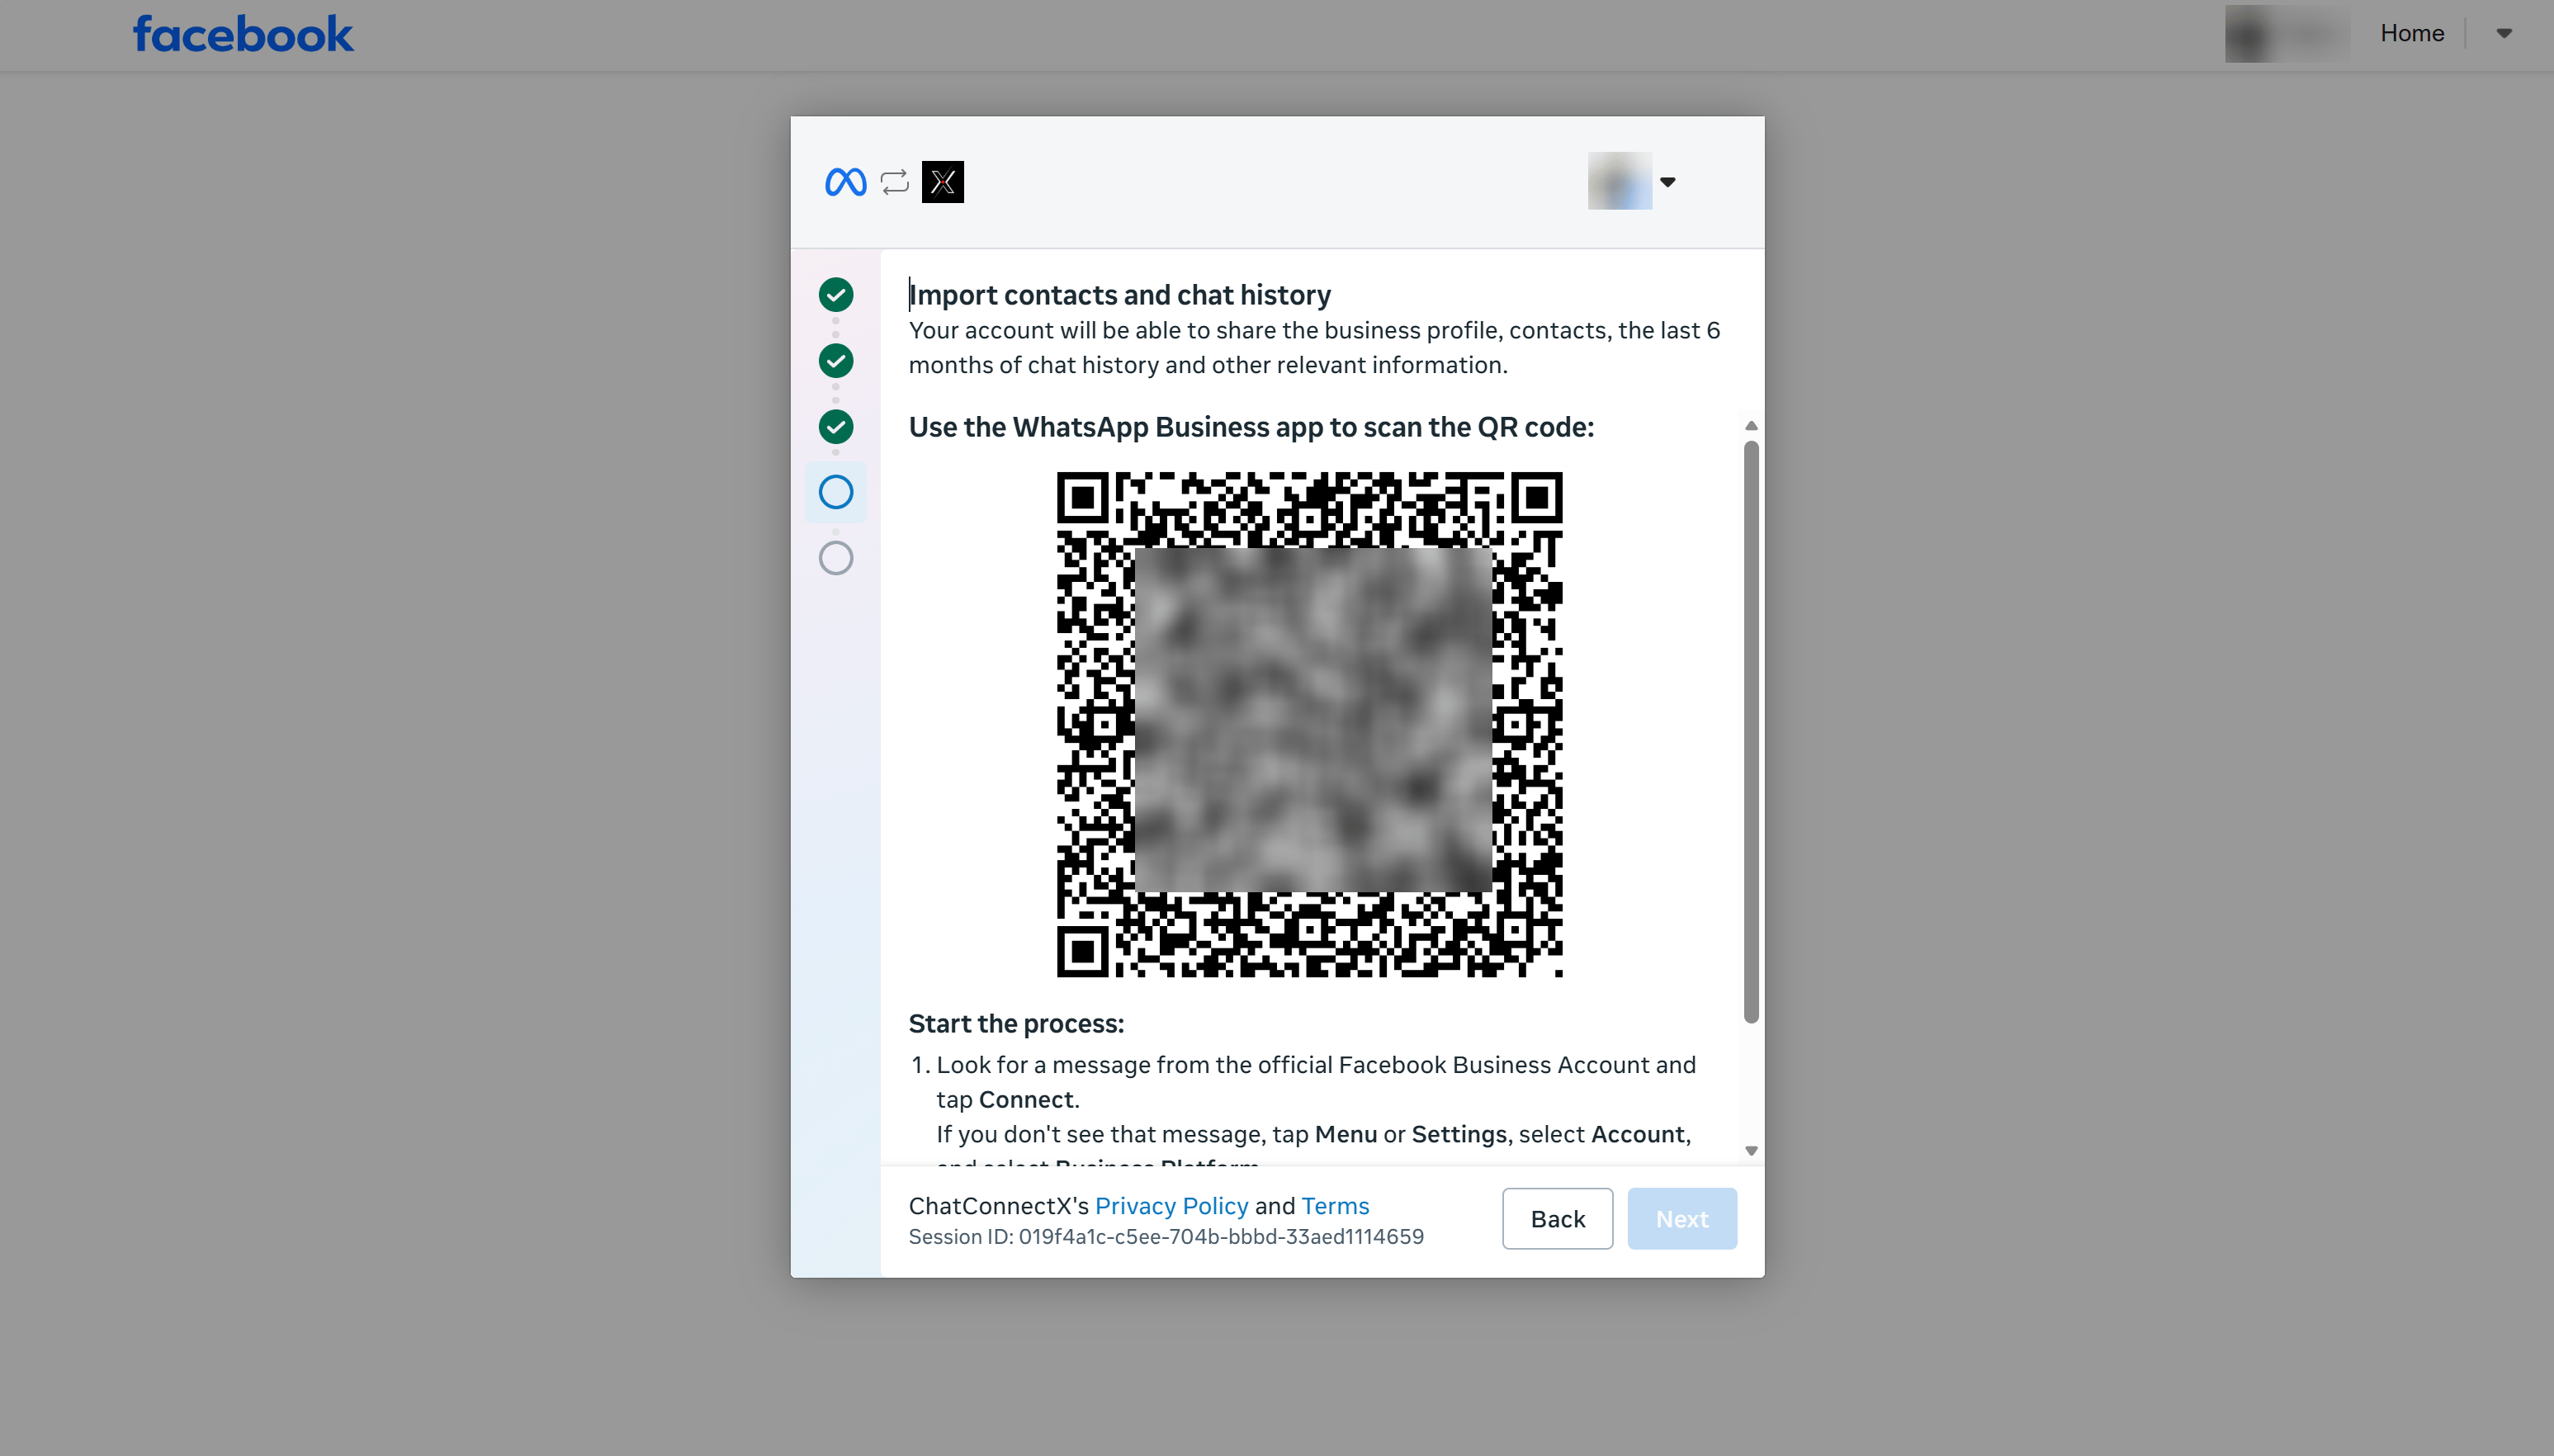
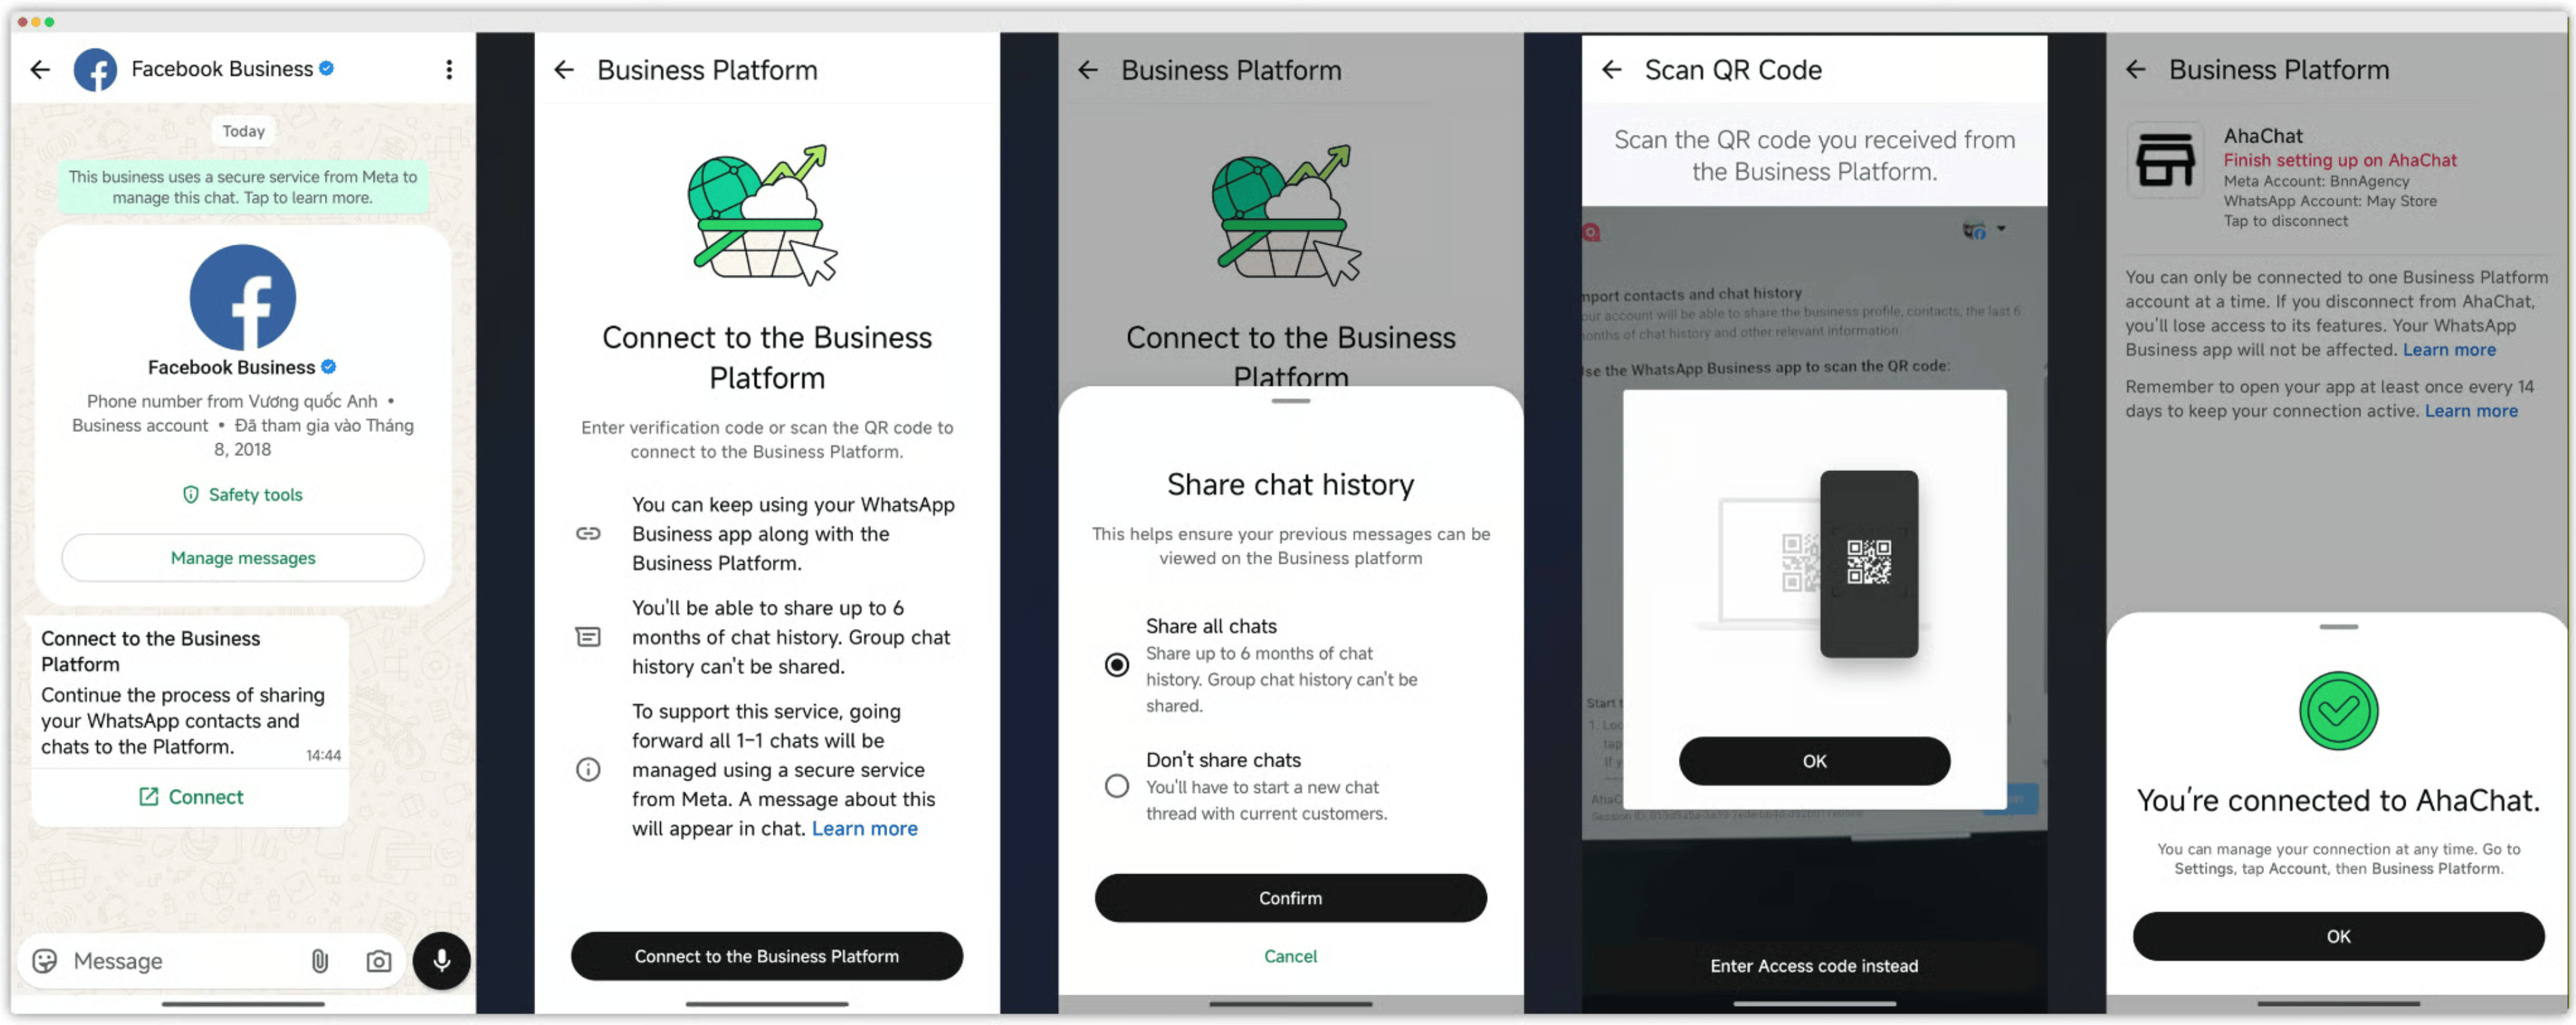
Step 10: Link the account on your mobile app
Open your phone and complete the following steps:1
Open the connection chat
Find the official chat from the Facebook Business account on WhatsApp, then tap Connect.
2
Accept the connection
On the “Connect to the Business Platform” screen, tap Connect to the Business Platform.
3
Select chat history synchronization
Under the “Share chat history” dialog, select Share all chats (to sync up to 6 months of 1:1 conversation history) or Don’t share chats, then tap Confirm.
4
Scan the QR code
Point your phone’s camera to scan the QR code displayed in Step 9 on your computer screen, then tap OK.
5
Complete the mobile setup
Wait a few seconds for the synchronization to finish. Once the success message “You’re connected to AhaChat” appears on your phone, tap OK.
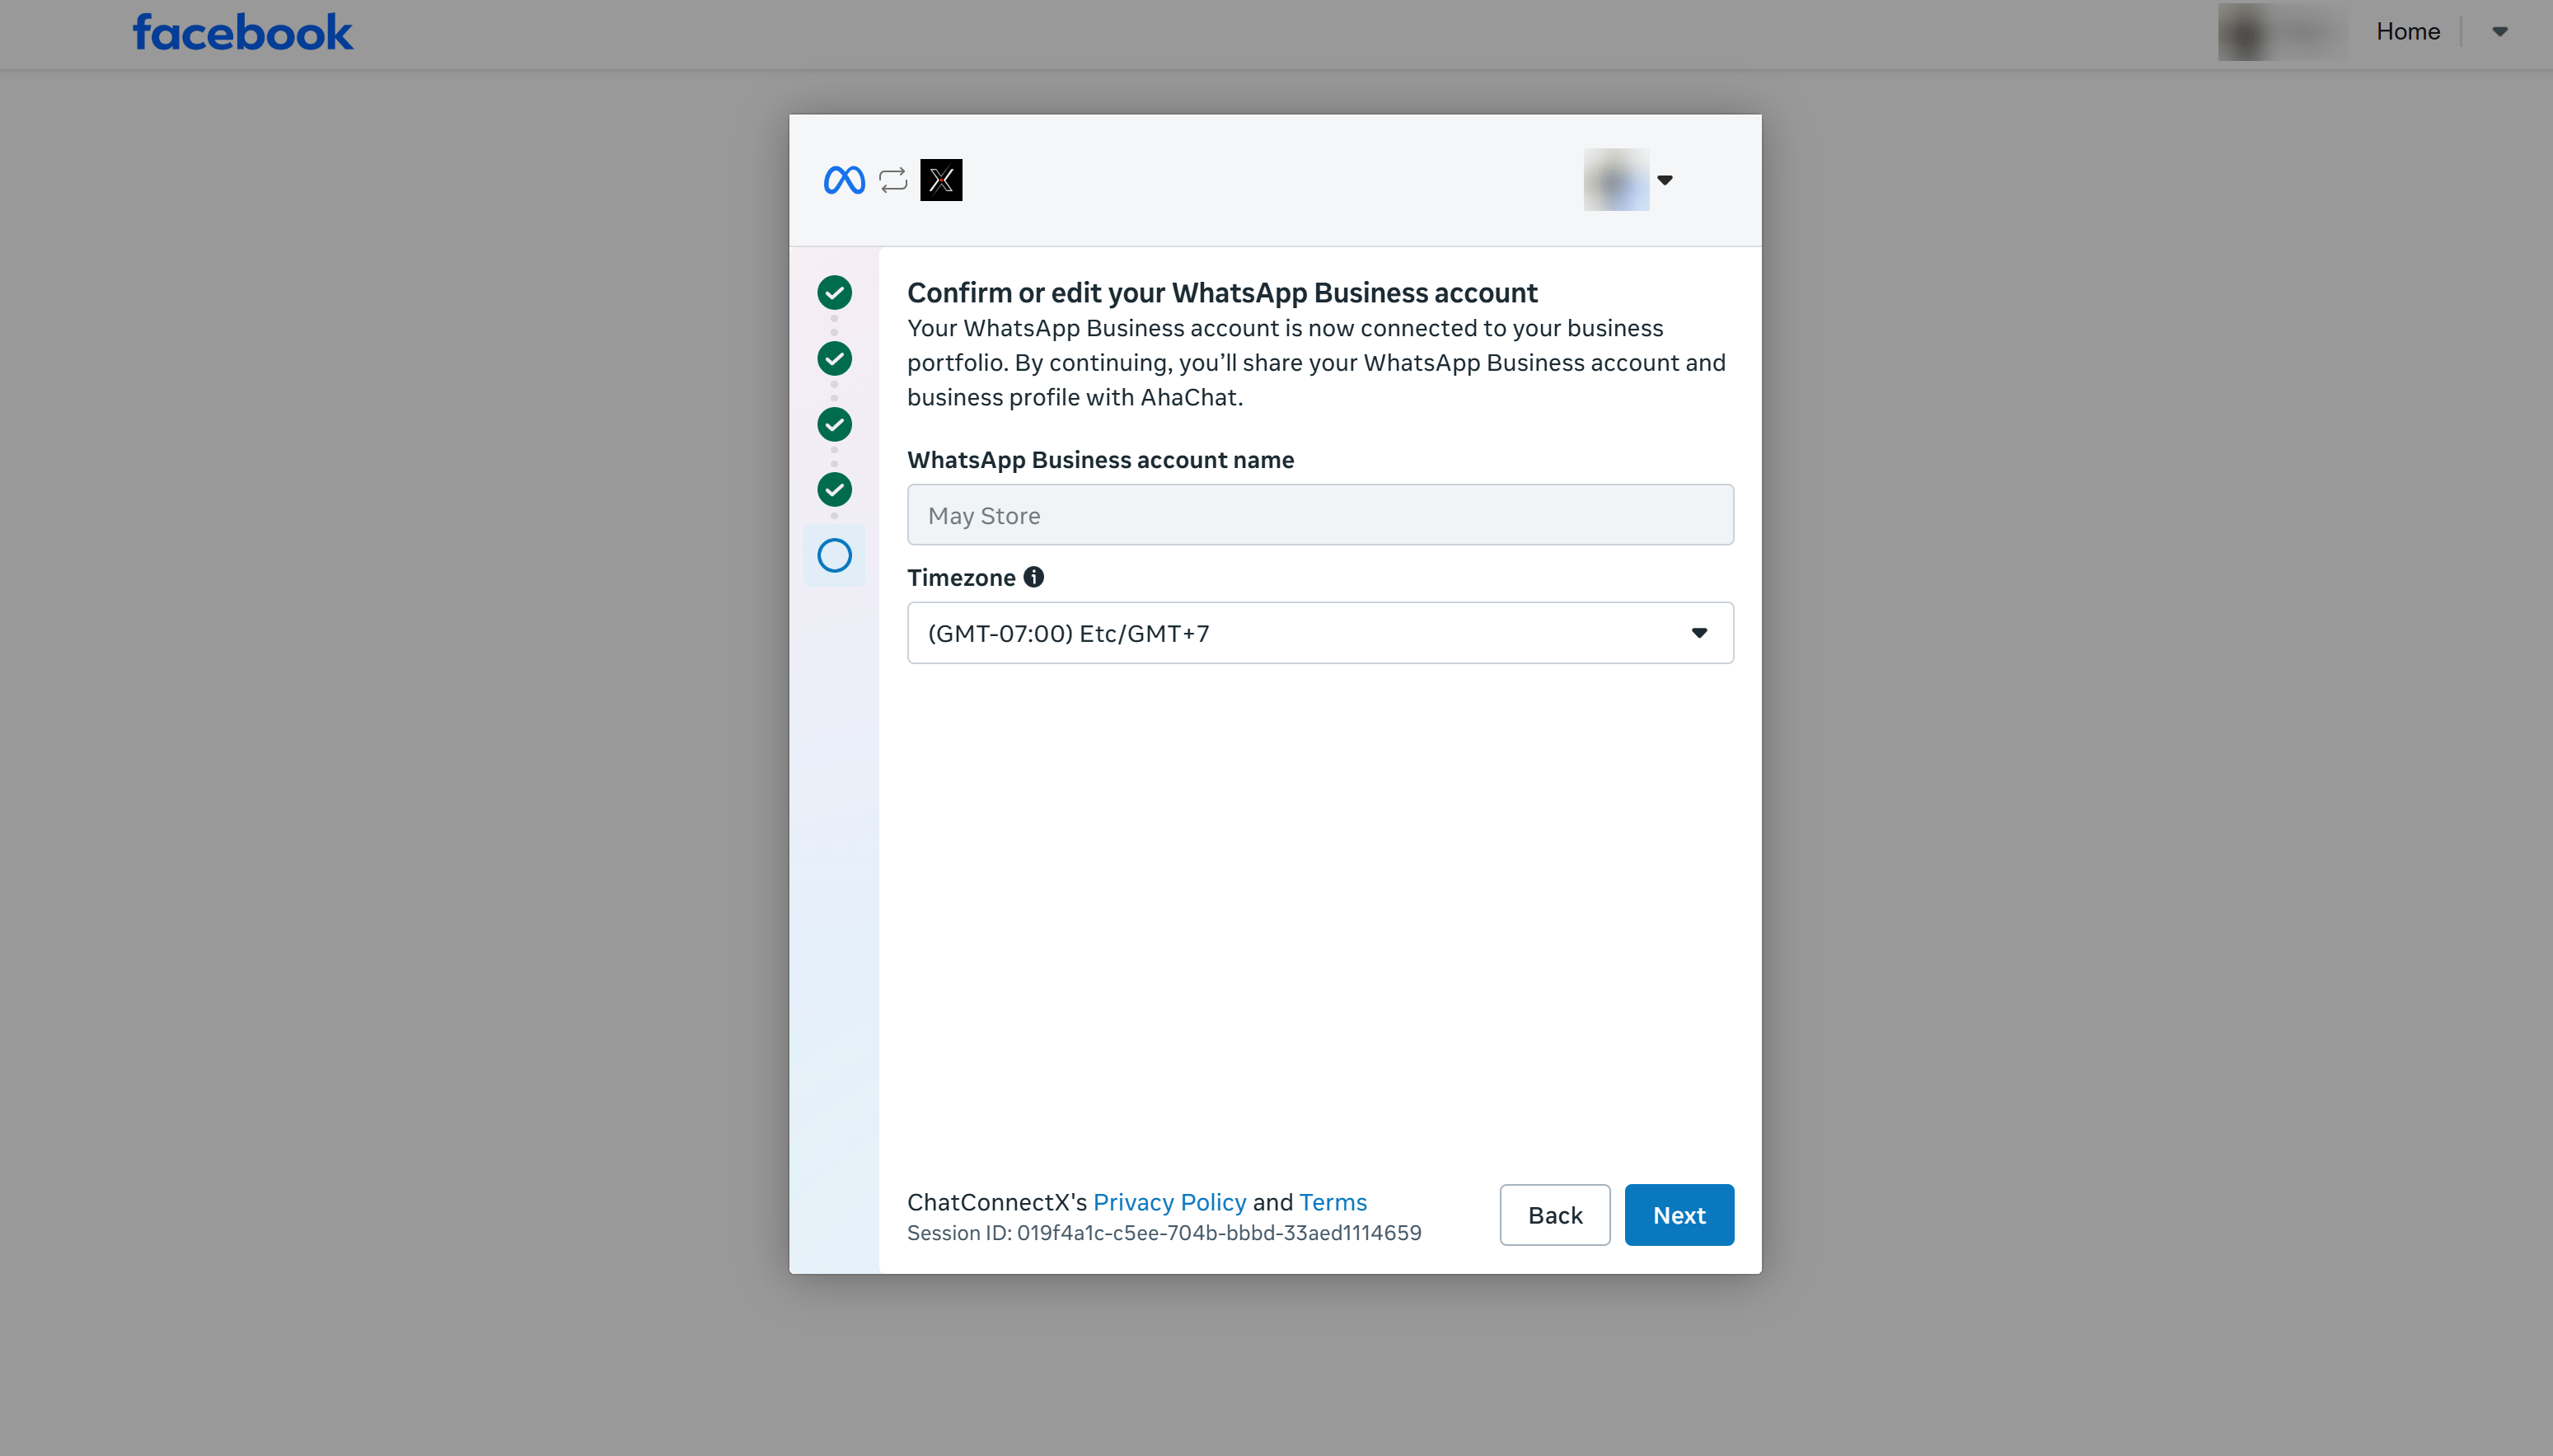
Step 11: Confirm or edit your WhatsApp Business Account details
Go back to your computer screen:- Confirm your display name under WhatsApp Business account name.
- Select your timezone under Timezone (e.g.,
(GMT-07:00) Etc/GMT+7or your local timezone). - Click Next.
Step 12: Review details shared with ChatConnectX
Check the list of requested permissions for account management and message delivery, then click Confirm.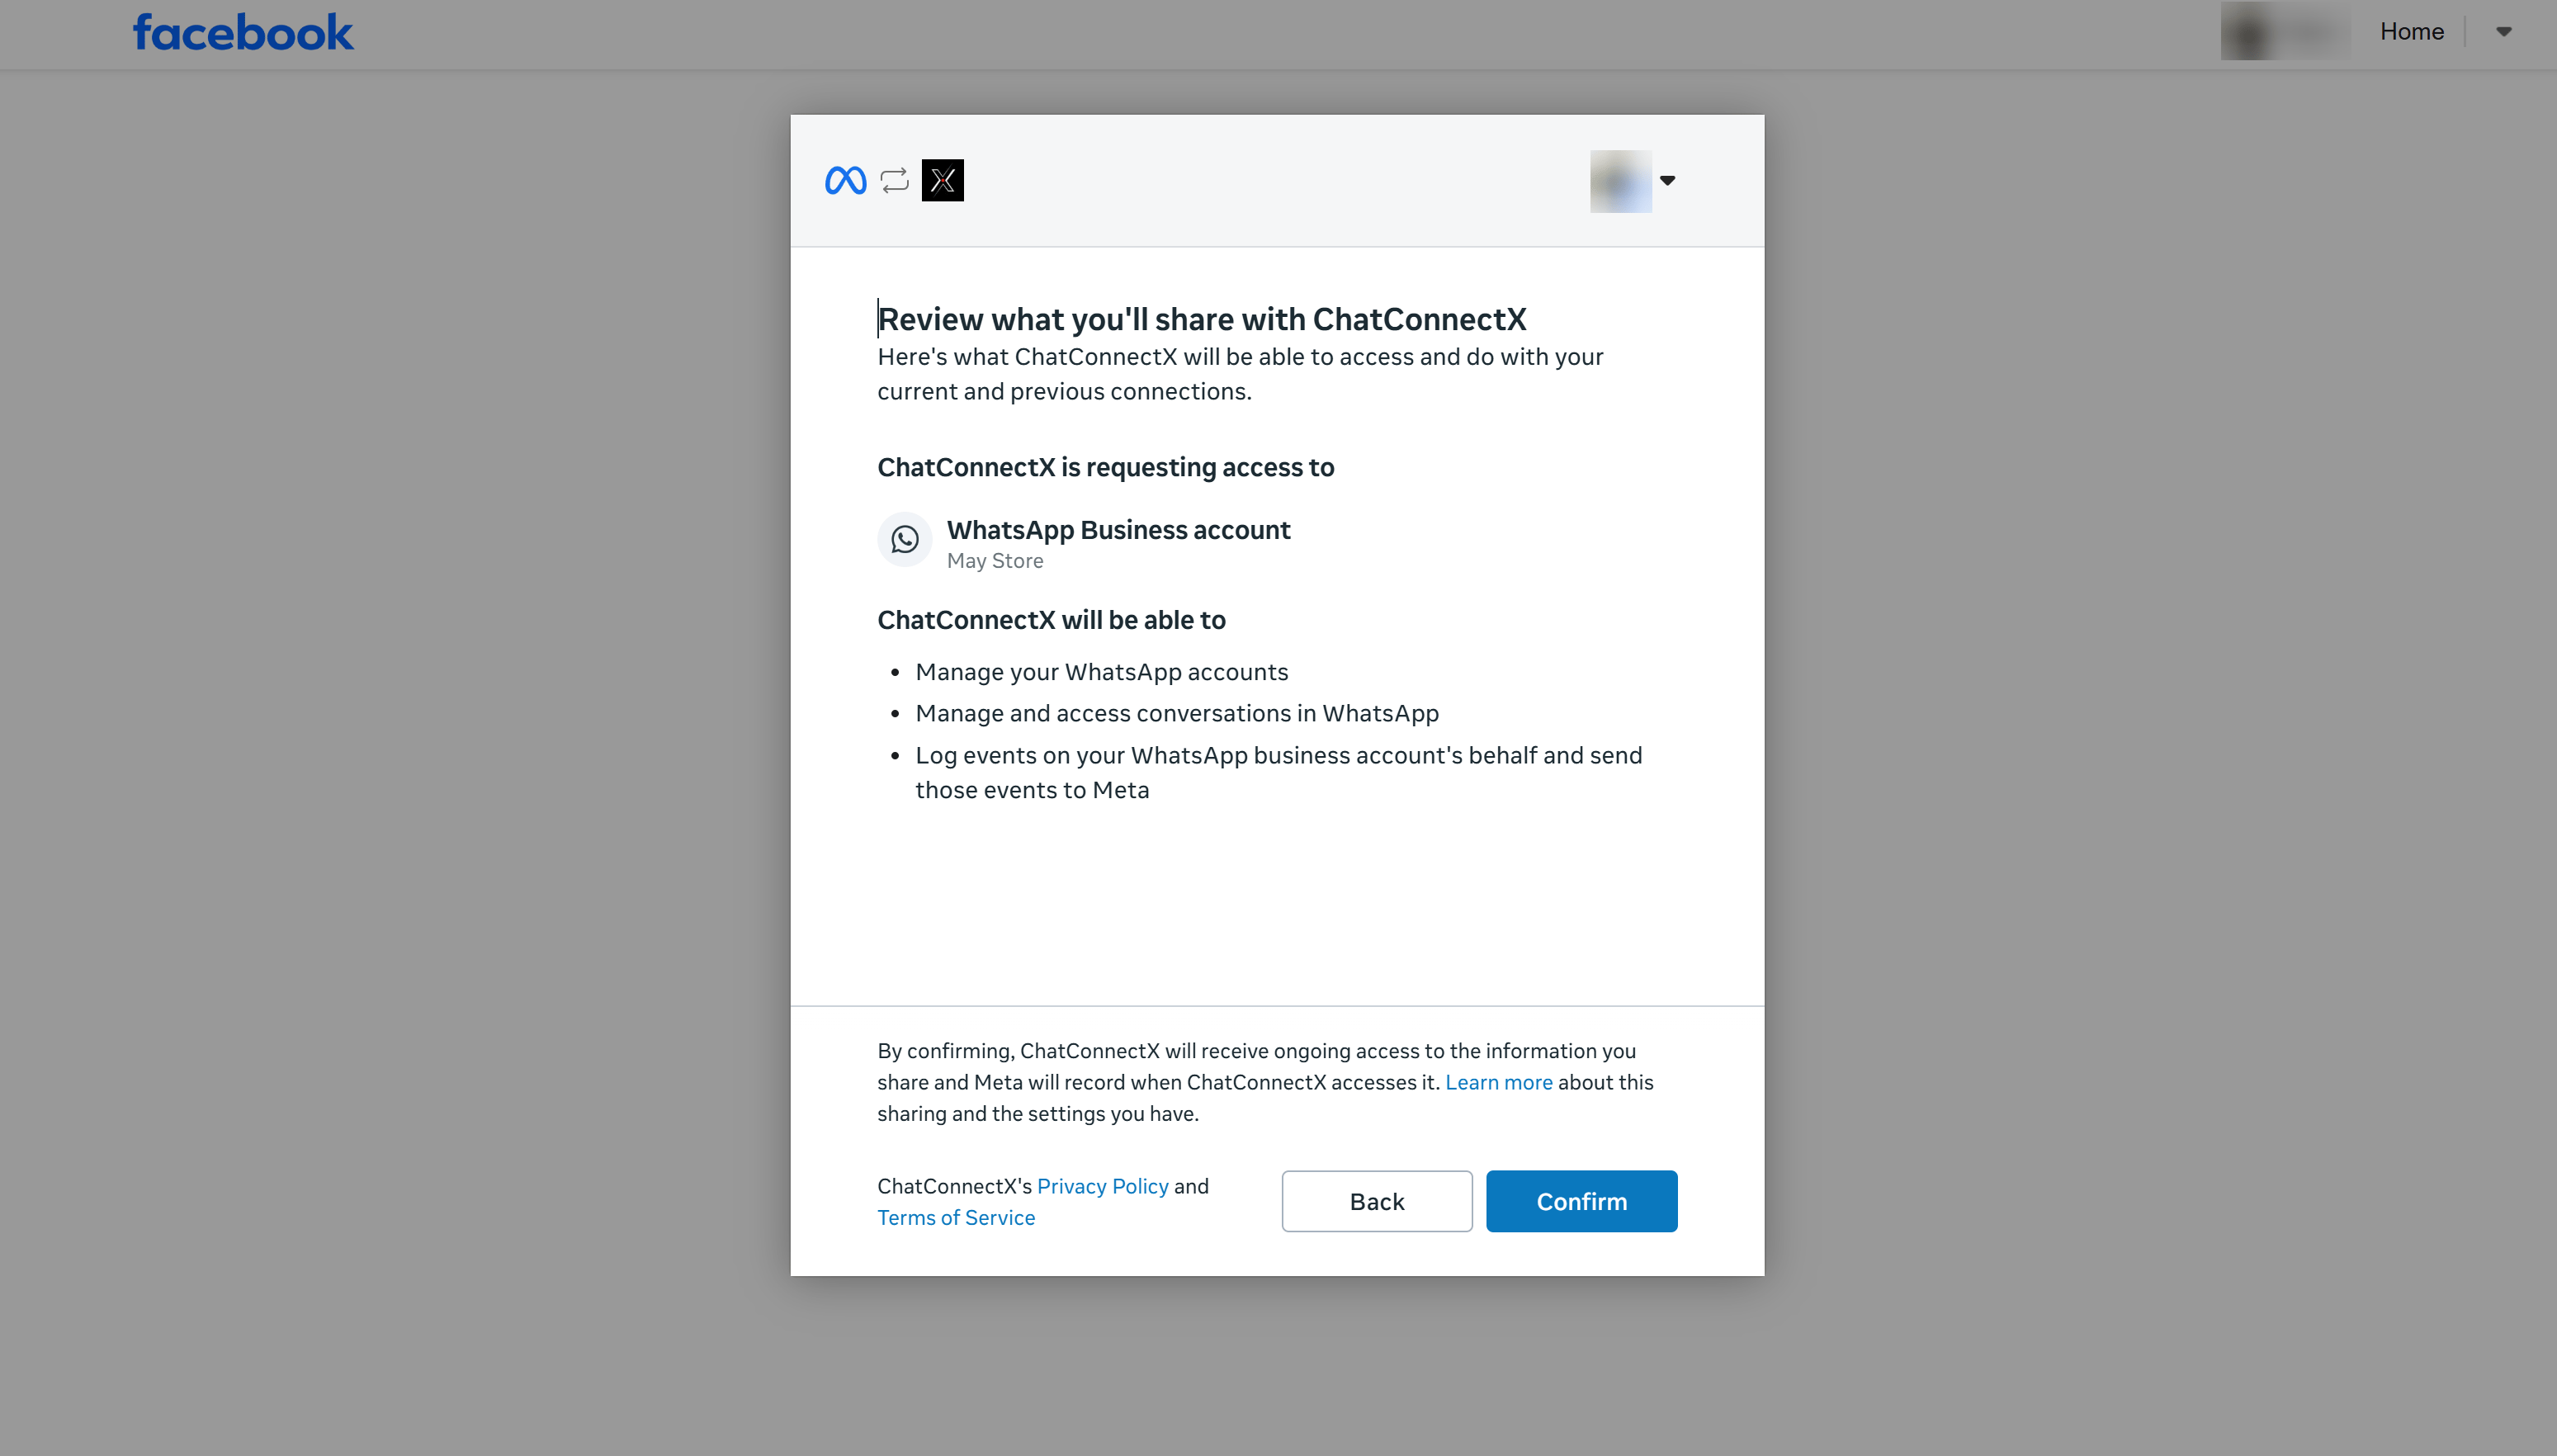
Step 13: Complete the Meta connection flow
Meta will show a message confirming that your account is linked (“Your account is connected to…”). Click Finish to close the setup window and return to ChatbotX.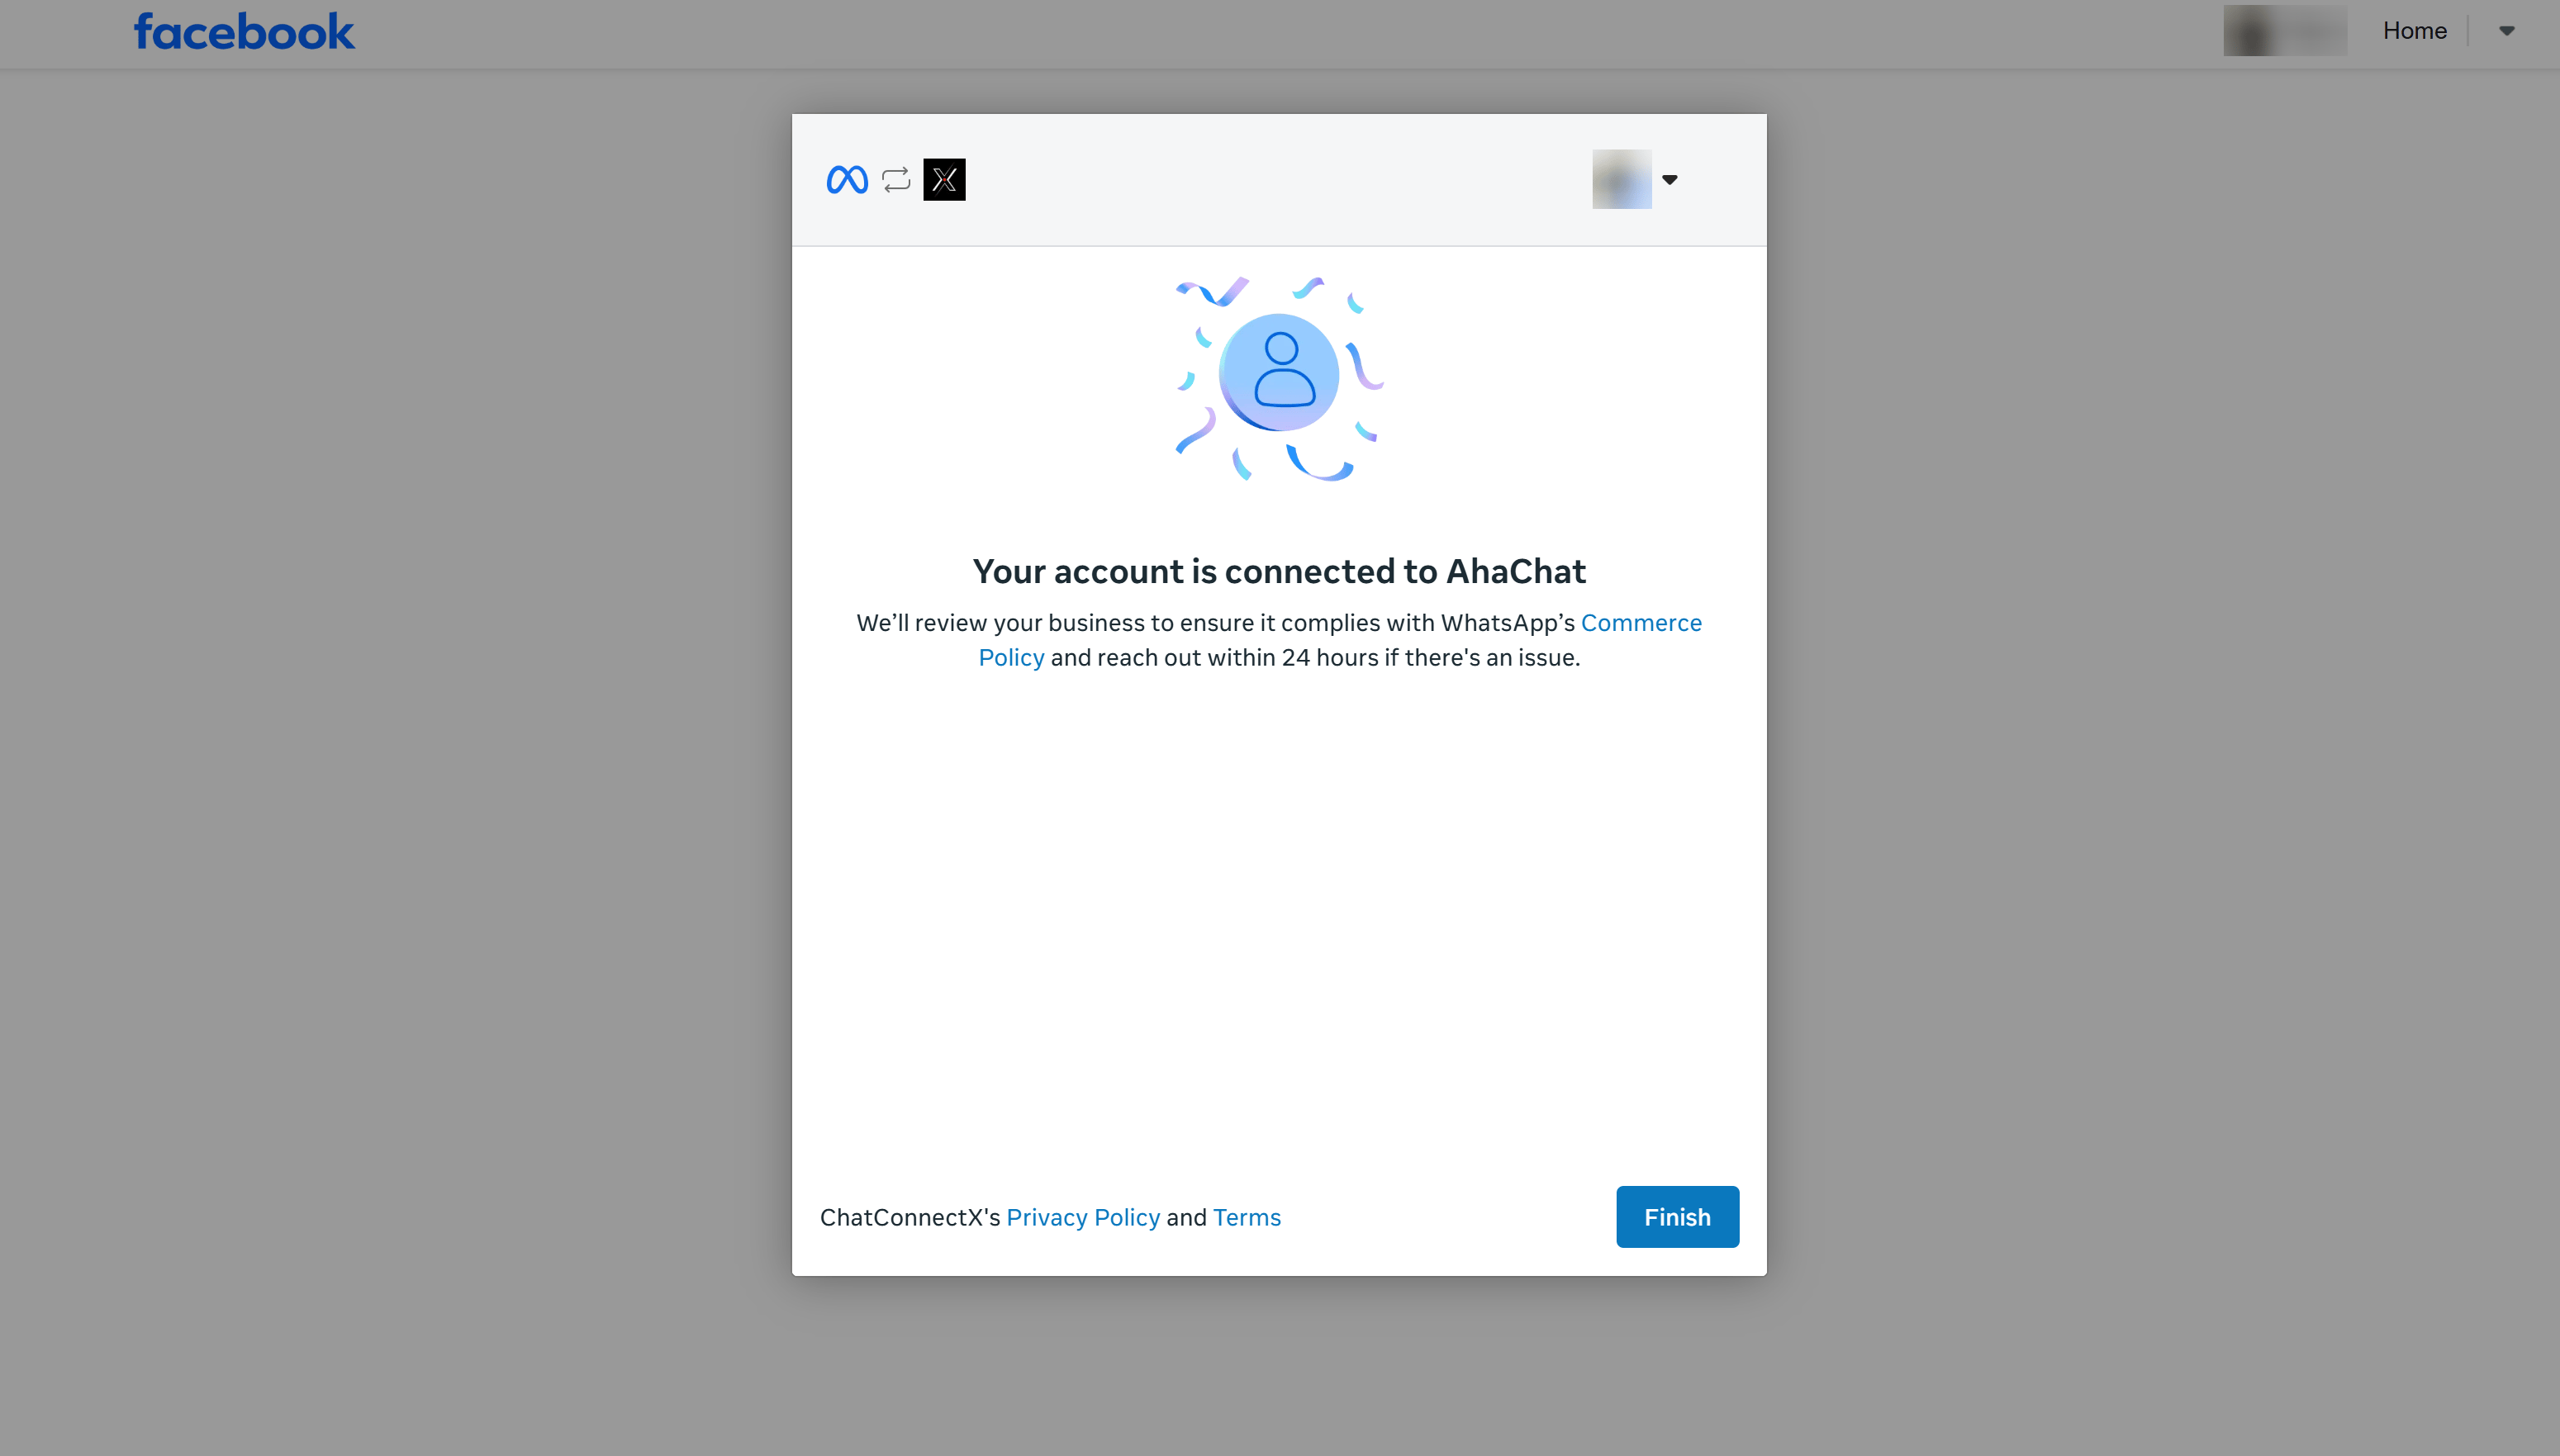
Step 14: Configure Contact, History Sync, and AI Context
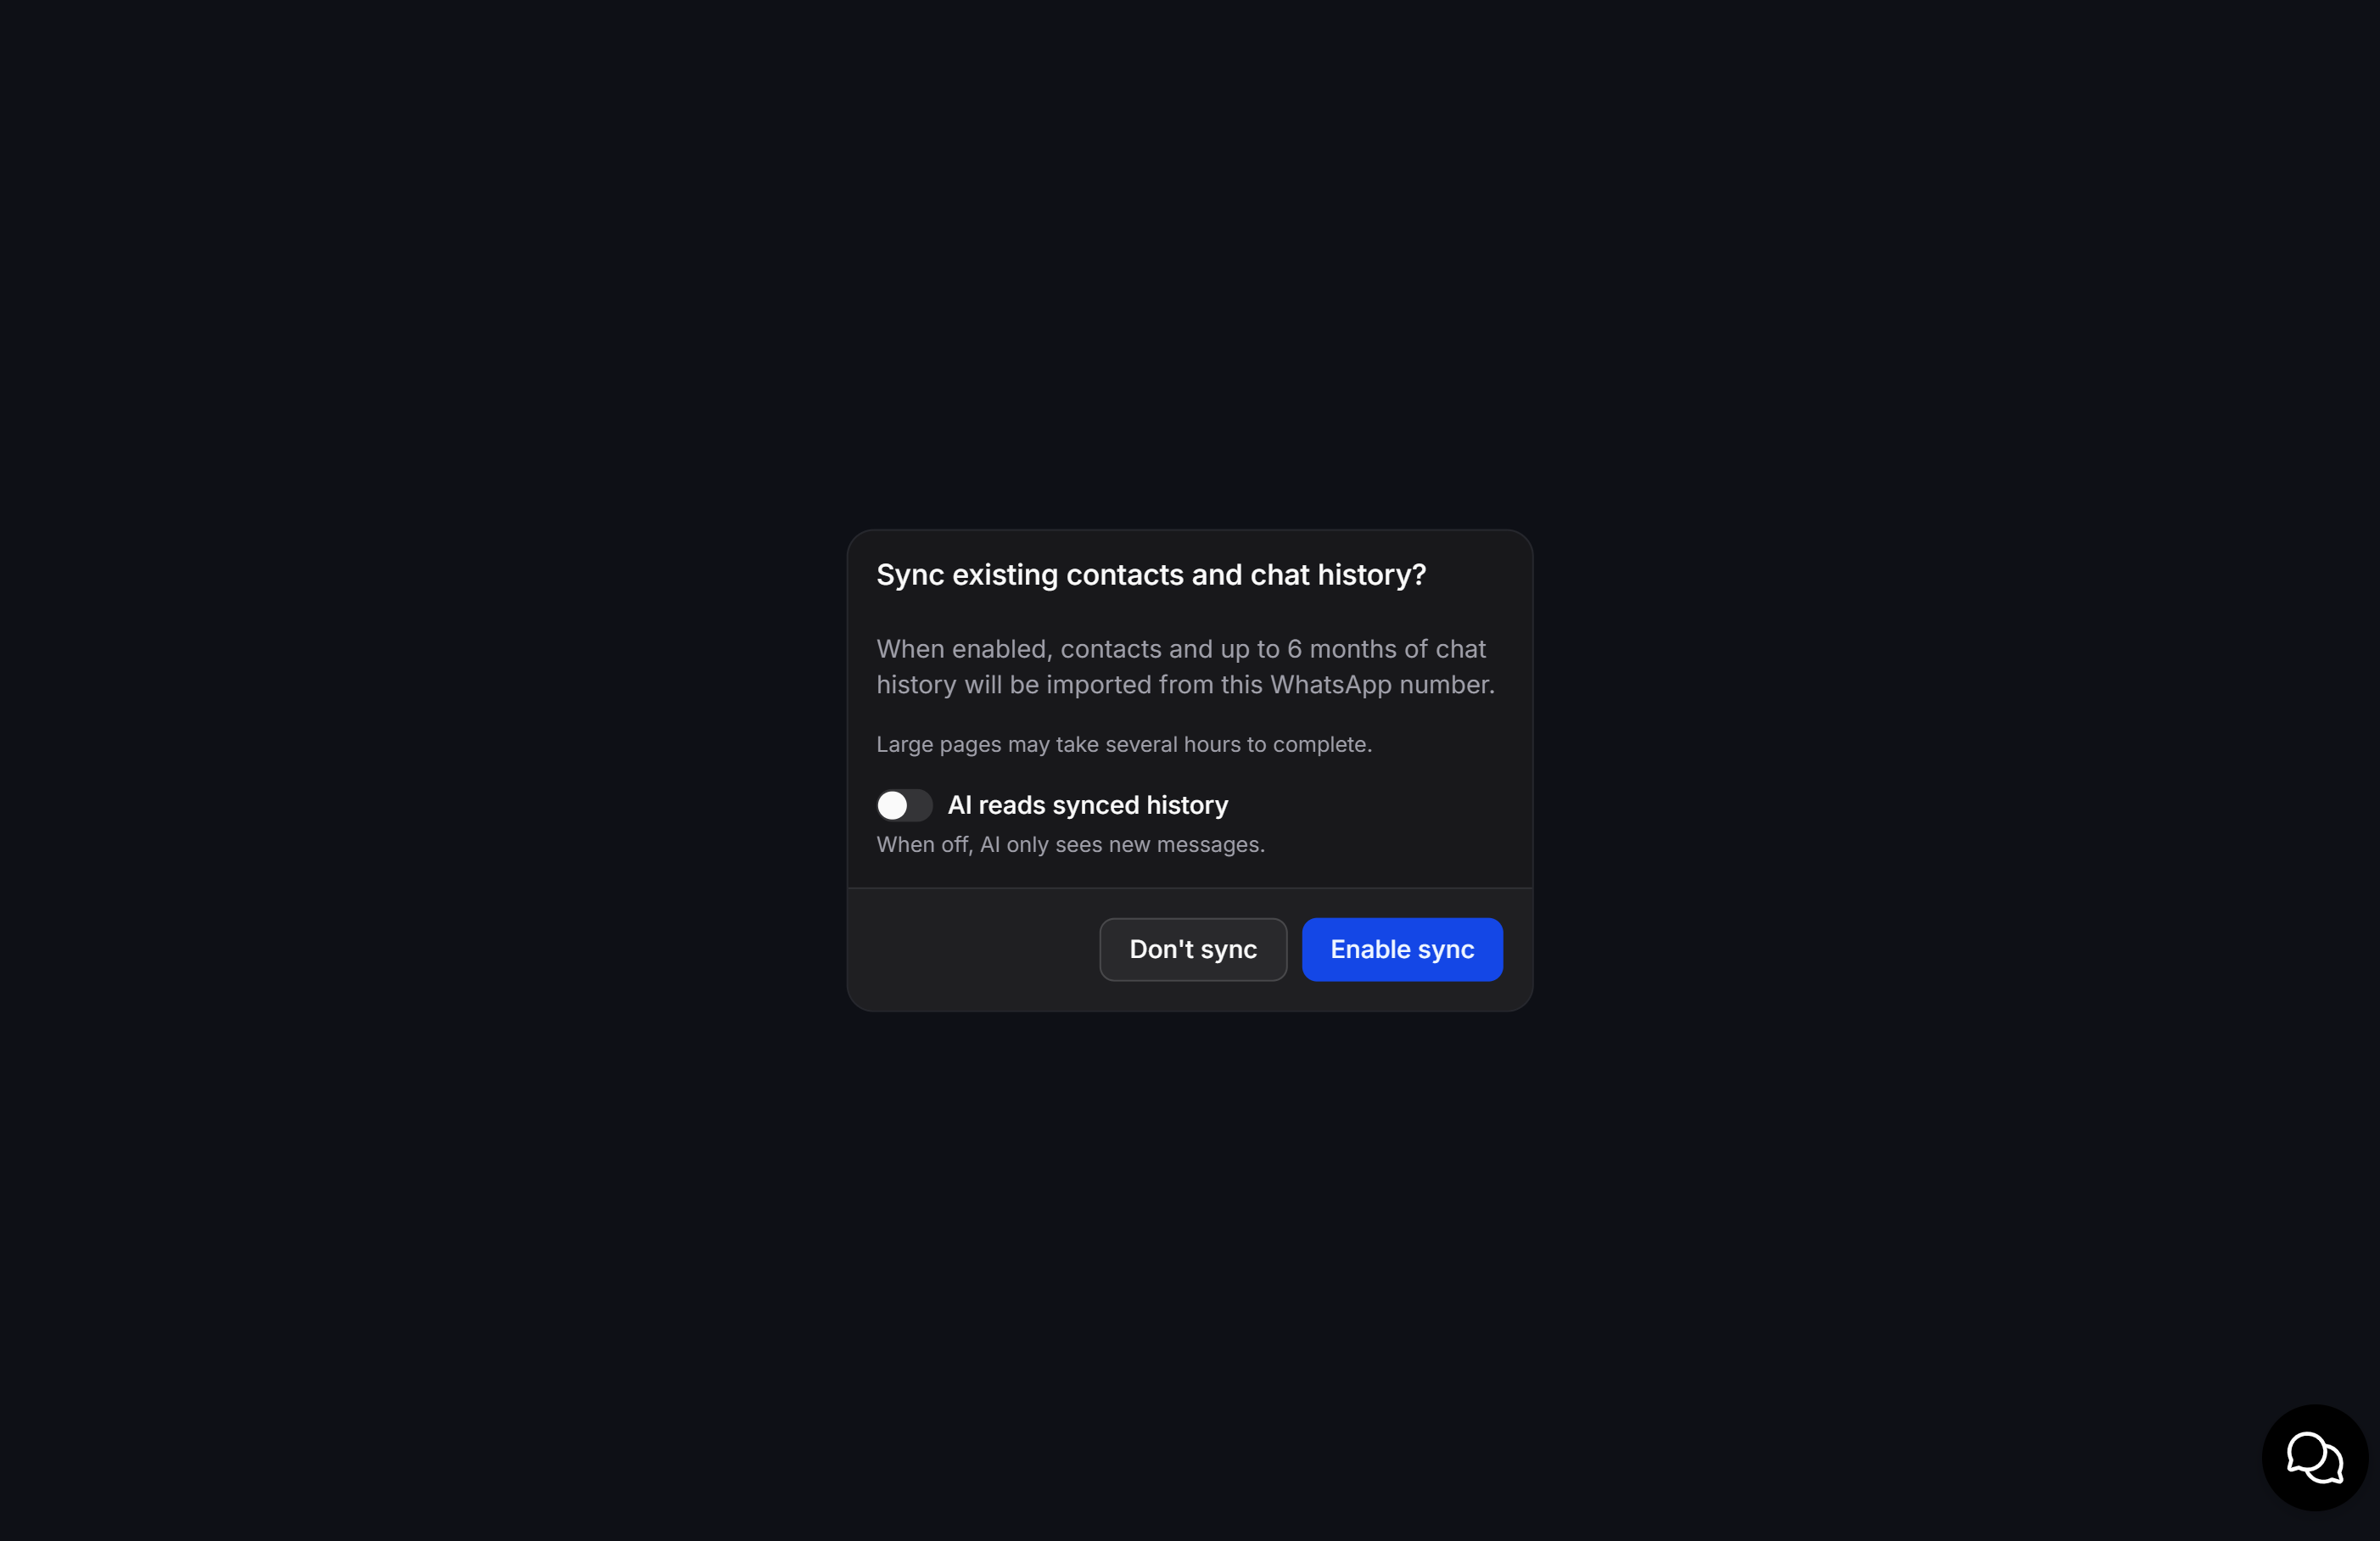
- Once you return to ChatbotX, the “Sync existing contacts and chat history?” dialog will appear.
- Configure the AI context settings:
AI reads synced historytoggle (Default: OFF):- When OFF (Default & Recommended): AI Agents will only process and respond to newly incoming messages after connection, without reading past chat history.
- When ON: All imported historical messages will be supplied into the conversation context for AI Agents.
- Click Enable sync to import contacts and up to 6 months of chat history from WhatsApp into ChatbotX (or click Don’t sync to skip historical data import).
Step 15: Verify on the Dashboard
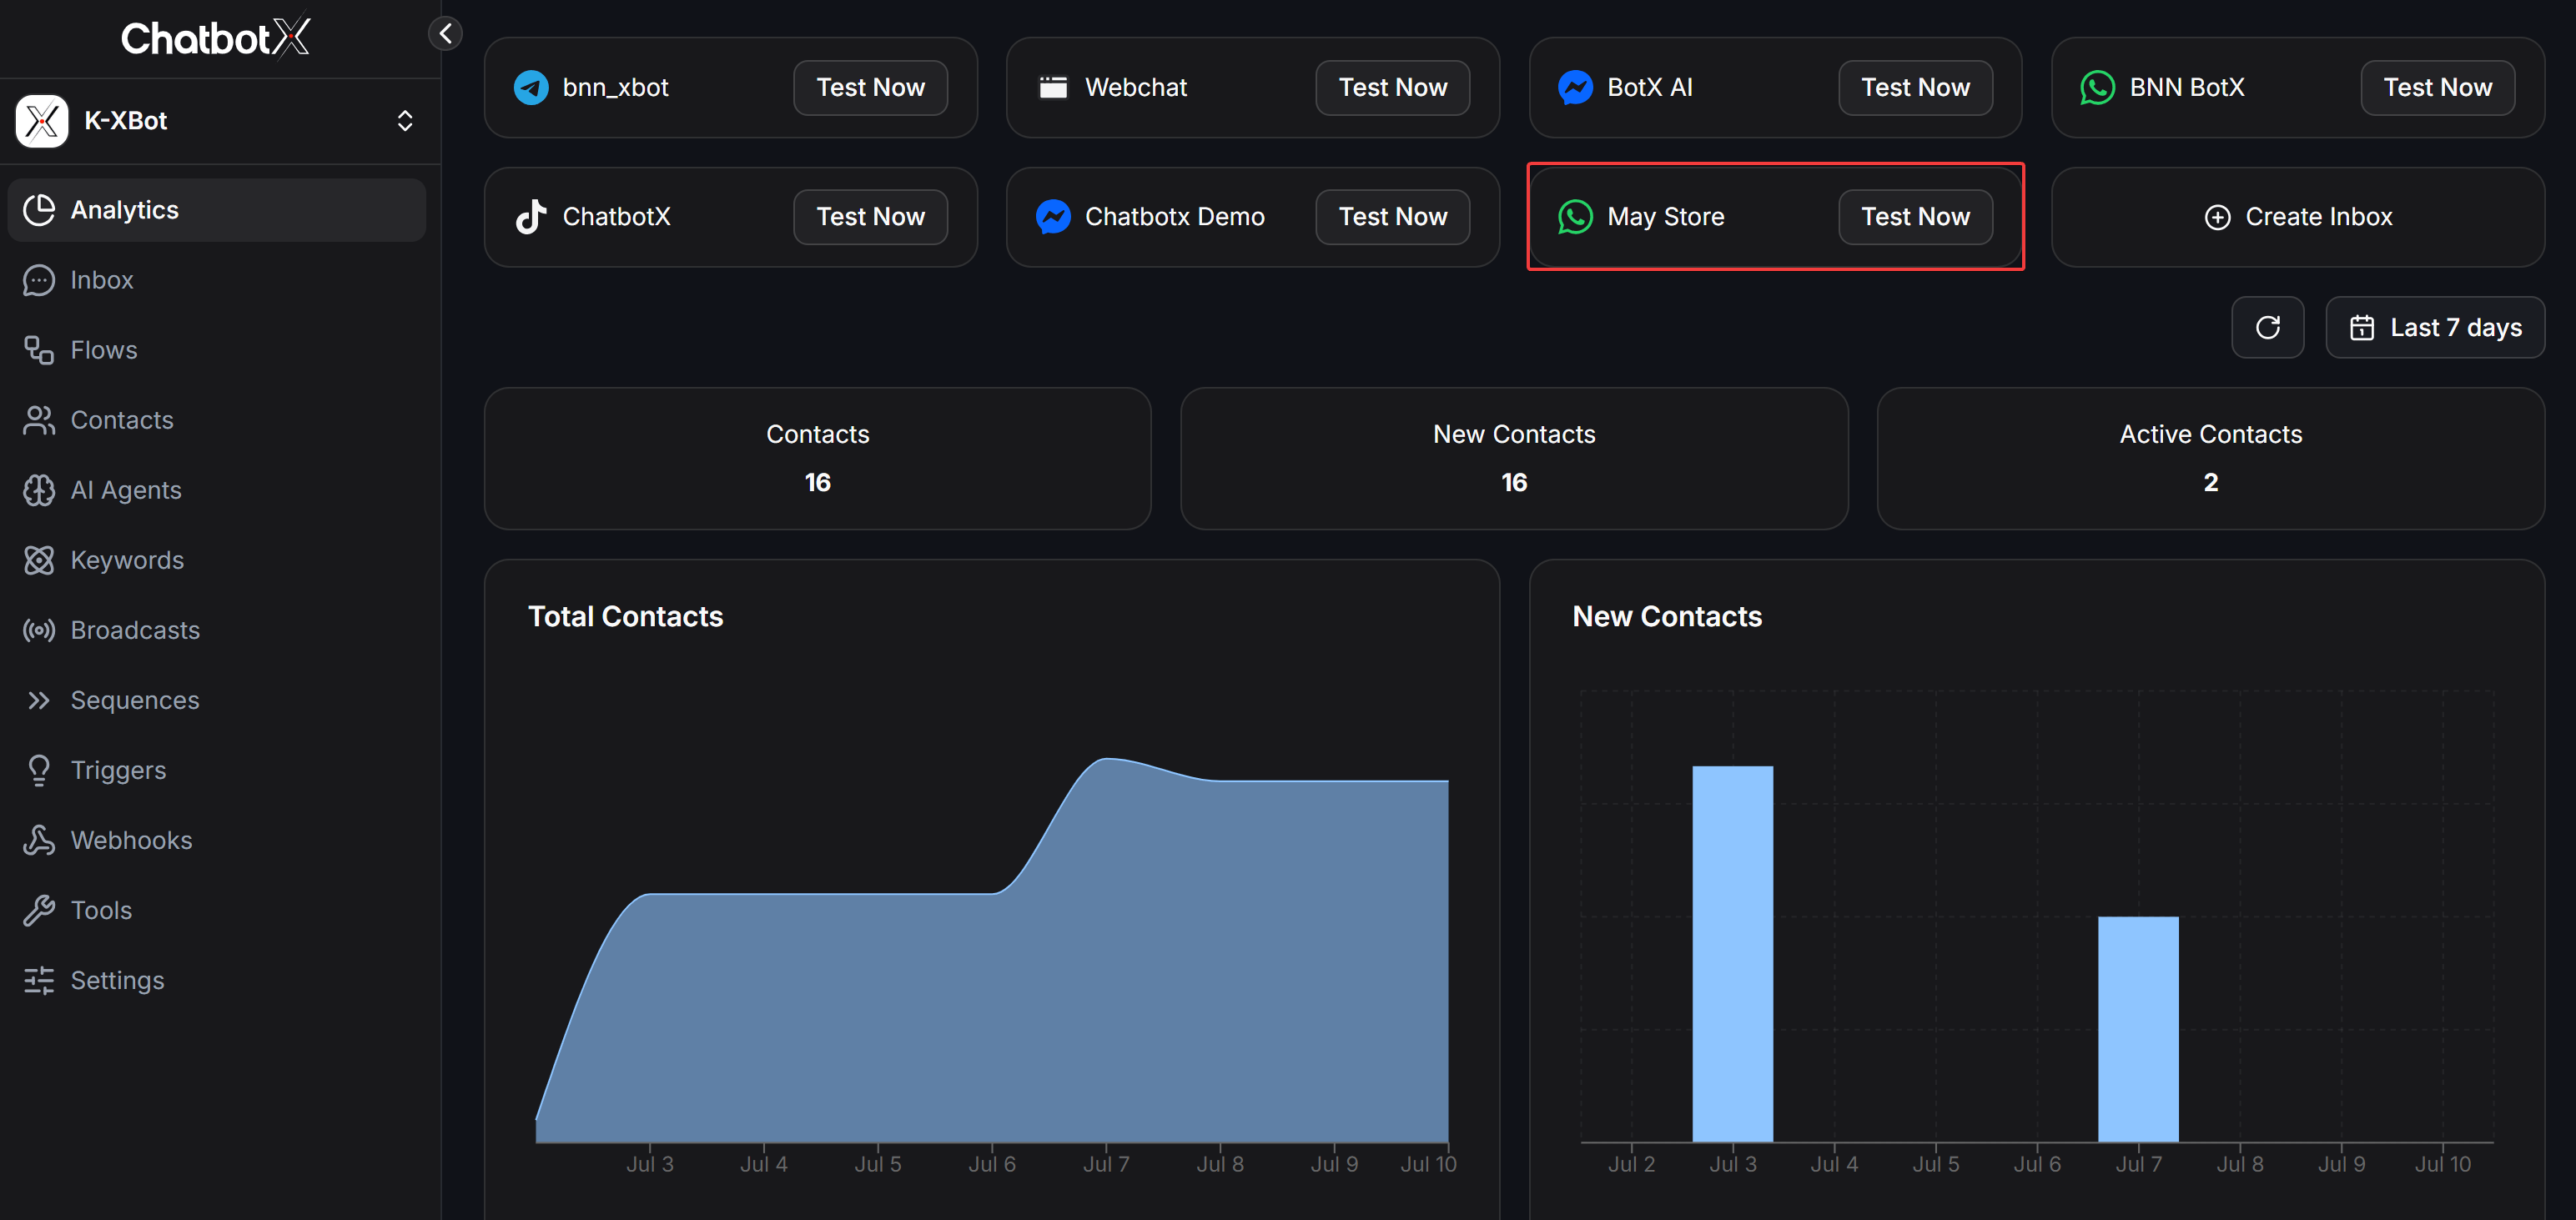
After synchronization completes, your new WhatsApp channel (e.g.,May Store) will appear on the dashboard with a Test Now button to send a test message.
FAQ
Can I keep my existing WhatsApp Business phone number?
Can I keep my existing WhatsApp Business phone number?
Yes. WhatsApp Coexistence allows you to use your active WhatsApp Business mobile number when connecting to ChatbotX.
Will my contacts and chat history be synchronized?
Will my contacts and chat history be synchronized?
Yes, ChatbotX supports synchronizing contacts and chat history during the setup process.
Why is my message sending rate limited immediately after setup?
Why is my message sending rate limited immediately after setup?
This is usually a temporary limitation while Meta reviews your account display name.