

- Create a Natural Flow: Prevent the bot from sending messages in rapid-fire succession, making the conversation feel more human, as if it is being typed by an agent.
- Automate Follow-Ups: Schedule messaging campaigns at intervals (e.g., sending a feedback survey 1 day after purchase, or a discount code 2 hours after subscription).
- Avoid Disturbing Users: Configure active sending windows (daily intervals) so automated messages are not sent during late hours.
Adding Wait Block to Your Flow
To insert a Wait block into your chatbot flow, follow these steps: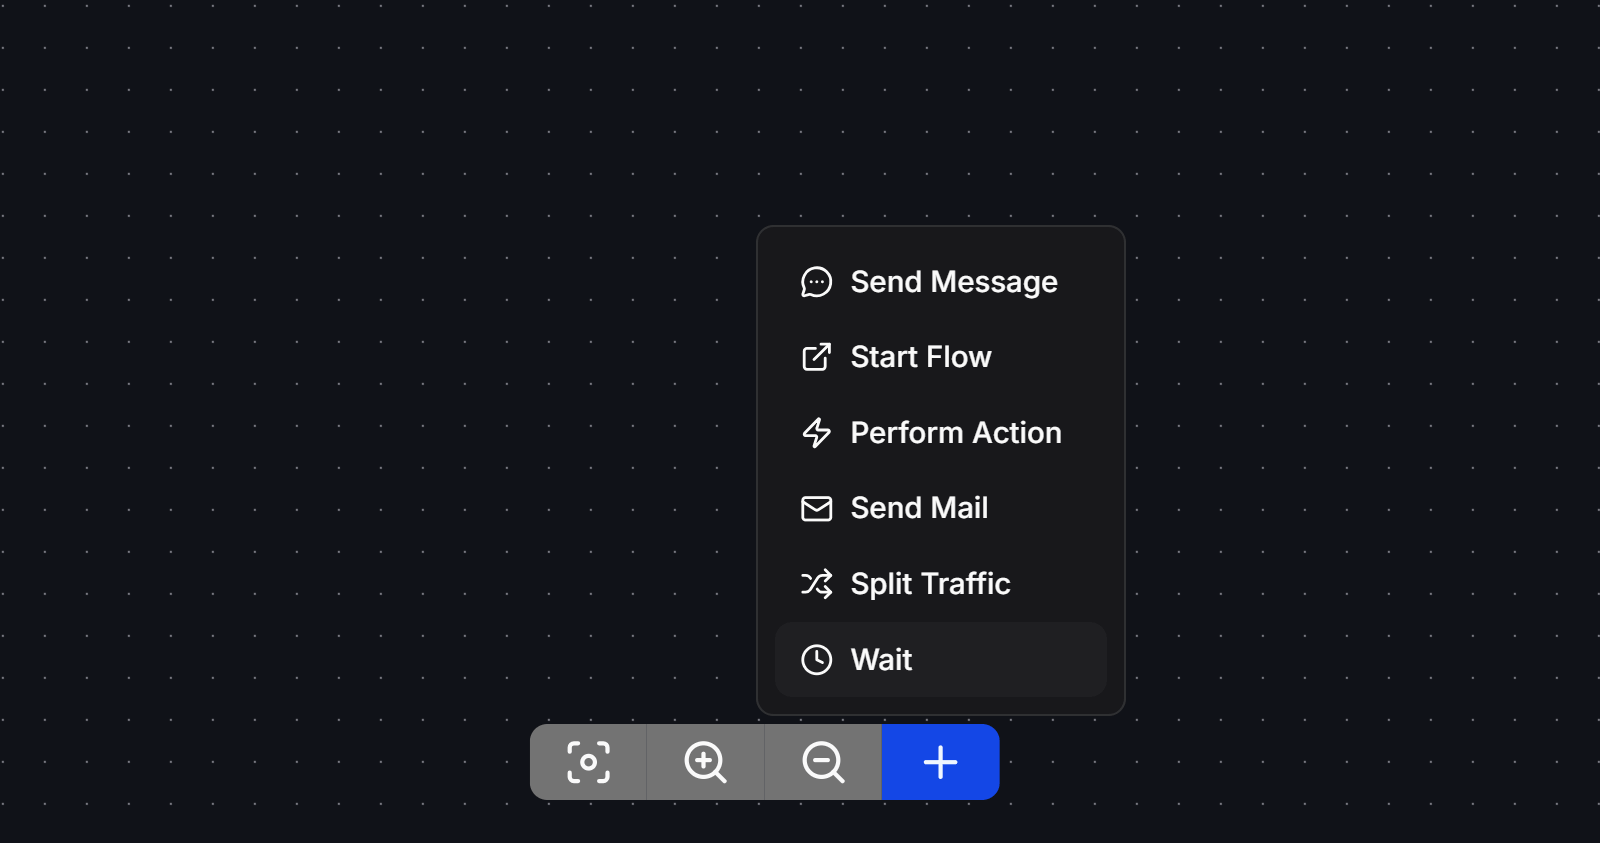
1
Open elements menu
In the Flow Builder canvas, click the blue + button at the bottom tool panel, or drag a connection line from any existing block out into empty canvas space.
2
Select Wait
In the pop-up menu, select Wait to create a new wait block on the canvas.
3
Connect and configure
Link the output port of the preceding message or action block to the input port (the white circle on the left) of the Wait block. Double-click the Wait block to open its configuration settings panel on the left.
Delay Types
ChatbotX supports 3 flexible delay types to accommodate different automation scenarios:1. Duration
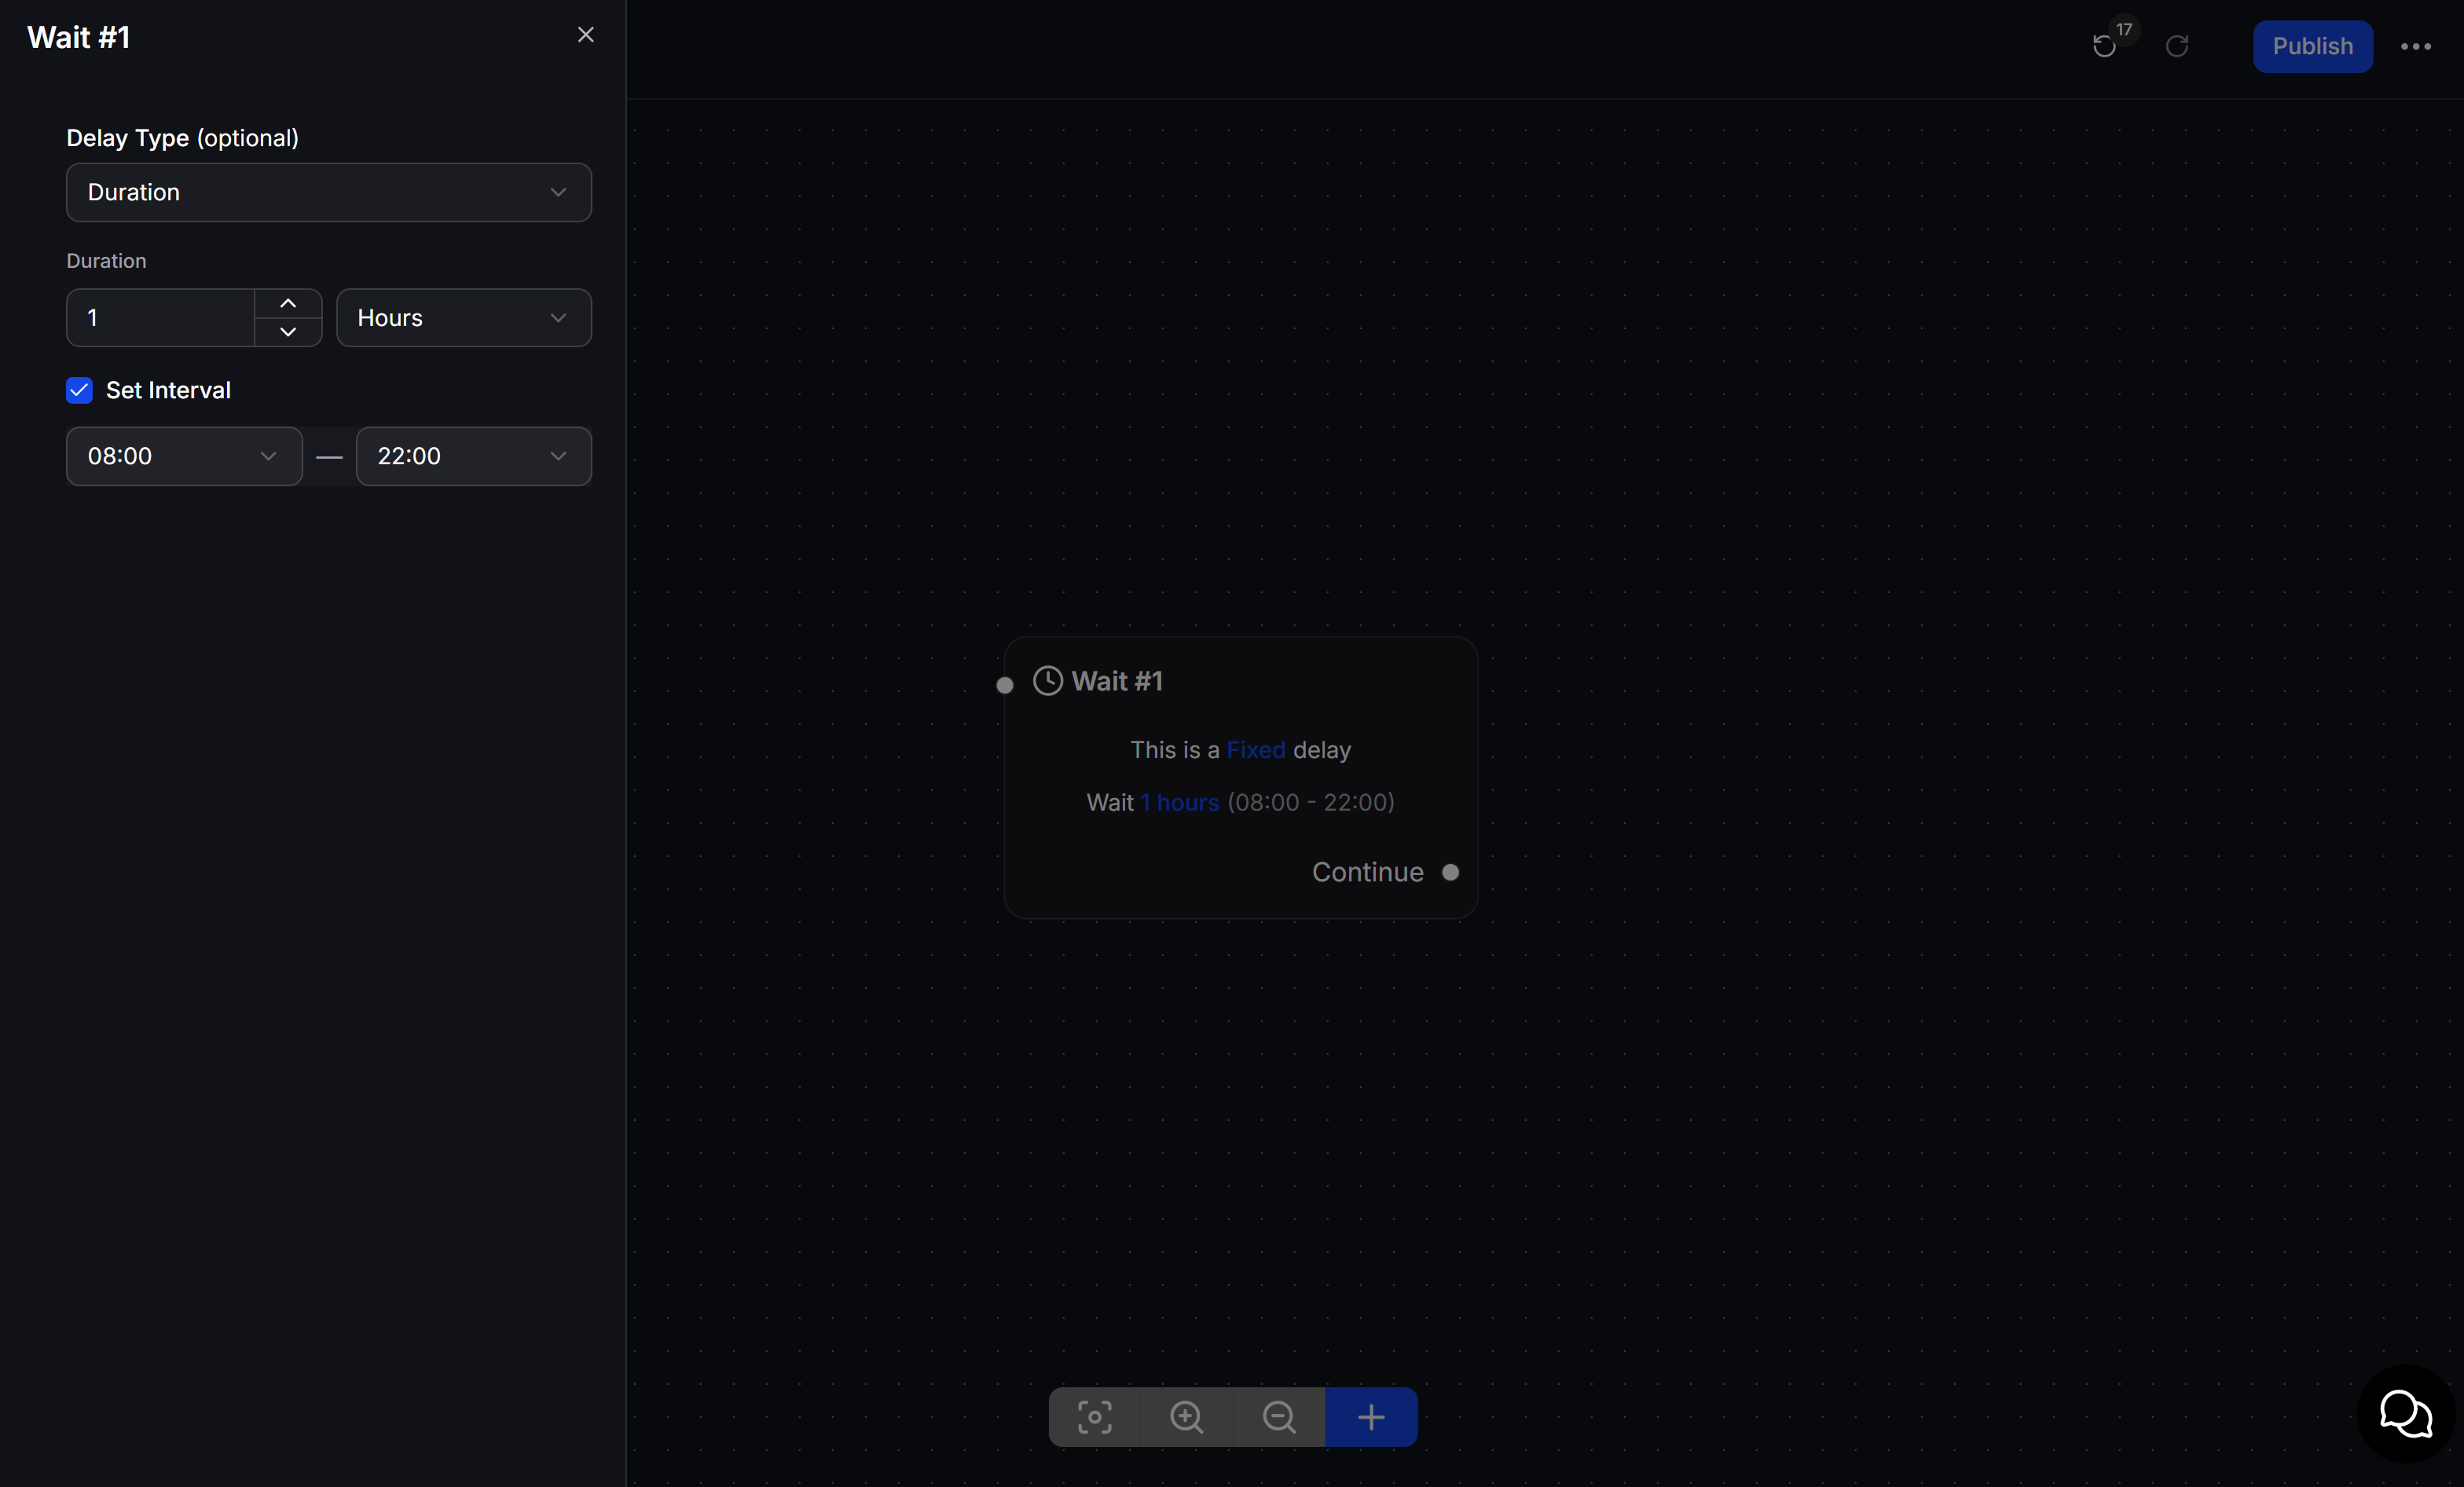
This is the most common option. It pauses the flow for a fixed amount of time after a user reaches this step.- Configuration: Select Duration in the Delay Type field. Input the desired value and select the time unit: Seconds, Minutes, Hours, or Days.
- Set Interval (Daily Active Window): When you toggle Set Interval, you can define a daily timeframe during which the flow is allowed to proceed (e.g.,
08:00 - 22:00).- How it works: If the delay timer finishes outside this window (e.g., at 11:30 PM), the bot will pause execution and wait until the active window opens the next day (at 8:00 AM) before sending the next message.
- Use Case: Sending a follow-up message 1 day after class registration, ensuring it only goes out during business hours.
2. Date
This option holds contacts at this step until a specific calendar time is met. There are two ways to define the target date/time:Specific Date
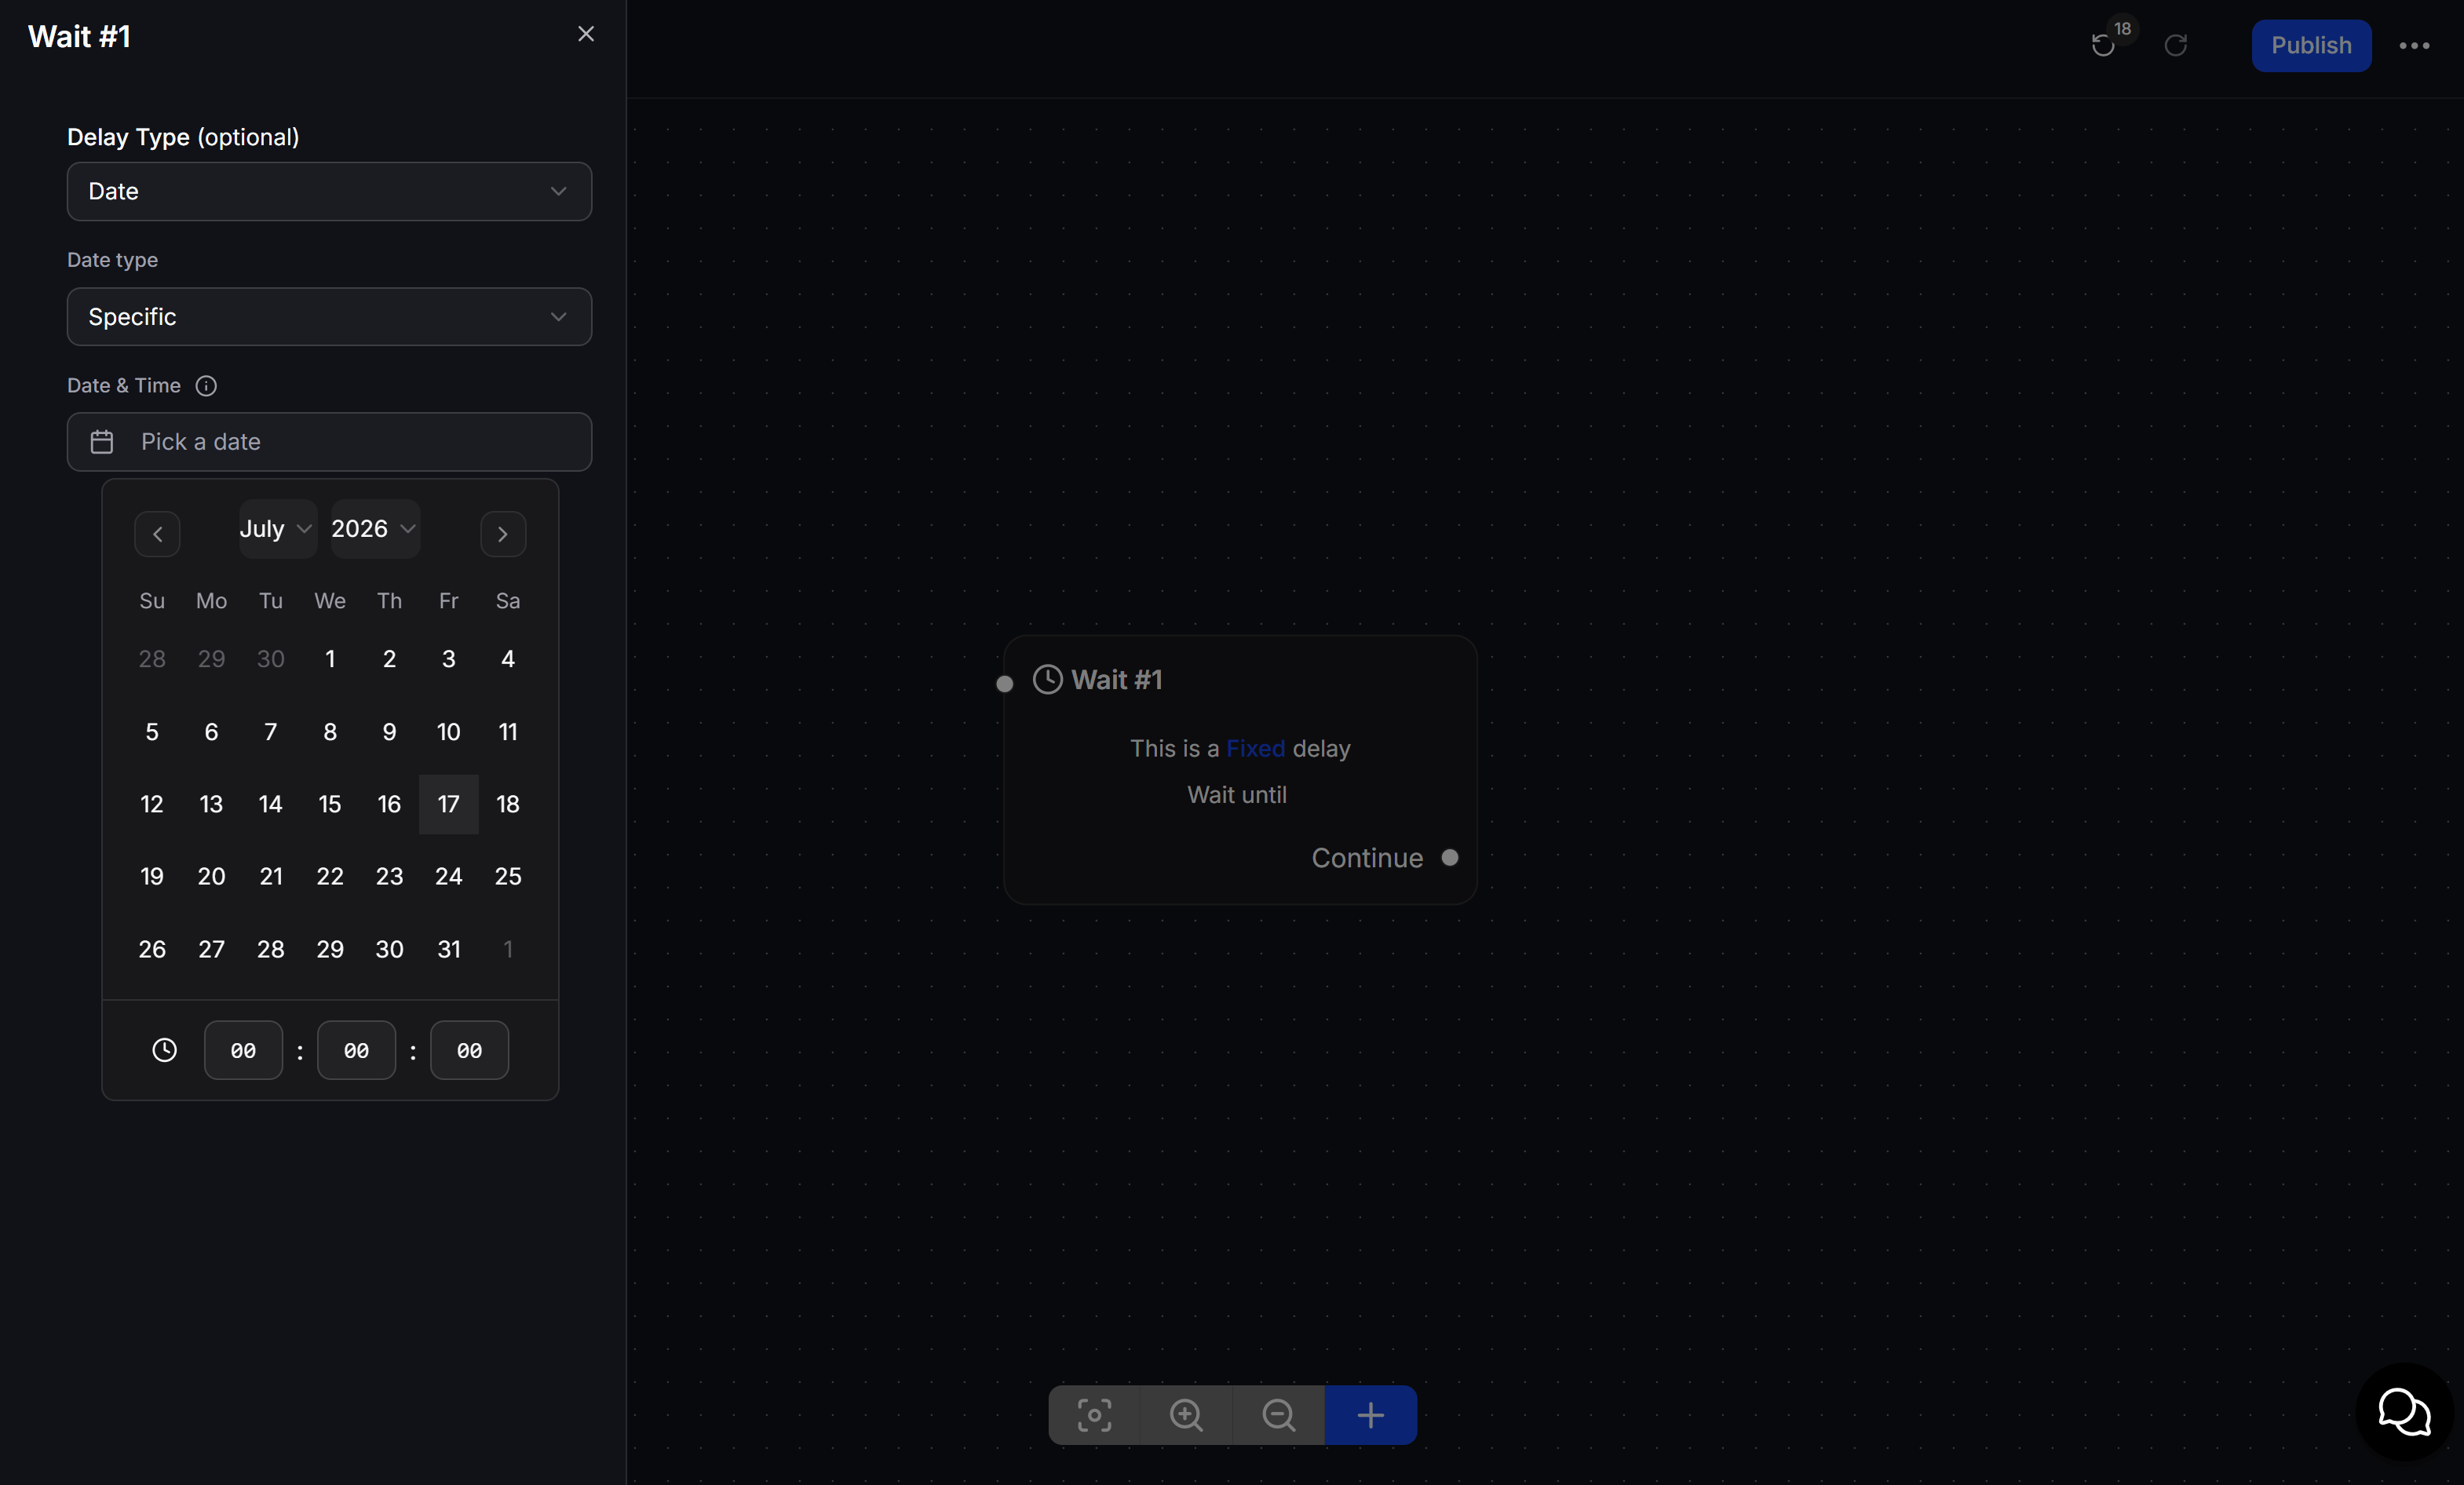
- Configuration: Select Date in the Delay Type field -> Set the Date type to Specific -> Click Pick a date to select a calendar date and specify the hour, minute, and second.
- Use Case: Holding users in a flow until exactly
20:00:00on the day of a live Webinar event.
Dynamic Date
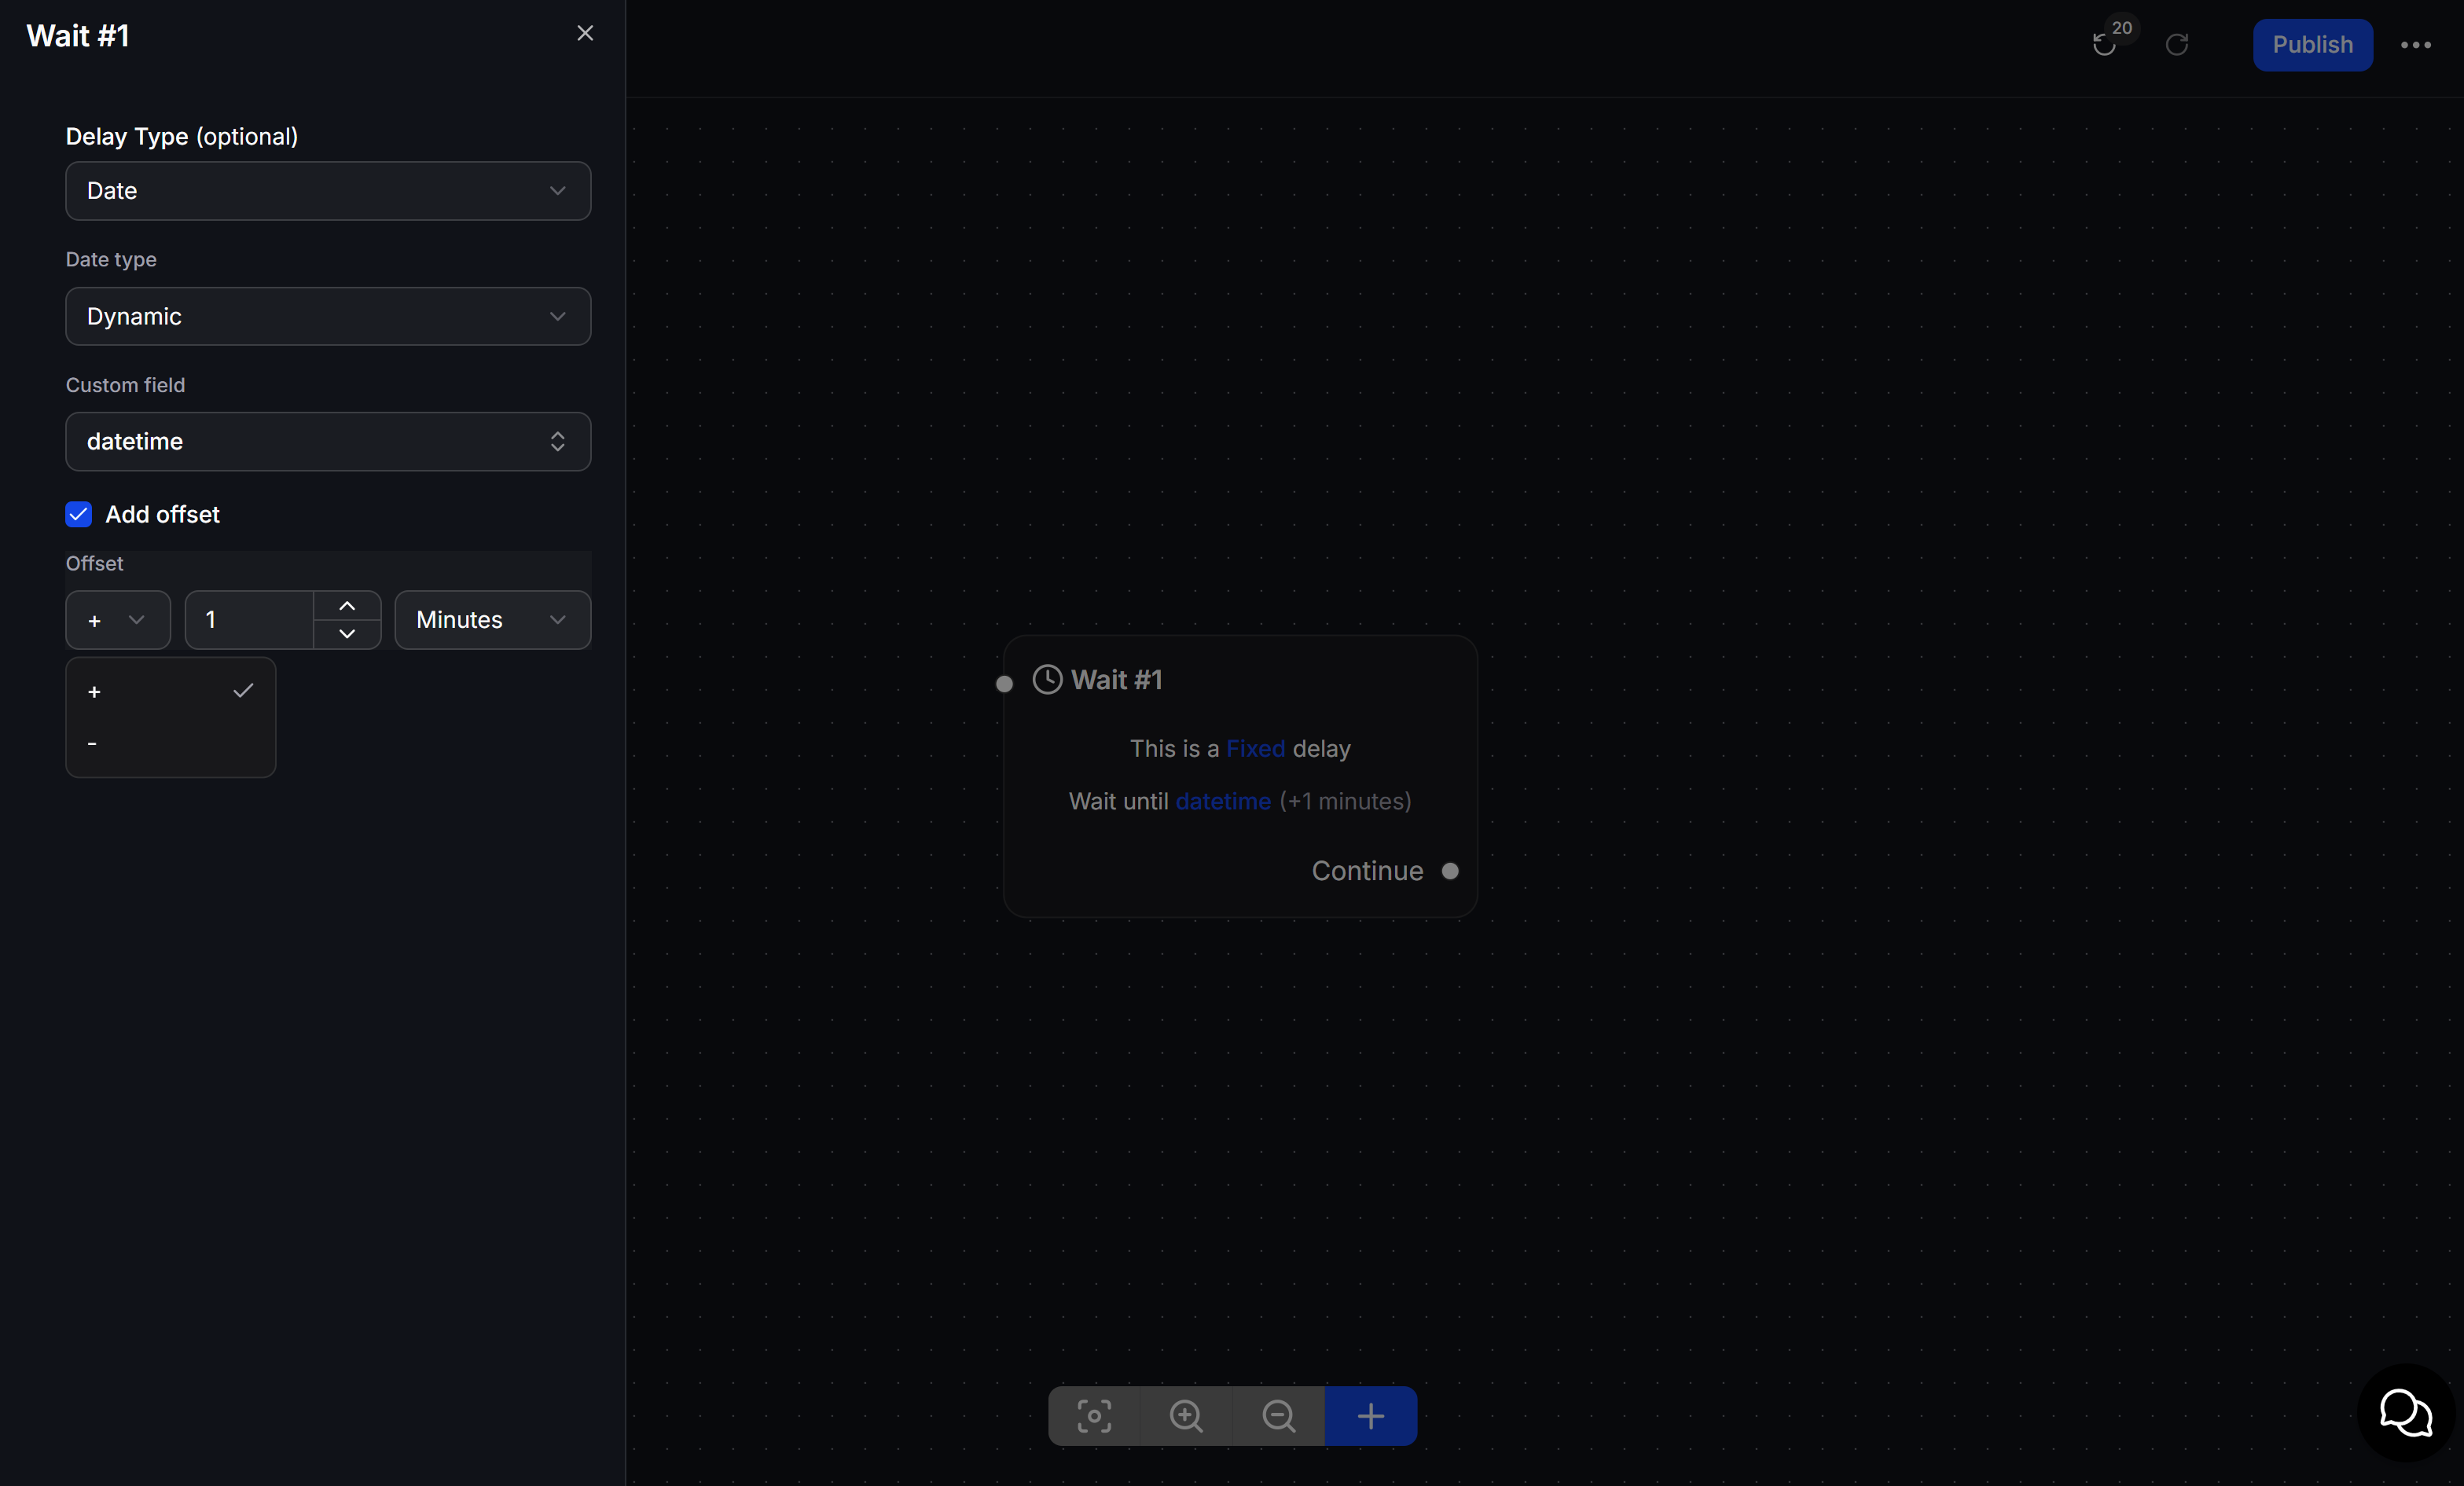
- Configuration: Select Date in the Delay Type field -> Set the Date type to Dynamic -> Choose a date/time Custom field from your contact variables (e.g., a custom field named
datetime). - Add offset: Allows you to adjust the delay relative to the date stored in the Custom Field (click the
+or-symbol, input a number, and select the unit). - Use Case: Sending a payment reminder 1 day before a user’s subscription expires (using a
- 1 Daysoffset from the subscription expiry date custom field).
3. Random
This option instructs the system to select a randomized delay time between a minimum and maximum range that you define.- Configuration: Select Random in the Delay Type field -> Specify the minimum and maximum limit under Random range -> Choose the unit under Unit.
- Use Case: Waiting anywhere between 1 to 10 hours before sending a promotional offer. This varying delay helps simulate human behavior and protects your account from automated bot detection systems.
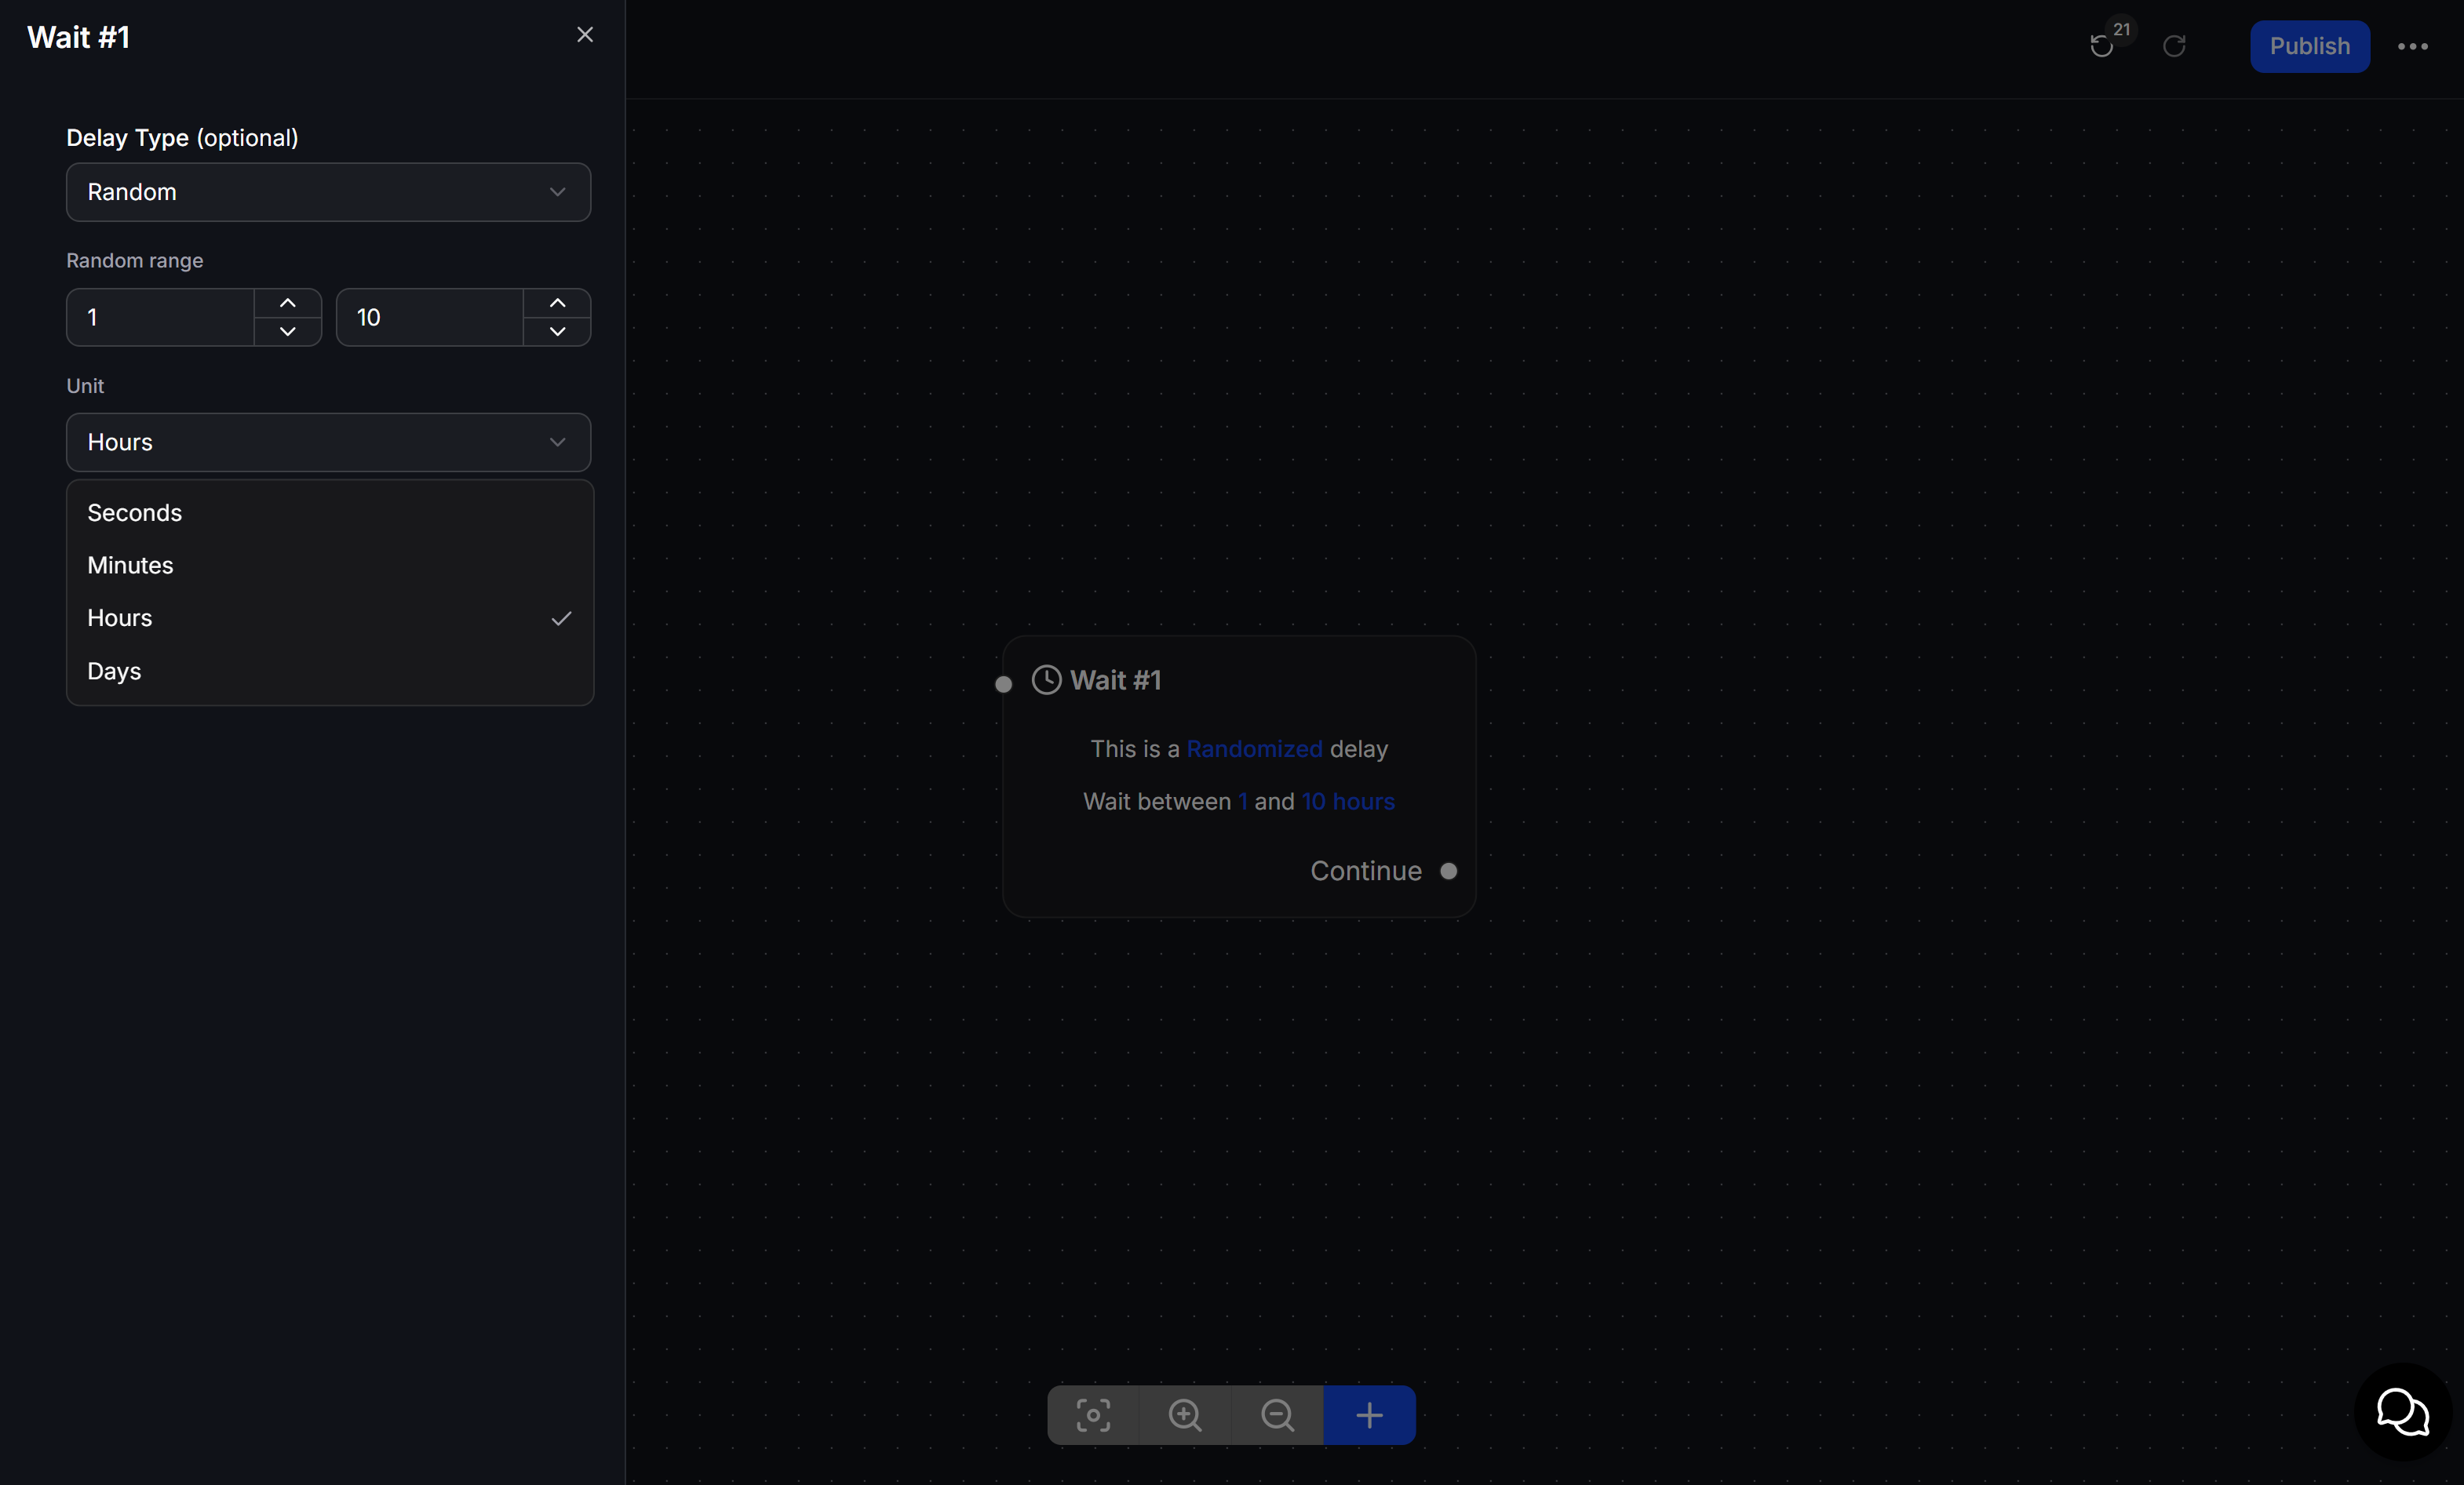
Canvas Interface Preview
Once configured, the delay settings are summarized directly on the Wait block face on the canvas, allowing you to quickly inspect your flow logic without opening the settings panel:- Fixed delay - Wait 1 hours (08:00 - 22:00): Wait for exactly 1 hour, restricted to the 8 AM - 10 PM daily window.
- Wait until: Pause until a specific date and time.
- Wait until datetime (+1 minutes): Pause until the date stored in the custom field plus a 1-minute offset.
- Randomized delay - Wait between 1 and 10 hours: Pause for a random duration between 1 and 10 hours.