

Prepare your API Token
You need to generate an API Token in MailerLite before connecting. This token allows ChatbotX to access subscribers, Groups, and Custom Fields in your account.1
Sign in to MailerLite
Sign in to the MailerLite account that you want to connect to ChatbotX.
2
Open Integrations
Select Integrations from the left menu, then open API.
3
Generate an API Token
On the Developer API page, click Generate new token. Enter a name that helps you identify the token and confirm its creation.
4
Copy the API Token
Copy the token and store it securely for use in ChatbotX.See MailerLite API Getting Started in the official MailerLite documentation.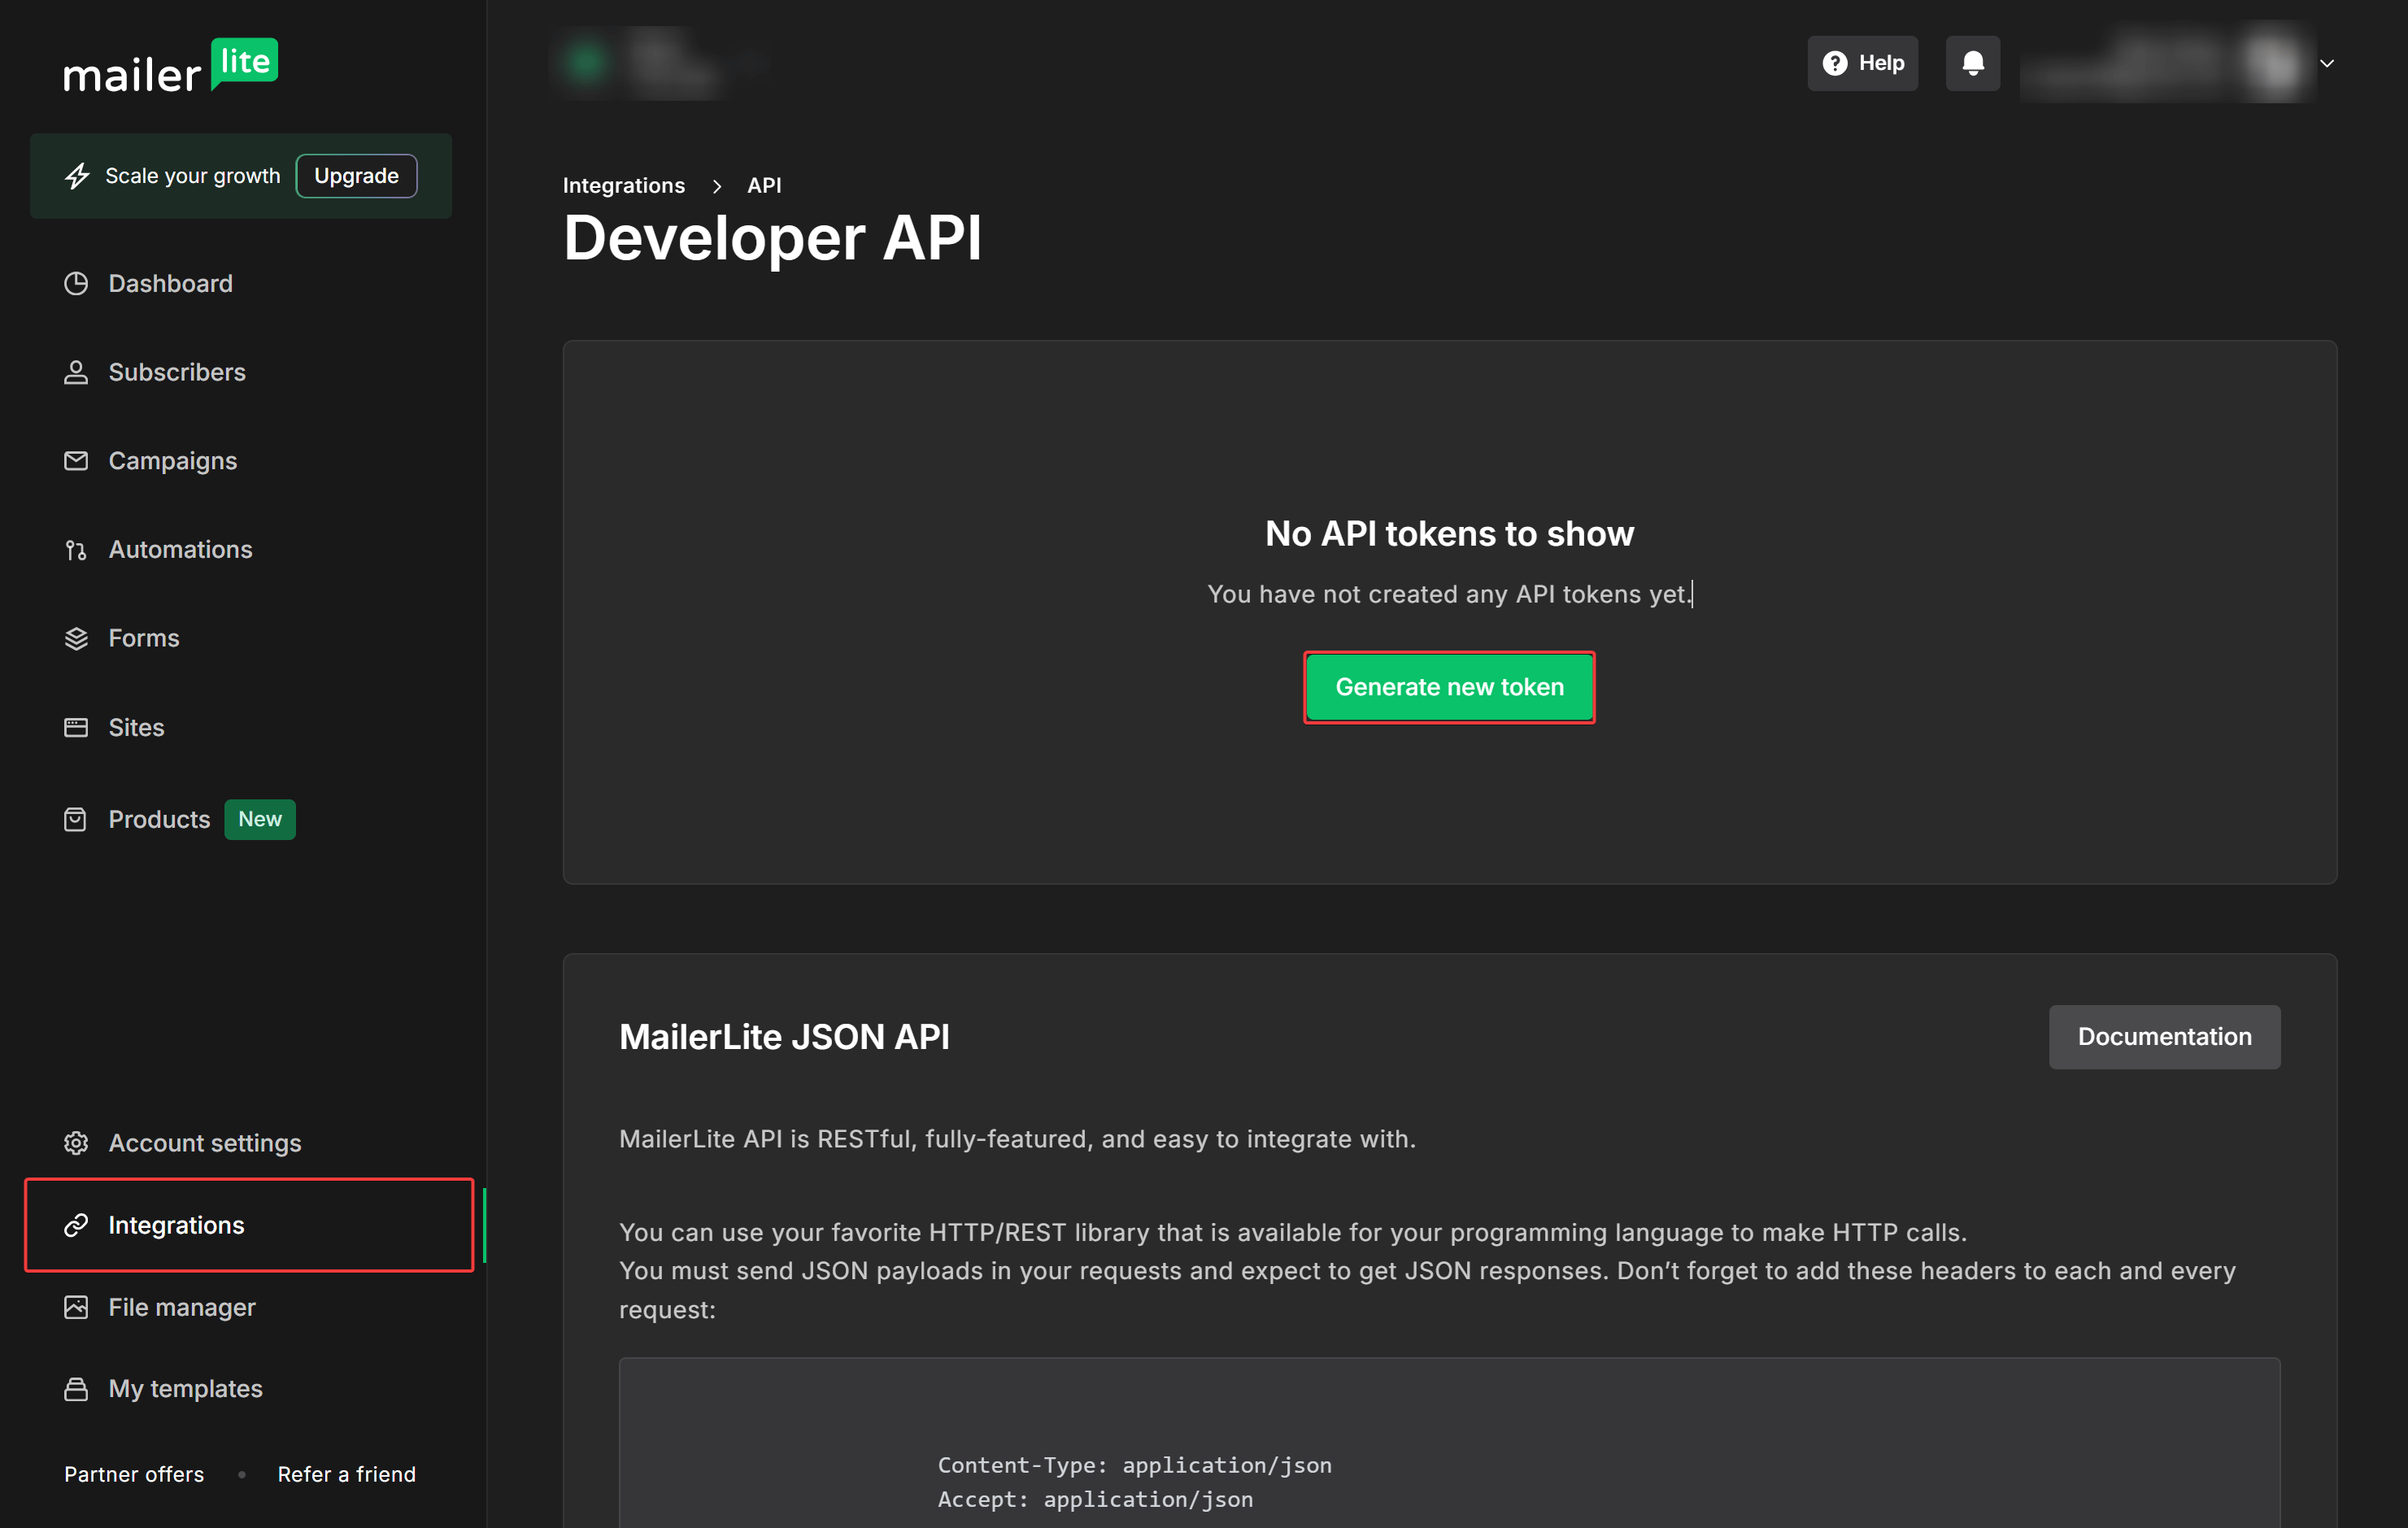
Connect MailerLite to ChatbotX
1
Open Settings
In your ChatbotX workspace, select Settings from the left menu.
2
Select Integrations
Select the Integrations tab, then open MailerLite.
3
Open the connection window
Click Connect to open the Connect MailerLite window.
4
Enter the API Token
Paste the generated token into API Token, then click Confirm.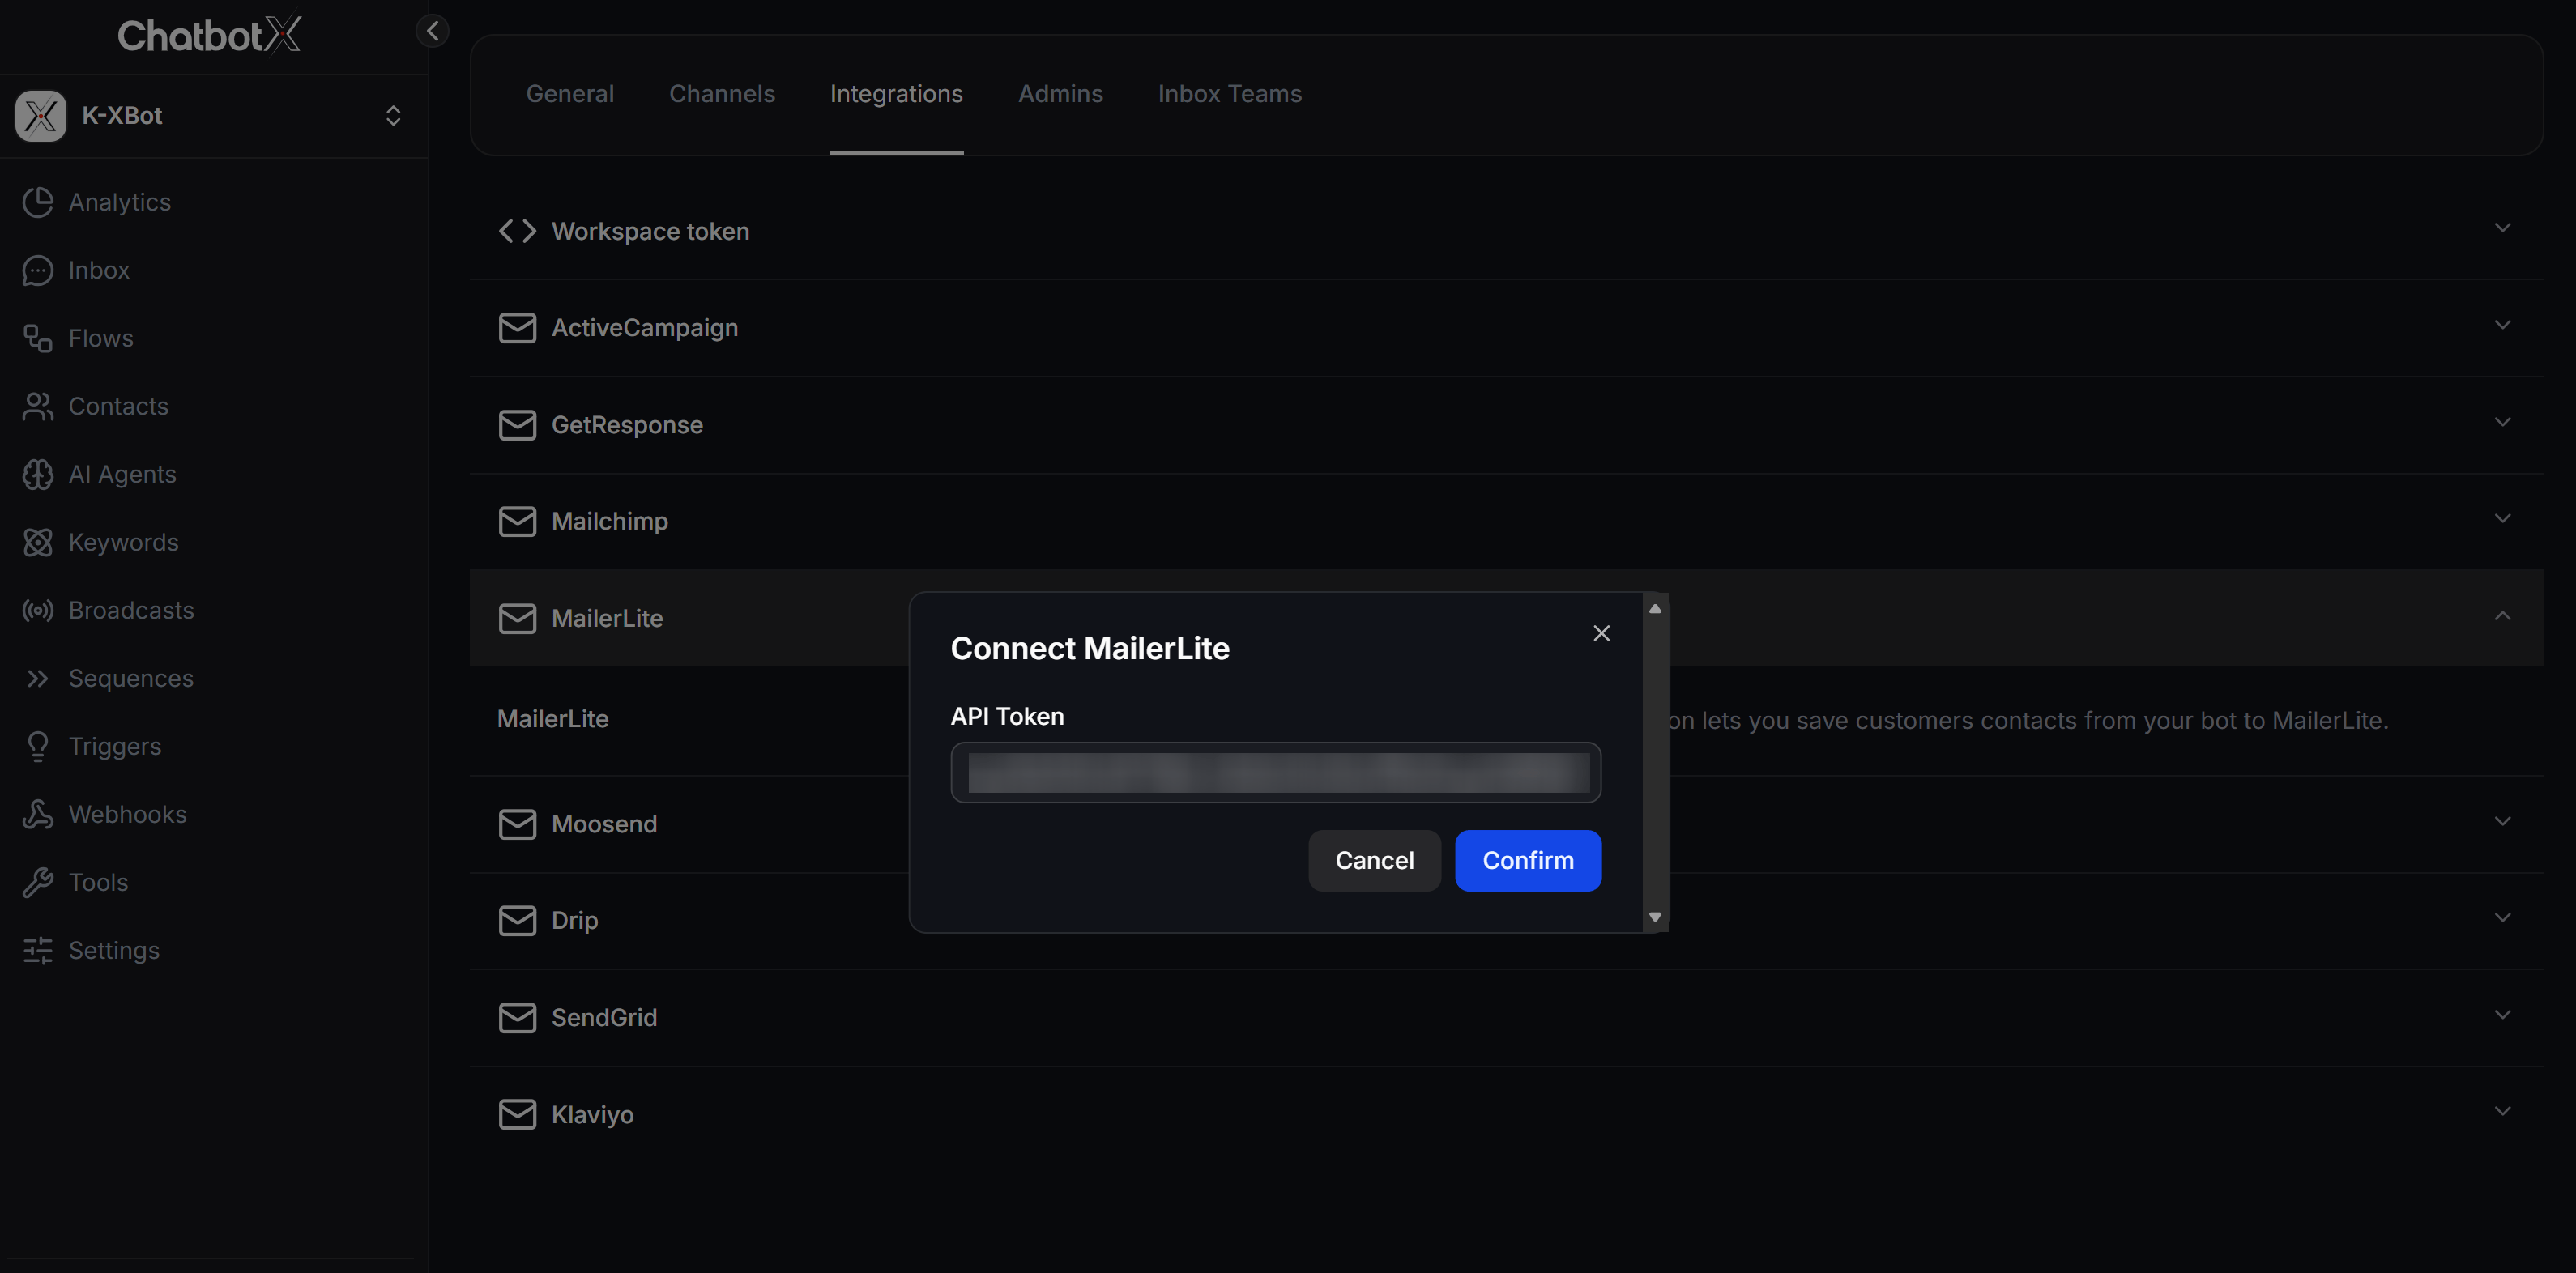
Add MailerLite to a Flow
Place the MailerLite action after collecting the email address and any other data that you want to synchronize. The action uses the email address to create a new subscriber or update an existing one.1
Open the Flow
Select Flows, then open the Flow that you want to use for collecting subscribers.
2
Add Actions
In a Send Message node, click + Create, then select Actions.
3
Select Email Actions
Open Email Actions and select Add Contact to MailerLite.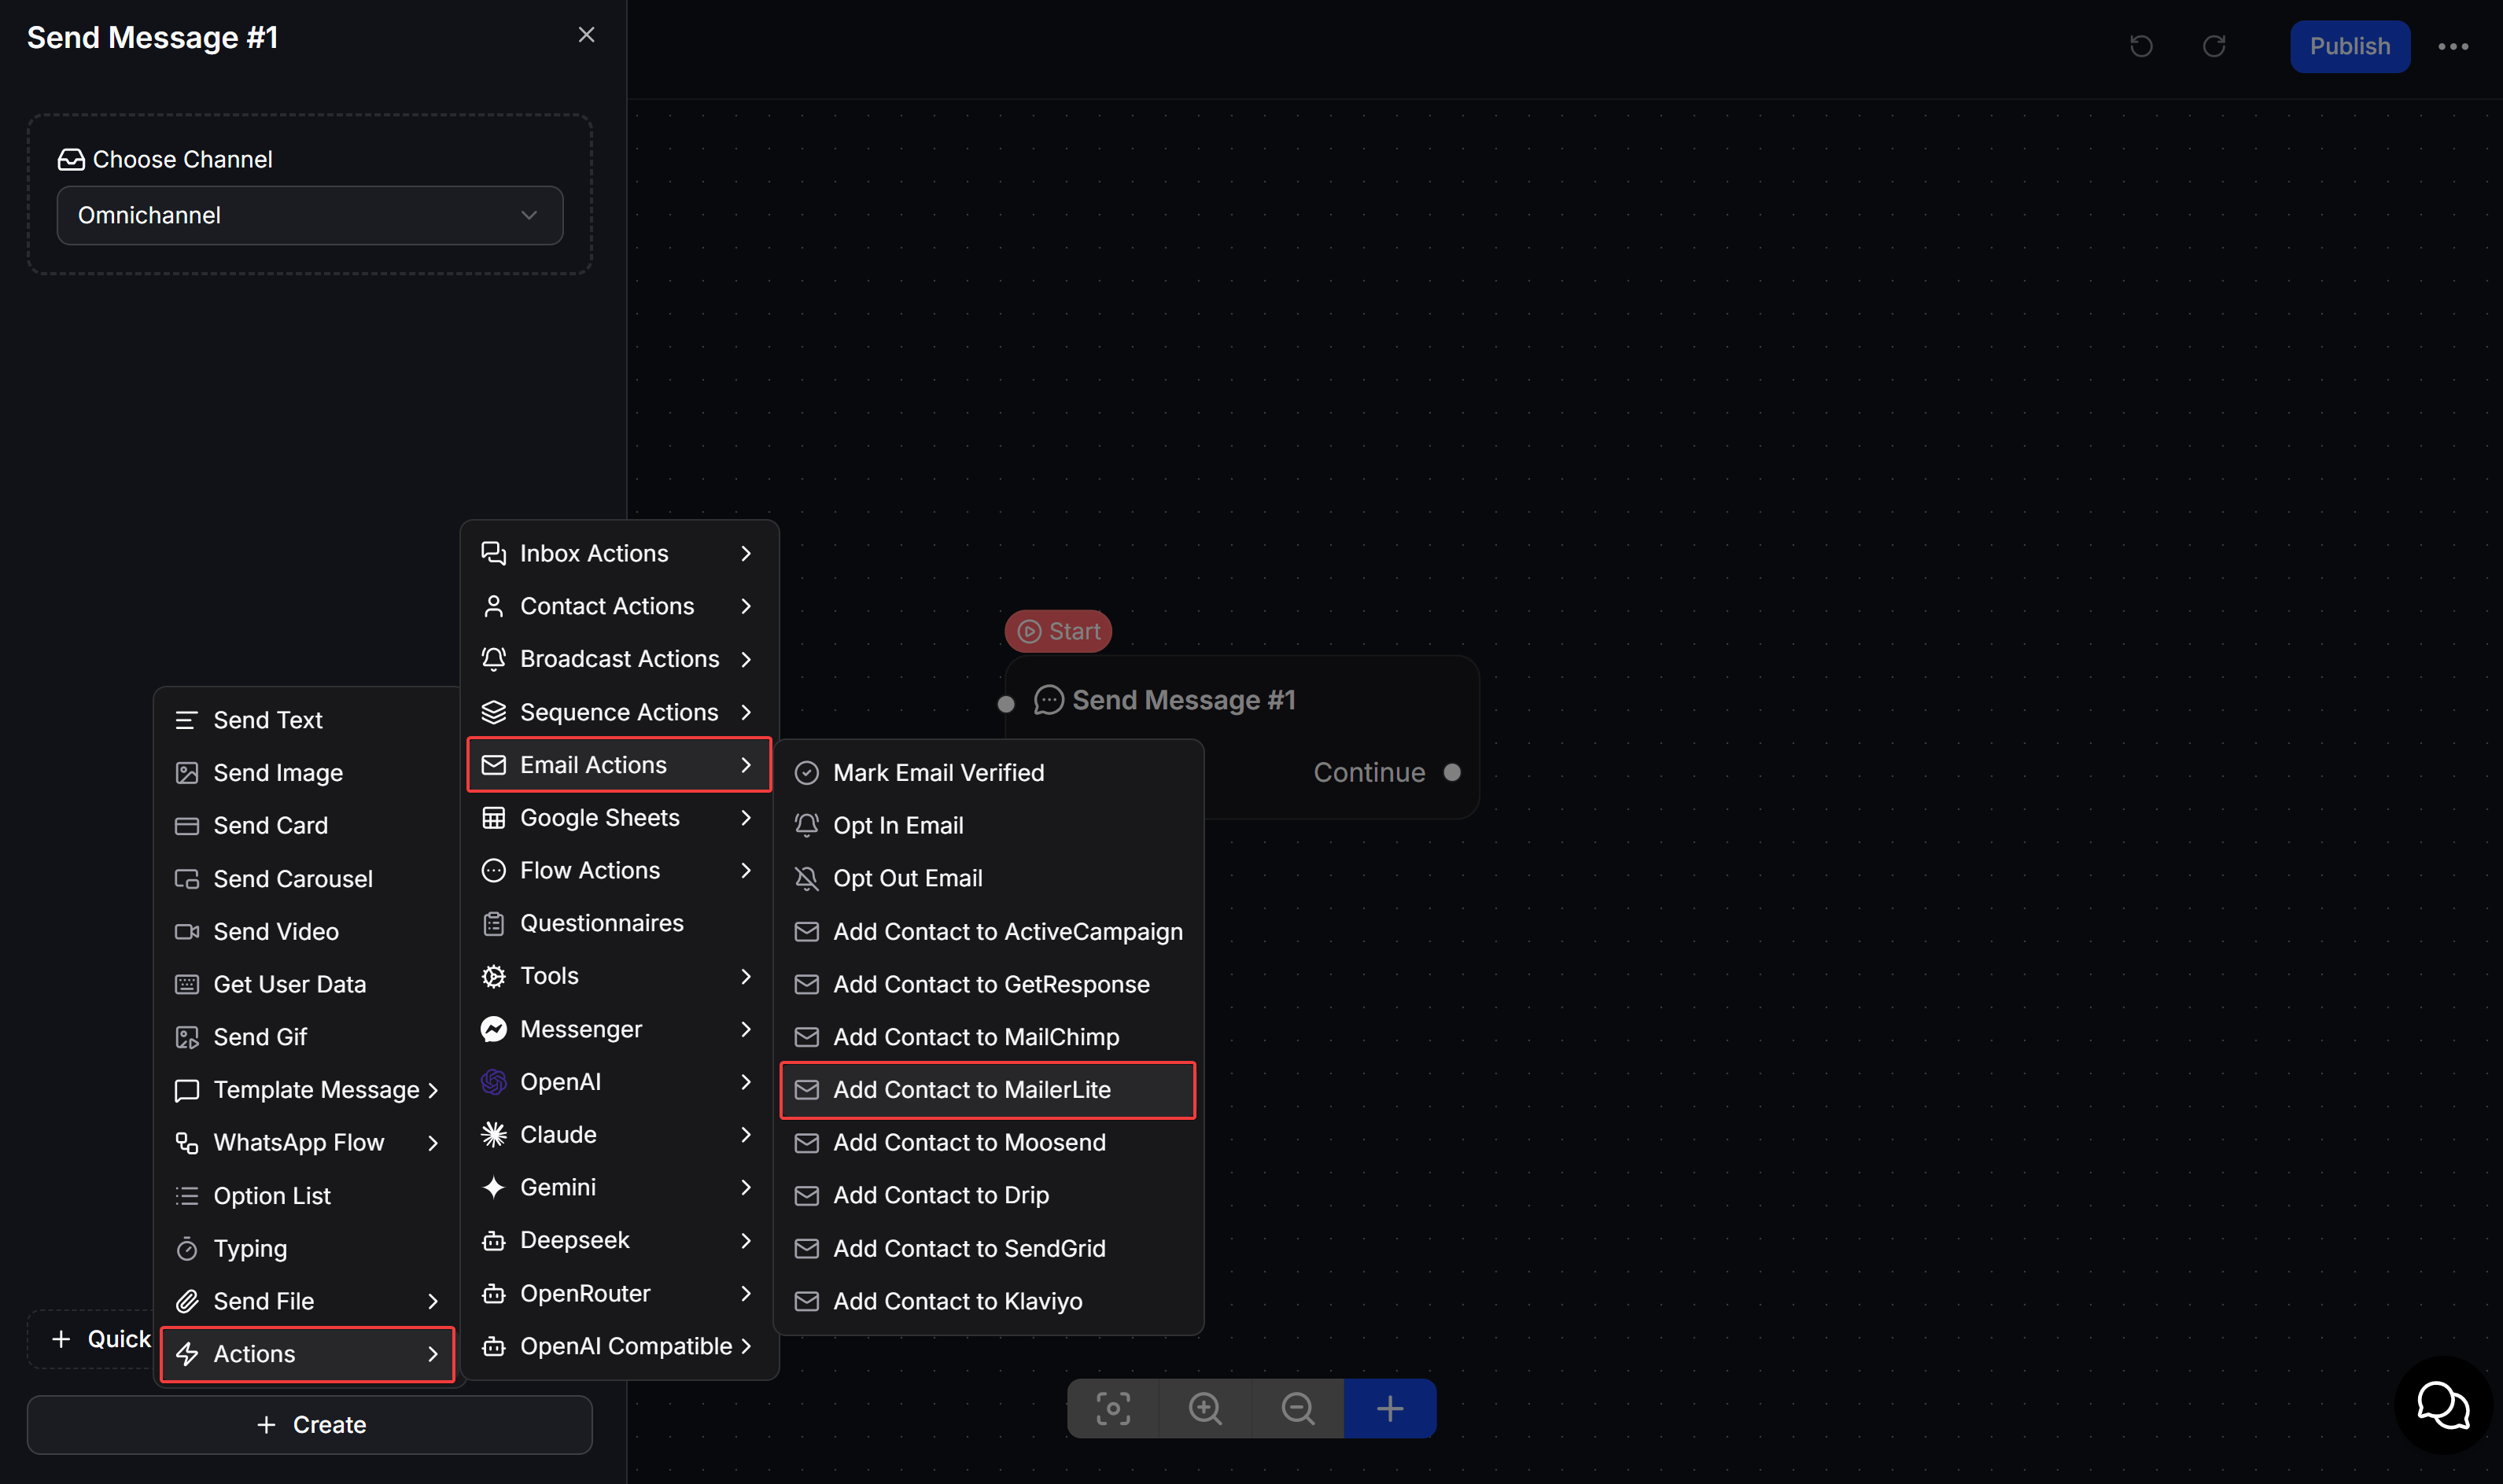
4
Open the configuration
Click Edit on the new action to select a Group, subscription status, and subscriber data mappings.
Configure Add Contact to MailerLite
Configure the fields in the Add Contact to MailerLite window, then click Save.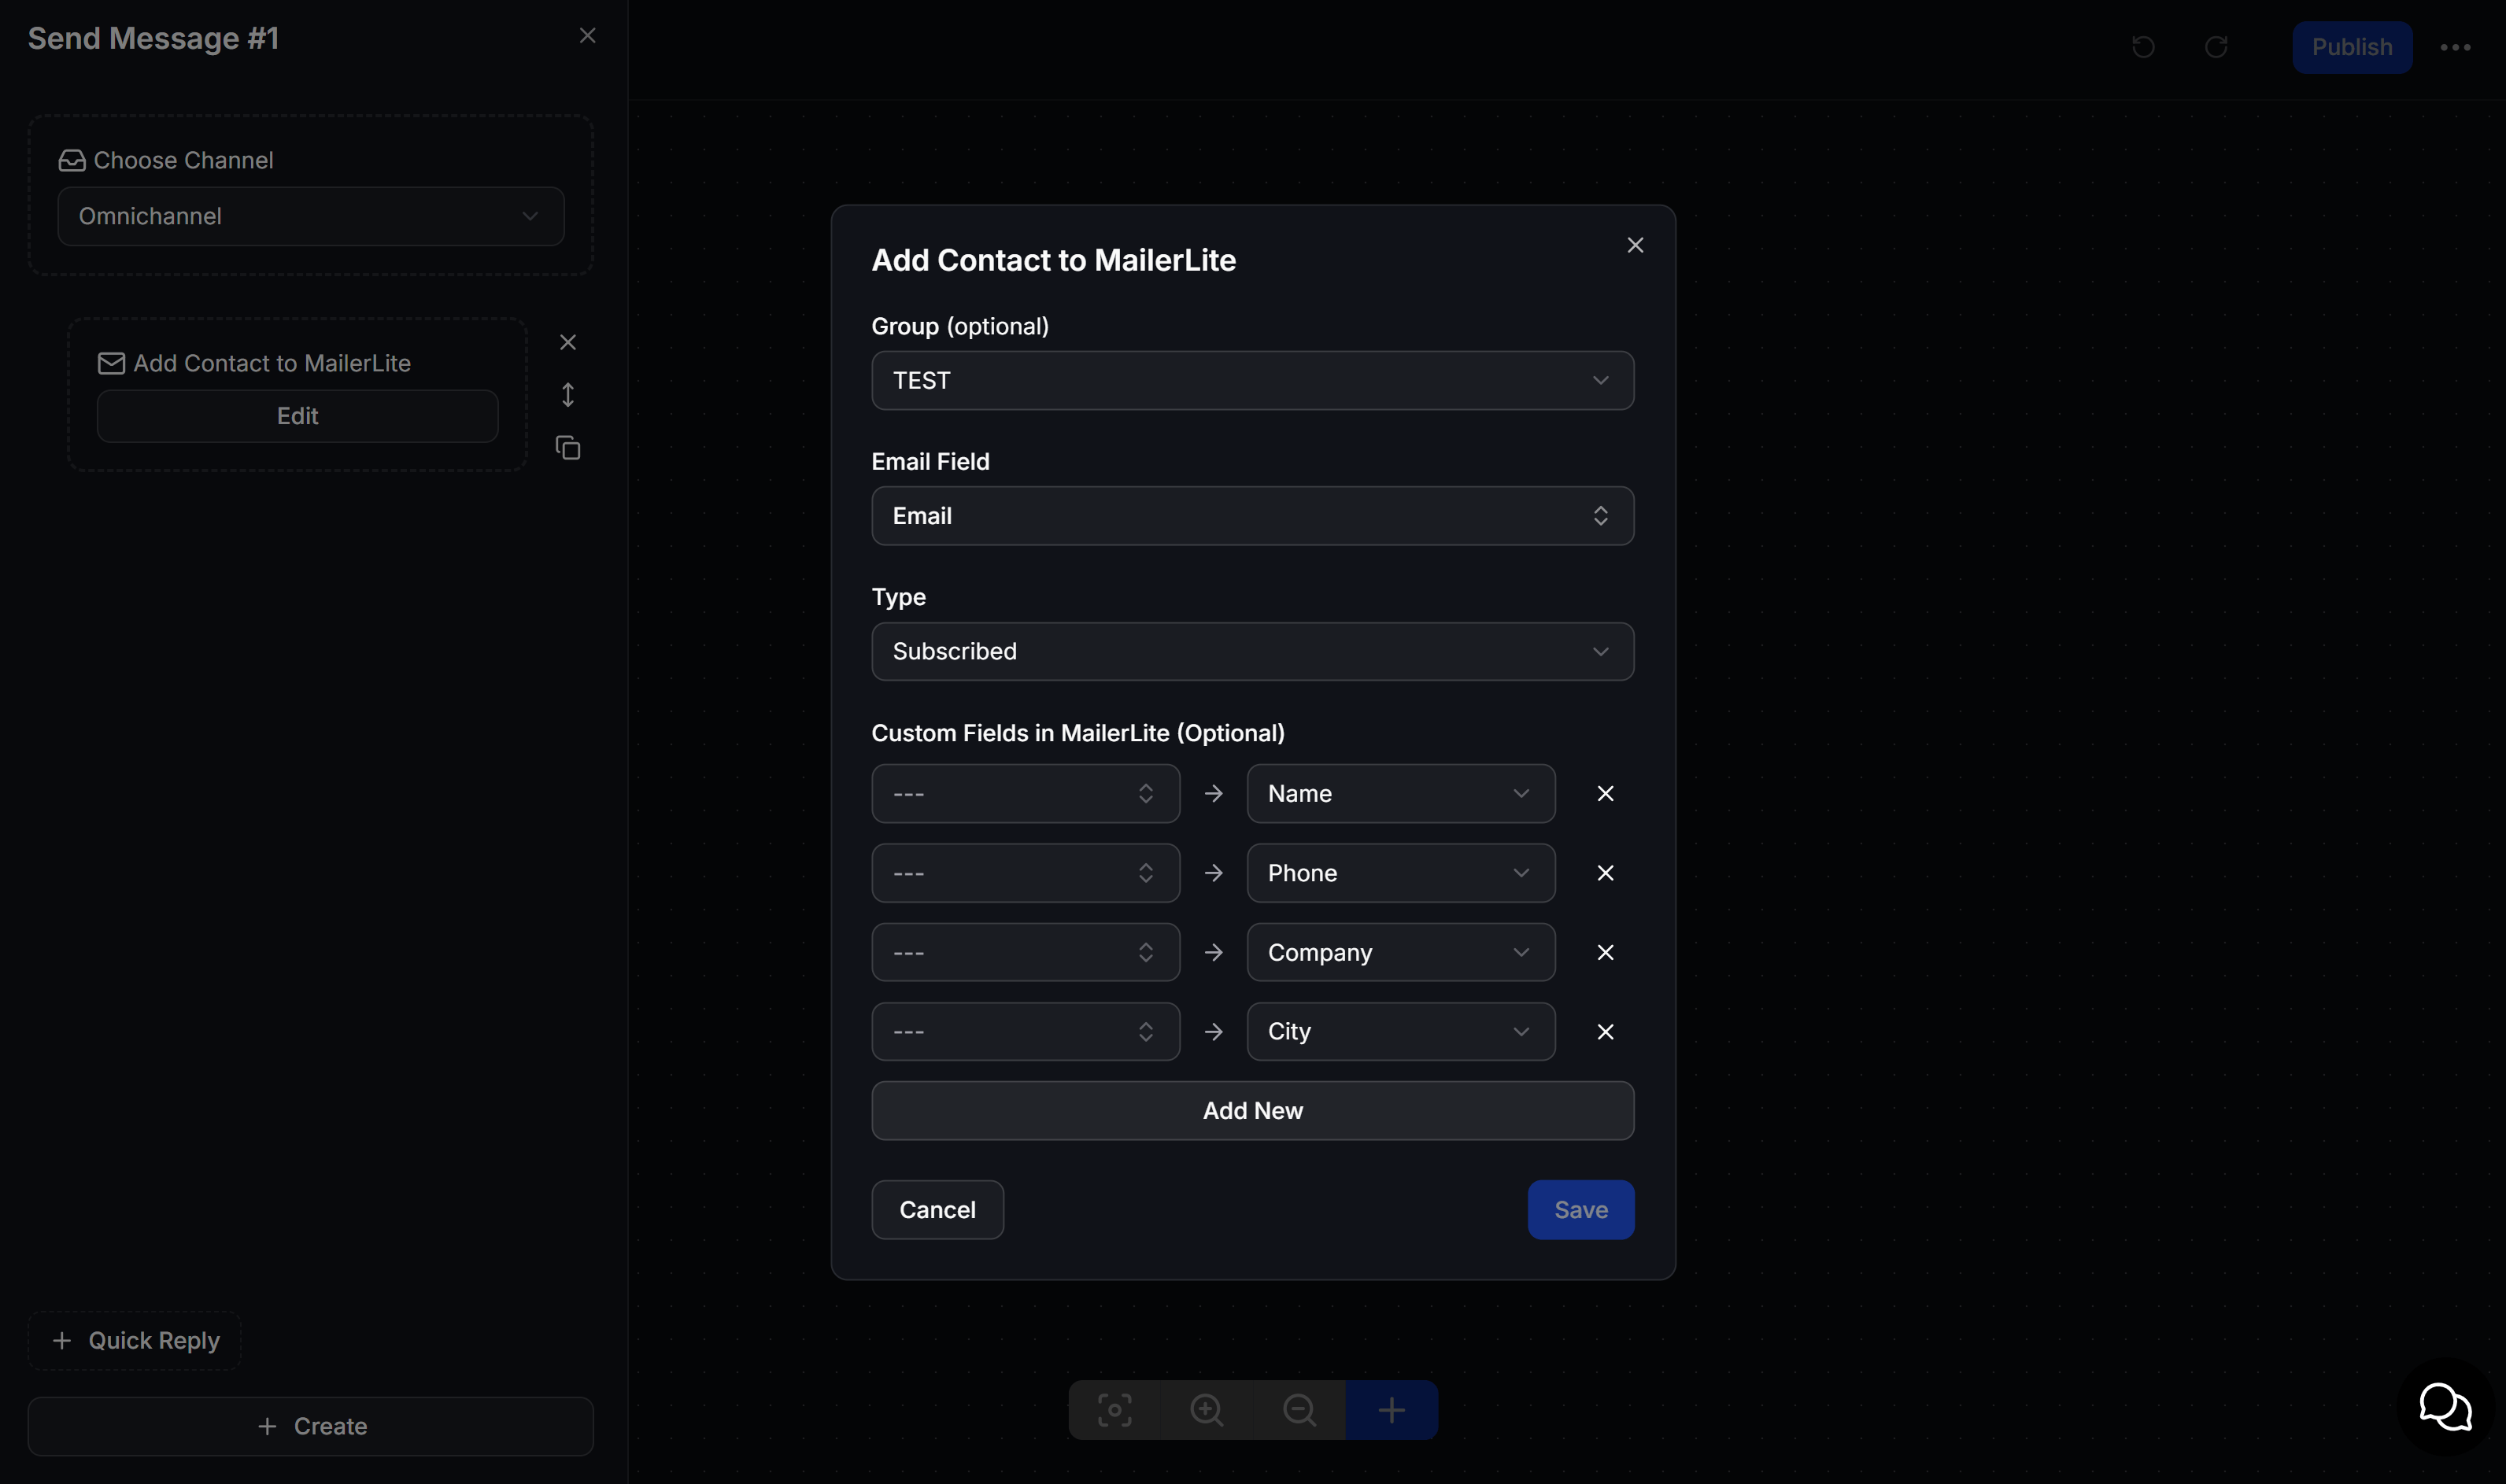
Groups and Custom Fields must already exist in MailerLite before you configure the action. Leaving Group empty does not remove the subscriber from Groups they have already joined.
Map Custom Fields
Mapping allows MailerLite to receive additional data for email personalization or subscriber segmentation.
Select the correct data type for each field. The email address must be valid, and each Custom Field value must match the field type configured in MailerLite.
Example: collect subscribers for an offer
A fashion store wants to collect email addresses from interested customers and introduce a new collection.1
Collect customer information
Use Get User Data to request the customer’s email address, name, and phone number, then save the responses to their corresponding fields.
2
Add the subscriber to MailerLite
Run Add Contact to MailerLite, select the Email field, and choose an appropriate Group when customer classification is needed.
3
Synchronize additional data
Select the appropriate status, then map the customer’s name and phone number to MailerLite Custom Fields.
Test the integration
Before publishing the Flow, test it with an email address that you can verify.- Open Subscribers in MailerLite and confirm that the subscriber appears.
- Check that MailerLite received the correct Group, status, and Custom Fields.
- If a Group or Custom Field does not appear, check the connection and reopen the action.
- If the API Token is no longer valid, generate a new token and reconnect it in ChatbotX.