

Prepare your API Token
Get your API Token from Drip before connecting the integration. The token authenticates your Drip user and allows ChatbotX to send contact data to the Accounts that the user can access.1
Sign in to Drip
Sign in with a user who can access the Account that you want to connect to ChatbotX.
2
Open User Settings
In Drip, select Settings > User Settings to open the settings for your user.
3
Open User Info
Select the Settings tab, then select User Info from the left menu.
4
Copy the API Token
Find the API Token field at the bottom of the page and select the copy icon. If API access is not enabled for your account, contact Drip support.See the official User Settings: Settings and API Token guide.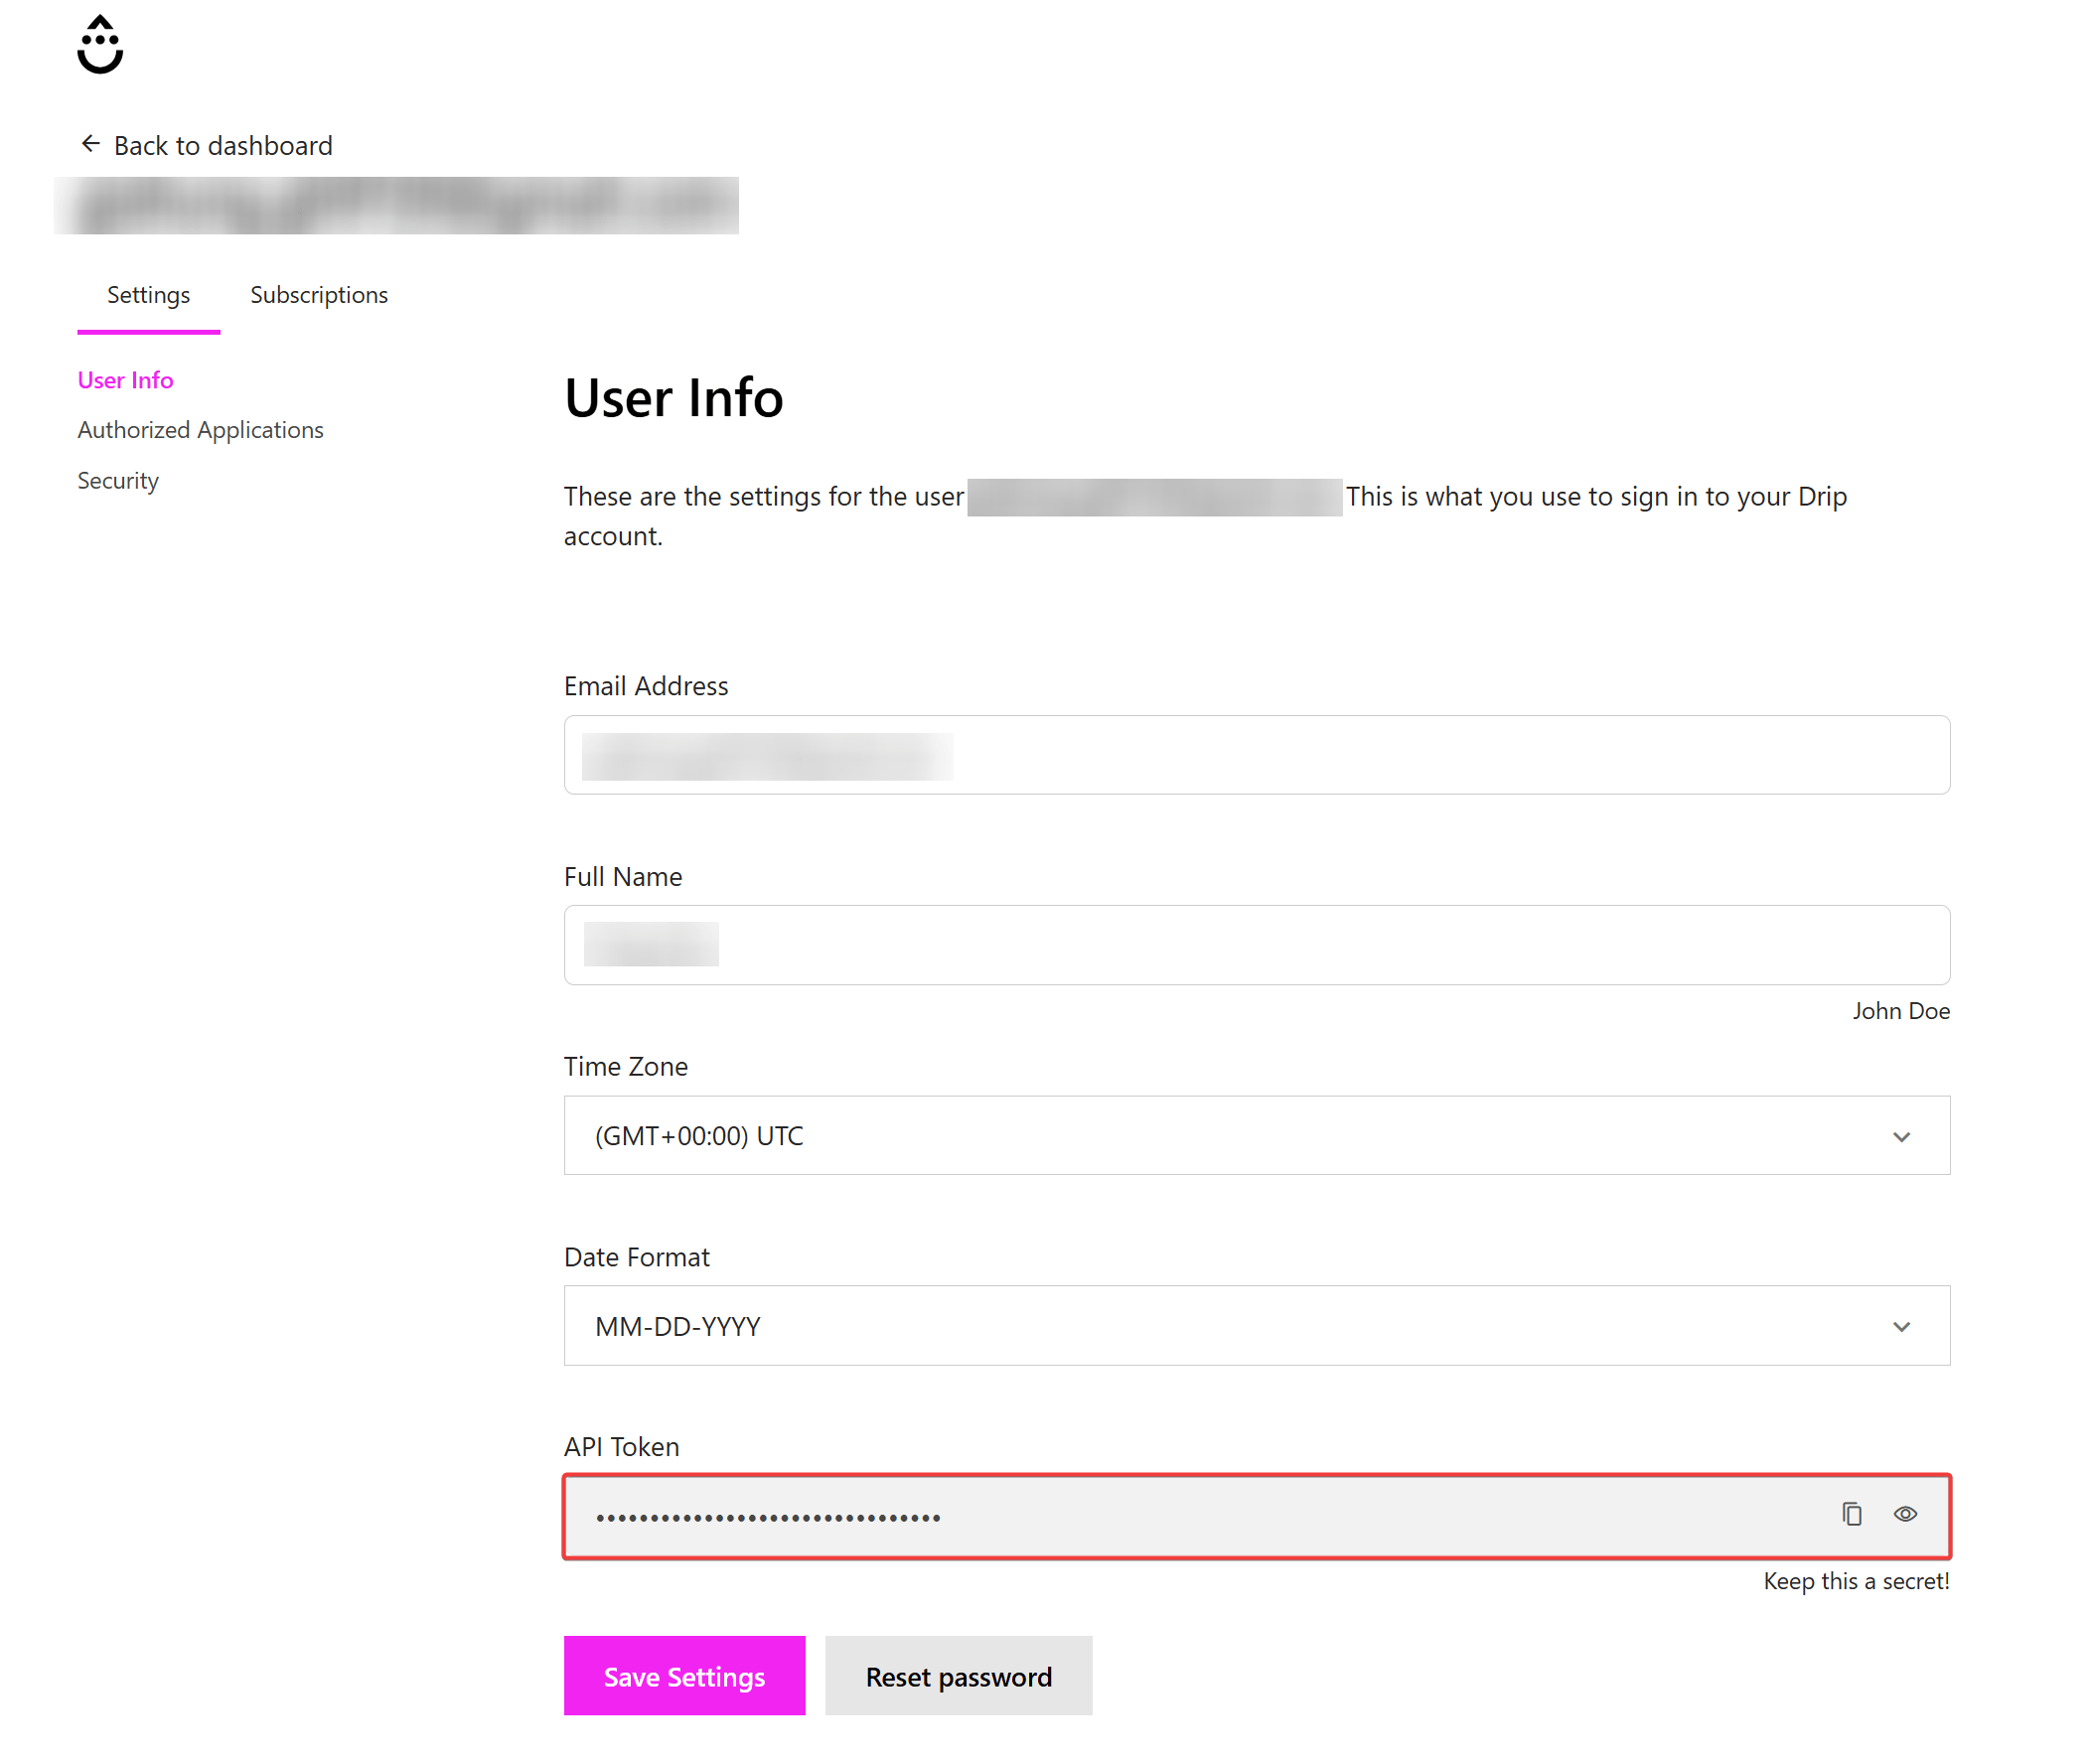
Connect Drip to ChatbotX
1
Open Settings
In your ChatbotX workspace, select Settings from the left menu.
2
Select Integrations
Select the Integrations tab, then open Drip.
3
Open the connection window
Select Connect to open the Connect Drip window.
4
Enter the API Token
Paste the Drip token into the API Token field, then select Confirm.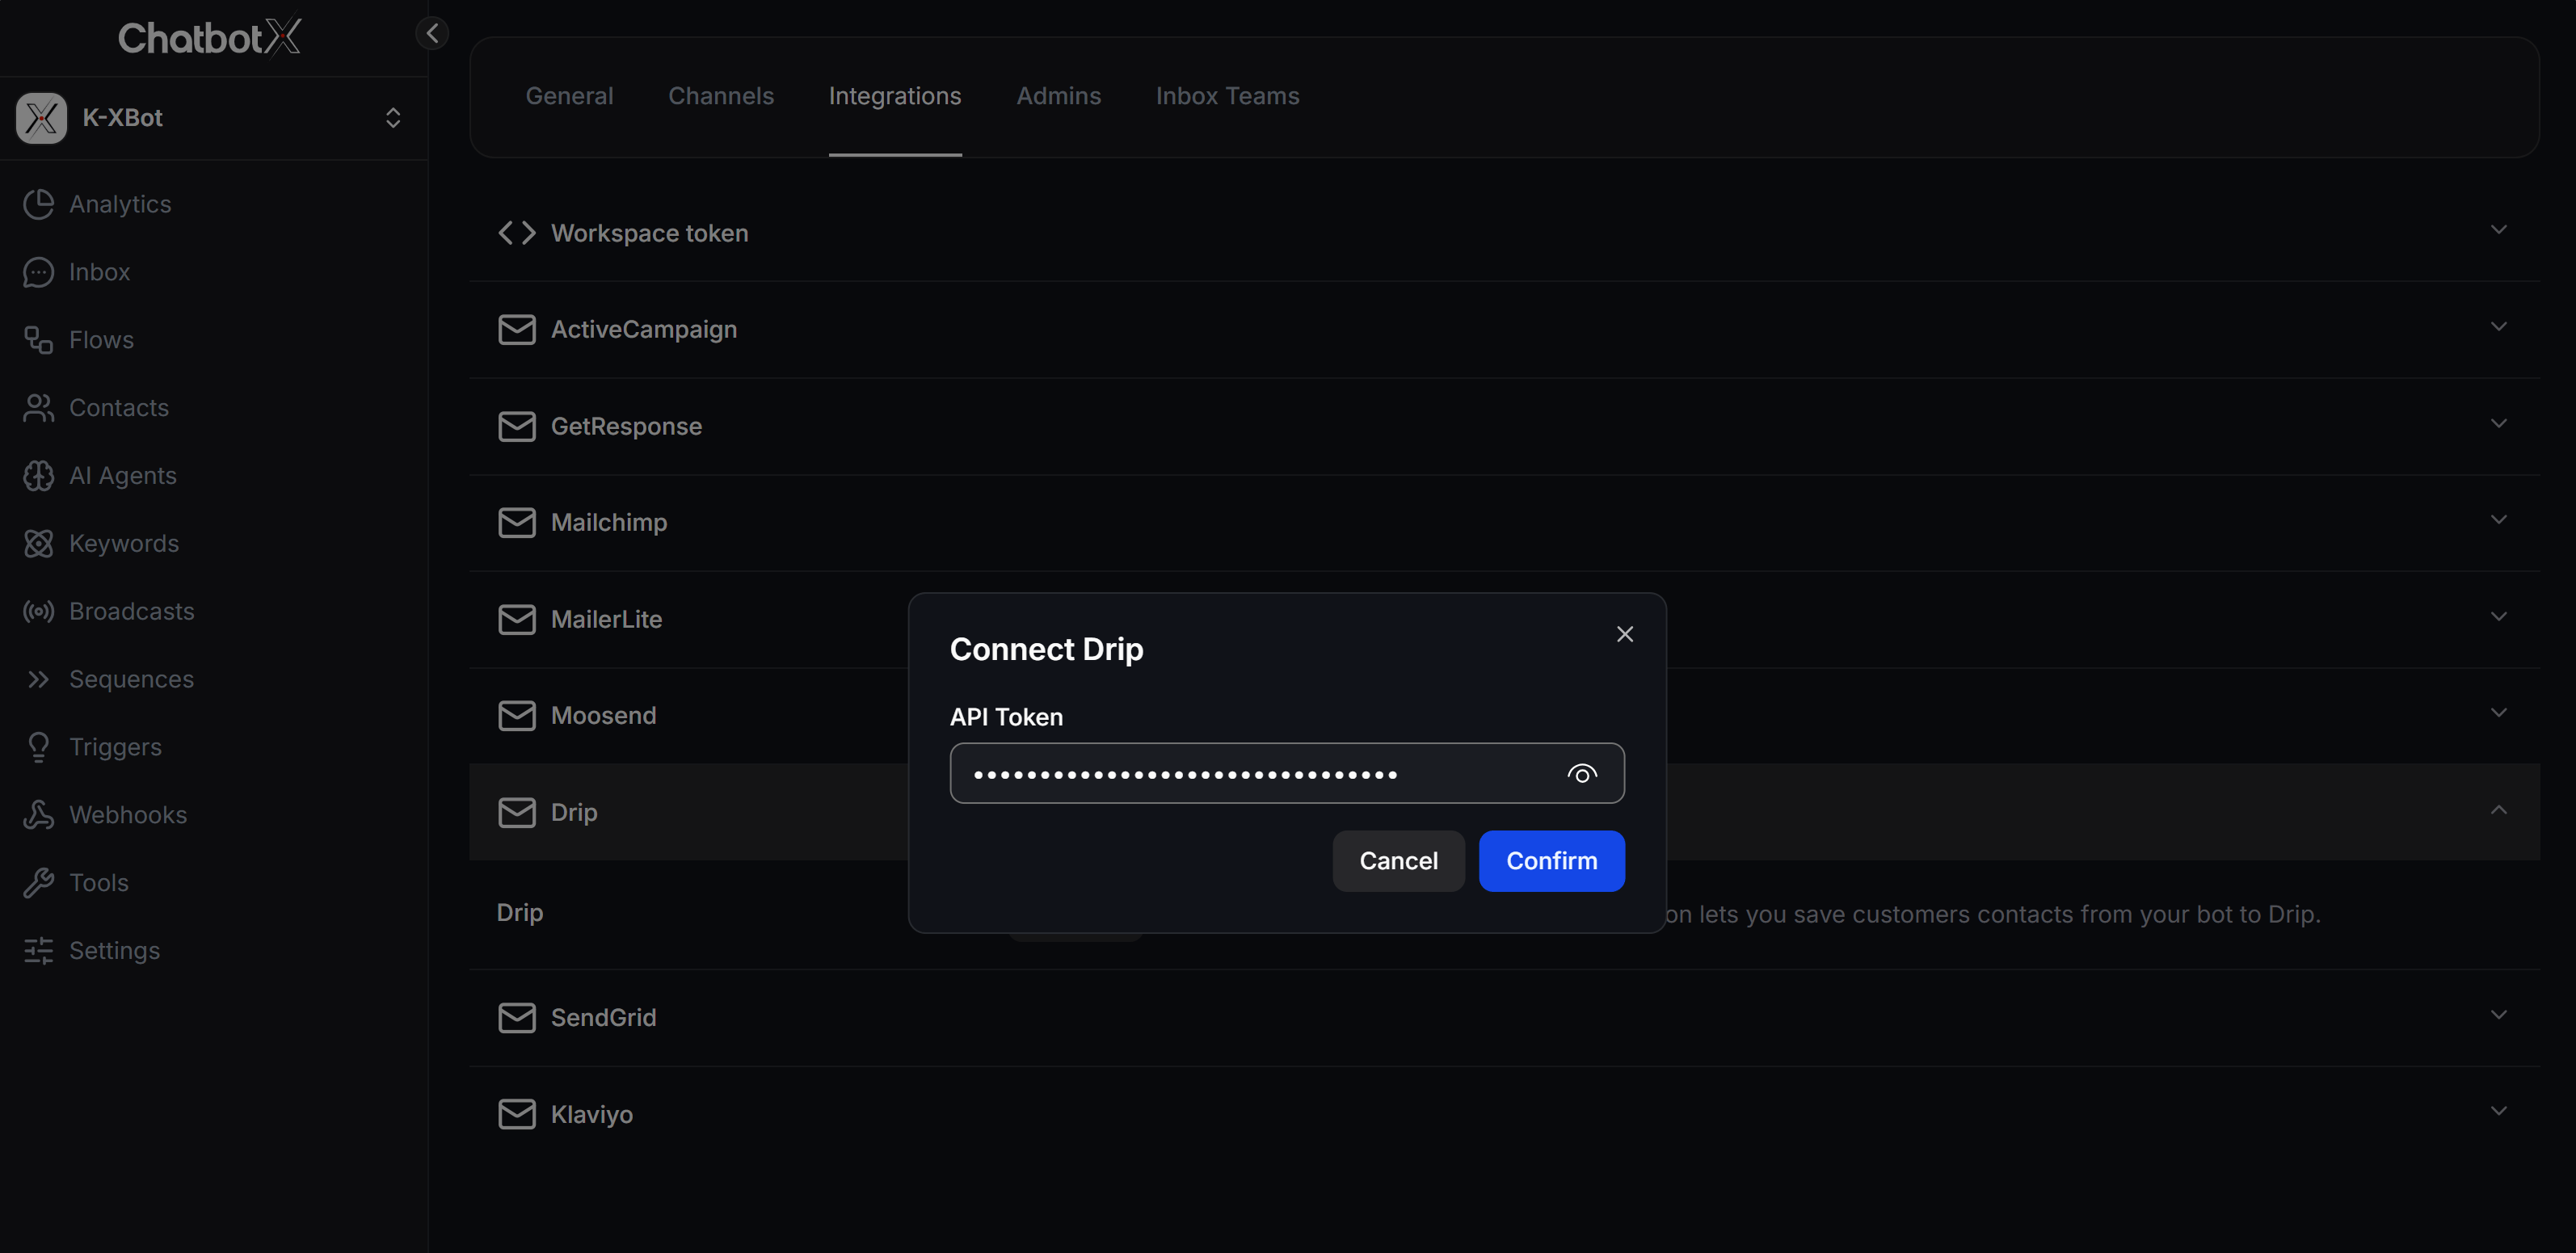
Add Drip to a Flow
Place the Drip action after collecting the email address and other data that you want to sync. Drip requires an email address to identify a person.1
Open the Flow
Select Flows, then open the Flow that you want to use to collect contacts.
2
Add Actions
In the Send Message node, select + Create, then select Actions.
3
Select Email Actions
Open Email Actions and select Add Contact to Drip.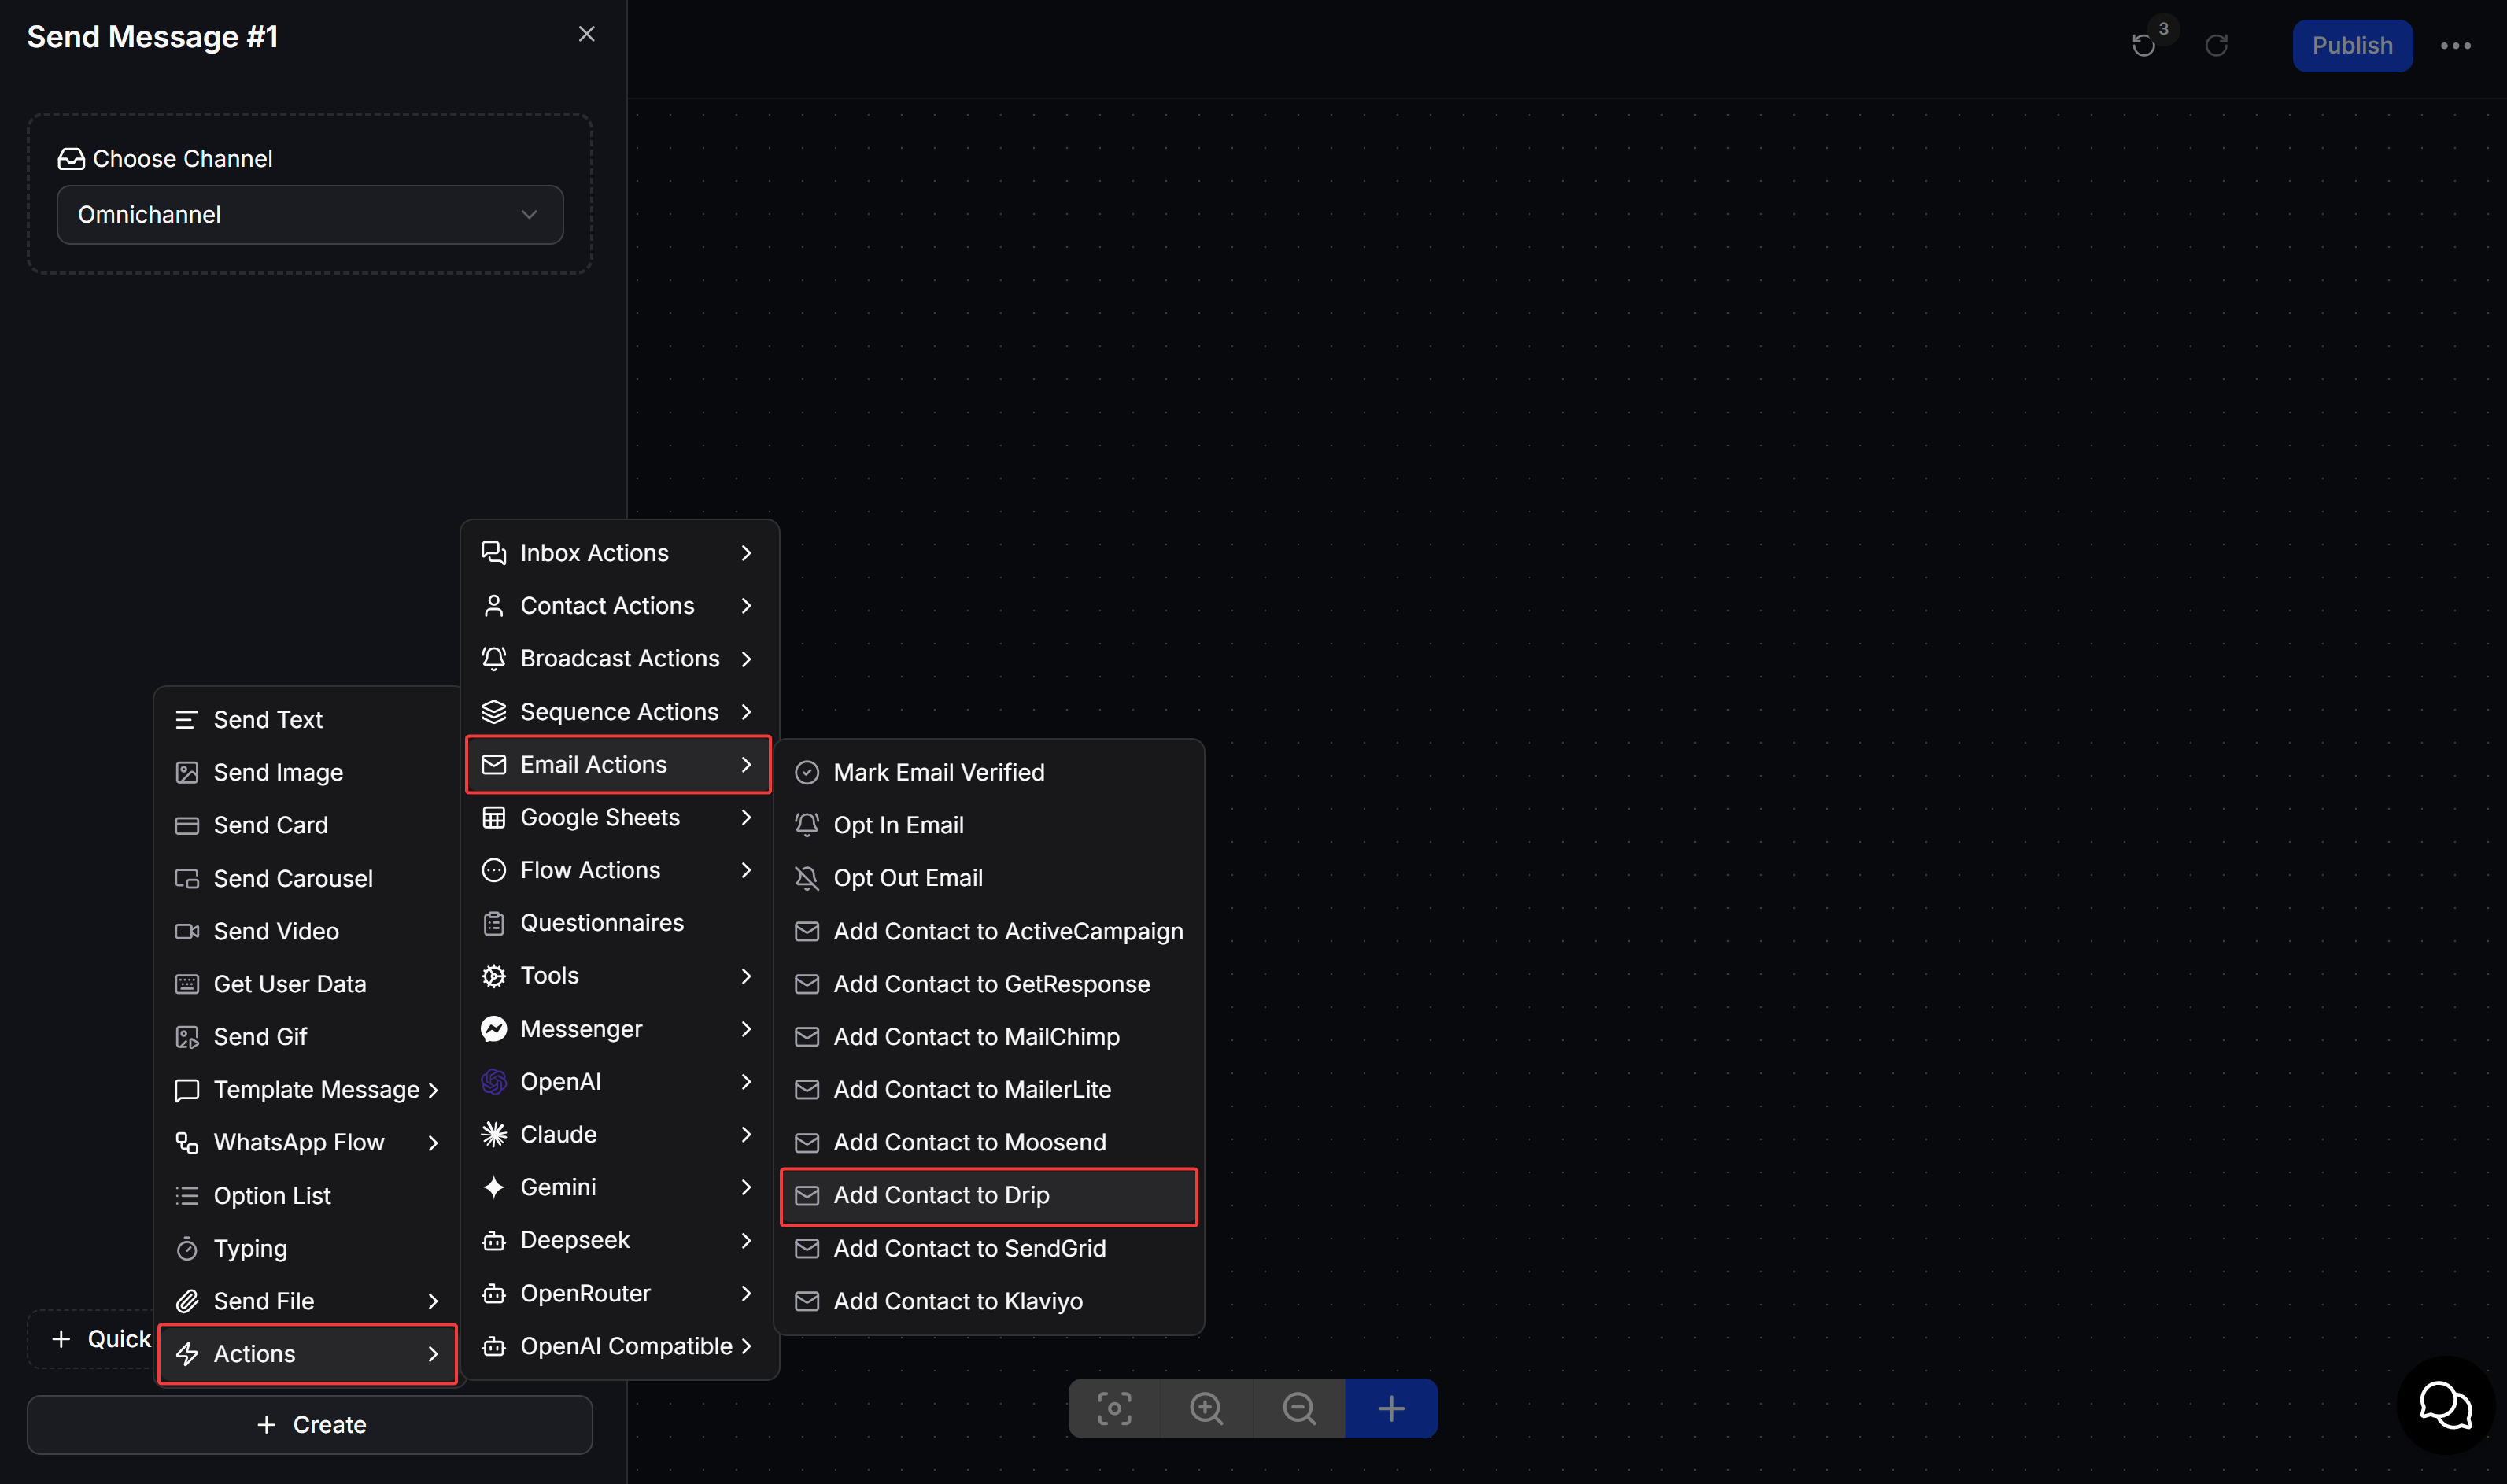
4
Open the configuration
Select Edit on the action to choose an Account and sync the contact data.
Configure Add Contact to Drip
Configure the fields in the Drip window, then select Save.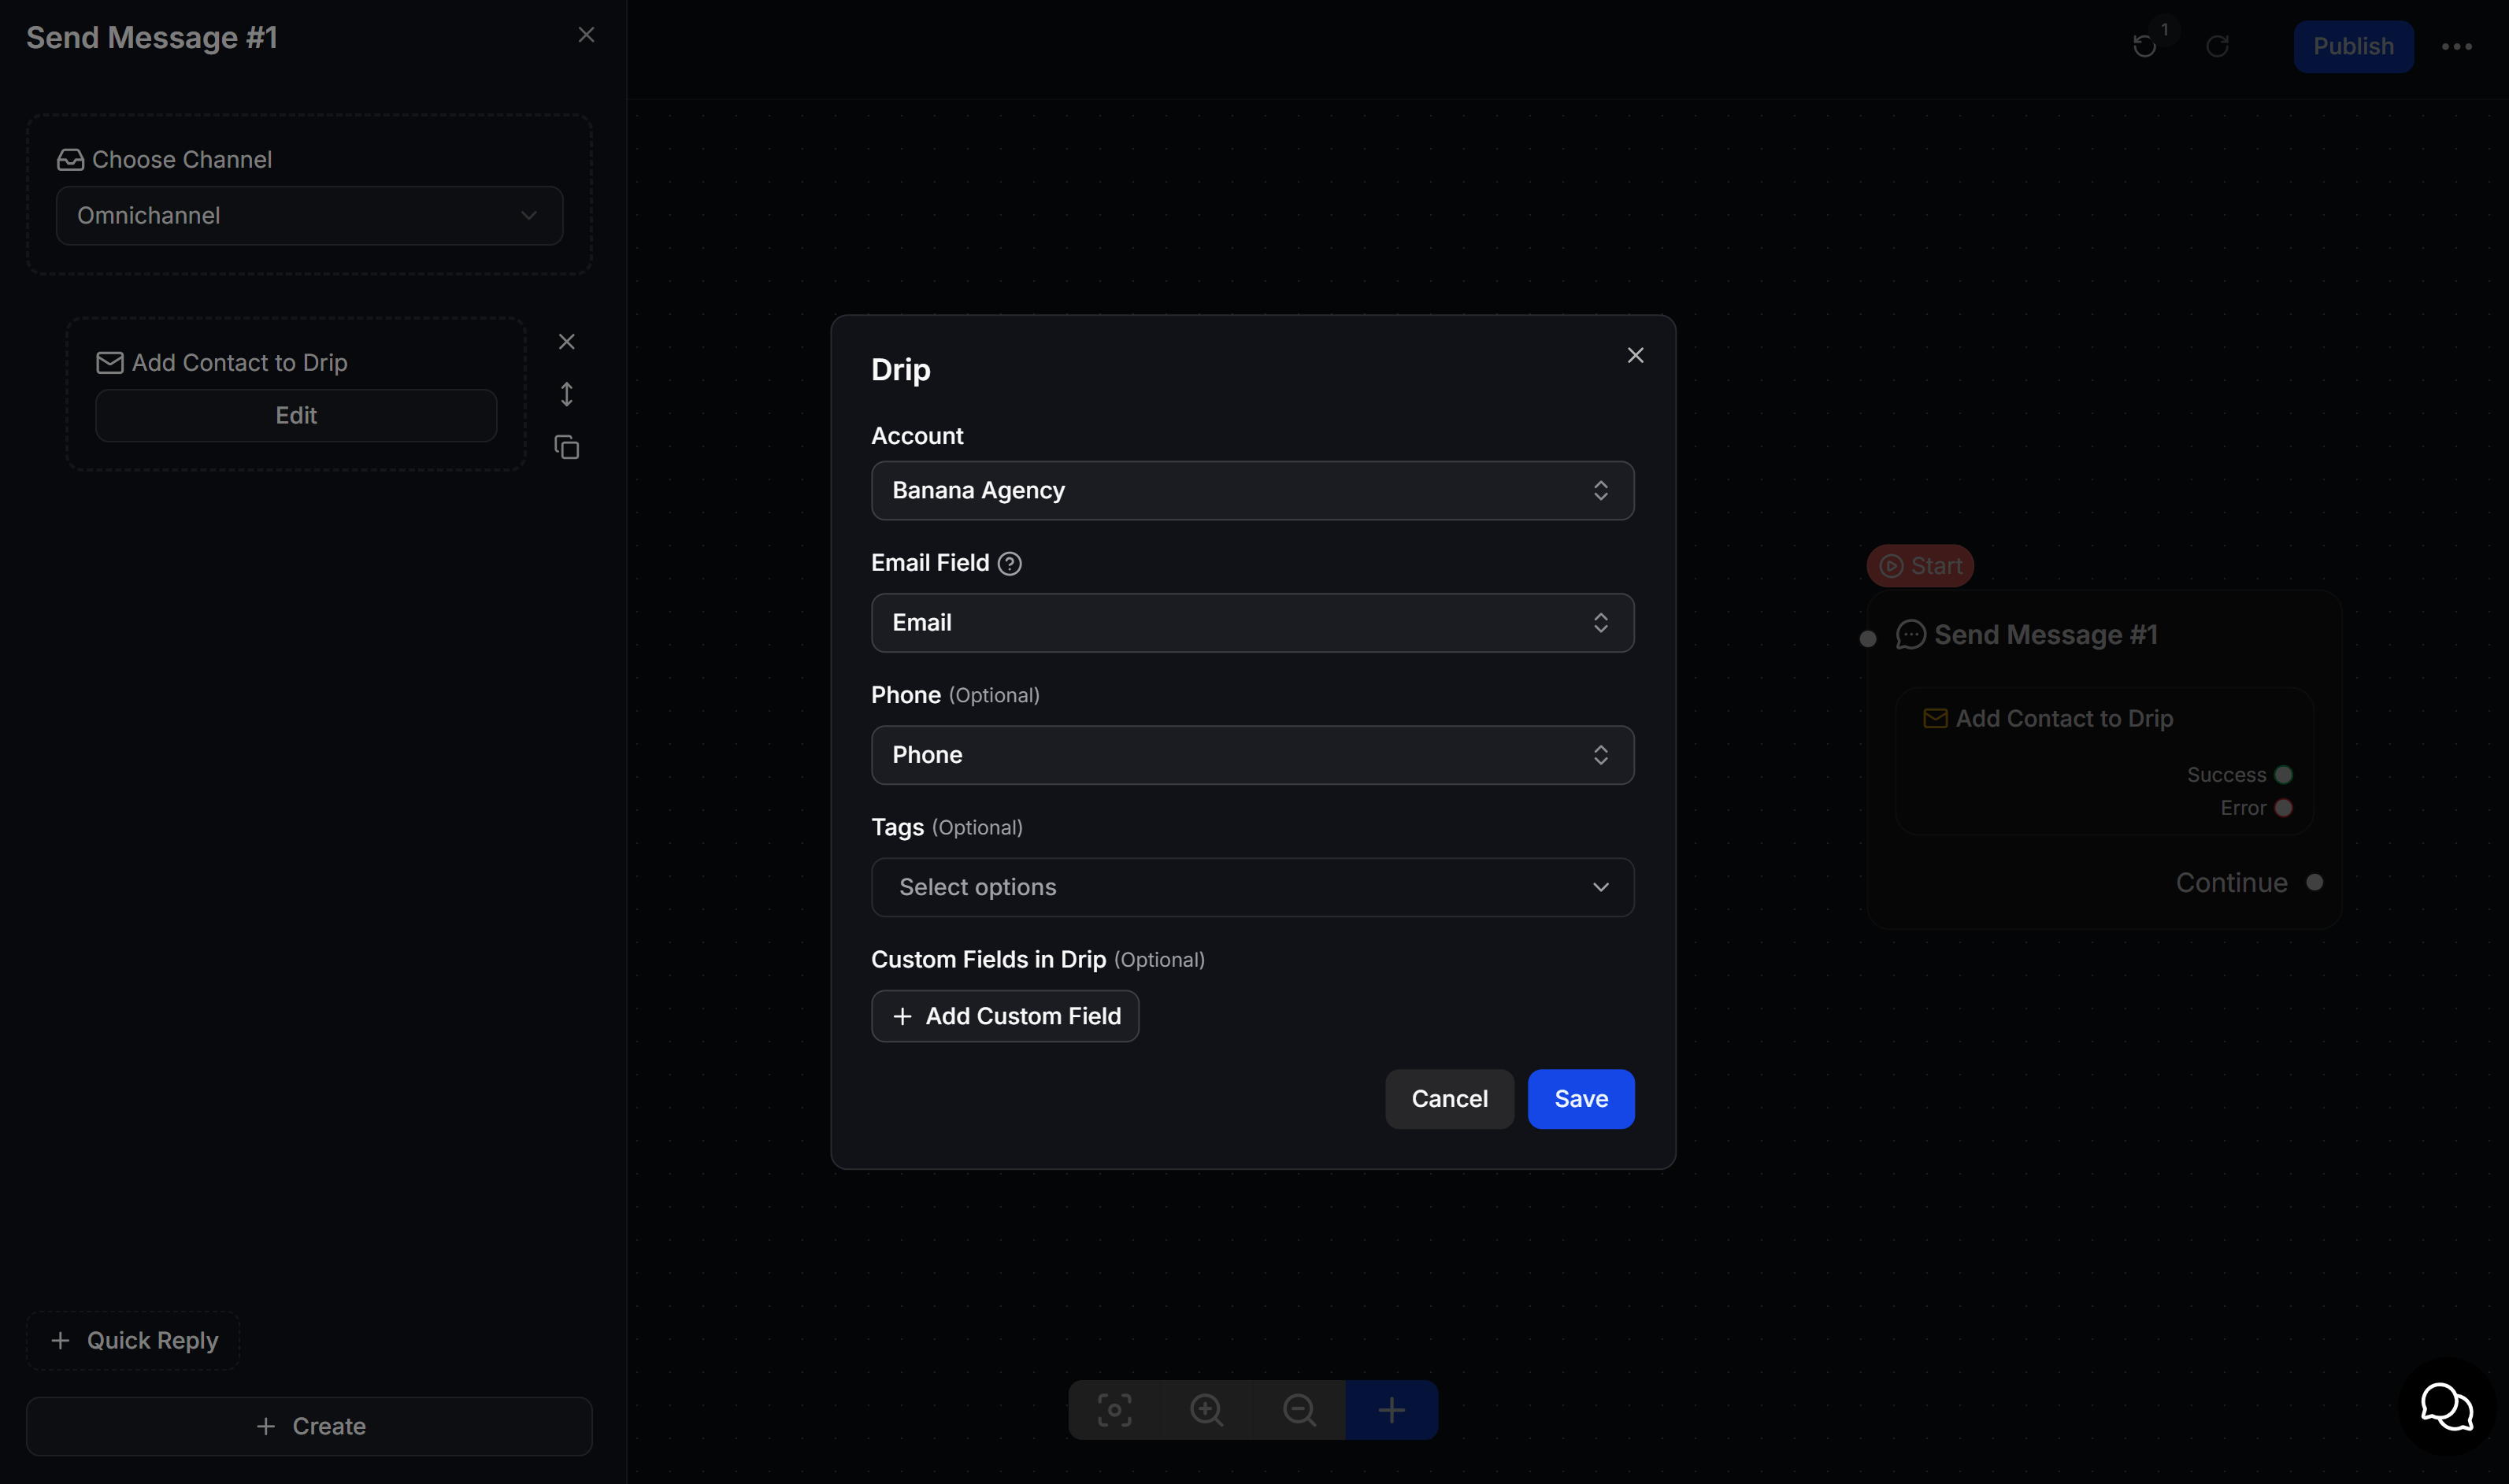
- Success: Drip processed the request to create or update the person.
- Error: The request failed because the email address, API Token, Account, or synced data is invalid.
The Add Contact to Drip action does not automatically add the person to a Workflow. You can use Tags or Custom Fields as trigger conditions in Drip after configuring the corresponding Automation.
Example: Collect customers who need product advice
A fashion retailer wants to save customers who are interested in its products and categorize them by their needs.1
Collect customer information
Use Get User Data to ask for the customer’s email address, phone number, and product interest.
2
Add the person to Drip
Run Add Contact to Drip, then select the correct Account, Email field, and Phone field.
3
Sync the customer's interests
Apply a relevant Tag and sync the product interest to a Custom Field in Drip.
4
Handle the result
Connect Success to a confirmation message. Connect Error to a branch that asks the customer to check their information or transfers the conversation to a team member.
Test the integration
Before you Publish the Flow, test it with an email address that you can access.- Open People in the correct Drip Account and confirm that the person appears.
- Confirm that the email address, phone number, Tags, and Custom Fields contain the correct data.
- Confirm that the Flow follows the Success branch for a valid email address.
- Enter an invalid email address to test the Error branch.
- If an Account or Tag does not appear, review the user’s permissions and reconnect the integration.
- If the API Token is no longer valid, copy the current token and update the connection in ChatbotX.