Prerequisites
Before you begin, make sure you have:- A ChatbotX installation
- A website where you can paste the embed code
Unlike Facebook or Zalo, Webchat does not require any credential configuration in ChatbotX. You can create and configure a widget directly from the channel settings.
Step 1 : Create a Webchat
You can create a Webchat in either of these two ways:- Method 1: From the Create Inbox flow
- Method 2: From the Channels management area
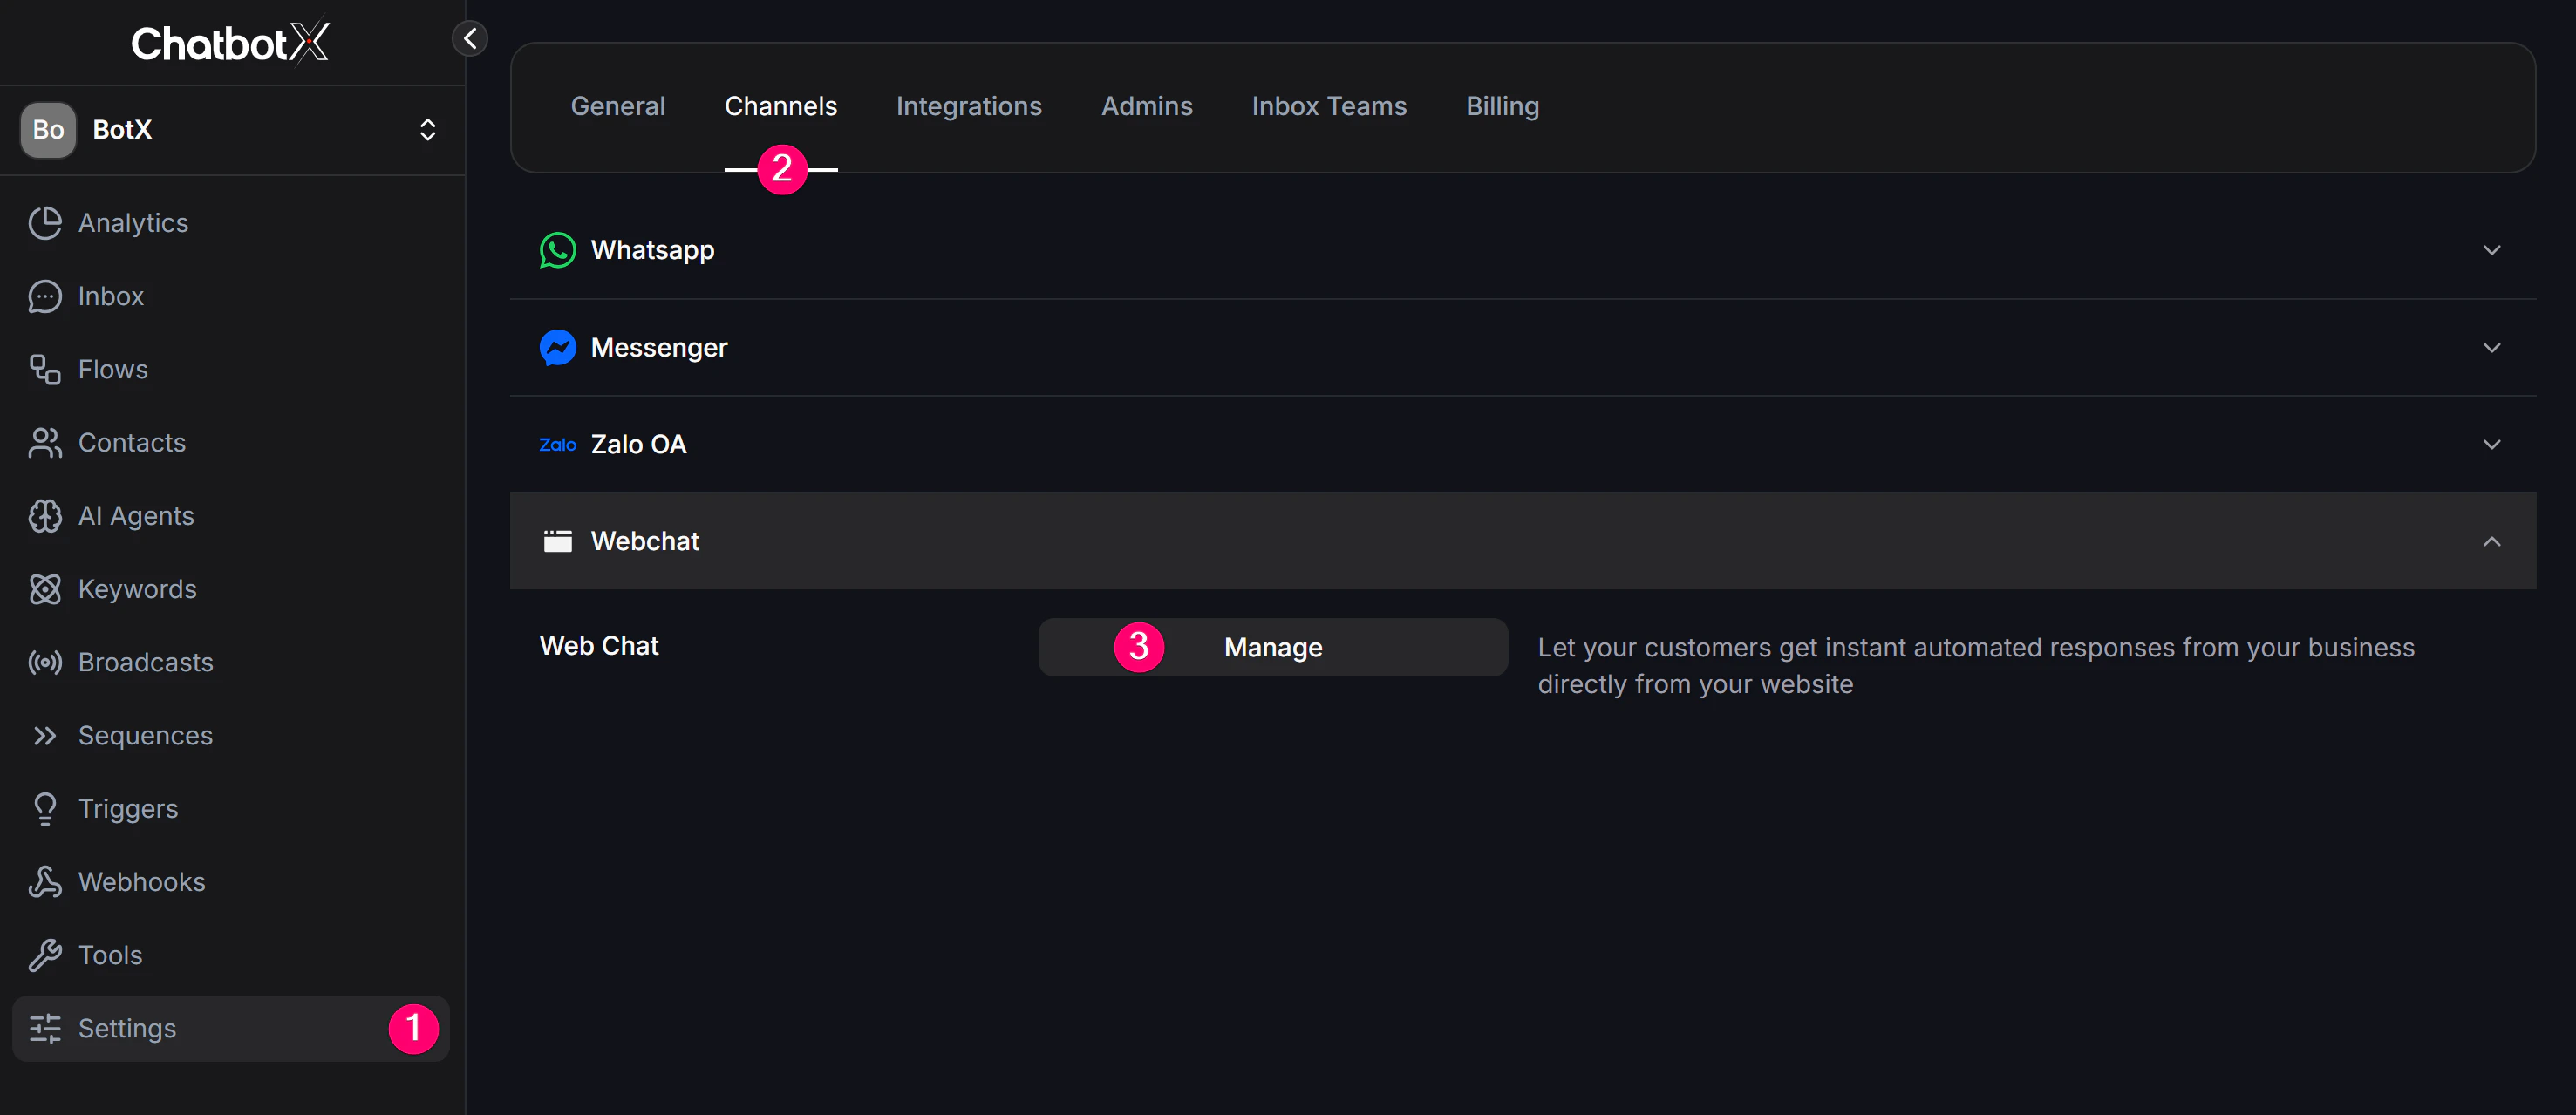
Step 2: Configure the Webchat
Basic settings
| Field | Required | Description |
|---|---|---|
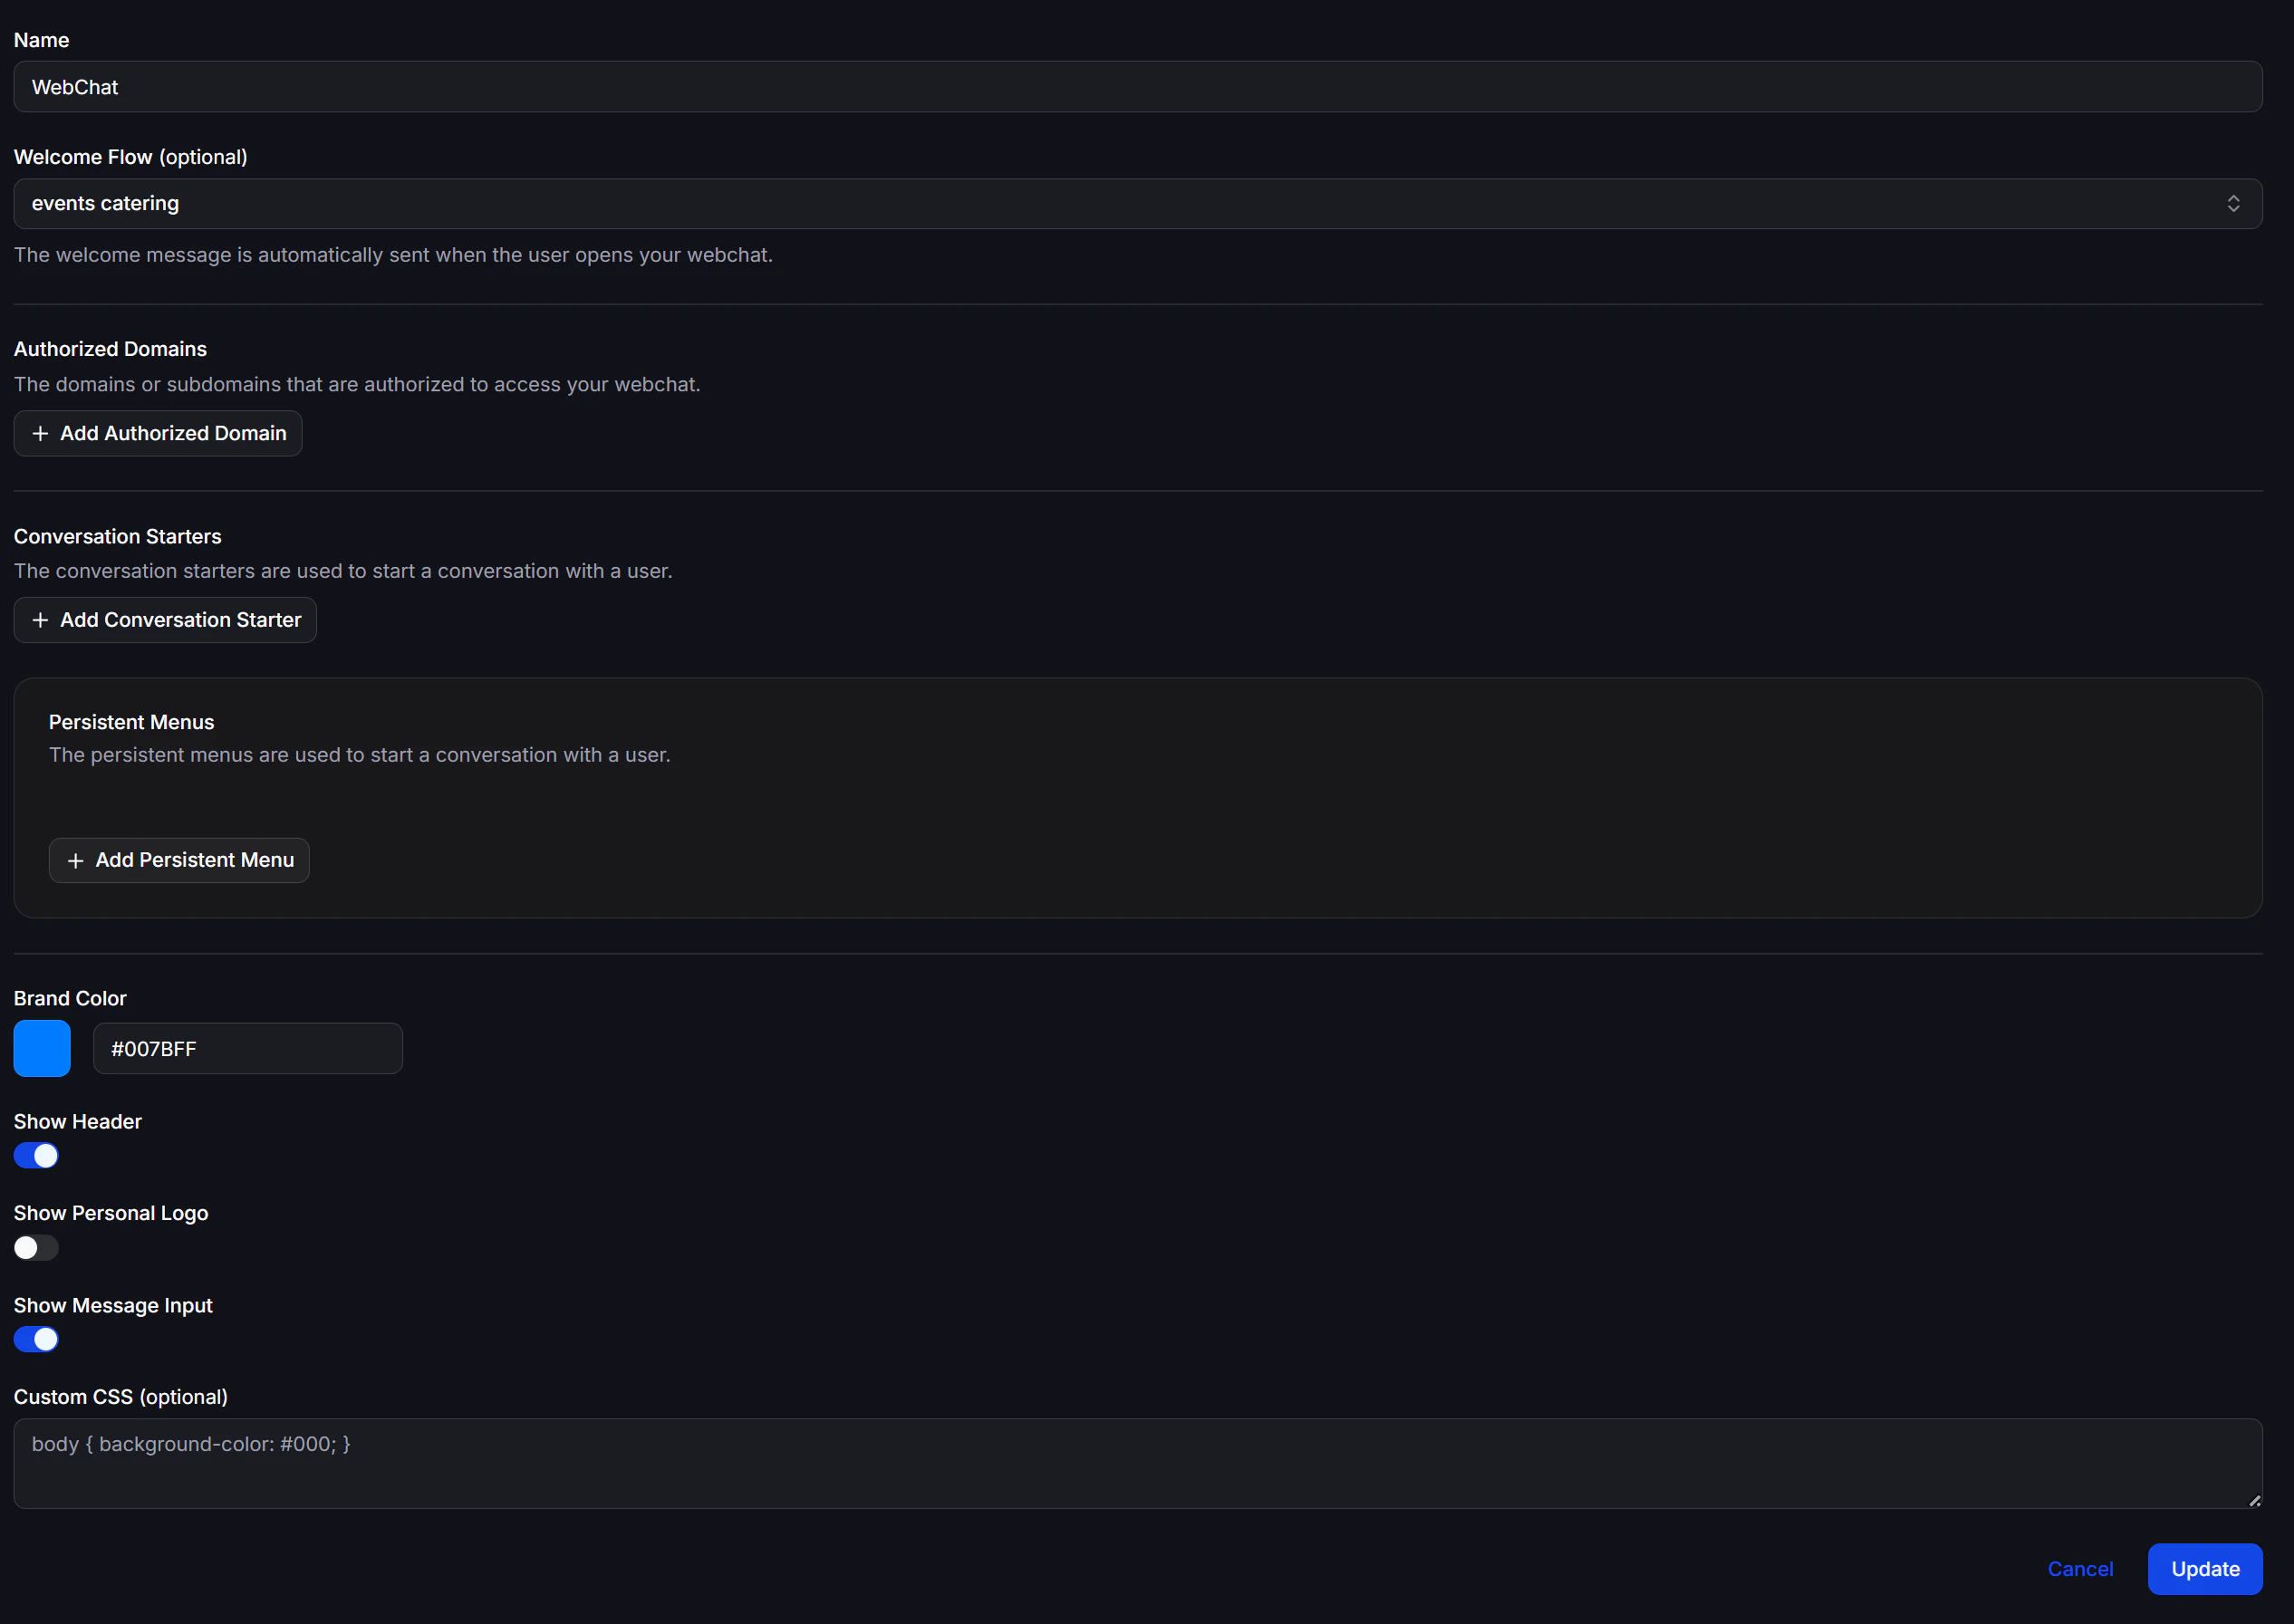
| Name | Yes | Internal name to distinguish this widget if you run multiple sites or widget versions |
| Welcome Flow | No | A Flow that runs automatically when a visitor opens the widget. Leave empty if you don’t need an automatic greeting |
Engagement features
| Feature | Description |
|---|---|
| Authorized Domains | Domains or subdomains allowed to load the widget. Click Add Authorized Domain to add one. The embed code only works on approved domains |
| Conversation Starters | Quick-reply prompts that help visitors start a conversation, for example, Pricing, Book a consultation, or Ask about a product. Click Add Conversation Starter to add one |
| Persistent Menus | Menu items that stay visible throughout the conversation. Useful when you want visitors to always see their main options. Click Add Persistent Menu to add one |
Appearance
| Setting | Description |
|---|---|
| Brand Color | Main color of the widget. Pick from the color picker or enter a hex code (for example, #007BFF) |
| Show Header | Toggle the widget header on or off |
| Show Personal Logo | Toggle a custom logo in the widget on or off |
| Show Message Input | Toggle the text input box on or off. When disabled, visitors can only interact through Conversation Starters or Persistent Menus |
| Custom CSS | Optional. Add your own CSS to match the widget to your website’s design |
Step 3: Get the Embed Code
After the Webchat is created, go to Channels → Webchat.Open the Embed Code window
For each Webchat row, click the embed code icon to open the Embed Code window.
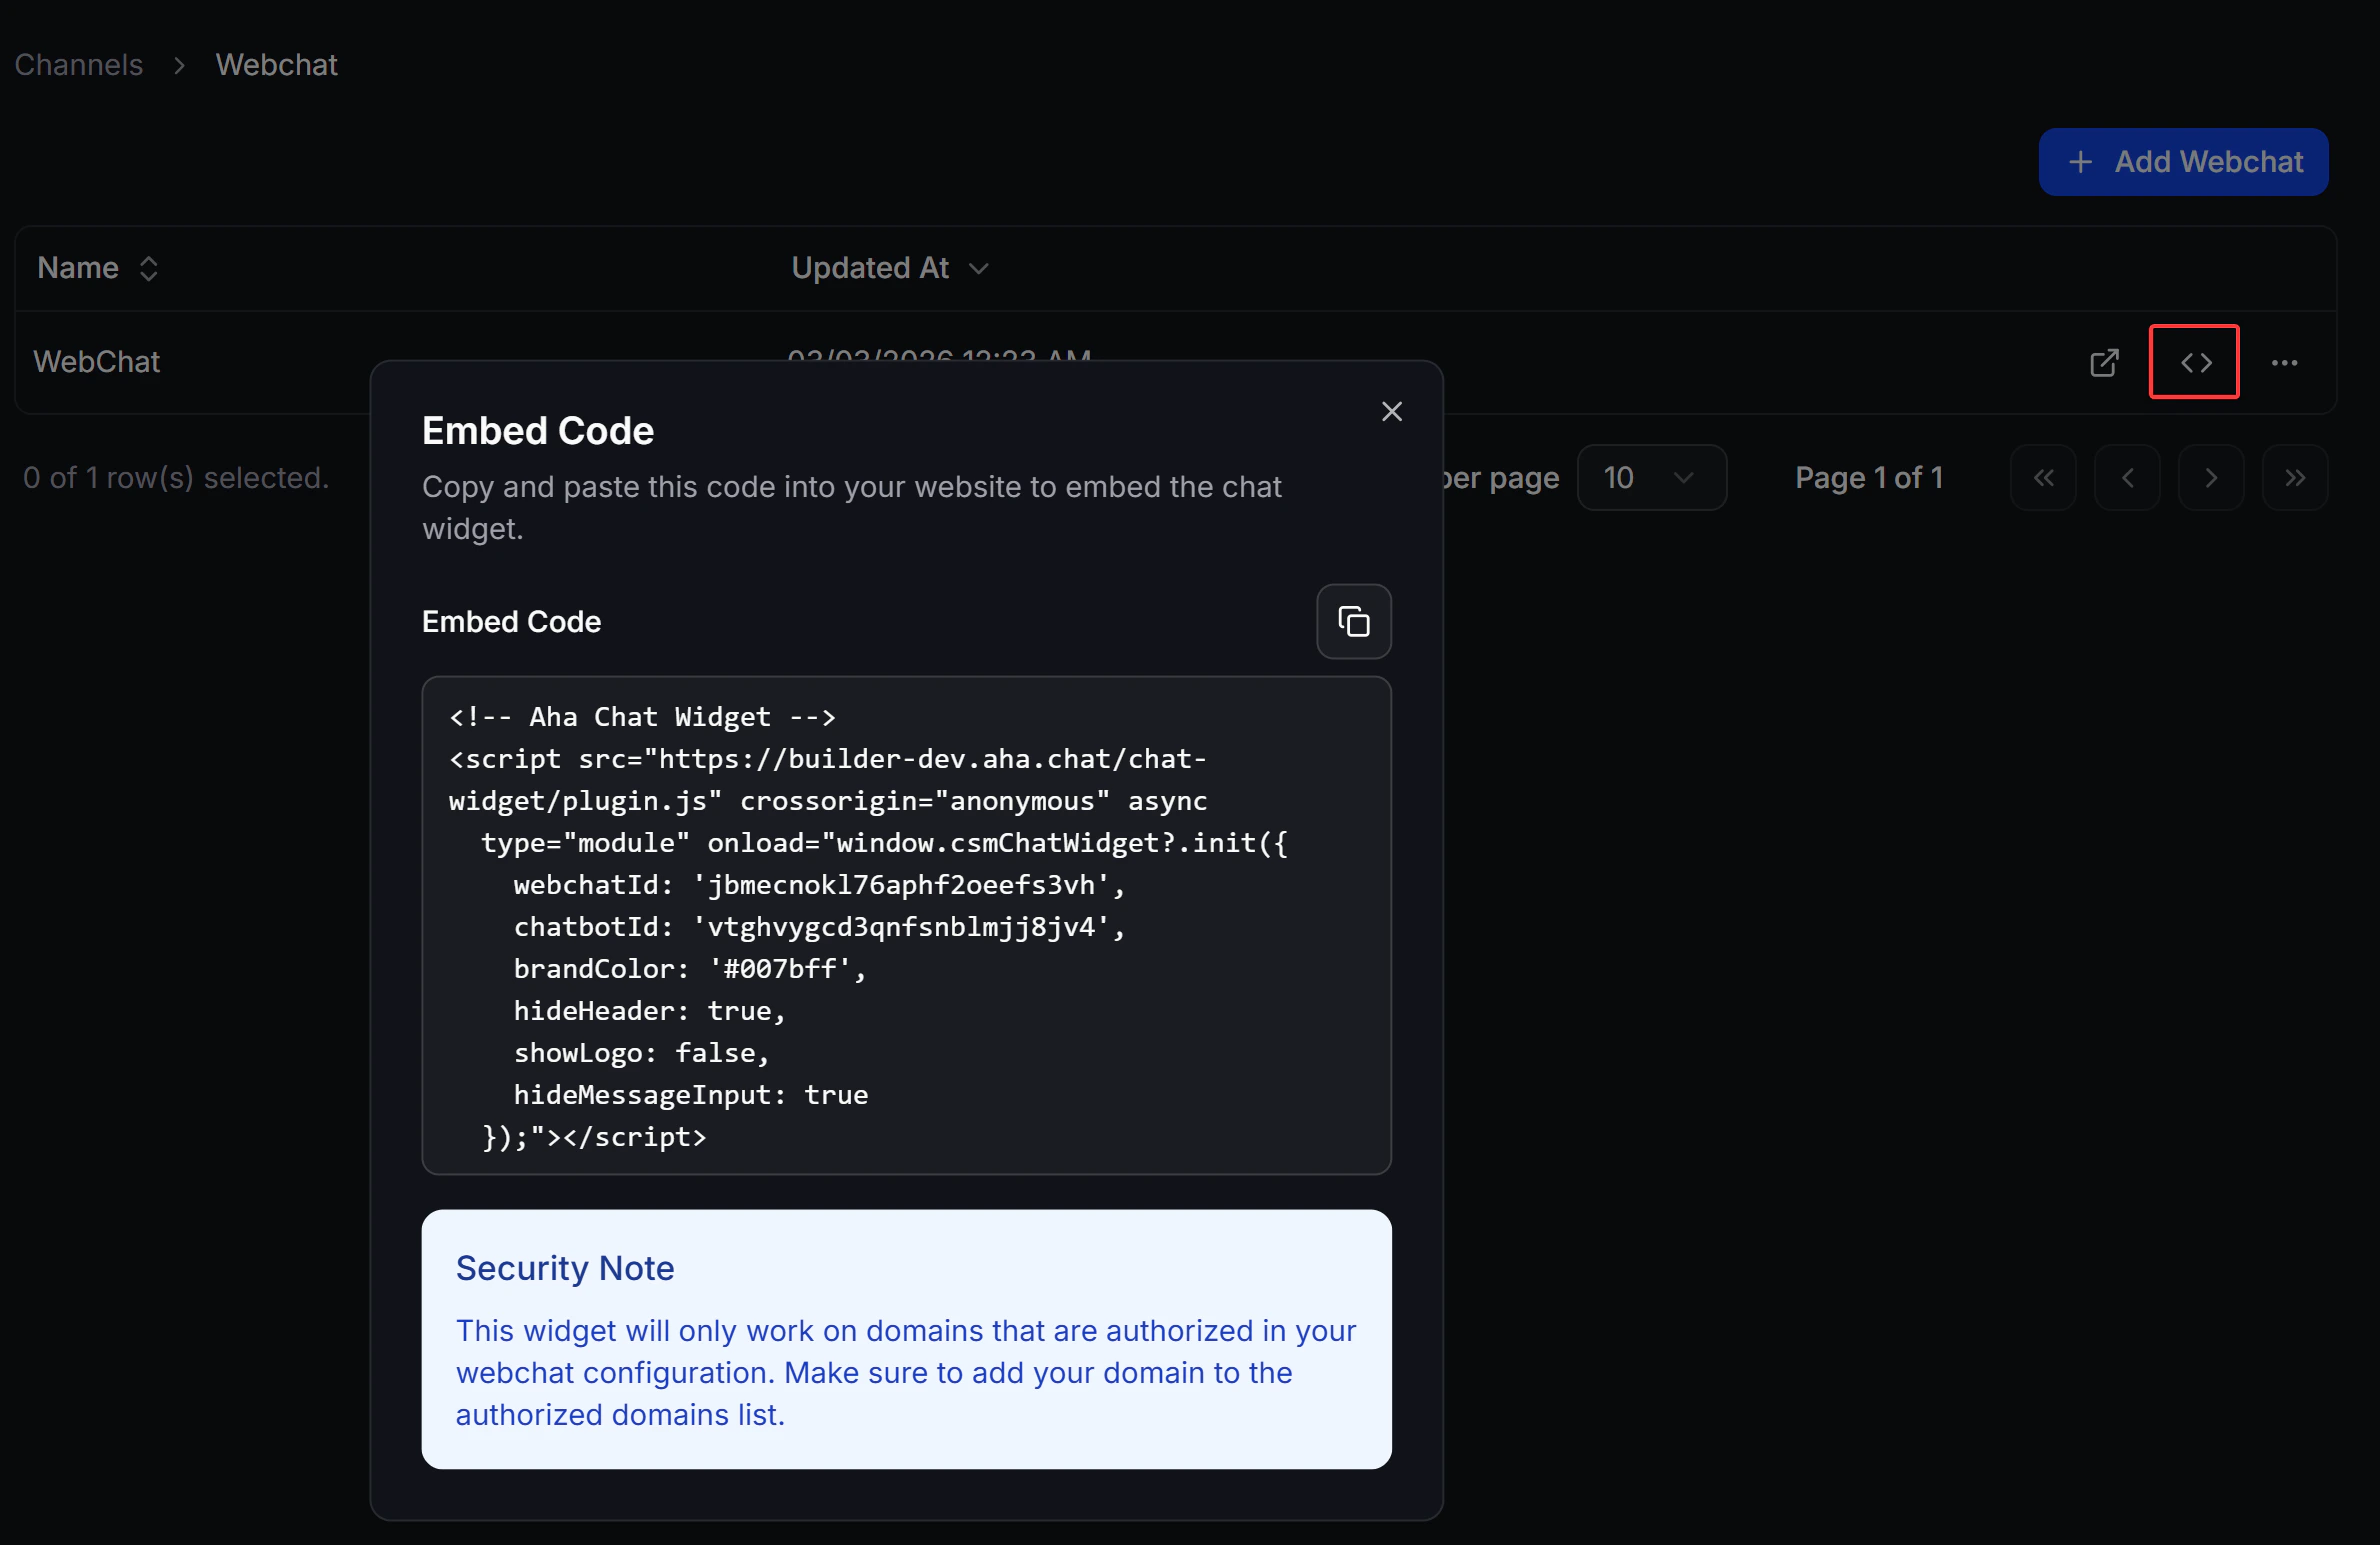
The embed code only works on domains listed under Authorized Domains. If Webchat does not work after embedding, check your Authorized Domains configuration first.
Step 4: Test the Webchat
From the Channels → Webchat list, click the Test now to open a live preview of the widget. Use this to confirm:- That the Welcome Flow runs as expected
- That visitors can see Conversation Starters, Persistent Menus, or the message input based on the options you enabled