

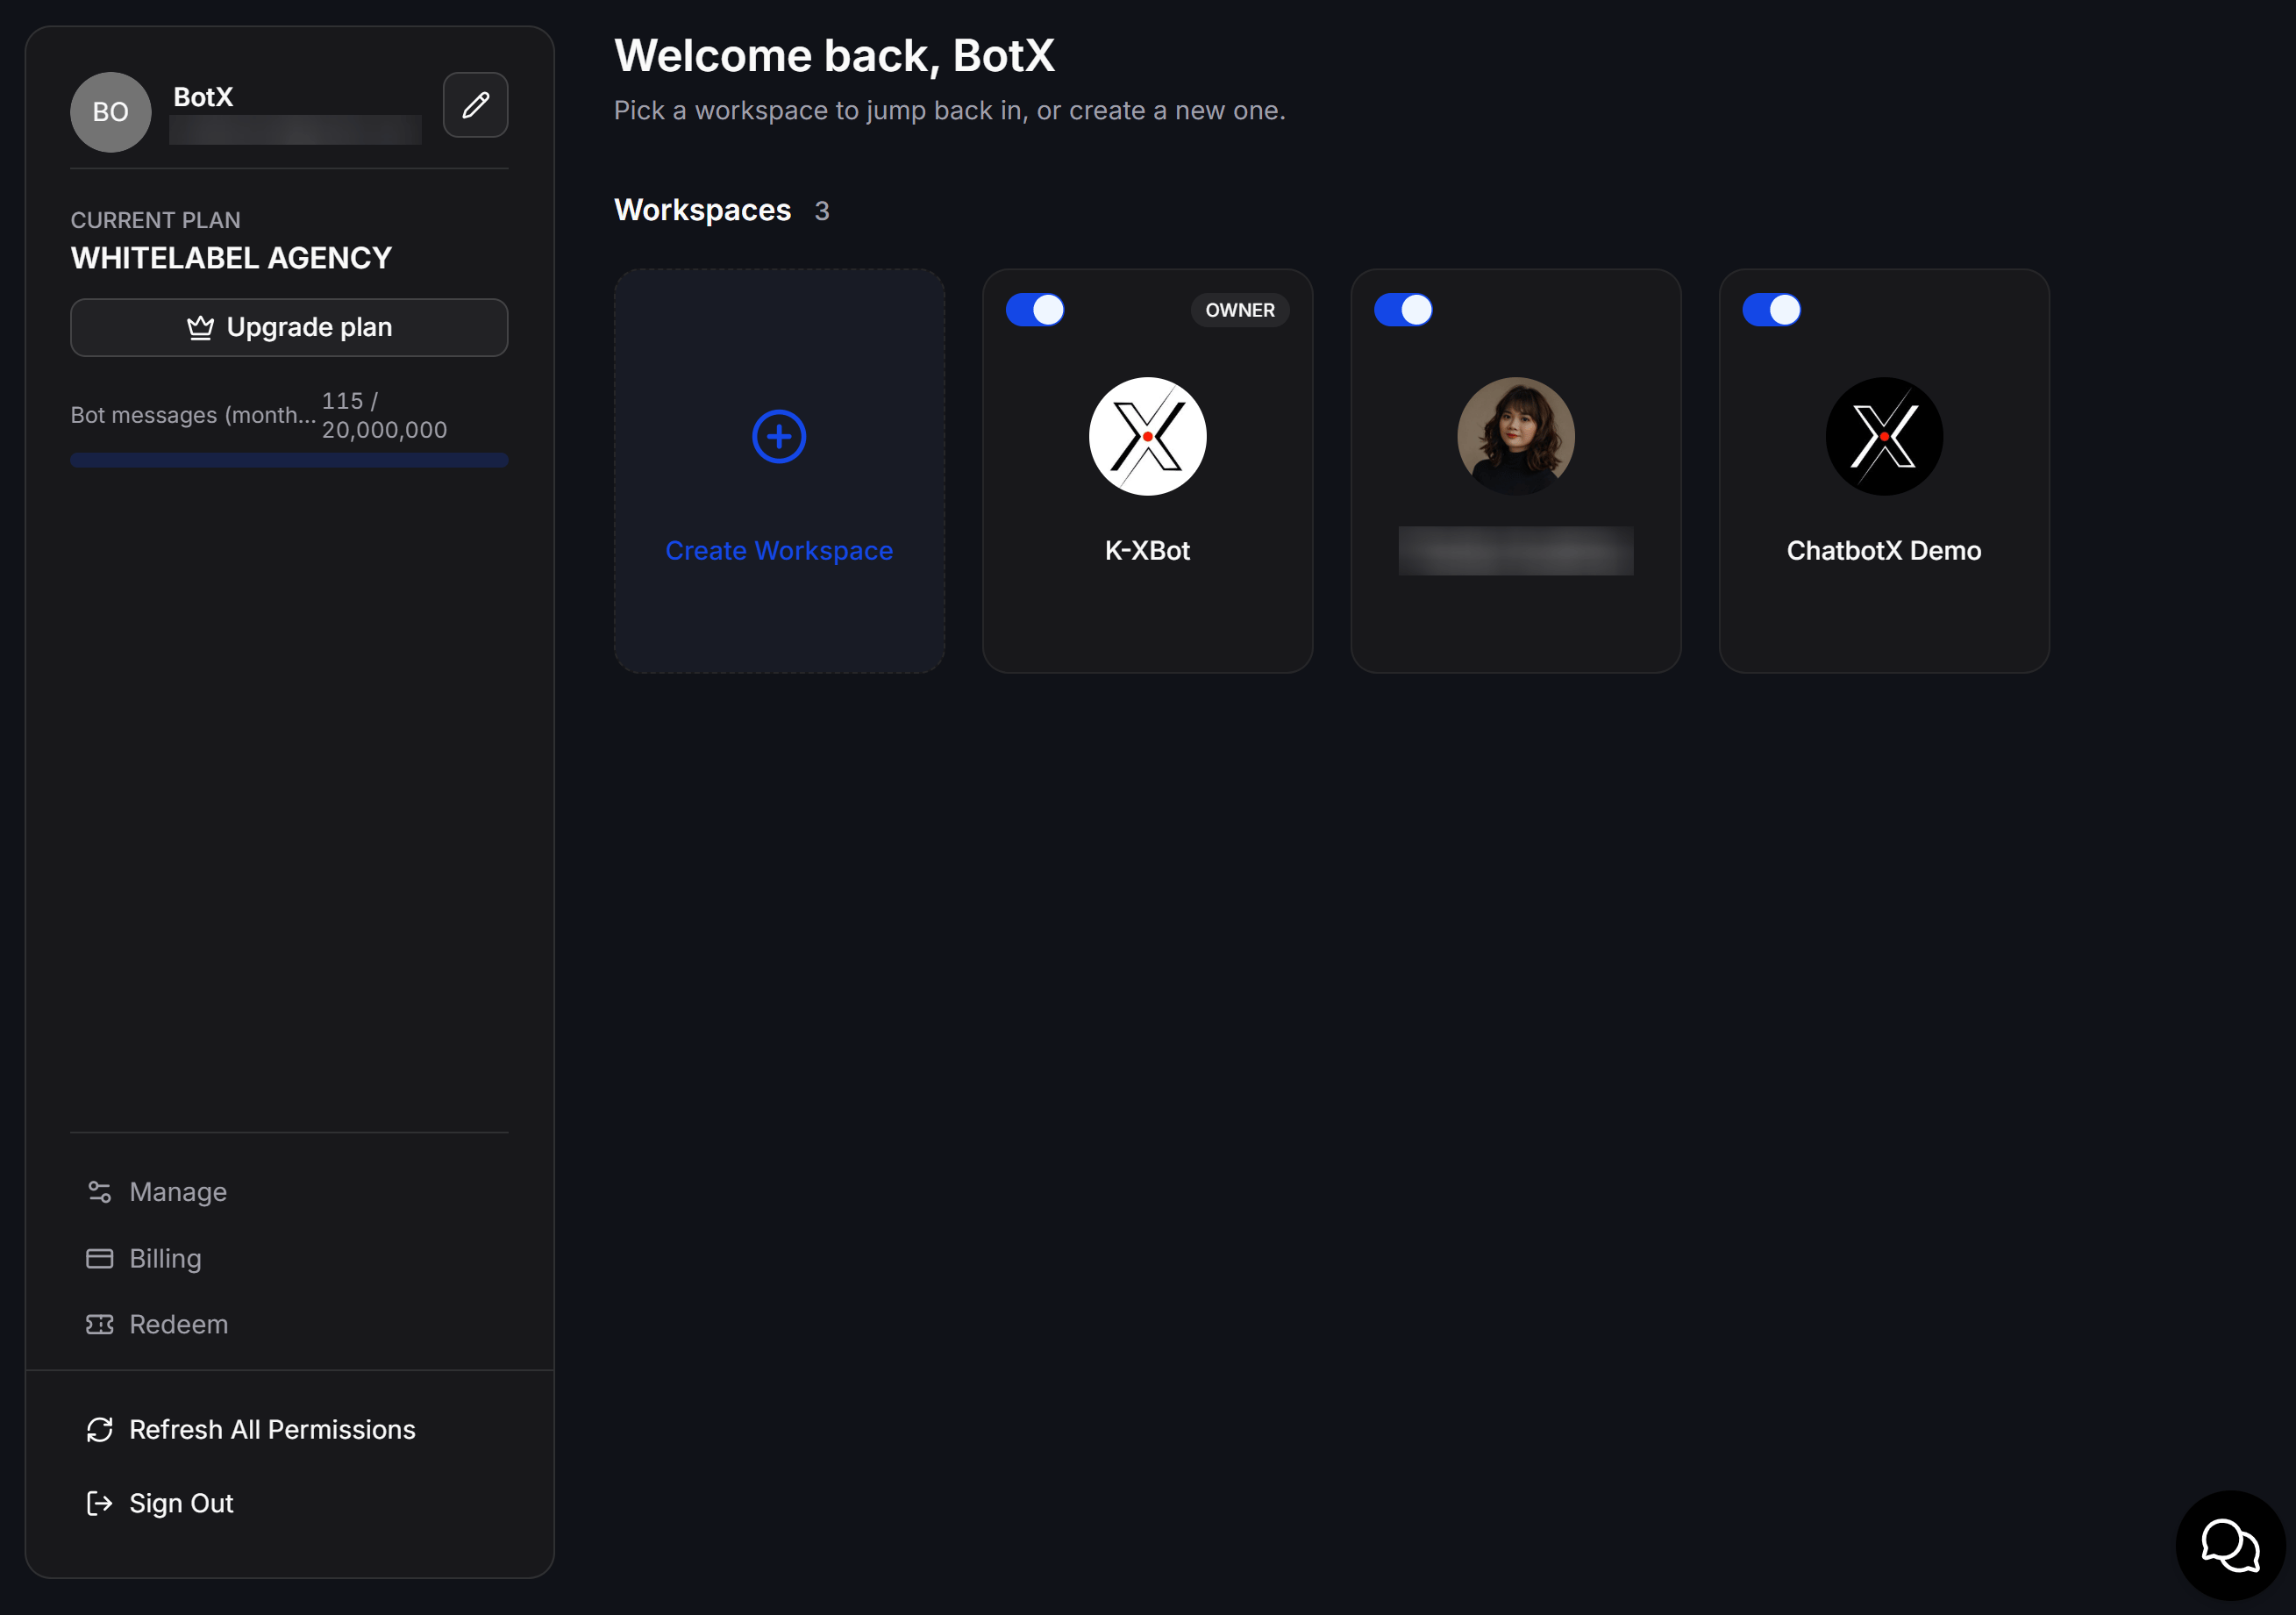
Select or create a workspace
The Workspaces area displays the workspaces your account can access.- Select a workspace card to open it and continue working in that workspace.
- The Owner label indicates that you own the workspace.
- Select Create Workspace to create a new workspace.
If you have reached your Plan’s workspace limit, upgrade the Plan or contact the White Label platform administrator for assistance.
Review your account and Plan
The account card on the left displays your name, email address, and Current Plan.- Select the edit icon next to your account information to update your profile.
- Select Upgrade plan to open the Plan selection page when your White Label platform offers upgrade options.
- The Bot messages bar shows the number of Bot messages used against the current allowance.
Open the account menu inside a workspace
After opening a workspace, select your profile at the bottom-left corner to open the account menu. This menu provides quick access to your profile, Plan, Billing, display preferences, permissions, and sign-out action.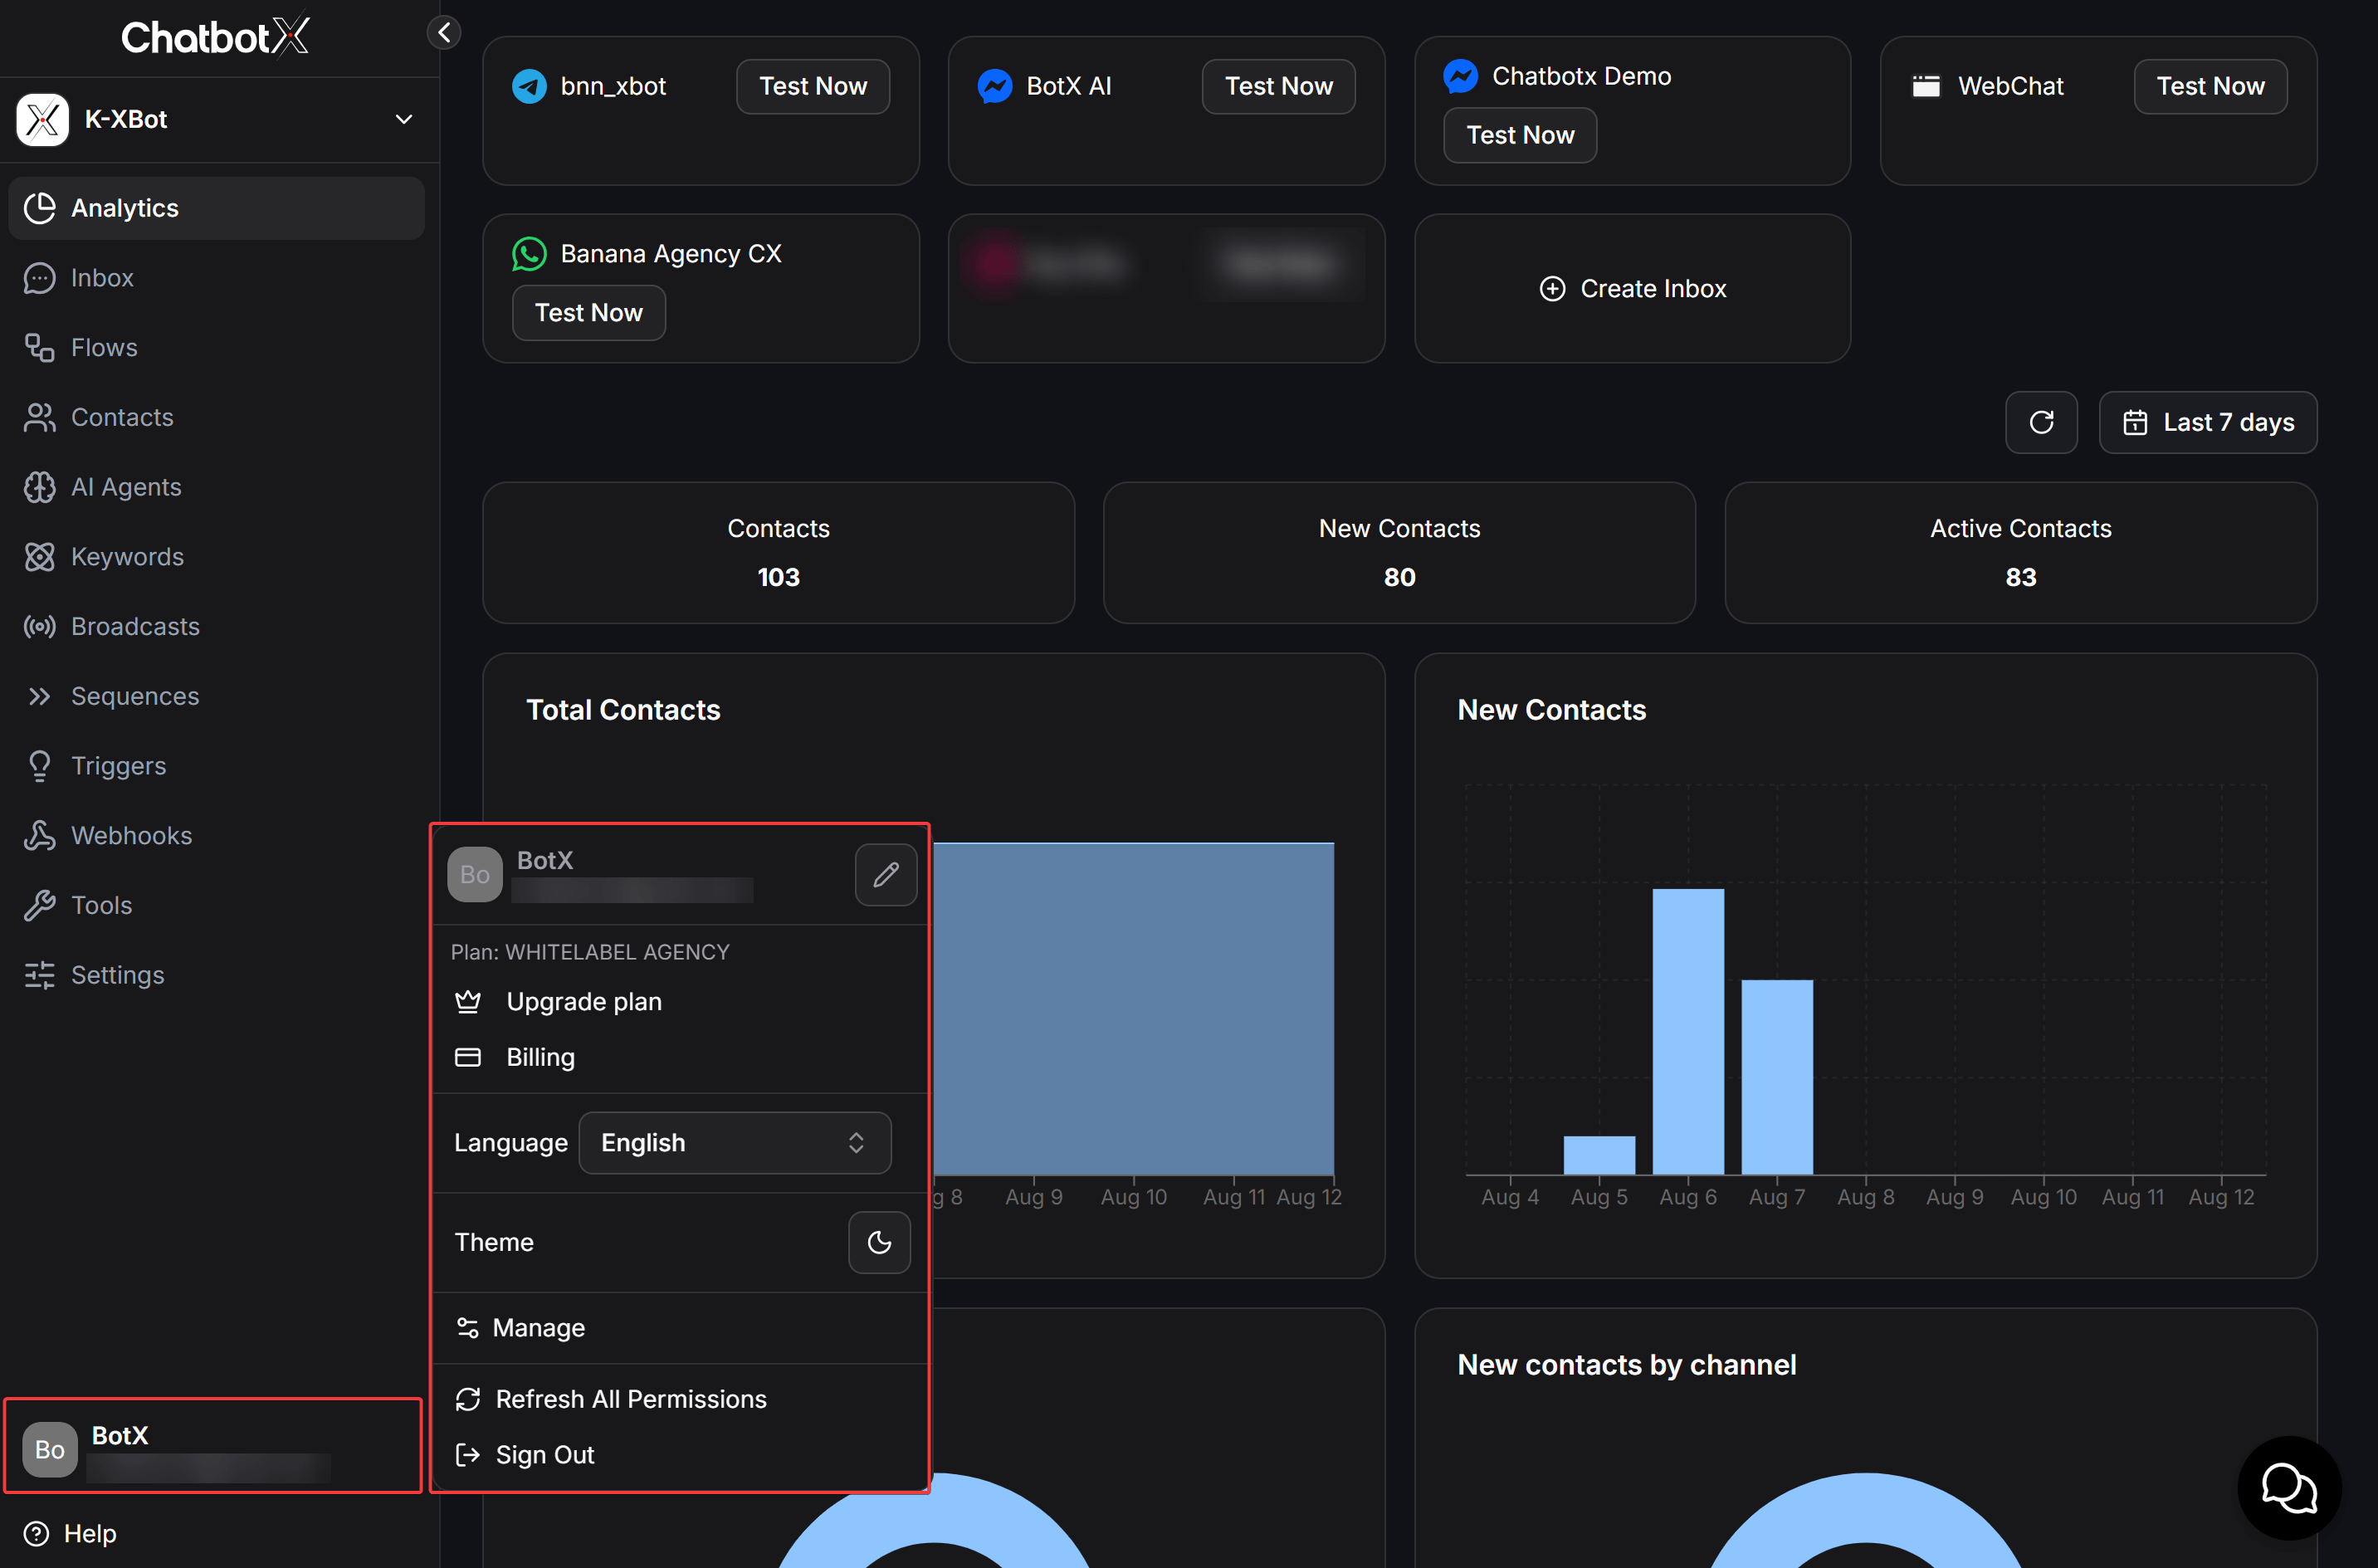
Change the platform language
Open Language, then select the language you want to use for the ChatbotX interface. A checkmark identifies the currently selected language. The platform currently lists these interface languages:The Language setting changes the platform interface for your account. It does not translate Flow content or messages sent to contacts.
Change the theme
Use Theme to change the interface appearance. The available control can switch the platform between its supported display themes.General workspace settings
Inside a Workspace, select Settings > General to view identifiers, update workspace details, configure default behavior, and manage shared settings.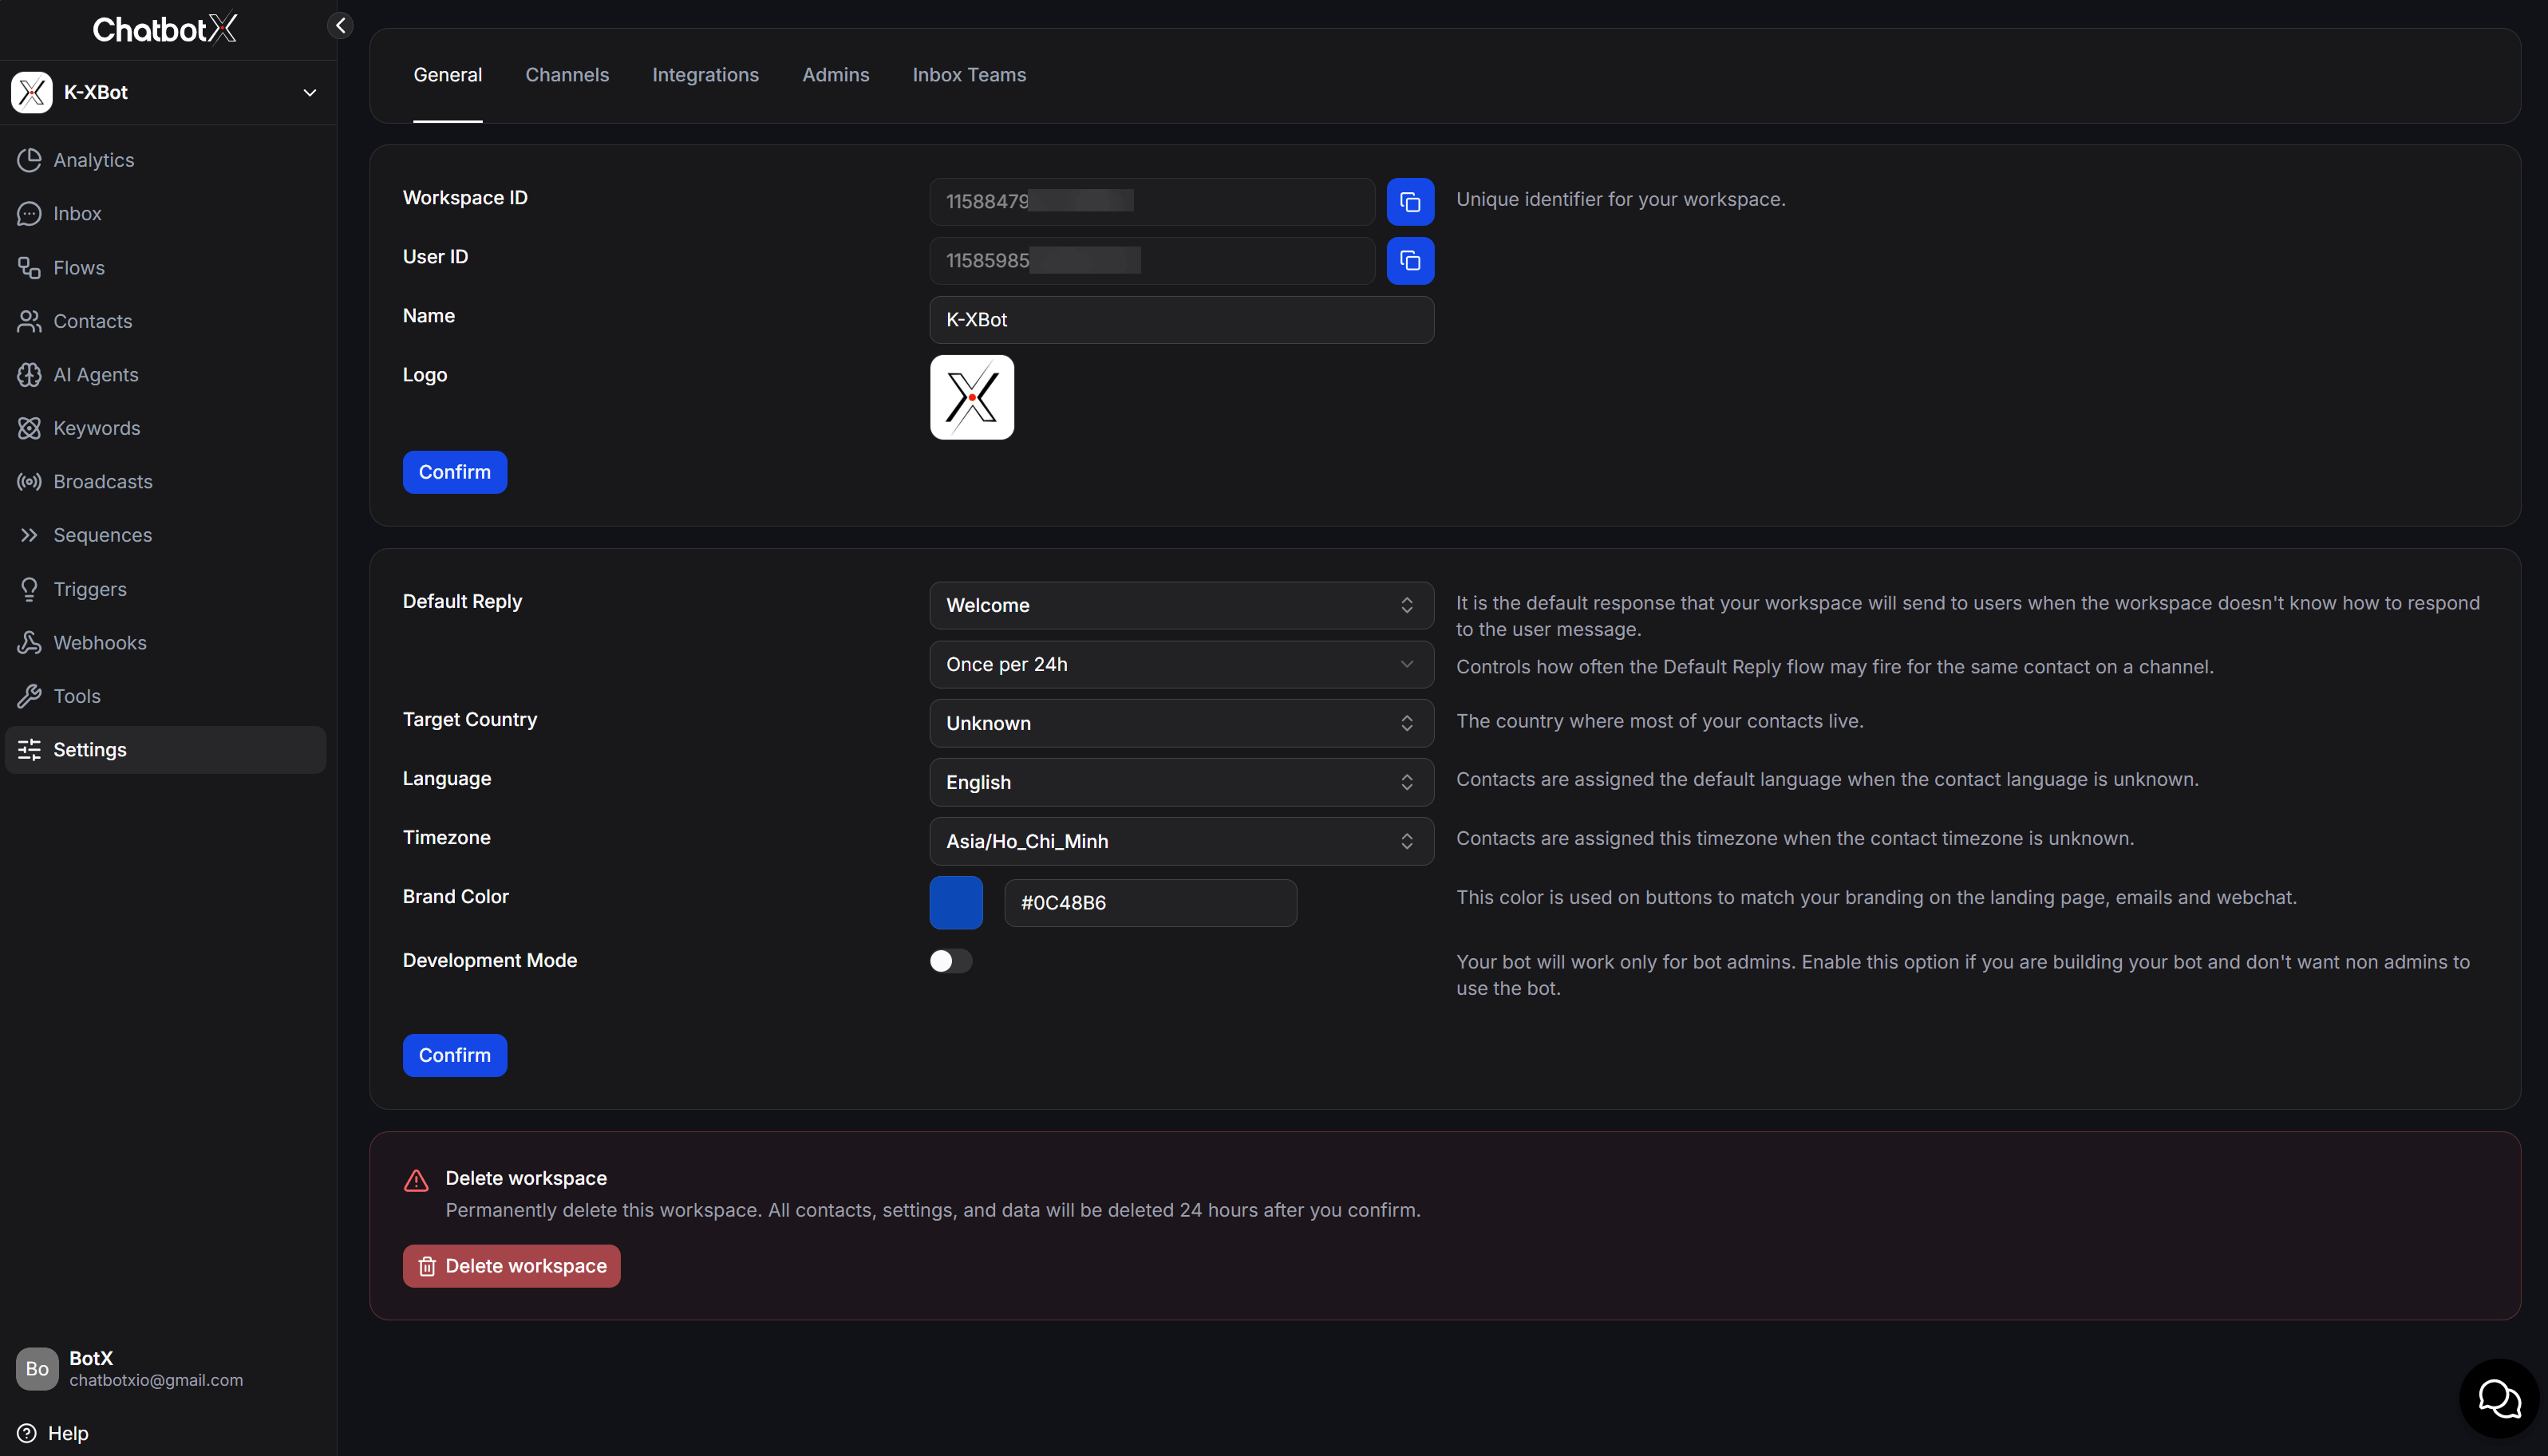
Identify and update the workspace
- Workspace ID: A unique ID for the Workspace. Select the copy icon when you need to share it with support or use it in an integration.
- User ID: The unique ID of the user account associated with the Workspace. Select the copy icon when needed.
- Name: Change the name shown for the Workspace.
- Logo: Upload or replace the Workspace logo.
- Select Confirm to save changes to the name or logo.
Configure Default Reply
Default Reply lets you choose the Flow that responds when the Workspace does not have another matching response for a Contact message. Use Default Reply frequency to control how often that Flow can run again for the same Contact on the same Channel:- All time: The Flow can run whenever the Default Reply conditions are met.
- Once per 1h: The Flow runs once, then waits one hour before it can run again for that Contact on that Channel.
- Once per 24h: The Flow runs once, then waits 24 hours before it can run again for that Contact on that Channel.
Set defaults for Contacts and your brand
- Target Country: Select the country where most Contacts are located.
- Language: Choose the default language assigned when a Contact’s language is unknown.
- Timezone: Choose the default timezone assigned when a Contact’s timezone is unknown.
- Brand Color: Set the color used for buttons on the landing page, emails, and Webchat. Select Confirm to save it.
Restrict access while building
Turn on Development Mode when you are building or testing the Bot. While it is on, only Bot admins can use the Bot.Delete a workspace
Select Delete workspace to schedule permanent deletion. ChatbotX deletes the Workspace, its Contacts, settings, and data 24 hours after you confirm.Manage
Manage opens the White Label configuration area. This area lets an account manage app credentials, branding, email, and other White Label settings. This option is available only when the Plan or customer package includes White Label functionality. An account without White Label access cannot open this configuration area. Start with Platform Credentials to learn how to configure connected apps and control which channels workspaces can create.Billing
Select Billing to manage the account’s Plan and payments. If you are a White Label administrator, see Plans + Top-up packs to configure Plans and Bot-message credit packs, or Stripe Billing to set up automated payments.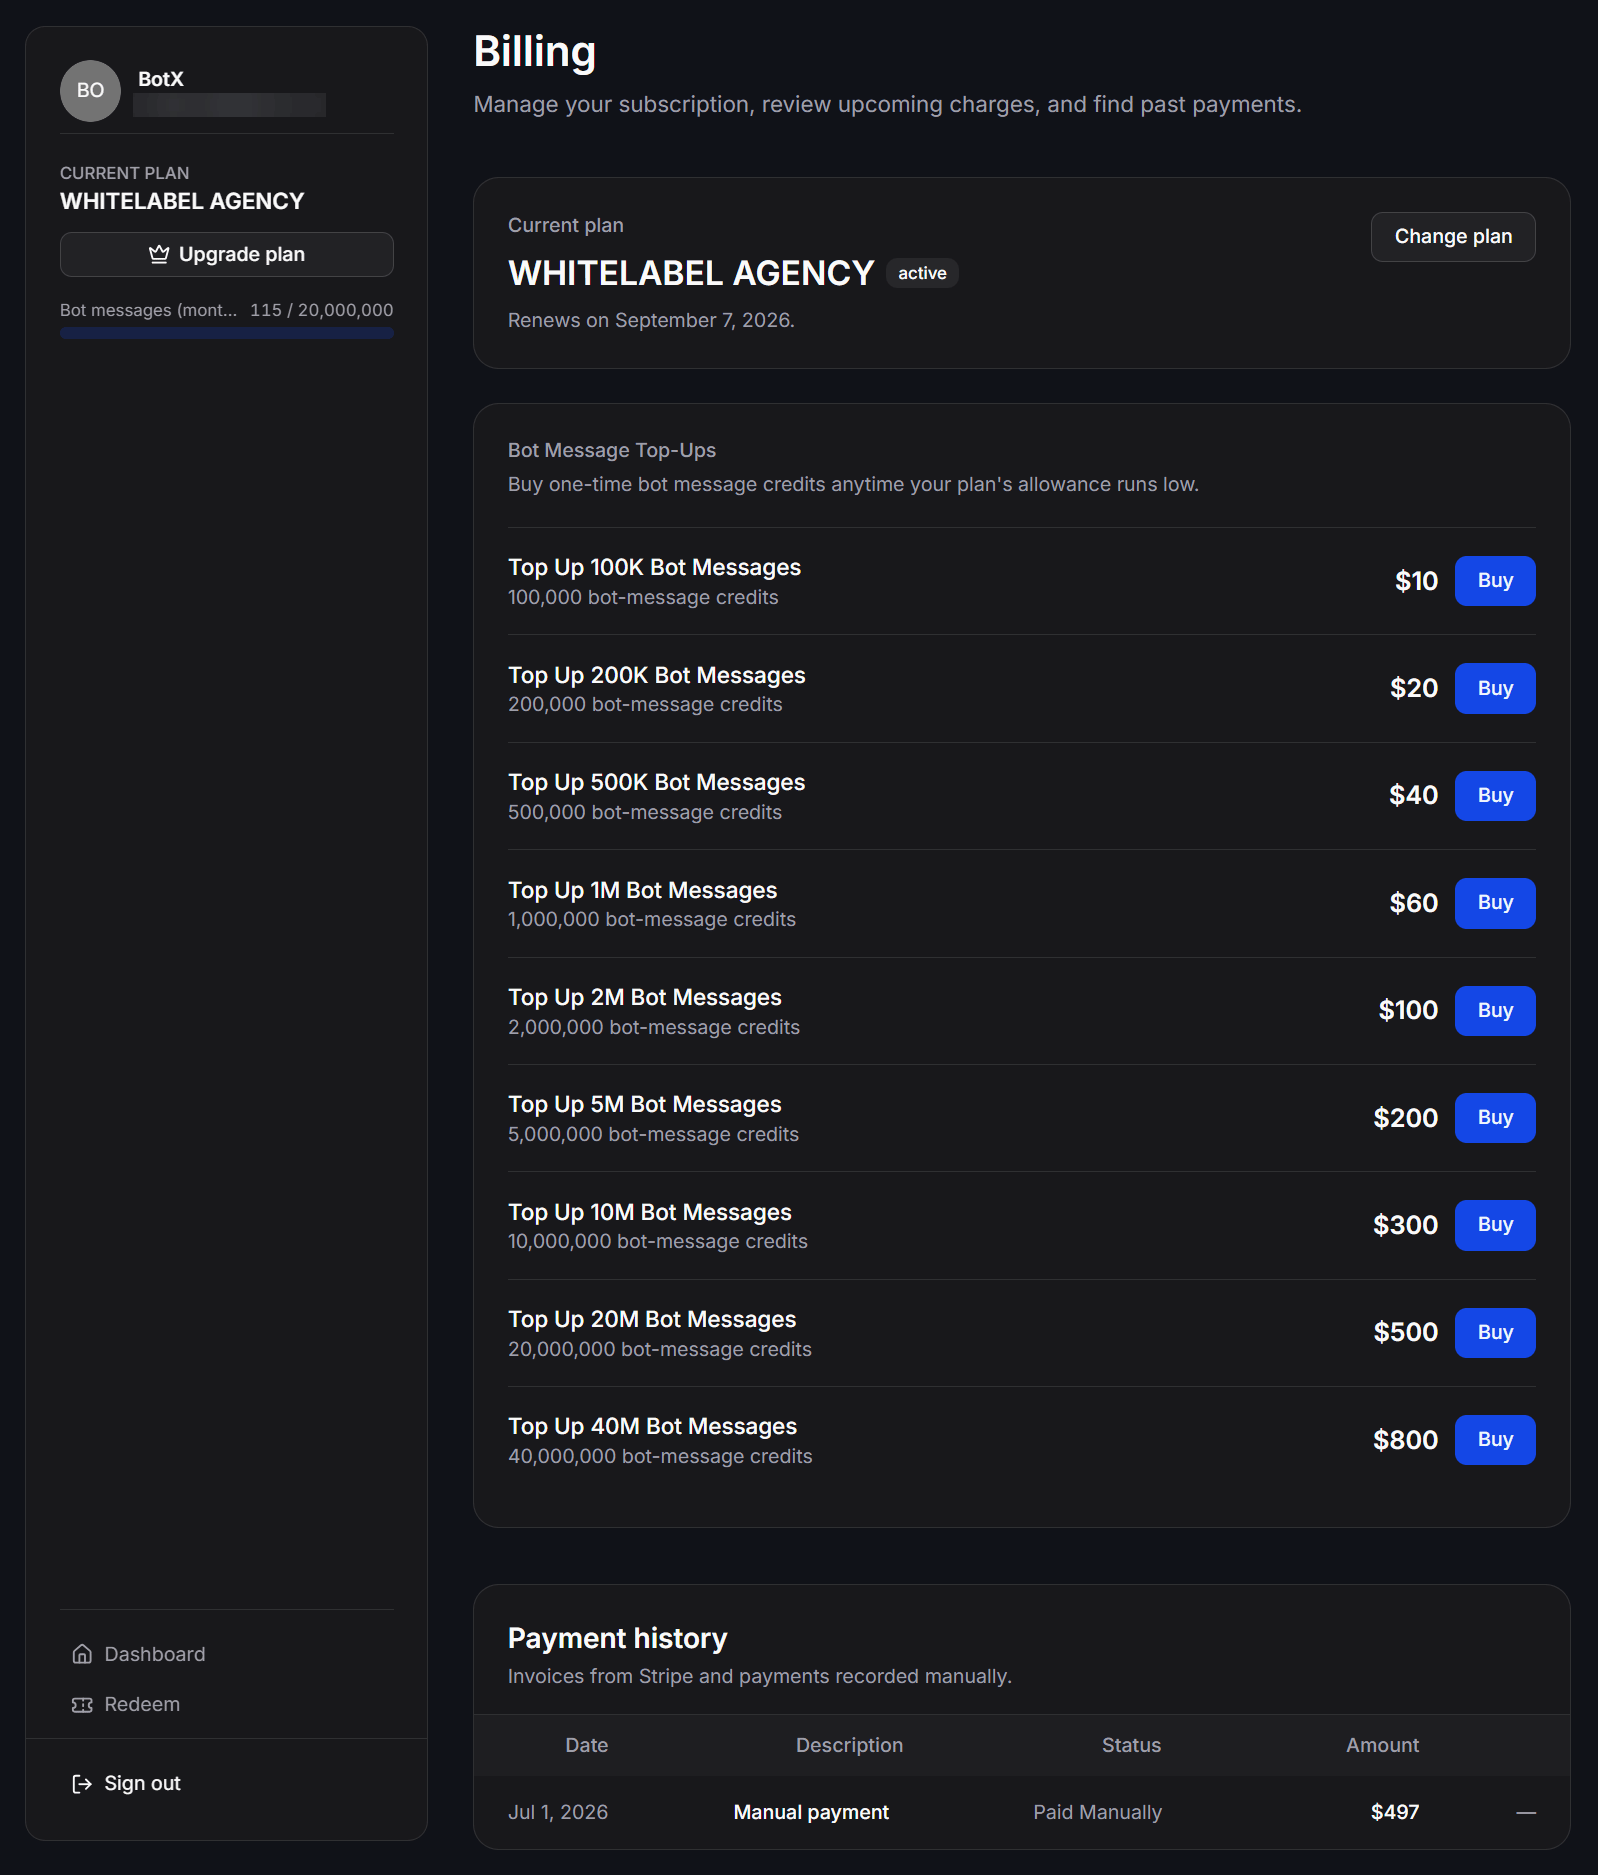
Current plan
The Current plan area displays:- The current Plan name and status.
- The next renewal date for a recurring subscription.
- A Change plan button when the platform provides this option.
Bot Message Top-Ups
The Bot Message Top-Ups area lists the Bot-message credit packs available for purchase. Each row shows the pack name, number of credits, and price. Select Buy for the appropriate pack to start the payment. Credits are added after the transaction is completed and do not change the Plan’s Workspaces, Channels, Team members, or Monthly active contacts limits.Payment history
Payment history shows the date, description, status, and amount of each transaction. The list can include online payments and payments recorded manually by an administrator.Prices, currencies, renewal dates, and available Top-up packs depend on the configuration of each White Label platform.
Redeem
Use Redeem to enter an AppSumo code and unlock the corresponding lifetime deal benefits.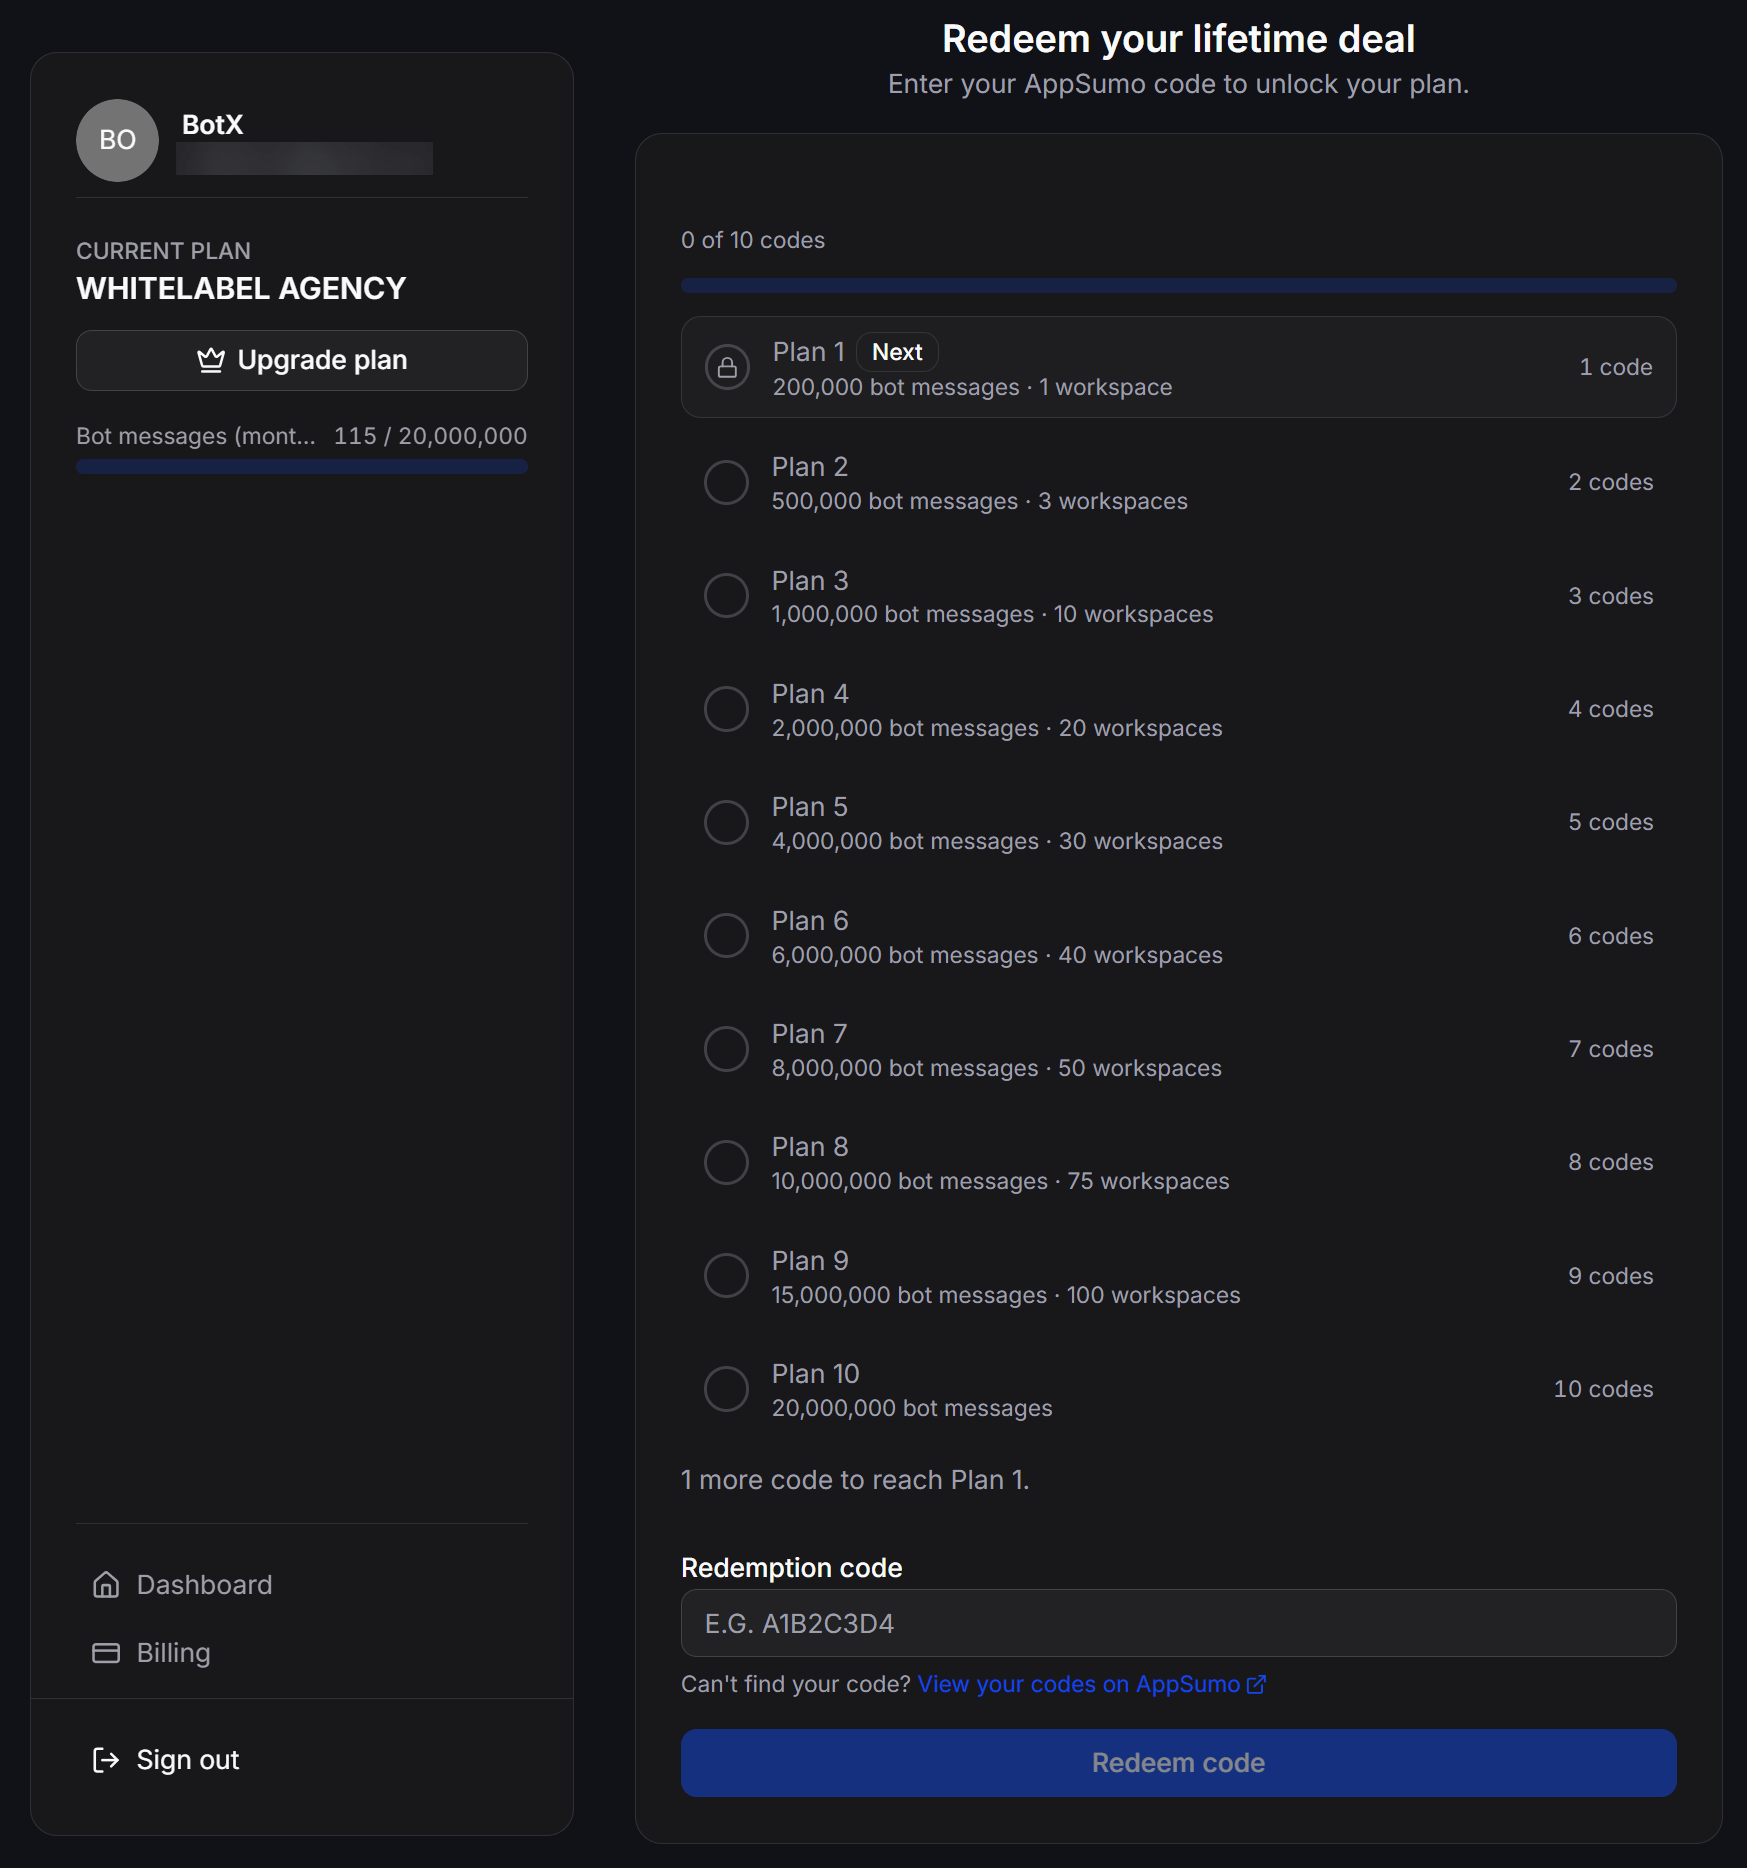
1
Review the Plan level
Check the number of codes required and the benefits of the Plan level you want to unlock.
2
Enter the AppSumo code
Enter a valid code in the Redemption code field.
3
Confirm the code
Select Redeem code. After the code is accepted, review the progress and your account’s Plan again.
Other account actions
- Refresh All Permissions: Reload access permissions after the account’s Plan, role, or permissions have changed.
- Sign Out: Sign out of the current account.