

2026-08-11T14:30:00 into 11/08/2026, 11 Aug 2026, or 14:30.
Add Format Date to a Flow
1
Open the Flow
Open the Flow that contains the date or time value you want to format.
2
Add a Perform Action node
Add a Perform Action node before the message or condition that will use the formatted value.
3
Choose Format Date
Open the node, click Create, then select Tools > Format Date.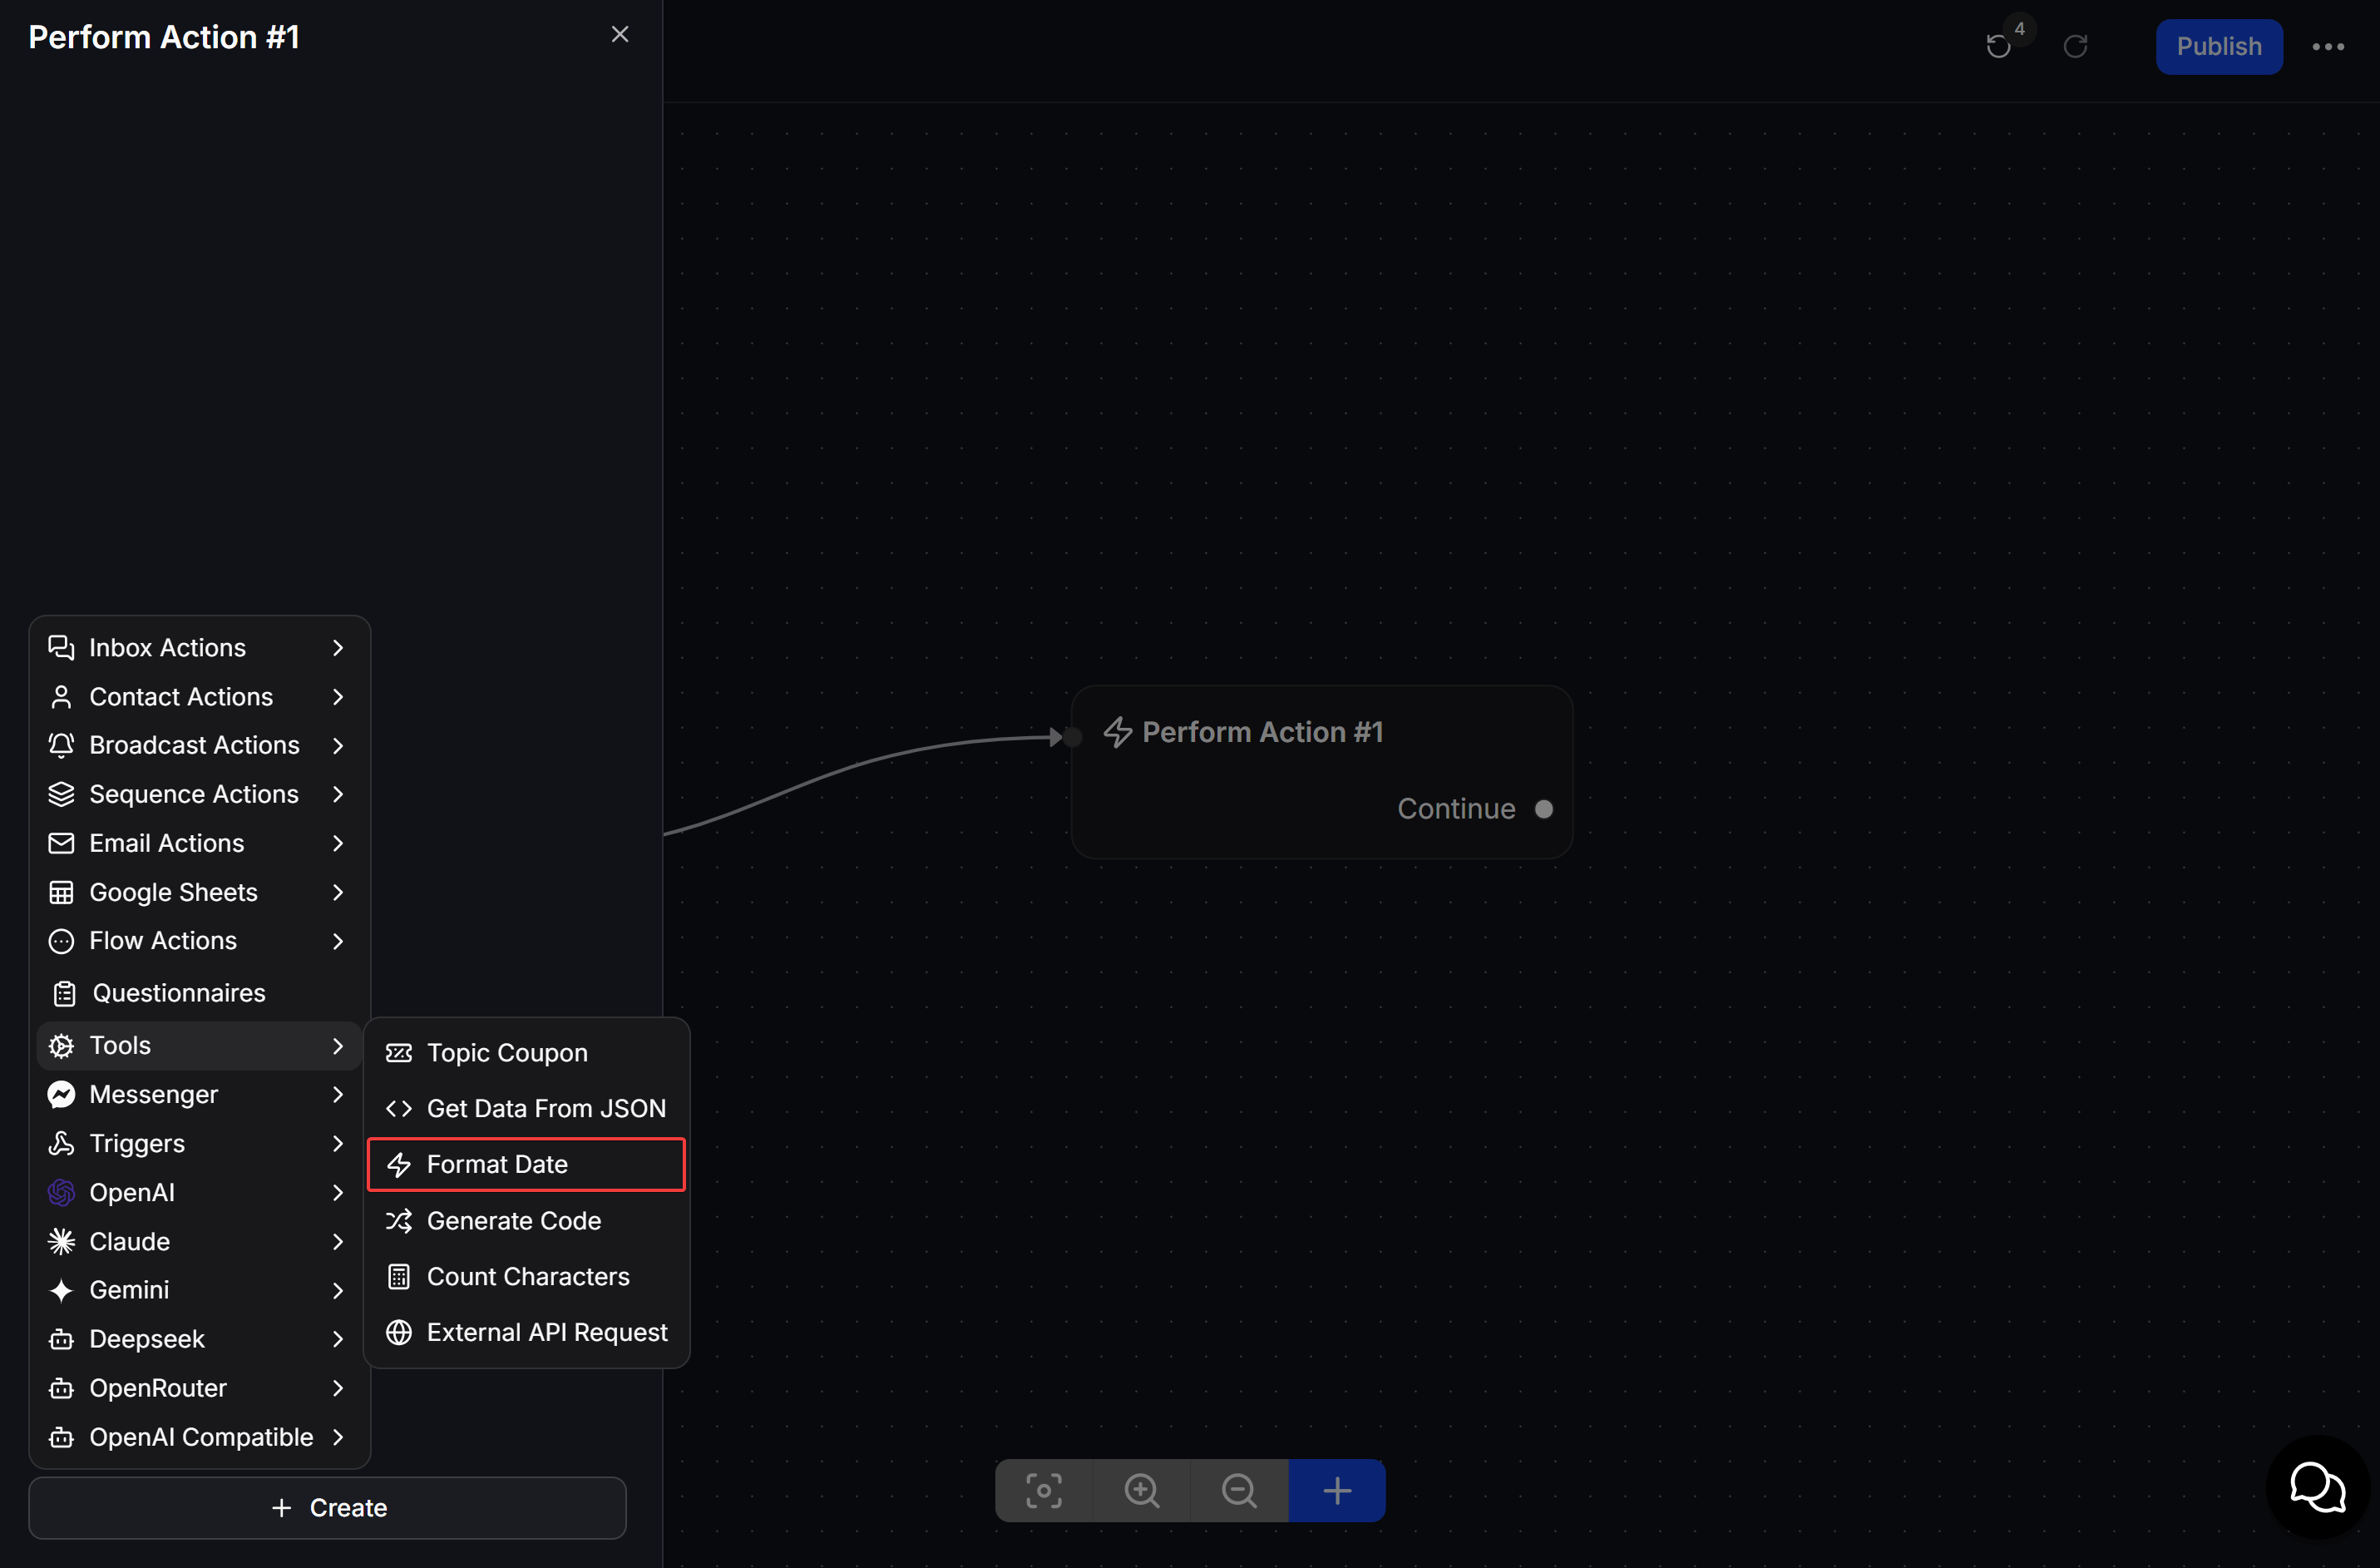
4
Choose the value and format
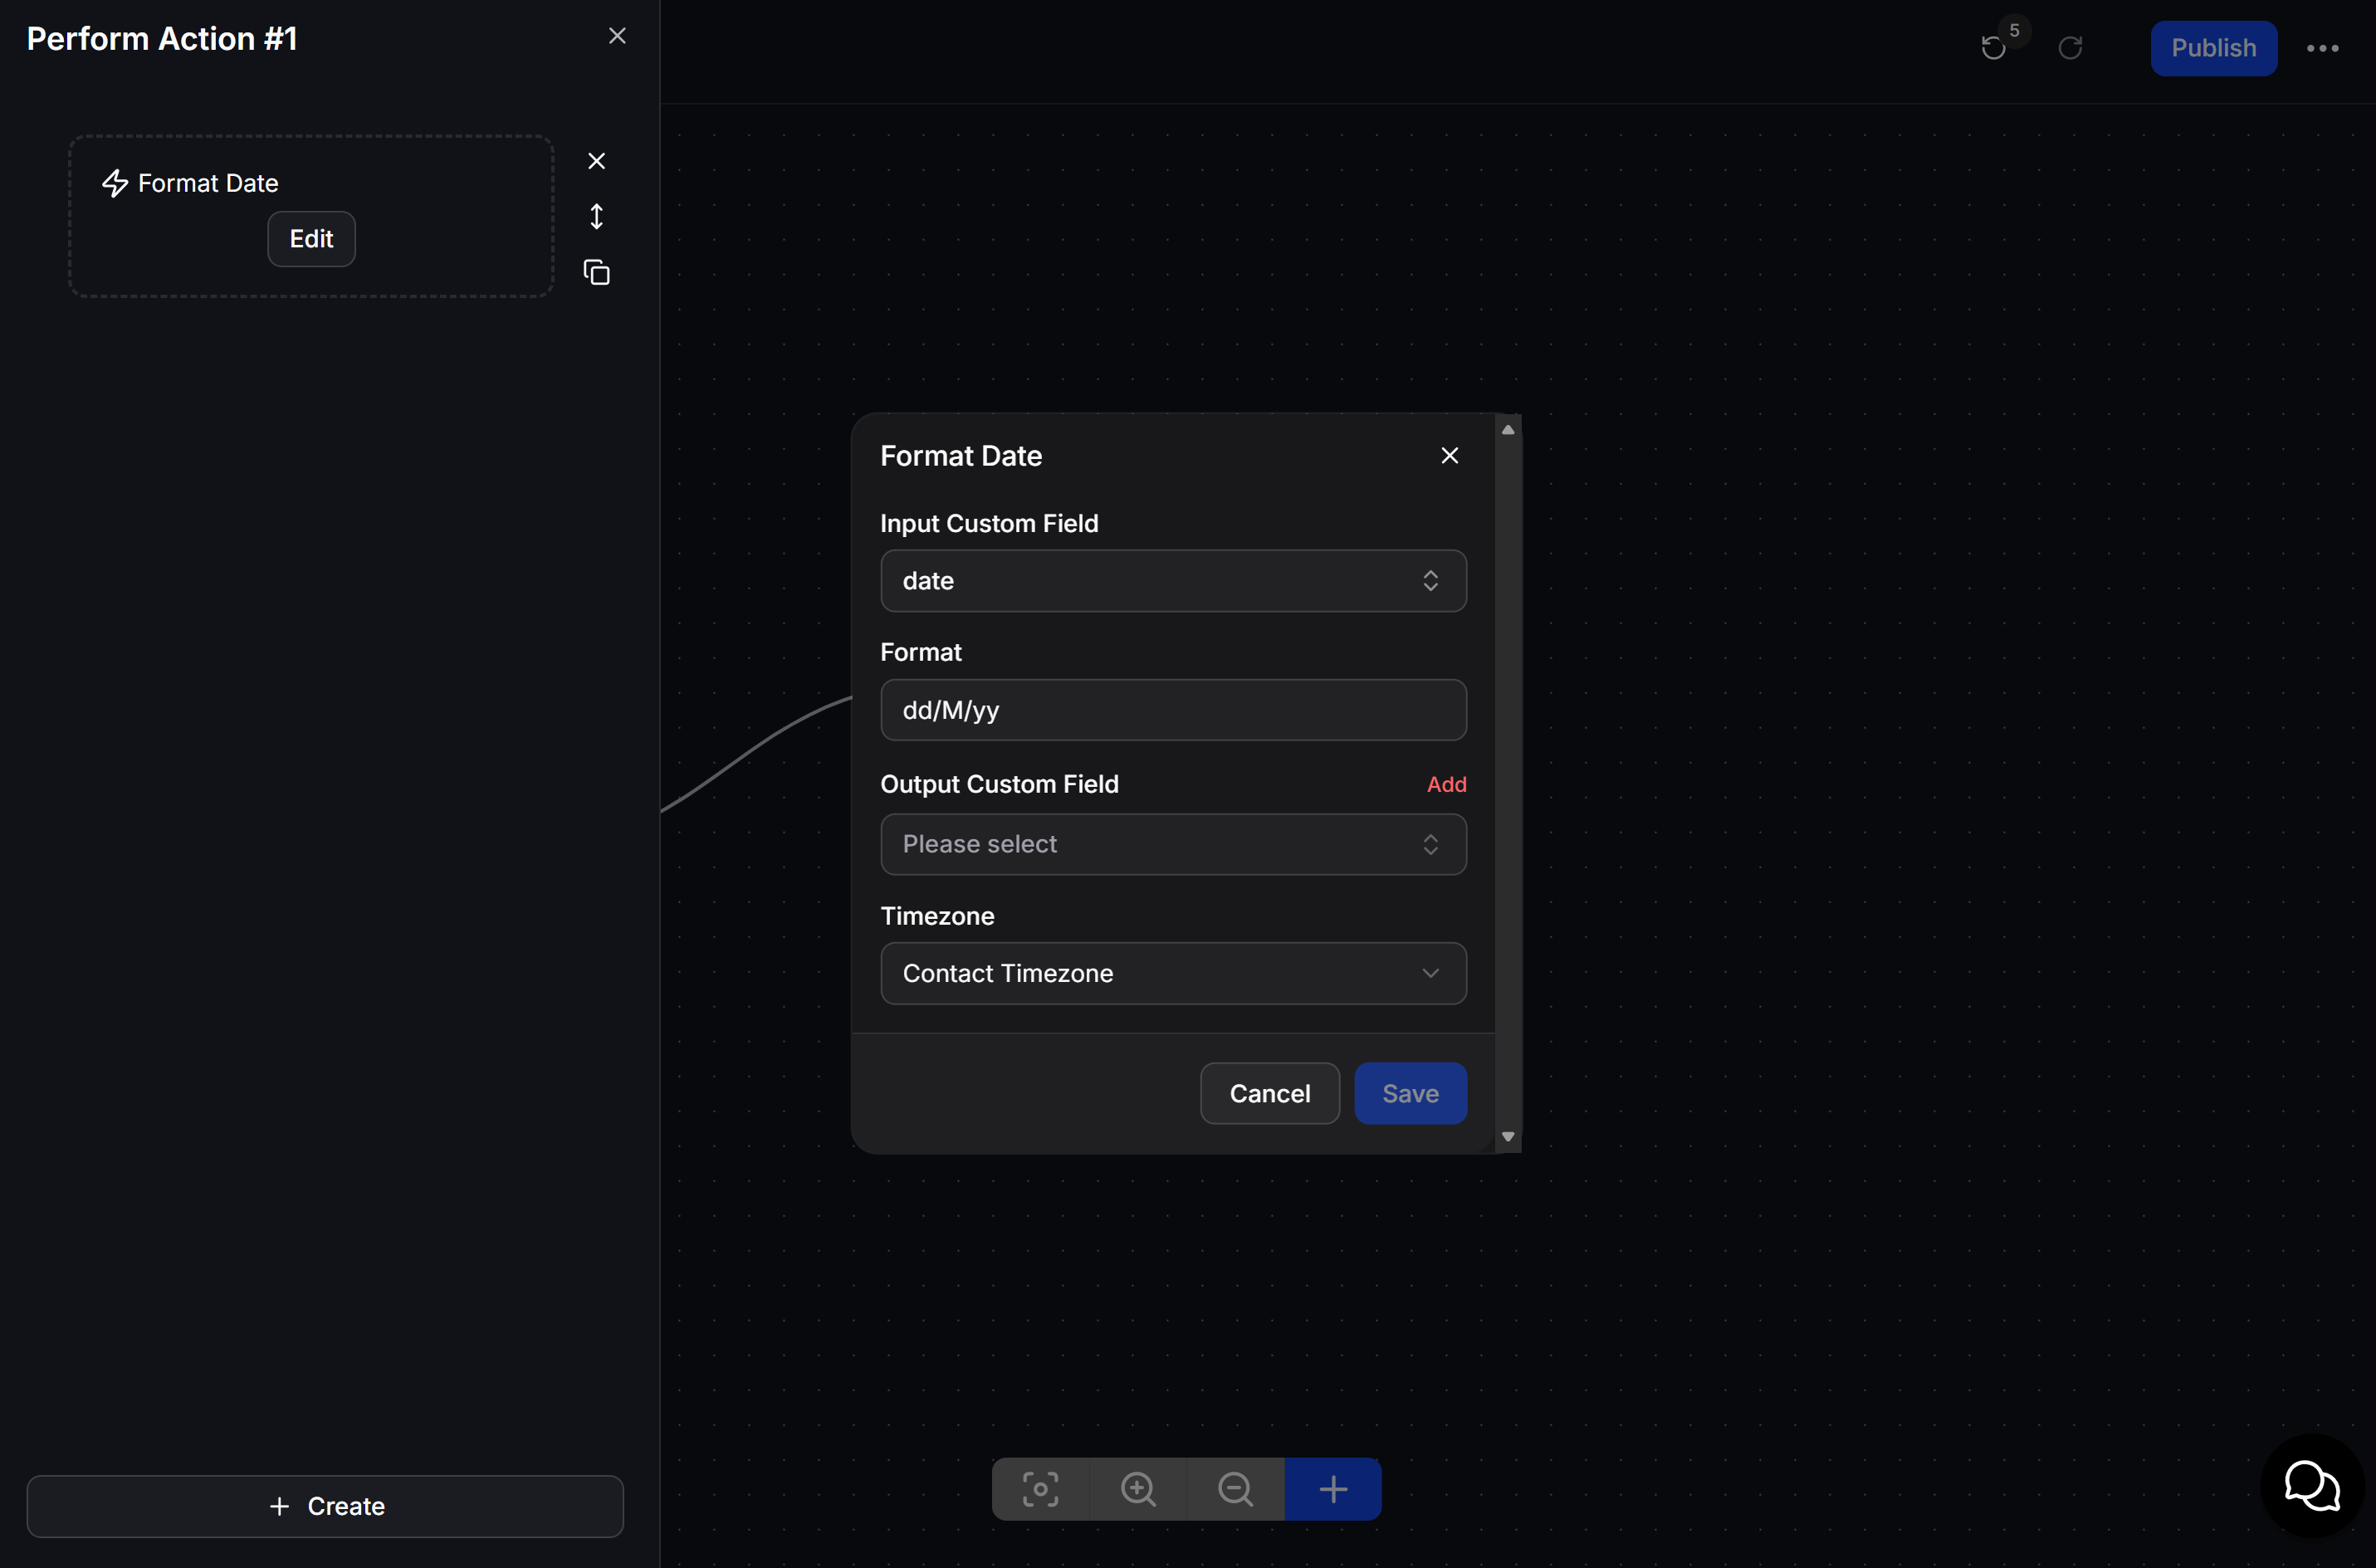
Select the Input Custom Field, enter a date-fns pattern in Format, choose the Output Custom Field, then select the Timezone and click Save.
Use date-fns format patterns
ChatbotX uses the date-fns formatting style. Use the date-fns interactive formatter to test patterns before adding them to your Flow.
Use uppercase
MM for months and lowercase mm for minutes. Use yyyy for a four-digit calendar year.
Choose the source, output, and timezone
- Input Custom Field: The field that stores the original date or time.
- Format: The date-fns pattern that controls the result.
- Output Custom Field: The field where ChatbotX saves the formatted value. Use Add when you need a new Custom Field.
- Timezone: The timezone used to format the value. Select Contact Timezone when the date should follow the contact’s timezone.
Example: show a delivery date
Your Flow stores a delivery date in a Custom Field. Add Format Date before the confirmation message, then usedd/MM/yyyy so the customer sees a familiar date format.
Test the pattern with a real date value before publishing the Flow. This helps you confirm the day, month, and time appear in the expected order.