Prerequisites
Before getting started, make sure you have met the following requirements:- Admin access: You need “Full Control” or Admin permissions on the Fanpage you want to connect.
- Personal Facebook account: You must use the personal Facebook account that manages the Fanpage, and it must be logged in on your browser.
- Meta Business Suite access: If the page belongs to a Business Manager (BM), your account must also have sufficient permissions within that BM.
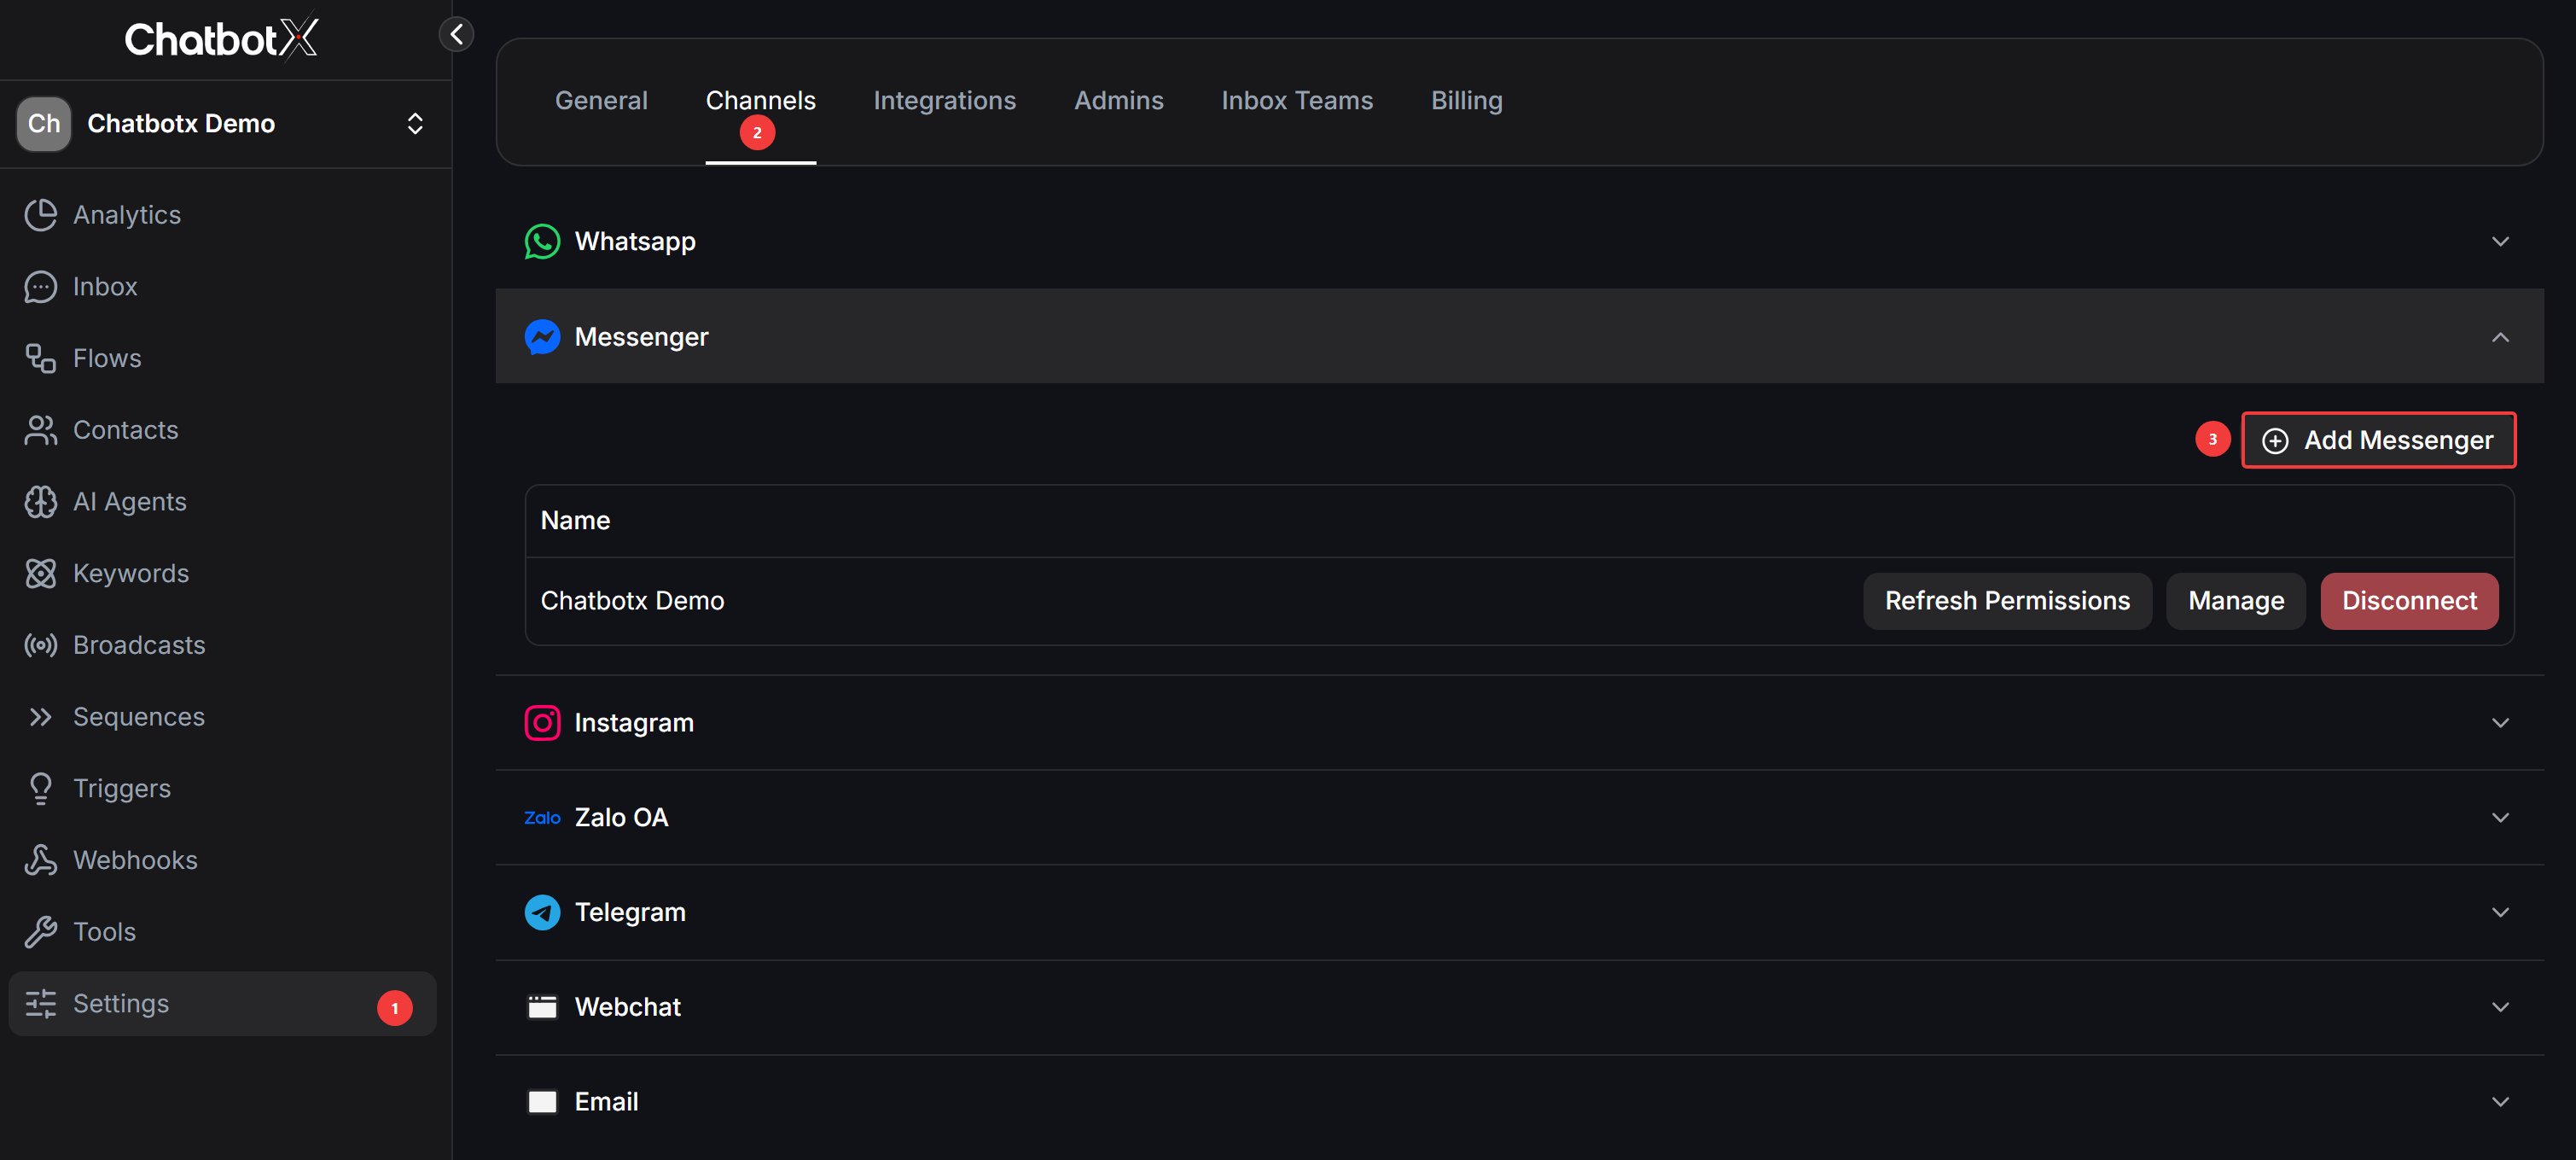
Step 1: Open the Channel Configuration
- Go to Settings → Channels.
- Find the Messenger icon and click the “Add Messenger” button.
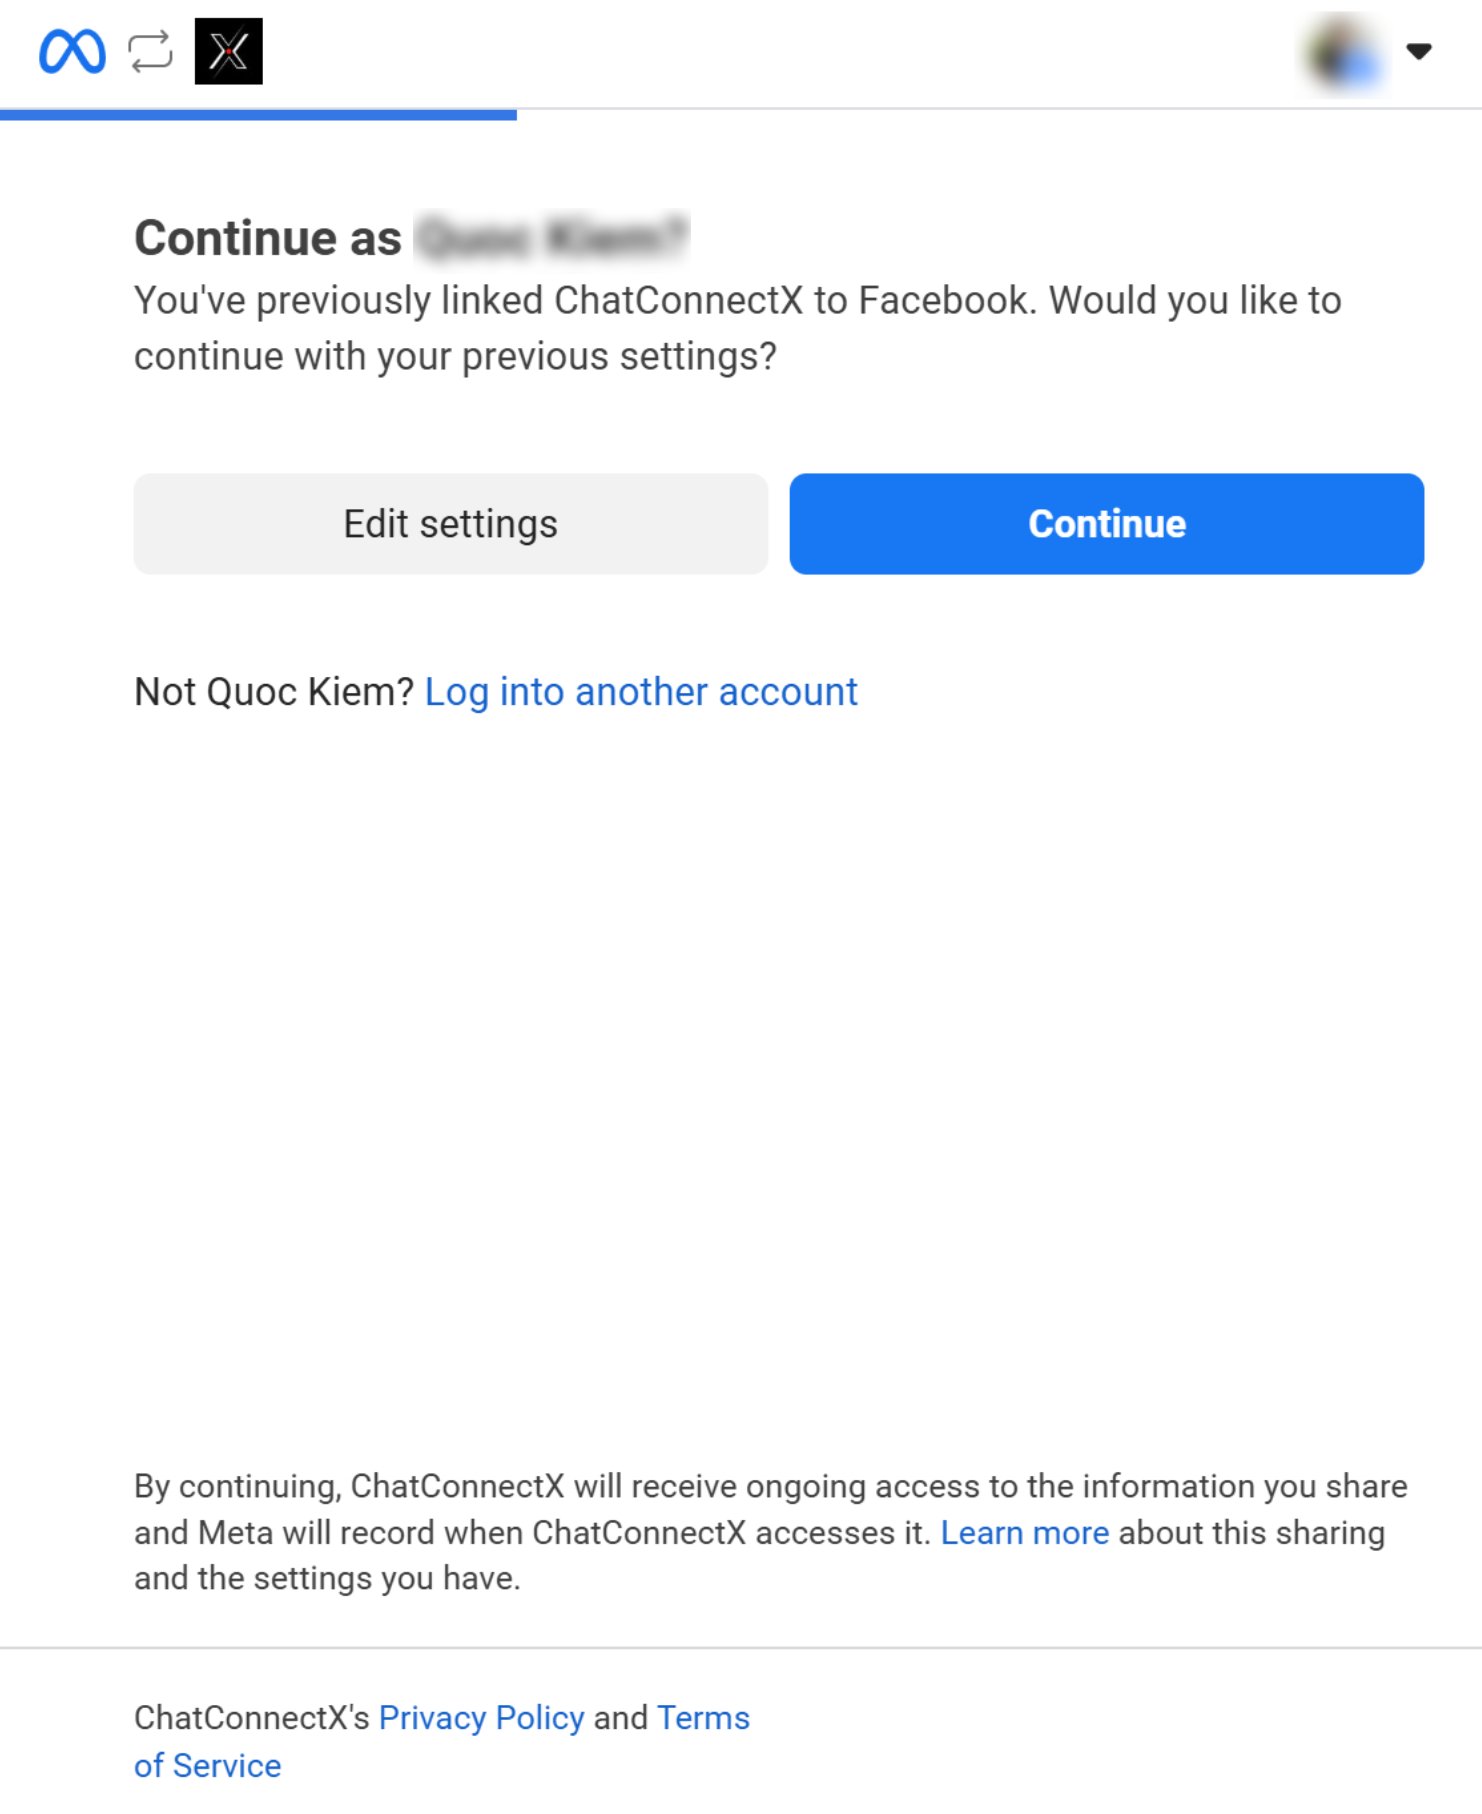
Step 2: Grant Access Permissions
The system will redirect you to the Facebook (Meta) authentication interface.- Click the “Continue as [Your Name]” button to grant permissions.
Important: If you have previously connected other pages, click Edit Settings to ensure all new or previously unselected pages are visible.
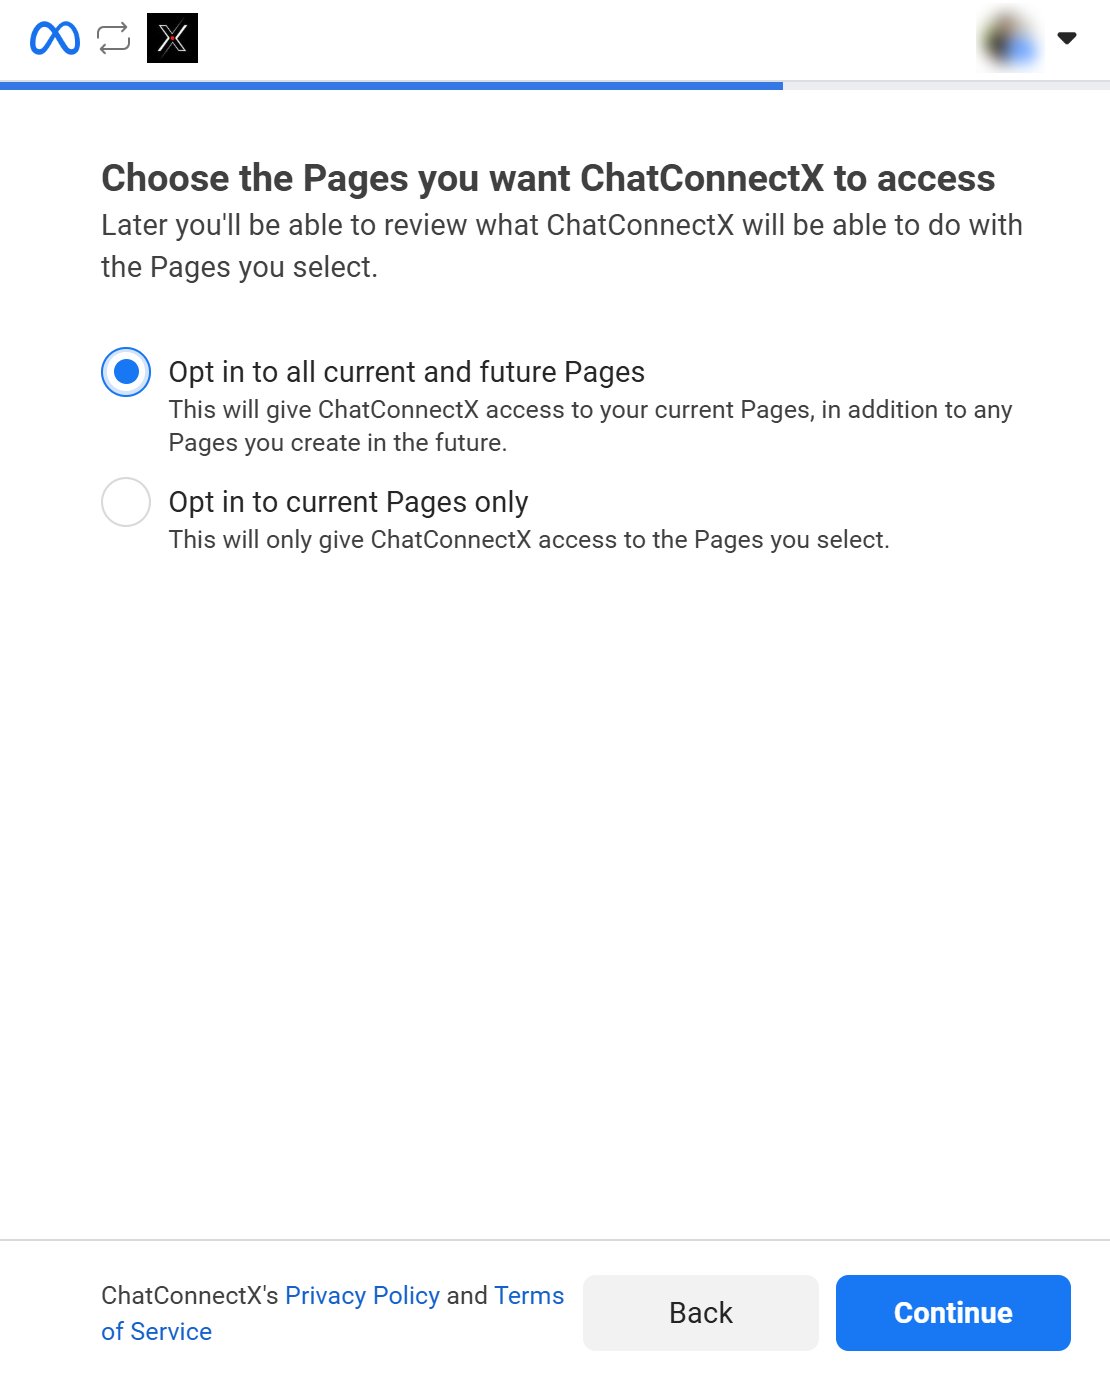
Step 3: Select Facebook Fanpages
A list of all Fanpages you manage will appear.- Check the Fanpages you want to connect to ChatbotX, or select All.
- Click Continue to proceed to the permission settings.
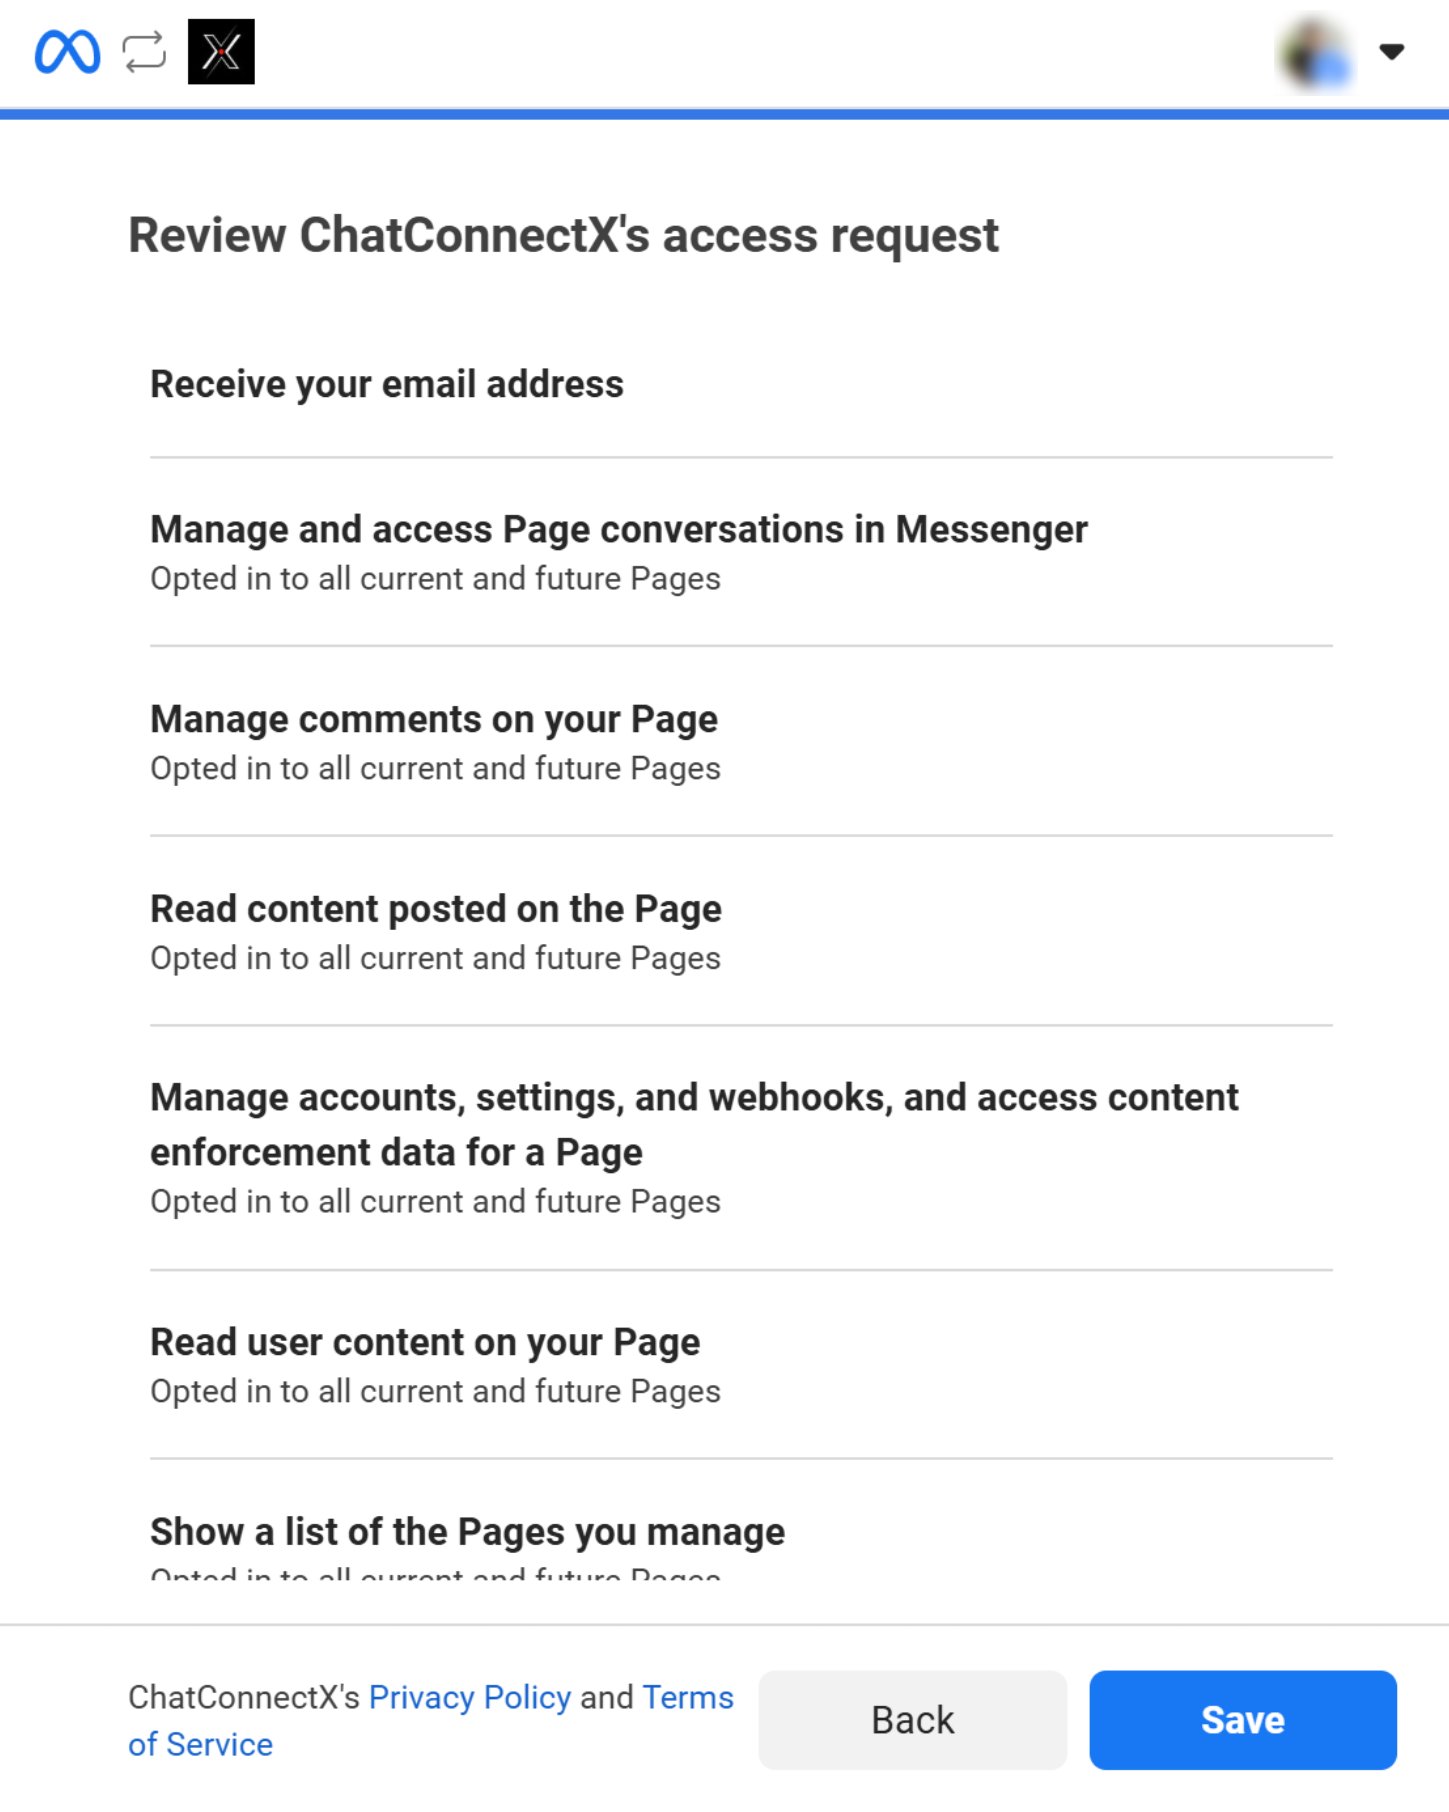
Step 4: Review Permissions
This is the final step.- Review the permissions the application is allowed to access.
- Once verified, click the Save button in the bottom right corner.
Step 5: Select a Facebook Page
Confirm the exact Fanpage you want to link to the platform.- Select the radio button next to the Facebook Page you want to use, e.g., ChatbotX Demo.
- Click the Continue button to complete the connection.

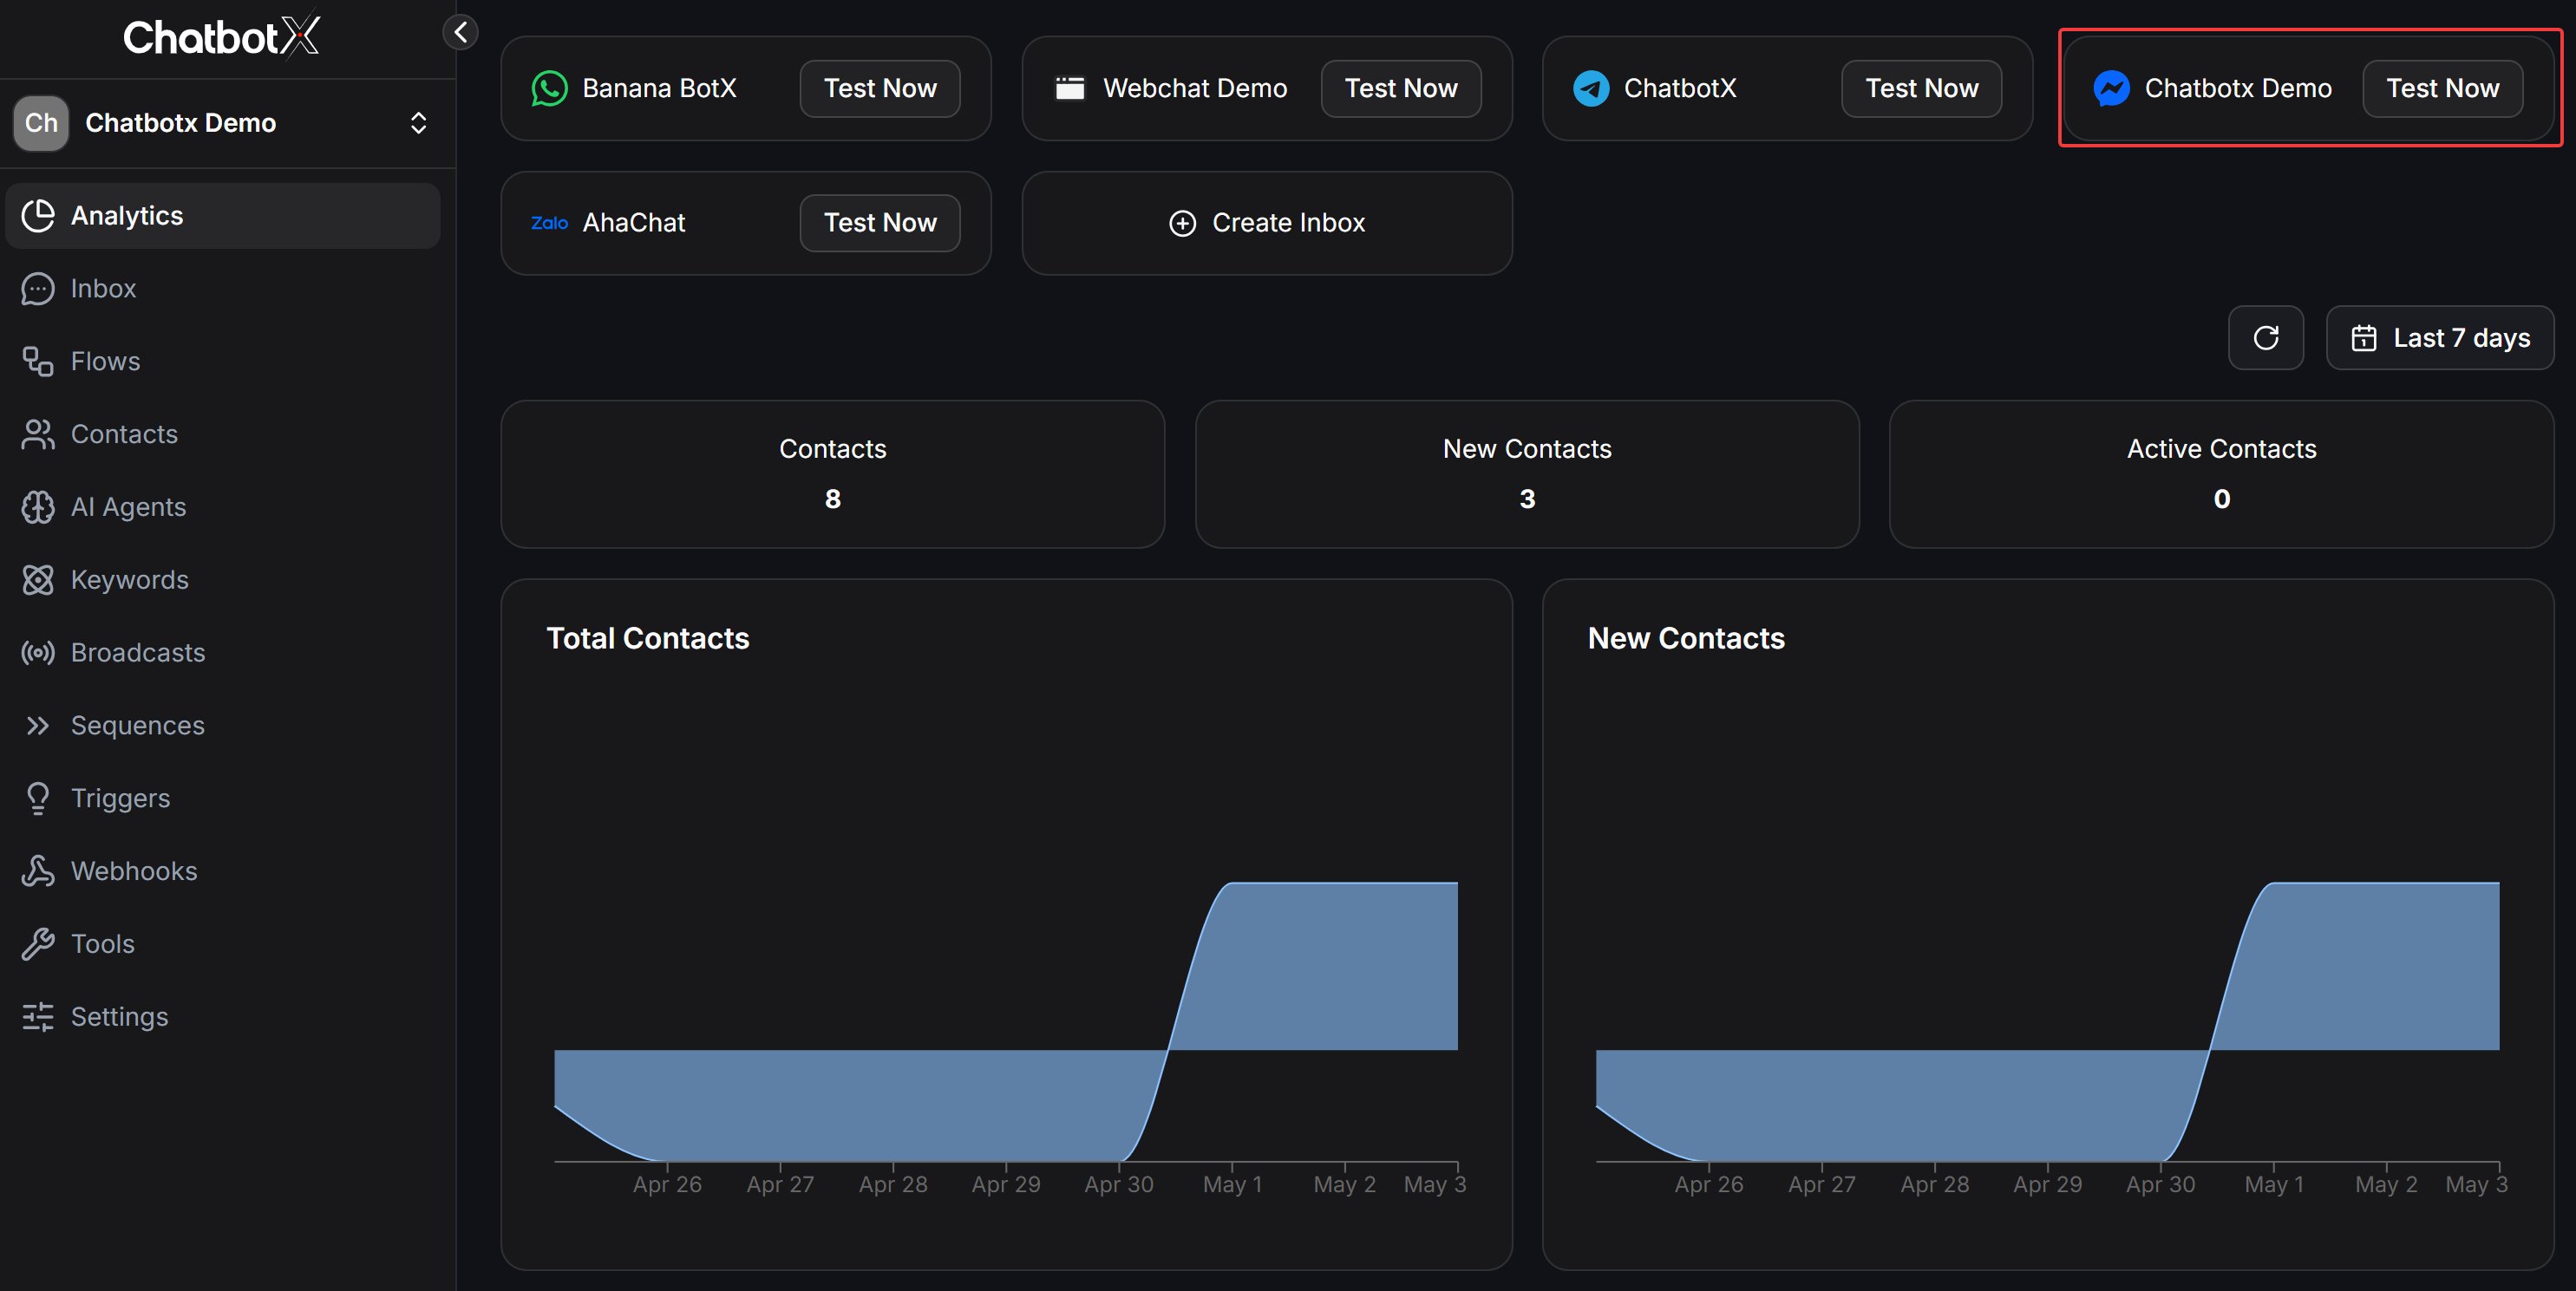
Step 6: Finalize and Verify
After being redirected back to the system, your Facebook Page will appear on the ChatbotX dashboard.- Confirm connection: Ensure the correct Fanpage is displayed with the Messenger icon.
- Test integration: Click Test Now to send a test message and confirm your AI Agent is working.
Step 7: Test Automation
Your page is now connected. You can test it using one of the following methods:- Option 1: Create a Flow
- Go to the Flows section in the sidebar.
- Create a simple welcome message or an interactive menu.
- Trigger it from Fanpage Messenger to verify the response.
- Option 2: Set up an AI Agent
- Go to the AI Agent tab to configure your agent’s personality.
- After saving, use the Test Now button on the dashboard to chat directly with the AI.
FAQ
Why doesn't my Fanpage name appear in the connection list?
Why doesn't my Fanpage name appear in the connection list?
There are two common causes:Access permissions
You may only have an Editor or Moderator role. Meta requires Admin permissions to set up the API.Missing app permissions
You may have previously connected ChatbotX but did not select this specific page during that permission grant.How to fix
Go to your personal Facebook profile → Settings & Privacy → Settings → Business Integrations.
Find ChatbotX, click Remove, then go back to Step 1 to start over.
I connected successfully but the AI isn't responding to customers?
I connected successfully but the AI isn't responding to customers?
Check the following:AI Agent configuration
Make sure you have assigned an AI Agent to this Messenger channel in the AI Agent Settings.Facebook Auto-Replies
Check if the Fanpage has Facebook’s default Instant Replies enabled, as this feature can conflict with ChatbotX.
Make sure you have assigned an AI Agent to this Messenger channel in the AI Agent Settings.Facebook Auto-Replies
Check if the Fanpage has Facebook’s default Instant Replies enabled, as this feature can conflict with ChatbotX.
Does ChatbotX support managing multiple Fanpages at once?
Does ChatbotX support managing multiple Fanpages at once?
Yes. ChatbotX is designed as an Omnichannel platform.You can connect multiple Fanpages, depending on your plan, and manage all incoming messages in a Unified Inbox.
How does Facebook's 24-hour rule affect the bot?
How does Facebook's 24-hour rule affect the bot?
According to Meta’s policy, bots are only allowed to respond to customers within 24 hours of the customer’s most recent message.After 24 hours, you must use:
- Message Tags, or
- Marketing Messages on Messenger
How do I update permissions when I add a new Fanpage?
How do I update permissions when I add a new Fanpage?
You don’t need to disconnect the existing connection.Simply repeat the Add Facebook Page process.
When the Meta window appears, click Edit Settings and check the new Fanpage.The system will automatically update the list without affecting previously connected pages.
When the Meta window appears, click Edit Settings and check the new Fanpage.The system will automatically update the list without affecting previously connected pages.