

Meta Policy and Regulations
To prevent your Fanpage from being blocked from sending messages, you must adhere to the following rules:- No promotional content: The message content must not contain any promotional, marketing, advertising information, or discount codes.
- Meta approval required: All message templates must be approved by Meta before they can be used.
- Correct categorization: Attempting to bypass rules by sending promotional messages through utility templates will result in Meta permanently blocking your Fanpage from sending messages.
Step 1: Create and submit utility templates for approval
The process of setting up utility templates for Meta review is performed directly on ChatbotX through these steps:1
Access Messenger management
Go to Settings -> Channels tab -> select Messenger -> click Manage next to the Fanpage you want to configure.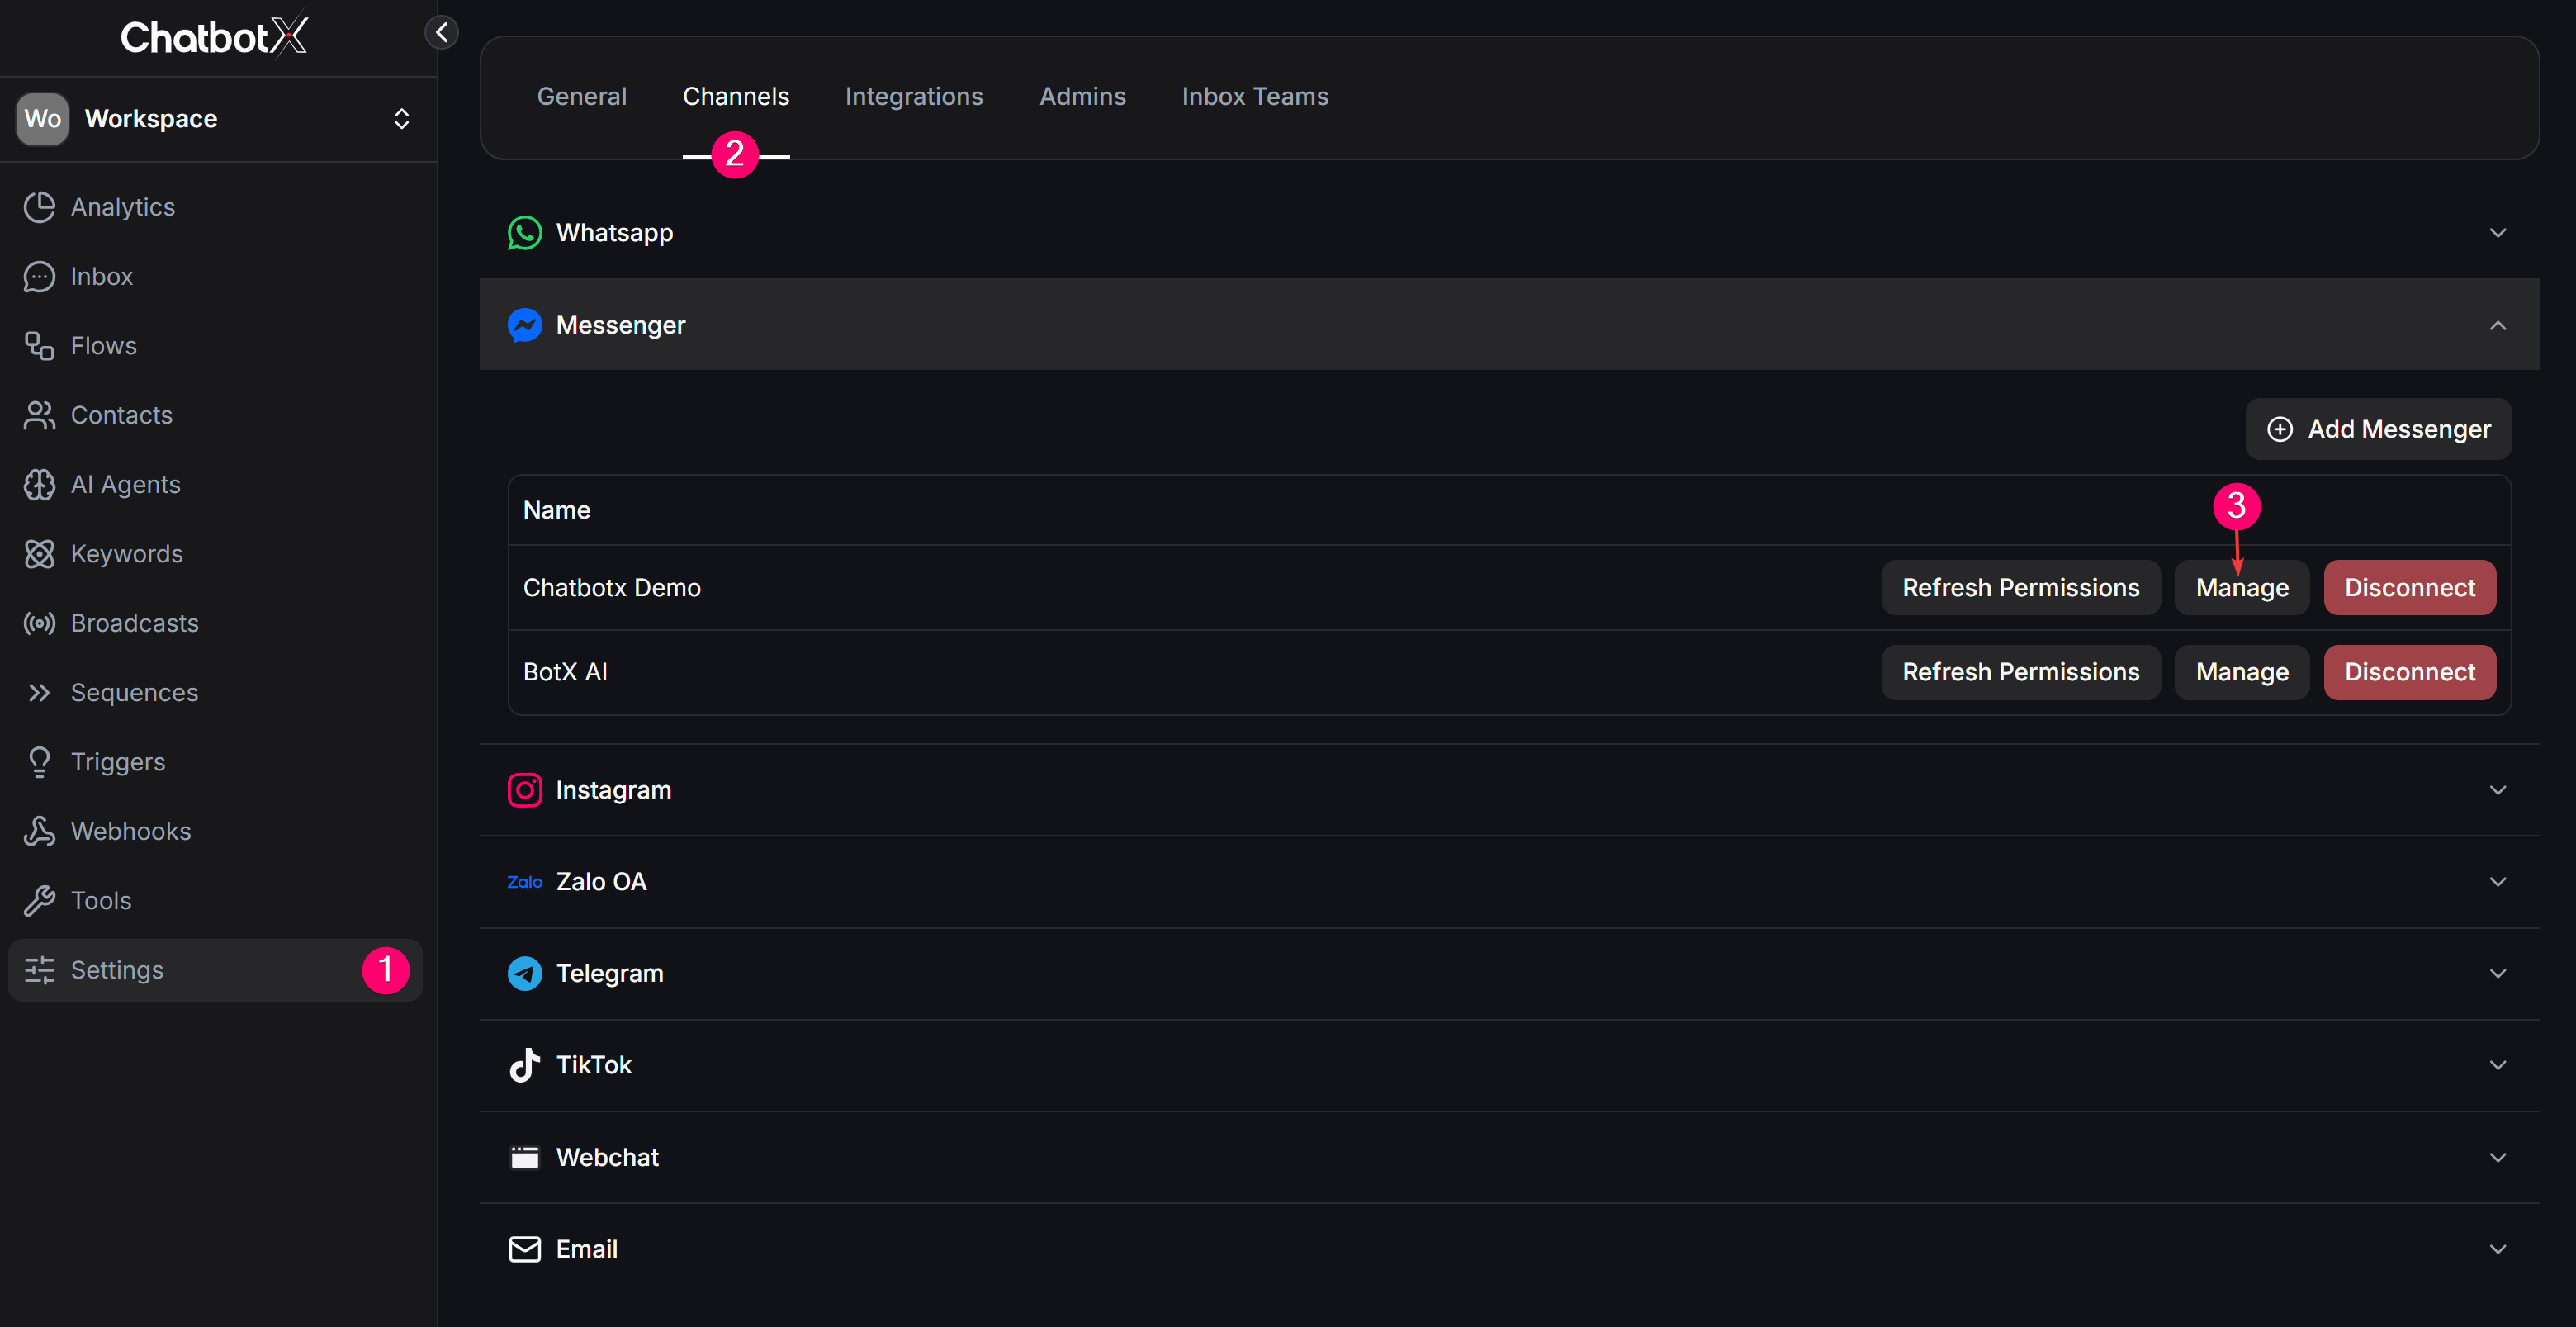
2
Open Message Templates tab
Select the Message Templates tab from the top horizontal menu. Here, you can view the approval status of existing templates, click Synchronize to sync templates from Meta to ChatbotX, or click the + Create new template button to create a new one.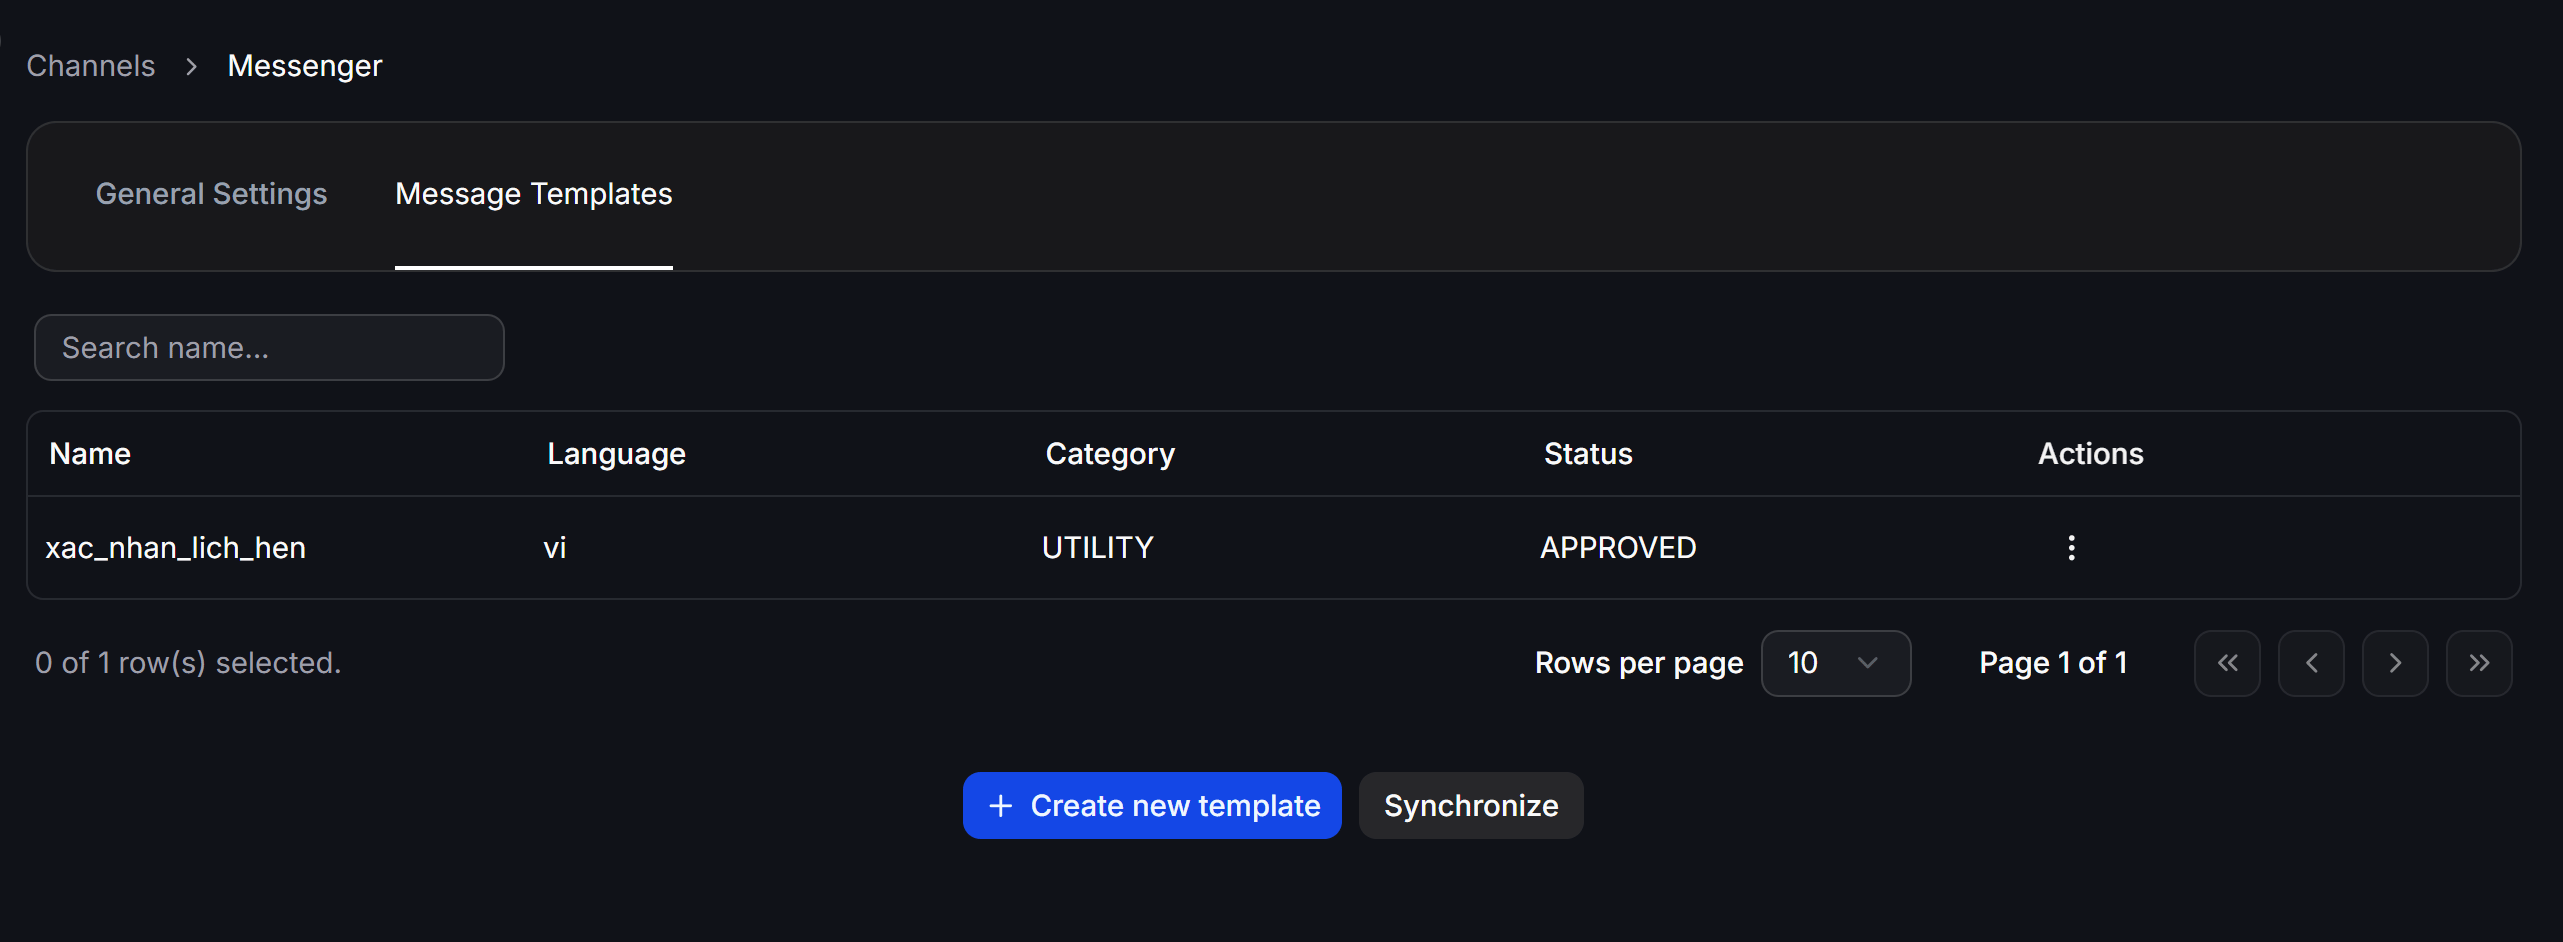
3
Draft utility template details
When the Create Message Template modal appears, fill in all required fields as requested by Meta: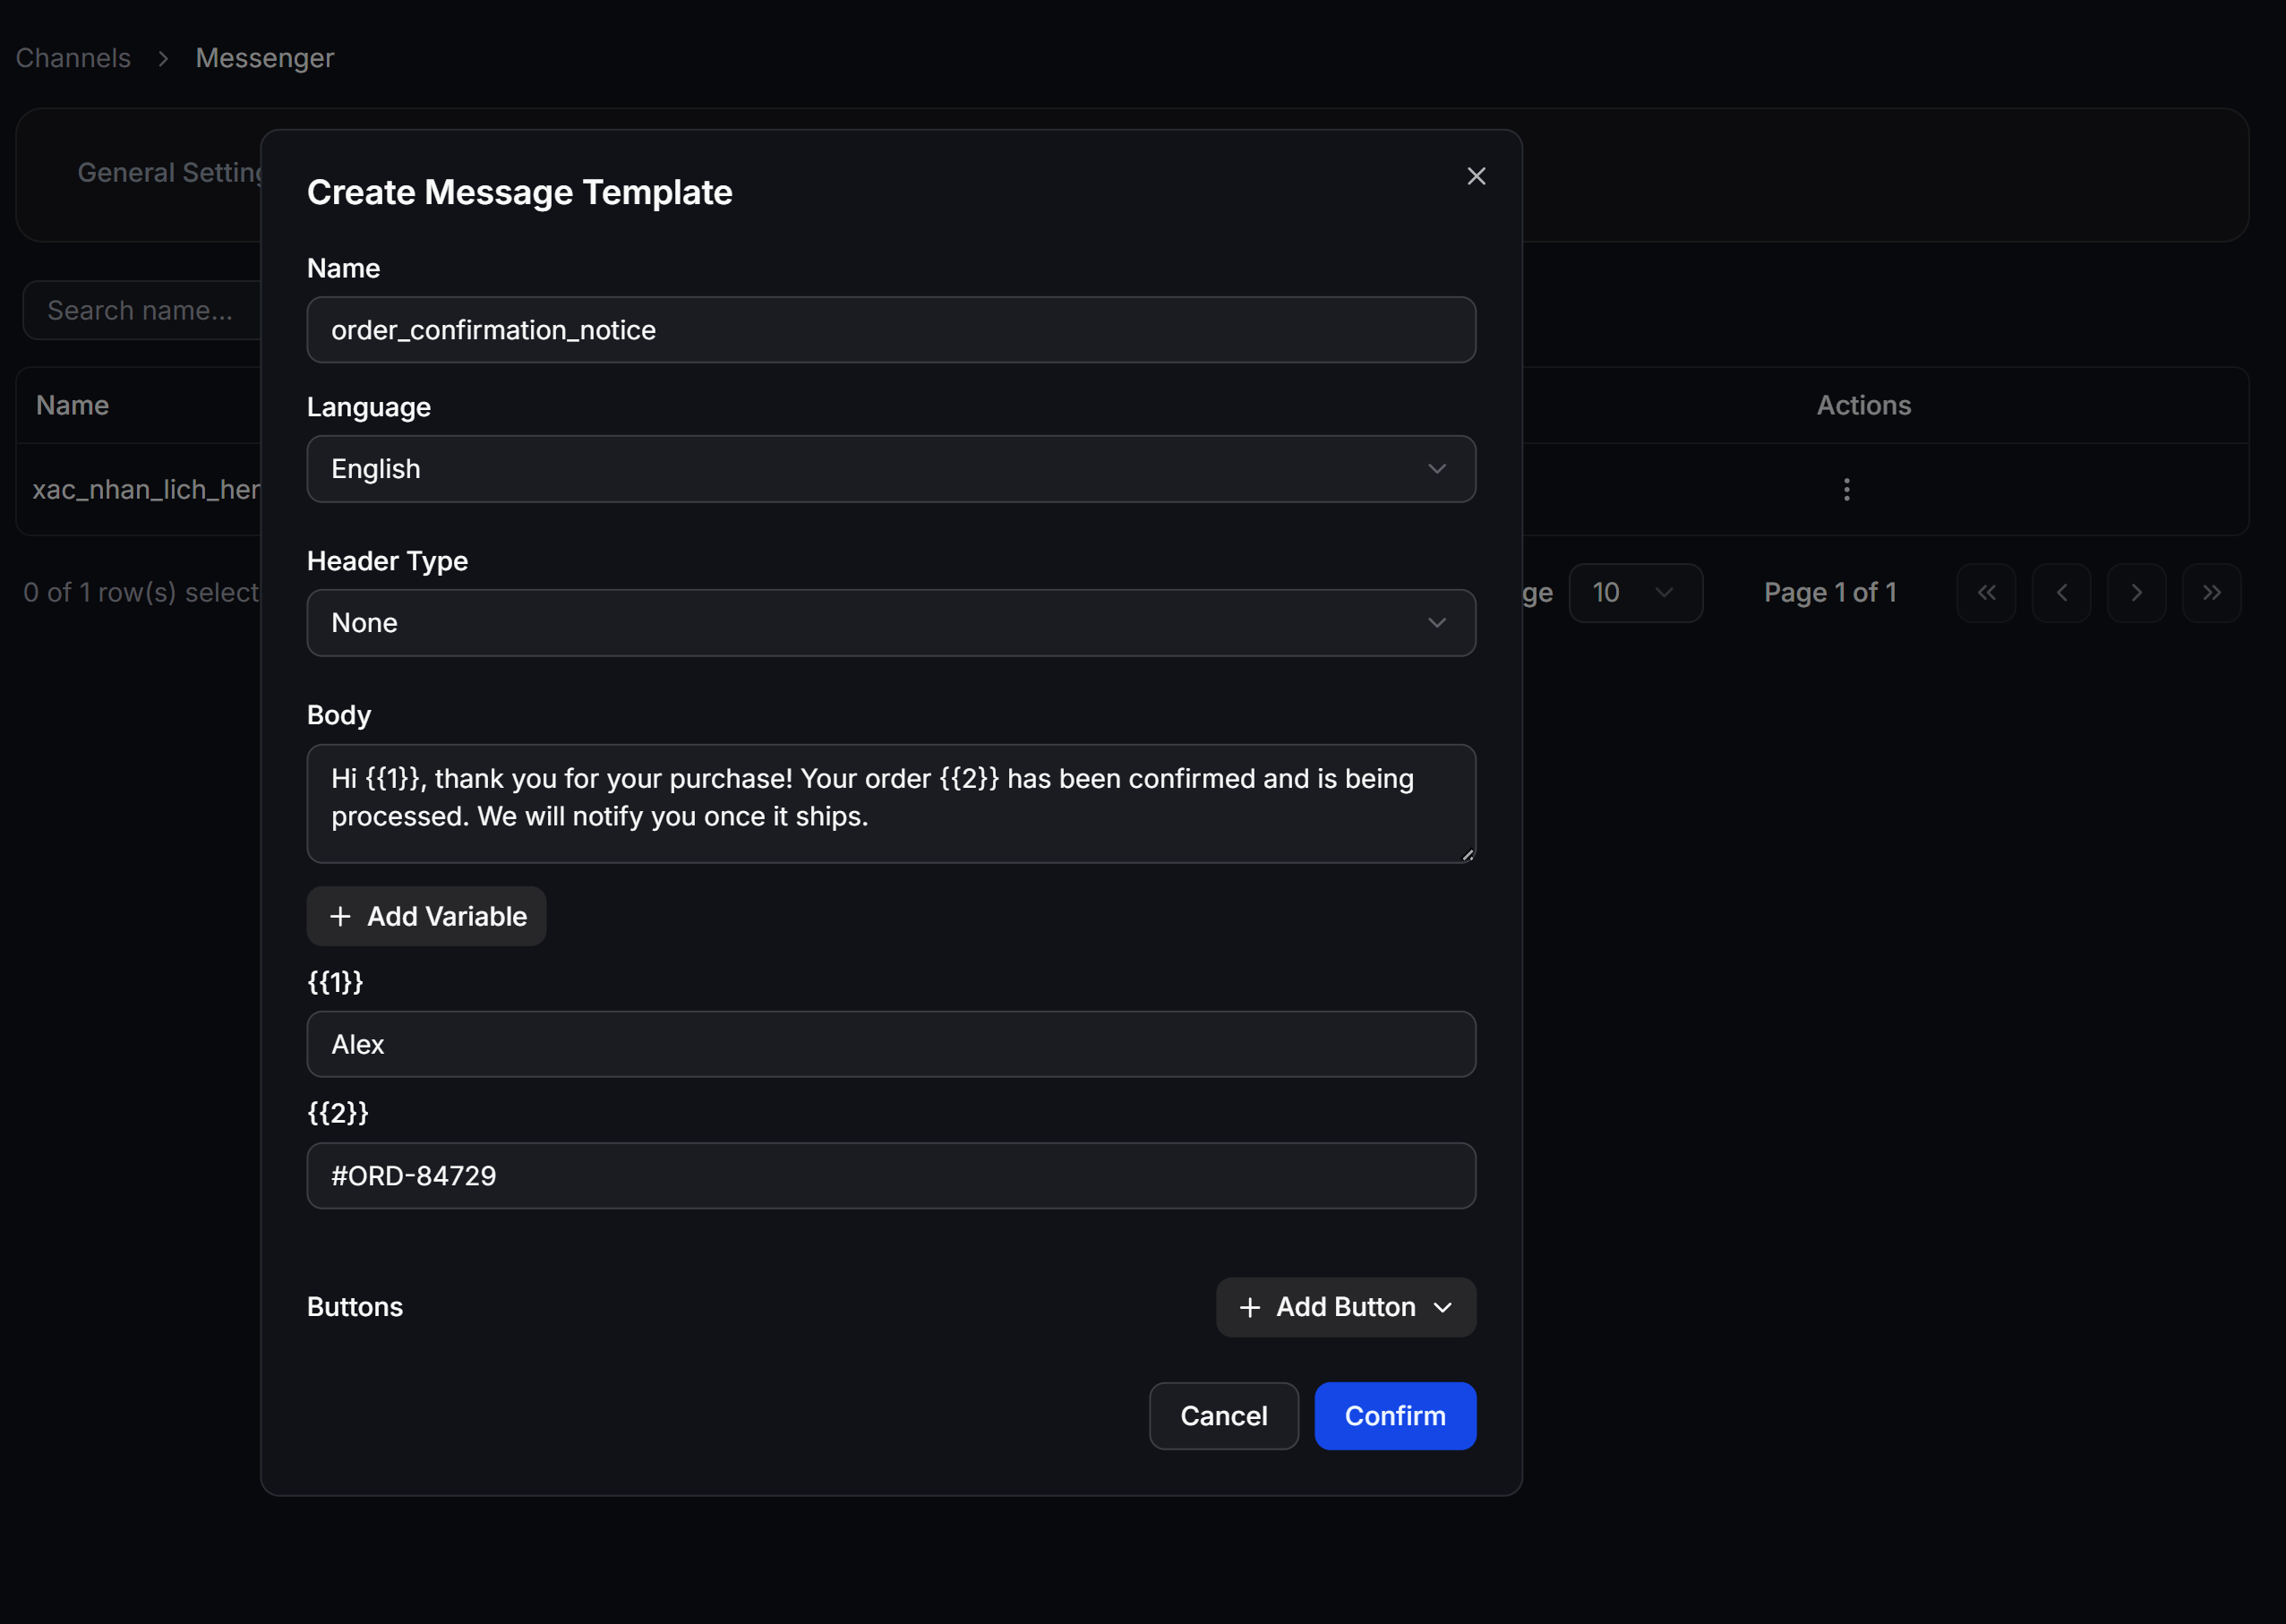
- Name: Set a name for the template.
- Rule: Only use lowercase letters without accents, numbers, and underscores (e.g.,
order_confirmation). Do not use uppercase, spaces, or special characters.
- Rule: Only use lowercase letters without accents, numbers, and underscores (e.g.,
- Language: Select the language of the message template (e.g., select English or Vietnamese depending on your content language).
- Header Type: Select the header type displayed at the top of the message. You can choose None or other options as needed.
- Body: Draft the main body text of the message (up to 1024 characters).
- + Add Variable: Click to insert dynamic variables like
{{1}},{{2}}… at positions where content needs personalization (such as customer name, order ID, appointment date). - Enter validation values for variables: For each dynamic variable
{{1}},{{2}}… inserted into the Body, the system will automatically create corresponding input fields below. You must enter a realistic sample value for each variable (e.g., enter a real customer name for{{1}}, a real order ID for{{2}}). - Buttons: Click + Add Button to add up to 3 interactive buttons at the bottom of the message and choose the button type:
- Button: A quick reply button for customers to click and trigger another Flow script, or forward chatbot processing.
- Call Phone Number: A button that helps customers quickly call a pre-configured phone number.
- Visit Website: A button that directs customers to a website link.
Step 2: Use approved message templates
Once a template is approved, you can send it to customers through 3 main methods on ChatbotX:Method 1: Send via automation flows (Flow Builder)
You can insert utility messages directly into your auto-response or care scripts.1
Create a message block
Go to Flows -> Create or edit a flow -> Create a new block -> Select the Utility Message block type.
2
Select template and map variables
Select the Fanpage in Messenger Channel, then select the approved template from the Messenger Template dropdown list -> Map static values or dynamic custom fields of the contact to fill in the variable placeholders
{{1}}, {{2}}… in the body.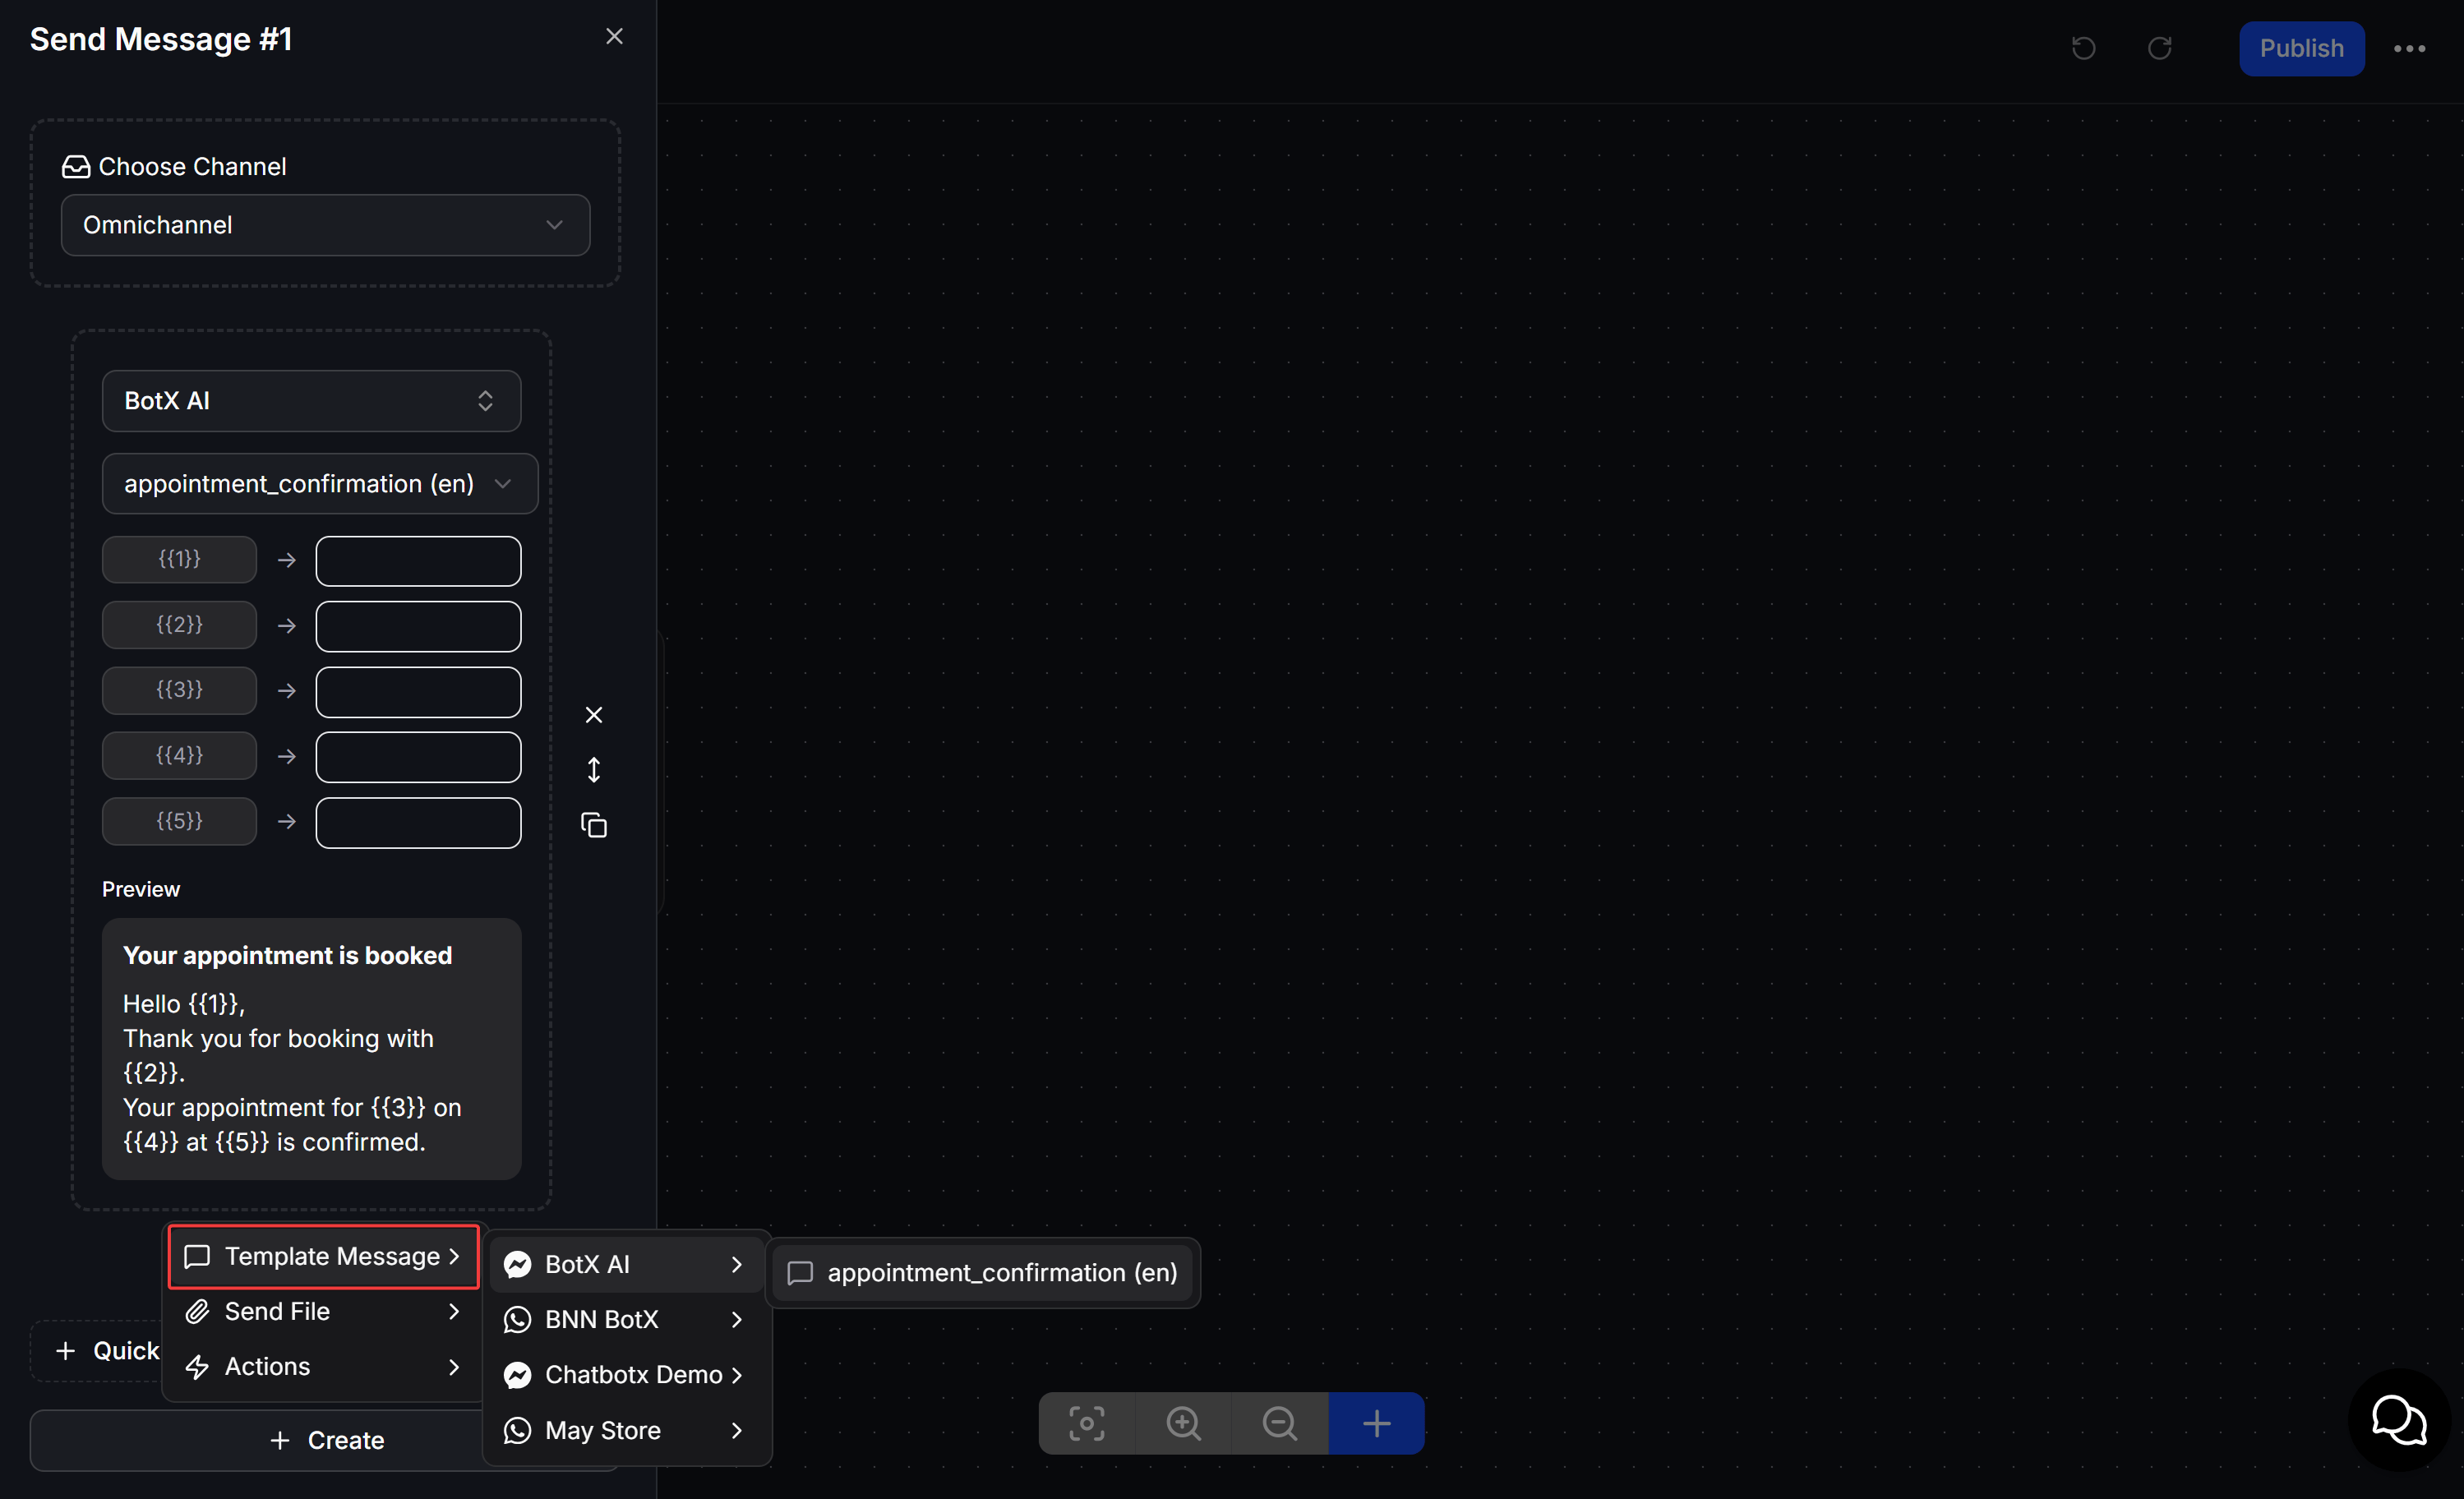
Method 2: Send bulk campaigns (Broadcasts)
Use this method when you need to proactively send bulk messages to a list of contacts outside the 24-hour window.1
Create a Broadcast campaign
Go to Broadcasts -> Click + Create Broadcast -> Select Messenger -> Select the Template Message option -> Click Continue.
2
Configure template message campaign
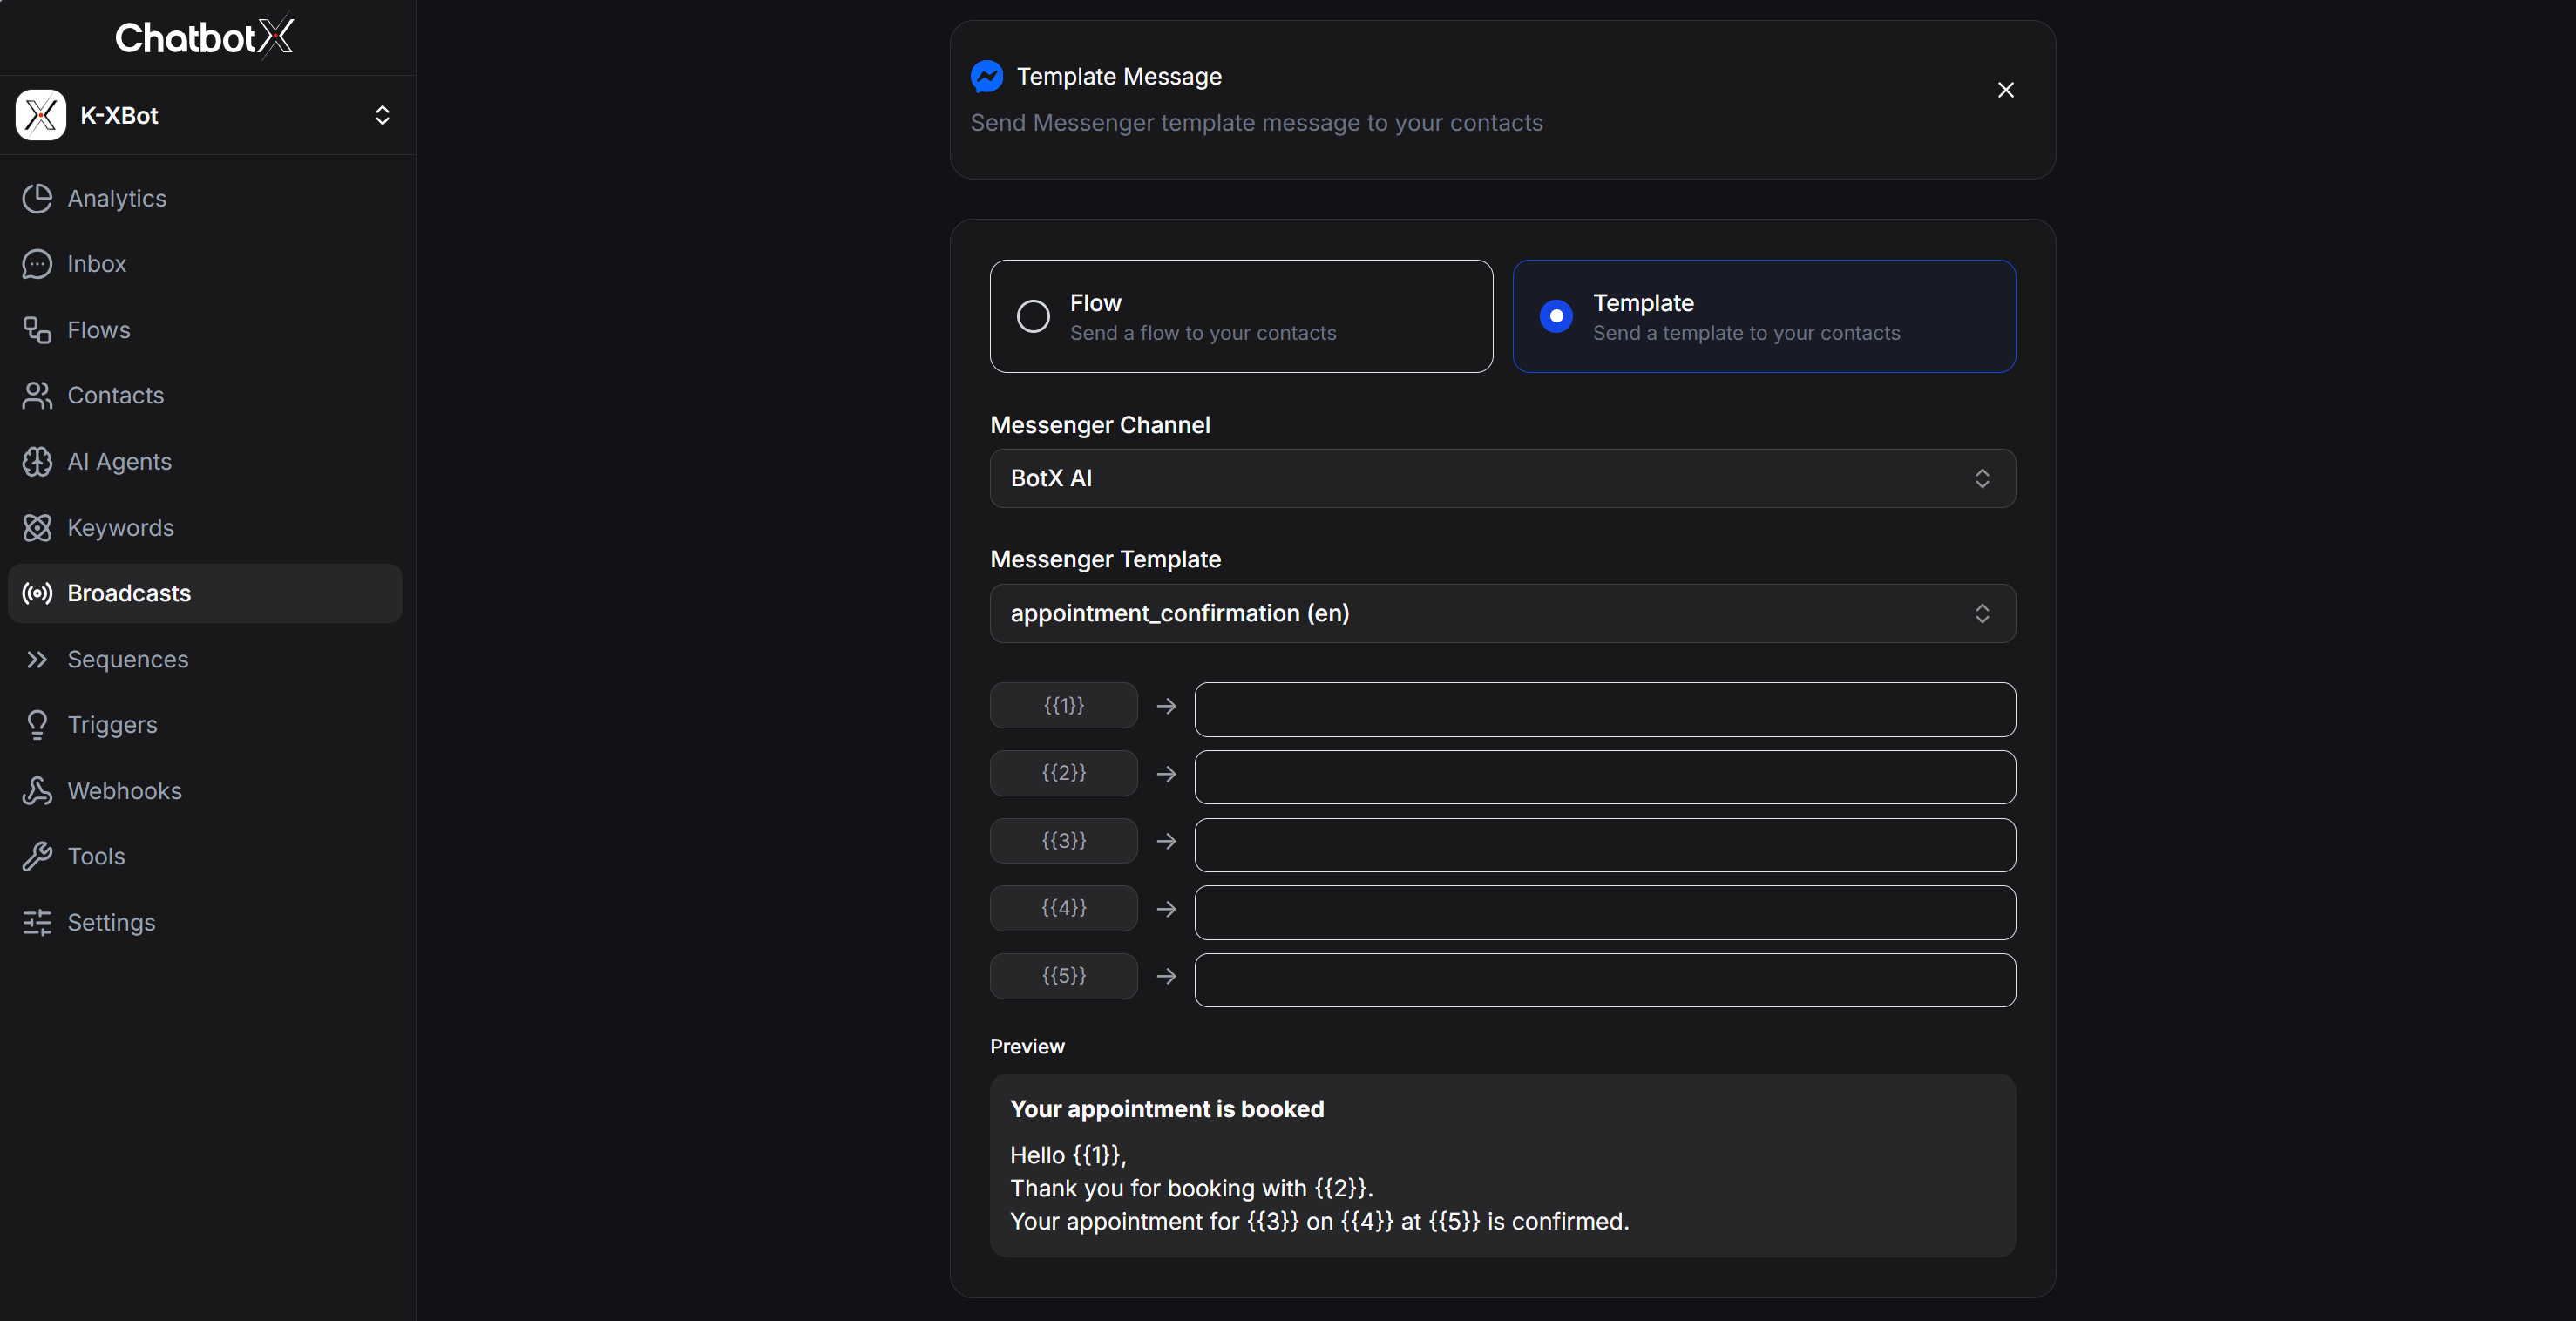
Select the Template option (“Send a template to your contacts”) -> Select the corresponding Fanpage in Messenger Channel -> Select the approved utility template in Messenger Template.
3
Map variables and send
Map the template variables to the contact’s custom fields -> Check the actual message layout in the Preview section -> Set up the contact filter and schedule the sending time (Schedule) -> Click Confirm to send.
Method 3: Send automatically via care sequences (Sequences)
Use this method to send automated reminder messages on a scheduled timeline (e.g., sending after 1 day, 3 days…).1
Create a new care sequence
Go to Sequences in the left sidebar menu (right below the Broadcasts item) -> Click + Create Sequence -> Enter the name and create.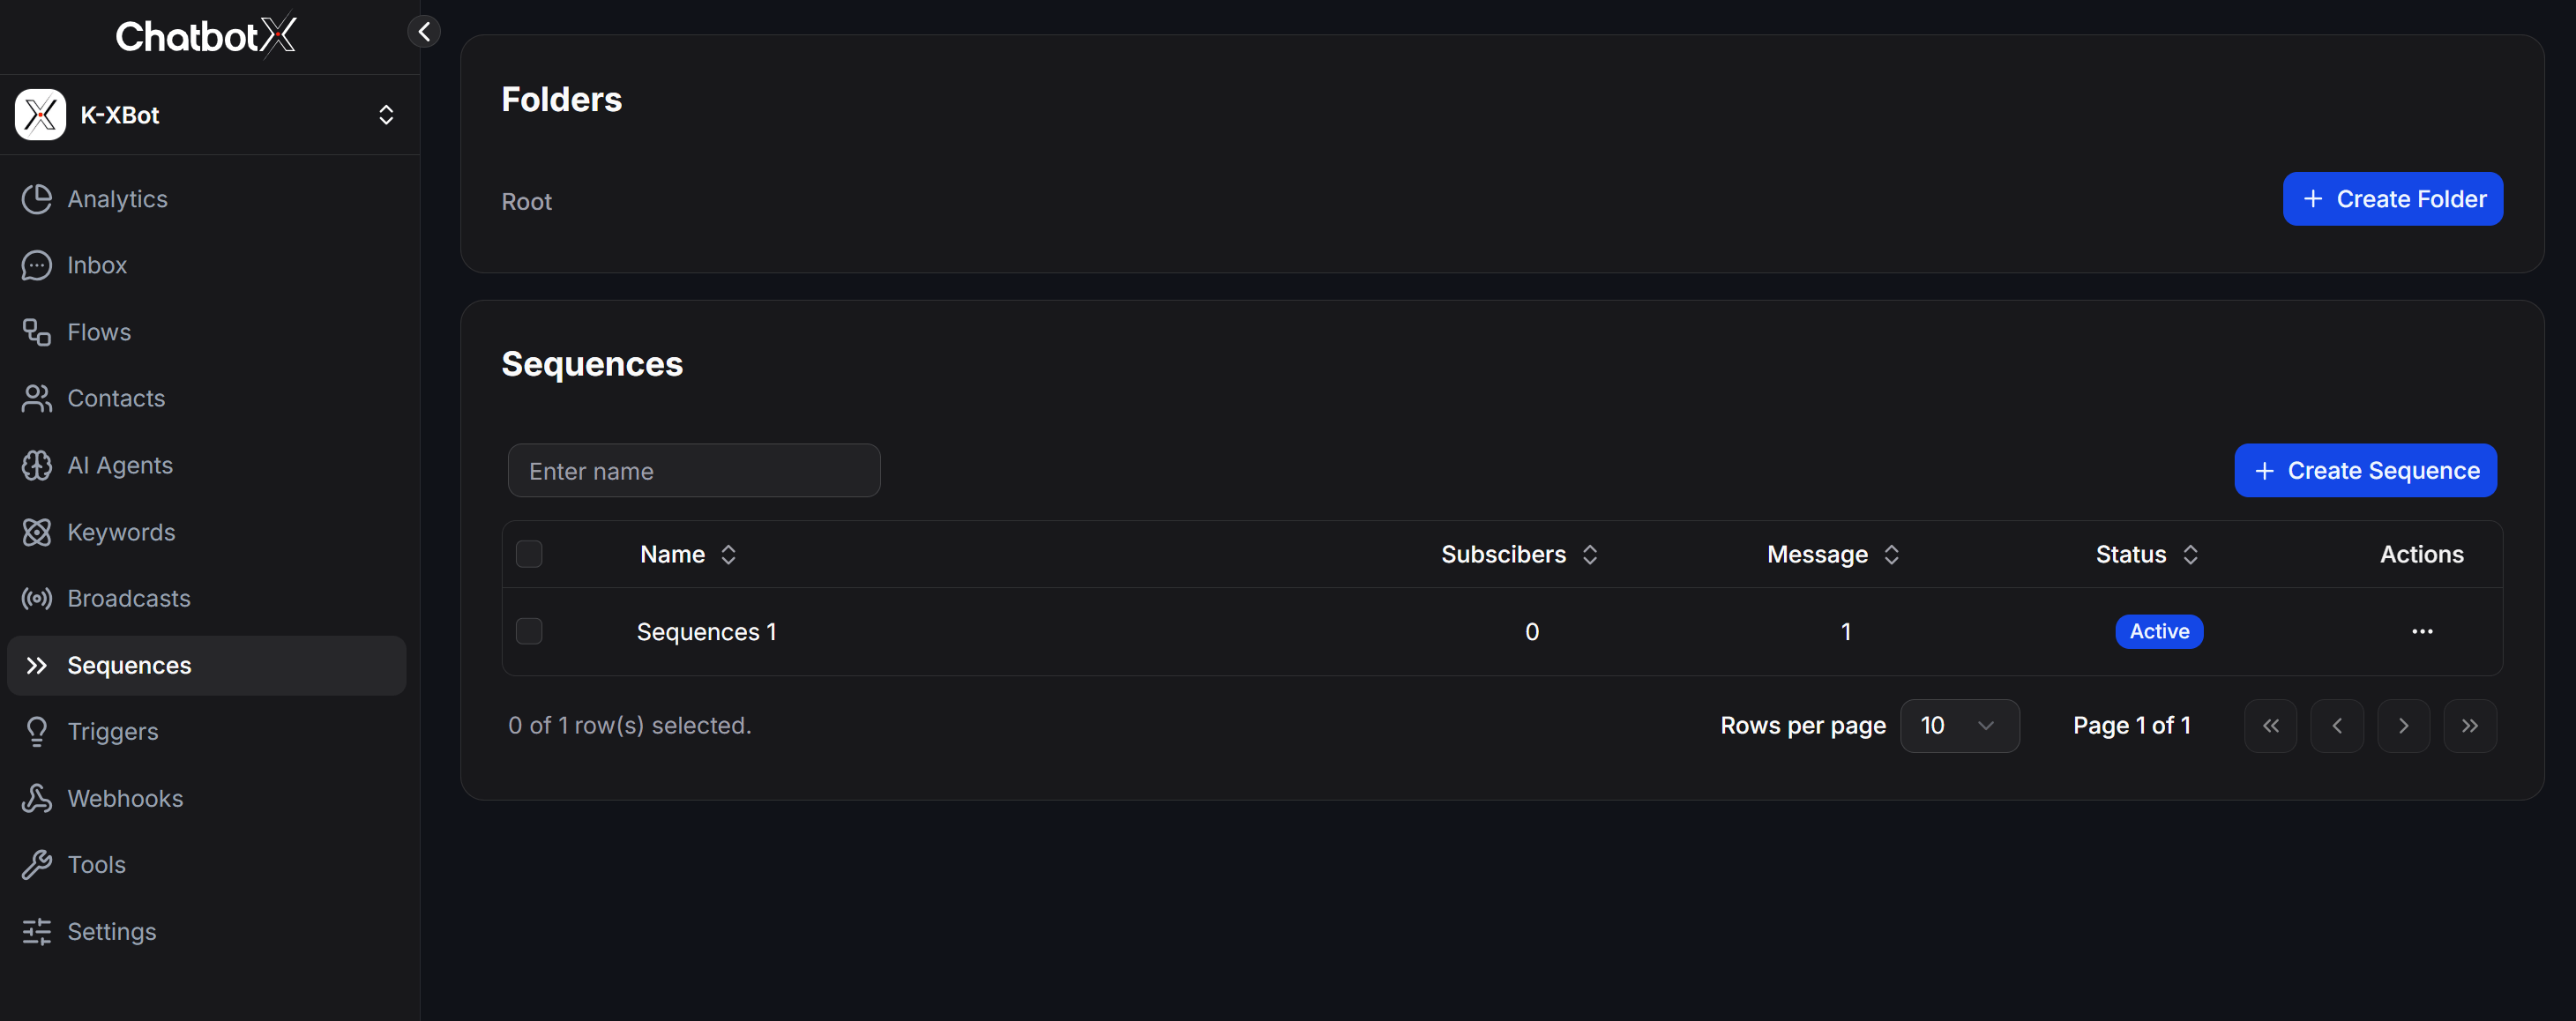
2
Add message to sequence
Click + Add Message -> Choose the sending type: Flow (select the flow containing the Utility Message block configured in Method 1) or Template (directly choose the approved utility template and map its variables) -> Set the delay time (e.g., send after 1 day at 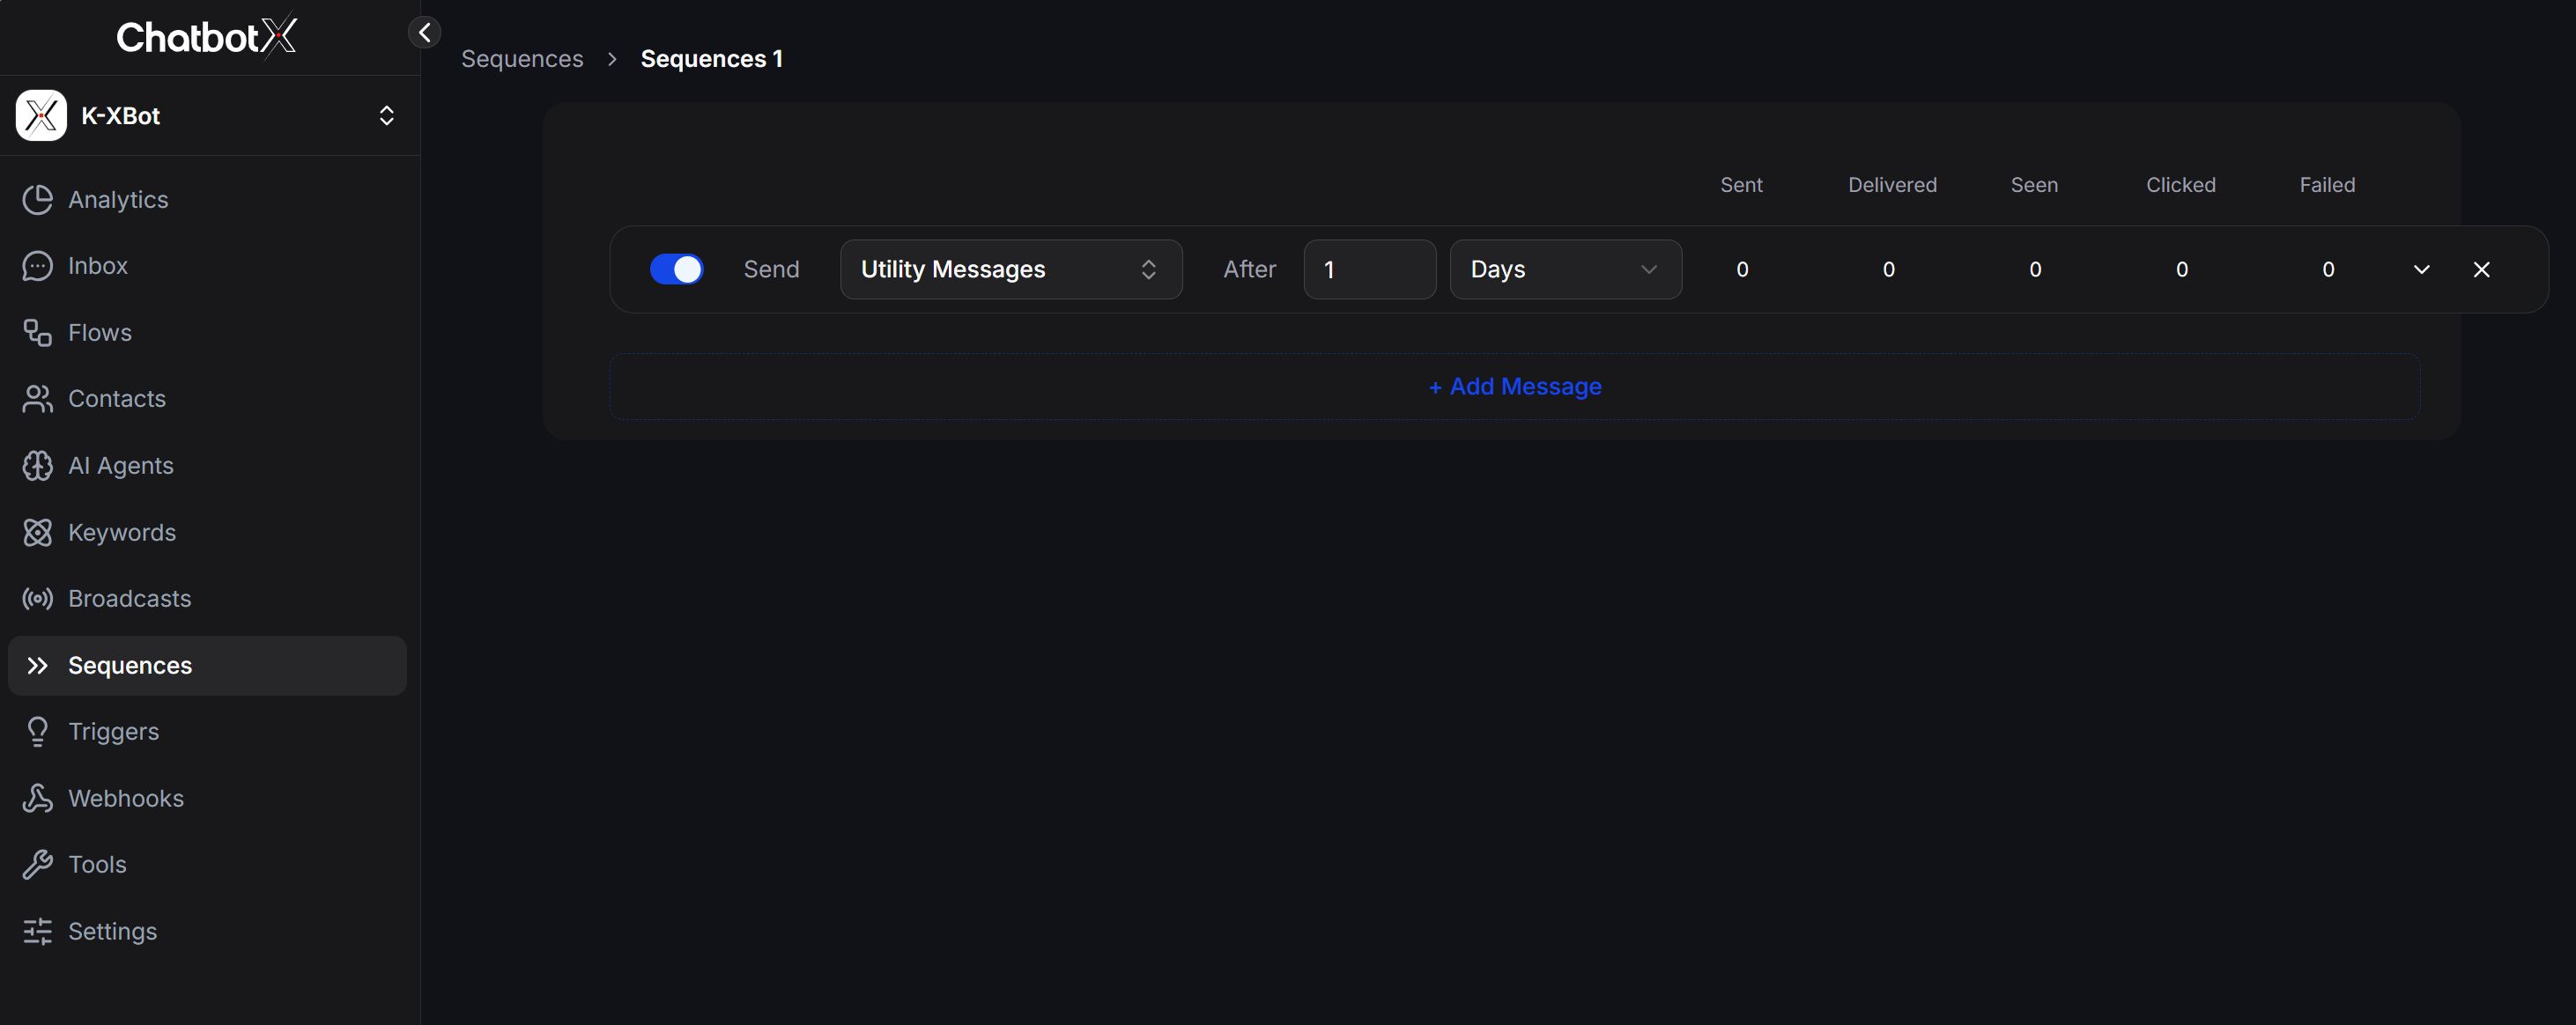
After 1 Days).Use Case Example:
- Context: After a customer successfully books an appointment on the Bot, the system automatically subscribes them to the care sequence
Sequences 1. - Operation: Exactly 1 day later (After 1 Days), the care sequence will trigger and automatically send the appointment reminder utility template (
appointment_confirmation) configured in the step above to notify the customer about their appointment details, even if the customer is outside the 24-hour interaction window.