Prerequisites
Before you connect Zalo OA, make sure these requirements are met:- Verified Zalo OA: Your Zalo Official Account must be verified by Zalo and show the yellow badge.
- Admin access: Your personal Zalo account must have Admin permission on the Official Account you want to connect.
Connect Zalo OA
You can start the connection in either of these ways:Method 1: From the Create Inbox flow
Open Analytics and click + Create Inbox
In your ChatbotX workspace, choose Analytics from the left menu, then click the + Create Inbox button.
Select Zalo OA and click Continue
Select Zalo OA from the channel list in the modal, then click Continue to proceed to the authorization page.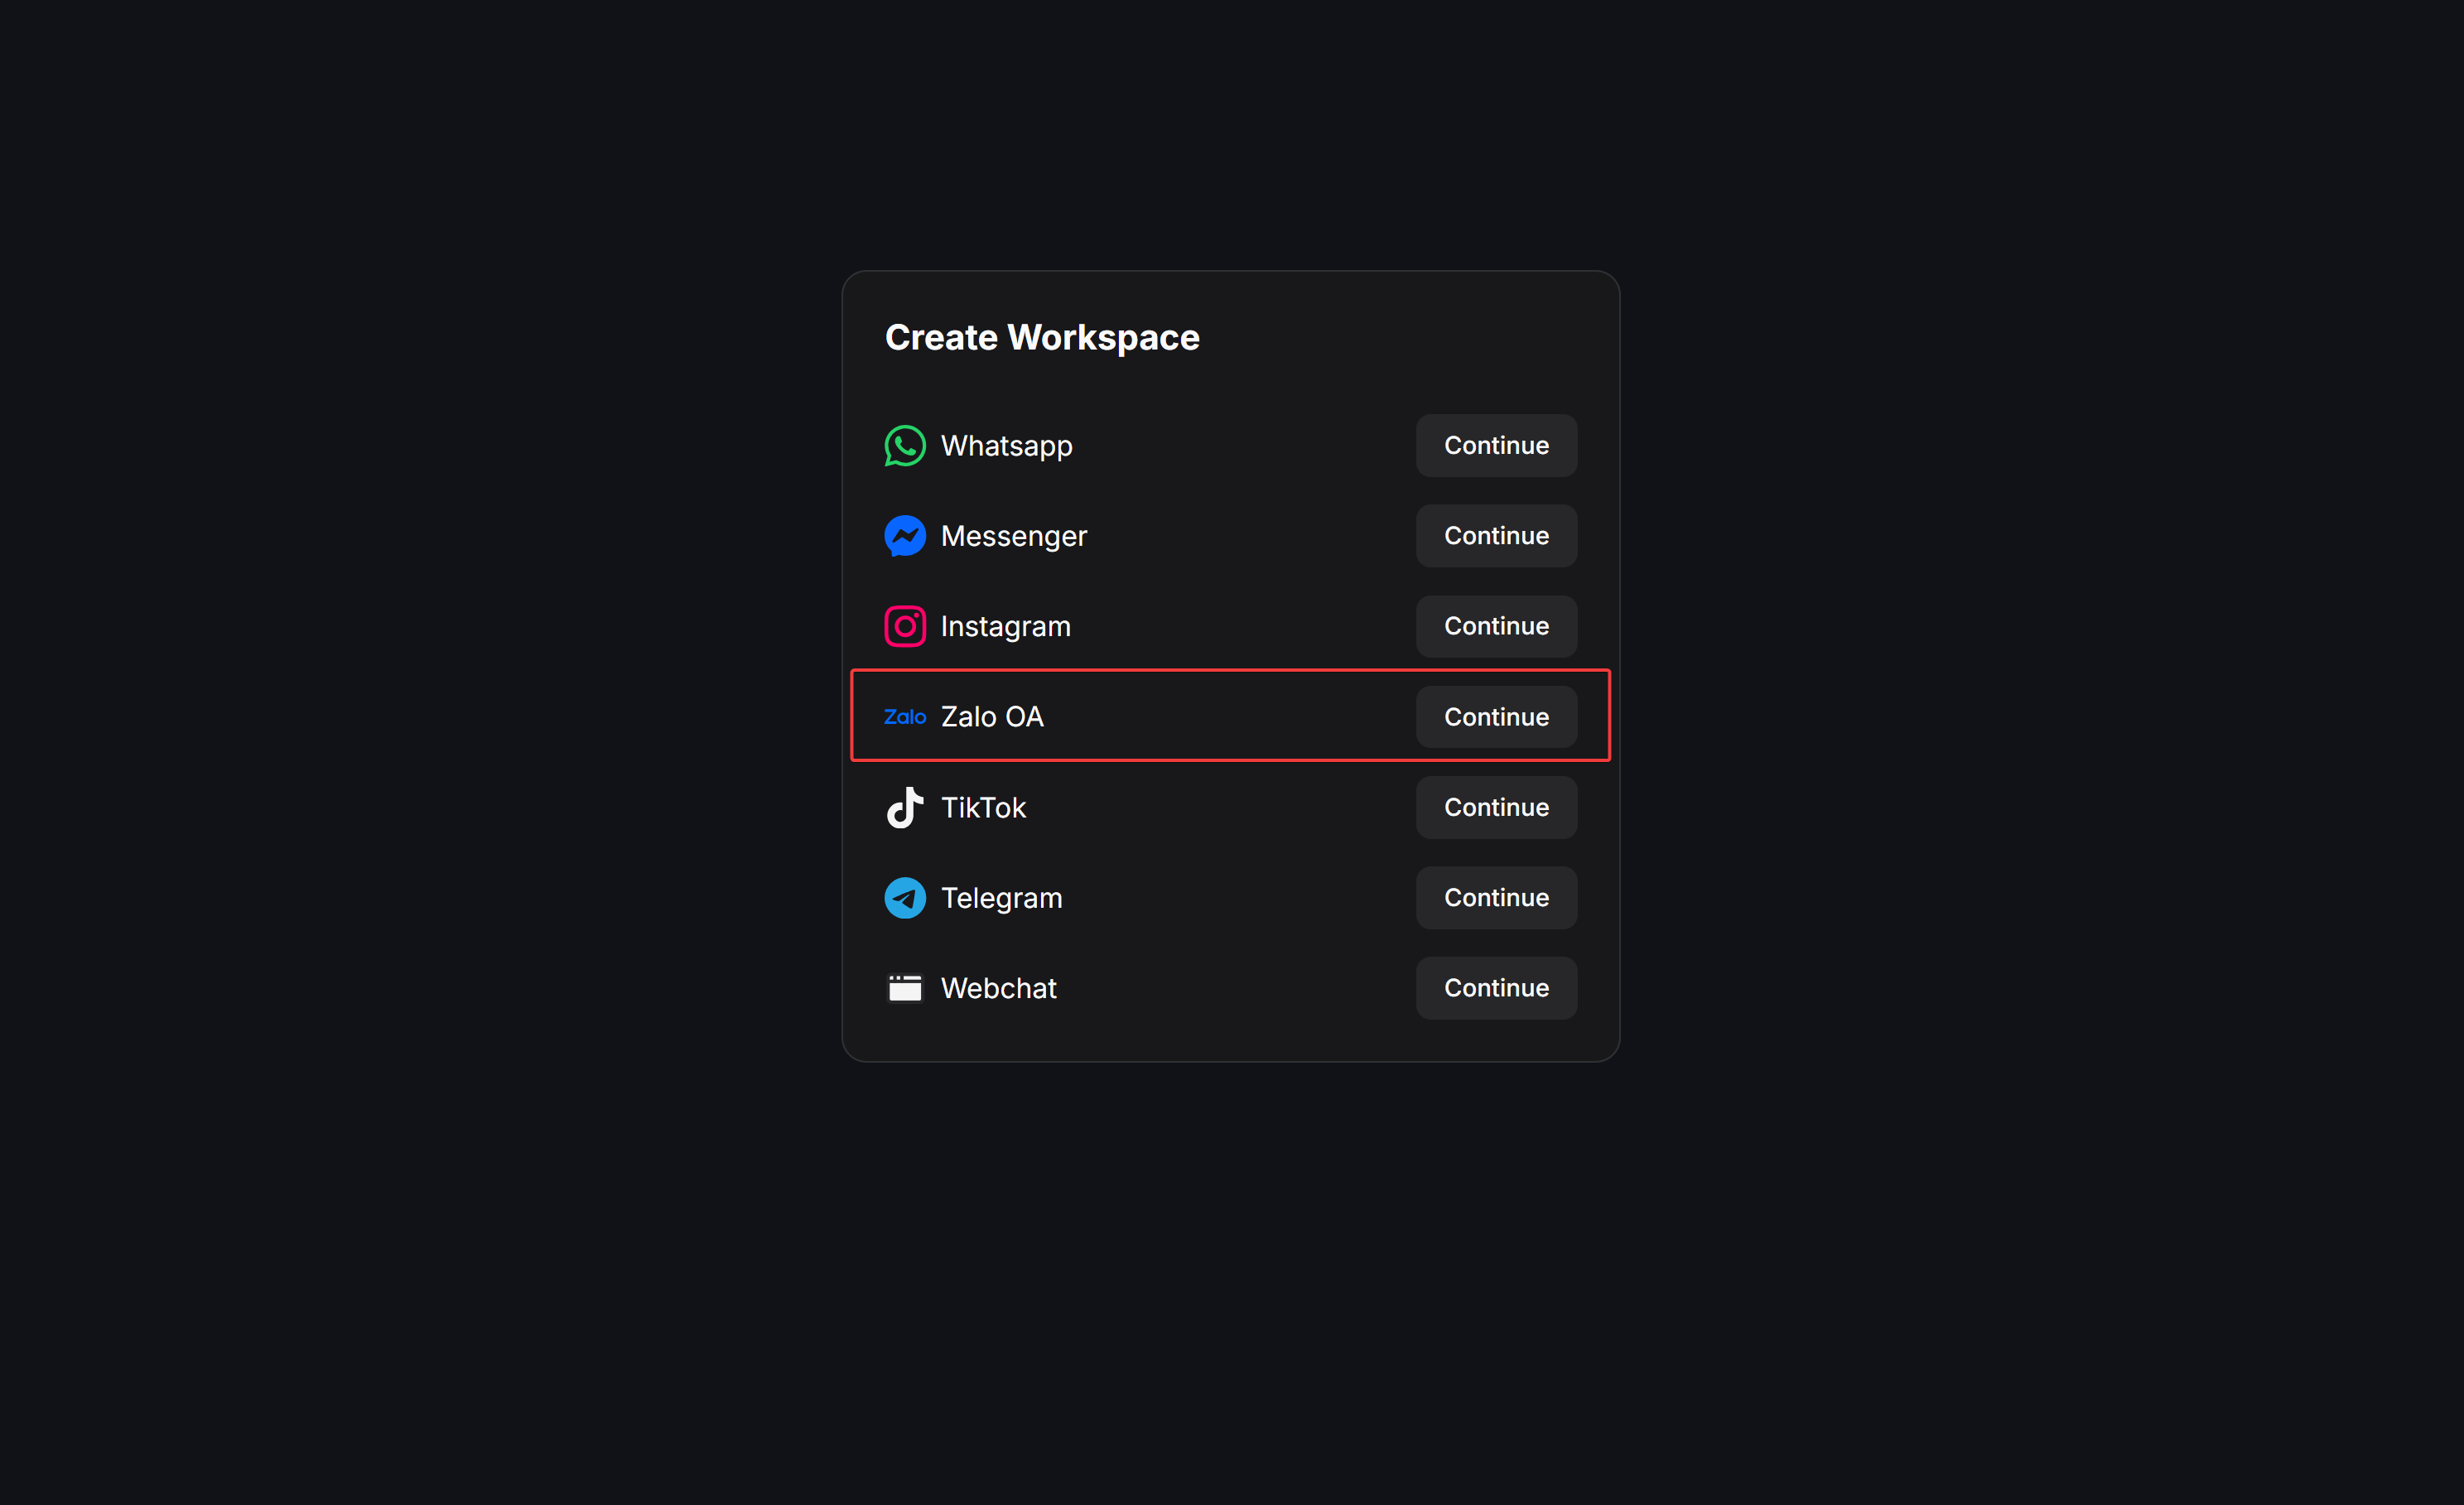
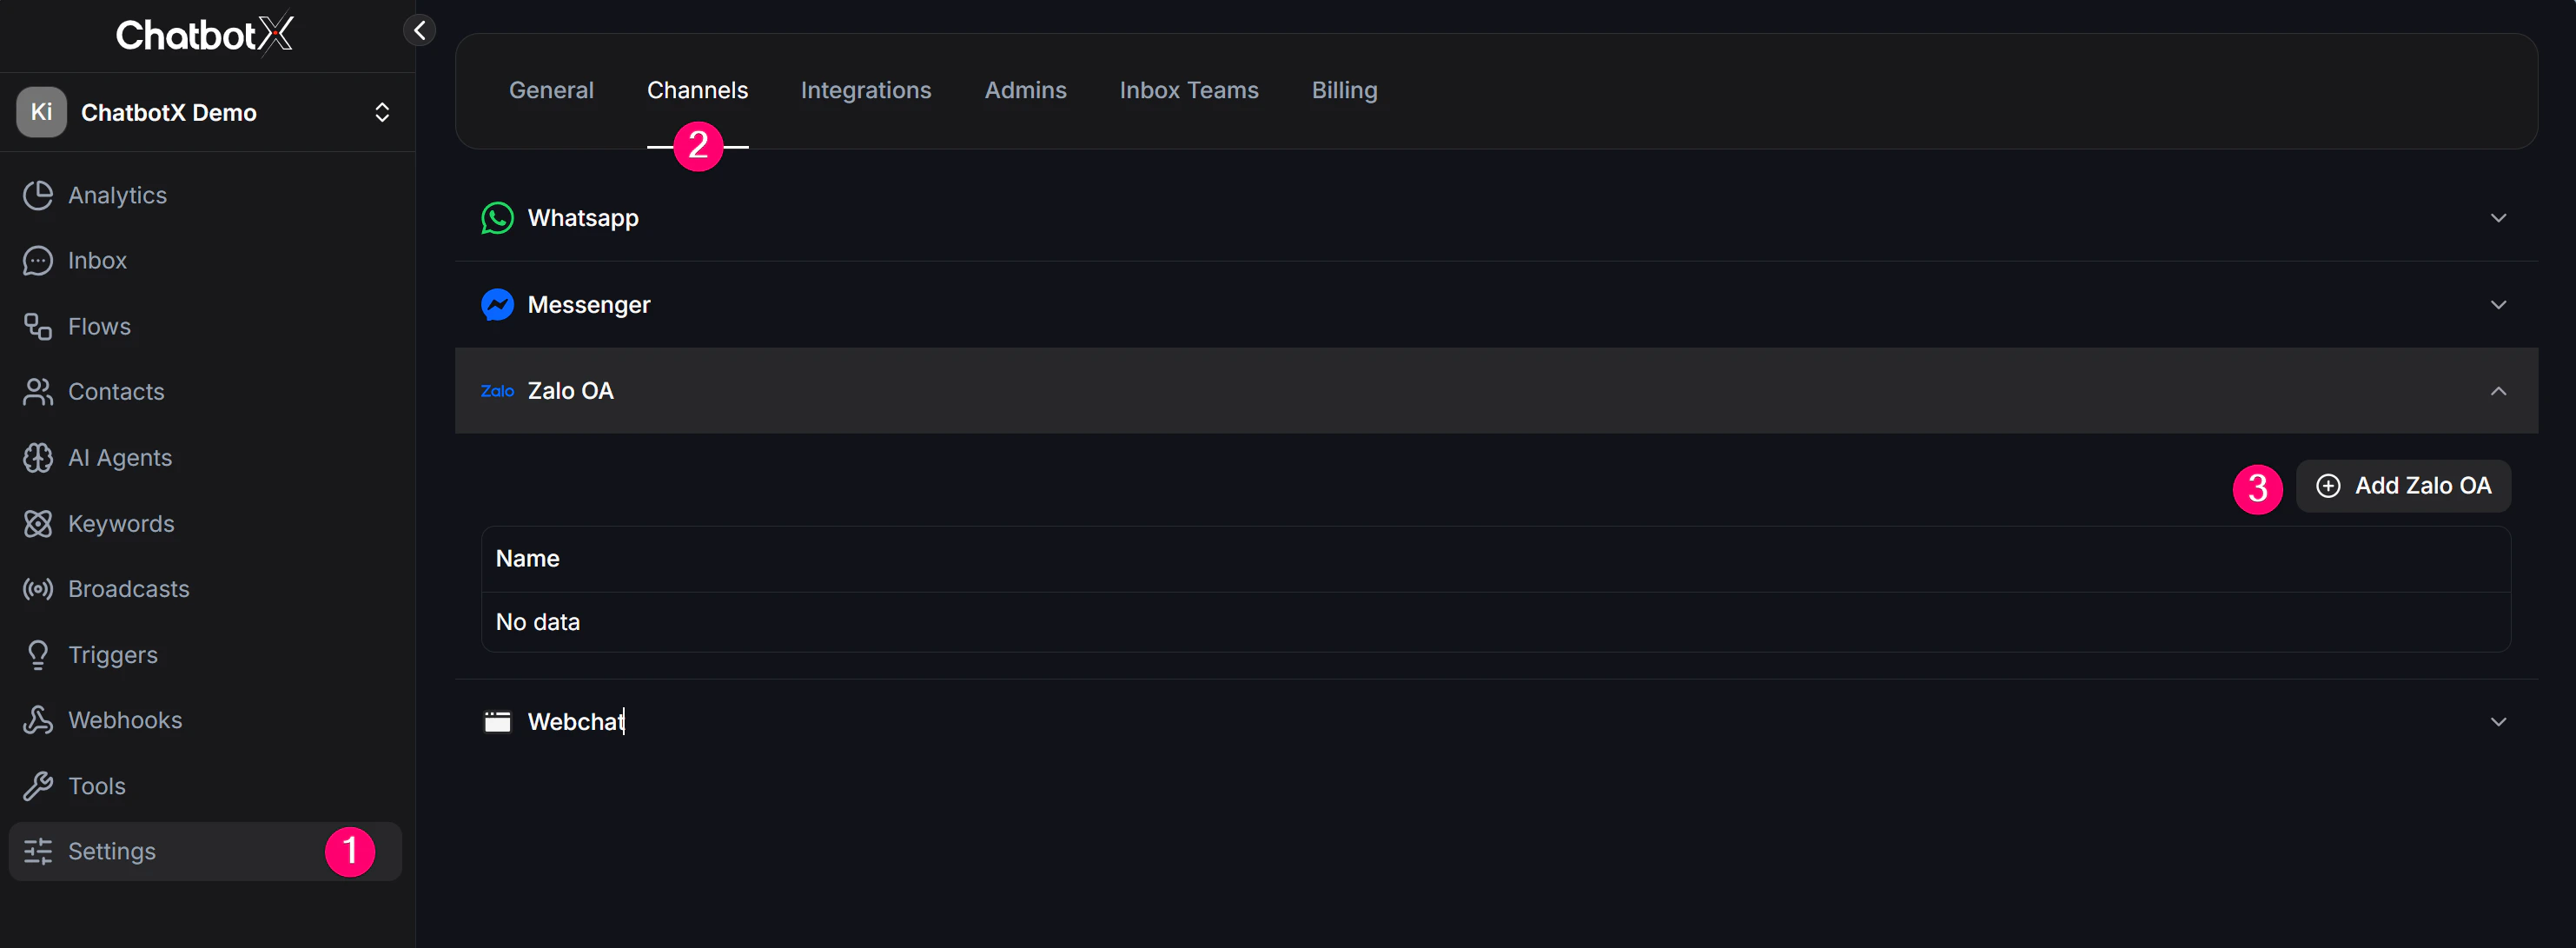
Method 2: From Channels management
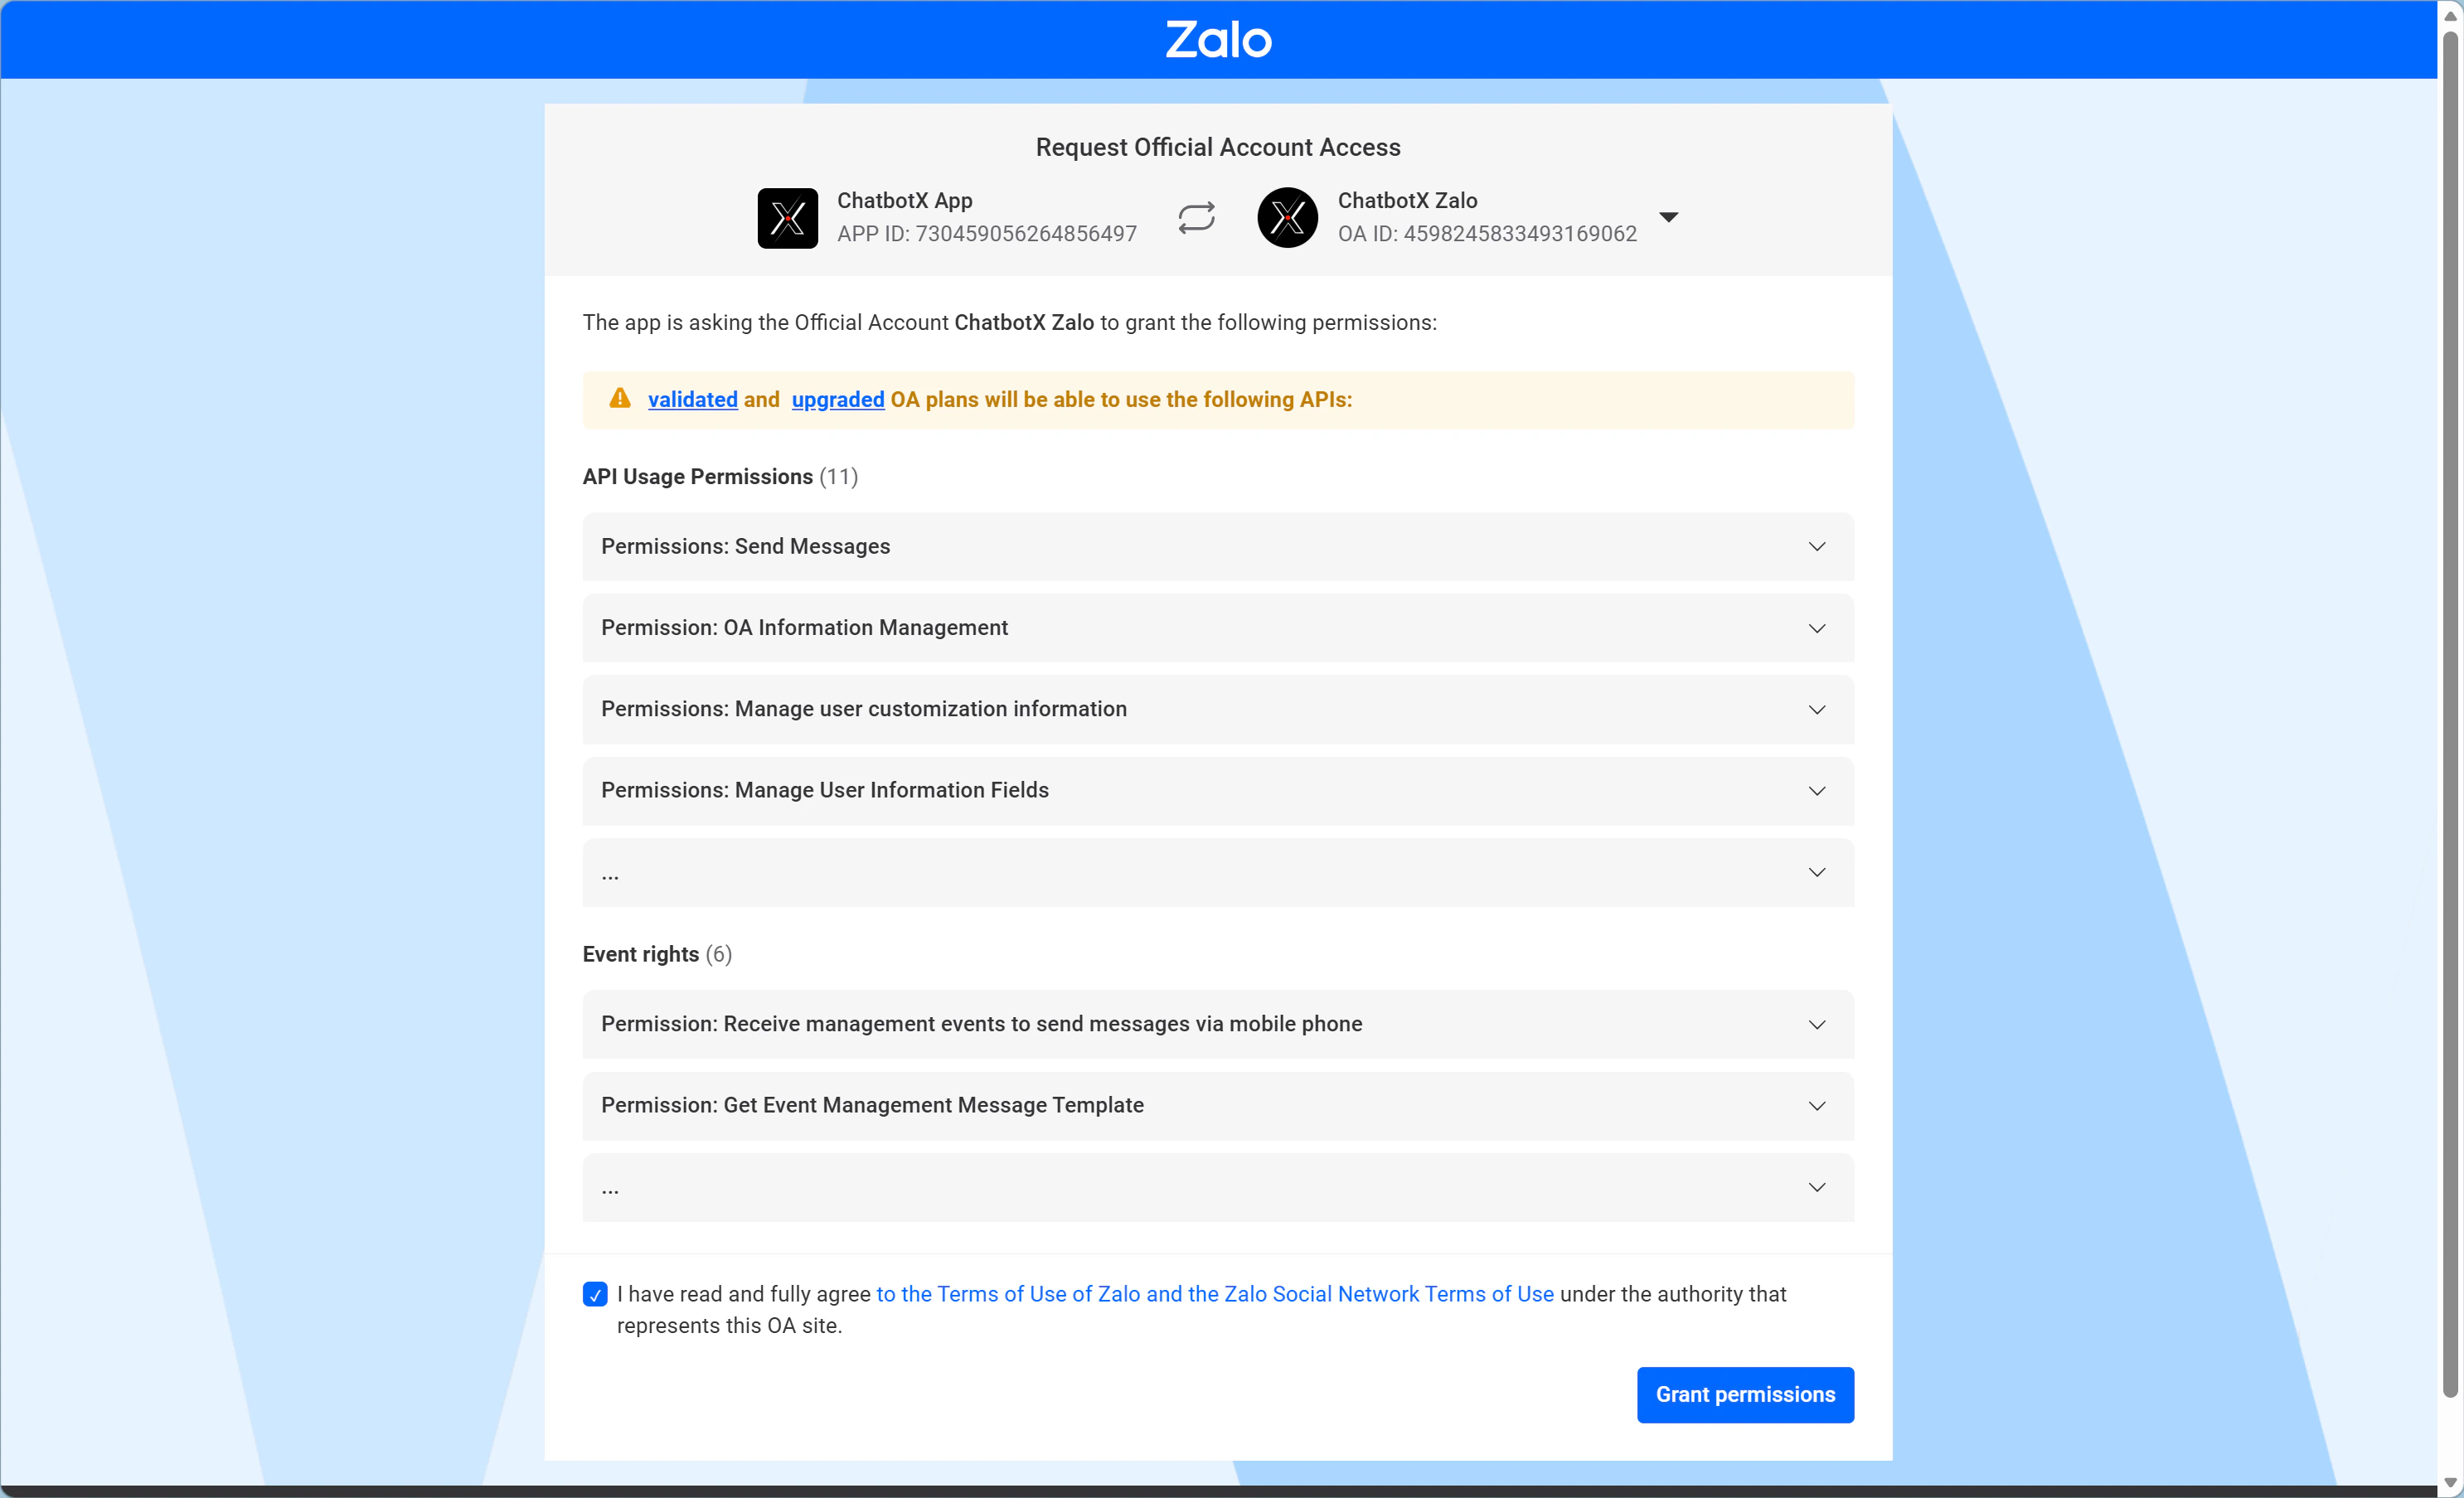
Return to ChatbotX
After the authentication succeeds, you will be redirected back to ChatbotX. There, the list of Zalo OA pages you authorized will appear. Check the Zalo OA you just approved and confirm that the channel now appears in ChatbotX.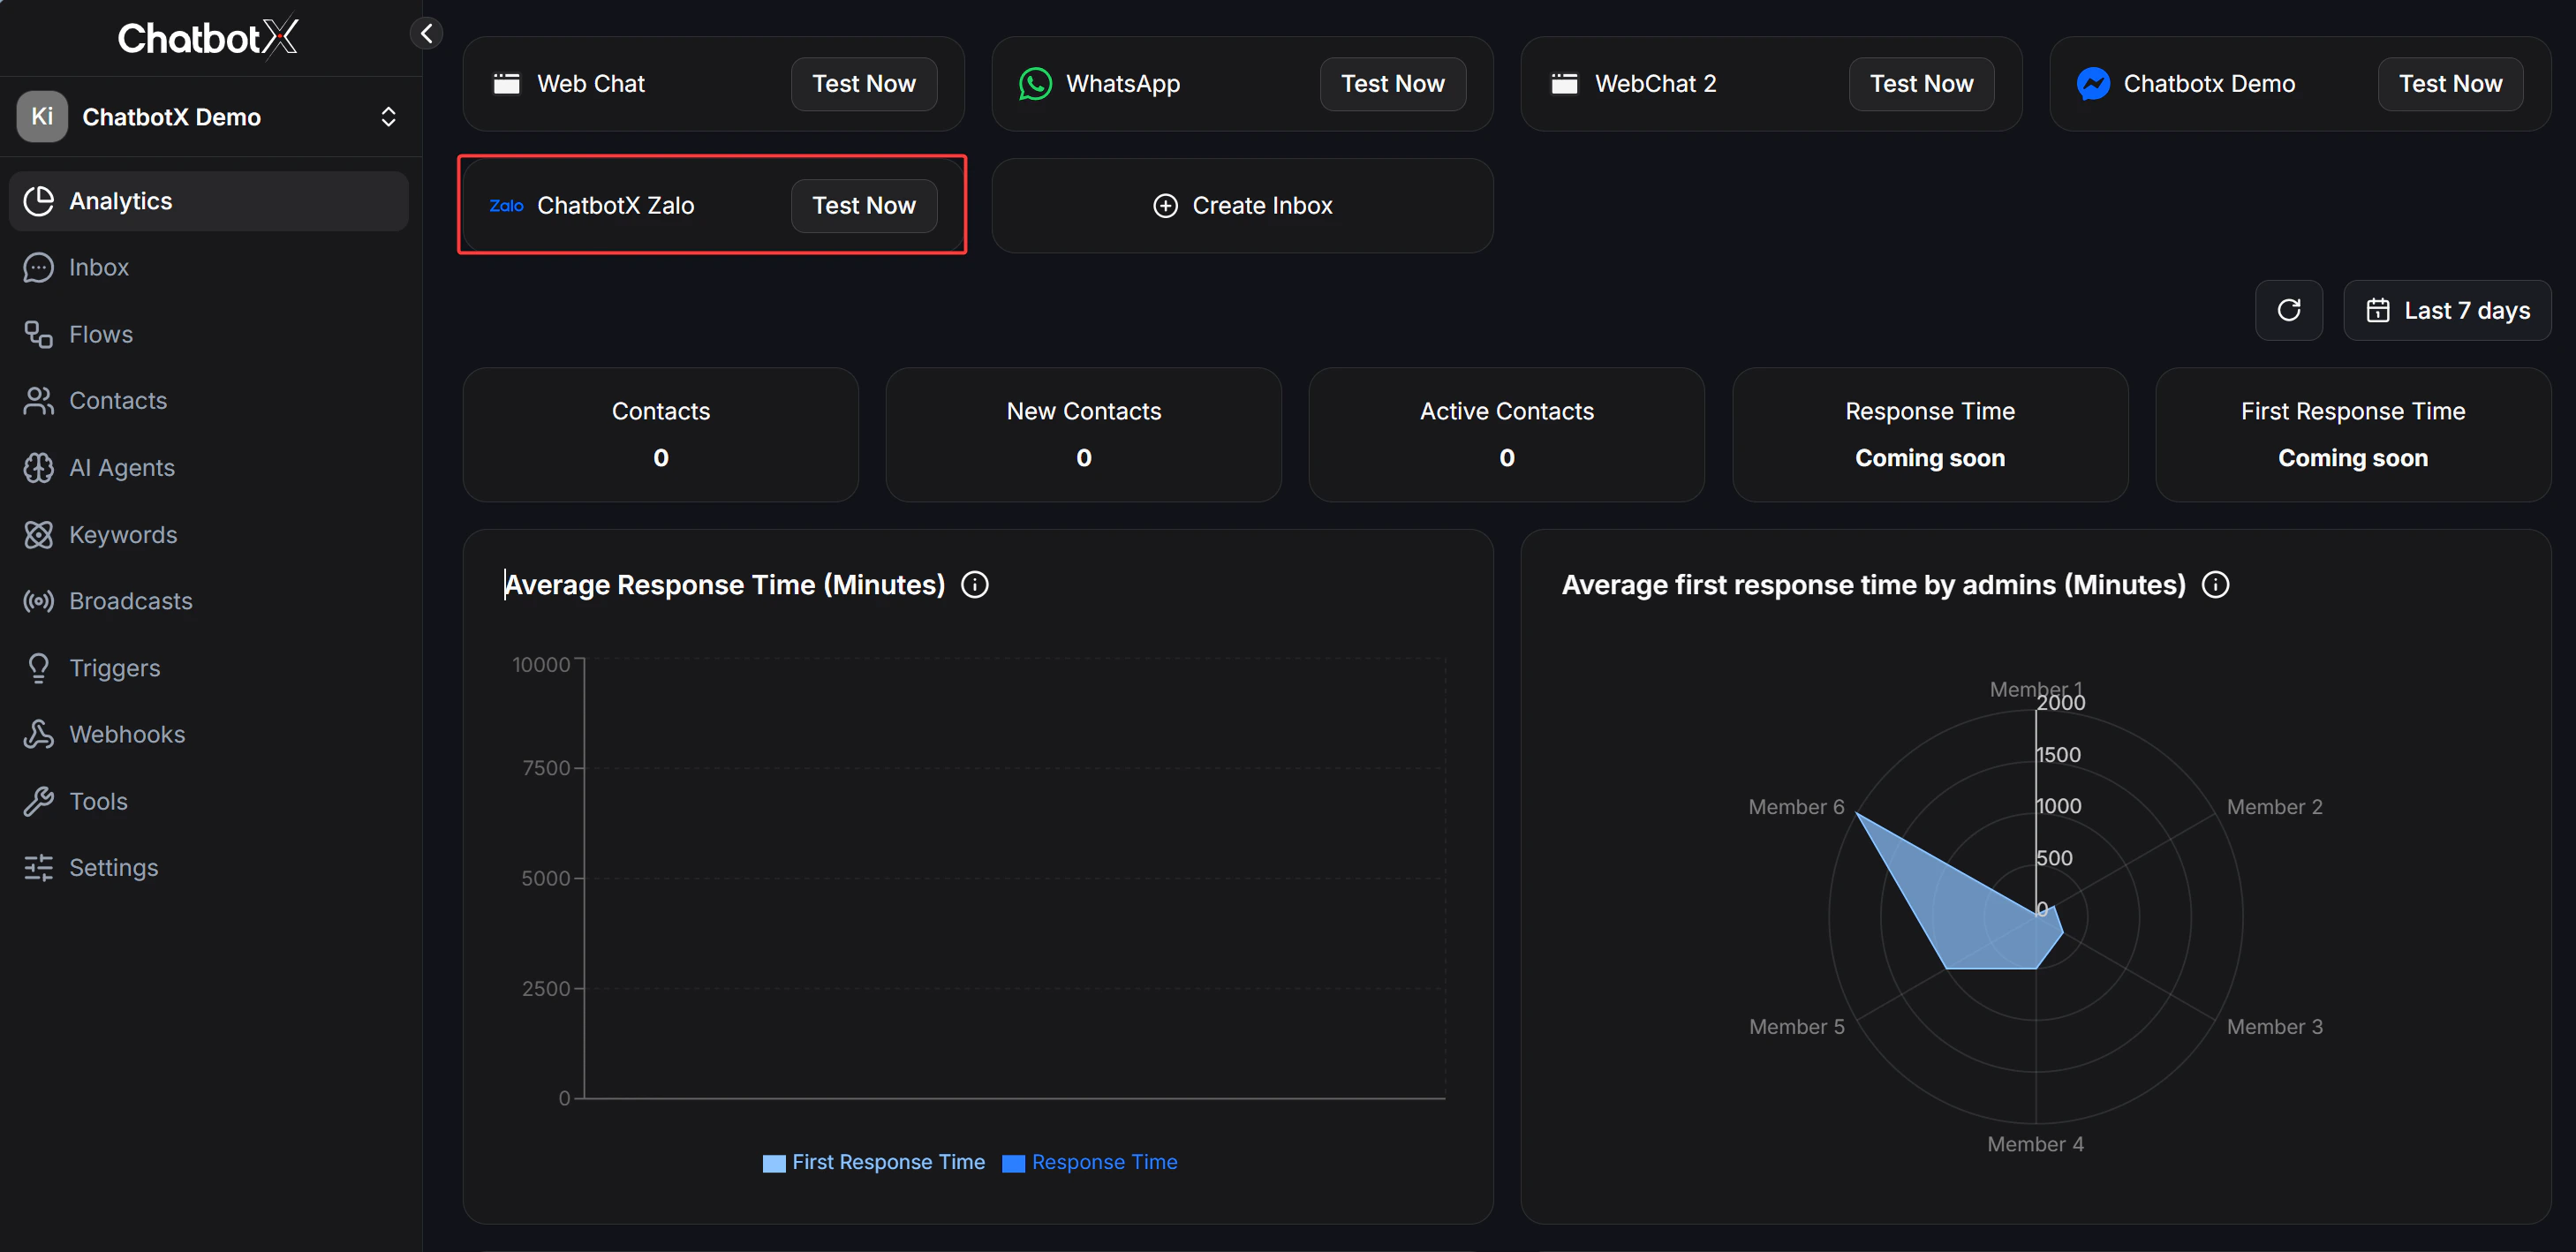
Finalize and check
When the setup is complete, your Zalo OA will be active on the ChatbotX dashboard. Go to Channels or Inbox to confirm that Zalo OA is connected. Then send a test message from a personal Zalo account to check whether the conversation arrives in ChatbotX. The Zalo interface and most automation features are similar to channels like Messenger. That said, the current Zalo API does not support some UI elements, such as Buttons inside Cards or Quick Replies.Test your automation
Now that Zalo OA is connected, you can start automating conversations.- Option 1: Create a Flow
- Open Flows from the sidebar.
- Build a simple welcome message.
- Send a message to your Zalo OA from a personal Zalo account and check the reply.
- Option 2: Set up an AI Agent
- Open AI Agent and configure the tone and knowledge base for the assistant.
- Assign that AI Agent to your Zalo OA channel so it can answer incoming questions automatically.