

When to use Automatic Customer Scan
This feature is particularly valuable when:- Connecting a new Facebook Page or Instagram account: Easily bring over past customers who interacted before connecting to ChatbotX.
- Preparing Remarketing campaigns: Re-engage past contacts with omnichannel broadcasts or automated follow-up sequences.
- Saving time on manual data entry: Eliminate tedious exports and imports by letting the system fetch conversations directly in the background.
How to run an Automatic Customer Scan
Follow these steps to scan contacts from an inbox channel:1
Open Contacts
From the left sidebar navigation, select Contacts to access the contact management dashboard.
2
Select Automatic Customer Scan
Click the Actions dropdown in the top-right corner, hover over Import, and select Automatic Customer Scan.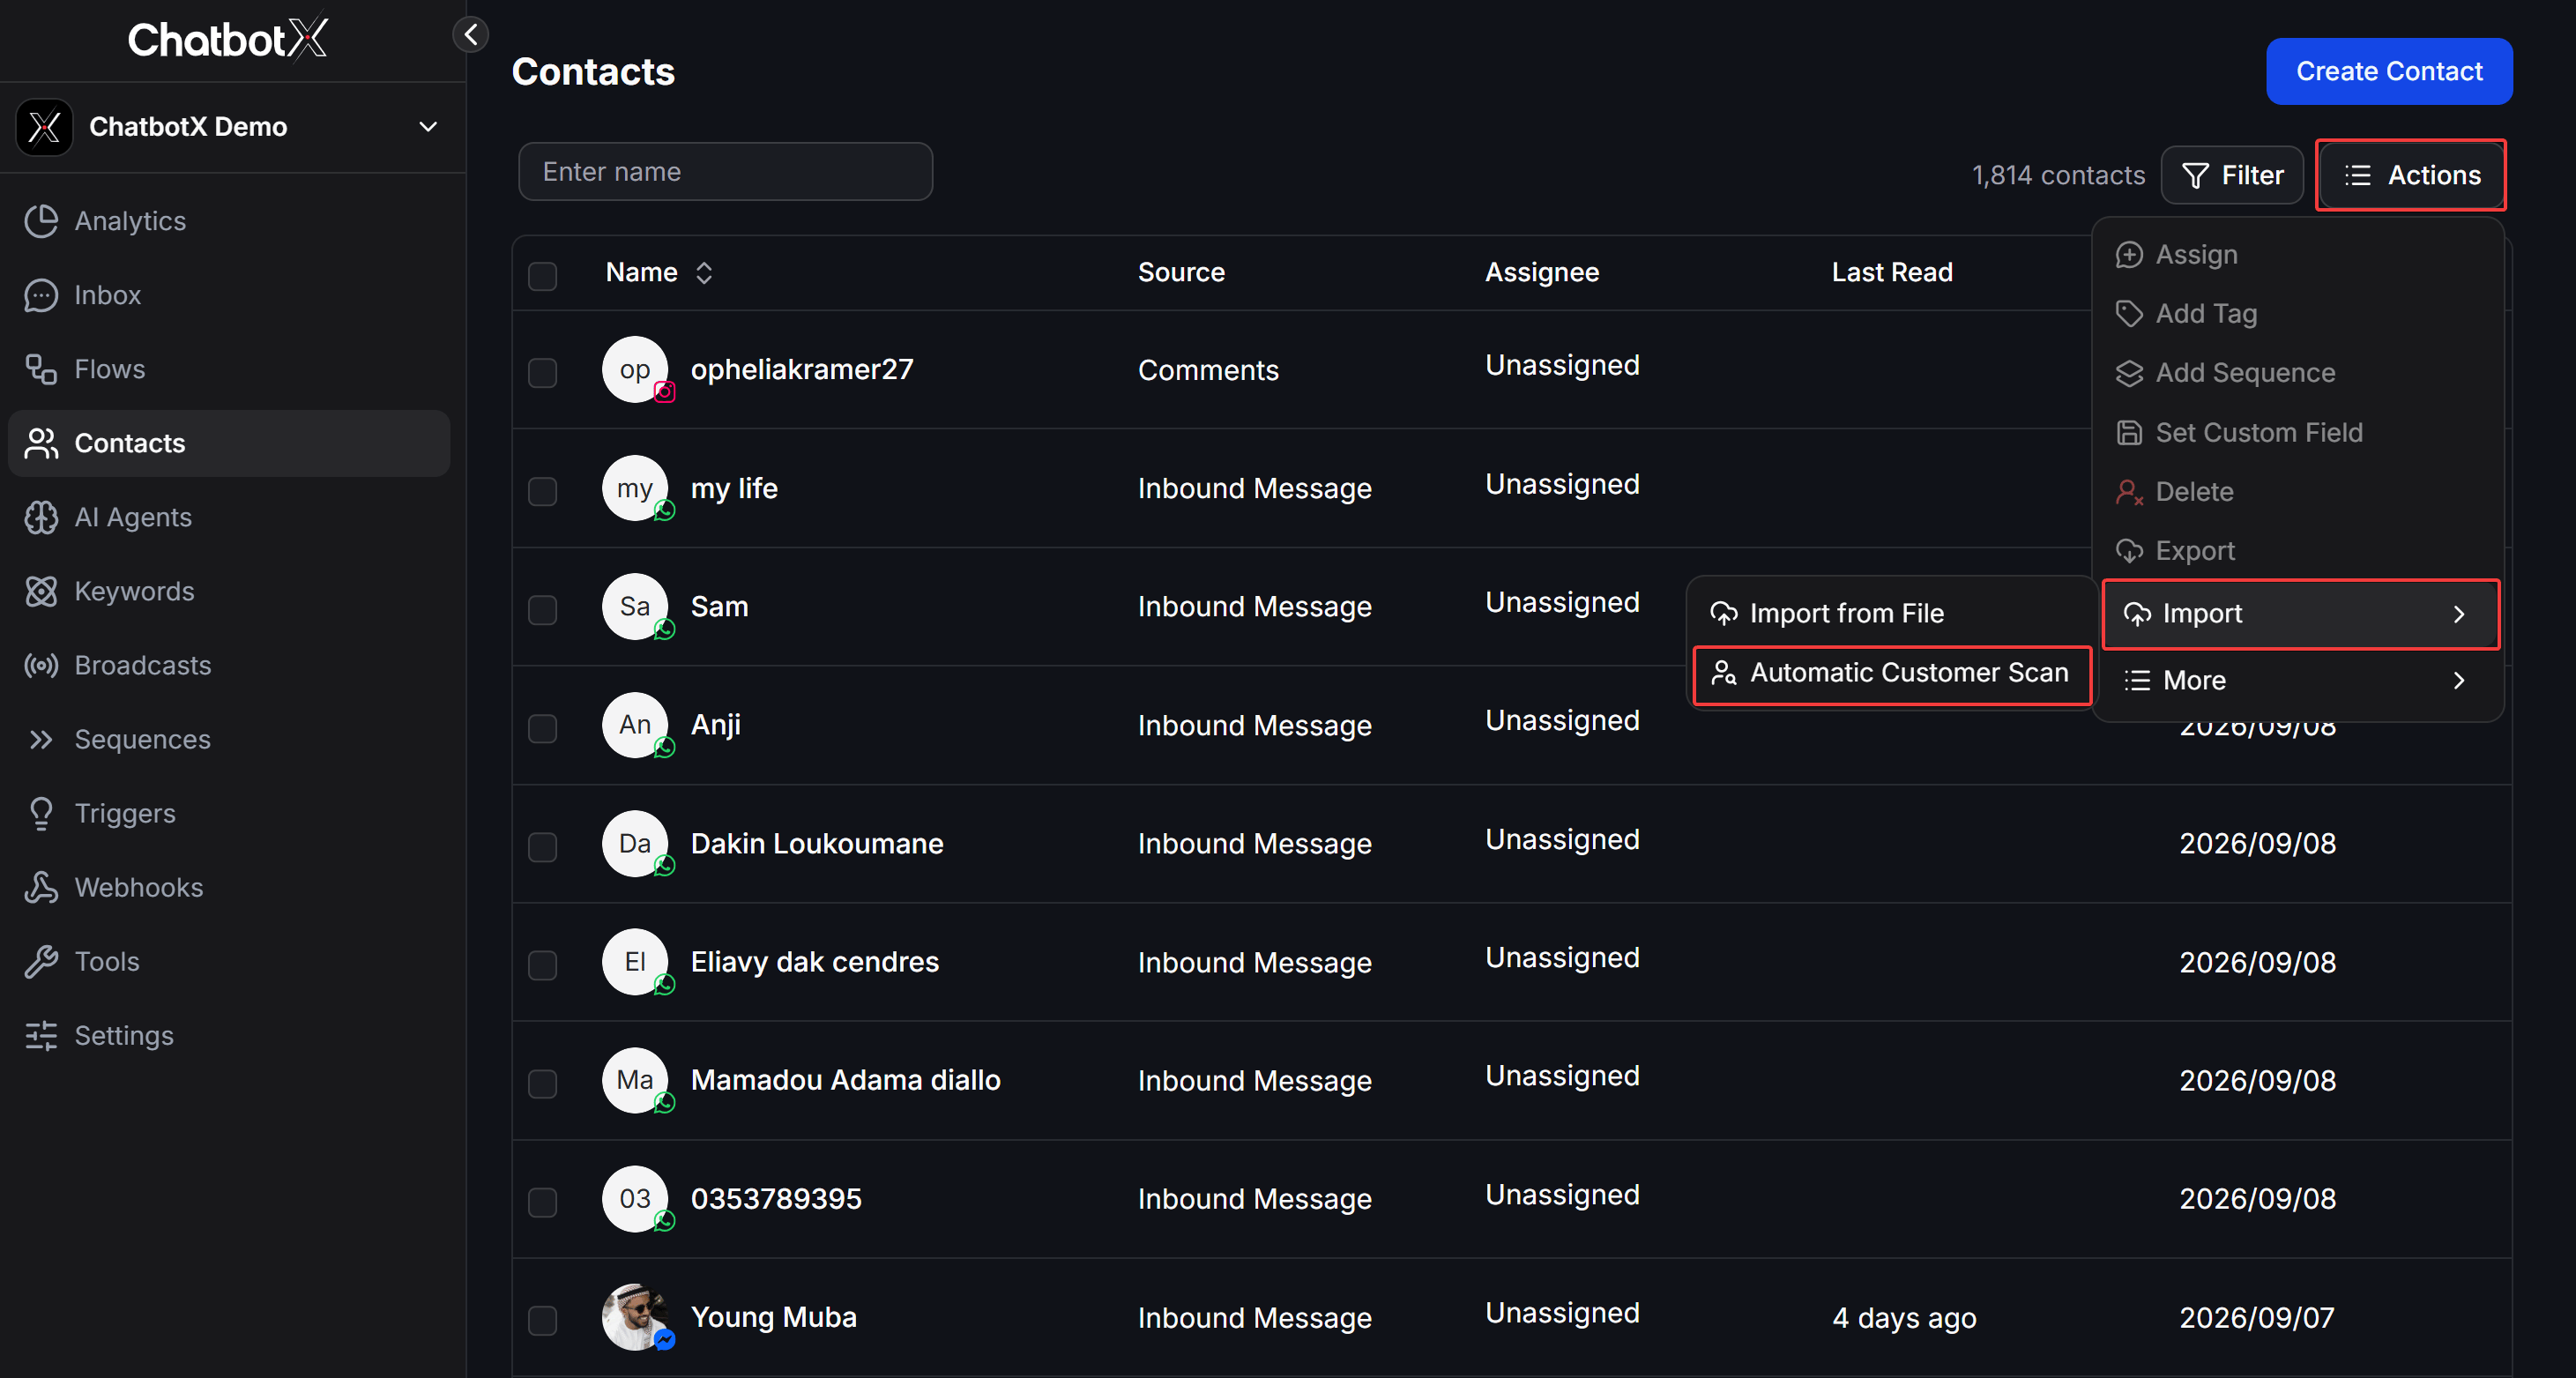
3
Configure scan parameters
In the configuration modal, choose your connected channel under Inbox and pick a start date and time under Scan Inbox from Time.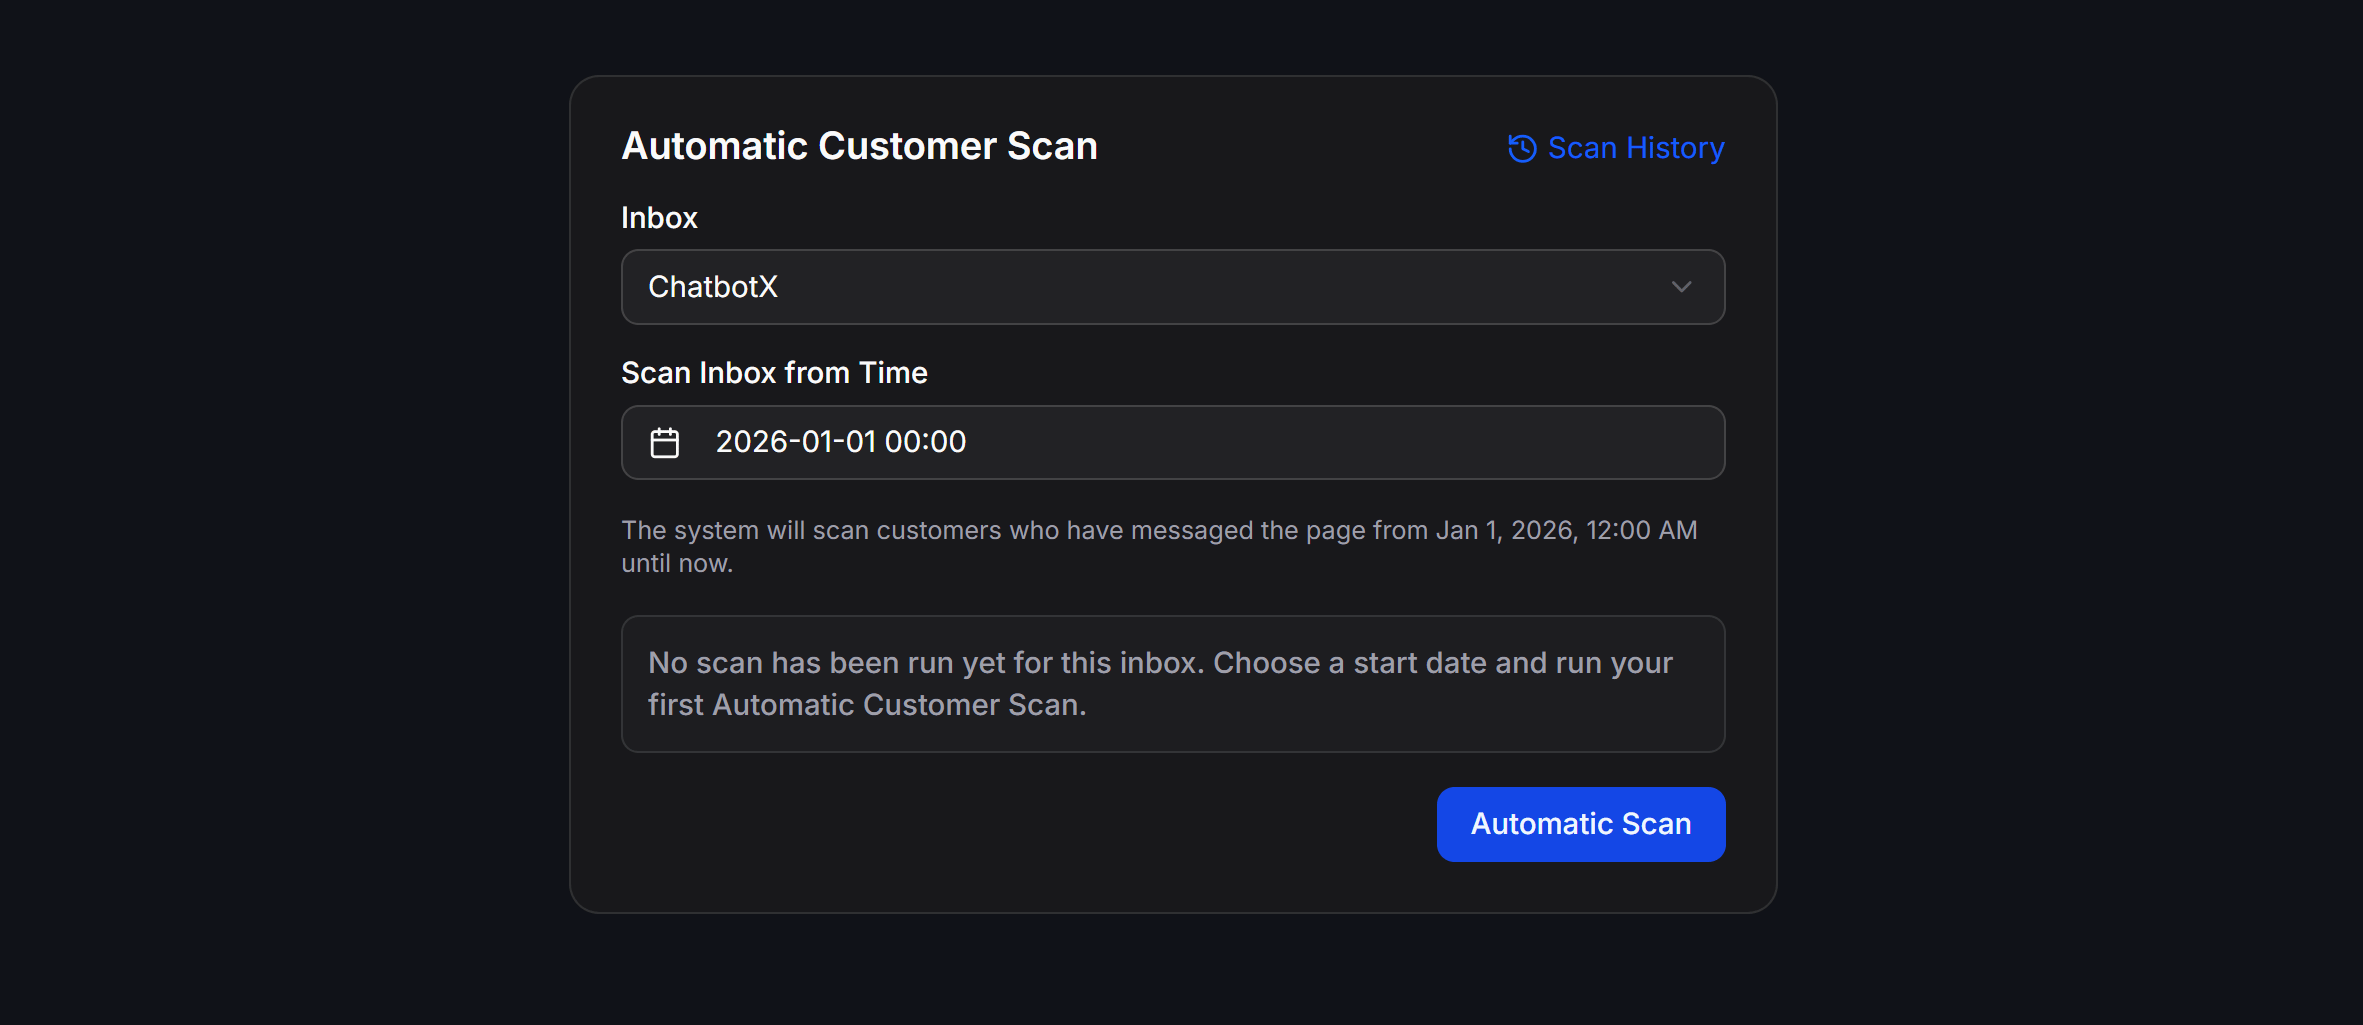
4
Start scan
Click the Automatic Scan button to launch the scanning process.
Scan Modal Fields
The Automatic Customer Scan modal includes the following settings:Scanning channels with large message volumes over extensive date ranges may take anywhere from a few minutes to several dozen minutes. The task runs completely in the background.
Track Progress in Scan History
After initiating a scan, you can monitor its status and results by clicking Scan History in the top-right corner of the scan modal.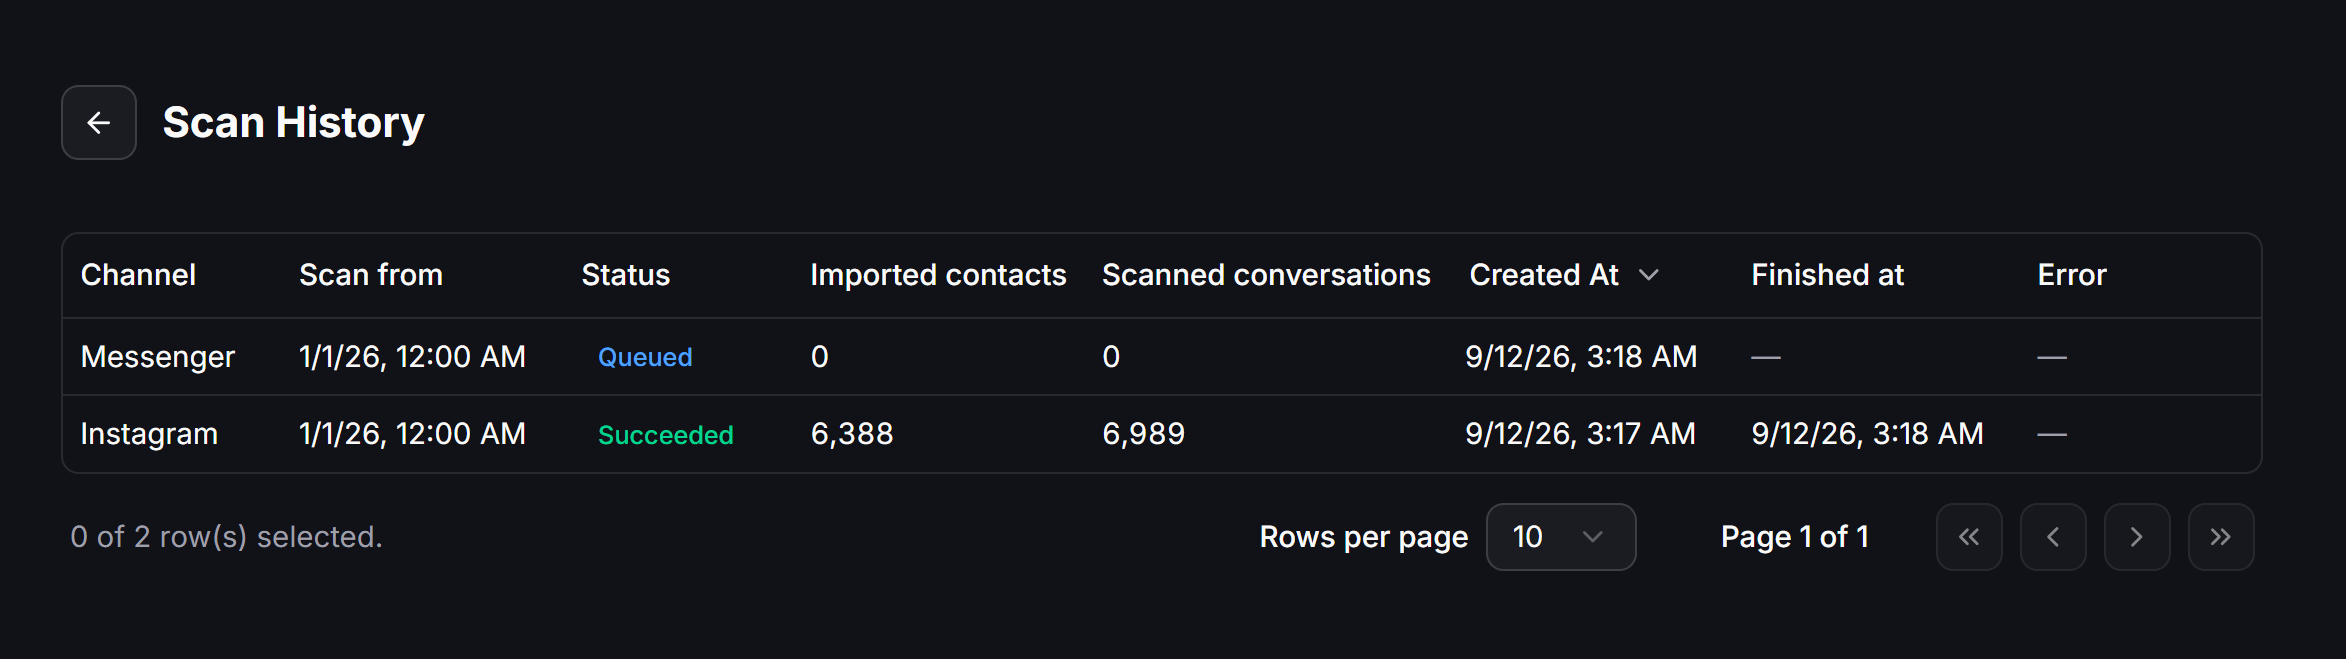
Scan Session Statuses
Scan jobs move through the following states:- Queued: The job has been submitted and is waiting in line for processing.
- Succeeded: The scan finished completely. All imported contacts are now accessible in Contacts.
- Failed: The scan failed (such as expired channel permissions or API rate limits). Check the Error column for troubleshooting.