

Contact Avatar Overlay
Automatically insert the recipient’s Facebook, Instagram, or WhatsApp profile photo into your canvas.
Dynamic Text Variables
Populate names, order numbers, balance points, or any custom contact fields dynamically.
Personalized QR Codes
Generate unique QR codes containing custom URLs or contact IDs with your brand logo in the center.
Create a new Dynamic Image
1
Open Dynamic Images
From the left sidebar in ChatbotX, go to Tools and select the Dynamic Images card.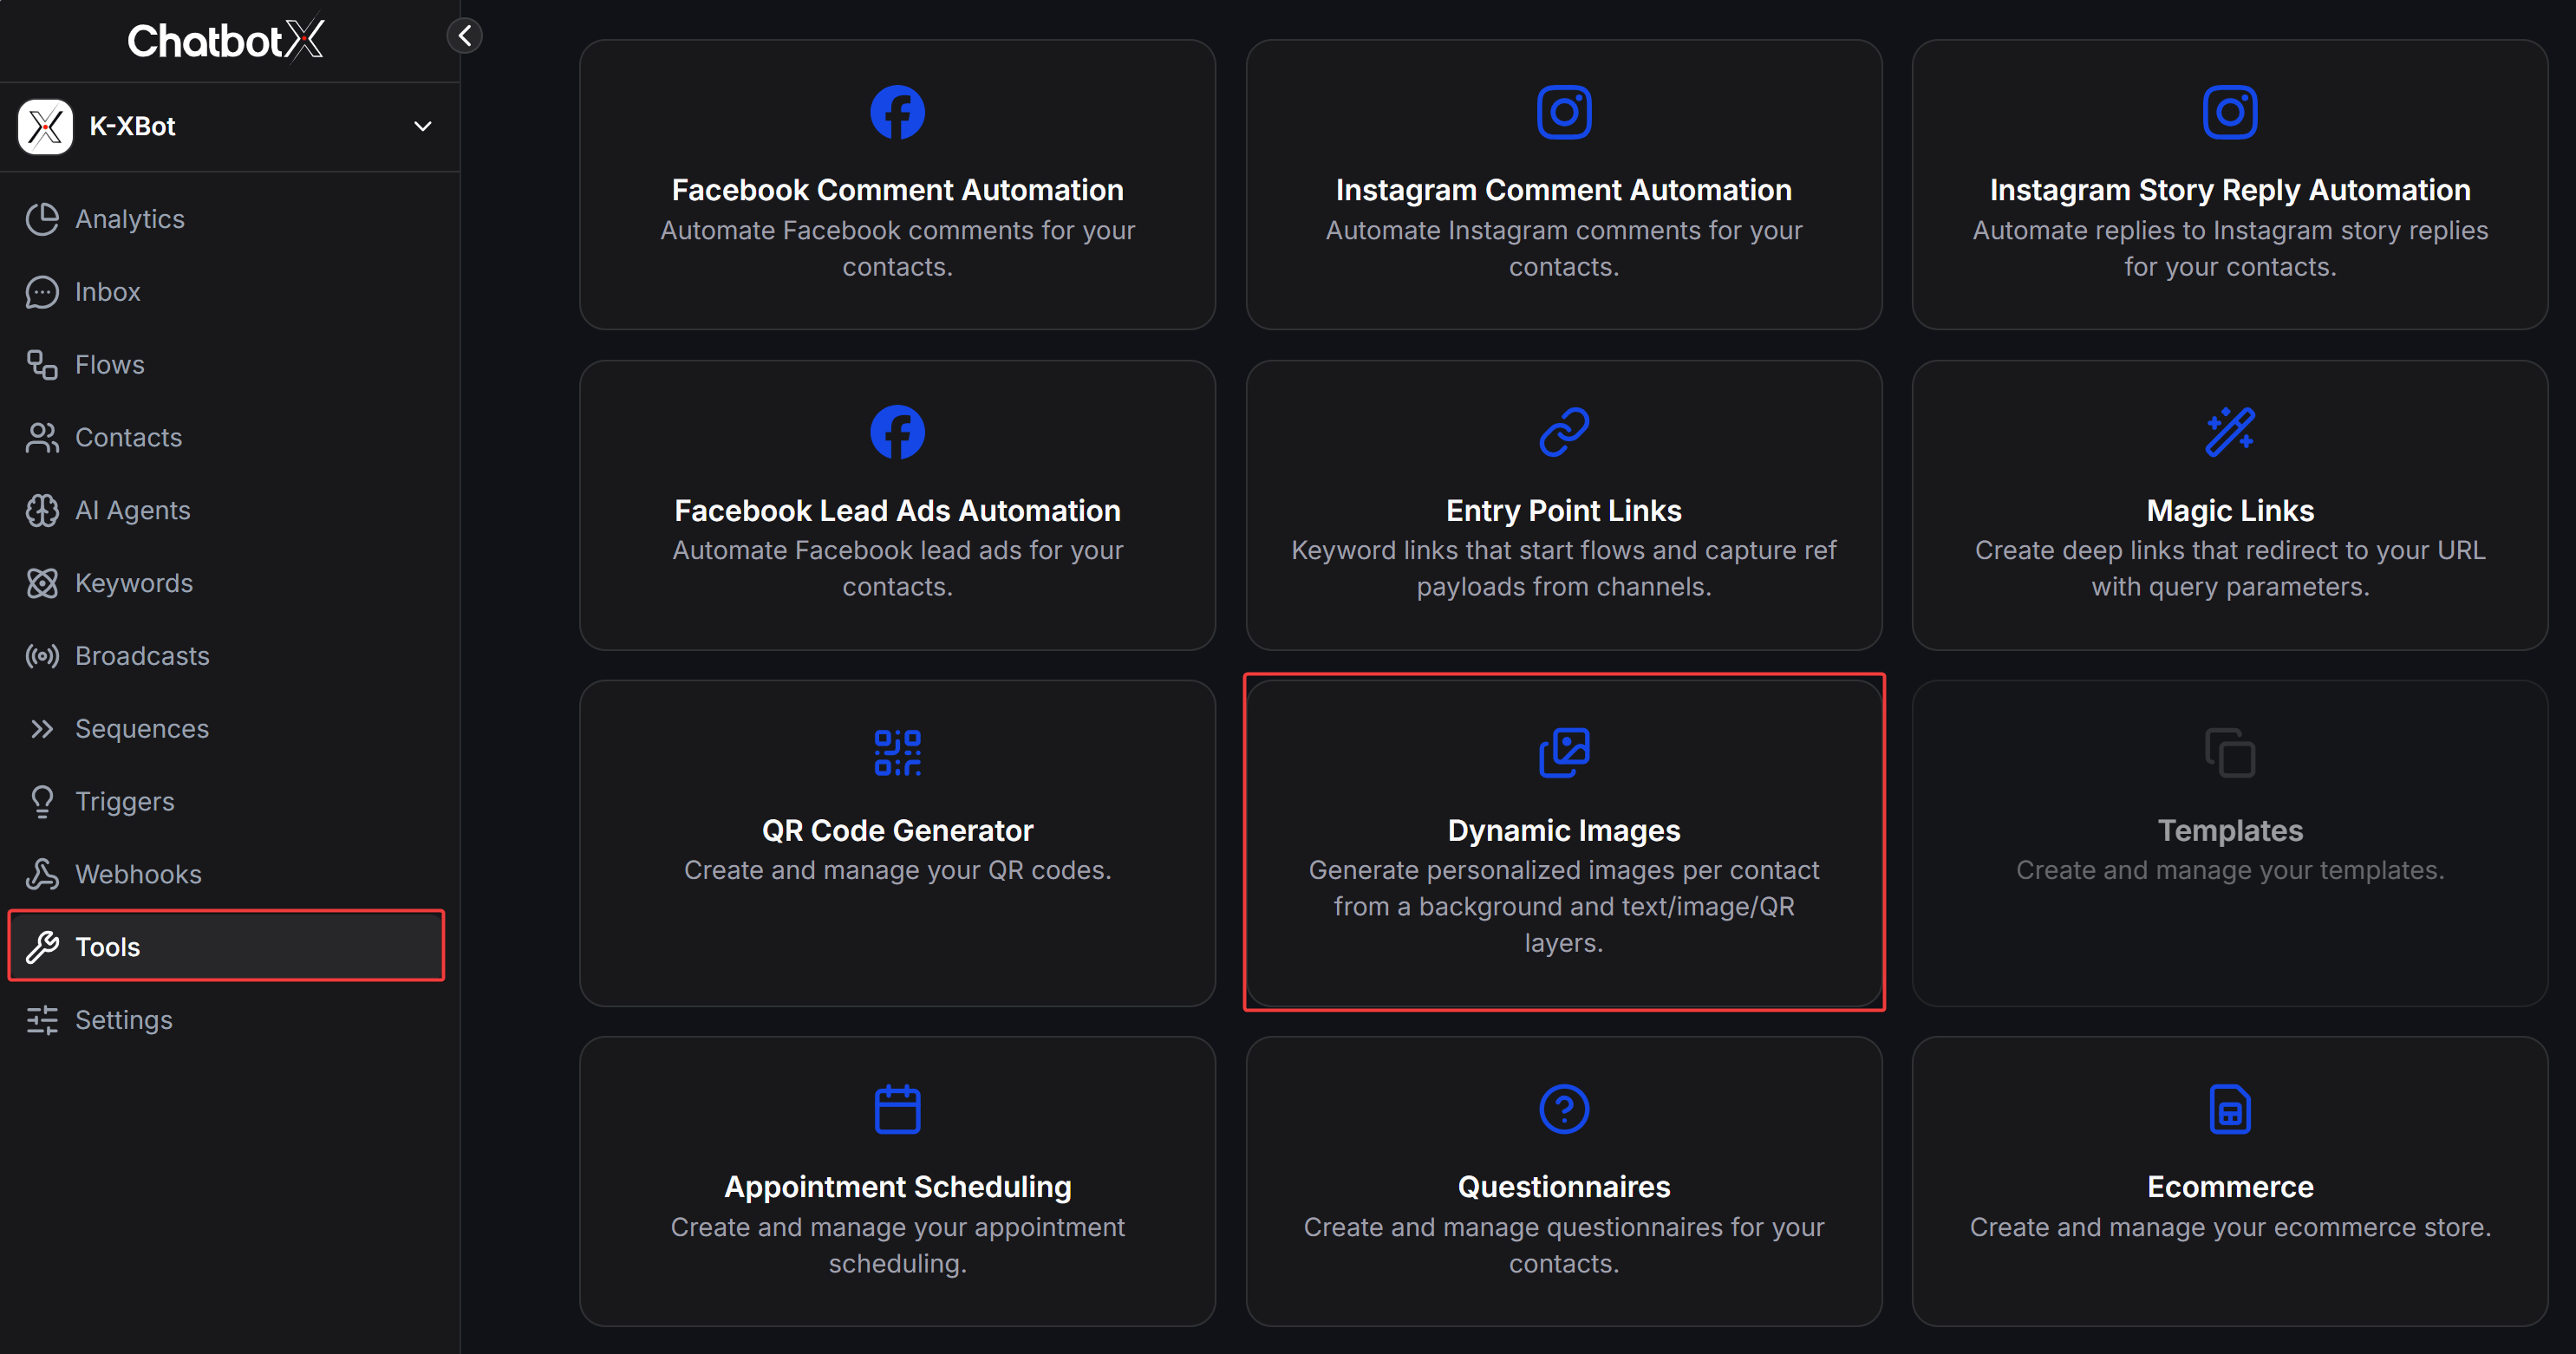
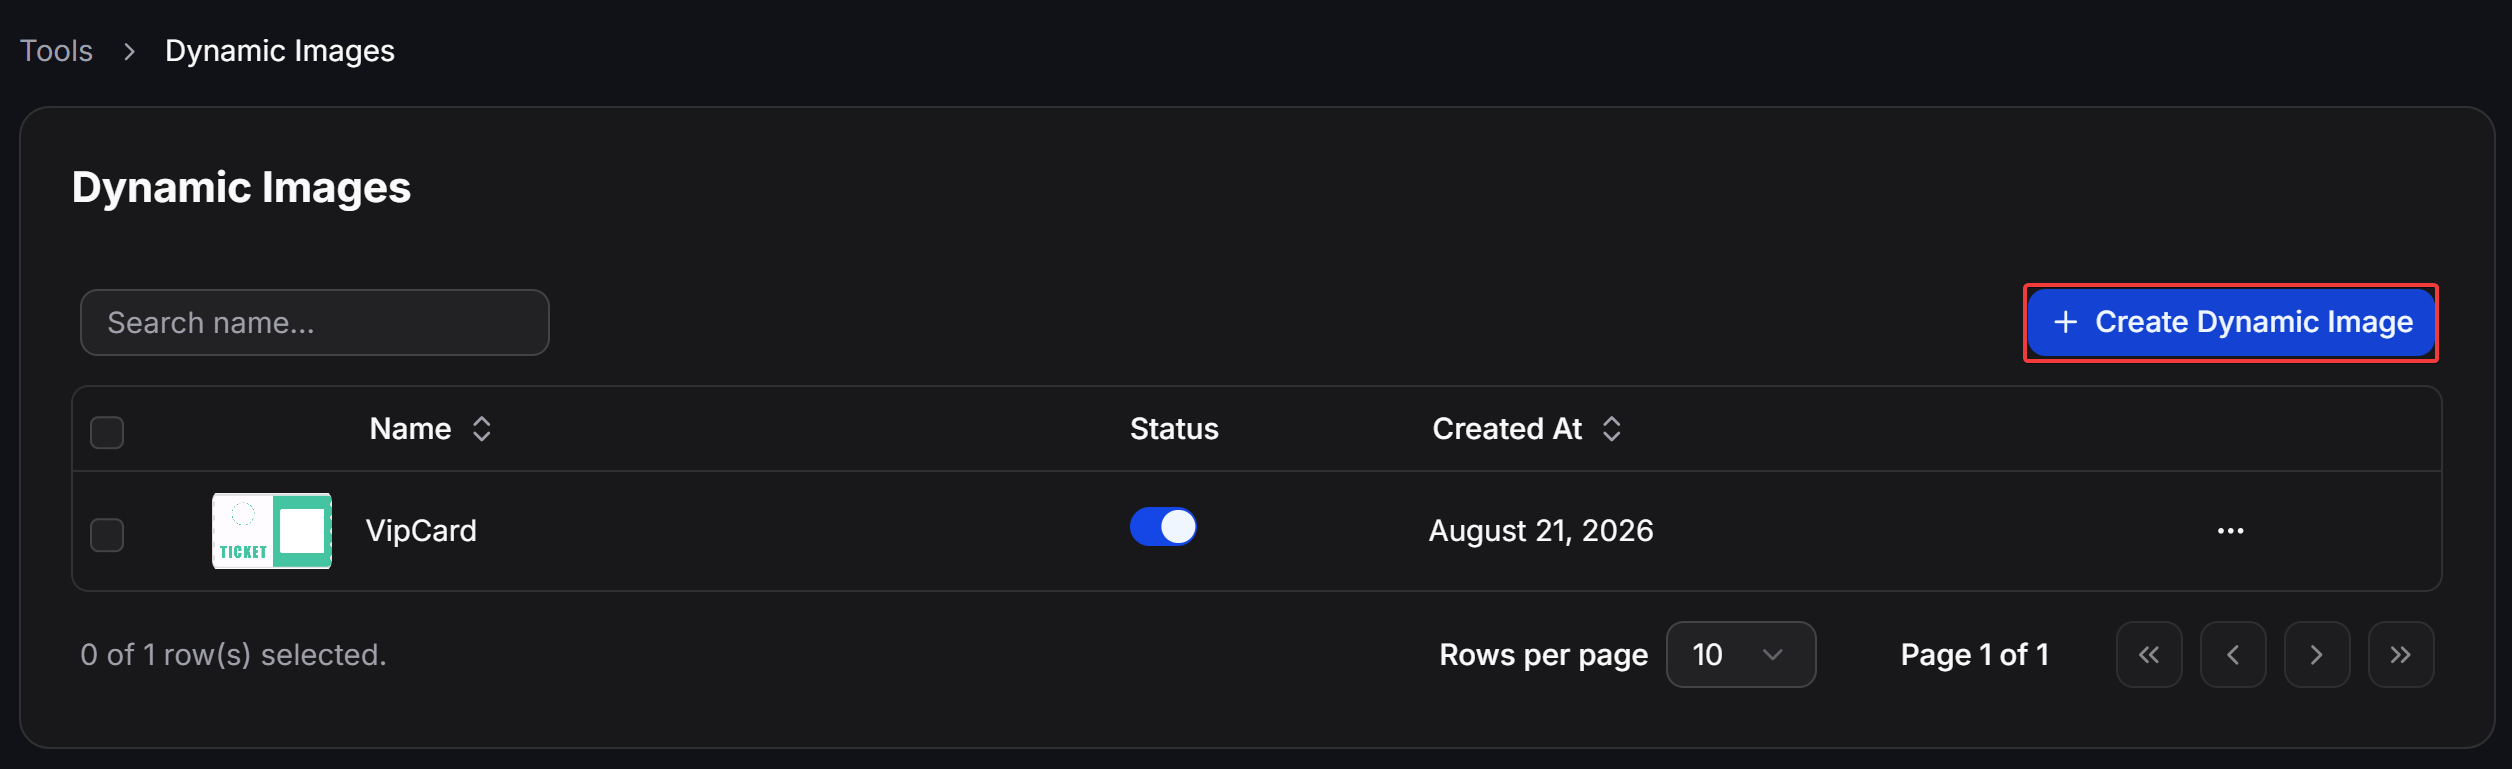
2
Configure basic settings
In the editor view, configure the initial template settings: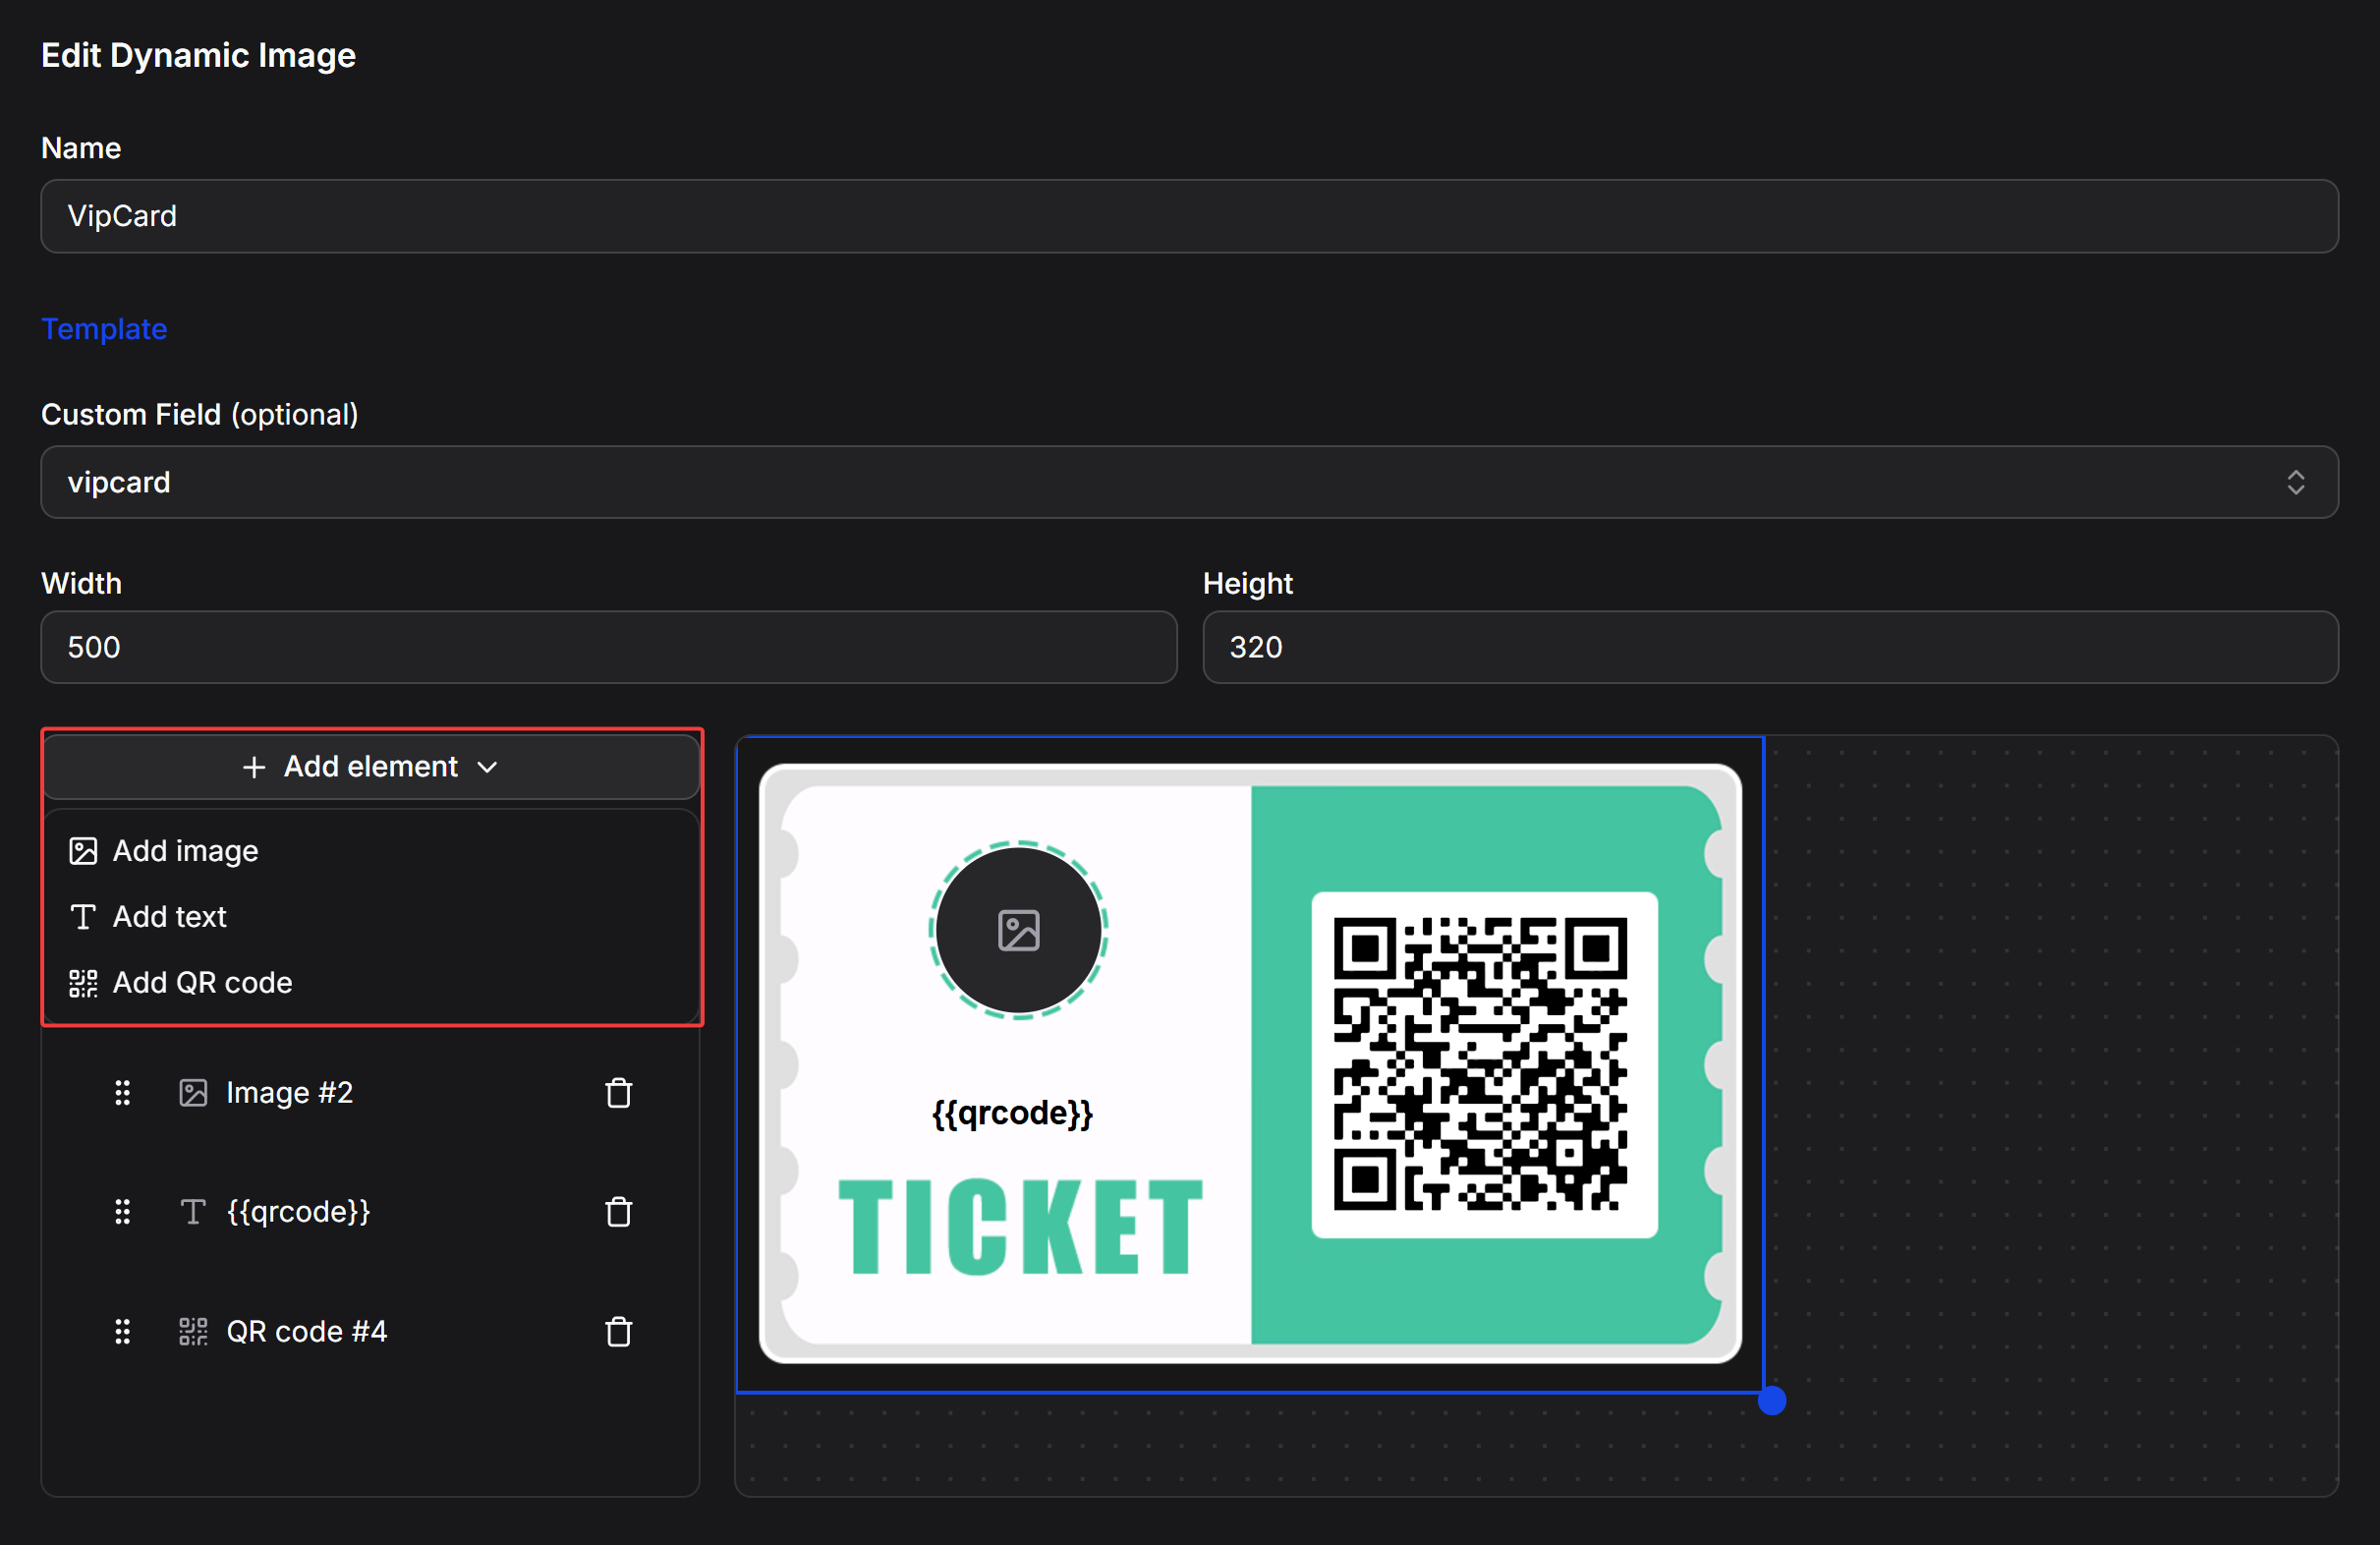
- Name: Enter a descriptive name for your template (for example,
VipCardorEventTicket). - Custom Field (optional): Select a Custom Field if you want ChatbotX to automatically save the generated image URL into the contact’s profile.
- Width & Height: Set the canvas width and height in pixels (for example,
500x320).
3
Choose a pre-made template (Optional)
If you want to quickly start from a pre-designed layout, click the blue Template link below the Name field.The Choose a template modal displays pre-built graphic cards (such as gold VIP cards, event passes, or gift certificate frames). Selecting a template applies its background and styling to your canvas.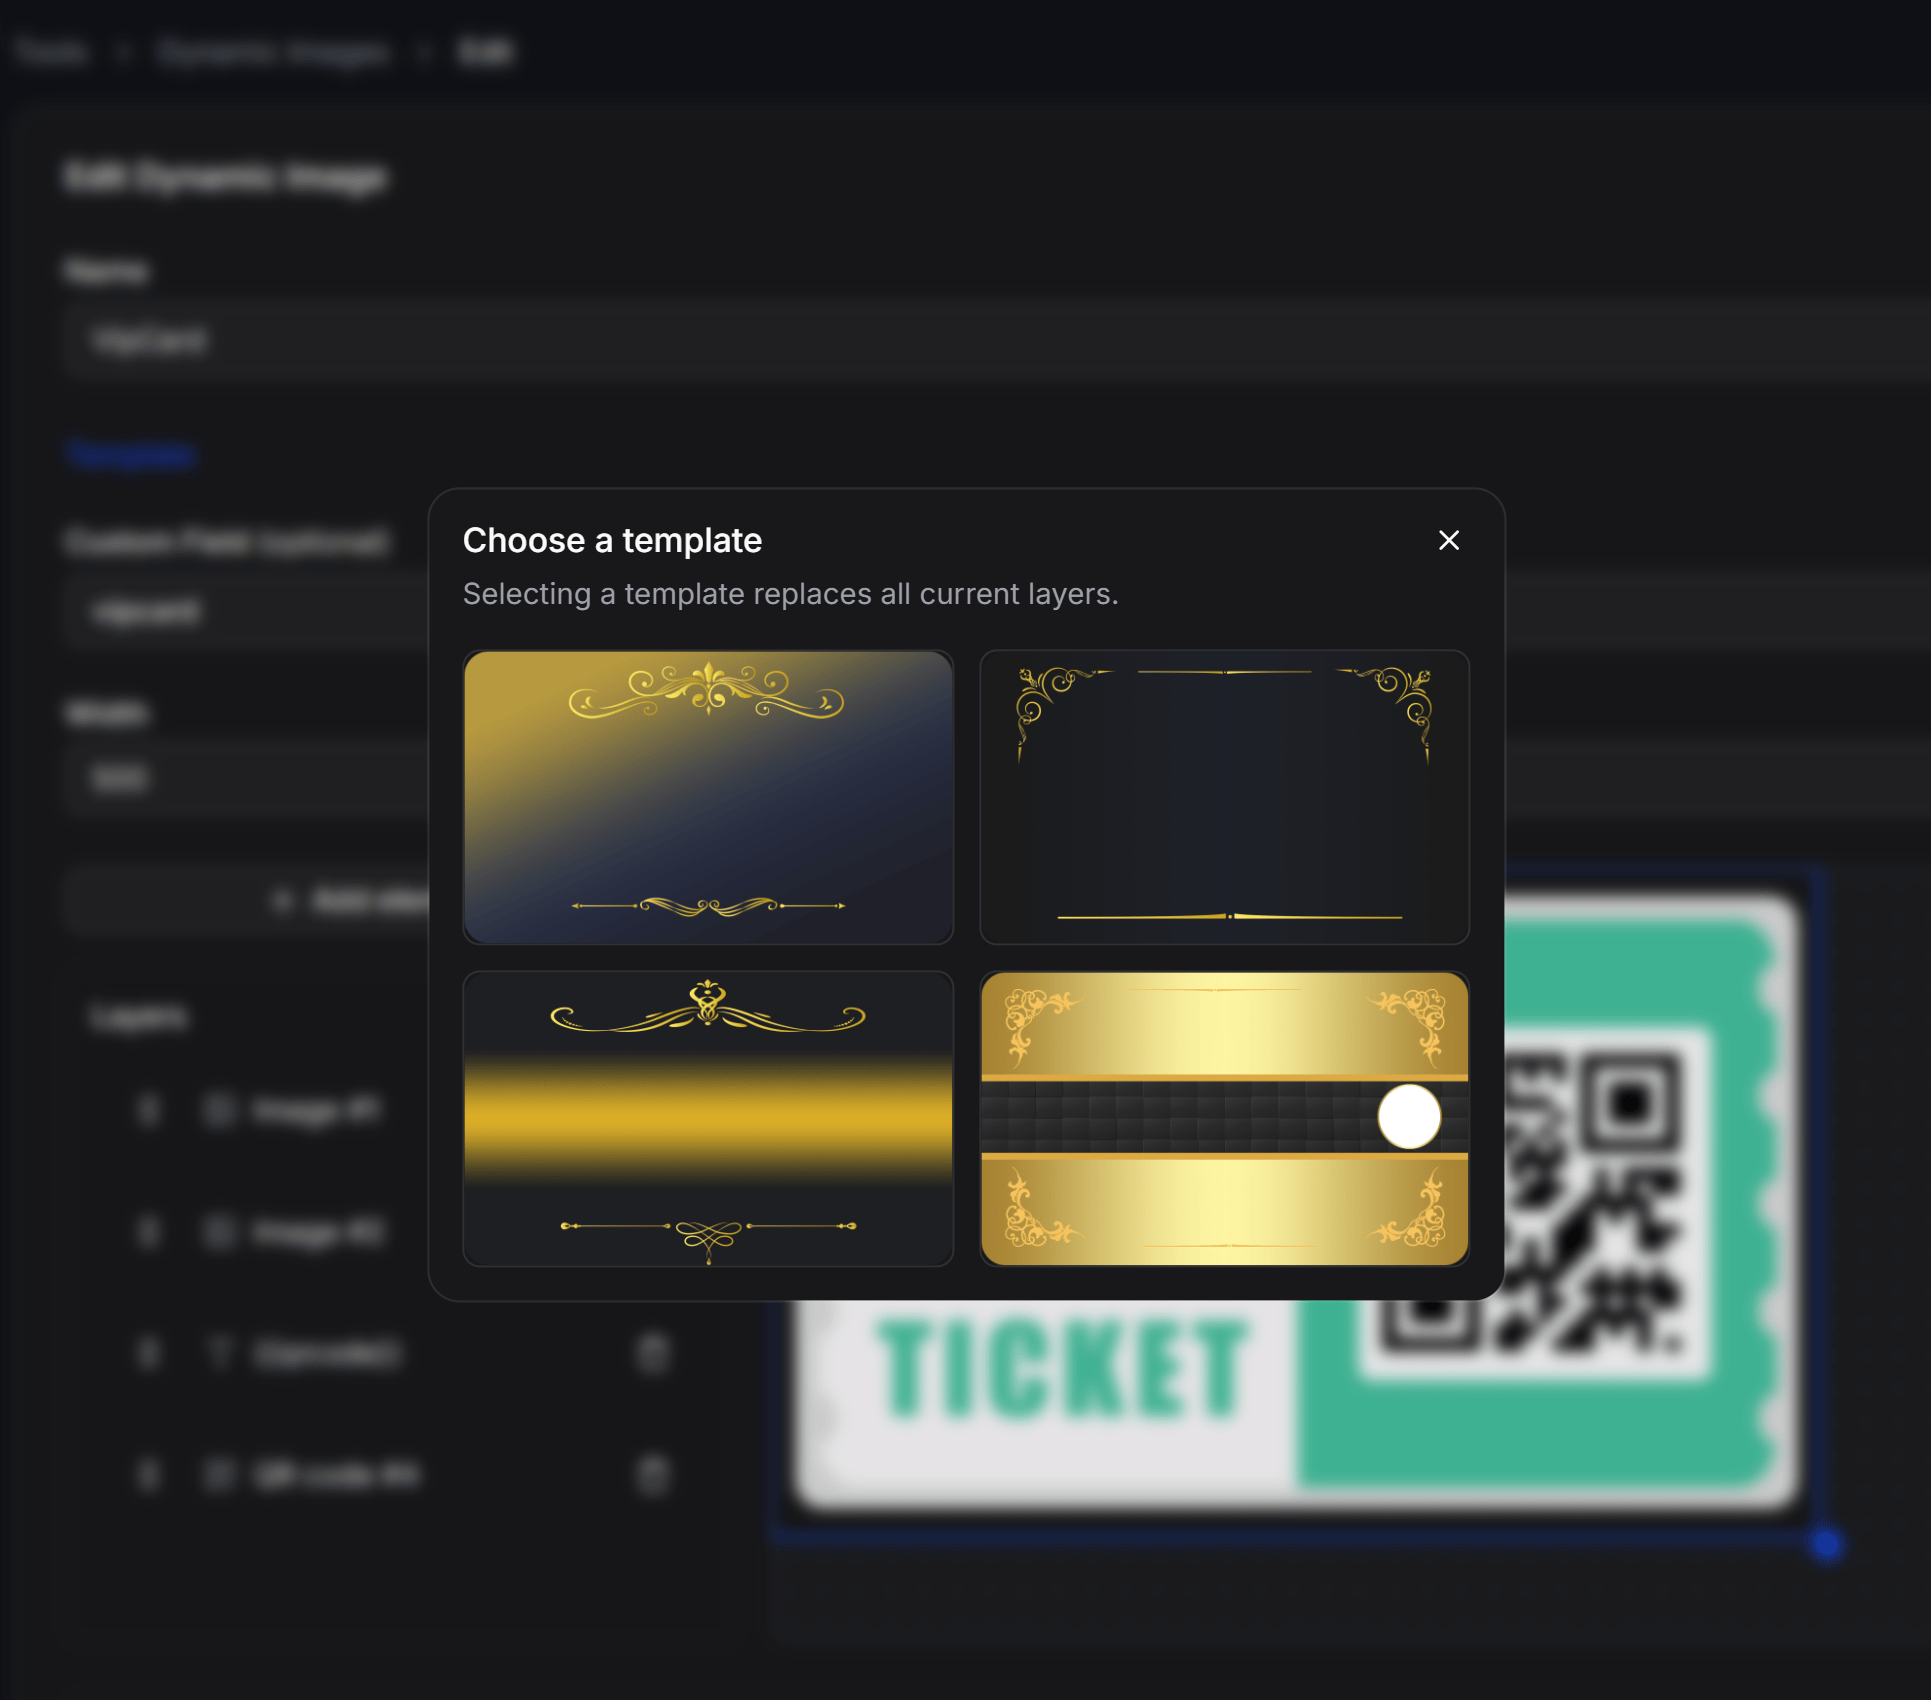
Selecting a template replaces all current layers on your canvas.
4
Add and customize layers
Click the + Add element button to add layers to your canvas:
- Add image: Add static background graphics, contact avatars, or images from Custom Fields.
- Add text: Add dynamic text layers with personalized contact attributes.
- Add QR code: Add a dynamic QR code layer.
5
Save and copy the Public URL
Once your design is ready, click Save in the bottom-right corner. The system provides a Public URL for automating image delivery in your chat flows.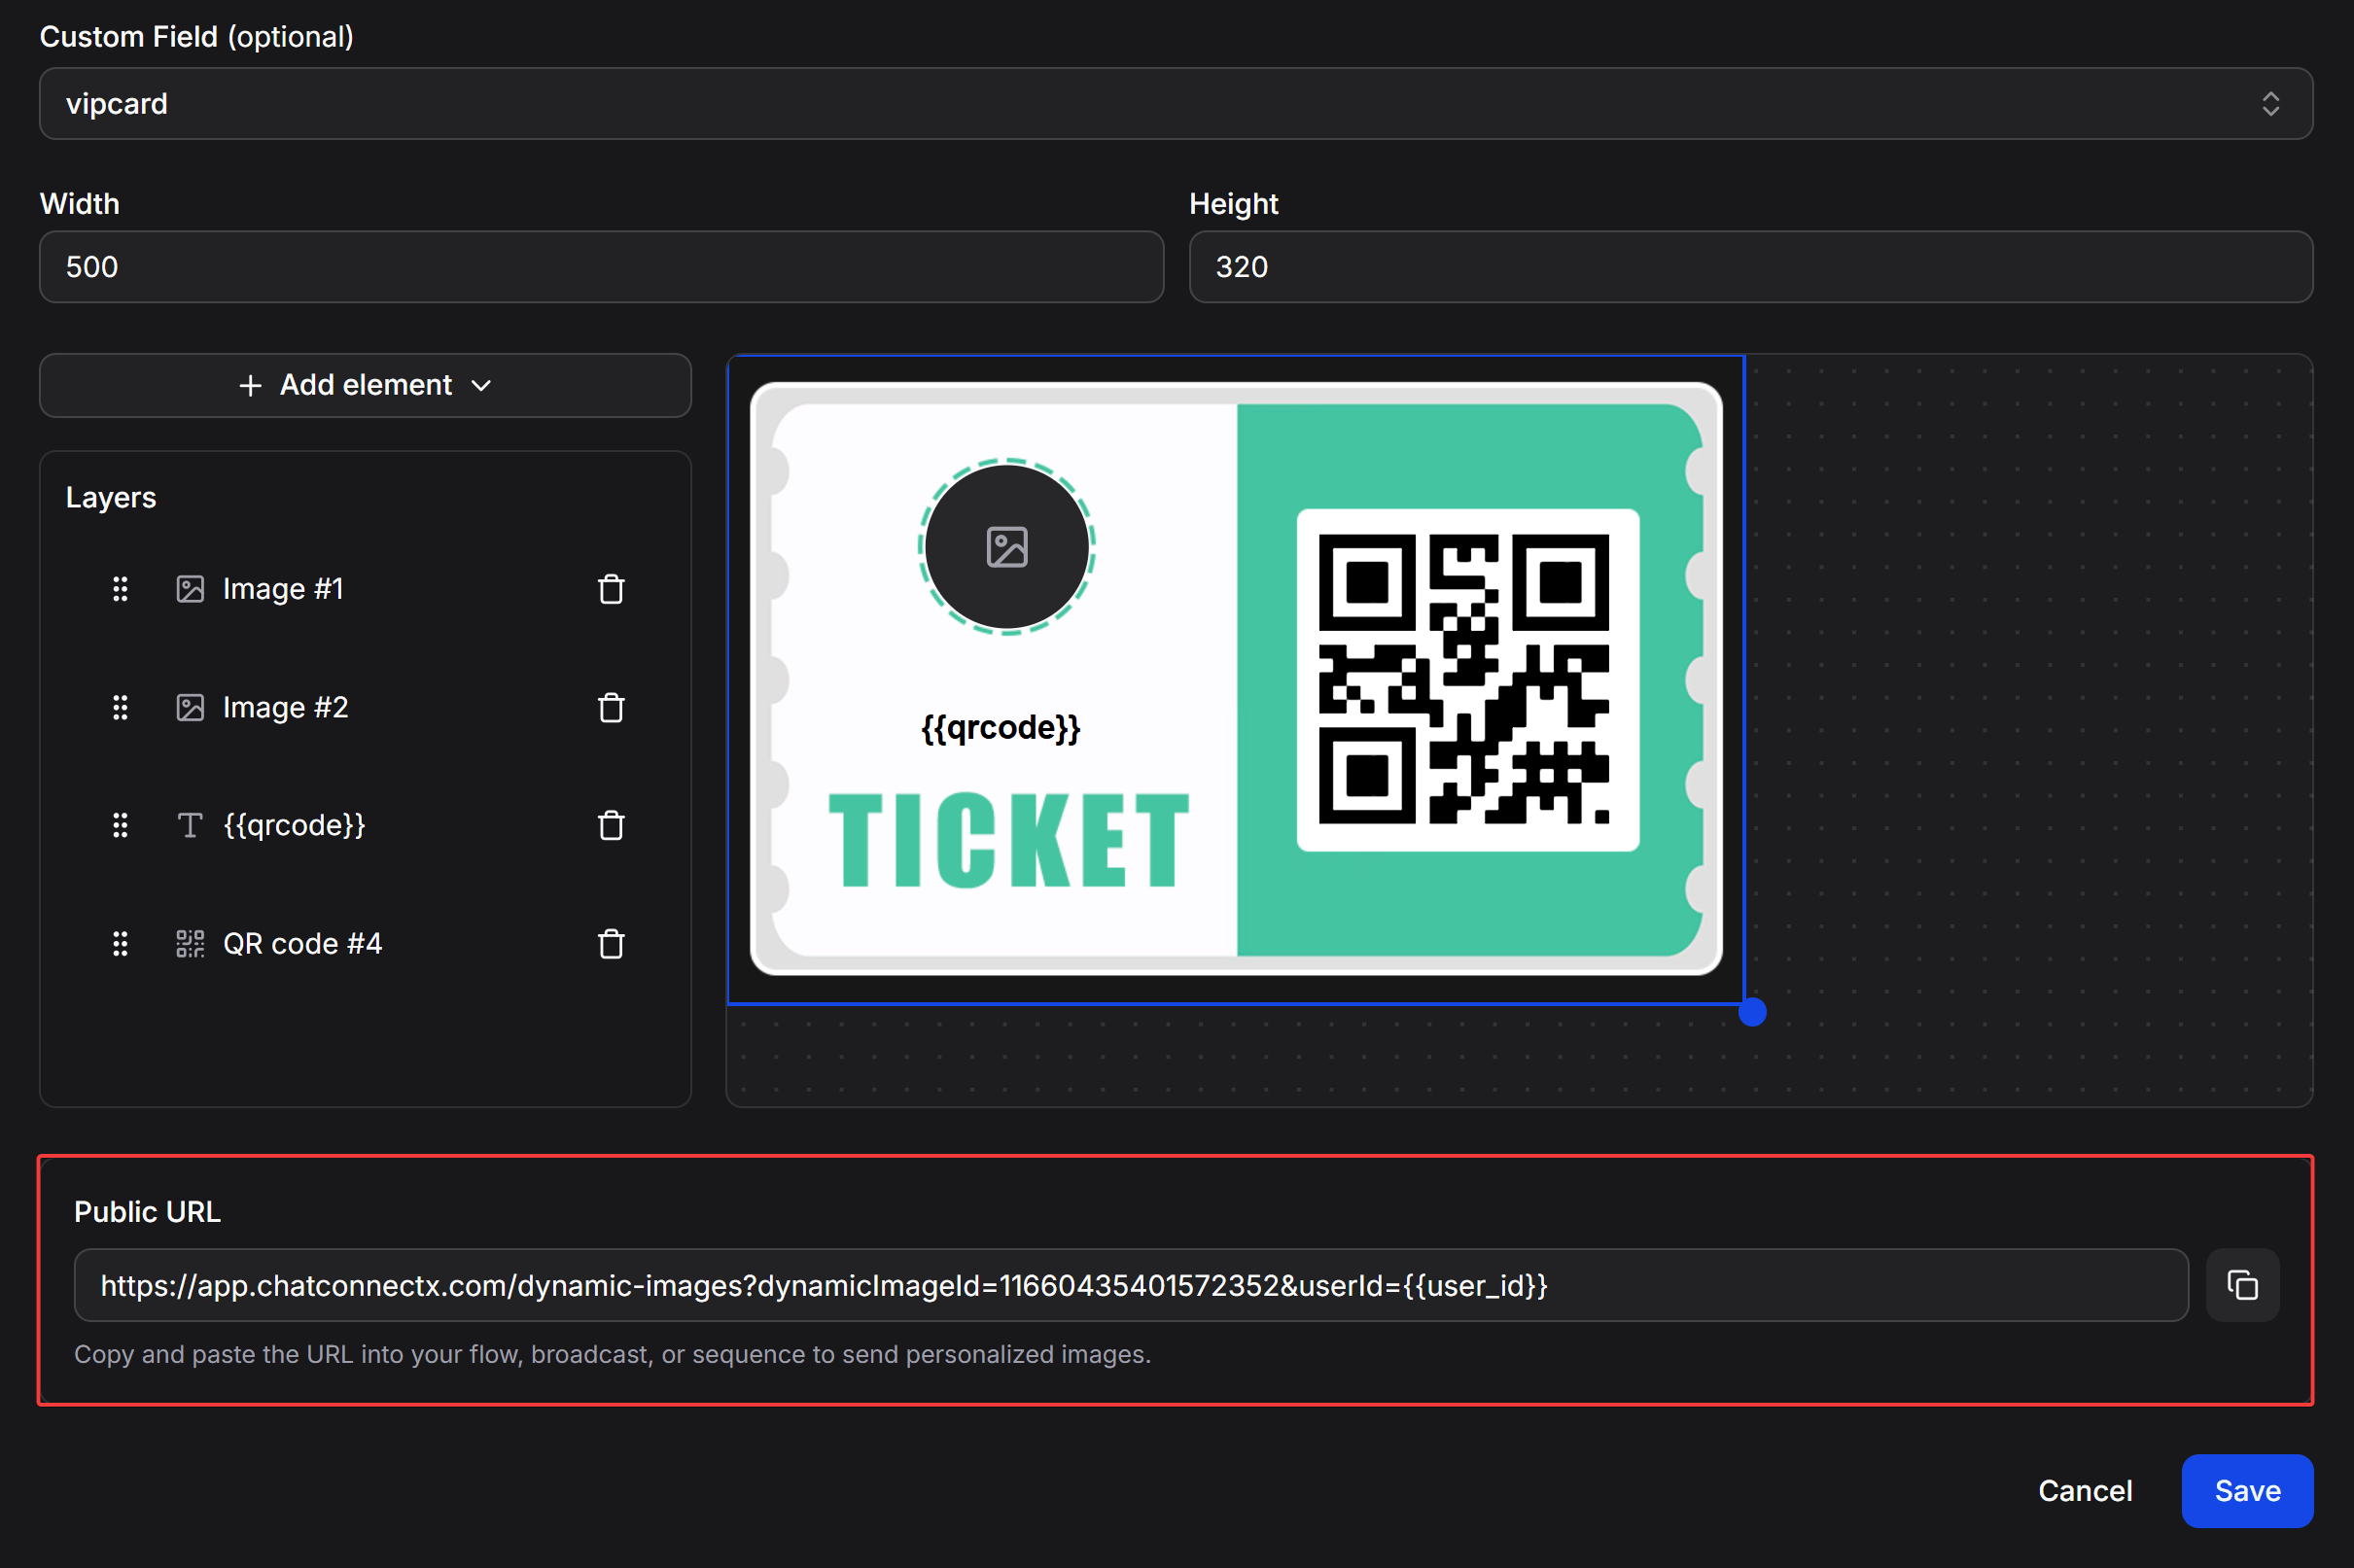
Configure layer elements
Image Element
When selecting an Image layer in the Layers panel, you can choose from three data sources under Image type:Image URL (Static image from URL or upload)
Use this option for static card backgrounds, badge graphics, decorative frames, or company logos. You can paste a direct image link into the Image URL field or click Upload image to upload a file from your computer. Configurable options include dimensions (Width, Height), frame shape (Square or Circle), and a Priority toggle to bring this layer to the front.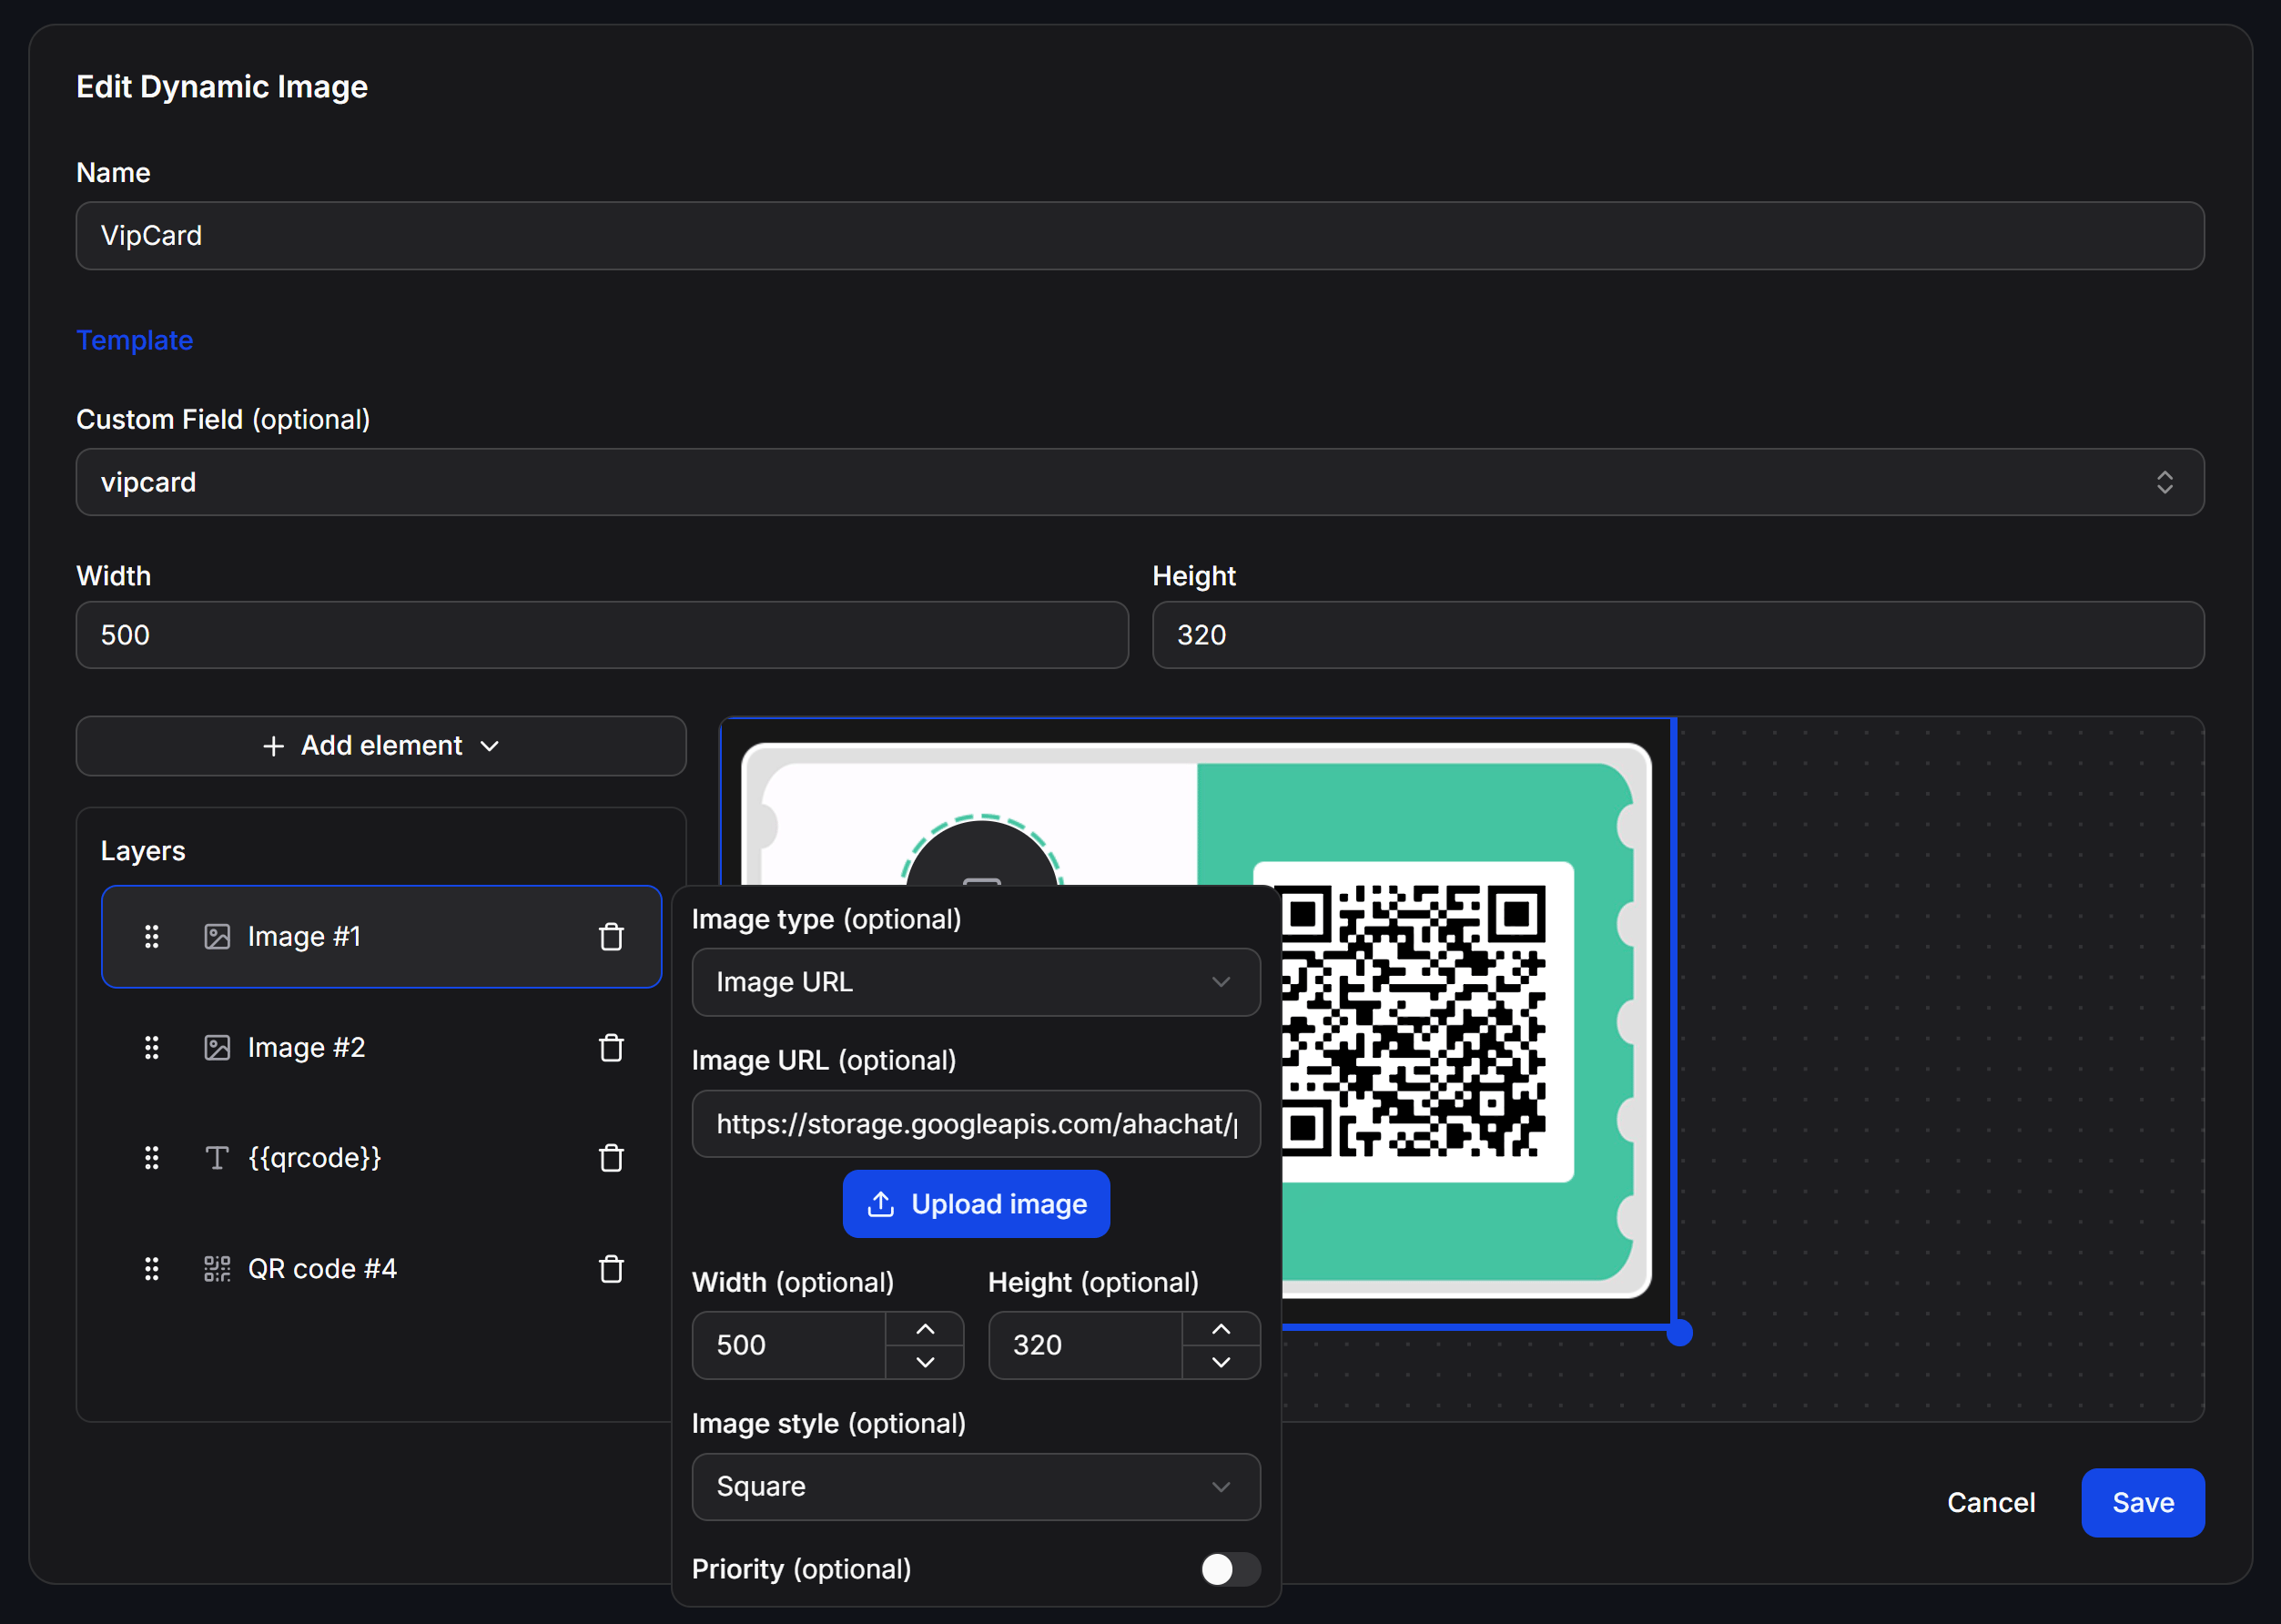
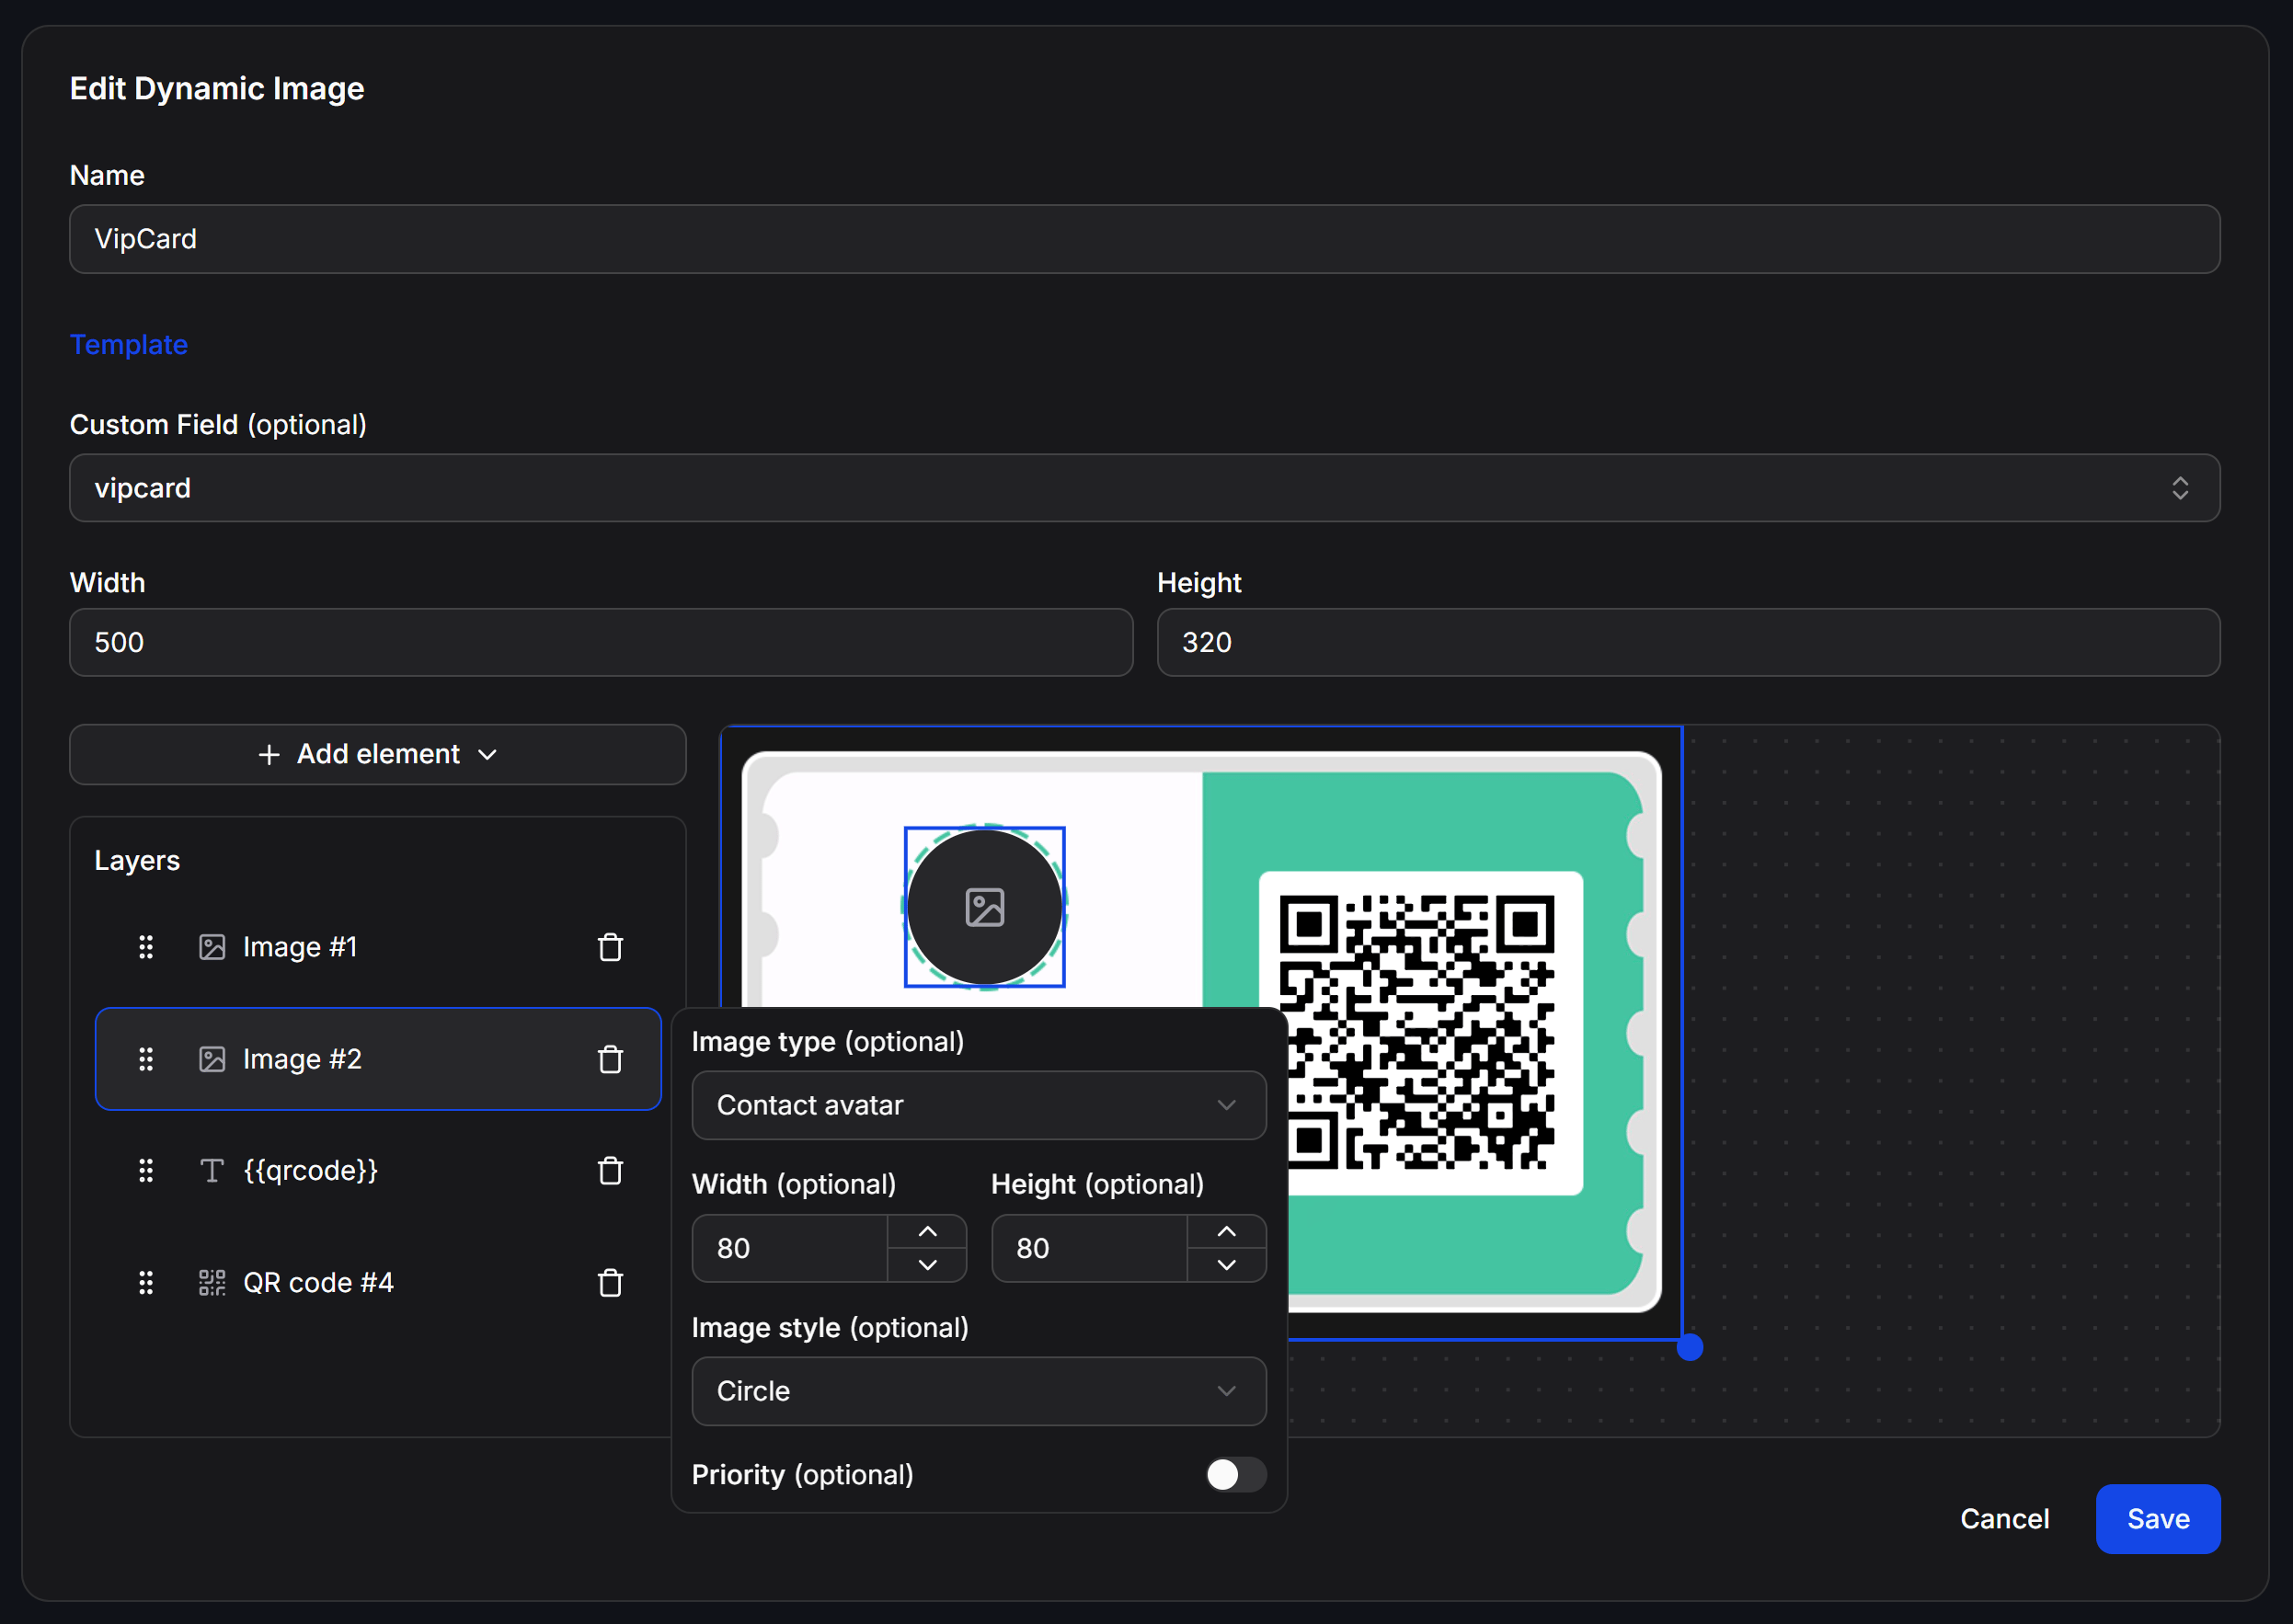
Contact avatar (Recipient profile picture)
Automatically fetches the recipient’s live profile avatar from the connected messaging channel (Facebook Messenger, Instagram, or WhatsApp). You can specify custom dimensions (for example,80 x 80 px) and set the Image style to Circle for a clean circular avatar.
Custom field (Dynamic image from contact attribute)
Reads a dynamic image URL stored in a contact’s custom attribute (for example, a previously uploaded portrait photo, digital signature, or certificate). Select the target Custom Field from the Custom field (optional) dropdown.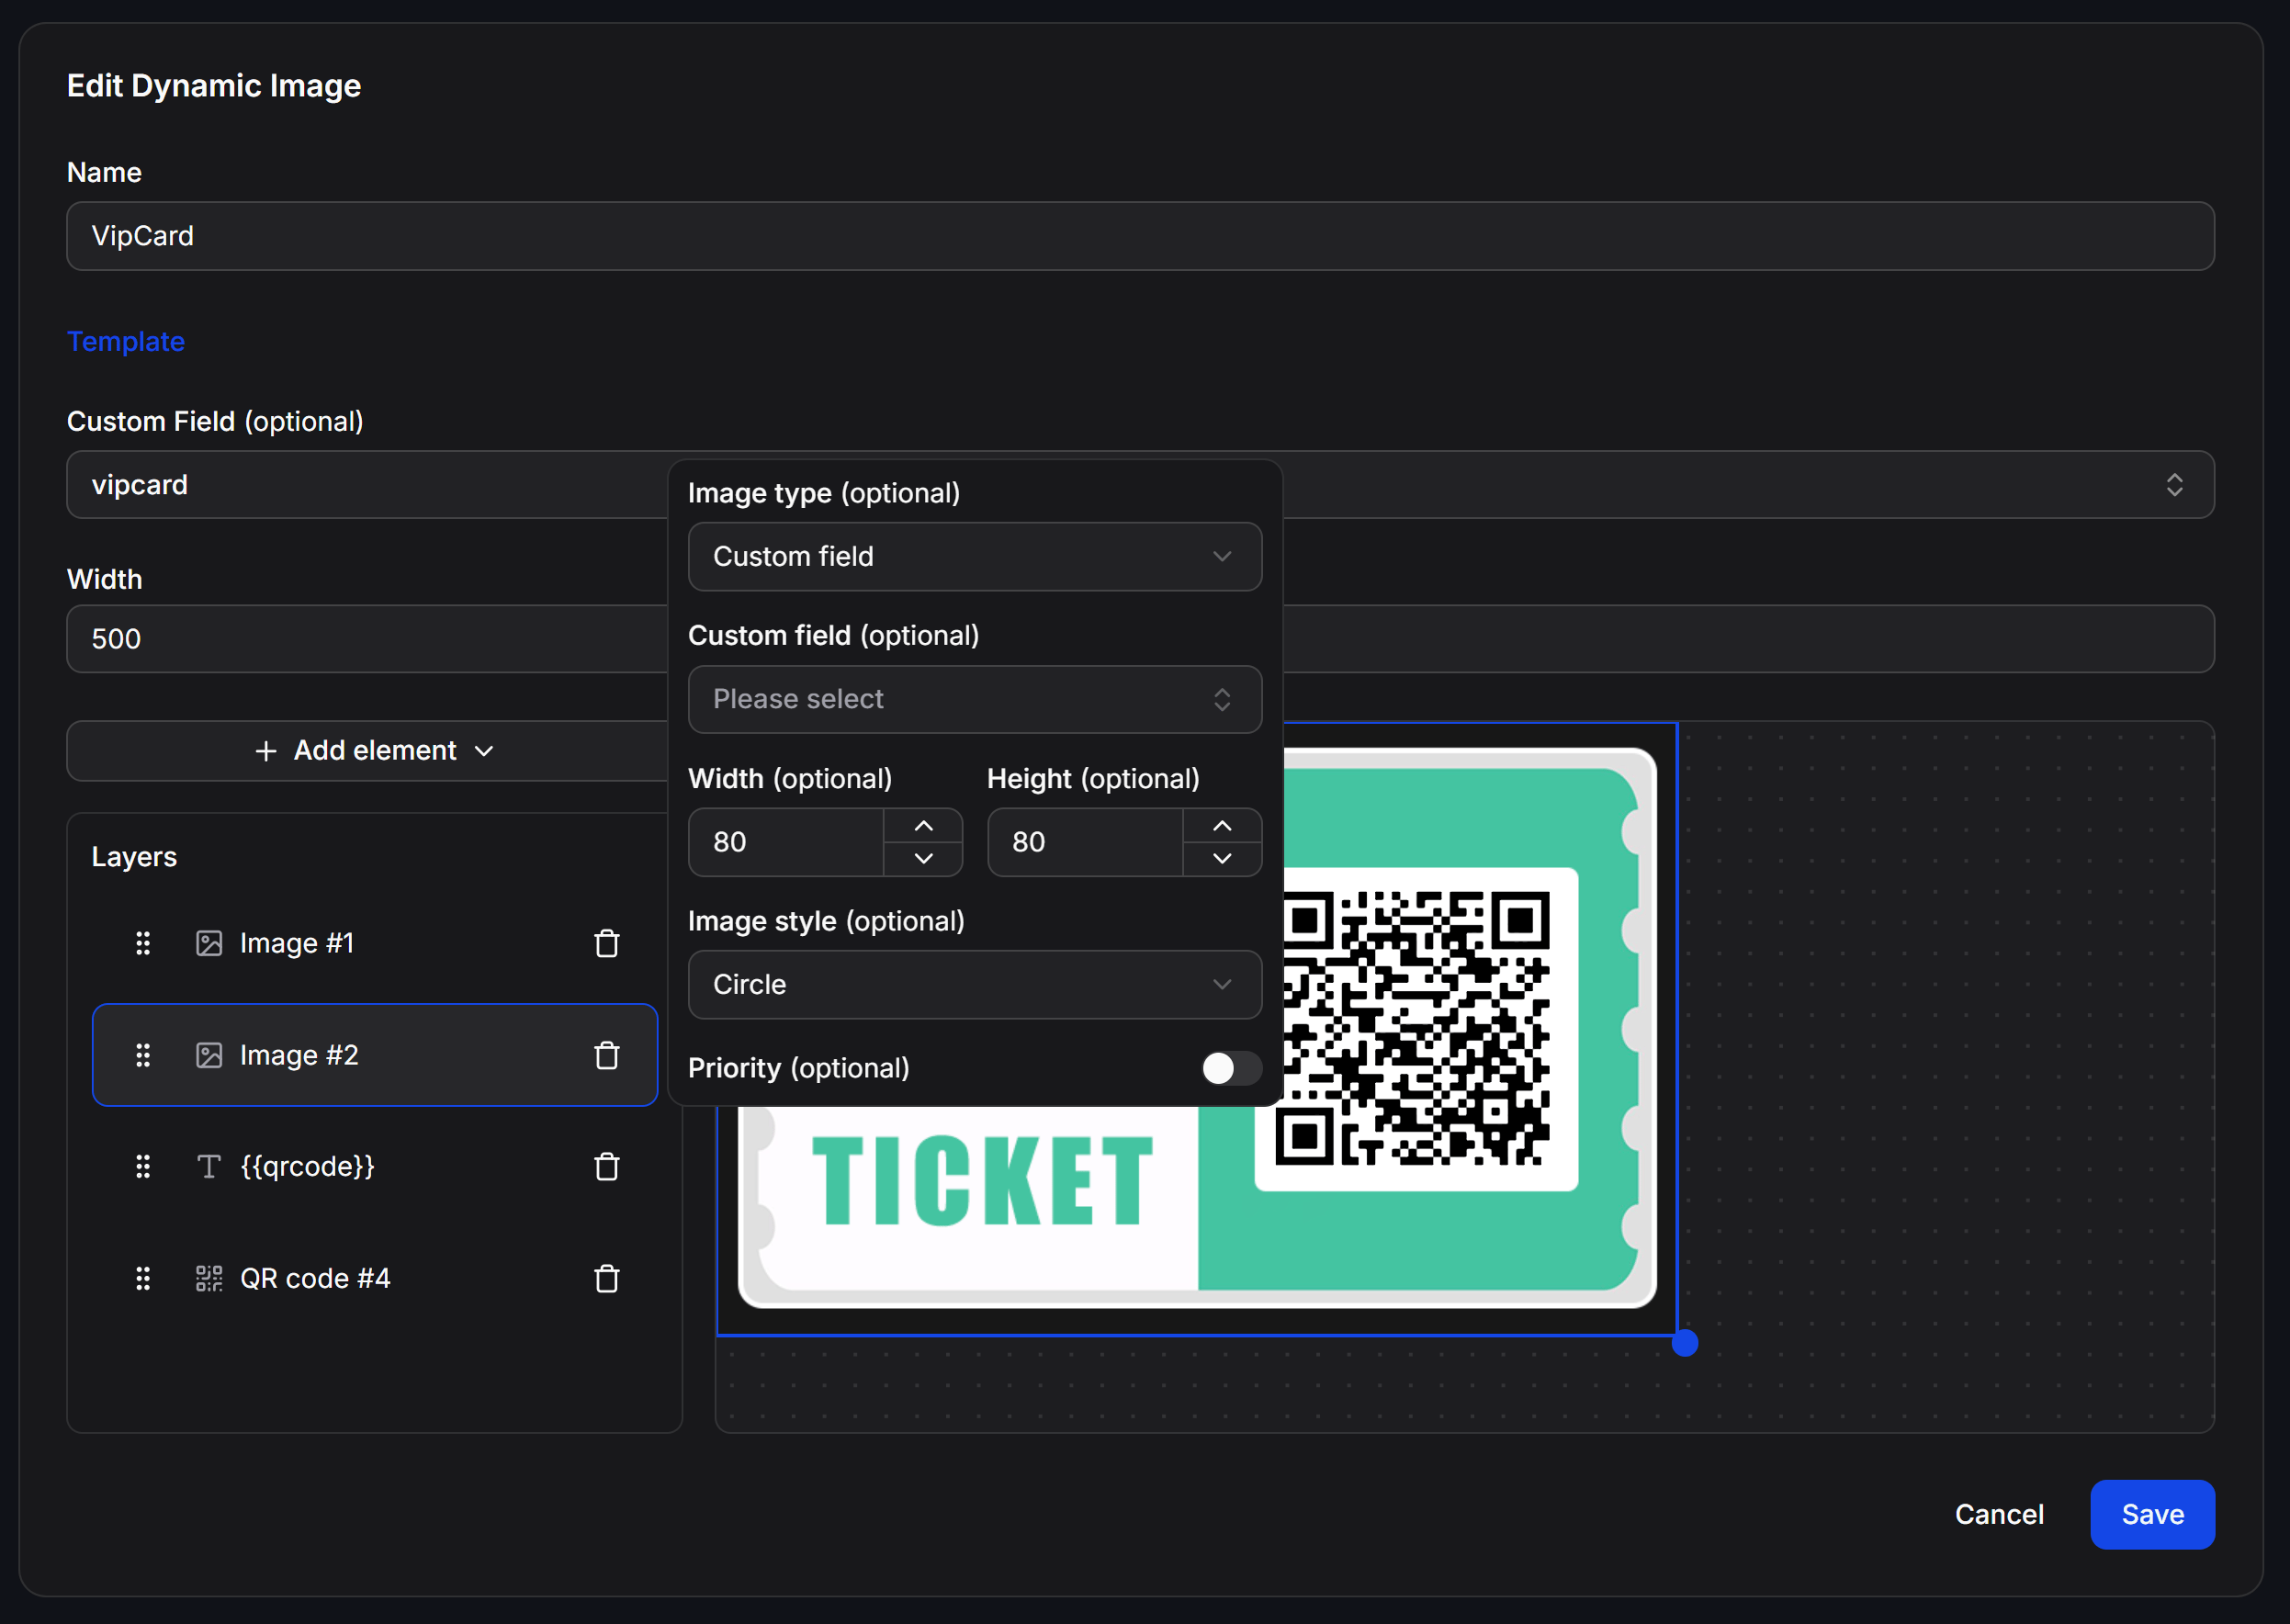
Text Element
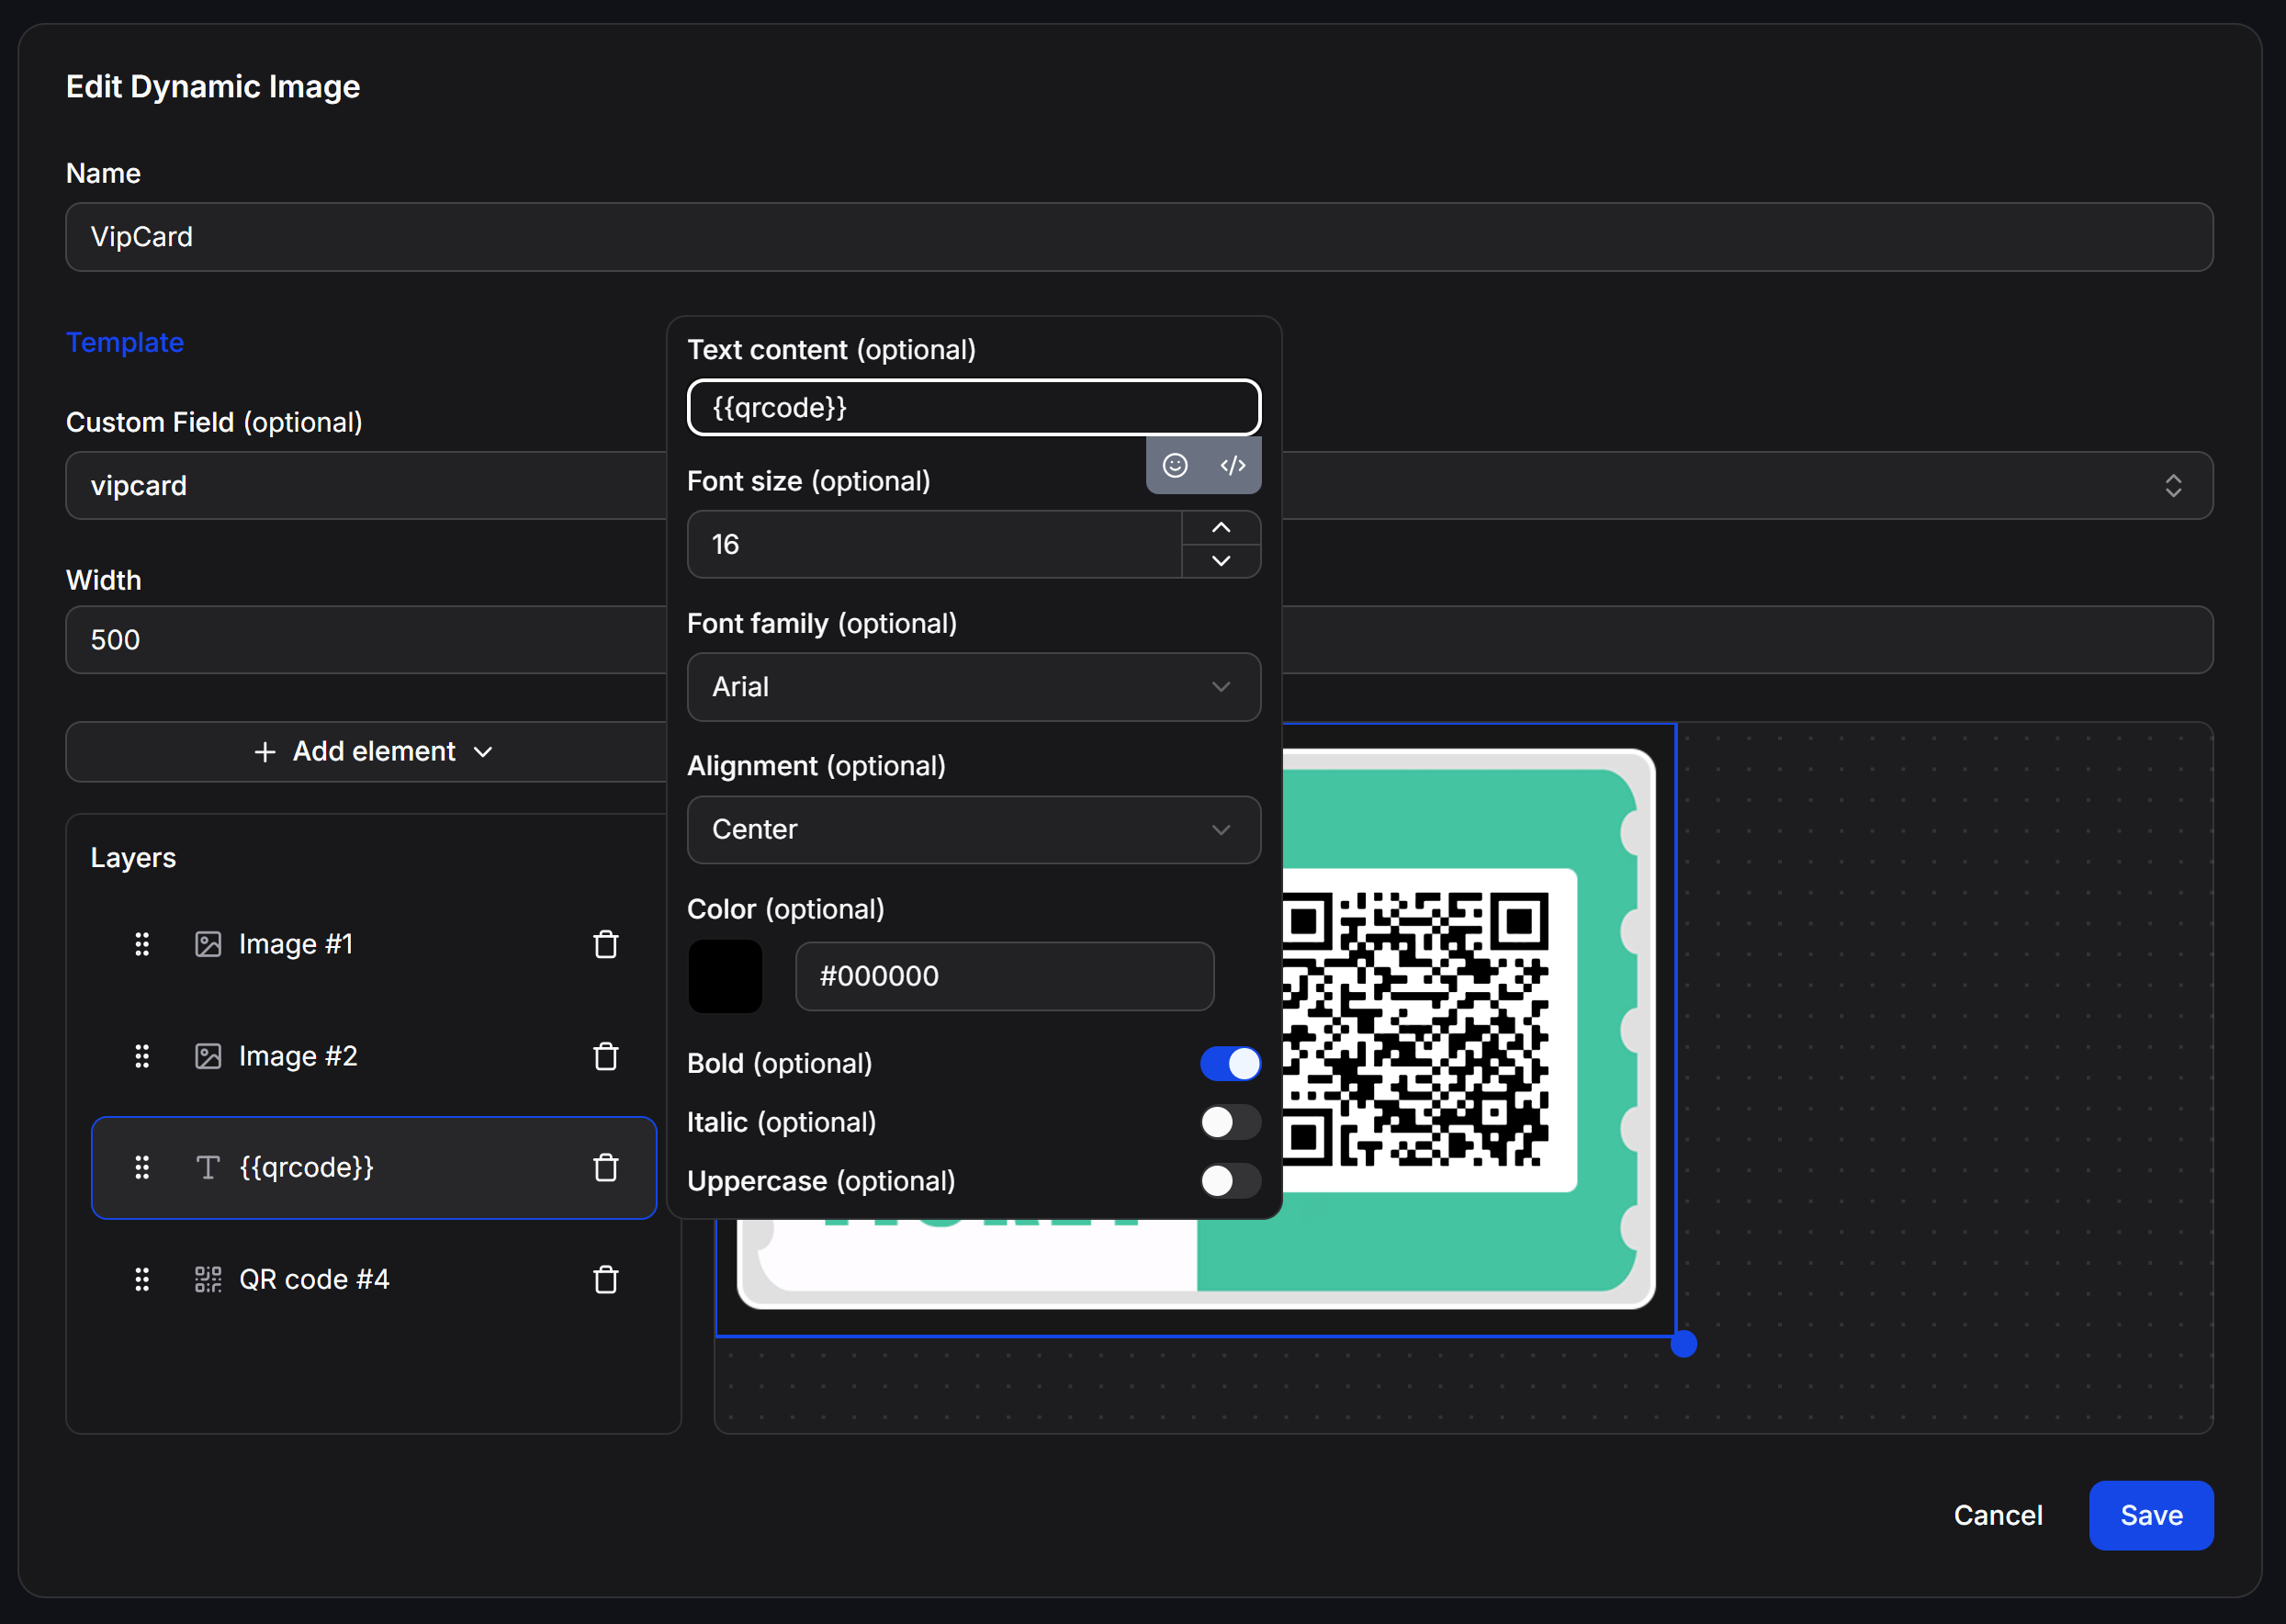
Text layers display static text combined with dynamic contact placeholders:- Text content: Enter your text string. Click the
</>code button to insert Custom Field variables (such as{{first_name}},{{phone}},{{qrcode}}) or the smiley icon to insert emojis. - Font size: Font size in pixels.
- Font family: Select font family (Arial, Roboto, etc.).
- Alignment: Text alignment options (Left, Center, Right).
- Color: Select a color or enter a hex color code (e.g.,
#000000). - Text formatting: Toggle switches for Bold, Italic, or Uppercase.
QR Code Element
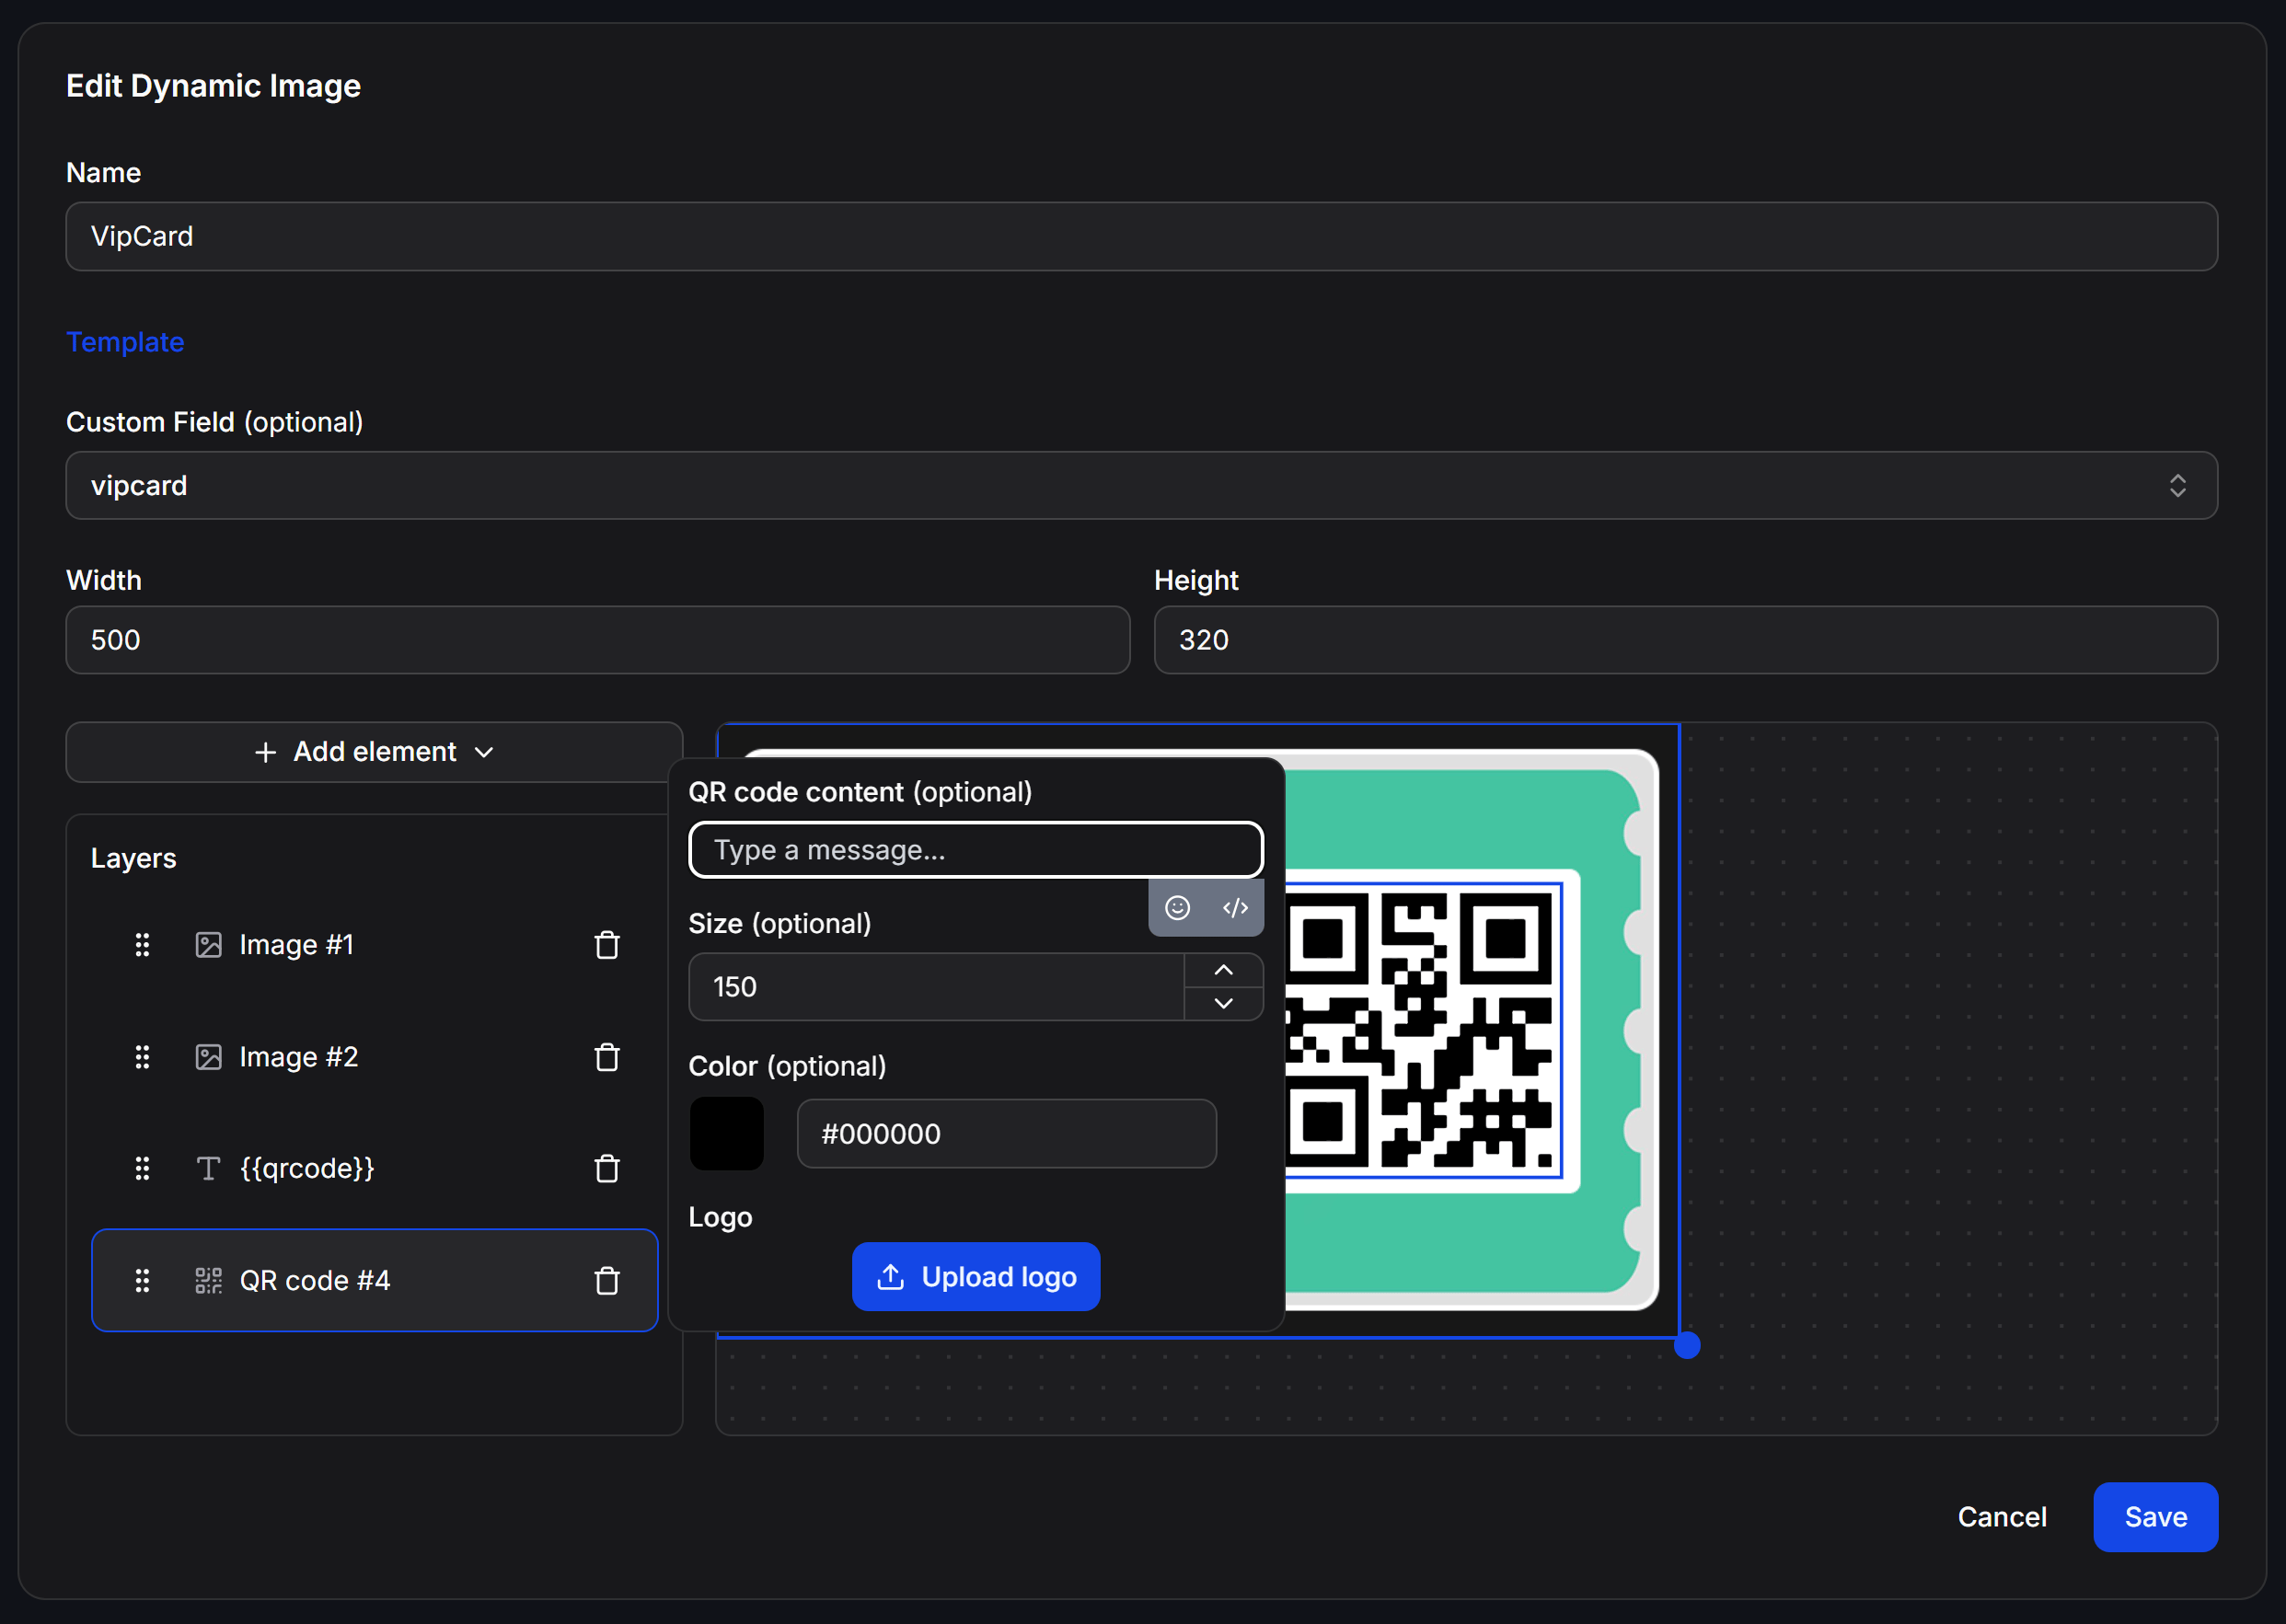
QR code layers generate scannable codes on the fly:- QR code content: Enter the data to encode. This can be a static website link, voucher code, or dynamic variables like
{{user_id}}. - Size: Dimensions of the QR code in pixels.
- Color: Foreground color of the QR code dots.
- Logo: Click Upload logo to place your brand logo at the center of the QR code.
Use Dynamic Images in Chatbot Workflows
After saving your template, ChatbotX generates a Public URL with the following format:userId={{user_id}} parameter ensures that whenever the message is delivered, ChatbotX dynamically resolves the recipient’s user ID and renders their personalized graphic in real time.
Send via Flow Builder message blocks
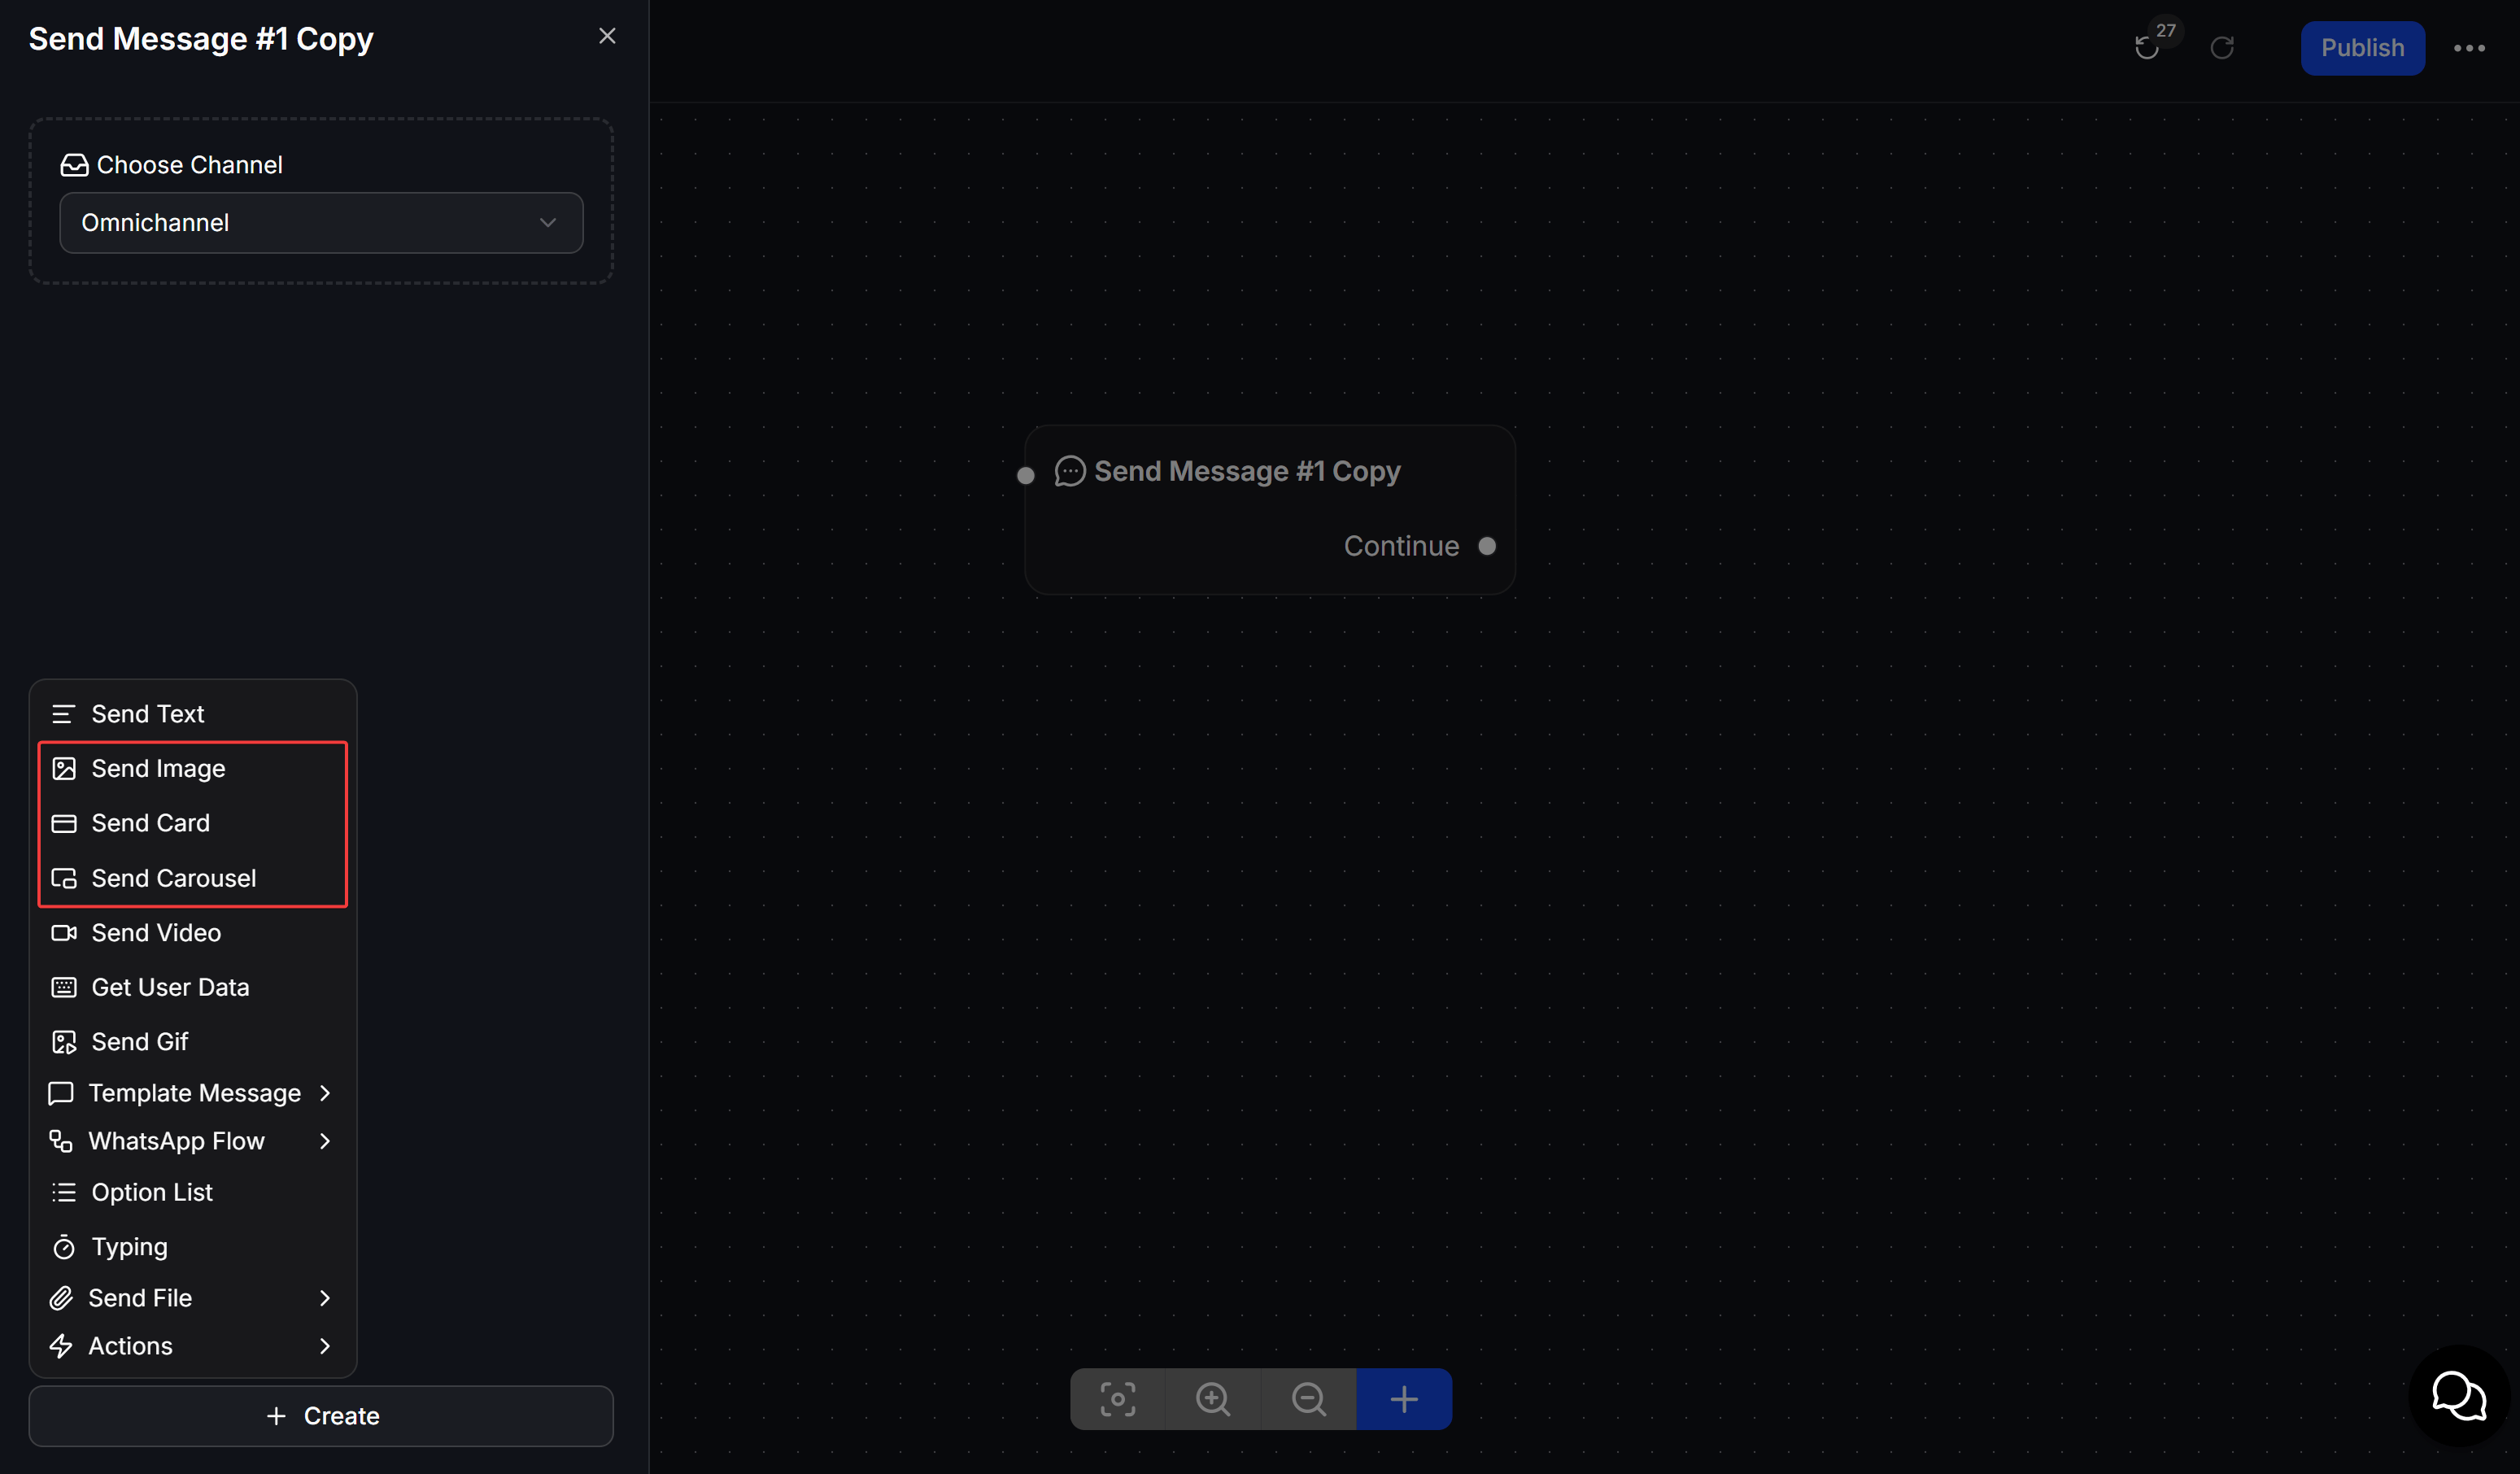
You can deliver personalized graphics in your automated flows using two methods: pasting the direct Public URL or referencing a Custom Field attribute. This capability is supported across all image-enabled message blocks:- Image: Delivers the personalized graphic as a standalone image message.
- Card: Displays the graphic as a card banner along with a title, subtitle, and interactive buttons.
- Carousel: Embeds personalized graphics across multiple carousel slides.
Method 1: Paste the Public URL directly
Copy the Public URL from your Dynamic Image template configuration (which includesuserId={{user_id}}) and paste it directly into the image URL field of an Image, Card, or Carousel block. When the message is sent, ChatbotX automatically detects the contact’s user_id and renders the personalized image in real time.
Method 2: Use a Custom Field attribute
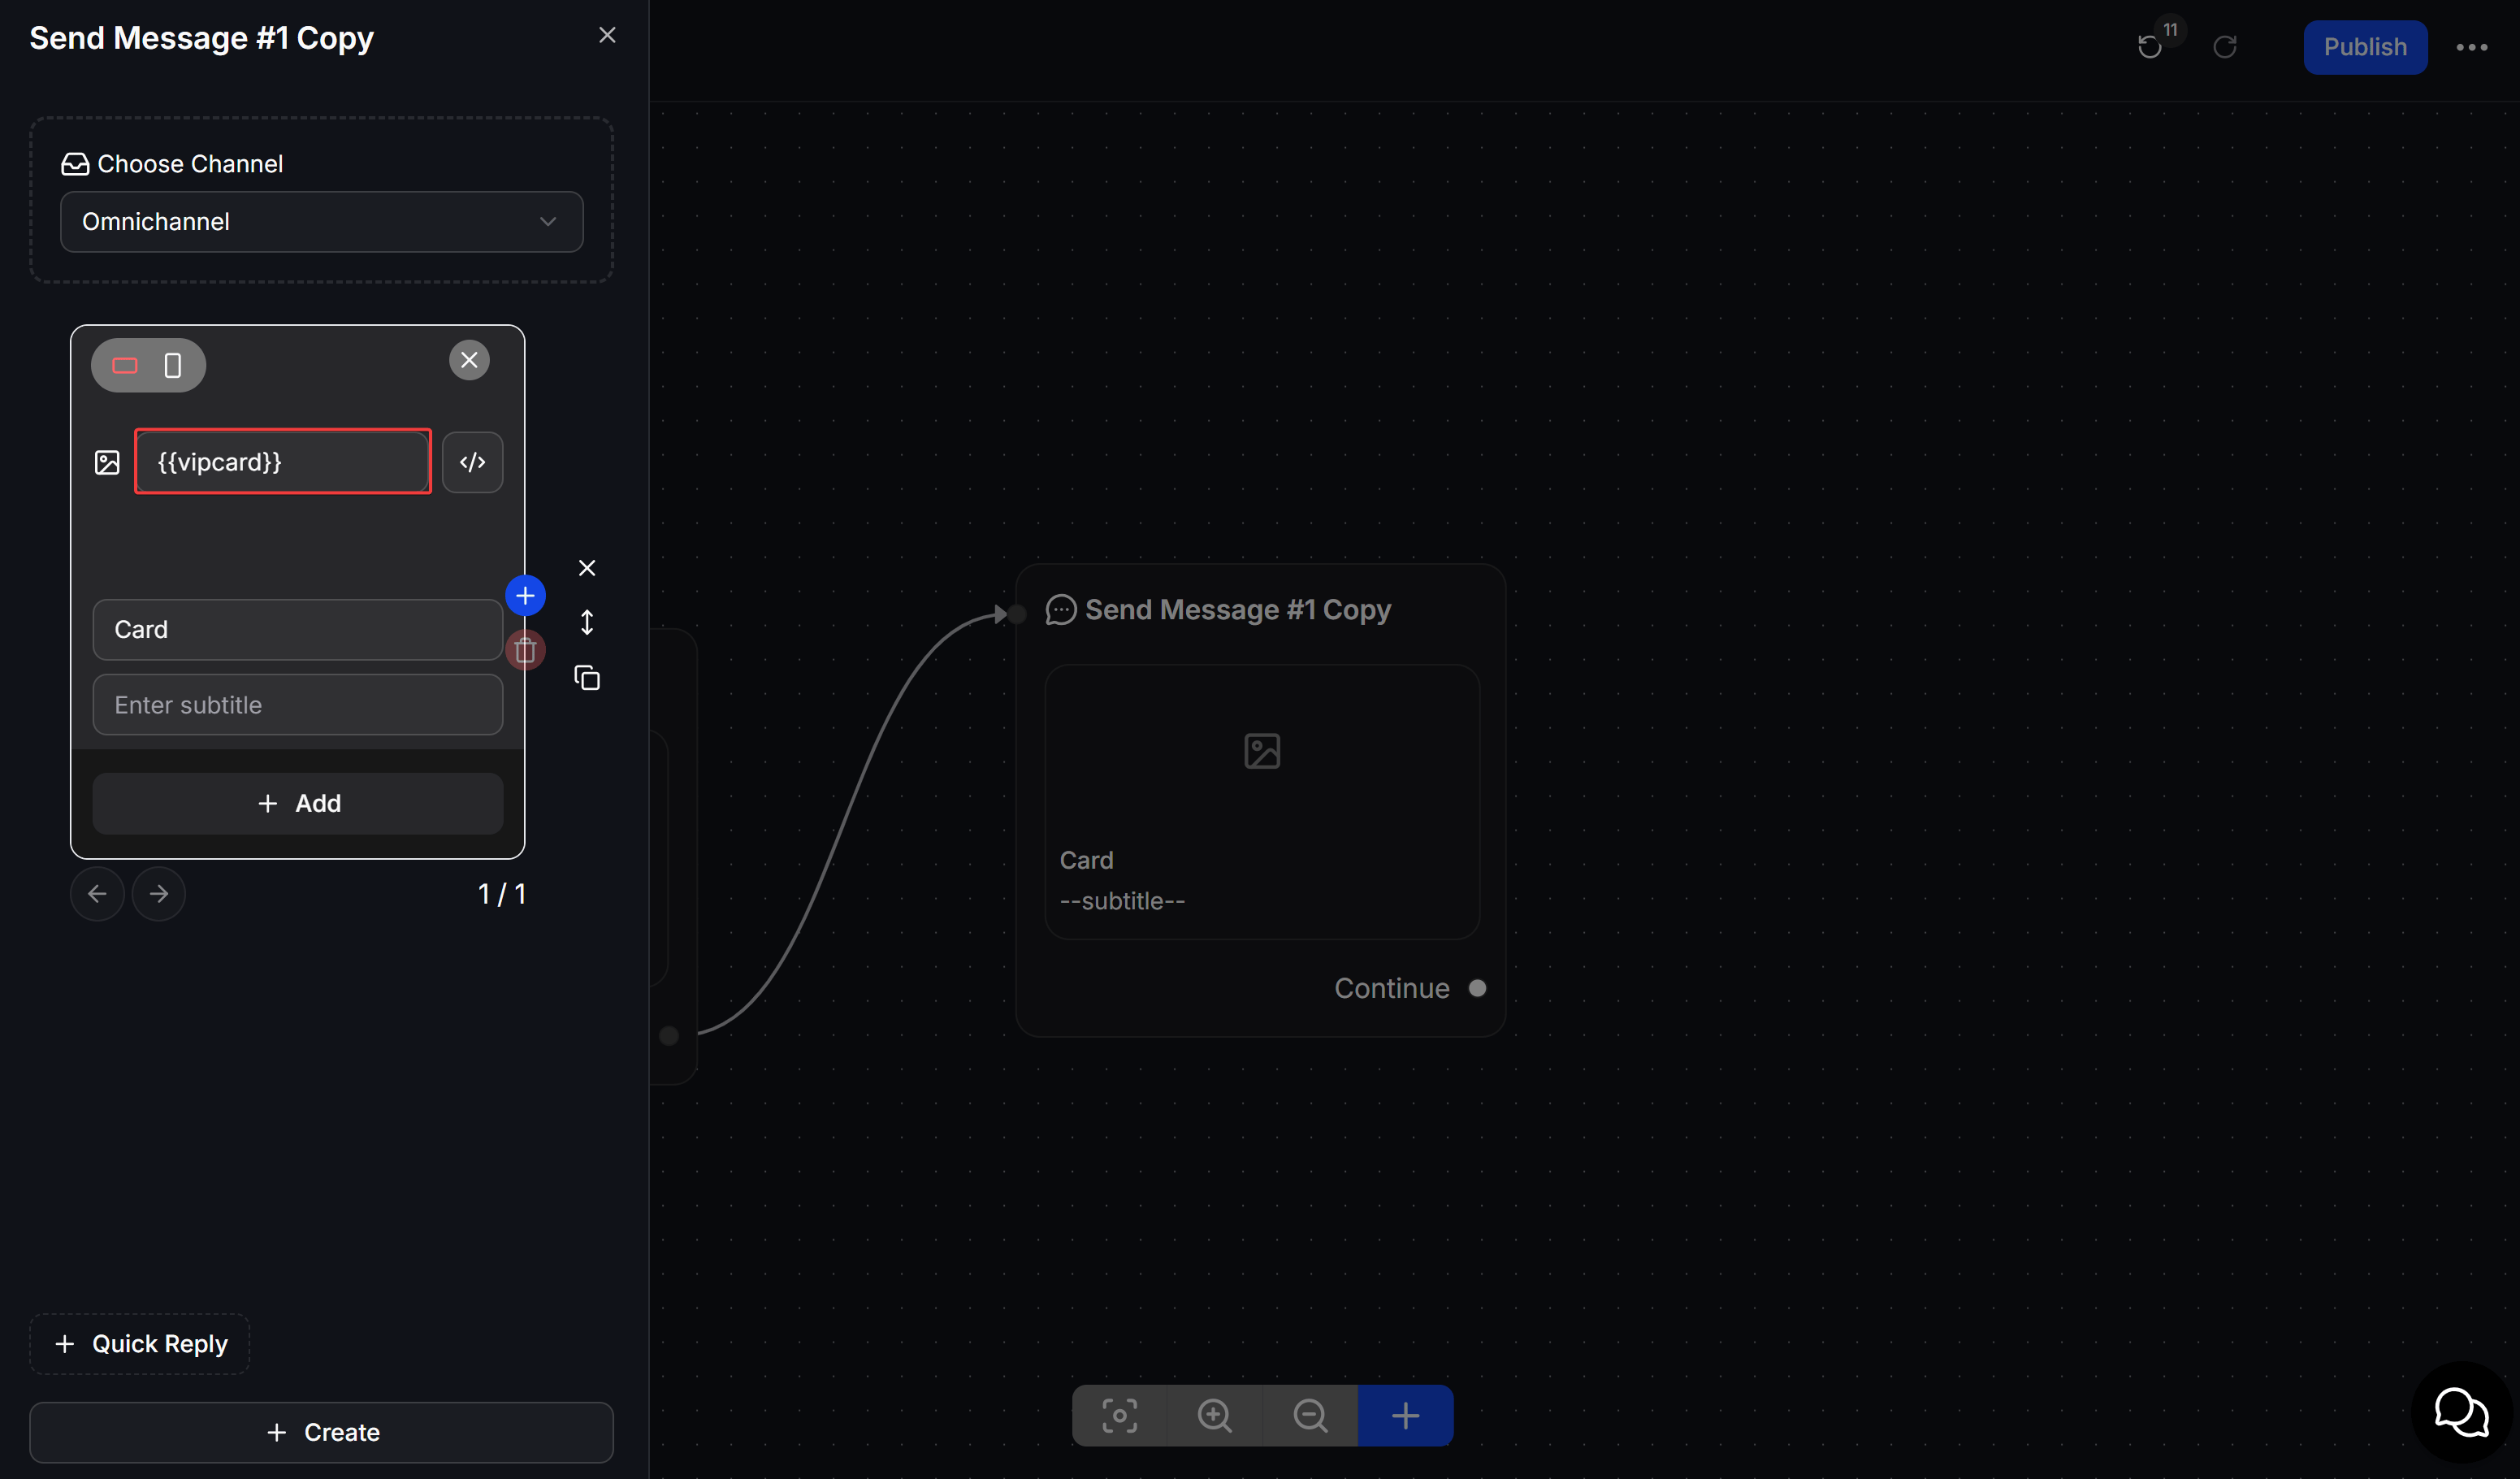
If you selected a Custom Field under Custom Field (optional) when creating your template (or stored the image URL in a contact attribute):- In the Image or Card block within Flow Builder, click the image URL input field.
- Enter the attribute tag directly using
{{attribute_name}}syntax (such as{{vipcard}}) or click the</>code icon on the right side of the input field to select your Custom Field. - When the flow executes, the system dynamically retrieves the image URL stored in that contact attribute and renders the corresponding image.
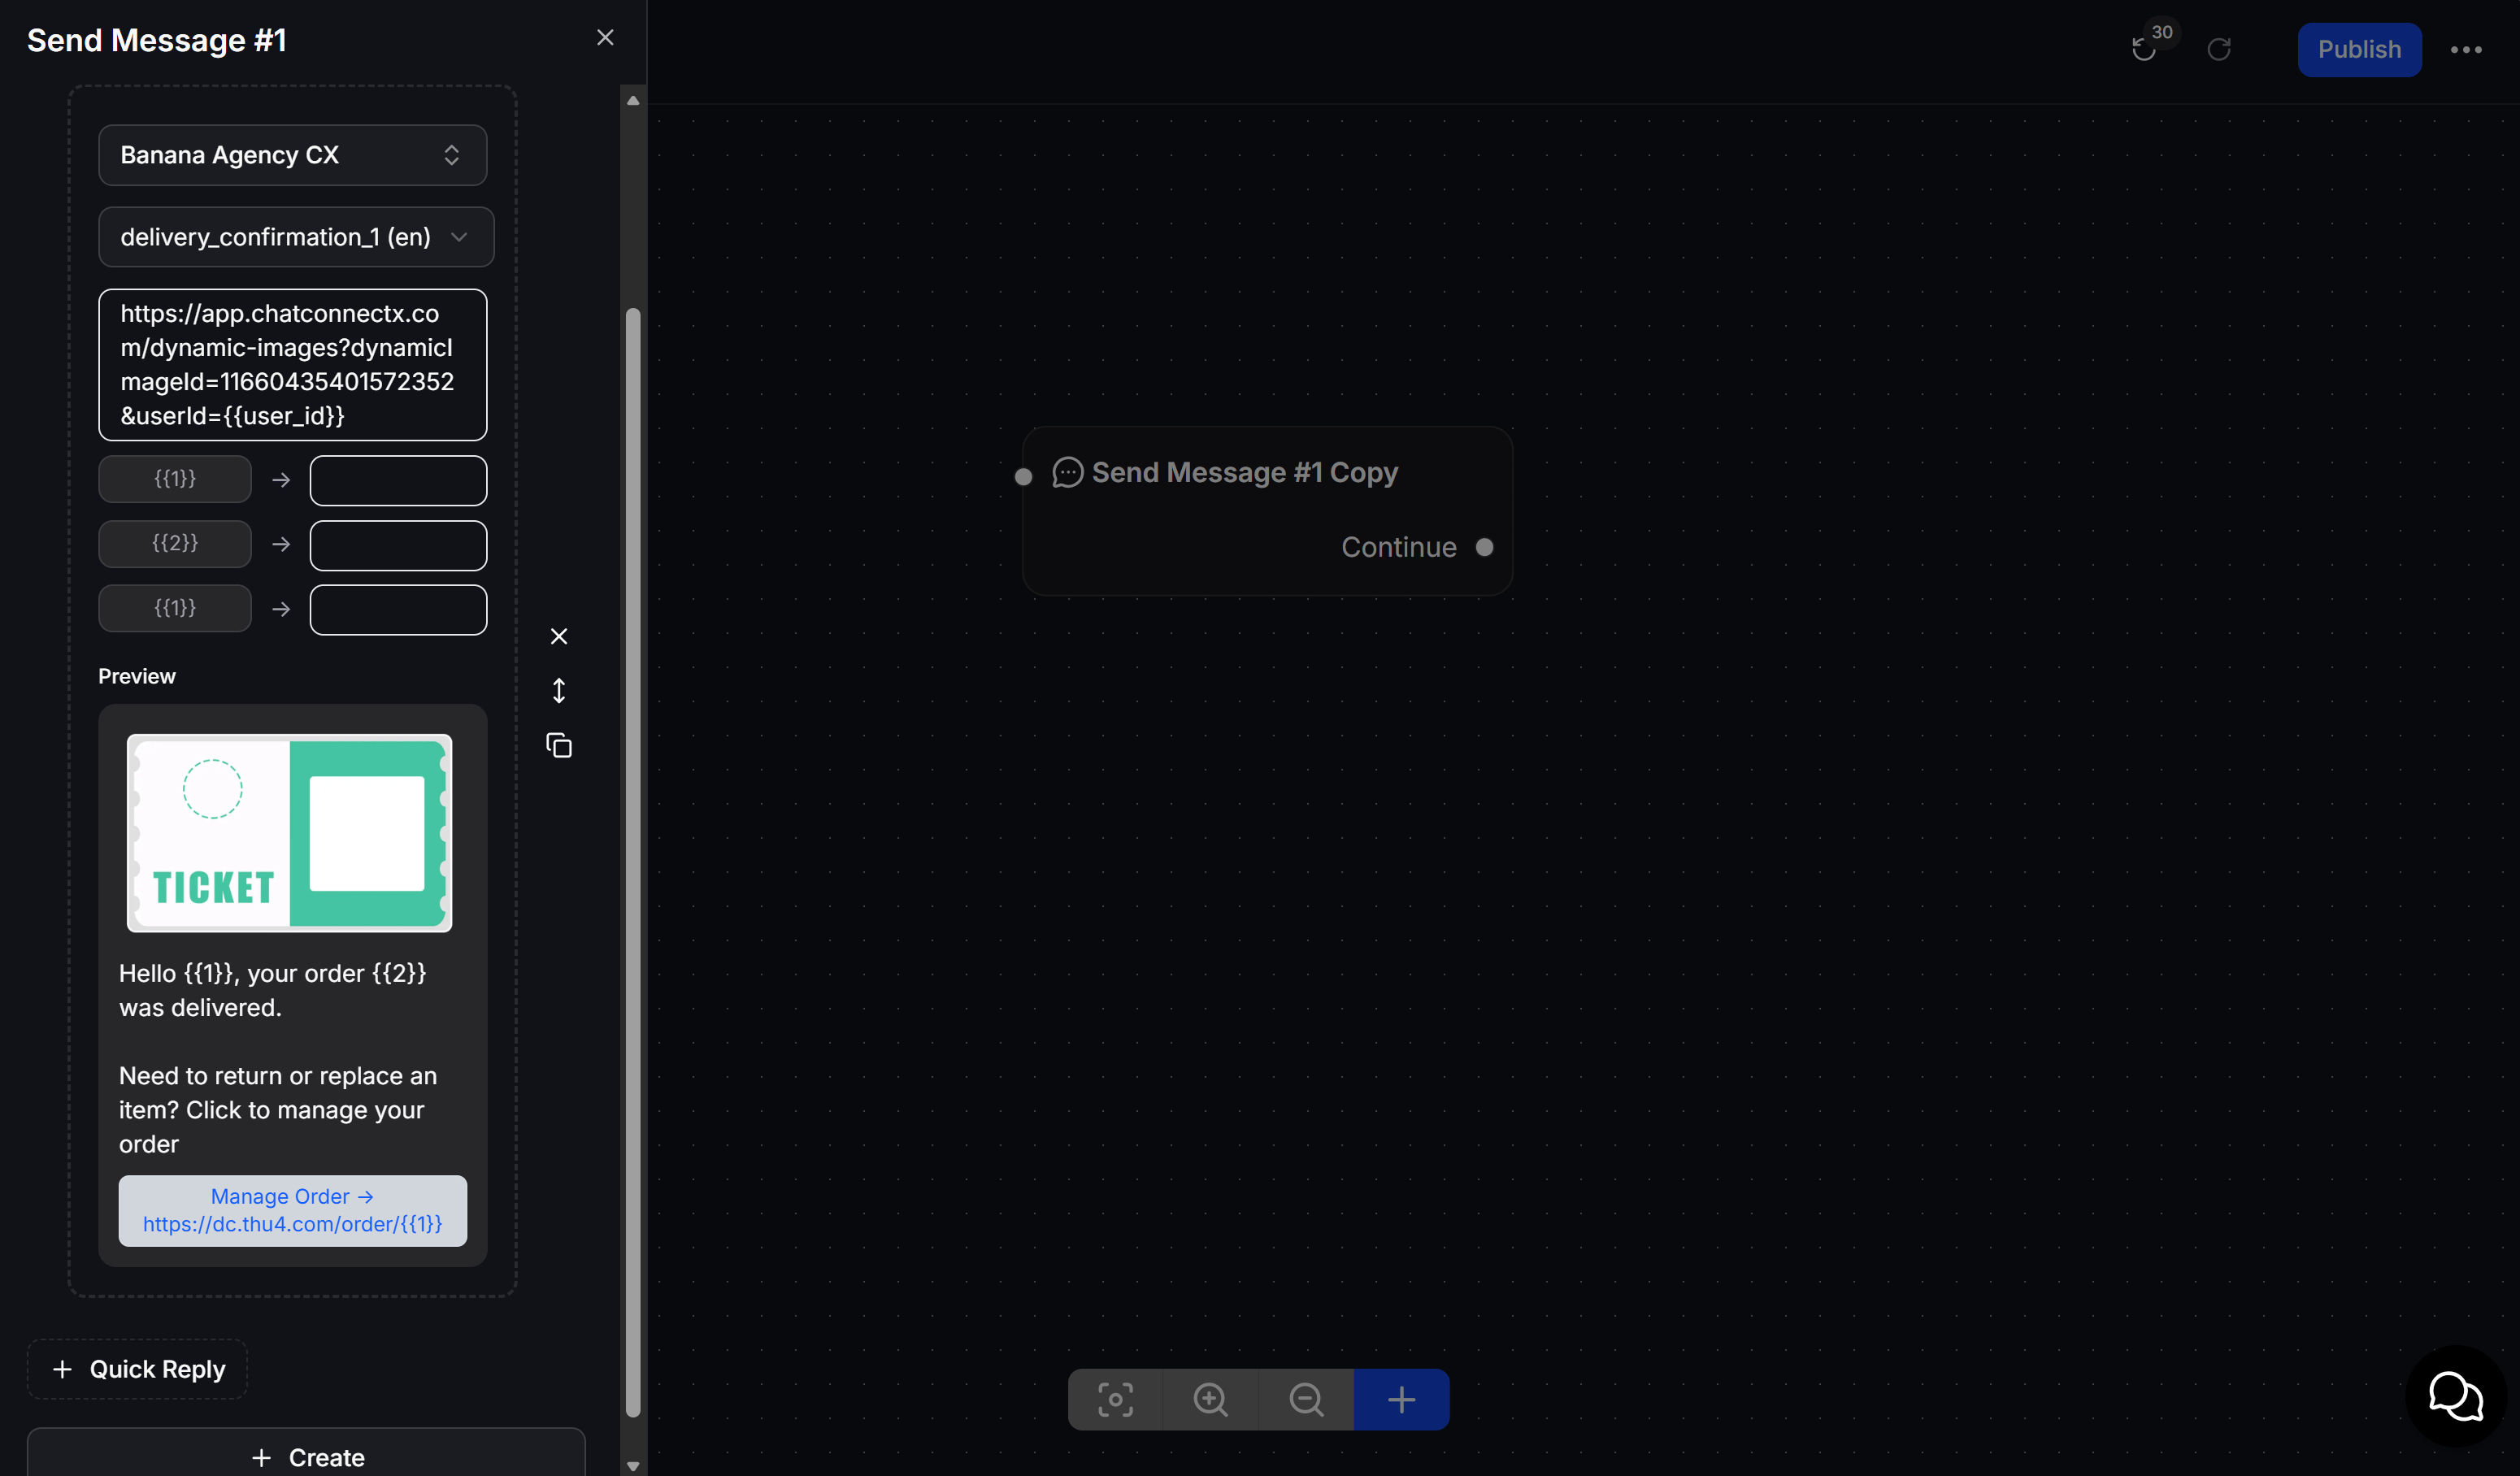
Send via WhatsApp Template Messages
For outbound notifications outside the 24-hour window on WhatsApp, you can include Dynamic Images in pre-approved Template Messages:1
Select a template with Media Header
Select or create a WhatsApp Template with a Media Header set to Image.
2
Paste the Public URL
In the Header media URL field, paste the Public URL of your Dynamic Image.
3
Configure dynamic parameters
Fill in the required body parameters (
{{1}}, {{2}}…).4
Preview template delivery
Preview the personalized image rendering directly inside the WhatsApp template preview card.
Practical Example: Automated VIP Card Distribution
Here is a common scenario for delivering personalized VIP cards:1
Design the VIP Card template
Upload a gold card background (500 x 320 px). Add a Contact avatar image layer with Circle style on the left. Add a Text layer containing
{{first_name}} formatted in bold uppercase. Add a QR code layer pointing to https://example.com/vip?id={{user_id}} with your company logo centered. Click Save and copy the Public URL.2
Attach Public URL to your Flow
Create a greeting or loyalty reward Flow. Add a Send Image or Send Card block and paste the Public URL into the Image URL field. Add call-to-action buttons below the card.
3
Verify delivery in live chat
When a contact triggers the flow, ChatbotX instantly generates their personalized card featuring their own avatar, name, and QR code, delivering it straight to their inbox.
Best Practices
- Preserve the
{{user_id}}parameter: Always ensureuserId={{user_id}}remains in the Public URL when pasting into Flows or WhatsApp Templates so the system can resolve contact attributes correctly. - Optimize background file sizes: For static background images, use compressed PNG or JPG files under 1MB to ensure fast loading times.
- Account for variable text lengths: If dynamic text fields (like names) vary significantly in length, choose an appropriate font size and alignment to prevent text clipping.