

Managing Mini Apps
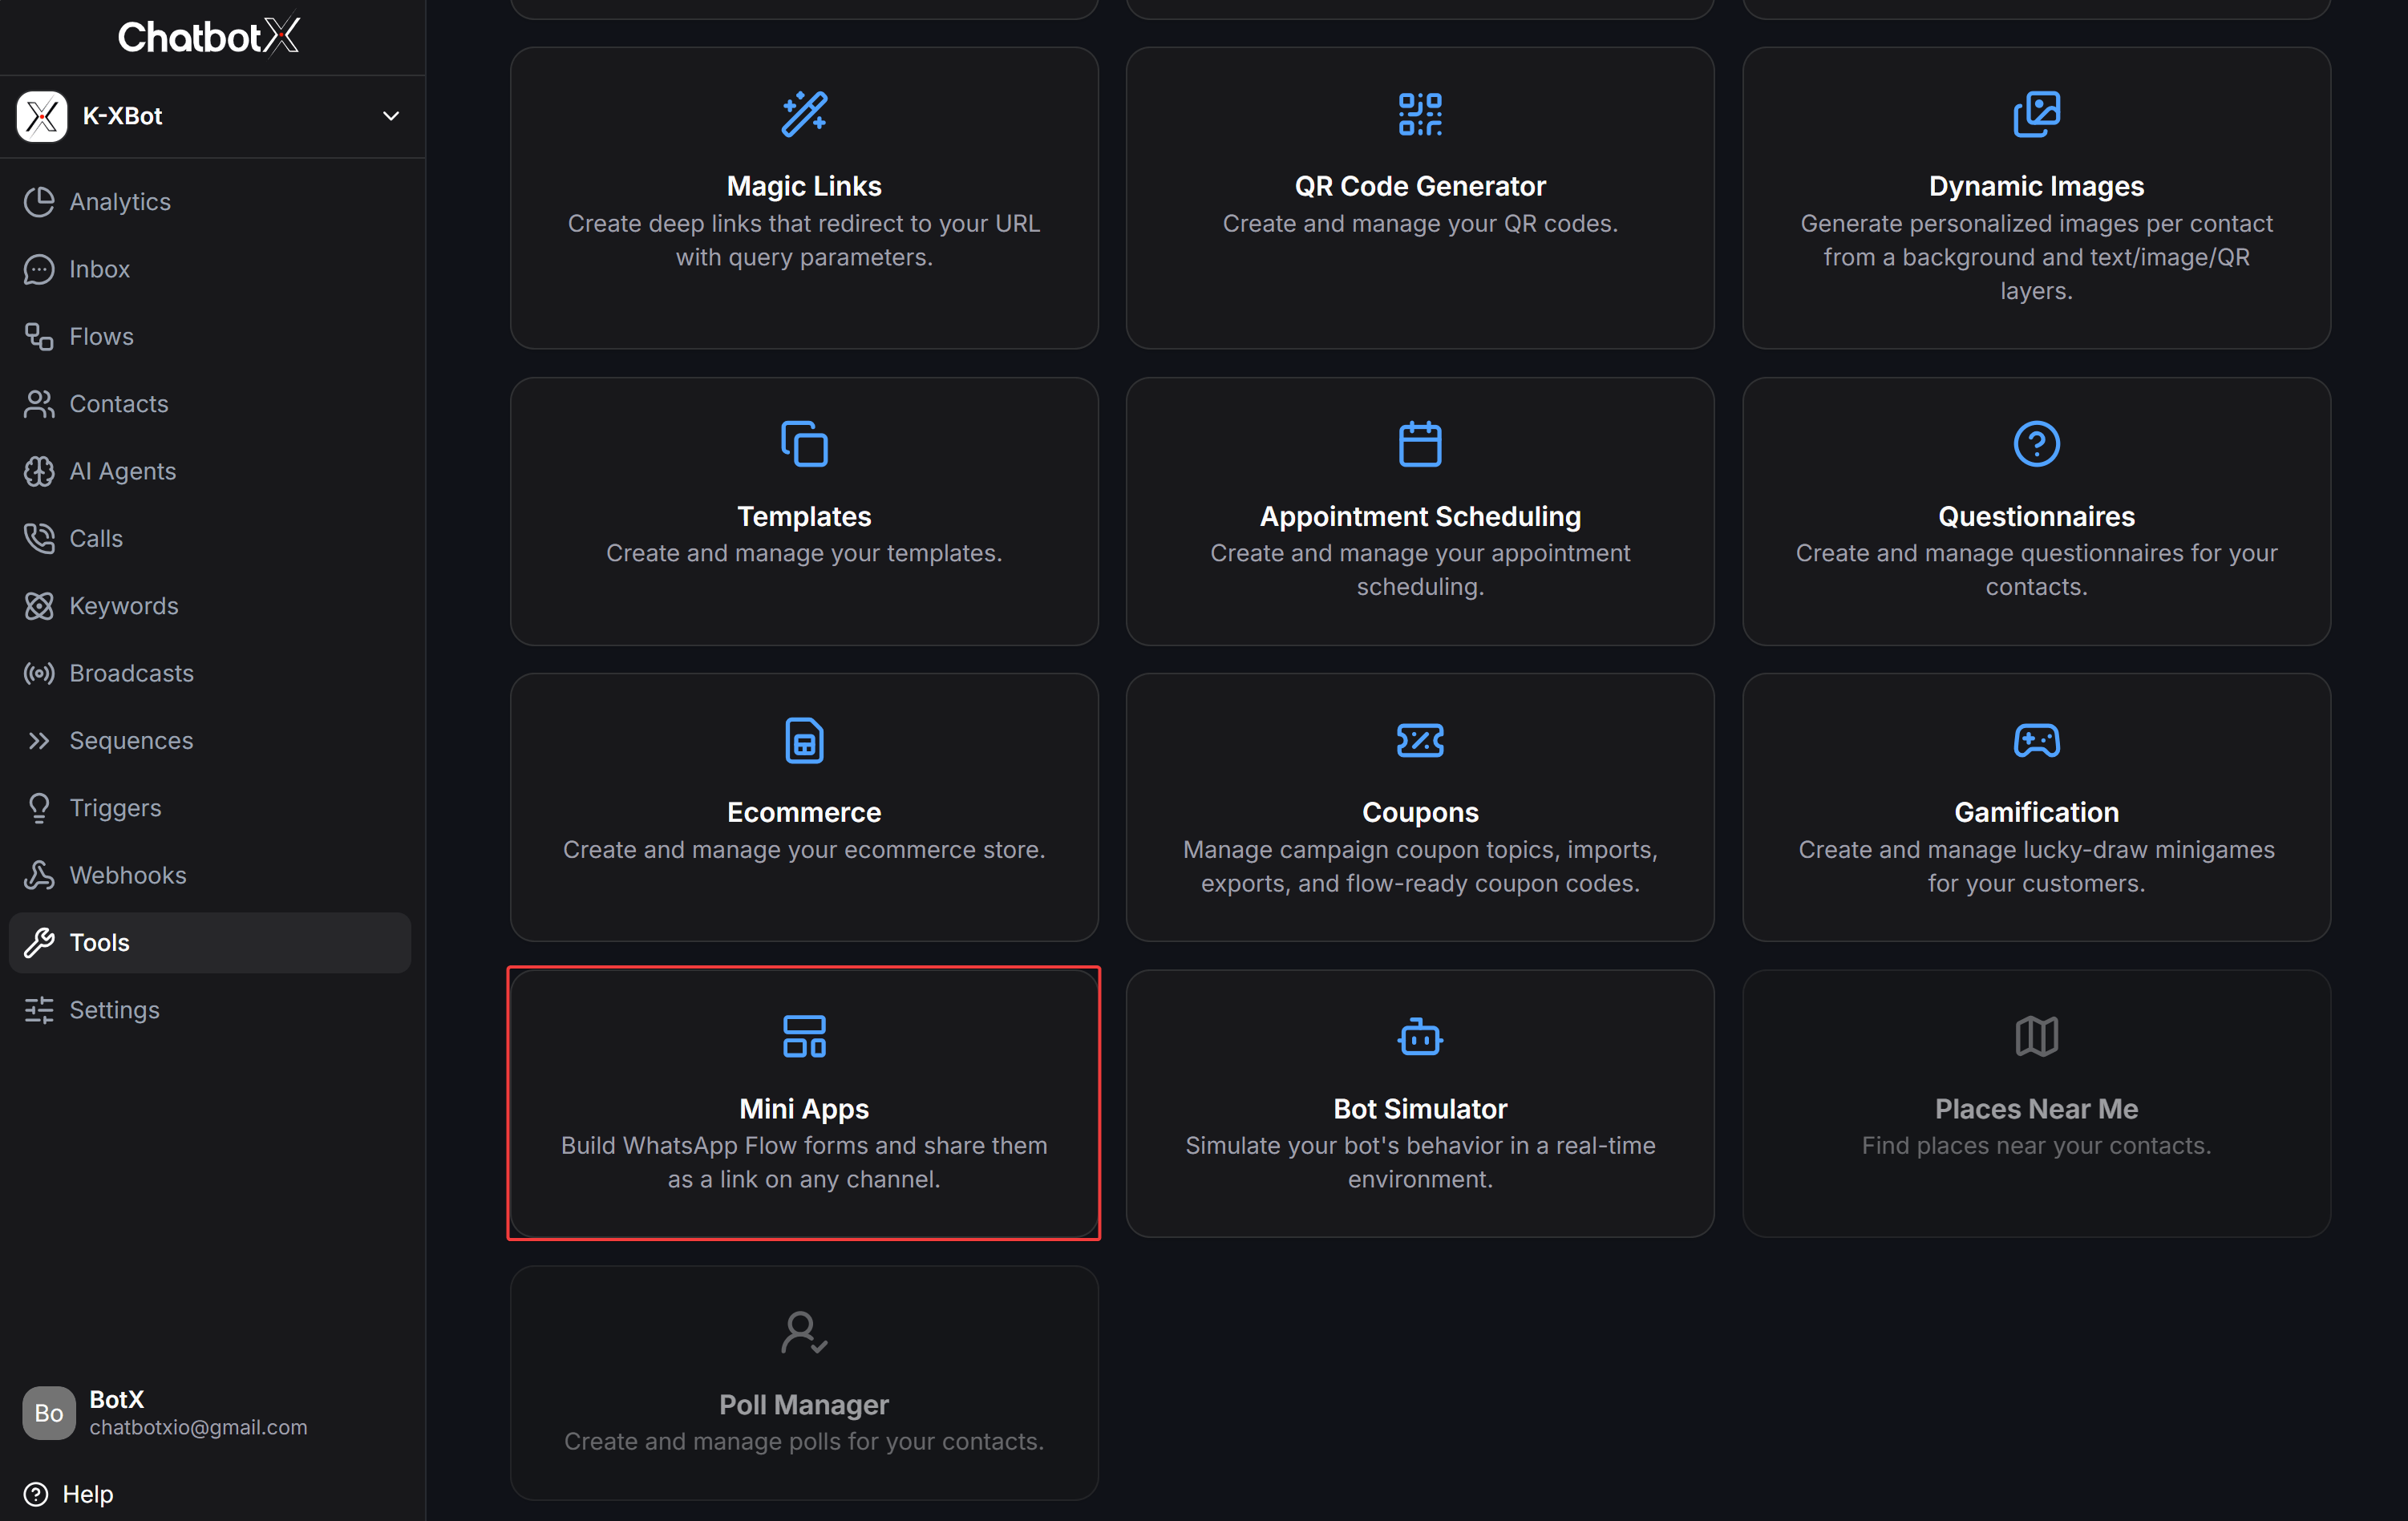
To access your forms, navigate to Tools in the main sidebar and select Mini Apps.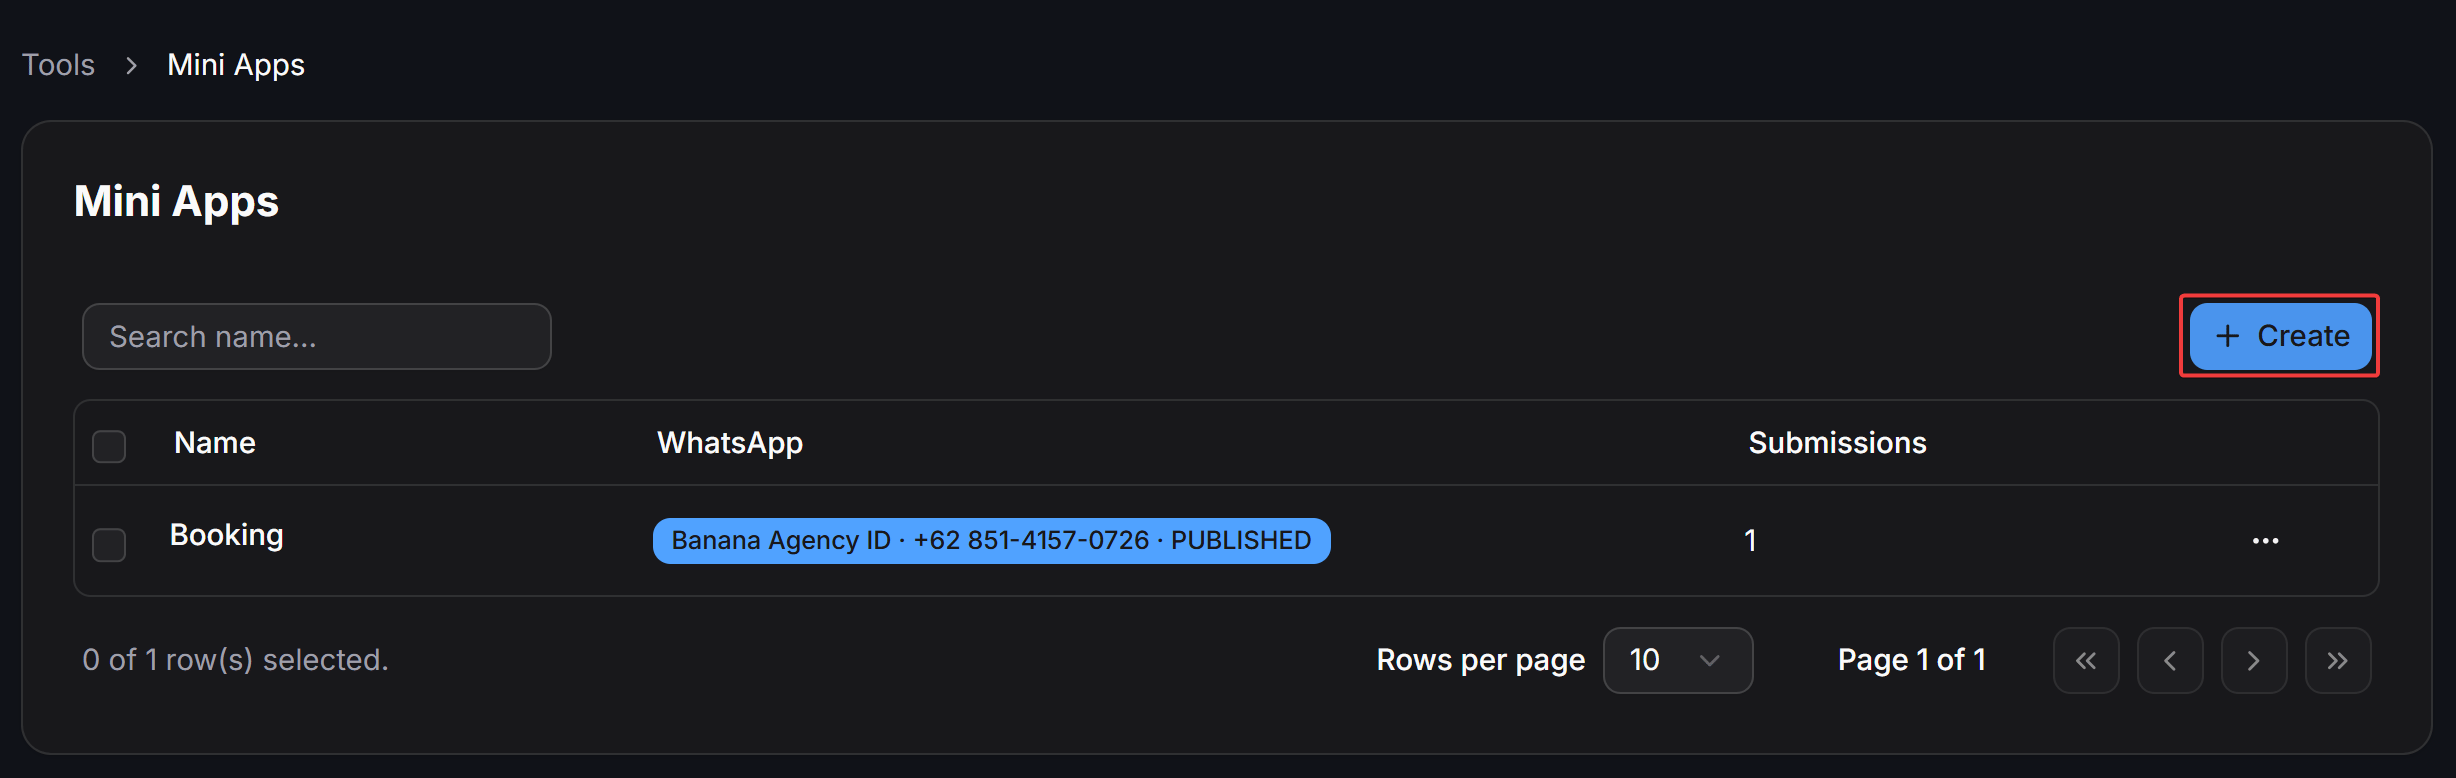
- Search bar: Quickly filter forms by name.
- + Create button: Start building a new Mini App.
- Overview table:
- Name: Name of the form.
- WhatsApp: Associated WhatsApp Business account, phone number, and publication status on Meta.
- Submissions: Total count of completed form submissions.
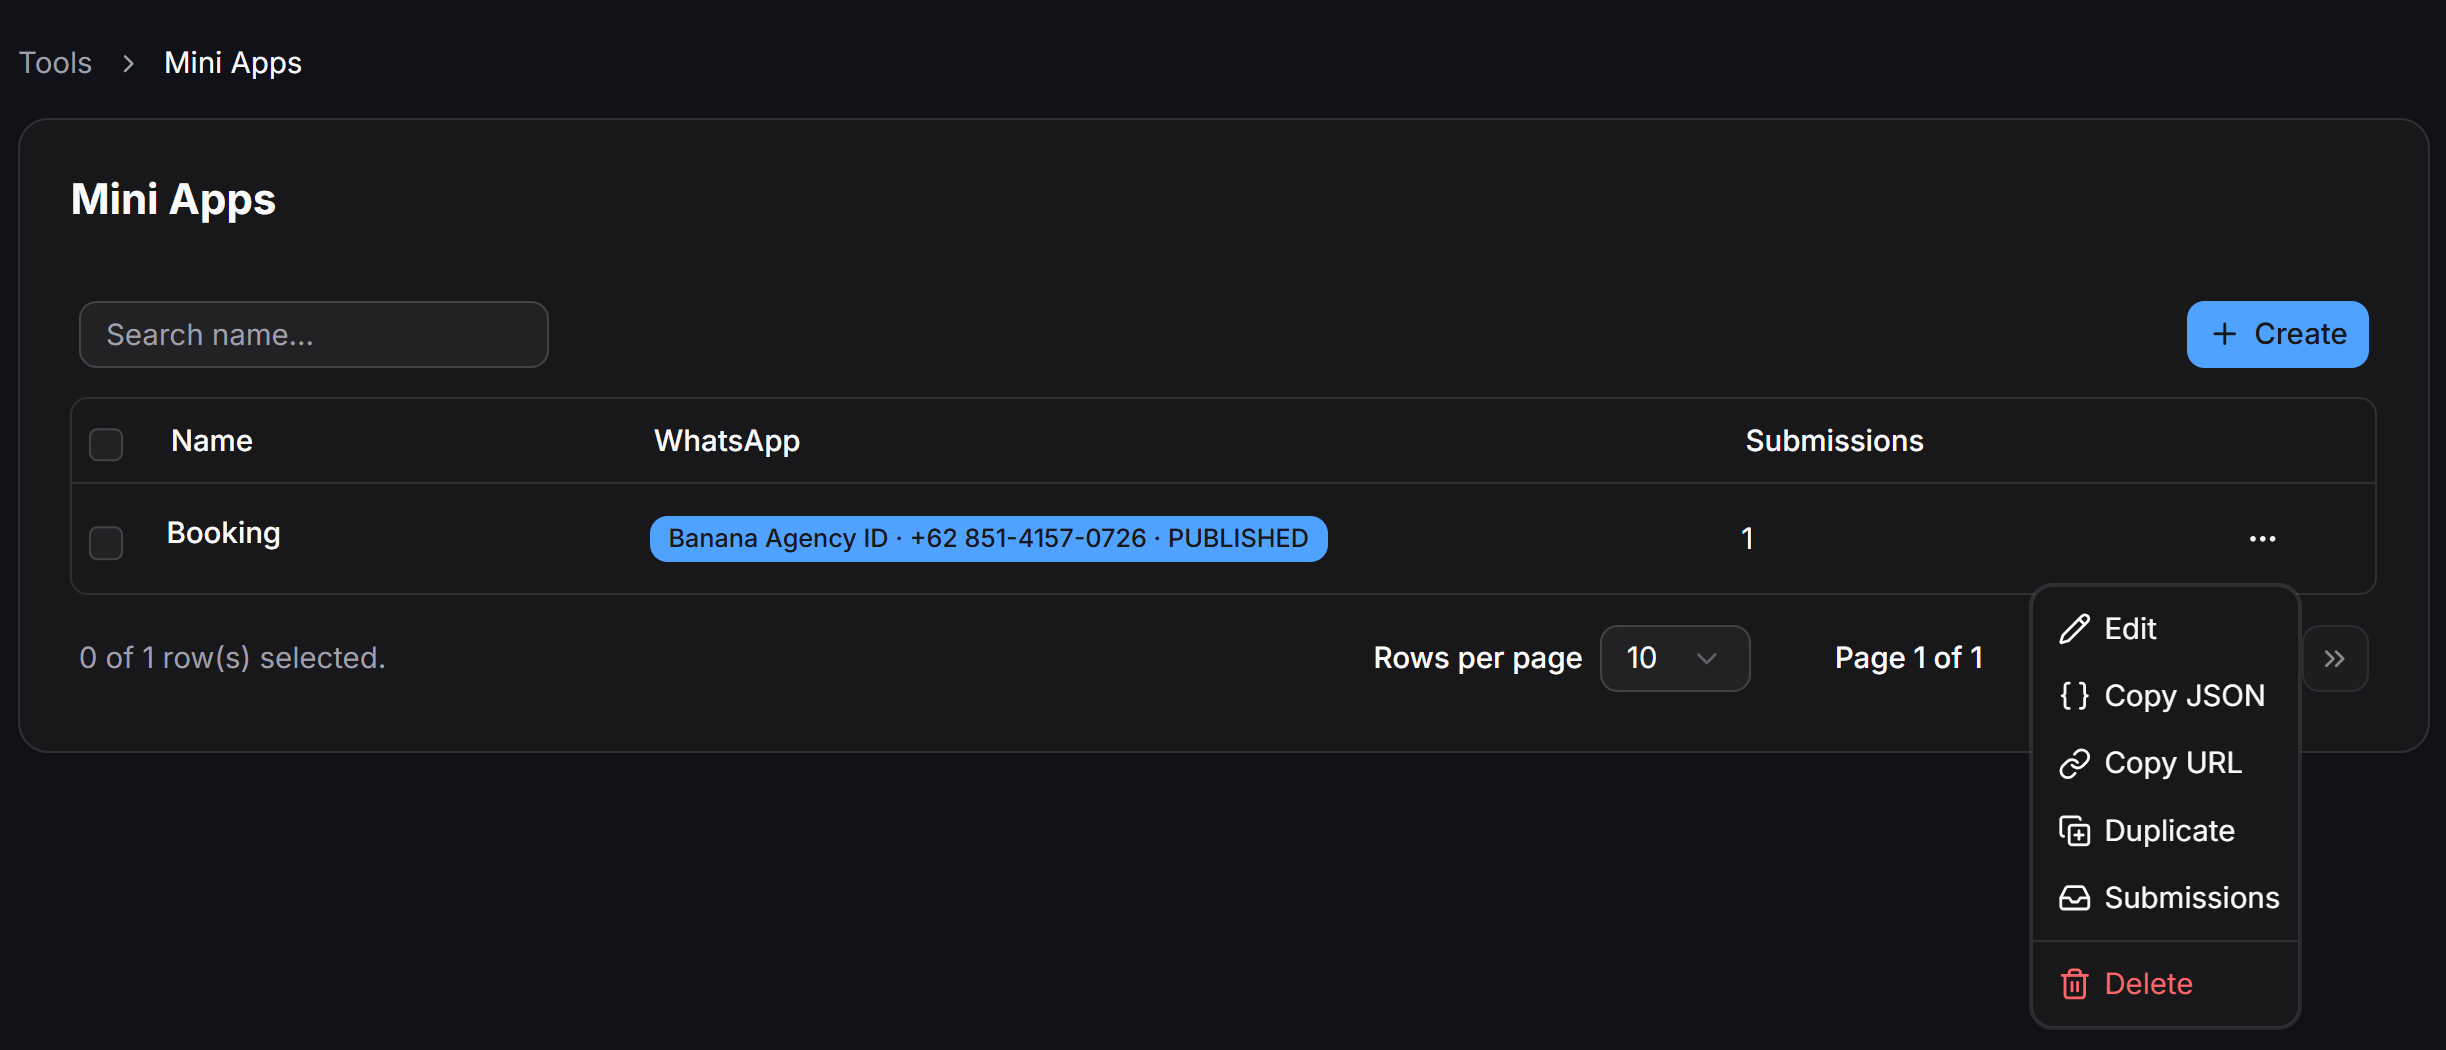
- Edit: Open the visual builder to modify the form.
- Copy JSON: Copy the Meta-compliant WhatsApp Flow JSON schema for backup or reuse.
- Copy URL: Copy the public URL for sharing across channels.
- Duplicate: Create an exact copy of the form.
- Submissions: View all customer responses collected by this form.
- Delete: Permanently remove the form from your workspace.
Designing Forms with Mini App Builder
The visual editor provides a two-tab workspace: Edit (visual design) and Submissions (collected data).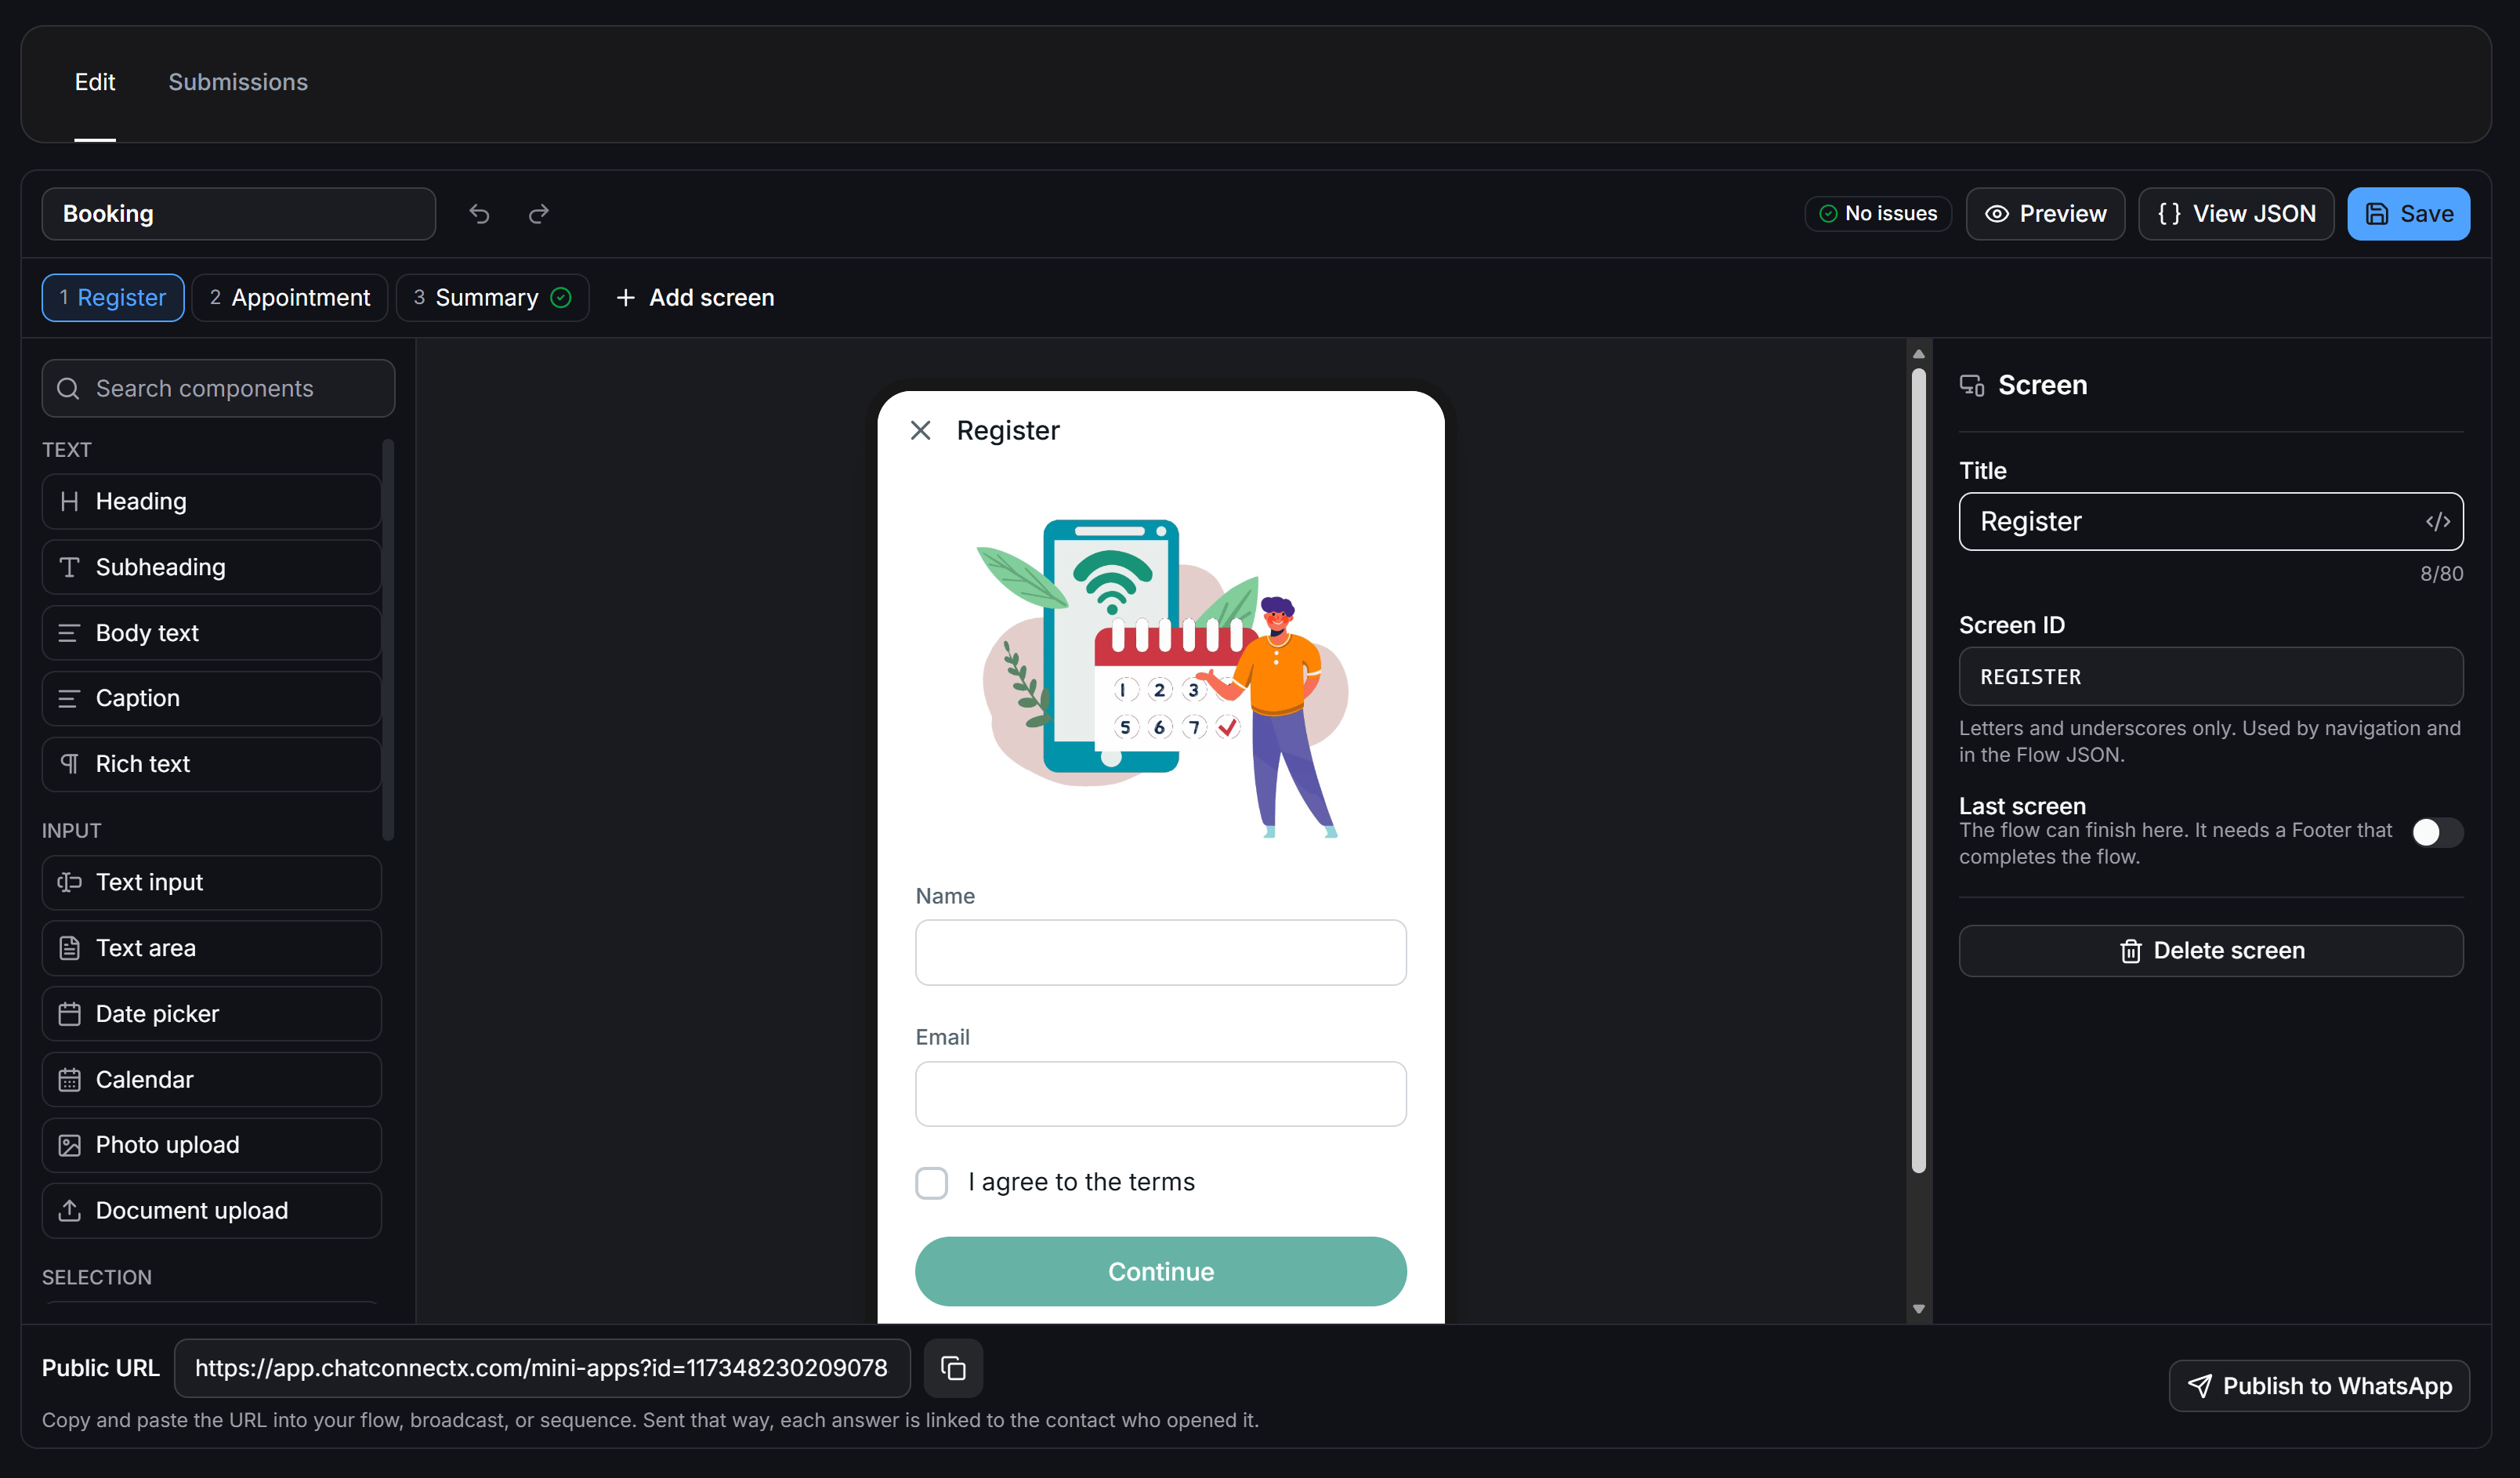
Workspace Structure
The builder is organized into four main areas:- Screens navigation bar: Located at the top, allowing you to build multi-step flows. Add new screens using + Add screen, switch between steps, or reorder them.
- Components panel: Located on the left, organized into functional groups.
- Mobile live preview: Displays a real-time interactive preview of the form on a mobile device.
- Properties inspector: Located on the right, allowing you to configure screen titles, screen IDs, and individual component settings.
Component Library
Mini Apps includes 24 pre-built components across 6 categories:Screen Configuration
Selecting a screen tab in the navigation bar reveals its properties in the right inspector:- Title: Header title displayed at the top of the mobile screen.
- Screen ID: Uppercase alphanumeric identifier used in navigation and Flow JSON references.
- Last screen: Toggle on if this is the final screen of your flow. When submitted, the flow completes and records responses to your workspace.
Building Dynamic Forms with Containers
The Containers category provides structural logic components that adapt your form in real time based on user answers without reloading.Form Container
The Form container serves as a required data wrapper for input fields. Each Form container has a unique Field key (such asform_1 or customer_info). When submitted, all answers inside this container are packaged into a structured data object.
The Form container also acts as a validation boundary. When the user taps the footer action button, ChatbotX automatically verifies that all required fields inside the Form are filled before proceeding to the next step.
If / Else Container
The If / Else container shows or hides components dynamically across two branches based on whether a logical condition evaluates to true or false.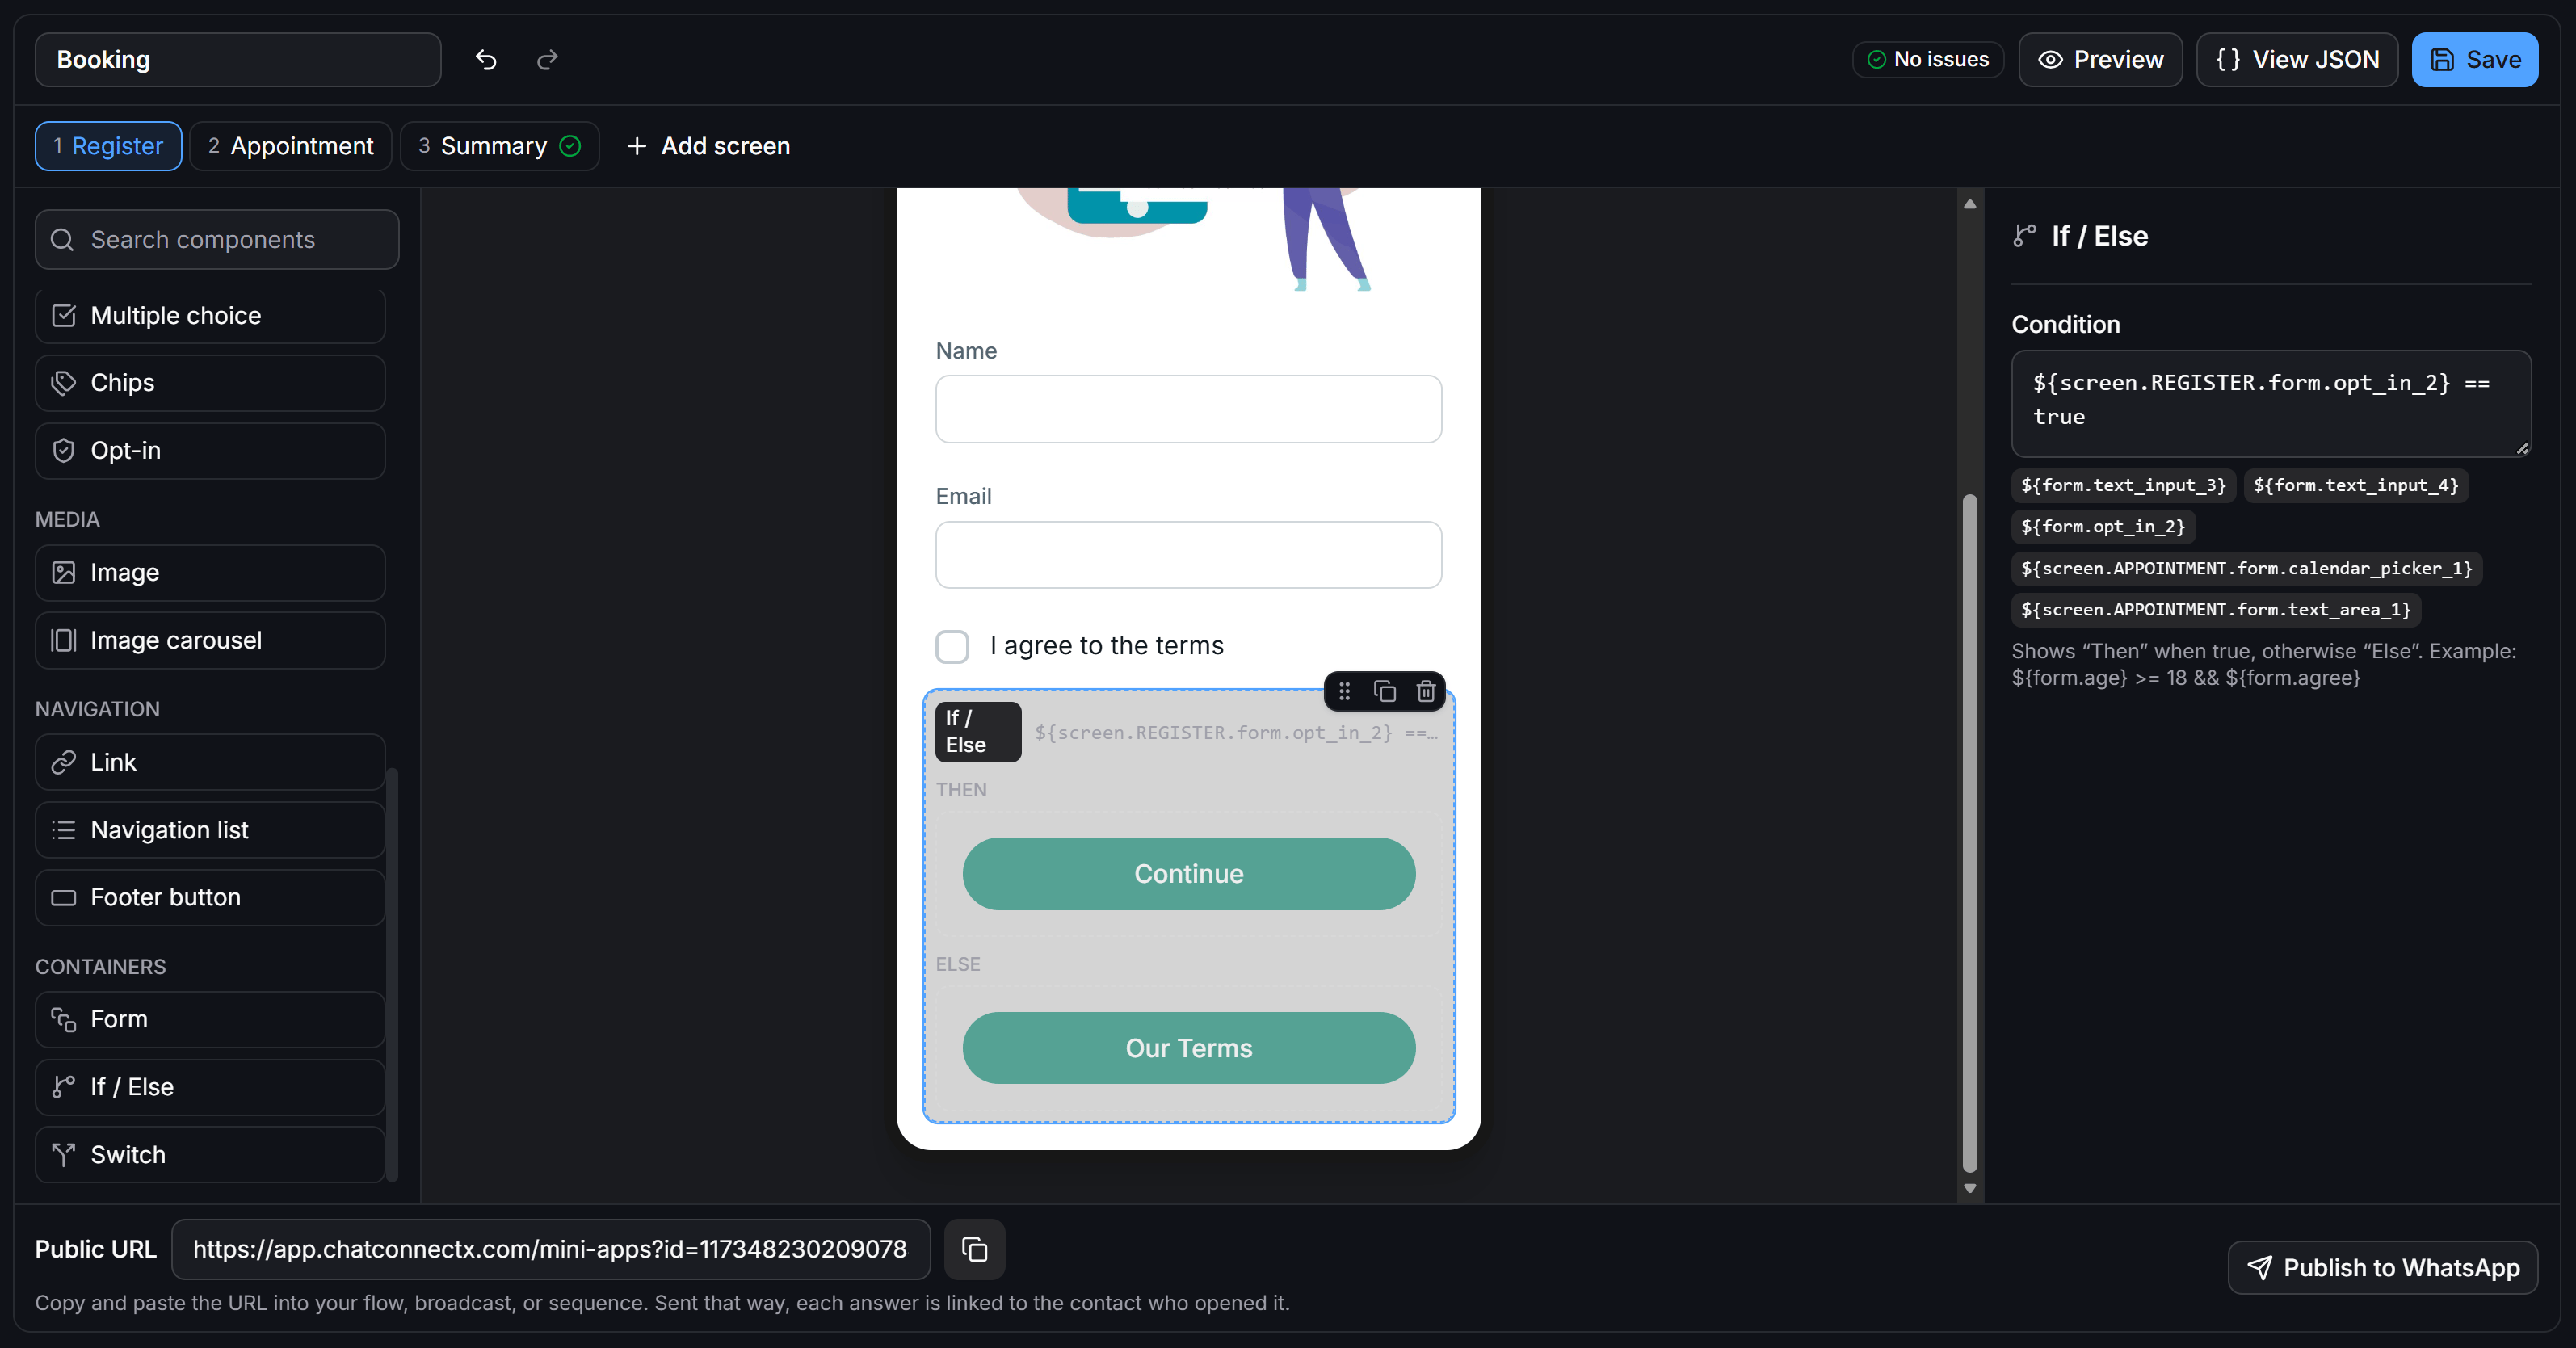
Answer References
To evaluate user input, every field in Mini Apps provides an Answer reference token.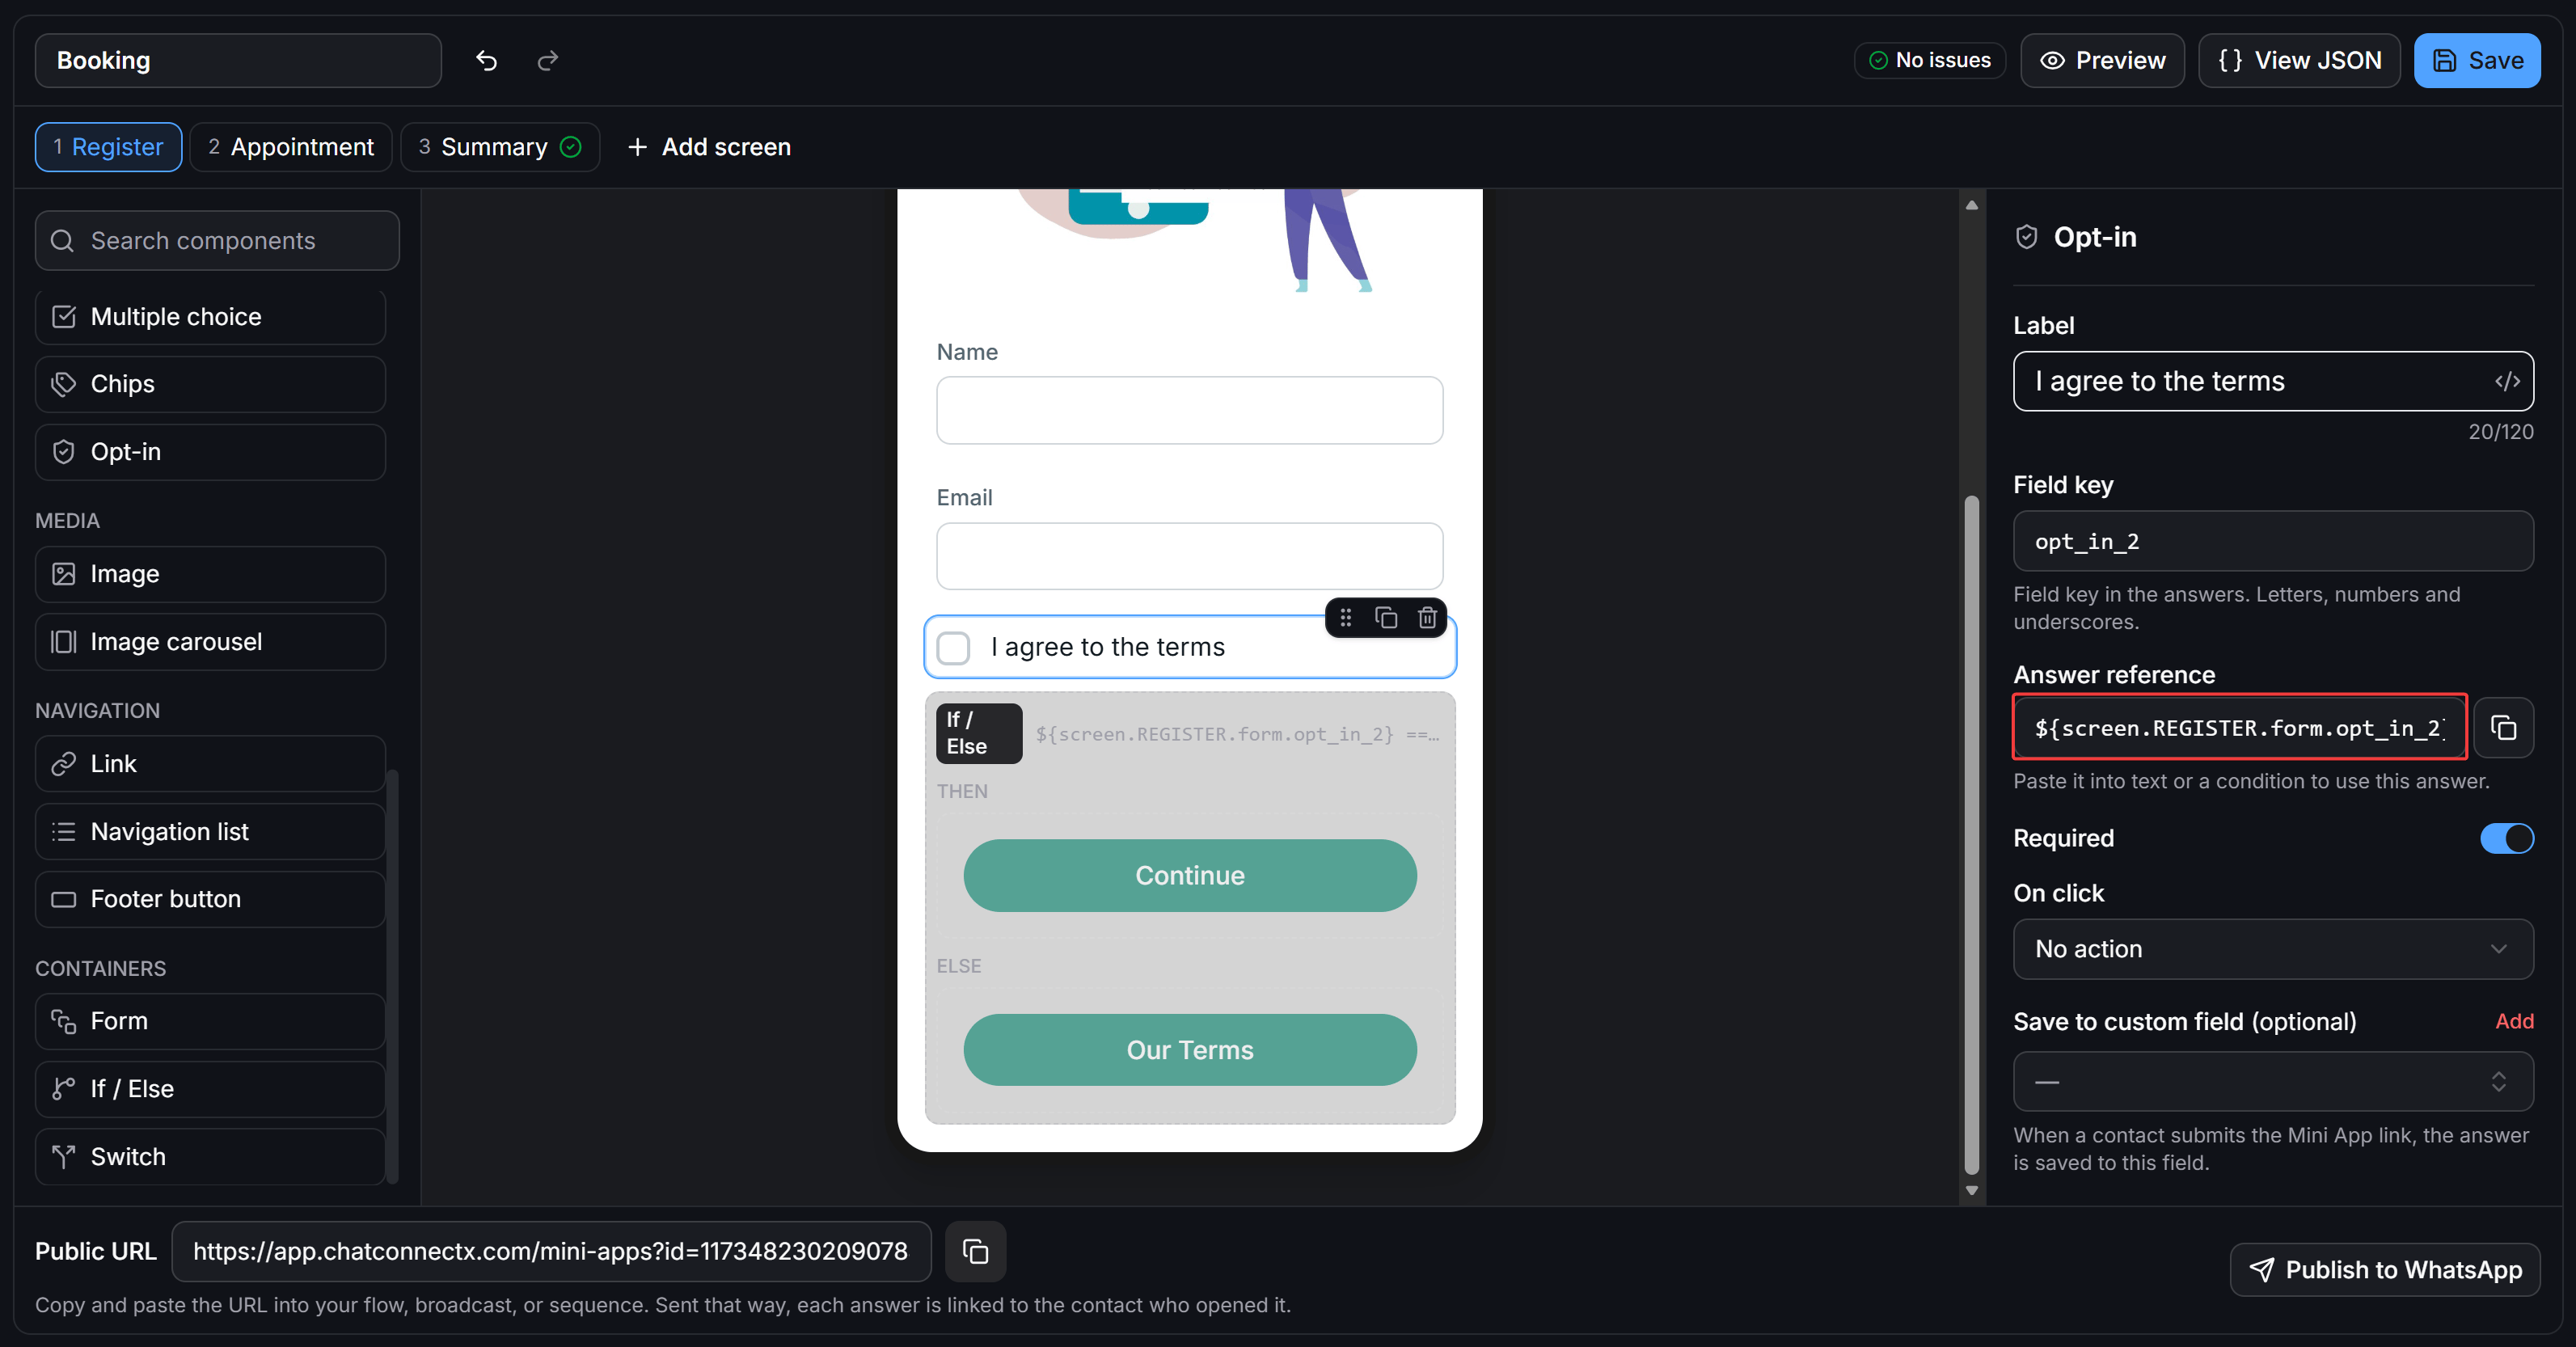
${screen.[SCREEN_ID].form.[FIELD_KEY]}.
Writing Conditions
In the Condition field of the If / Else container, enter your evaluation expression:- Boolean evaluation:
${screen.REGISTER.form.opt_in_2} == true - Numeric comparison:
${form.age} >= 18 - Compound logic: Combine rules using
&&(AND) or||(OR). For example:${form.age} >= 18 && ${form.agree} == true
Switch Container
While If / Else handles binary conditions, the Switch container is designed for branching into three or more views based on a single selected option.Switch Logic Overview
The Switch container functions as an internal UI router. It reads the selected variable and renders only the matching case: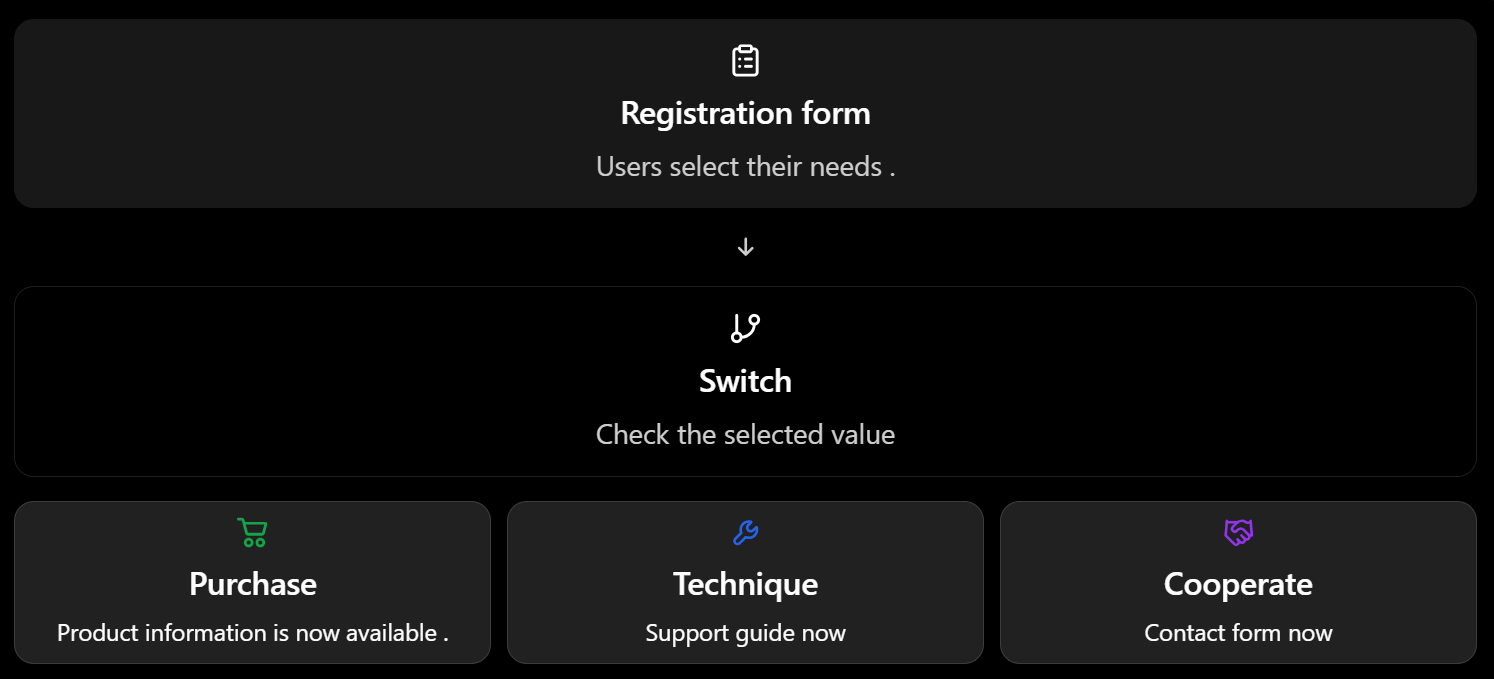
- The user selects an option in the form.
- The Switch container evaluates the value.
- The screen renders the relevant UI: product details for Sales, troubleshooting guides for Technical support, or a partnership form for Business inquiries.
Configuring the Switch Container
1
Create the source selection component
Add a
Single choice or Dropdown component with options matching your requirements (for example: basic, pro, vip).2
Add the Switch container
Drag a
Switch component from the CONTAINERS group and drop it beneath your selection question.3
Assign the Value expression
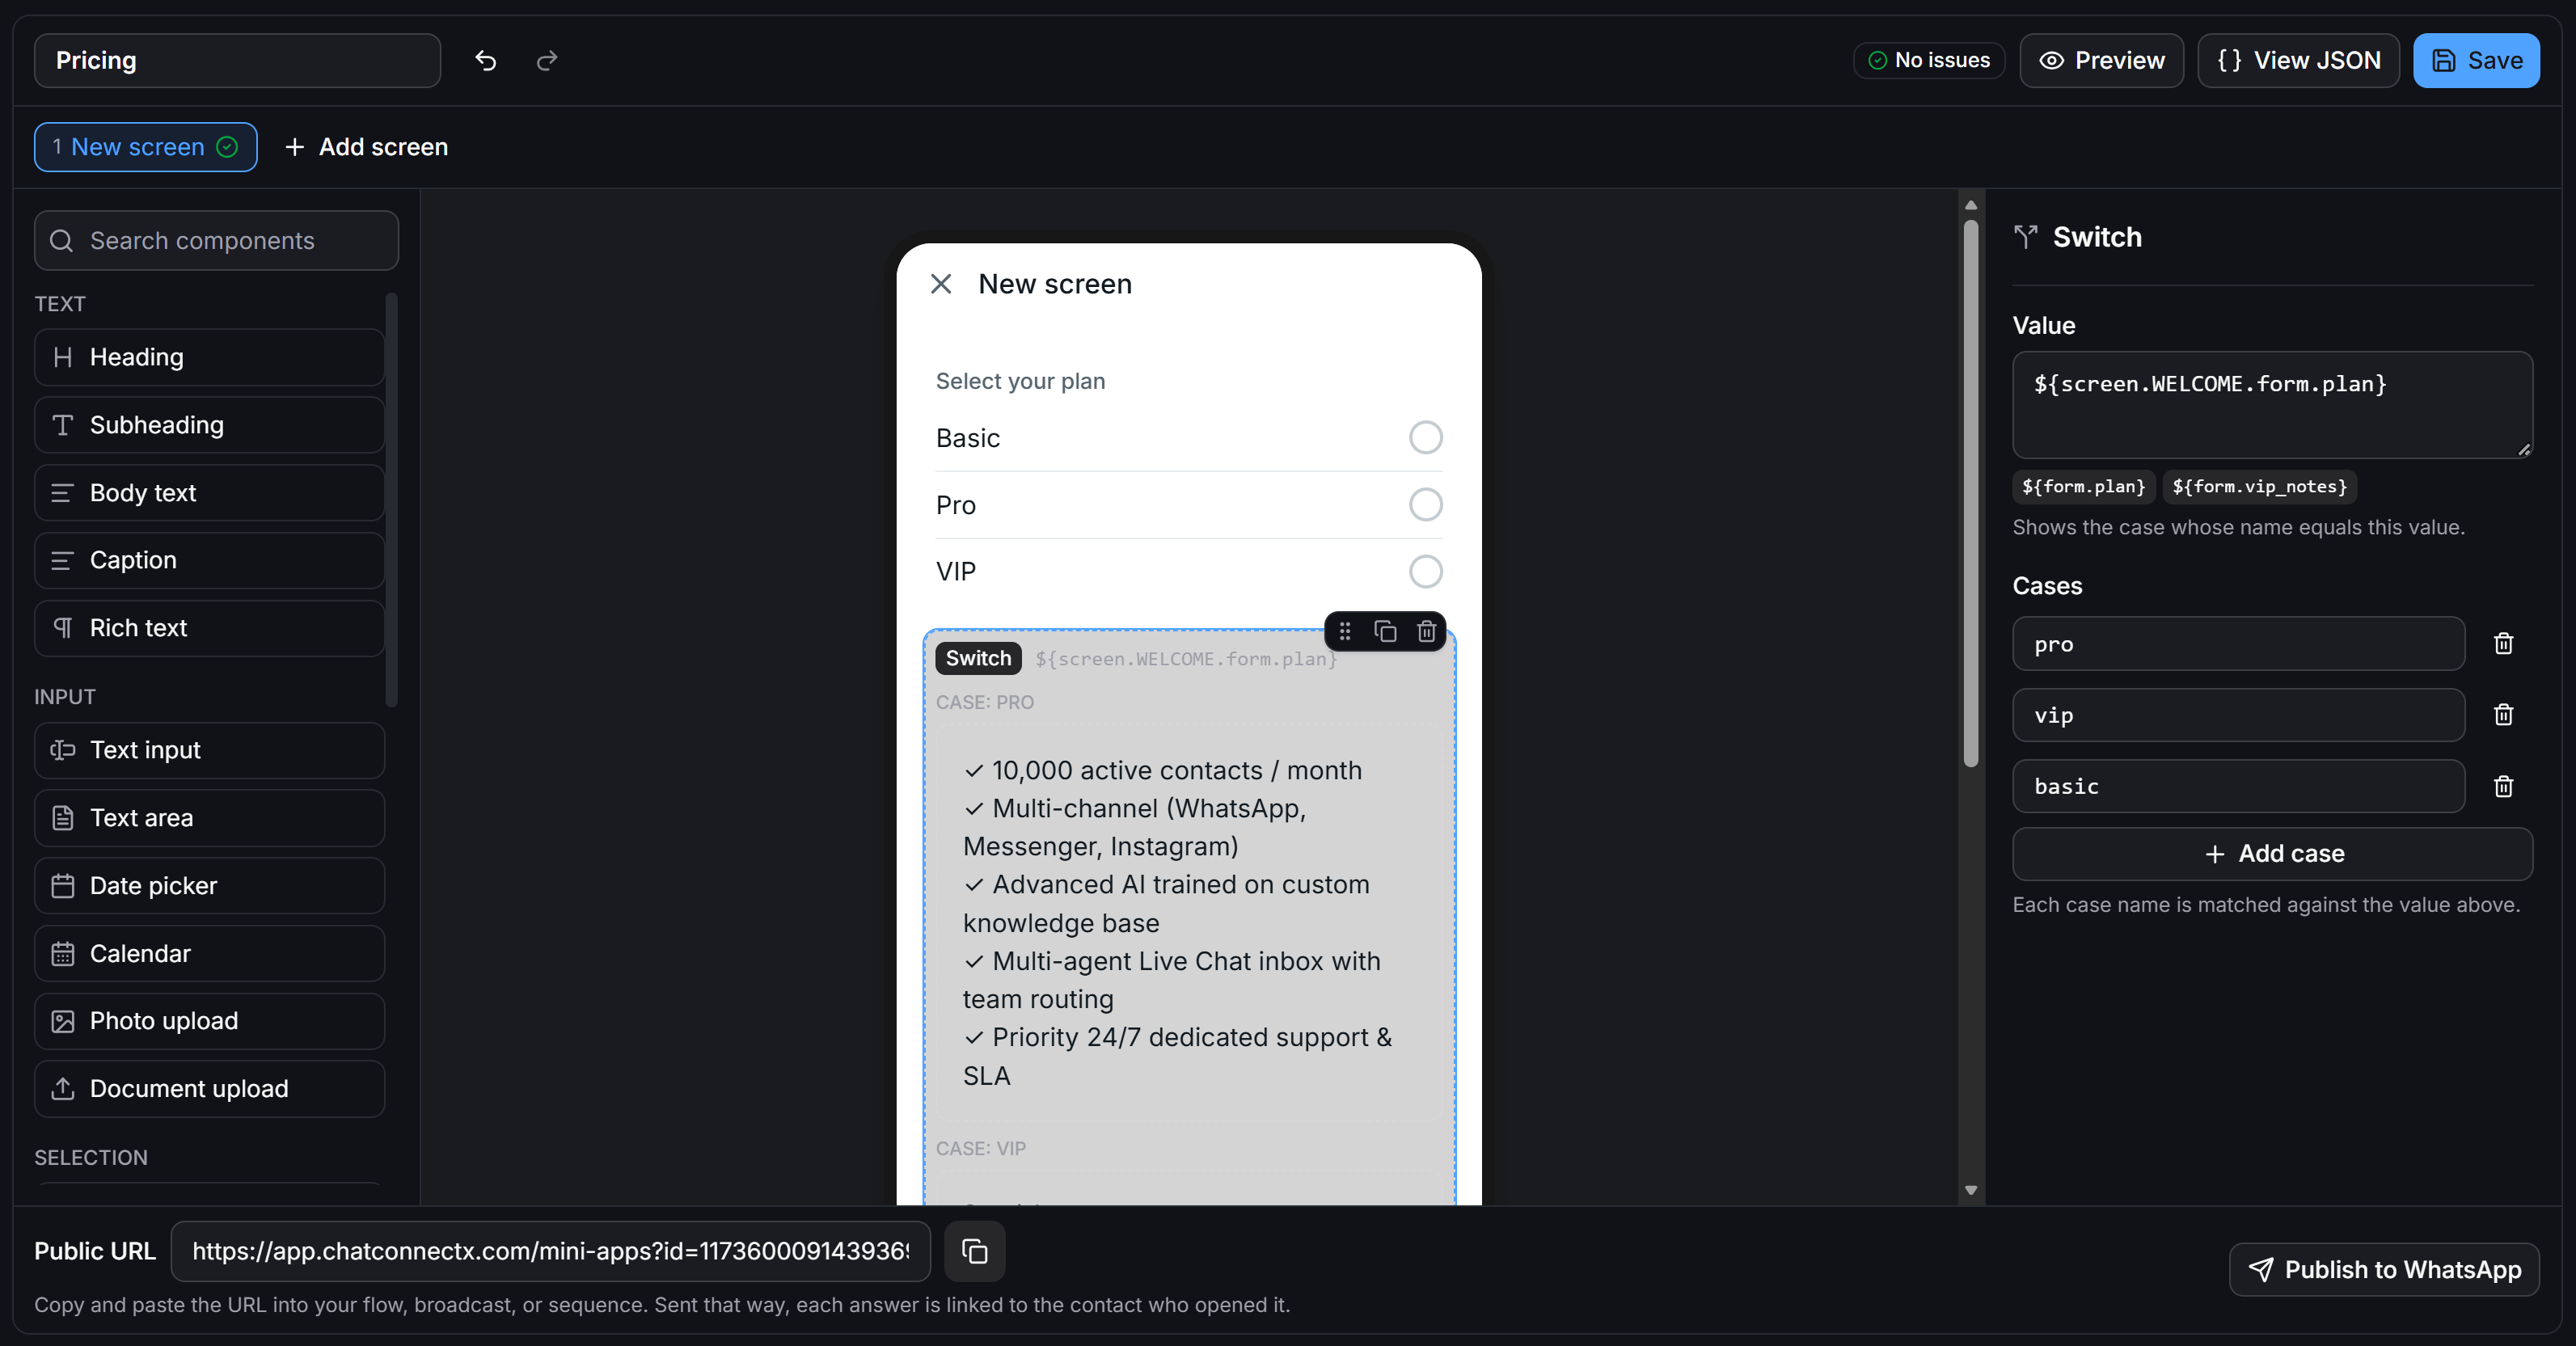
In the right inspector, paste the Answer reference of your question into the Value field (such as
${screen.WELCOME.form.plan} or click the ${form.plan} chip).4
Define your Cases
Under Cases, click + Add case and enter the exact values corresponding to your choices (
pro, vip, basic).5
Drop components into each case
Place specific components (Rich text feature lists, extra input fields, or unique action buttons) into each case container on the phone canvas.
Distributing Mini Apps
Once your form is designed, you can distribute it using three flexible methods: opening directly via a button in an automated Flow, publishing natively to WhatsApp, or sharing via a public URL.Opening Directly via a Flow Button
You can attach a Mini App directly to any message button inside your automated Flows. When a contact taps the button during a conversation, the Mini App opens immediately without complex redirects.1
Open the button configuration modal
Inside a message block in the Flow Builder, click + Add (or click an existing button) to open the Edit Button modal. In the Name field, enter the label displayed on the button.
2
Select the Open Mini App action
Under the When this button is pressed action list, select the Open Mini App option to configure form opening behavior.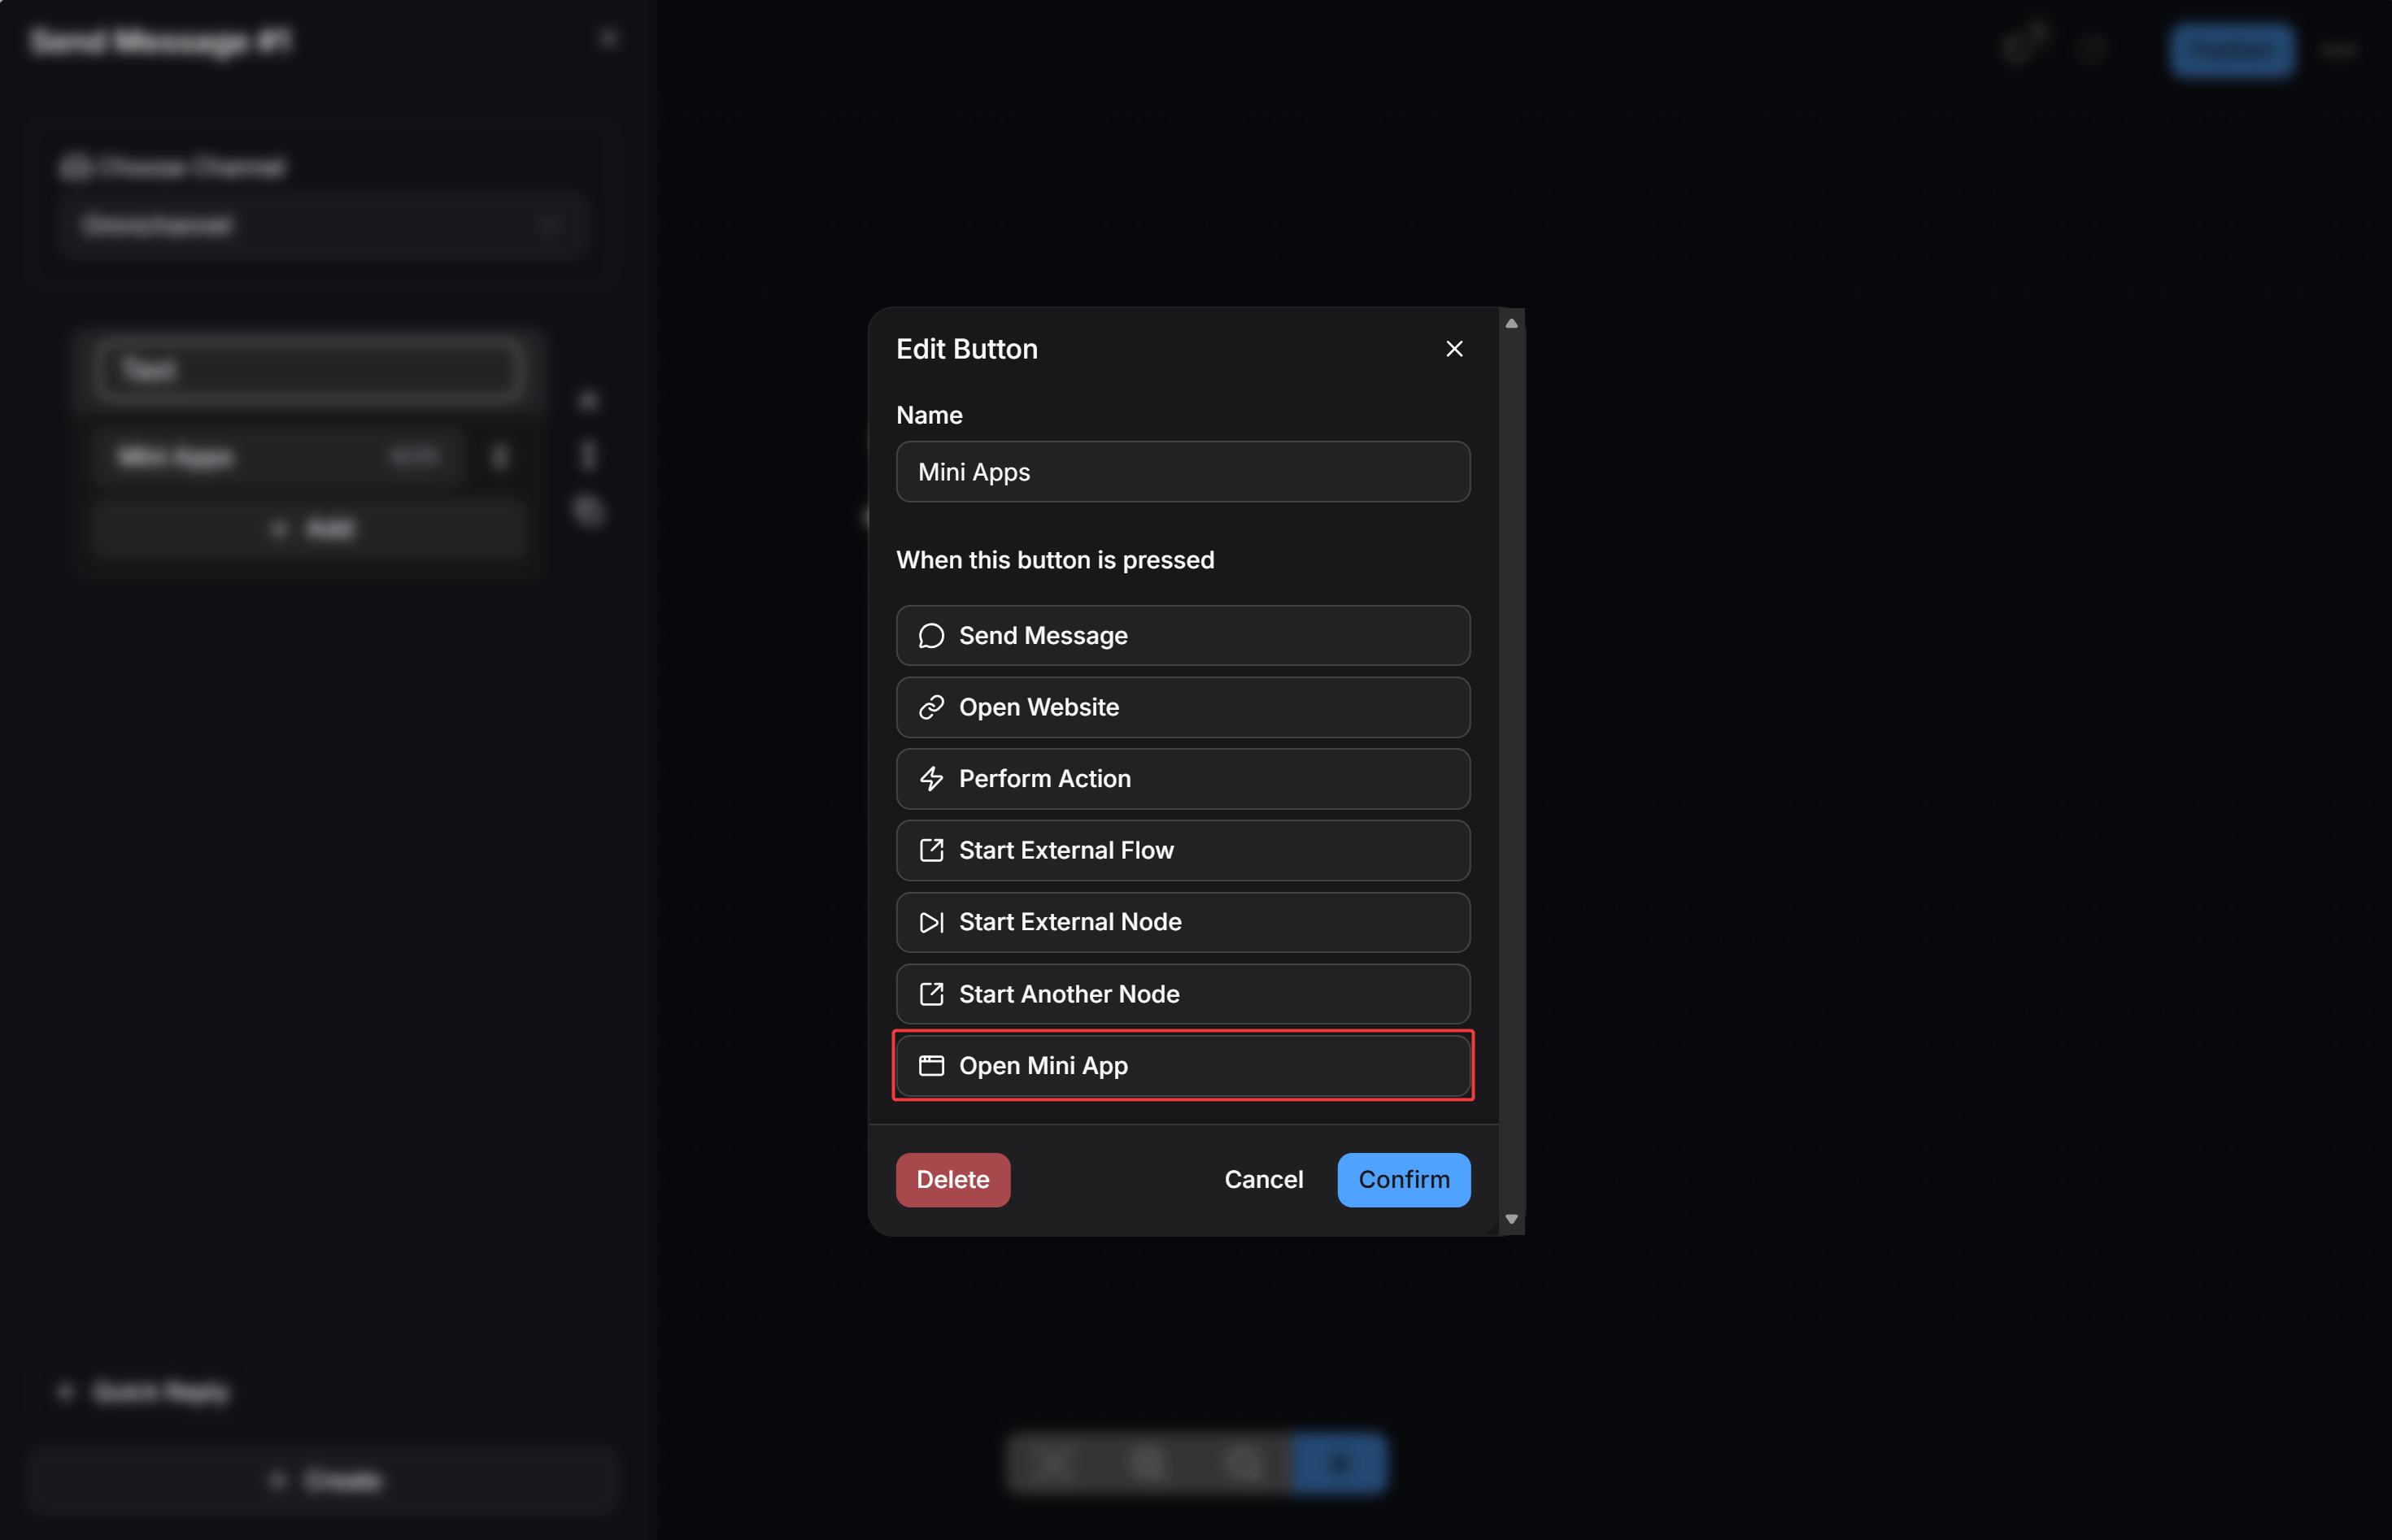
3
Choose your Mini App and confirm
In the configuration card, choose the desired form from the Mini App dropdown menu. If you want to trigger additional automated actions (such as adding tags or updating custom fields) when the contact clicks the button, click + Actions under Additional steps. Finally, click Confirm to save your button.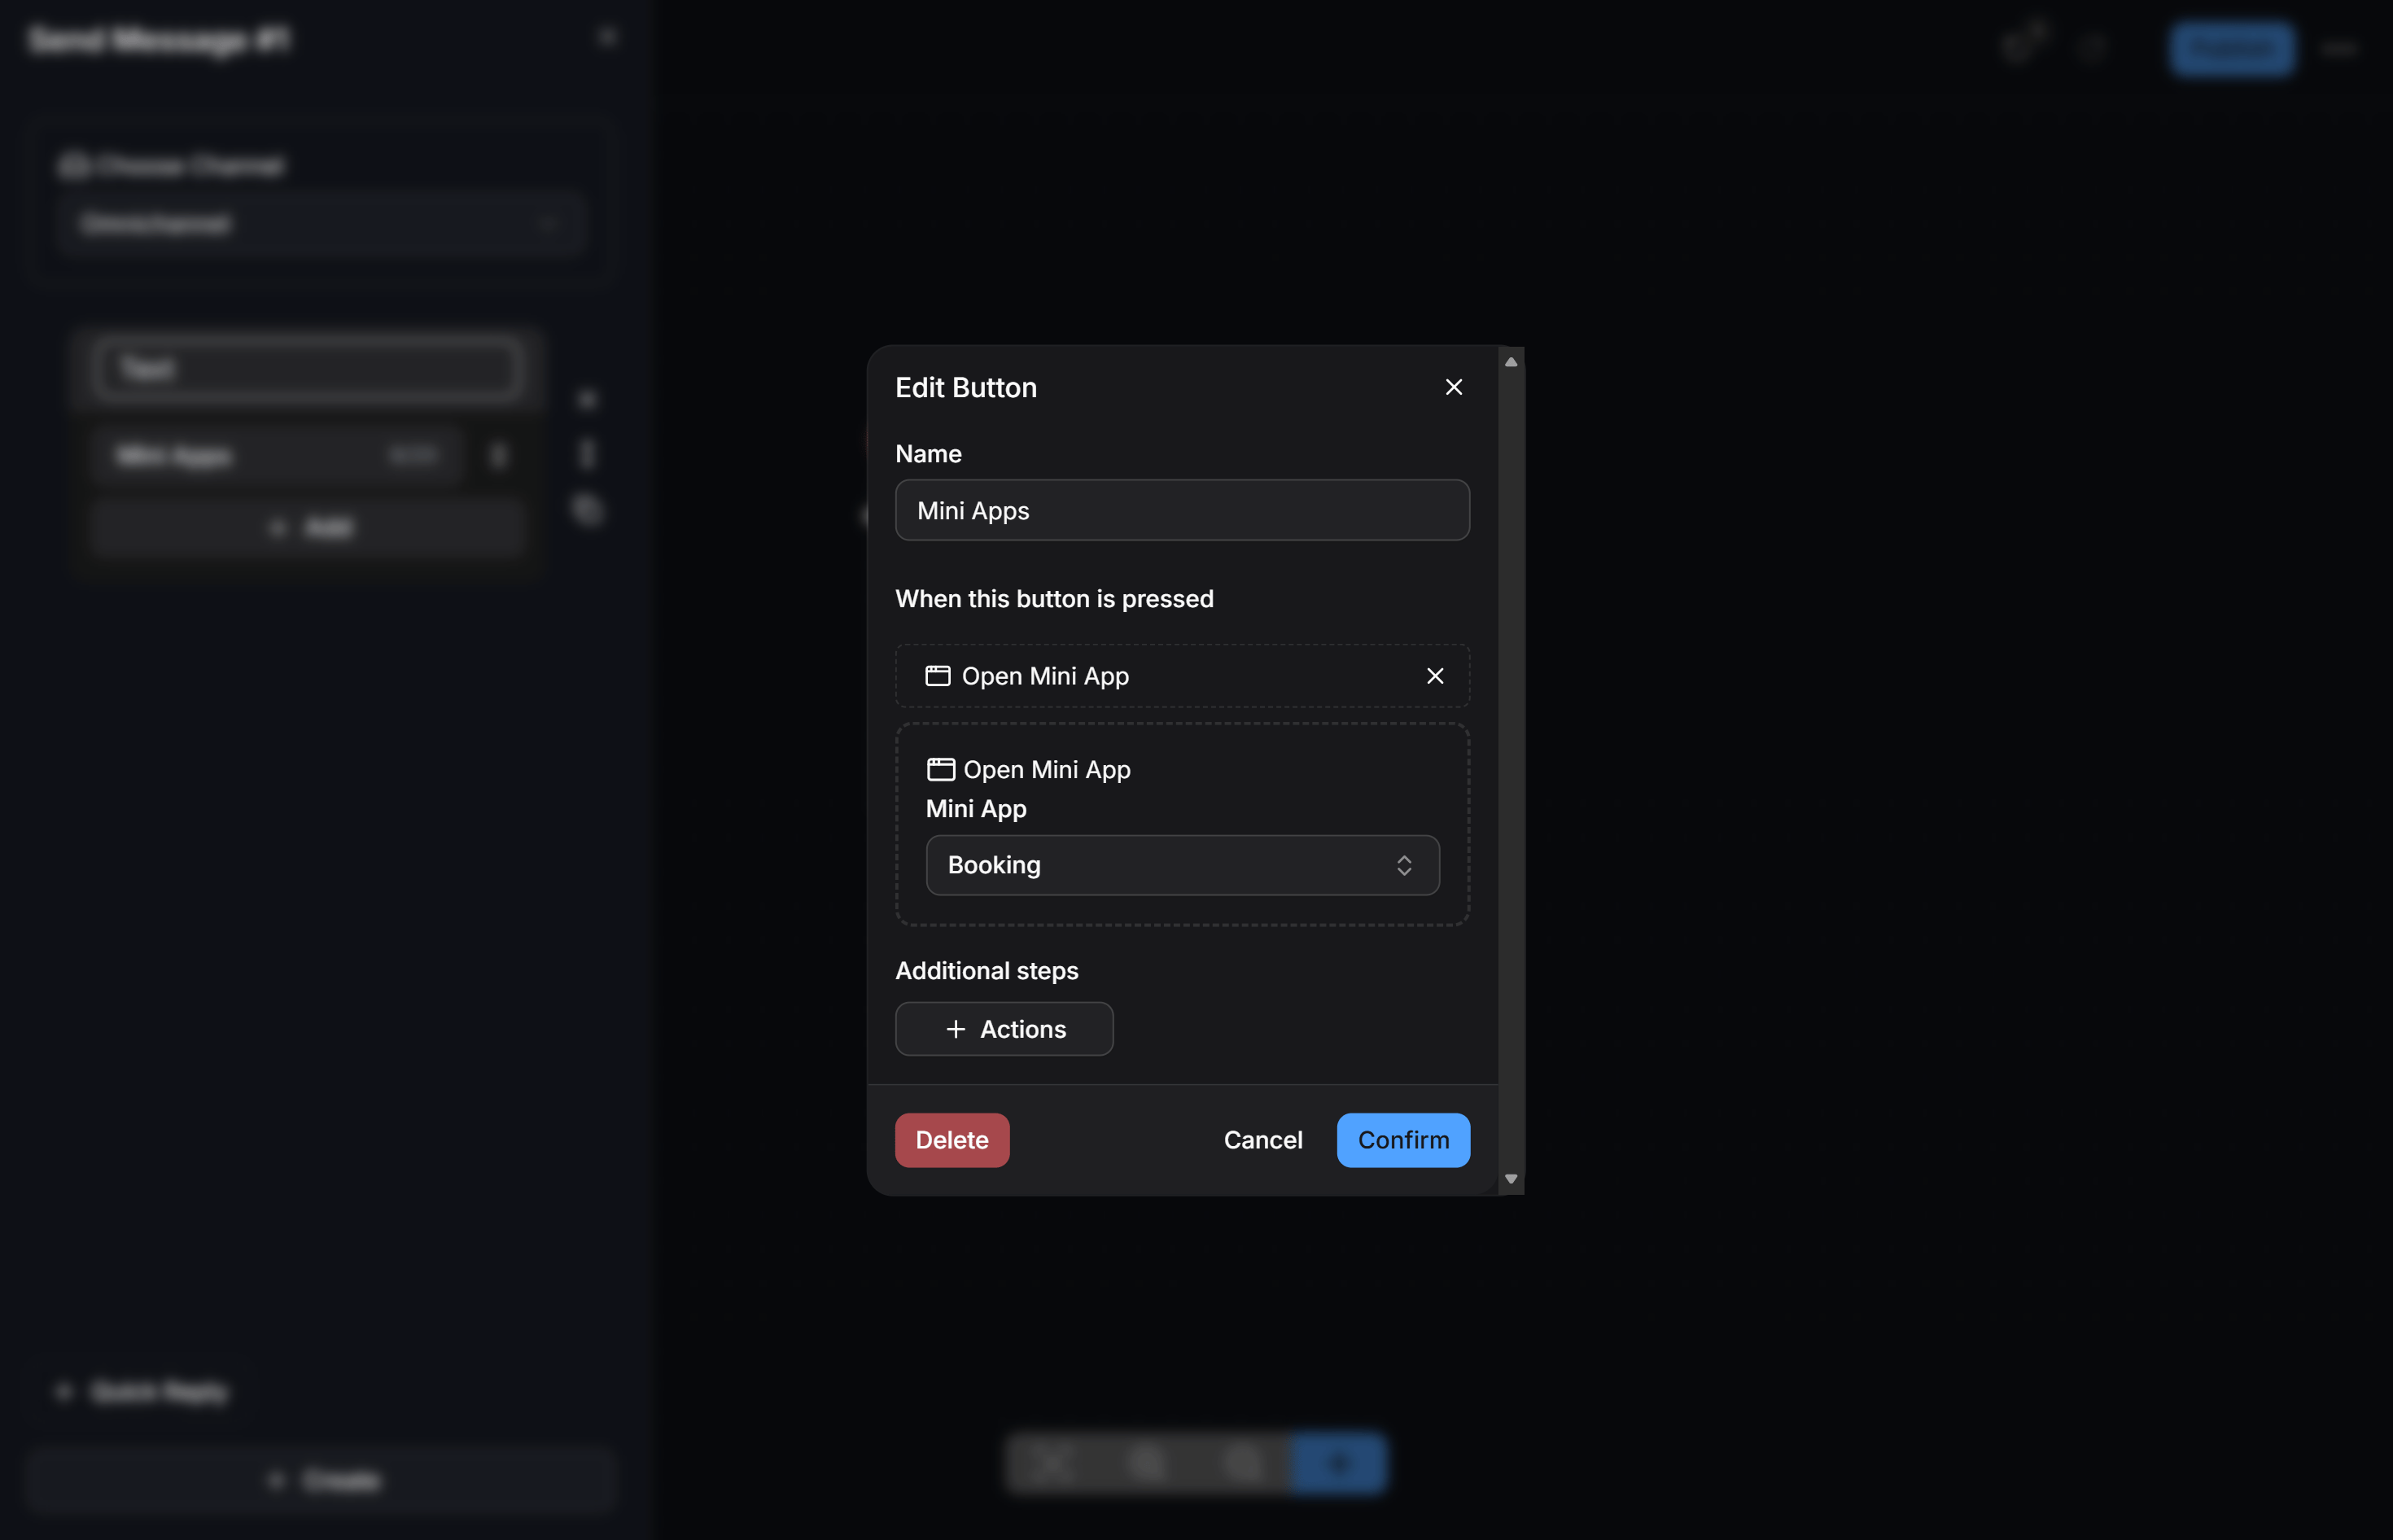
Publishing to WhatsApp
This method publishes your form directly as a native Meta WhatsApp Flow.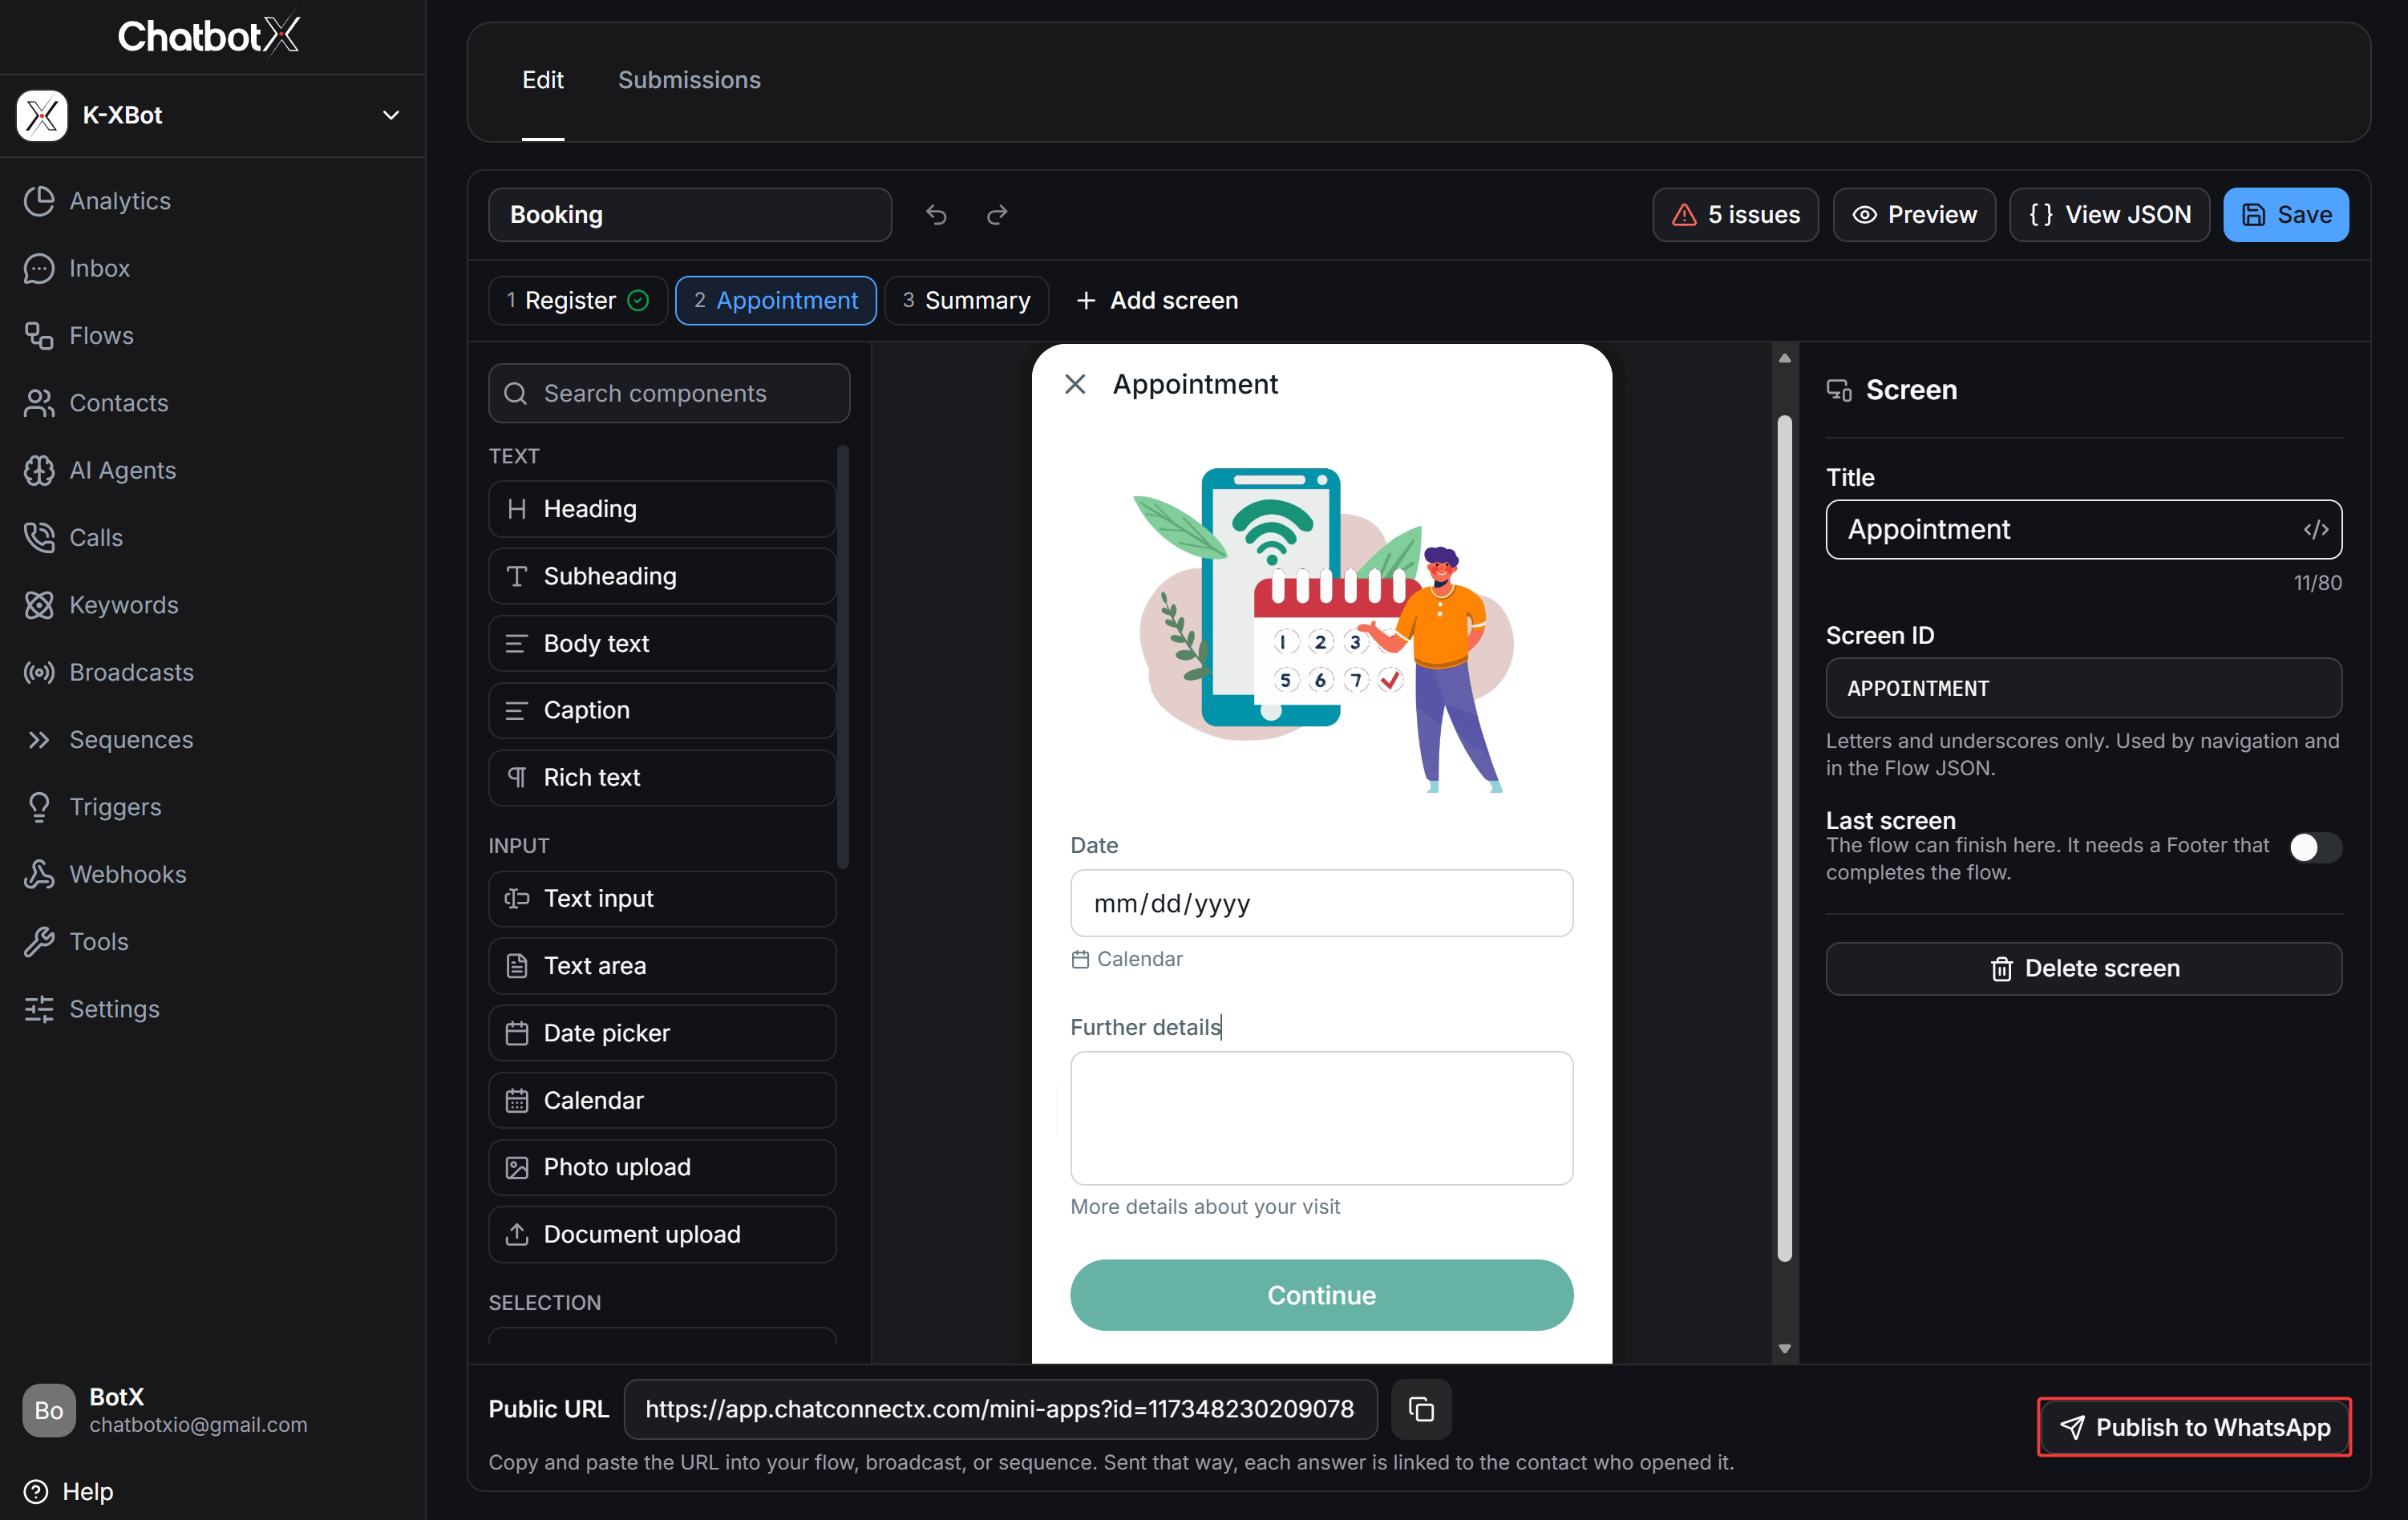
1
Initiate publishing
Click the Publish to WhatsApp button in the bottom right corner of the builder.
2
Select WhatsApp Business number
In the pop-up modal, choose your target WhatsApp Business number under WhatsApp number and click Publish.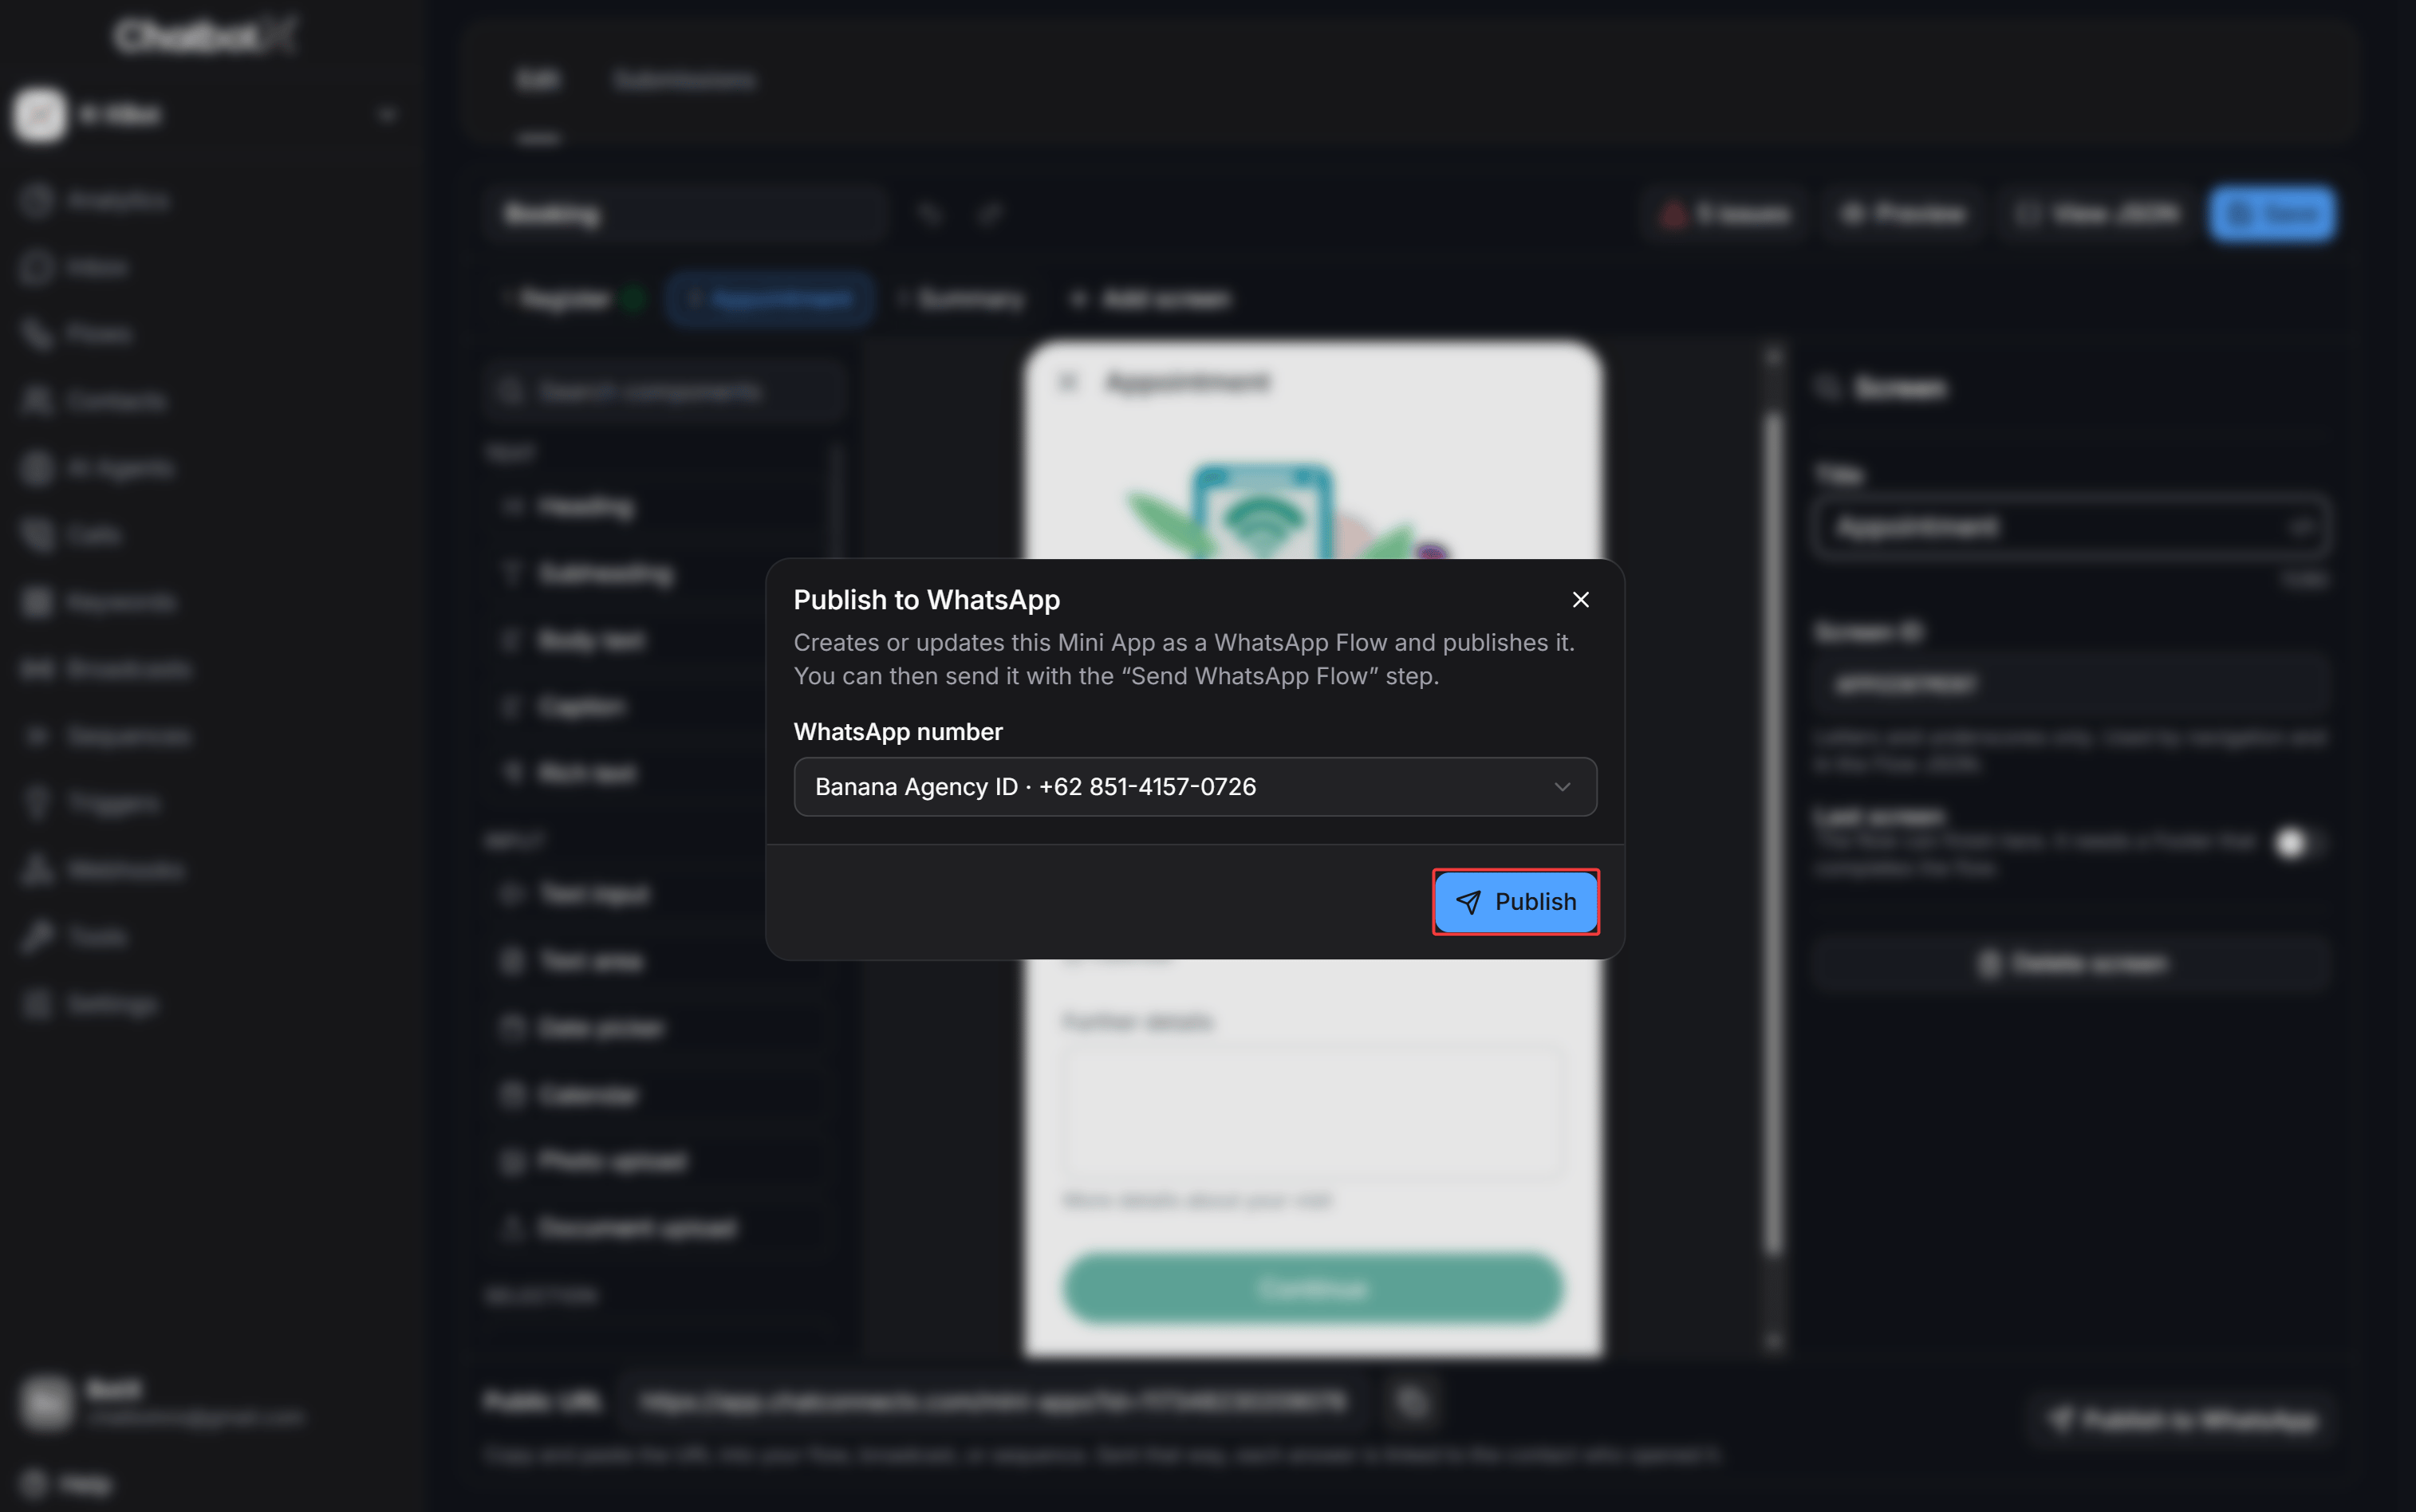
3
Verify on Meta WhatsApp Manager
ChatbotX compiles your design into standard JSON and syncs it with Meta Cloud API. You can confirm the Published status and view the assigned Flow ID in your Meta WhatsApp Manager.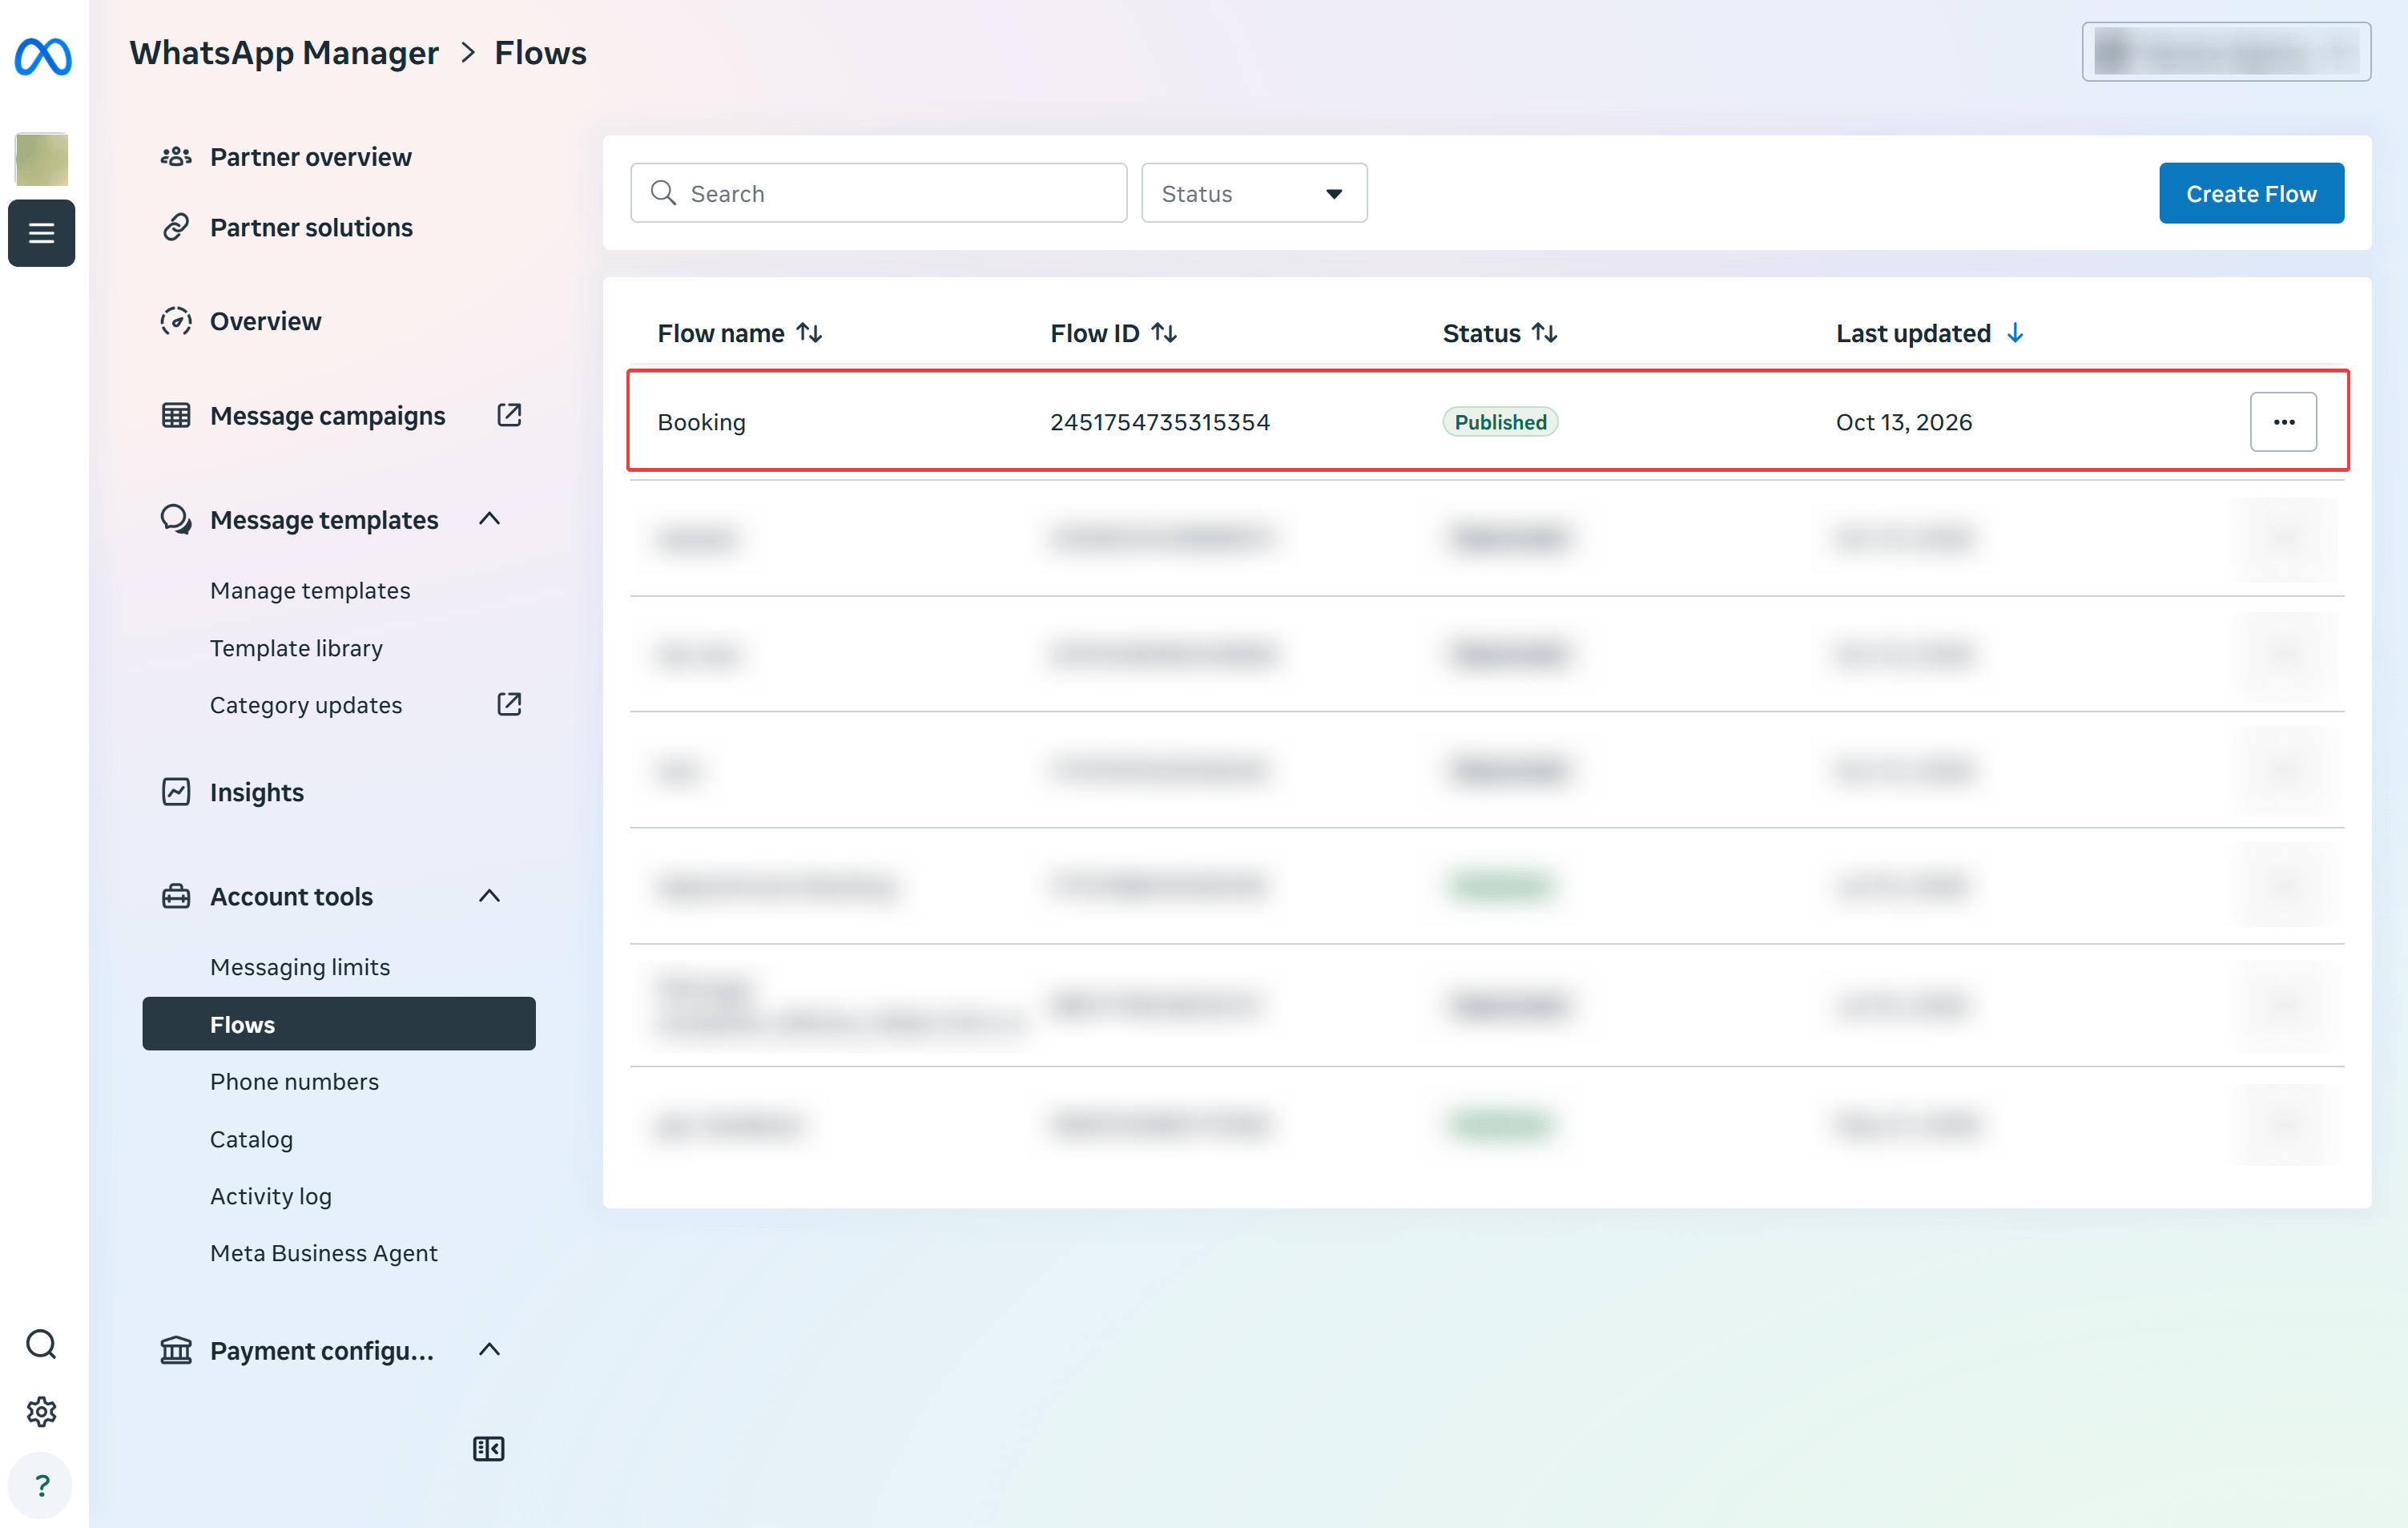
Omnichannel Sharing via Public URL
Every Mini App includes an independent public link displayed in the bottom bar:- Inside automated bot replies on Messenger, Instagram, Webchat, or Zalo.
- In Broadcast campaigns or automated nurture Sequences.
- In direct emails, SMS messages, or social media bios.
Managing Submissions
To inspect submitted answers, open the Mini App and click the Submissions tab at the top: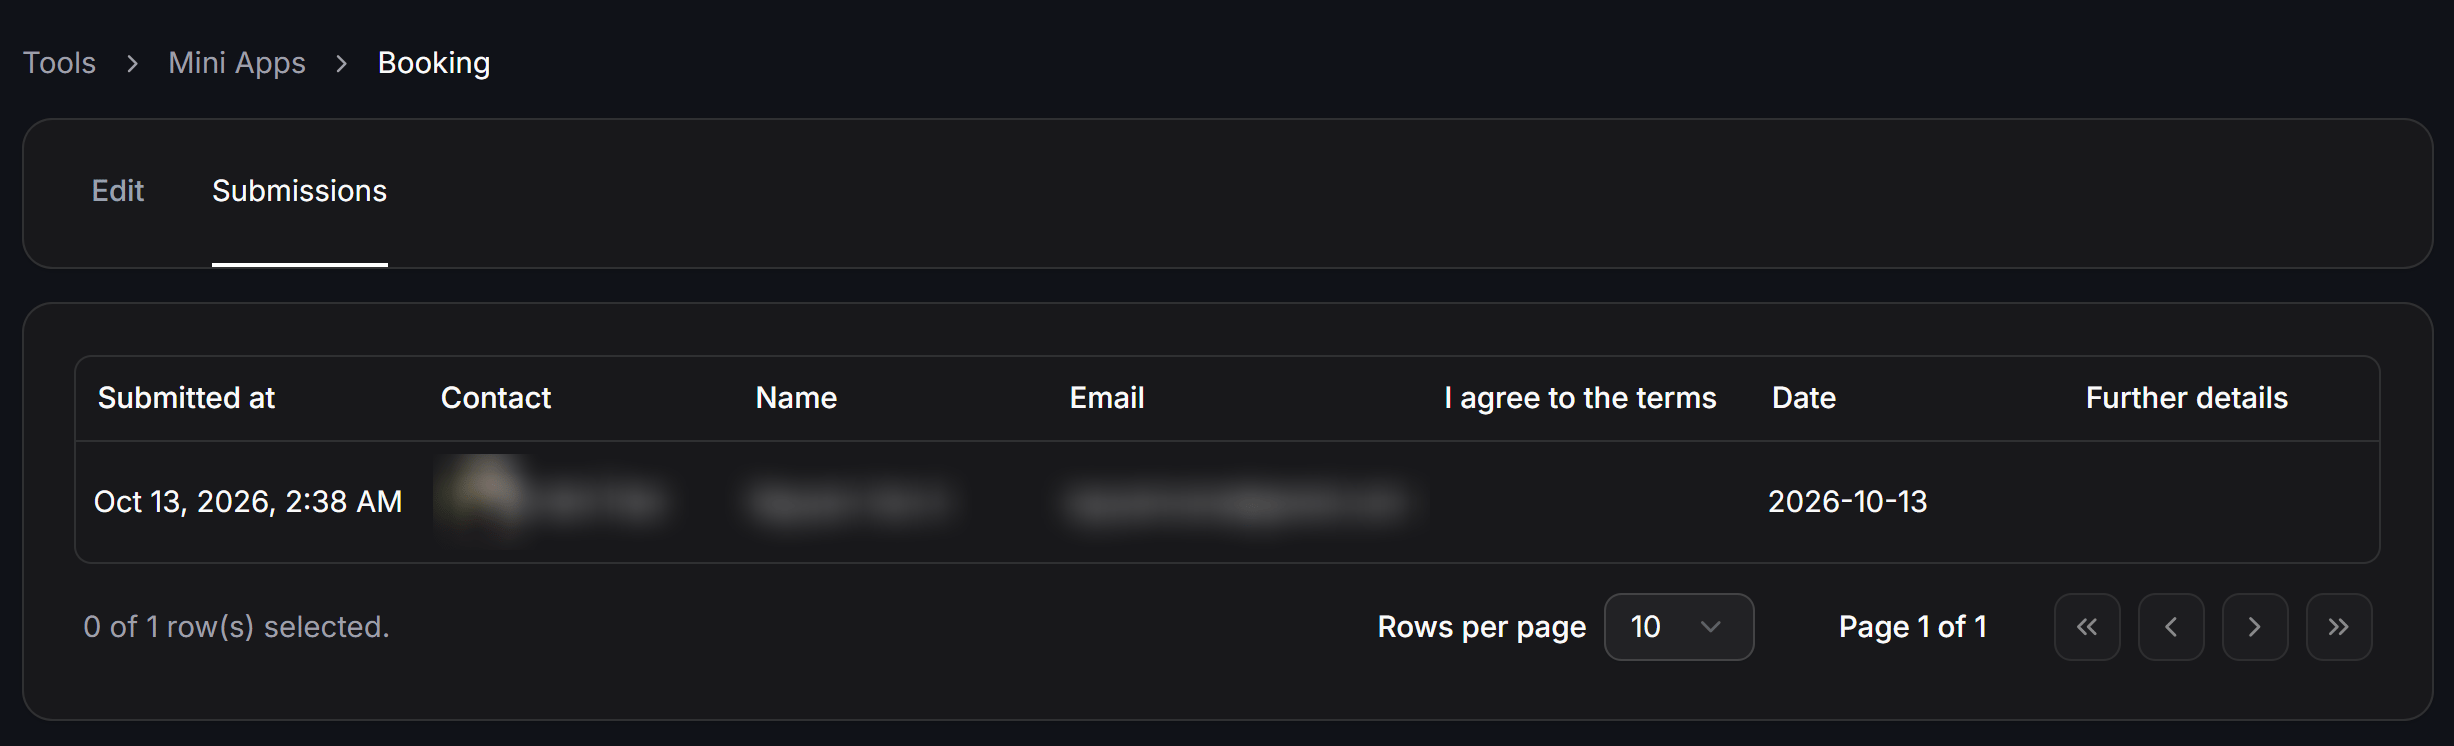
- Submitted at: Timestamp of when the form was completed.
- Contact: Name and phone/email of the contact, with direct links to their CRM profile.
- Dynamic field columns: Columns matching each field key in your form (Name, Email, Terms consent, Appointment date, Special requests…).
Frequently Asked Questions
How do Mini Apps differ from standard WhatsApp Flows?
How do Mini Apps differ from standard WhatsApp Flows?
Standard WhatsApp Flows require writing raw JSON or configuring templates within Meta Business Manager. Mini Apps provides a drag-and-drop builder with zero coding required, while also providing a public link that runs on any messaging channel.
Can answers be saved to Custom Fields automatically?
Can answers be saved to Custom Fields automatically?
Yes. In the inspector for each input component, enable Save to custom field and select the desired attribute in ChatbotX to automatically update contact records upon submission.
Can desktop users access Mini Apps?
Can desktop users access Mini Apps?
Yes. When accessed via the Public URL, Mini Apps renders a fully responsive web interface optimized for both desktop and mobile web browsers.
How do I mark the completion of a flow?
How do I mark the completion of a flow?
In the properties of your final screen, enable the Last screen toggle. This screen must contain a footer action button that completes the submission.