

Time-Bound Campaigns
Set precise start and end dates. The system automatically manages active, upcoming, and expired poll states.
Omnichannel Sharing
Generate channel-specific deep links with automated payload parameters for Messenger, WhatsApp, Instagram, Telegram, and Webchat.
Post-Vote Automation
Trigger automated follow-up flows immediately when a contact votes to deliver rewards, thank-you messages, or apply tags.
Demographic Analytics
Track total votes, candidate shares, and demographic breakdowns by gender in real-time with visual distribution charts.
Access Poll Manager
To access the Poll Manager dashboard:1
Open Tools
Click Tools in the left navigation sidebar.
2
Select Poll Manager
Click the Poll Manager card to open the dashboard.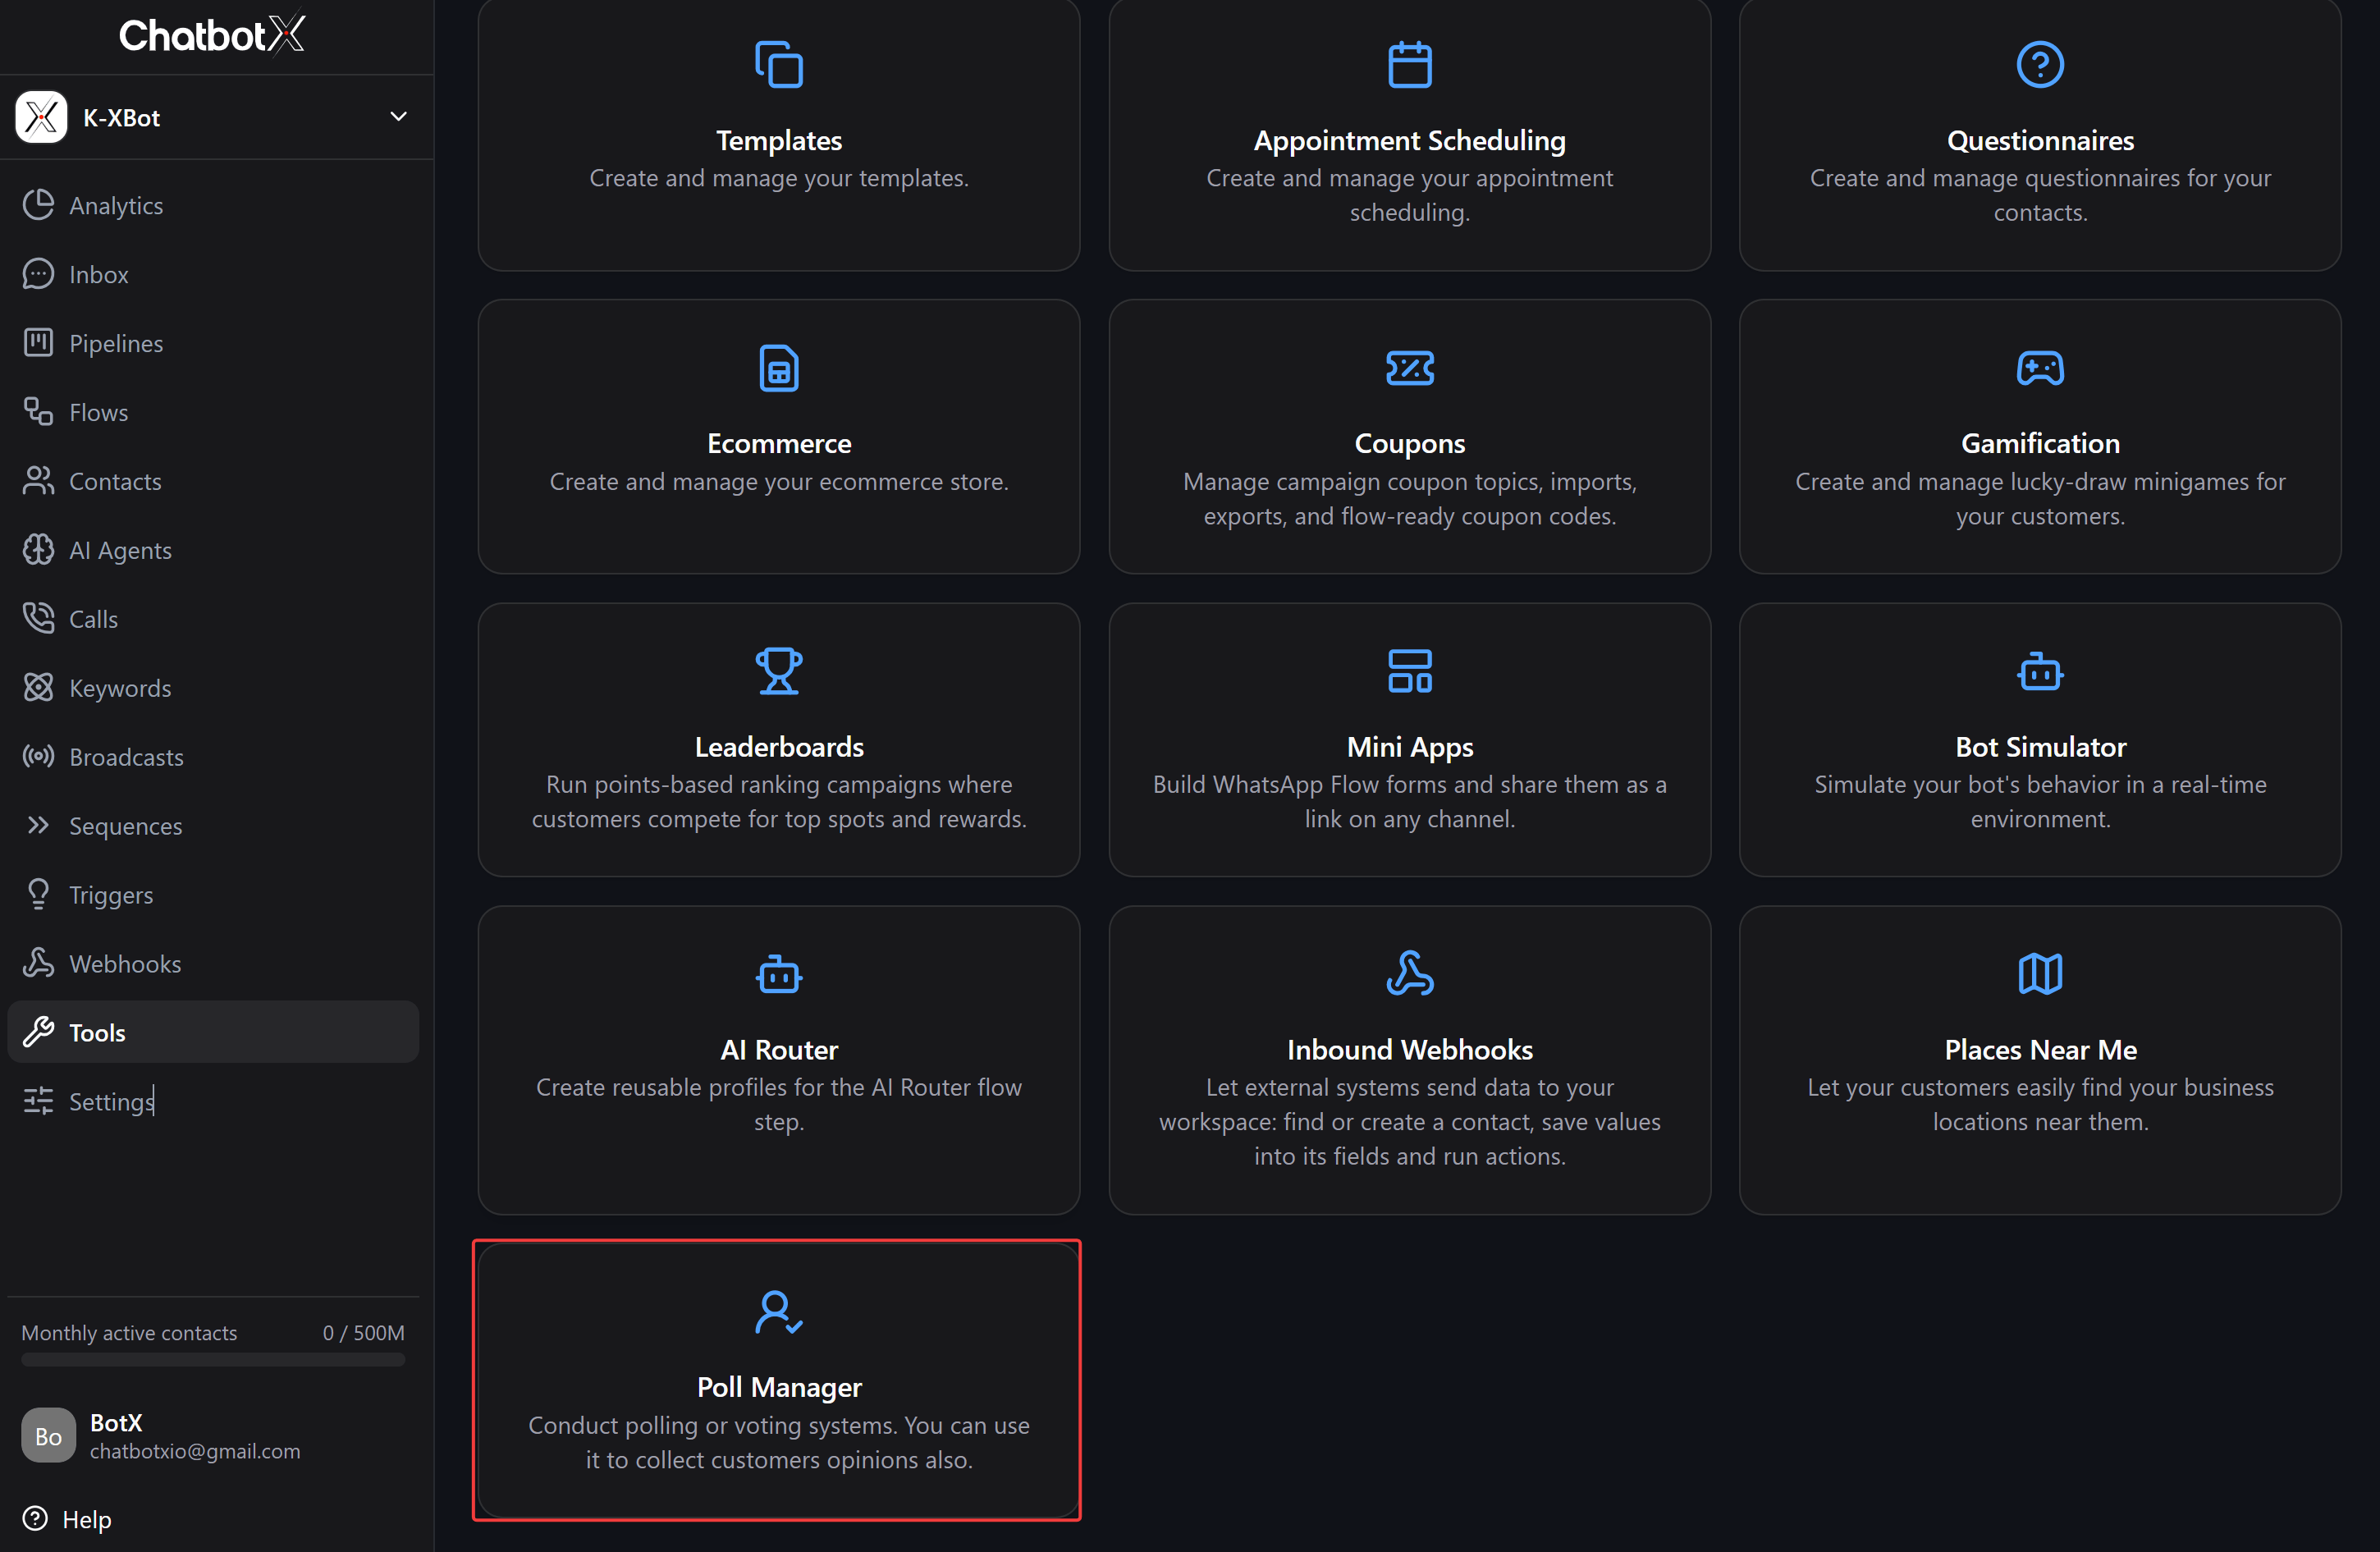
Manage polls
The Poll Manager dashboard lists all created polls with their key metrics: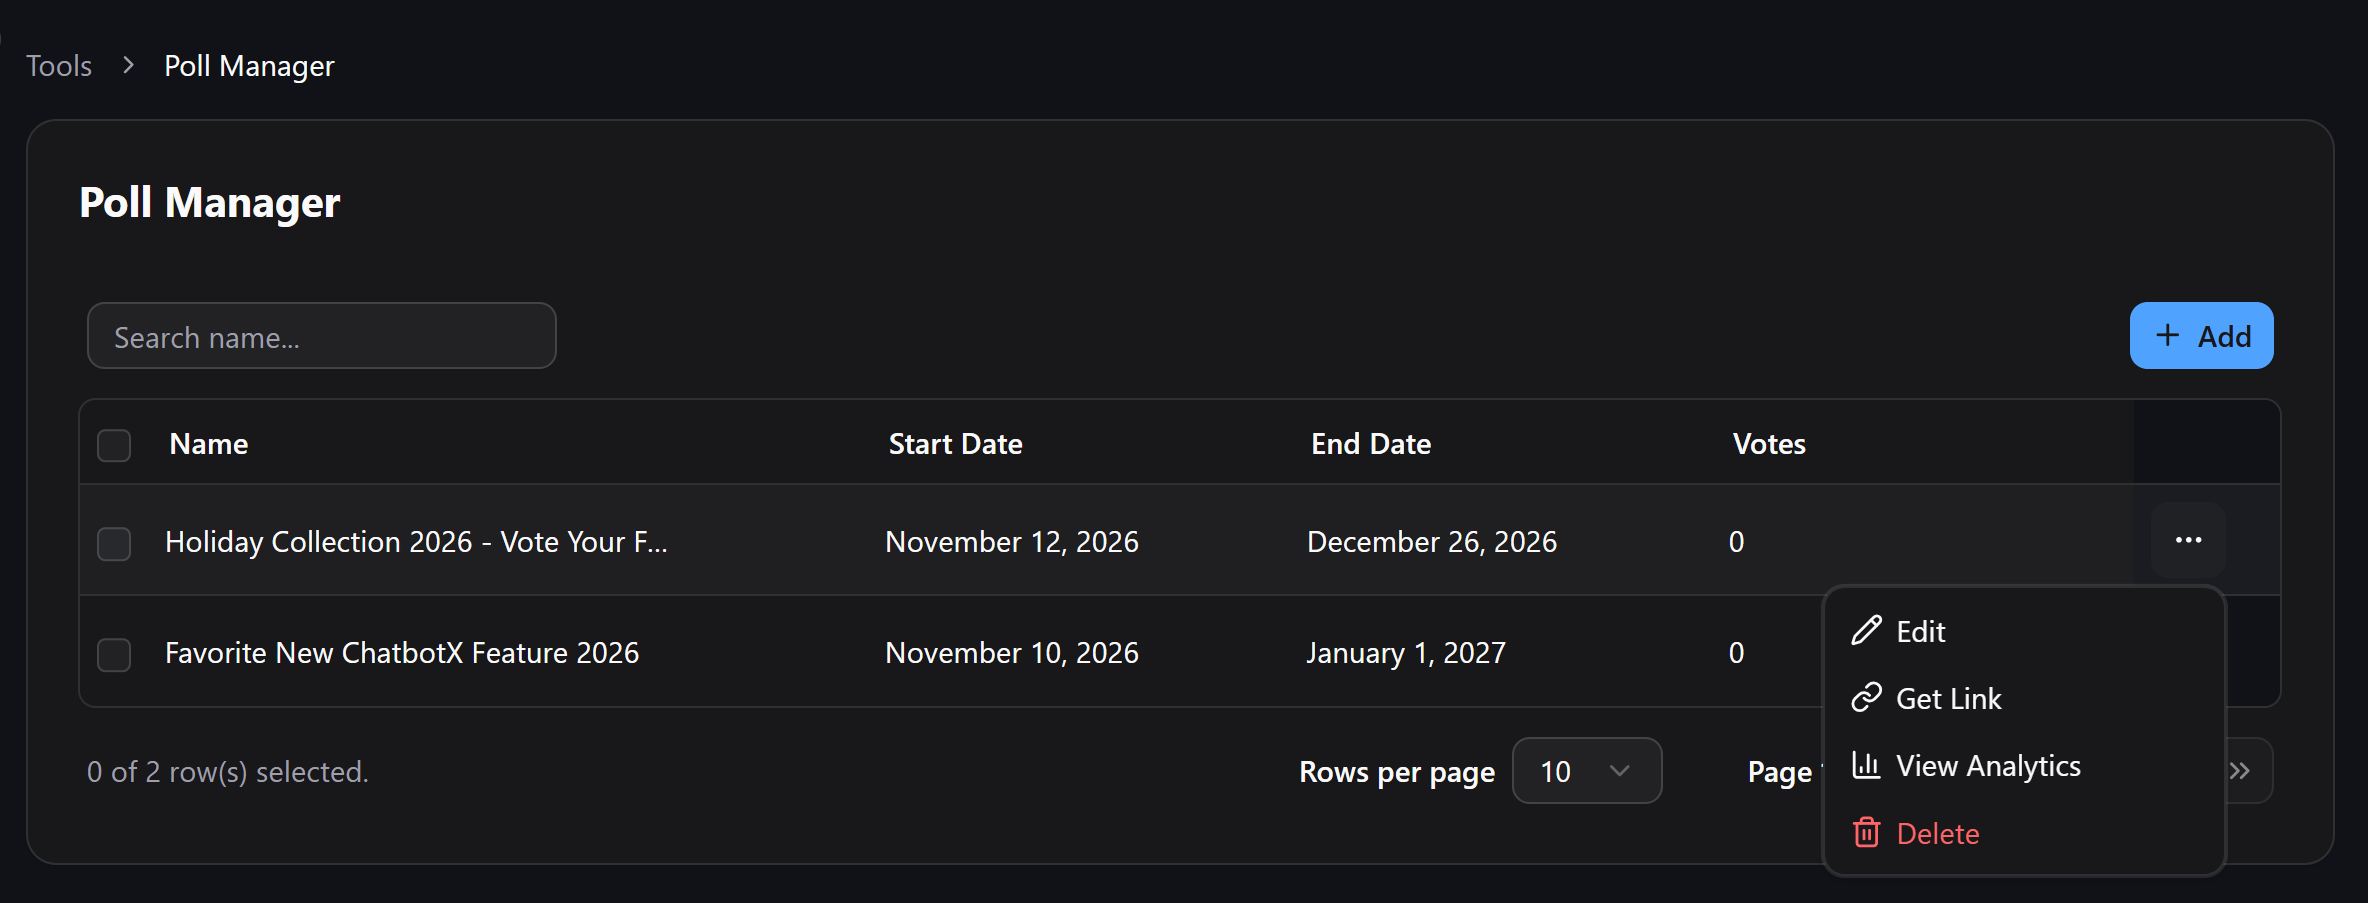
- Name: The display title of the poll.
- Start Date: The start date and time when voting opens.
- End Date: The end date and time when voting closes.
- Votes: The total number of registered votes submitted so far.
- Edit: Modify the poll name, voting period, cover image, candidate list, or post-vote flow.
- Get Link: Open the sharing dialog to copy deep links for connected channels.
- View Analytics: Open the real-time reporting dashboard to analyze voting results and voter demographics.
- Delete: Permanently remove the poll.
Create a new poll
Click the + Add button at the top right of the dashboard to create a new poll.1
Configure general information and voting period
Fill in the core poll details in the top card: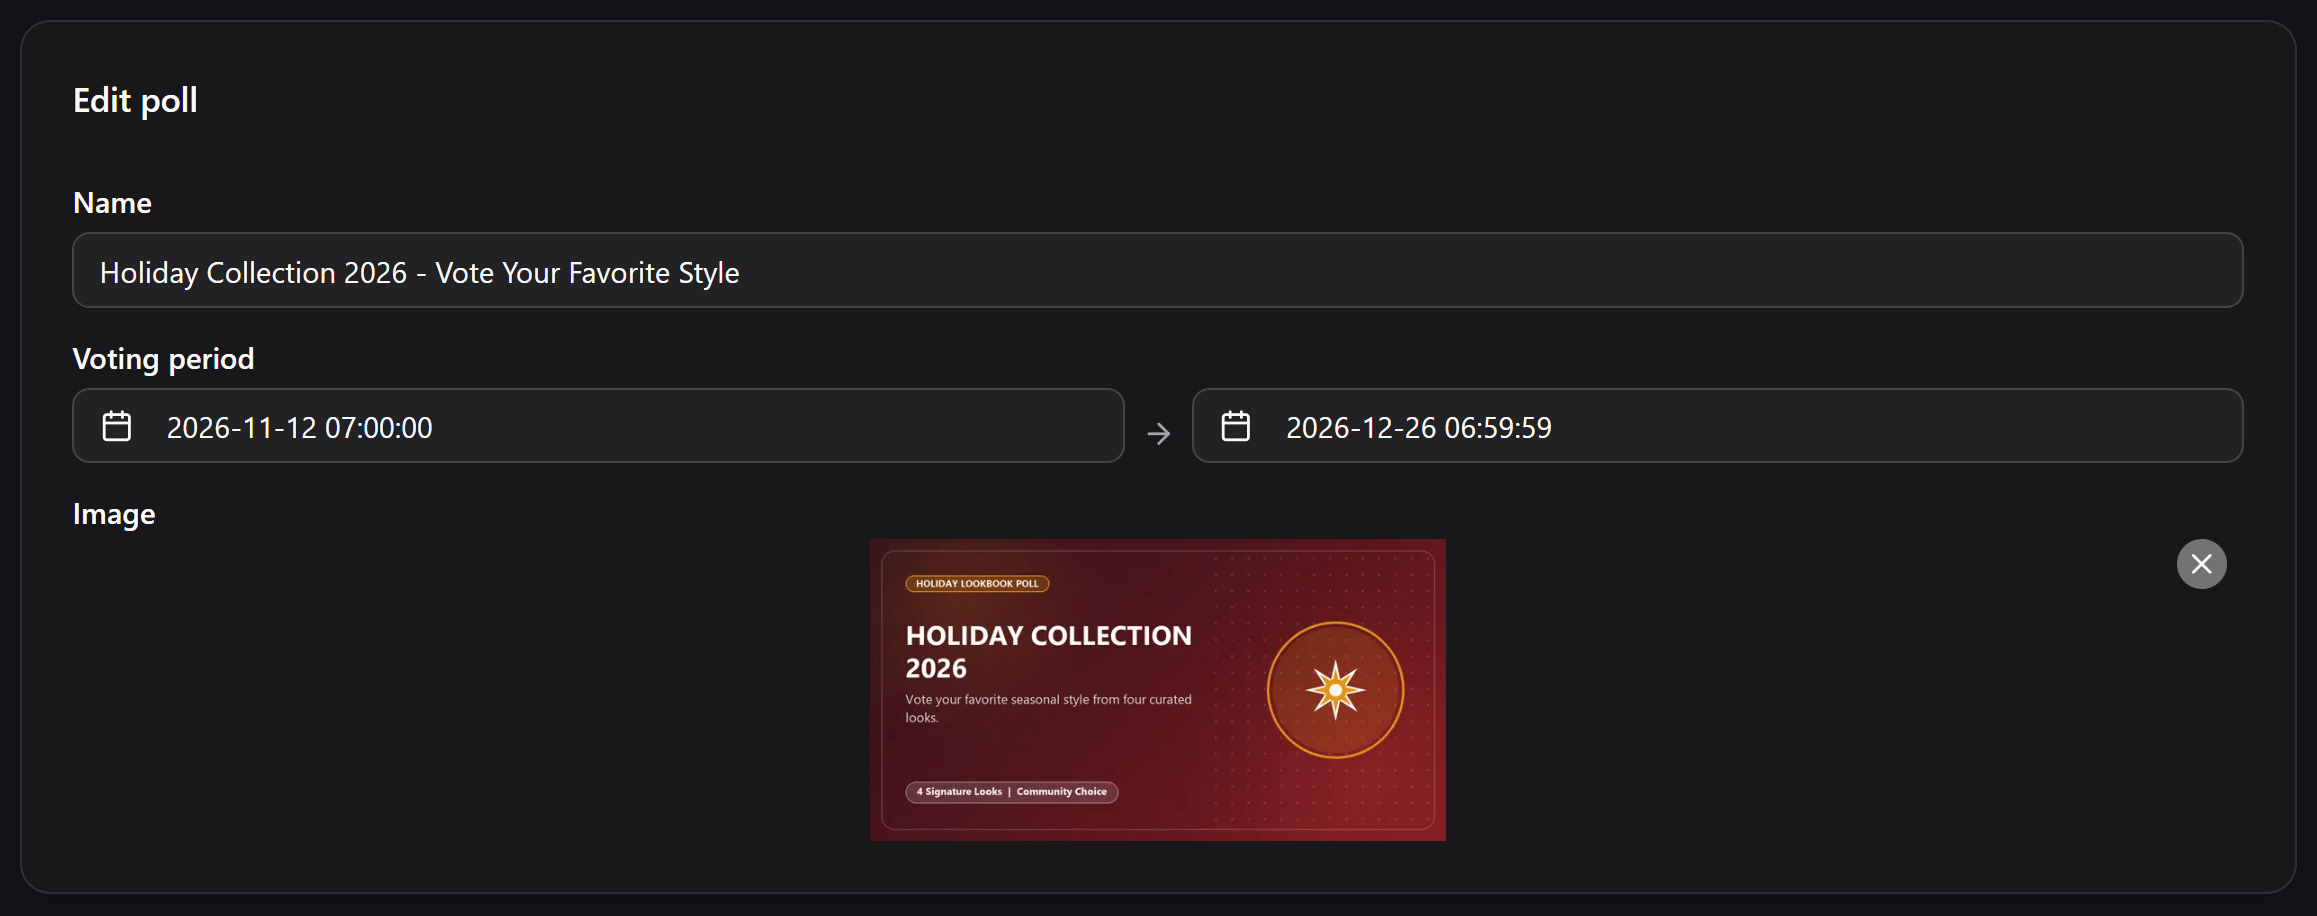
- Name: Enter a clear, descriptive title for the poll. This appears as the main heading in chat cards.
- Voting period: Specify the Start date and End date with times. Contacts can only vote during this window.
- Before start date: The chat card displays a Not started status.
- Active window: The chat card displays a Voting started status with an active Vote button.
- After end date: The chat card displays a Voting ended status and closes voting.
- Image: Upload an optional cover image (JPG, PNG) to illustrate the poll topic in chat cards.
2
Add candidates or options
Scroll to the Candidates or Options section to define the voting choices: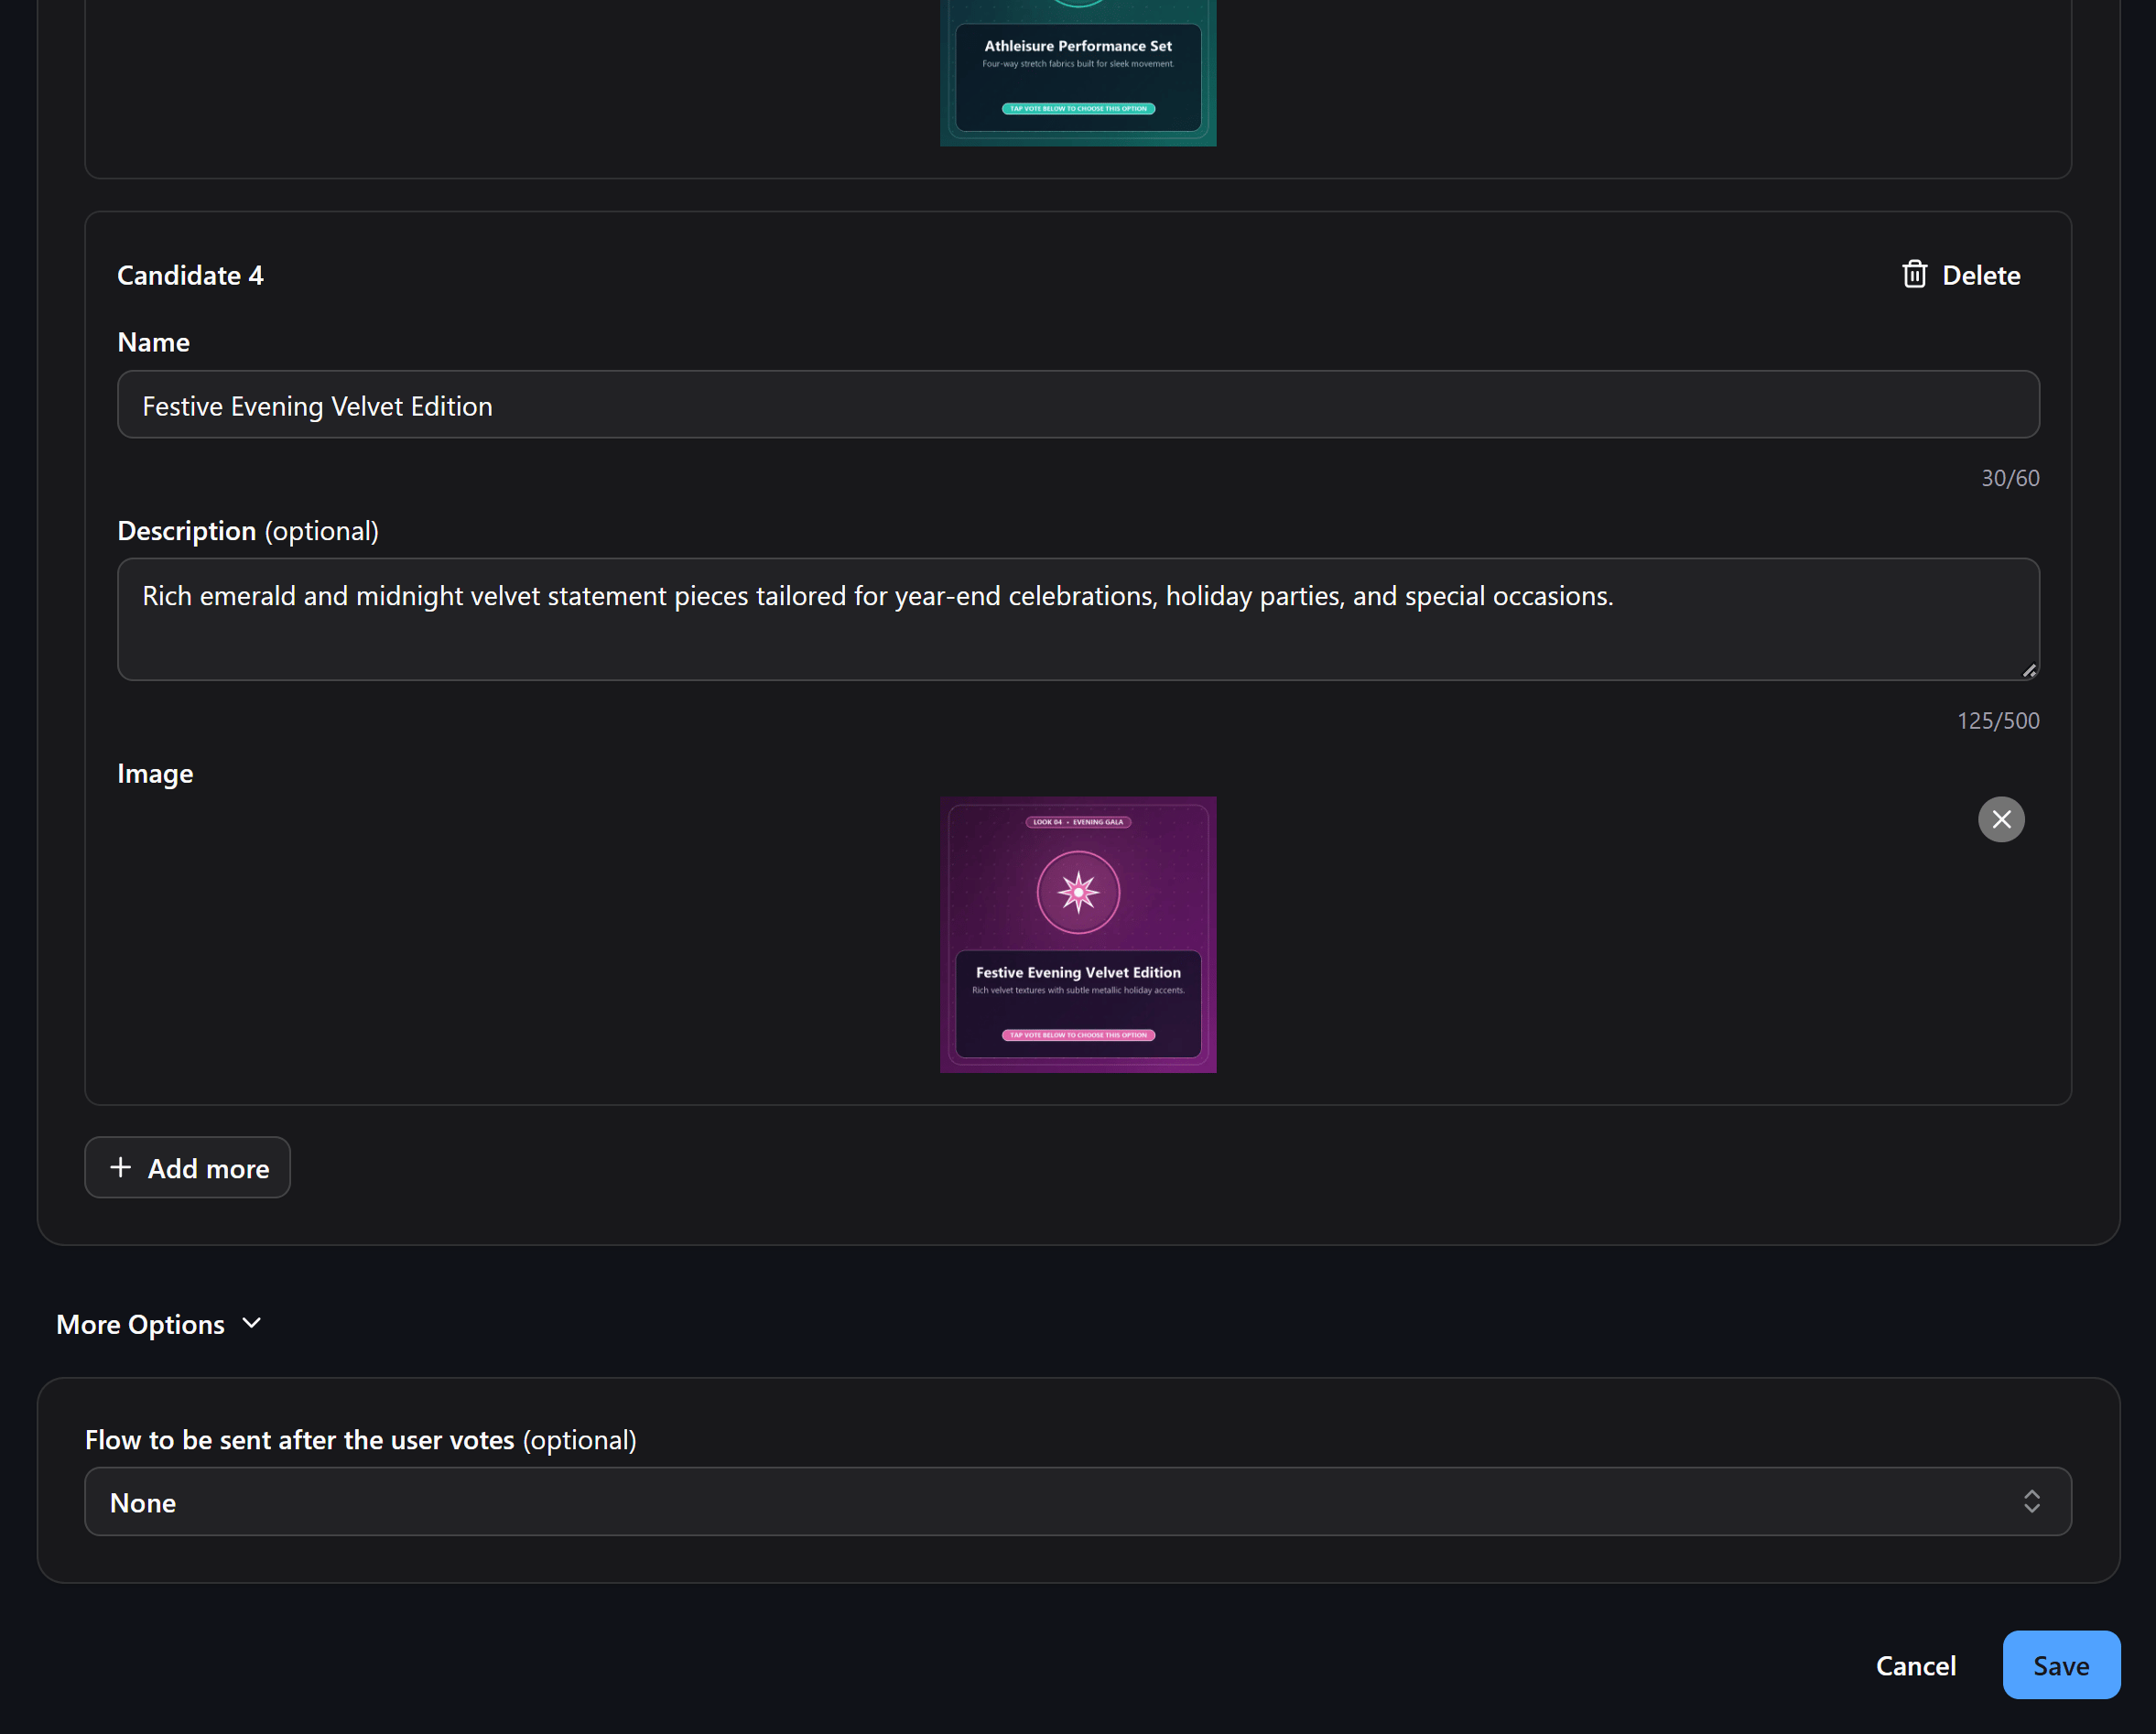
- Candidate name: Enter the name of the choice or candidate.
- Description: Add brief supporting details, descriptions, or itineraries.
- Image: Upload a representative photo or banner for the option.
- Click + Add More to add additional candidates.
- Click the trash icon to remove an option (available when more than 2 options exist).
3
Set post-vote automation (optional)
Click More Options at the bottom of the form to configure automated actions:
- Flow to be sent after the user votes: Select a Flow that executes immediately after a contact casts a vote. Use this flow to:
- Send a personalized thank-you message confirming their selection.
- Deliver a discount code, coupon, or digital reward.
- Add a Contact Tag or update a Contact Custom Field for future audience segmentation.
4
Save the poll
Click Save to publish the poll. It will immediately appear in your Poll Manager list.
Share poll links across channels
To distribute your poll to contacts and social audiences:- In the Poll Manager dashboard, click the three-dots (…) menu next to the poll and select Get Link.
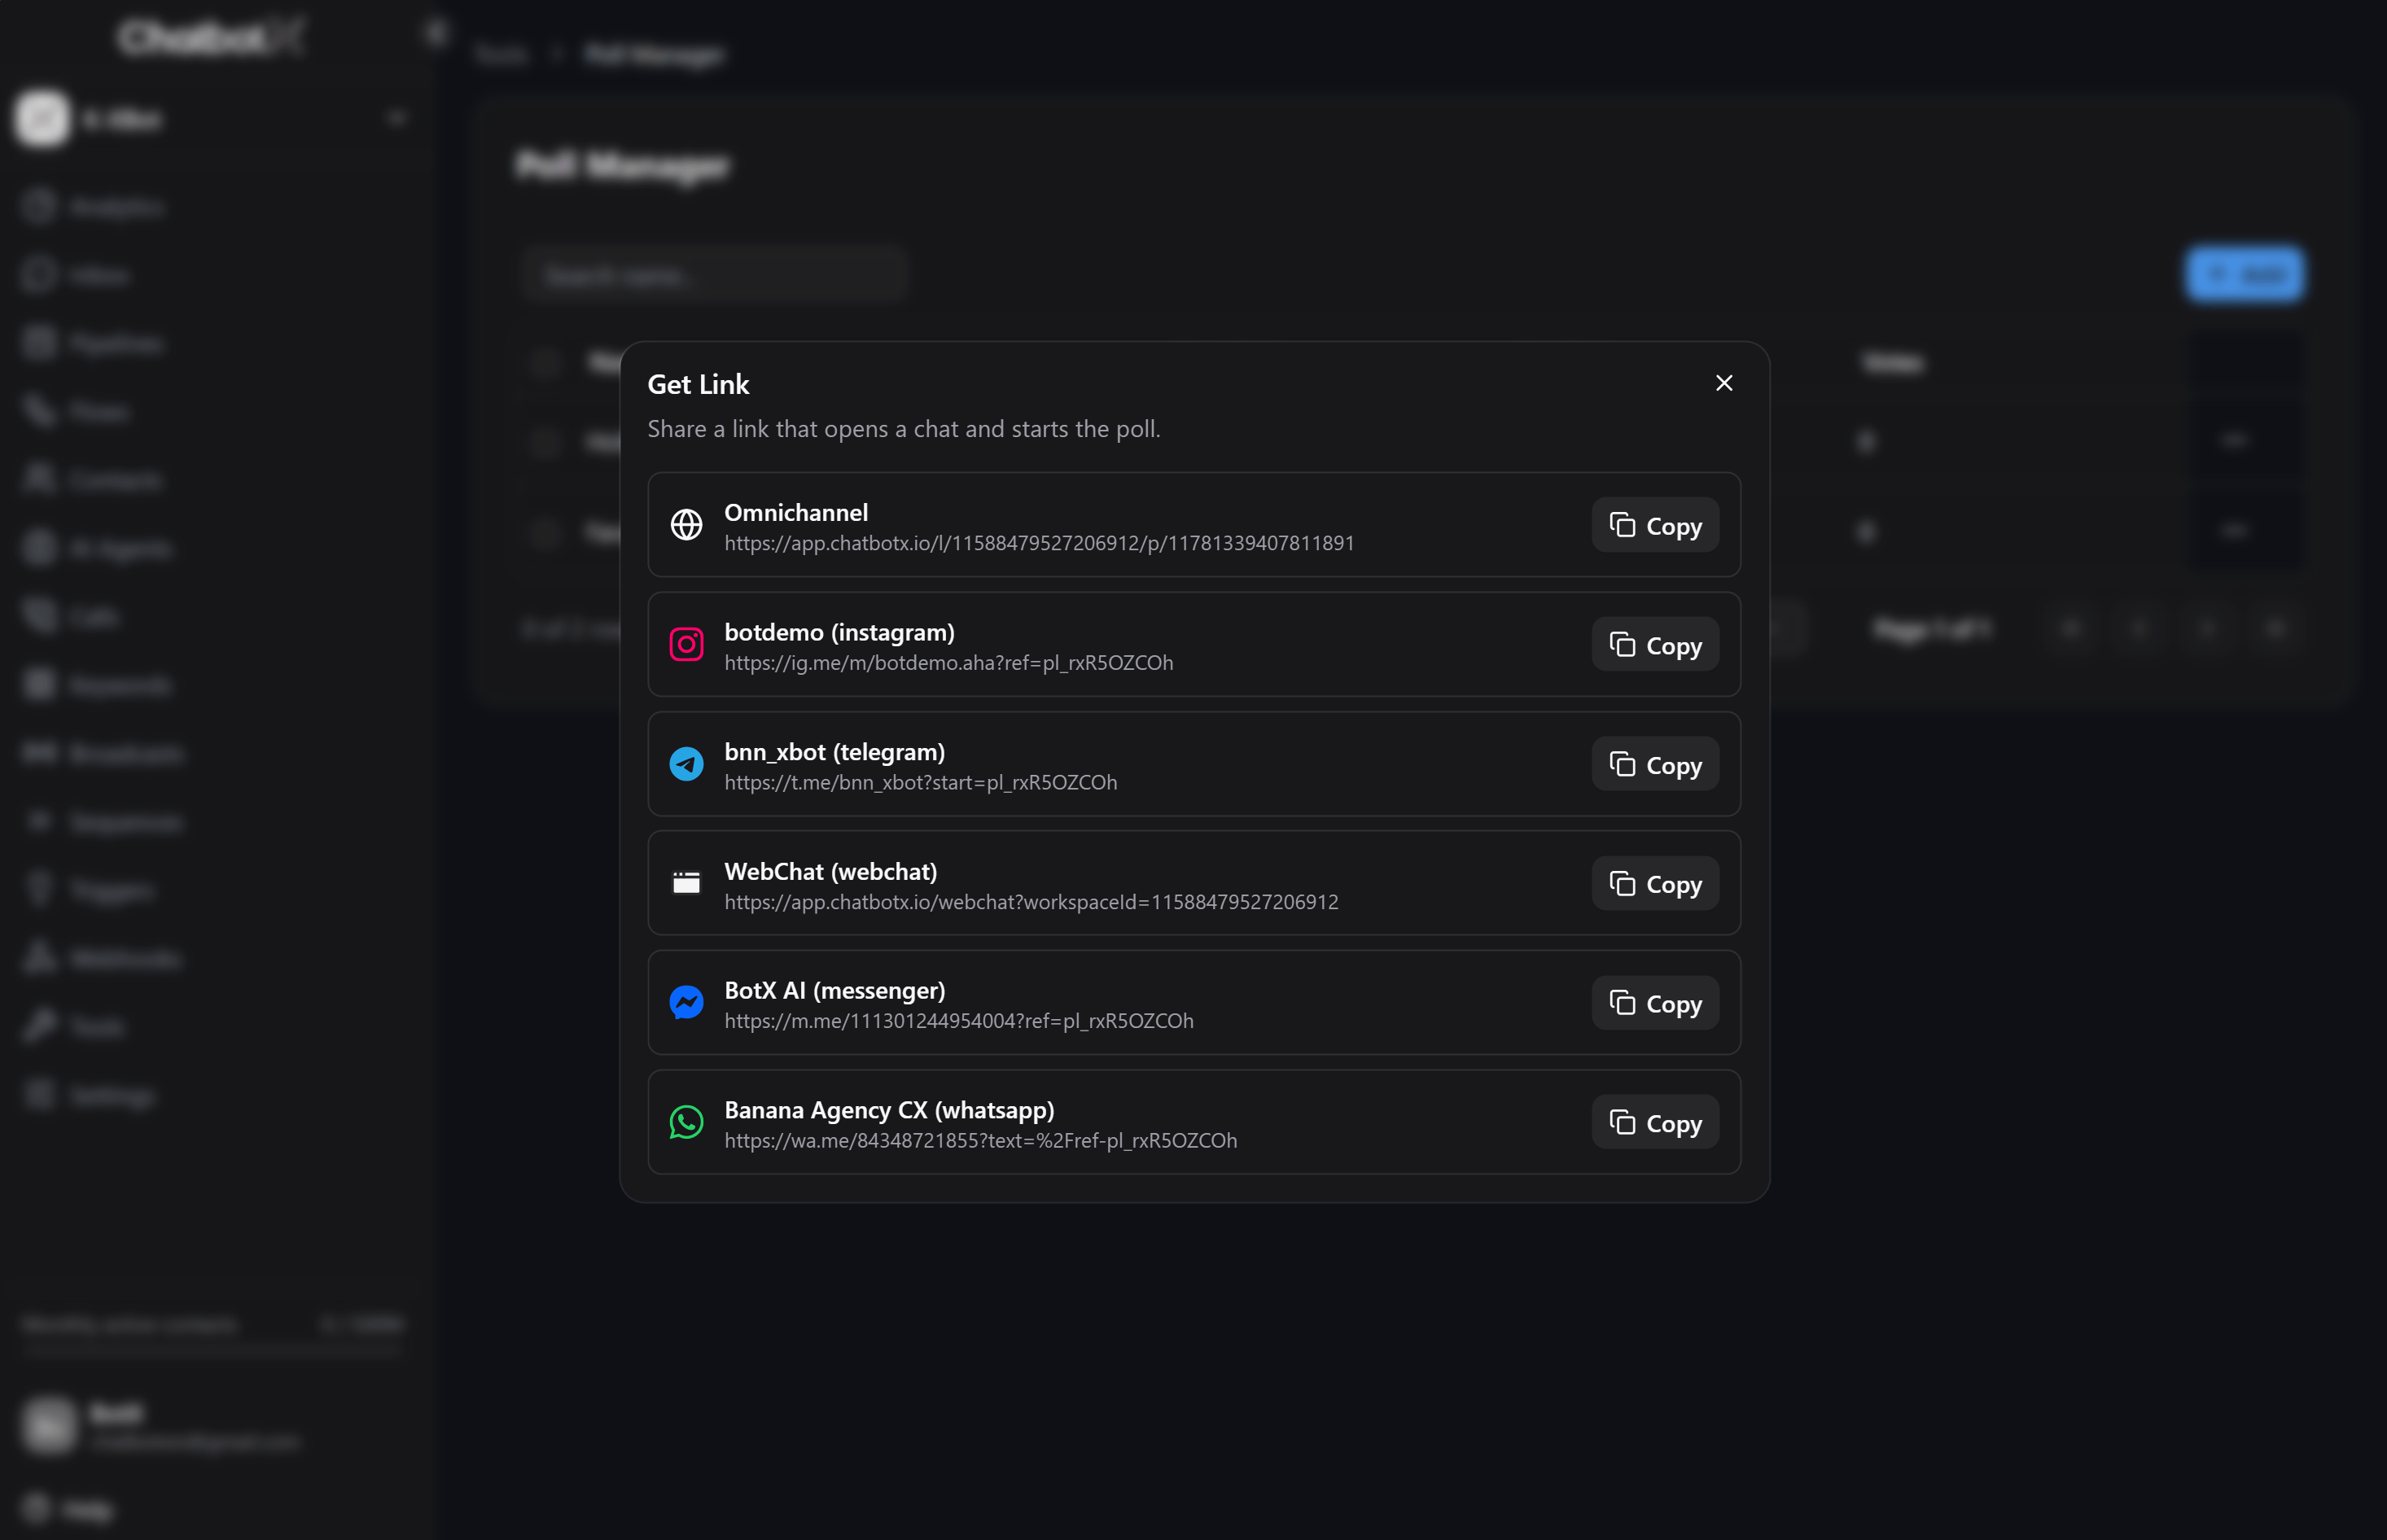
- The dialog provides ready-to-use deep links:
- Omnichannel: A universal link that routes contacts based on their device and channel preference.
- Connected Channels: Direct deep links configured with the
pl_<pollId>parameter for Facebook Messenger, Instagram, WhatsApp, Telegram, and Webchat.
Channels that do not support automated deep link referral parameters, such as TikTok or Google App, are labeled accordingly in the dialog.
In-chat voting experience
When contacts access the poll link via any supported messaging channel, ChatbotX handles the entire voting flow interactively: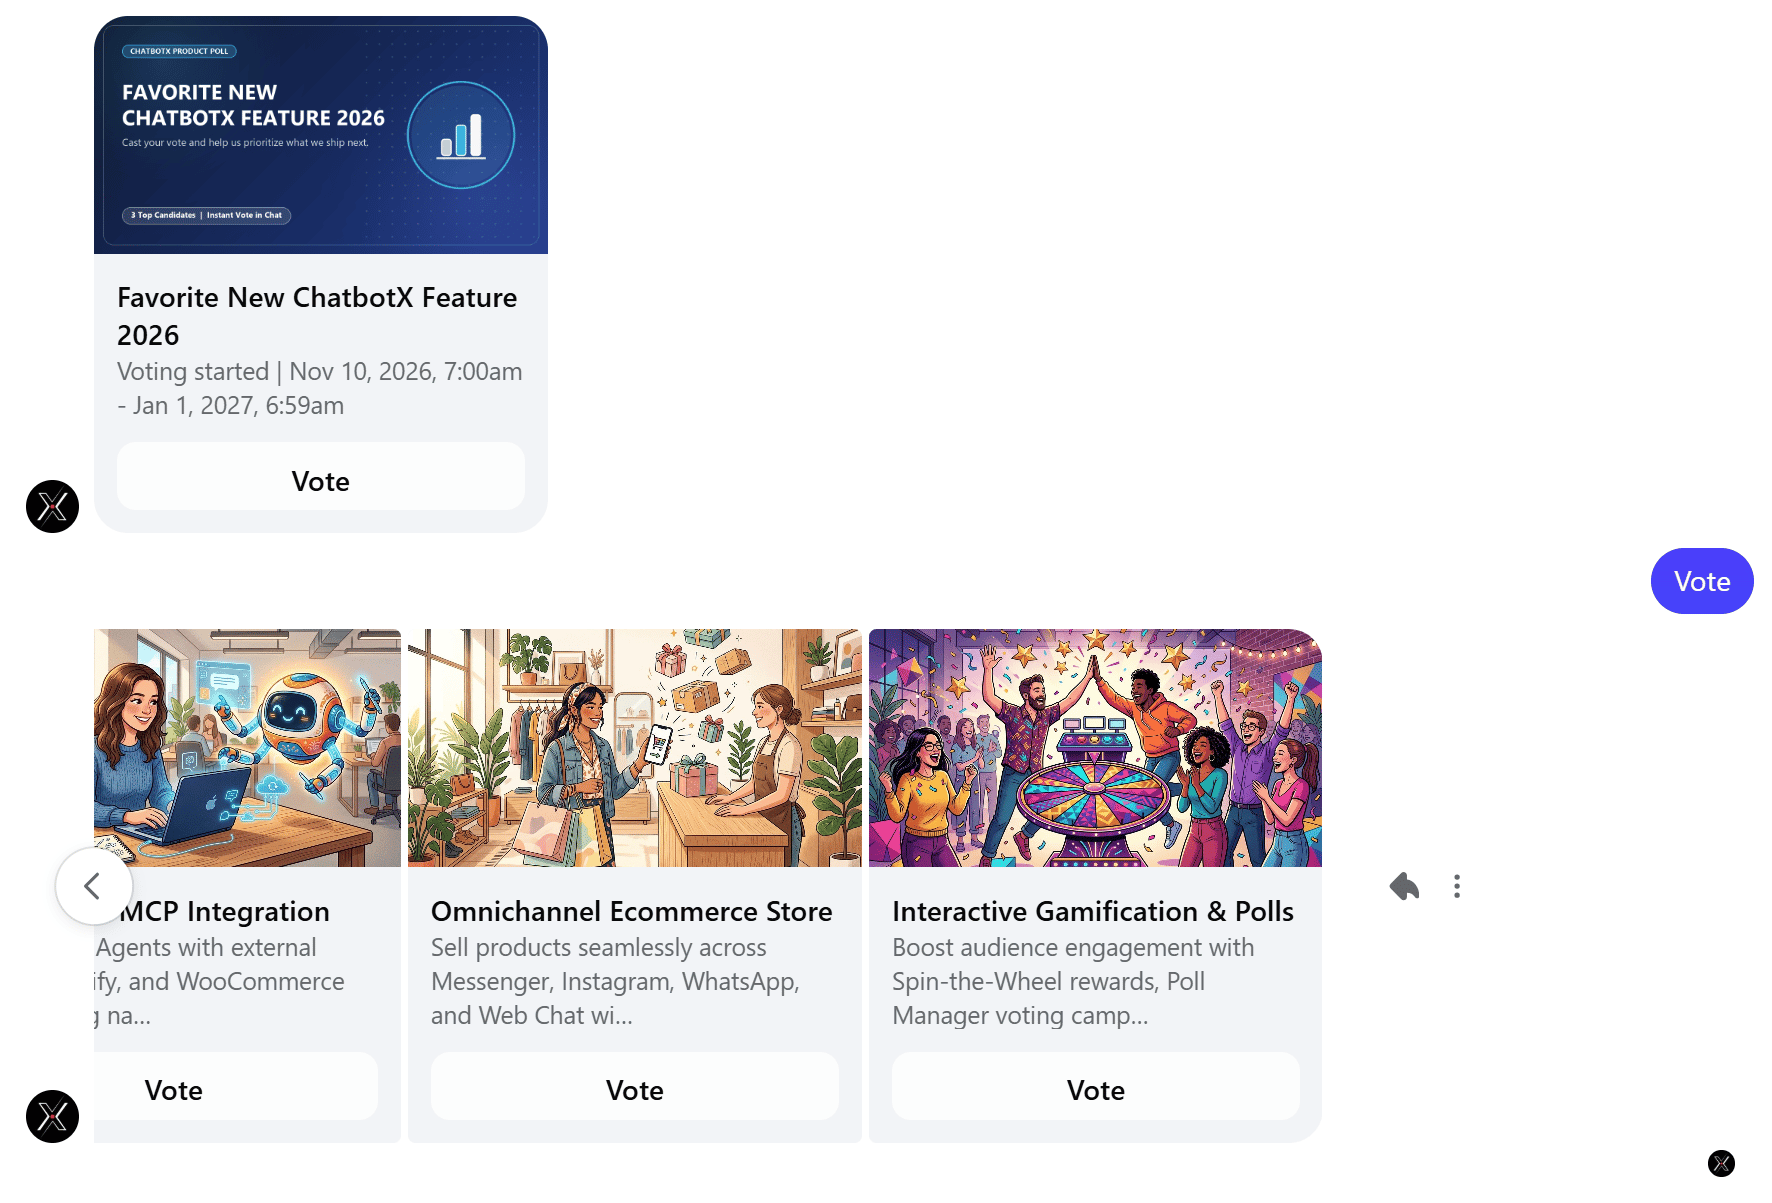
- Poll introduction card: The contact receives a greeting card displaying the cover image, poll title, voting window, and a Vote button.
- Interactive candidate carousel: Tapping Vote displays a carousel of candidate cards. Each card displays the candidate’s image, title, description, and an individual Vote button.
- Instant confirmation: Tapping the button under a candidate registers the vote immediately. The bot responds with confirmation message: “Your vote was successfully registered.” alongside a Polls button.
- Changing votes: If a contact changes their mind while the poll is active, they can tap Vote on another candidate. The system automatically updates their record and decrements their previous choice.
- Automated follow-up: If a post-vote Flow was configured, it triggers right after the confirmation message.
View analytics and reporting
Click … > View Analytics next to any poll to review detailed results and voter demographics: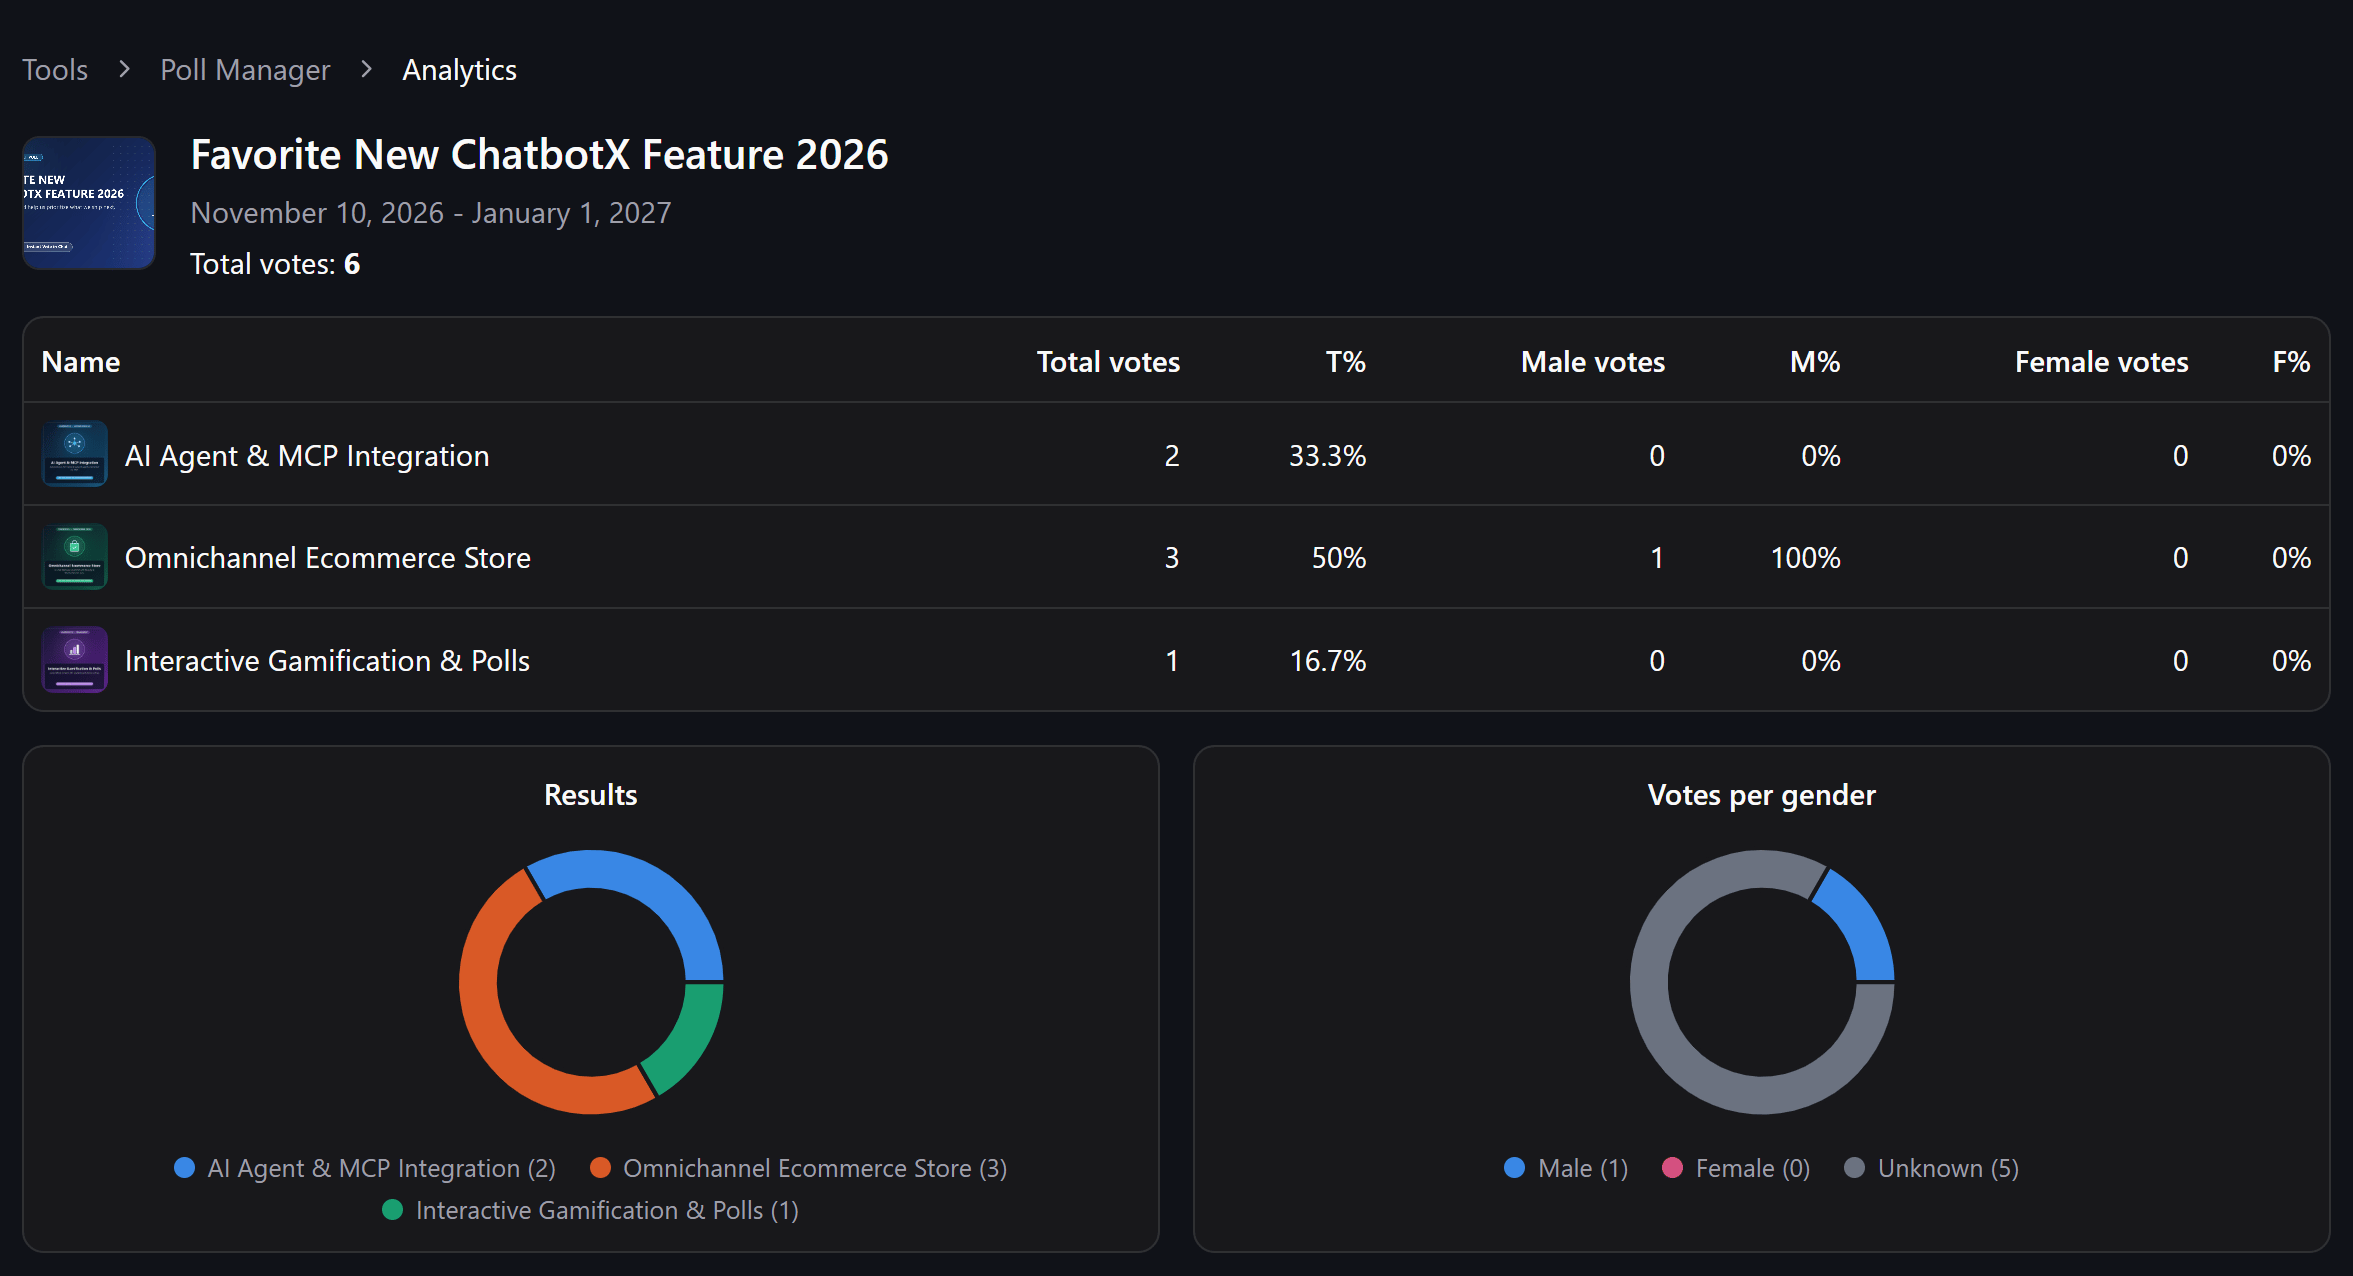
Overview metrics and table
- Total votes: The aggregate number of validated votes cast across all channels.
- Detailed candidate table:
- Name: The candidate or option title.
- Total votes: Absolute vote count received.
- T%: Percentage share of total votes.
- Male votes: Total votes cast by male contacts.
- M%: Proportion of votes from male contacts.
- Female votes: Total votes cast by female contacts.
- F%: Proportion of votes from female contacts.
Visual charts
- Results chart: A visual breakdown showing the distribution of votes across all candidates.
- Votes per gender chart: A demographic donut chart illustrating voter participation across identified gender segments (Male, Female, Unknown).