

Parallel Operations and the Handover Protocol
Within the Meta ecosystem, activating Meta Business AI on a Facebook Page introduces an exclusive response policy.- Frontline Discovery (Meta AI handles): When customers message your Page, Meta Business AI answers inquiries regarding products, general policies, and pricing using trained catalog sources.
- Automated Handover: As soon as Meta AI finishes its consultation or detects that external assistance is needed, the thread is handed back to ChatbotX.
- Automated Flow Execution: ChatbotX immediately triggers your designated Flow (such as order confirmation, storing customer attributes into Custom Fields, or syncing rows to Google Sheets) or routes the dialogue directly to human staff.
Activating and Training AI in Meta Business Suite
To turn on Meta’s business assistant for your Fanpage, follow these steps in Meta Business Suite:Navigate to Business AI
Enable the Business Agent
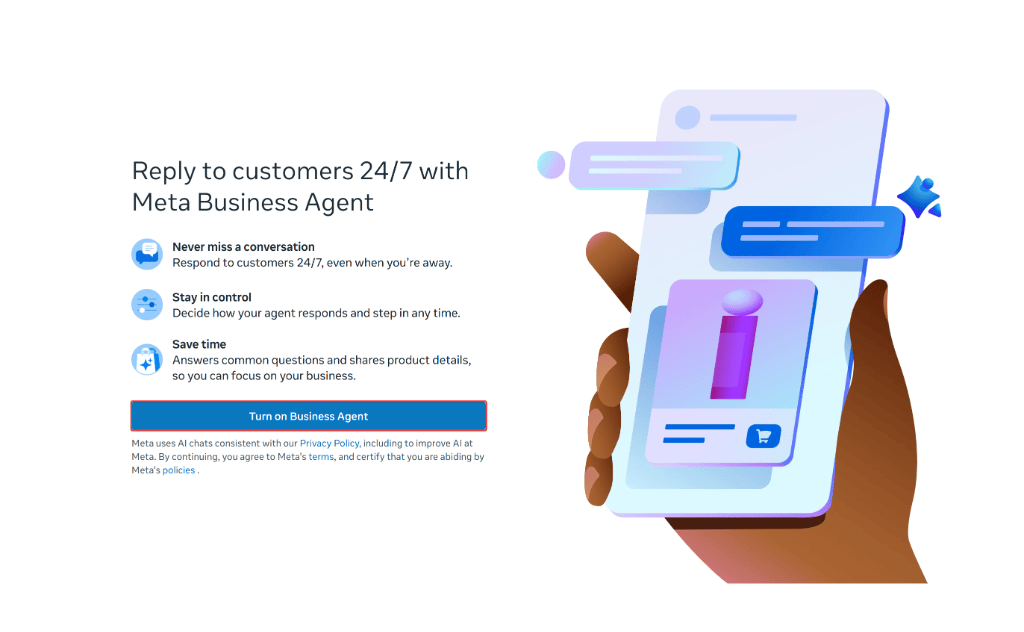
Activating Meta Business Agent in Meta Business Suite
Train your AI knowledge base
- Connect your Google Drive: Link Google Drive accounts so your agent can index company policies, service guidelines, and product documents.
- Add top products: Provide structured product details by entering them manually or integrating your Shopee storefront catalog.
- Book appointments with your AI agent: Enable automatic customer appointment scheduling synced to your calendar.
- Test chat: Test your assistant’s live conversational quality in the right-hand testing sandbox using common inquiries such as location, shipping policies, and business hours.
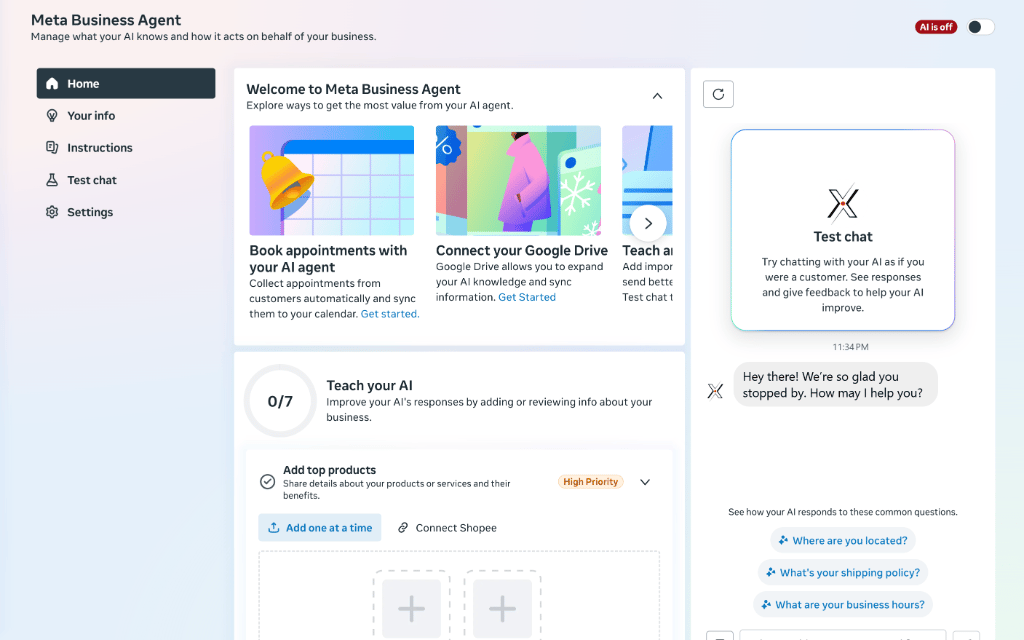
Central Meta Business Agent training dashboard
Configure audience and response schedule
- Audience: Choose which contacts the AI should engage (
Everyonefor all chats,Anyone messaging for the first time, orAnyone messaging from ads). - Schedule: Set your operational window to
Always availablefor uninterrupted 24/7 assistance. - Follow up: Define how soon the assistant automatically re-engages inactive contacts (such as
Follow up after 1 hour).
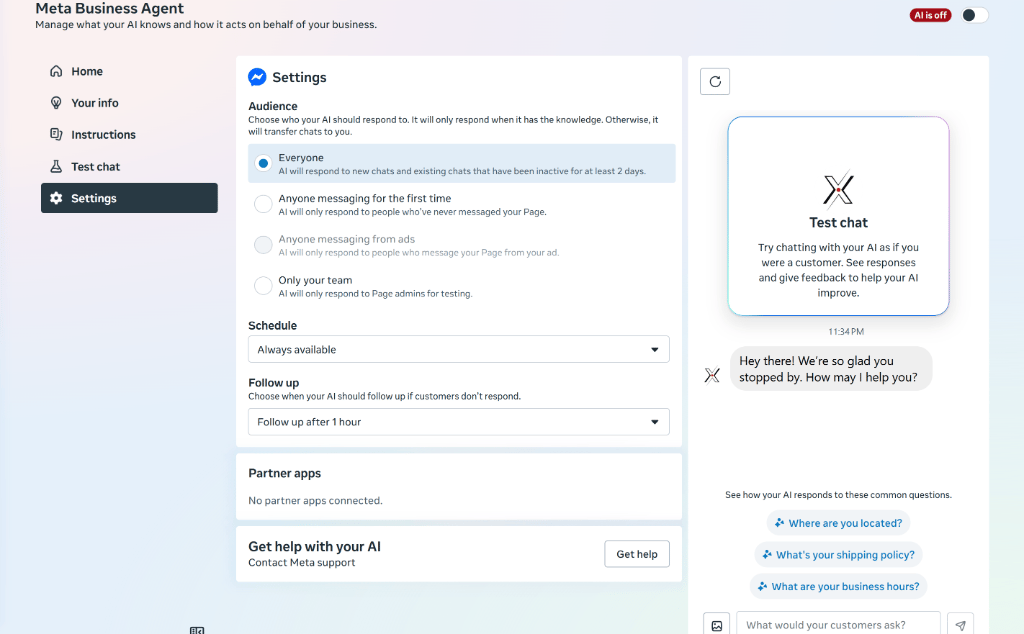
Configuring audience, schedule, and follow-up intervals
Switch on AI status
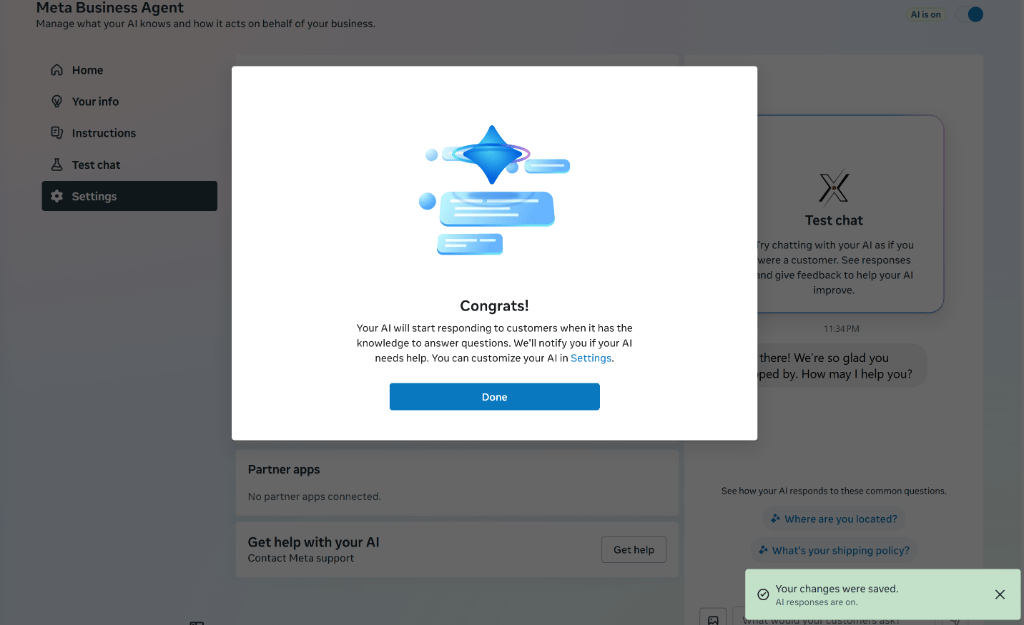
Confirmation showing AI responses are active
Configuring Handover Settings in ChatbotX
Once Meta AI is active on Facebook, configure the return behavior inside ChatbotX to catch conversations after Meta AI completes its session.Access Messenger channel settings
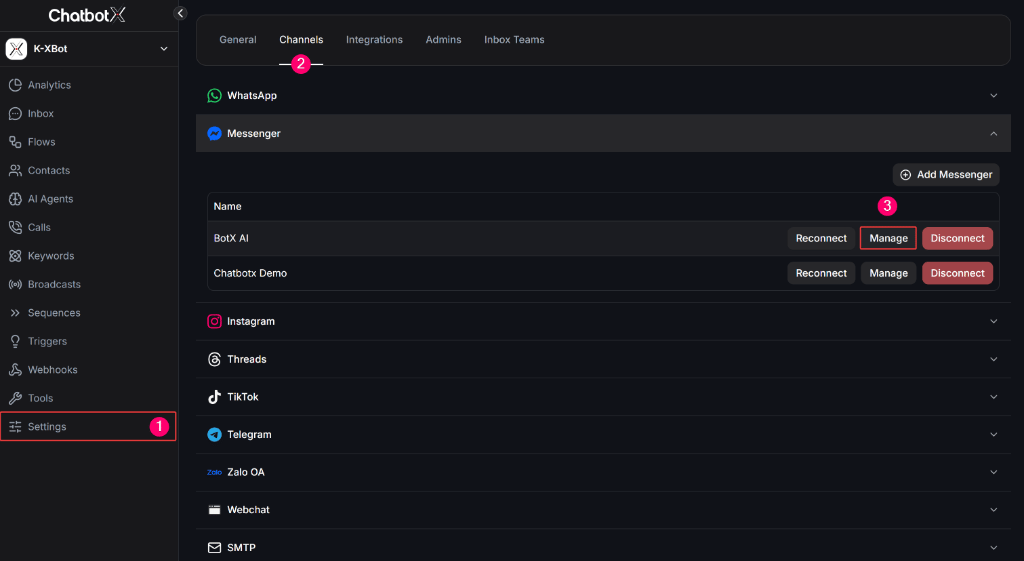
Managing the Messenger channel inside ChatbotX settings
Enable Meta Business AI
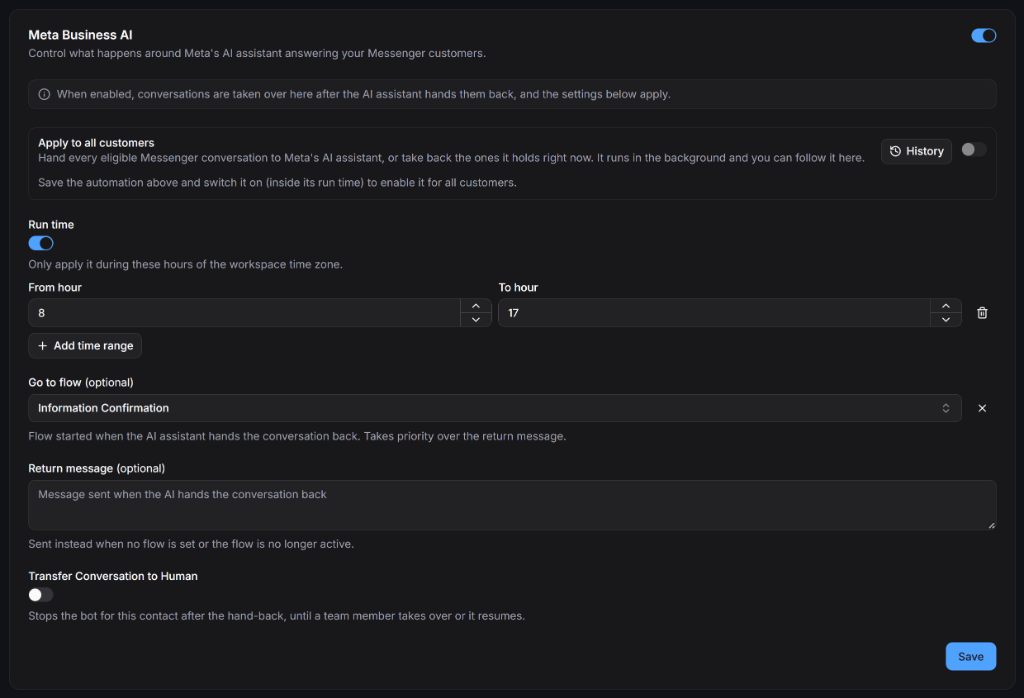
Meta Business AI configuration card under General Settings
Configure automation parameters
- Apply to all customers: Enable this toggle to apply the handover protocol to all eligible Messenger threads. Click History to review the log of past hand-offs.
- Run time: Specify your operational hours (
From hourtoTo hour) based on workspace timezone. Click + Add time range to support split shifts. - Go to flow (optional): Choose the automated Flow that launches immediately after Meta AI hands back the thread (such as the
Information Confirmationflow for order fulfillment). - Return message (optional): Supply a fallback text reply sent if no Flow is chosen or if the selected Flow is inactive.
- Transfer Conversation to Human: Enable this switch if you want to stop the bot upon handover, keeping the thread open for a human team member to take over.
Save configuration
Setting up Messenger Conversation Routing on Facebook
To guarantee that conversations handed back by Meta AI route into ChatbotX rather than disappearing or falling back to the default inbox, designate ChatbotX as the primary routing app in your Facebook Page settings.Open Messenger conversation routing
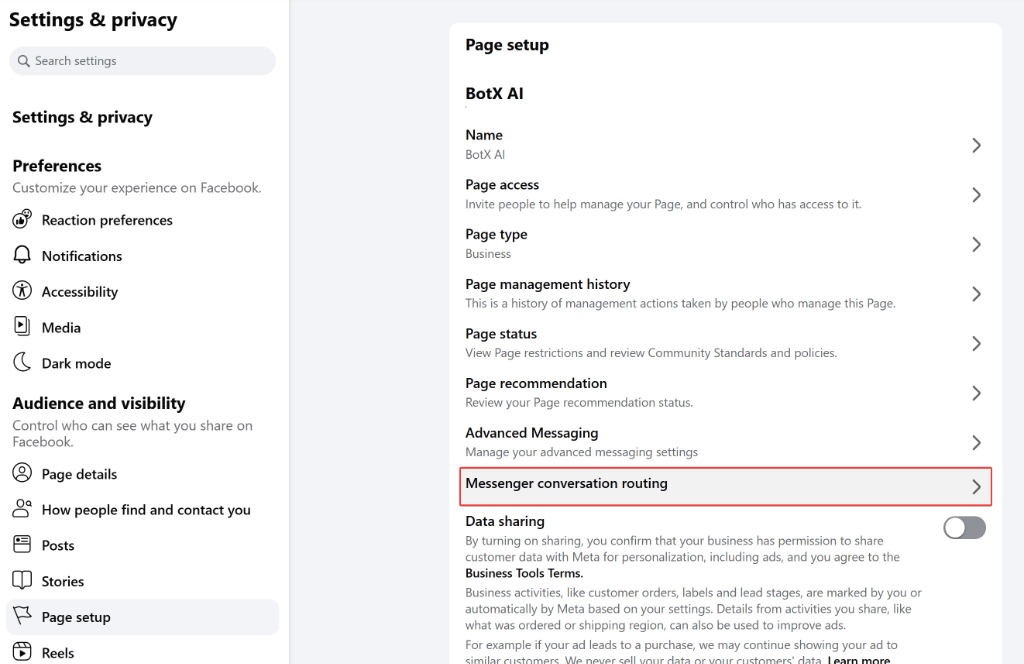
Locating Messenger conversation routing in Page setup
Initiate default routing app setup
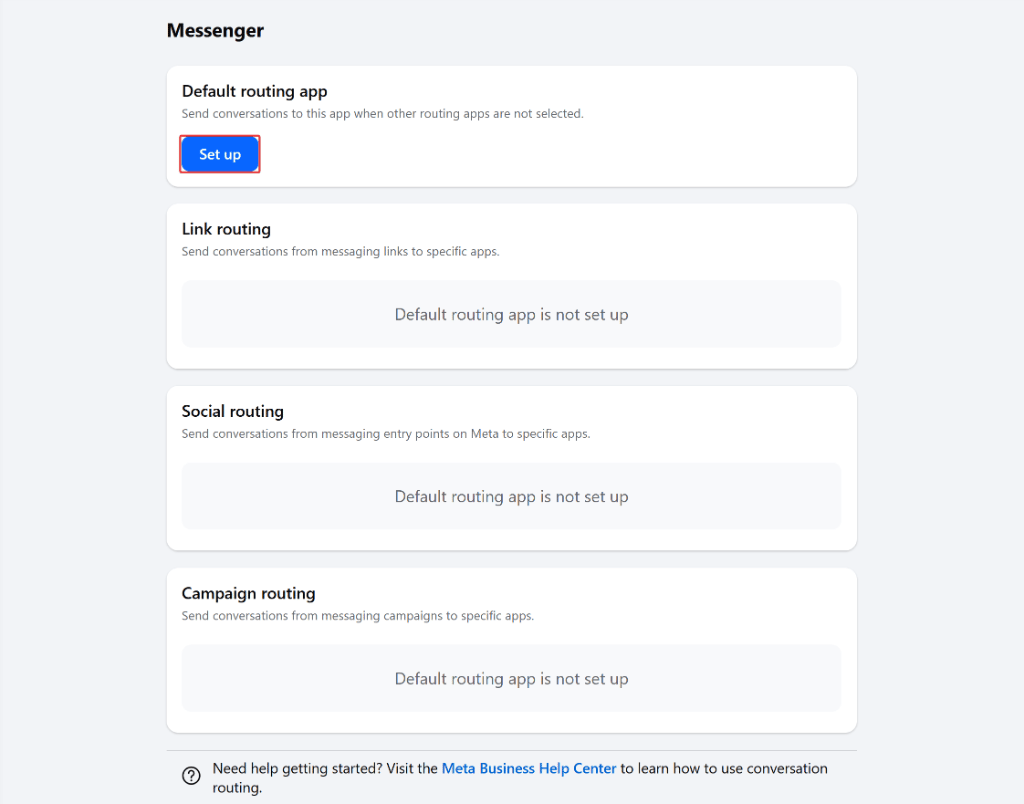
Clicking Set up on Default routing app
Begin setup wizard
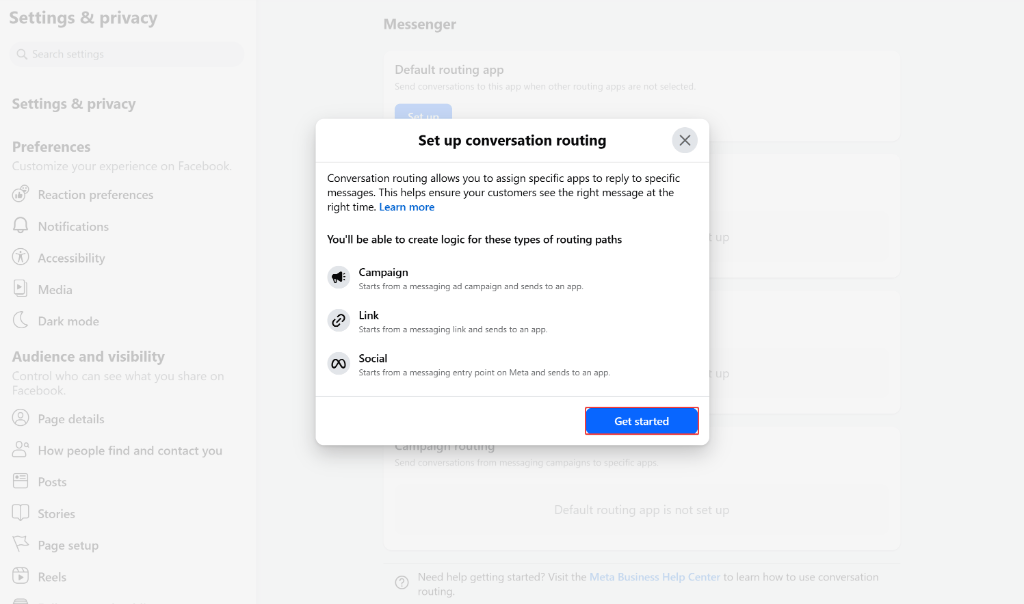
Getting started with conversation routing
Acknowledge compatibility notice
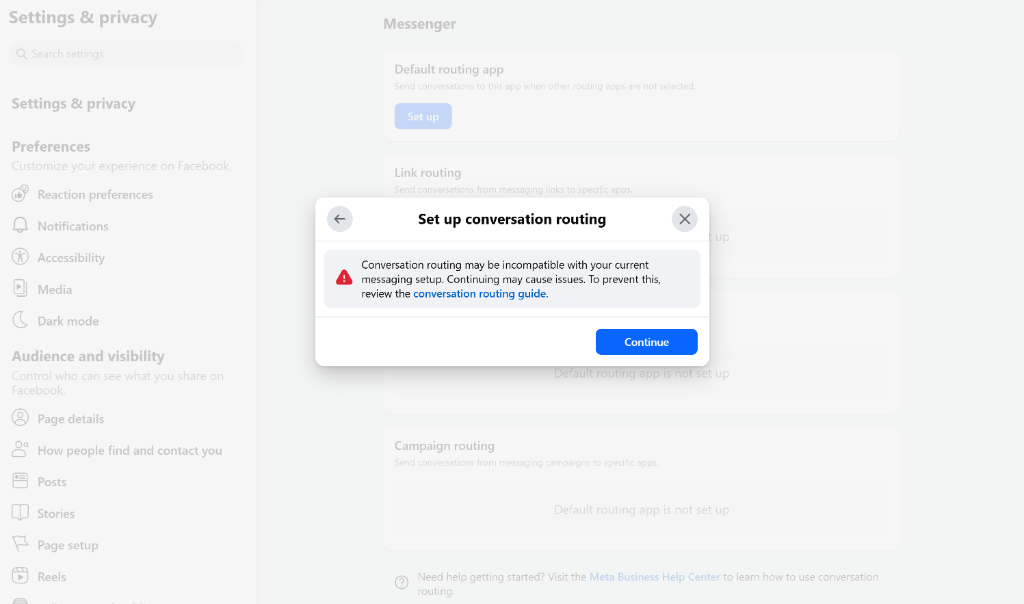
Acknowledging the compatibility warning
Select ChatConnectX
894156910972023). Confirm to finish.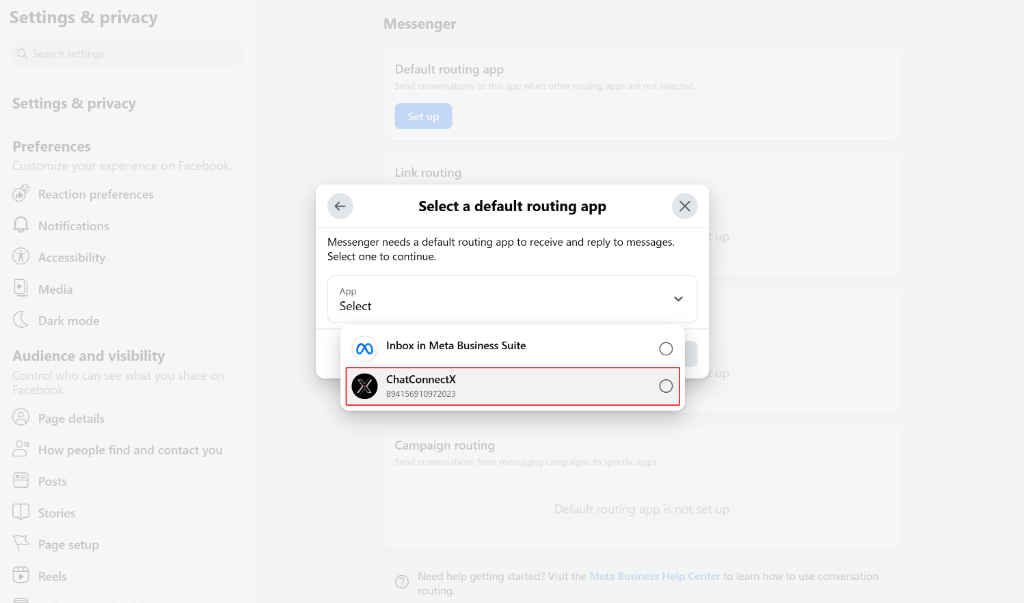
Choosing ChatConnectX as the default routing app
Automatically Extracting Customer Data with AI
When paired with ChatbotX, you can extract structured lead attributes from the raw conversational context that Meta AI generated during its session. Upon thread handover, ChatbotX captures the entire dialogue history into a system variable (such as{{bizai_chat_history}}). You can process this history with an AI Agent or an OpenAI / Claude node in your handover Flow.
Extraction Prompt Template
When setting up your AI block, apply the following strict extraction prompt:Sample Extraction Fields
Configure specific extraction directives mapped to your ChatbotX Custom Fields:Extract customer phone number from {{bizai_chat_history}}-> Map to:phone_numberExtract customer recipient full name from {{bizai_chat_history}}-> Map to:full_nameExtract detailed shipping address from {{bizai_chat_history}}-> Map to:addressExtract customer product interest or inquiry topic from {{bizai_chat_history}}-> Map to:ai_answer
Controlling AI in Livechat
While Meta Business AI actively consults with your leads, your support team can monitor live interactions from the ChatbotX Inbox / Livechat console and take over instantly when necessary.Monitoring Meta AI thread status
When a customer is engaged by Meta AI, the Livechat view provides real-time state indicators:- The customer contact card in the inbox sidebar displays an orange badge: Standby (Meta AI).
- The right sidebar under Conversation routing reflects
Thread state: Standby,Current owner: Meta AI, and sets your role toStandby - listening only. - The lower message composer is locked to prevent collisions, displaying an advisory banner: “You’re on standby (listening only). A third-party partner is handling this conversation. The message box is locked to avoid duplicate replies.”
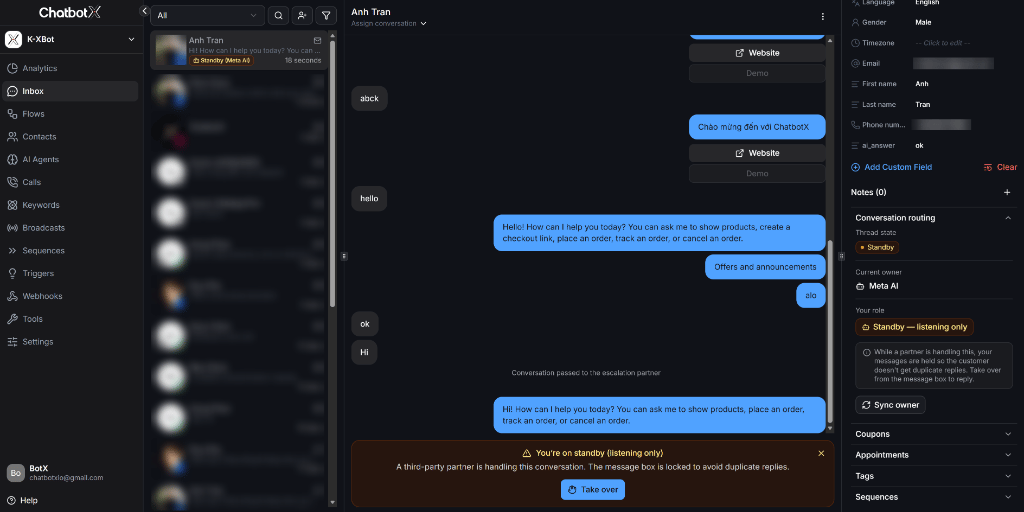
Livechat interface while Meta AI holds ownership of the conversation thread
Taking over manually (Human Takeover)
If a customer requires customized pricing, urgent support, or expresses dissatisfaction, human agents can intervene immediately:Click Take over
Engage directly
Thread state: Owned and Current owner: you. Team members can type custom replies, upload attachments, or send automated flows.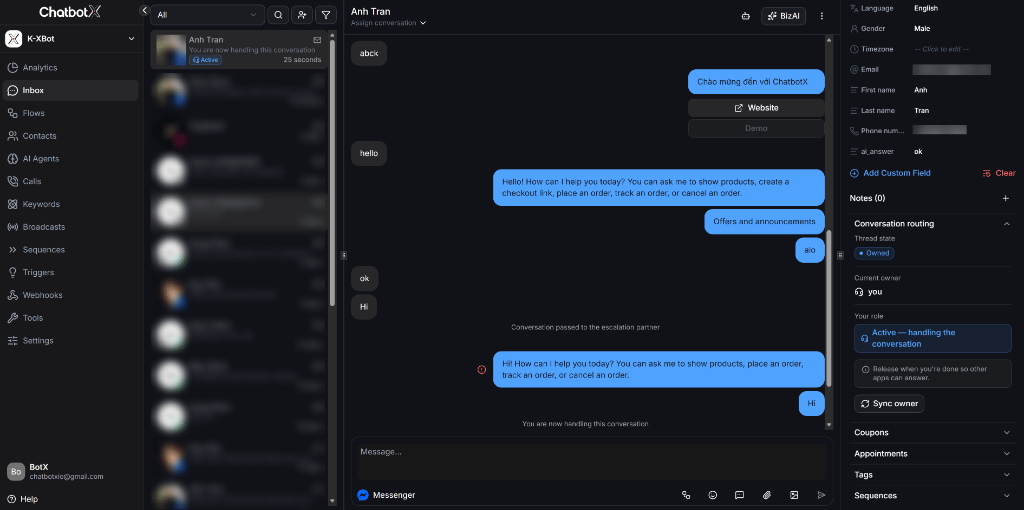
Livechat interface after a human agent successfully takes over the conversation
Handing control back to Meta AI
Once your team has resolved the specific question and wants Meta AI to resume automated consultation, return thread control with two clicks:Click BizAI on the header
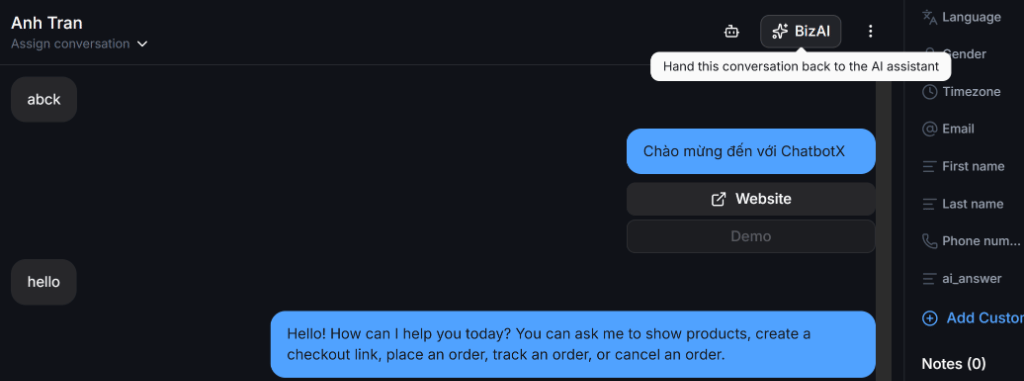
BizAI button in the chat header to initiate thread handover
Confirm thread return
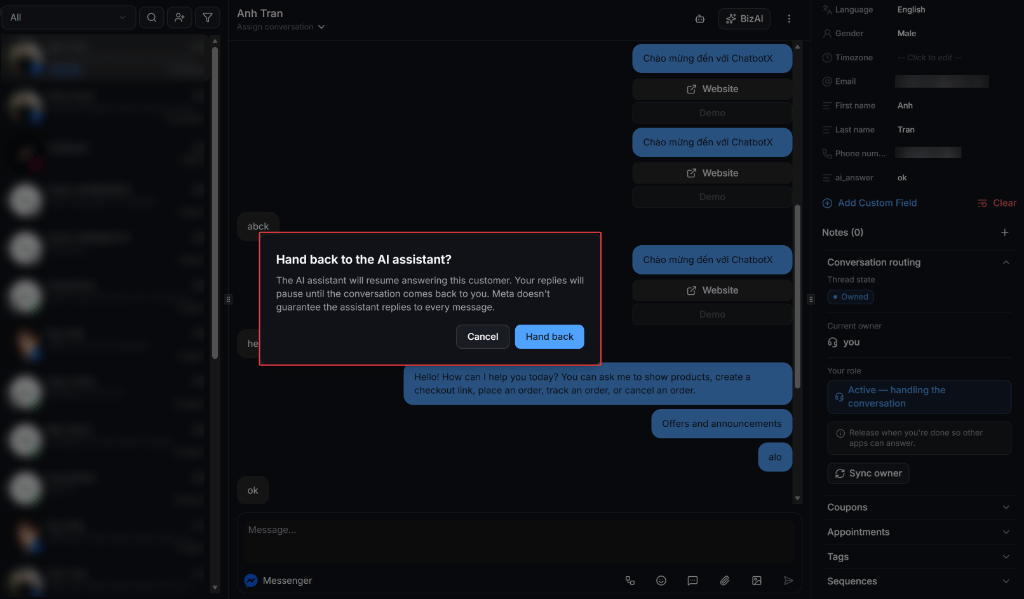
Confirmation modal to hand back thread ownership to Meta AI