

Categories and Vendors
Group merchandise into categories, subcategories, and brand vendors with dedicated deep links for each collection.
Variants and Add-ons
Configure multiple size or color options with independent pricing and attach recommended add-on items.
Automated Inventory Tracking
Track stock quantities by SKU, automatically deducting inventory on new orders and restocking when orders are cancelled.
Promotional Coupons
Issue percentage, fixed-amount, or free-delivery discount codes with optional auto-apply rules at checkout.
Managing Product Categories
The Categories tab lets you organize the navigation structure of your Webview storefront so shoppers can filter products quickly.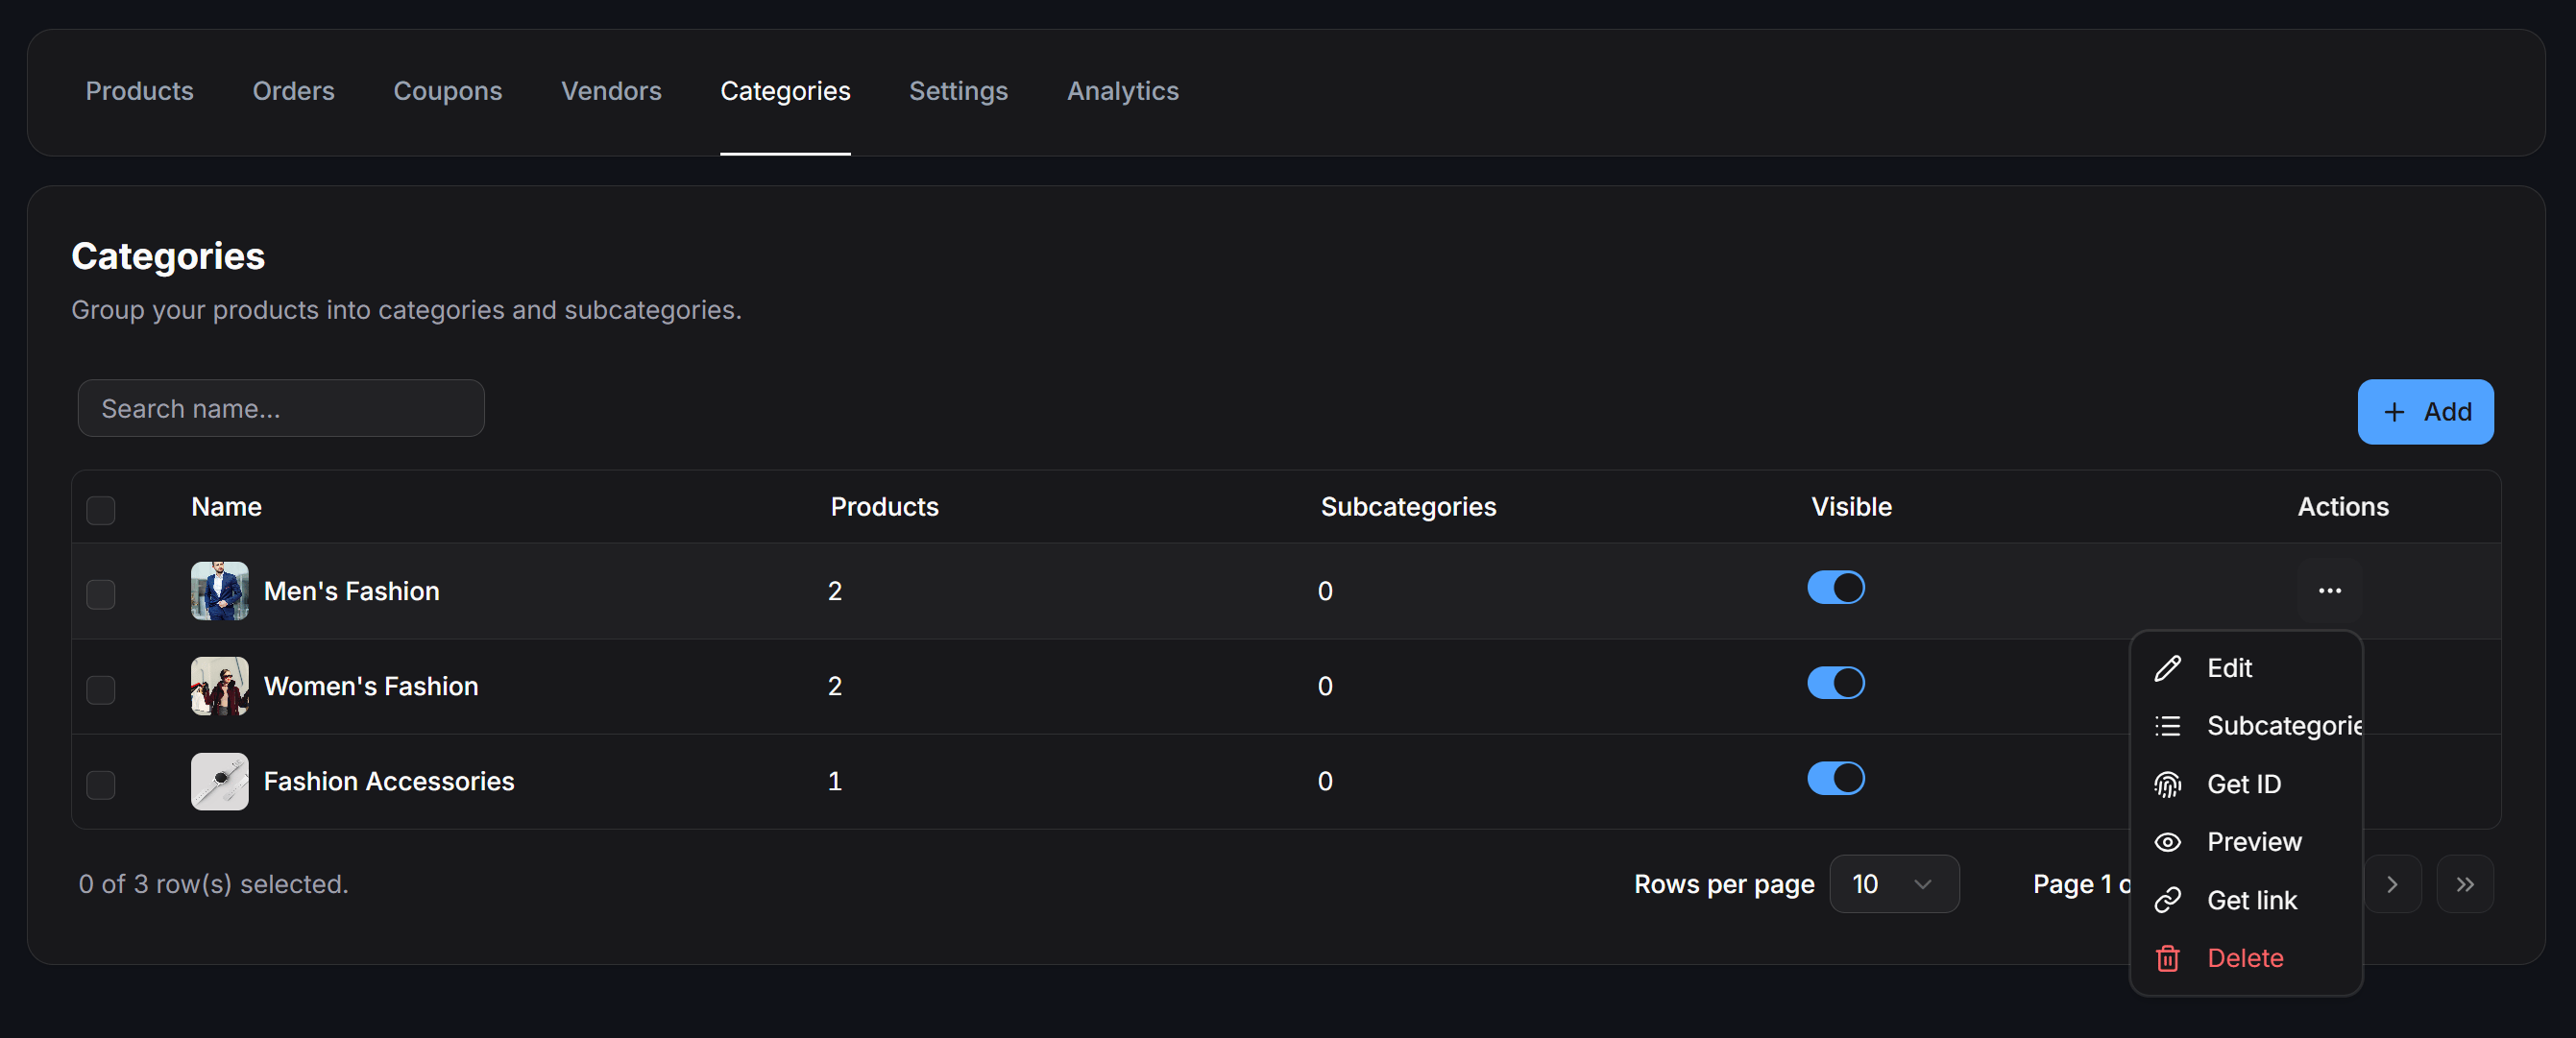
Click the three-dot Actions icon on any category row to access:
- Edit: Update the category name, cover image, or display rank.
- Subcategories: Open and manage child subcategories under this category.
- Get ID: Copy the category’s unique identifier for API or filtering use.
- Preview: Open a browser preview filtered to this category.
- Get link: Copy the personalized category link containing
{{shop_token}}to attach to buttons in your flows. - Delete: Remove the category from your store.
Creating and Editing a Category
Click + Add (or select Edit from the actions menu) to open the category configuration modal: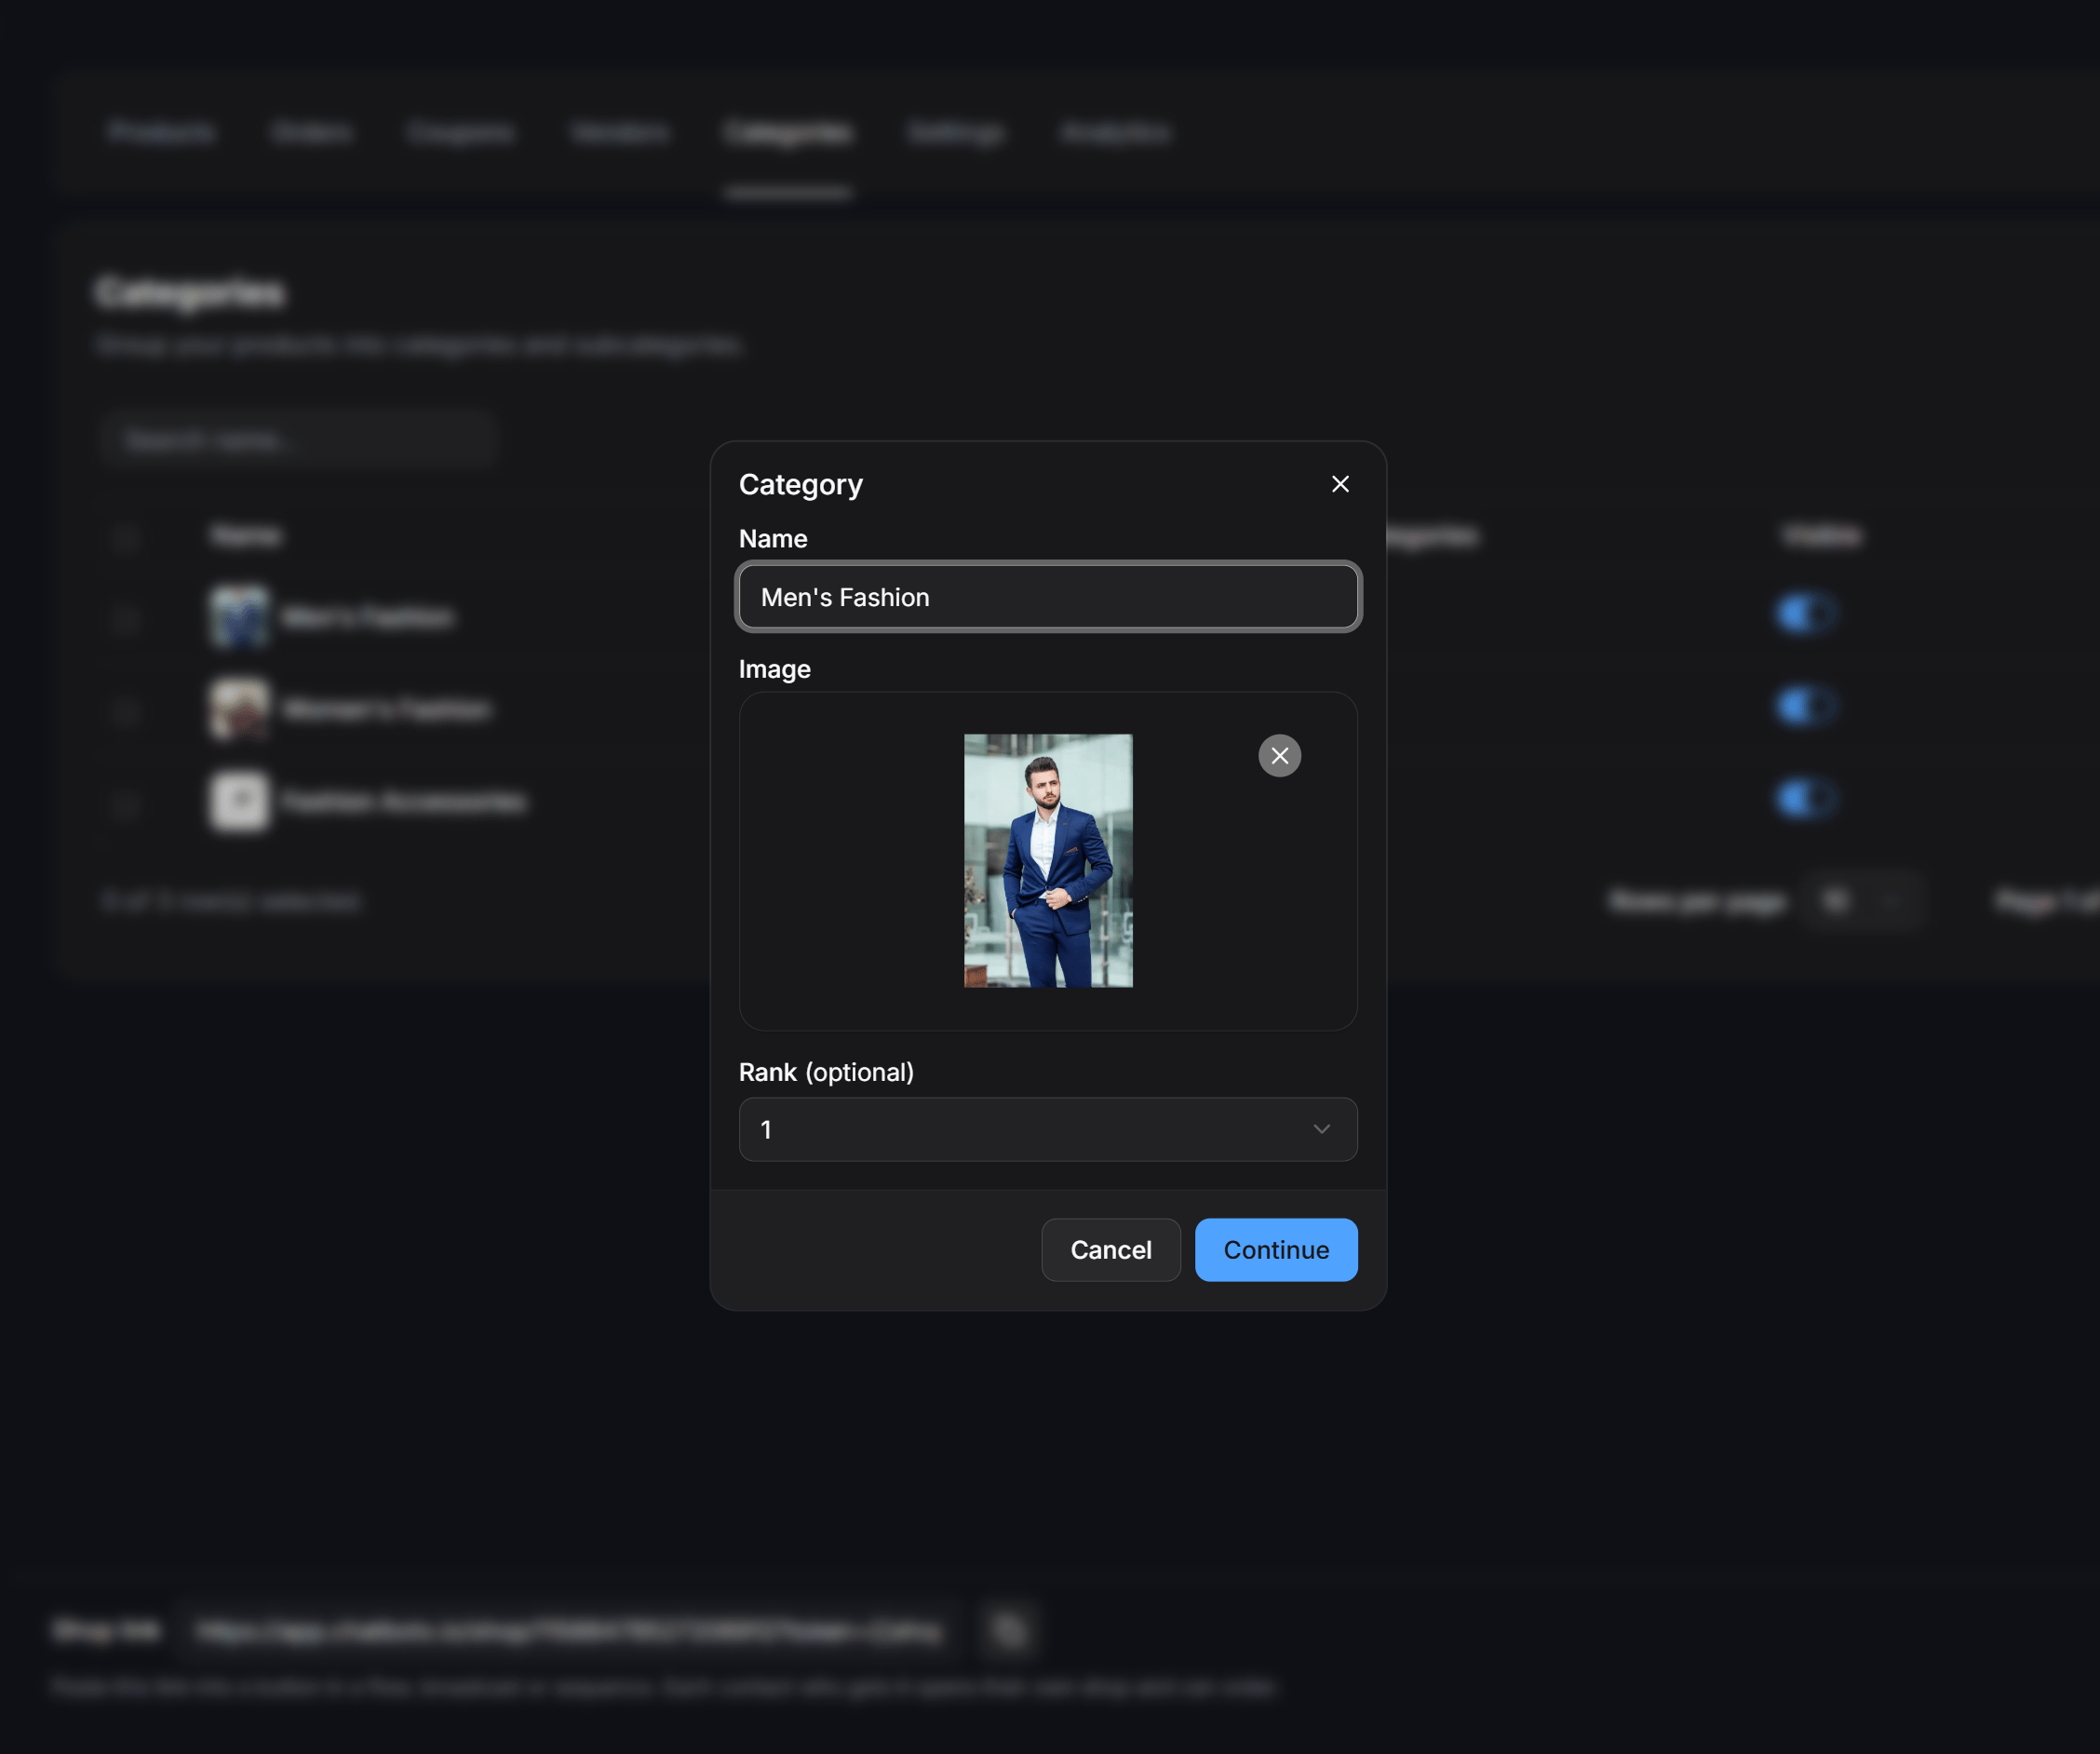
- Name: Enter the category name shown to shoppers.
- Image: Upload a cover image from your computer or paste a direct image URL.
- Rank (optional): Set the display priority on the storefront menu. Lower numbers appear first.
Managing Vendors and Brands
The Vendors tab lets you group products by brand, manufacturer, or supplier partner. This is ideal for multi-brand boutiques, marketplaces, or multi-branch stores.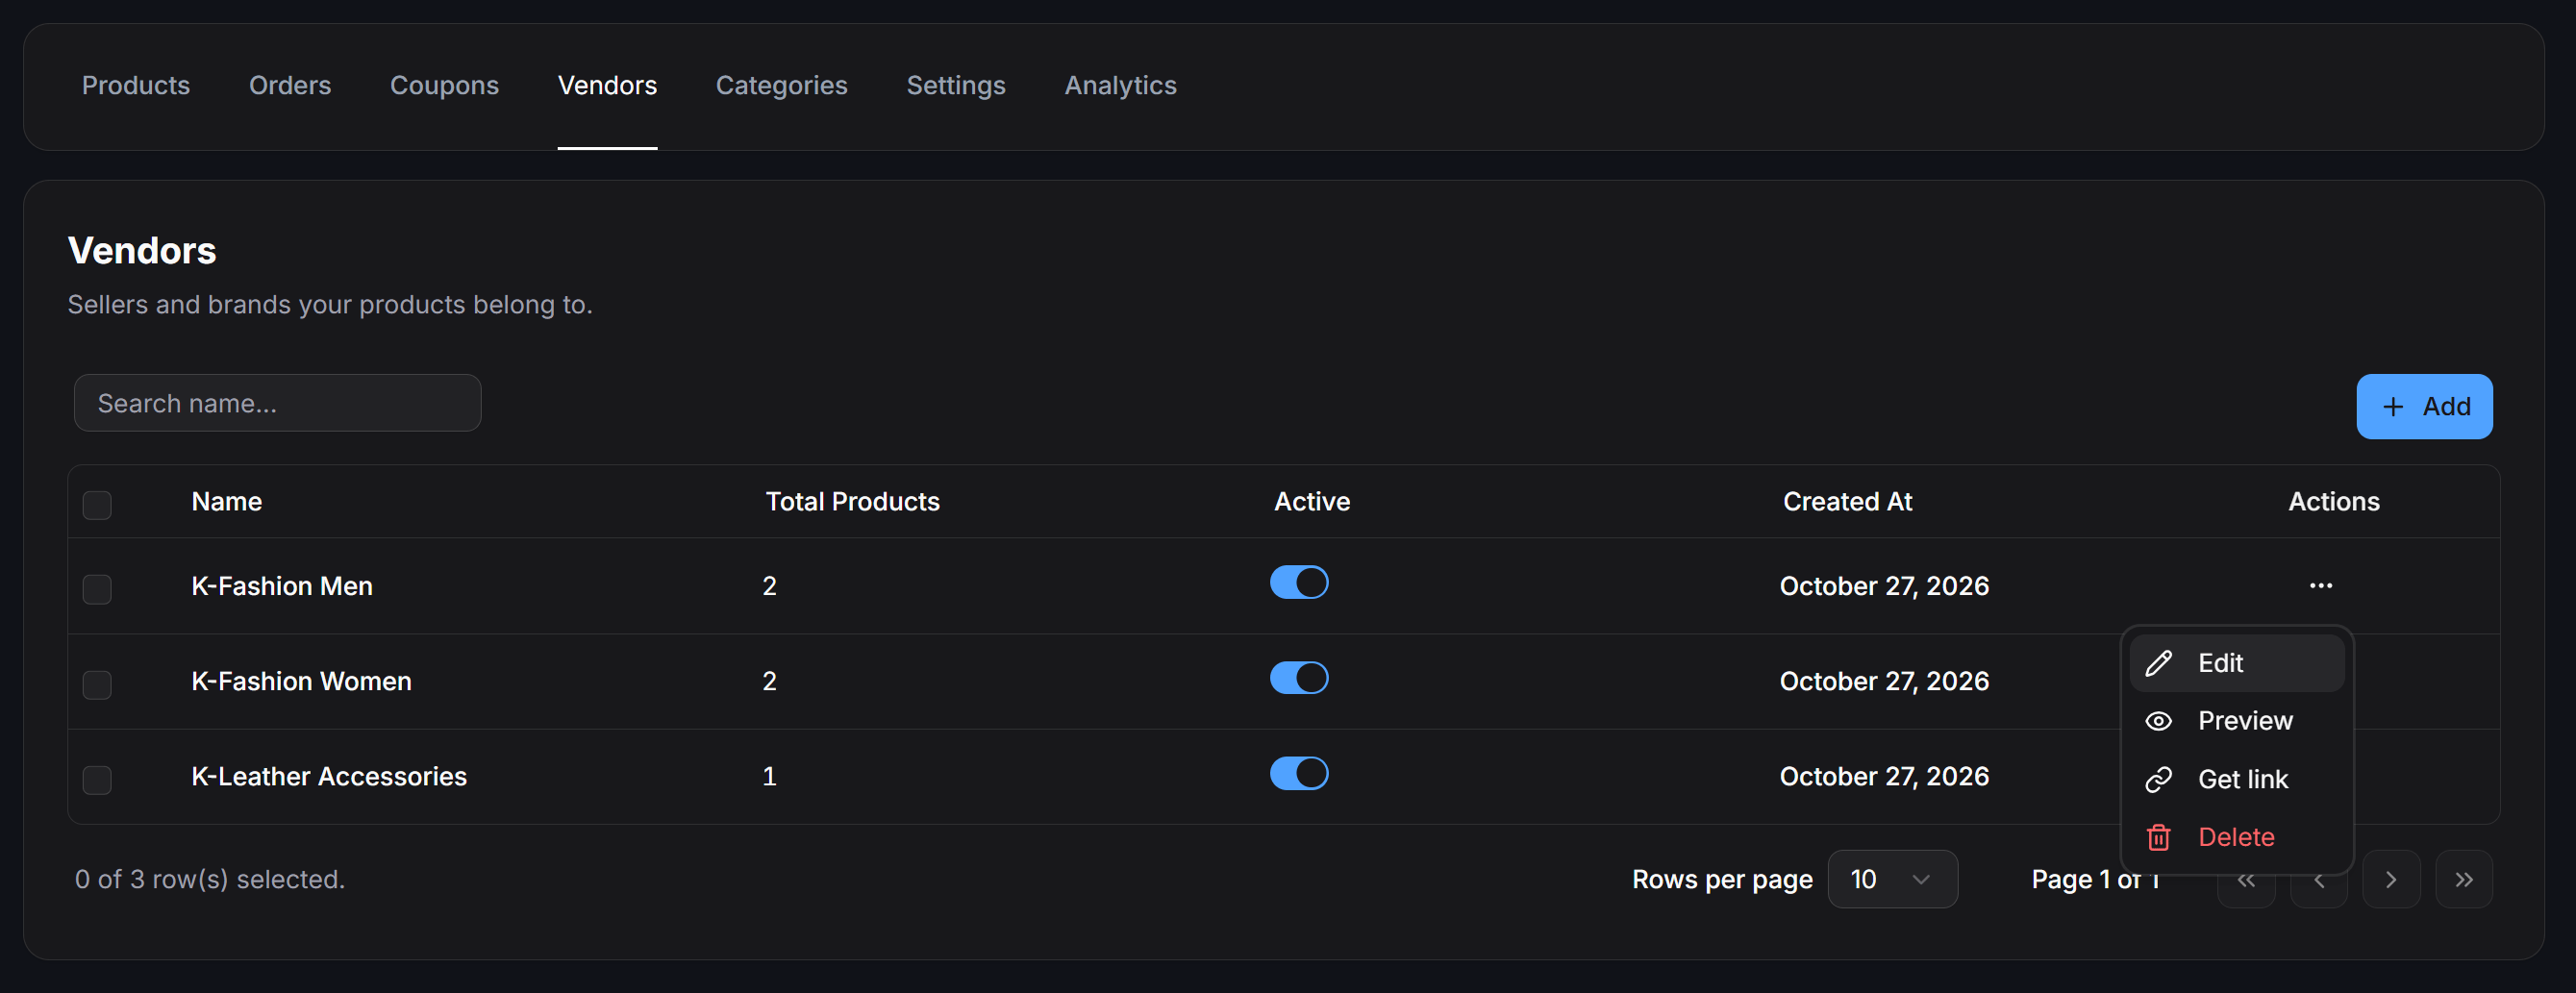
Name, Total Products linked to that vendor, an Active status toggle, Created At timestamp, and the Actions menu.
From the Actions (…) menu of any vendor, you can select Edit to update details, Preview to inspect the vendor page, Get link to copy a personalized link containing {{shop_token}} that opens only that vendor’s products, or Delete to remove the vendor.
Adding and Configuring a Vendor
Click + Add at the top right of the Vendors tab to open the vendor editor: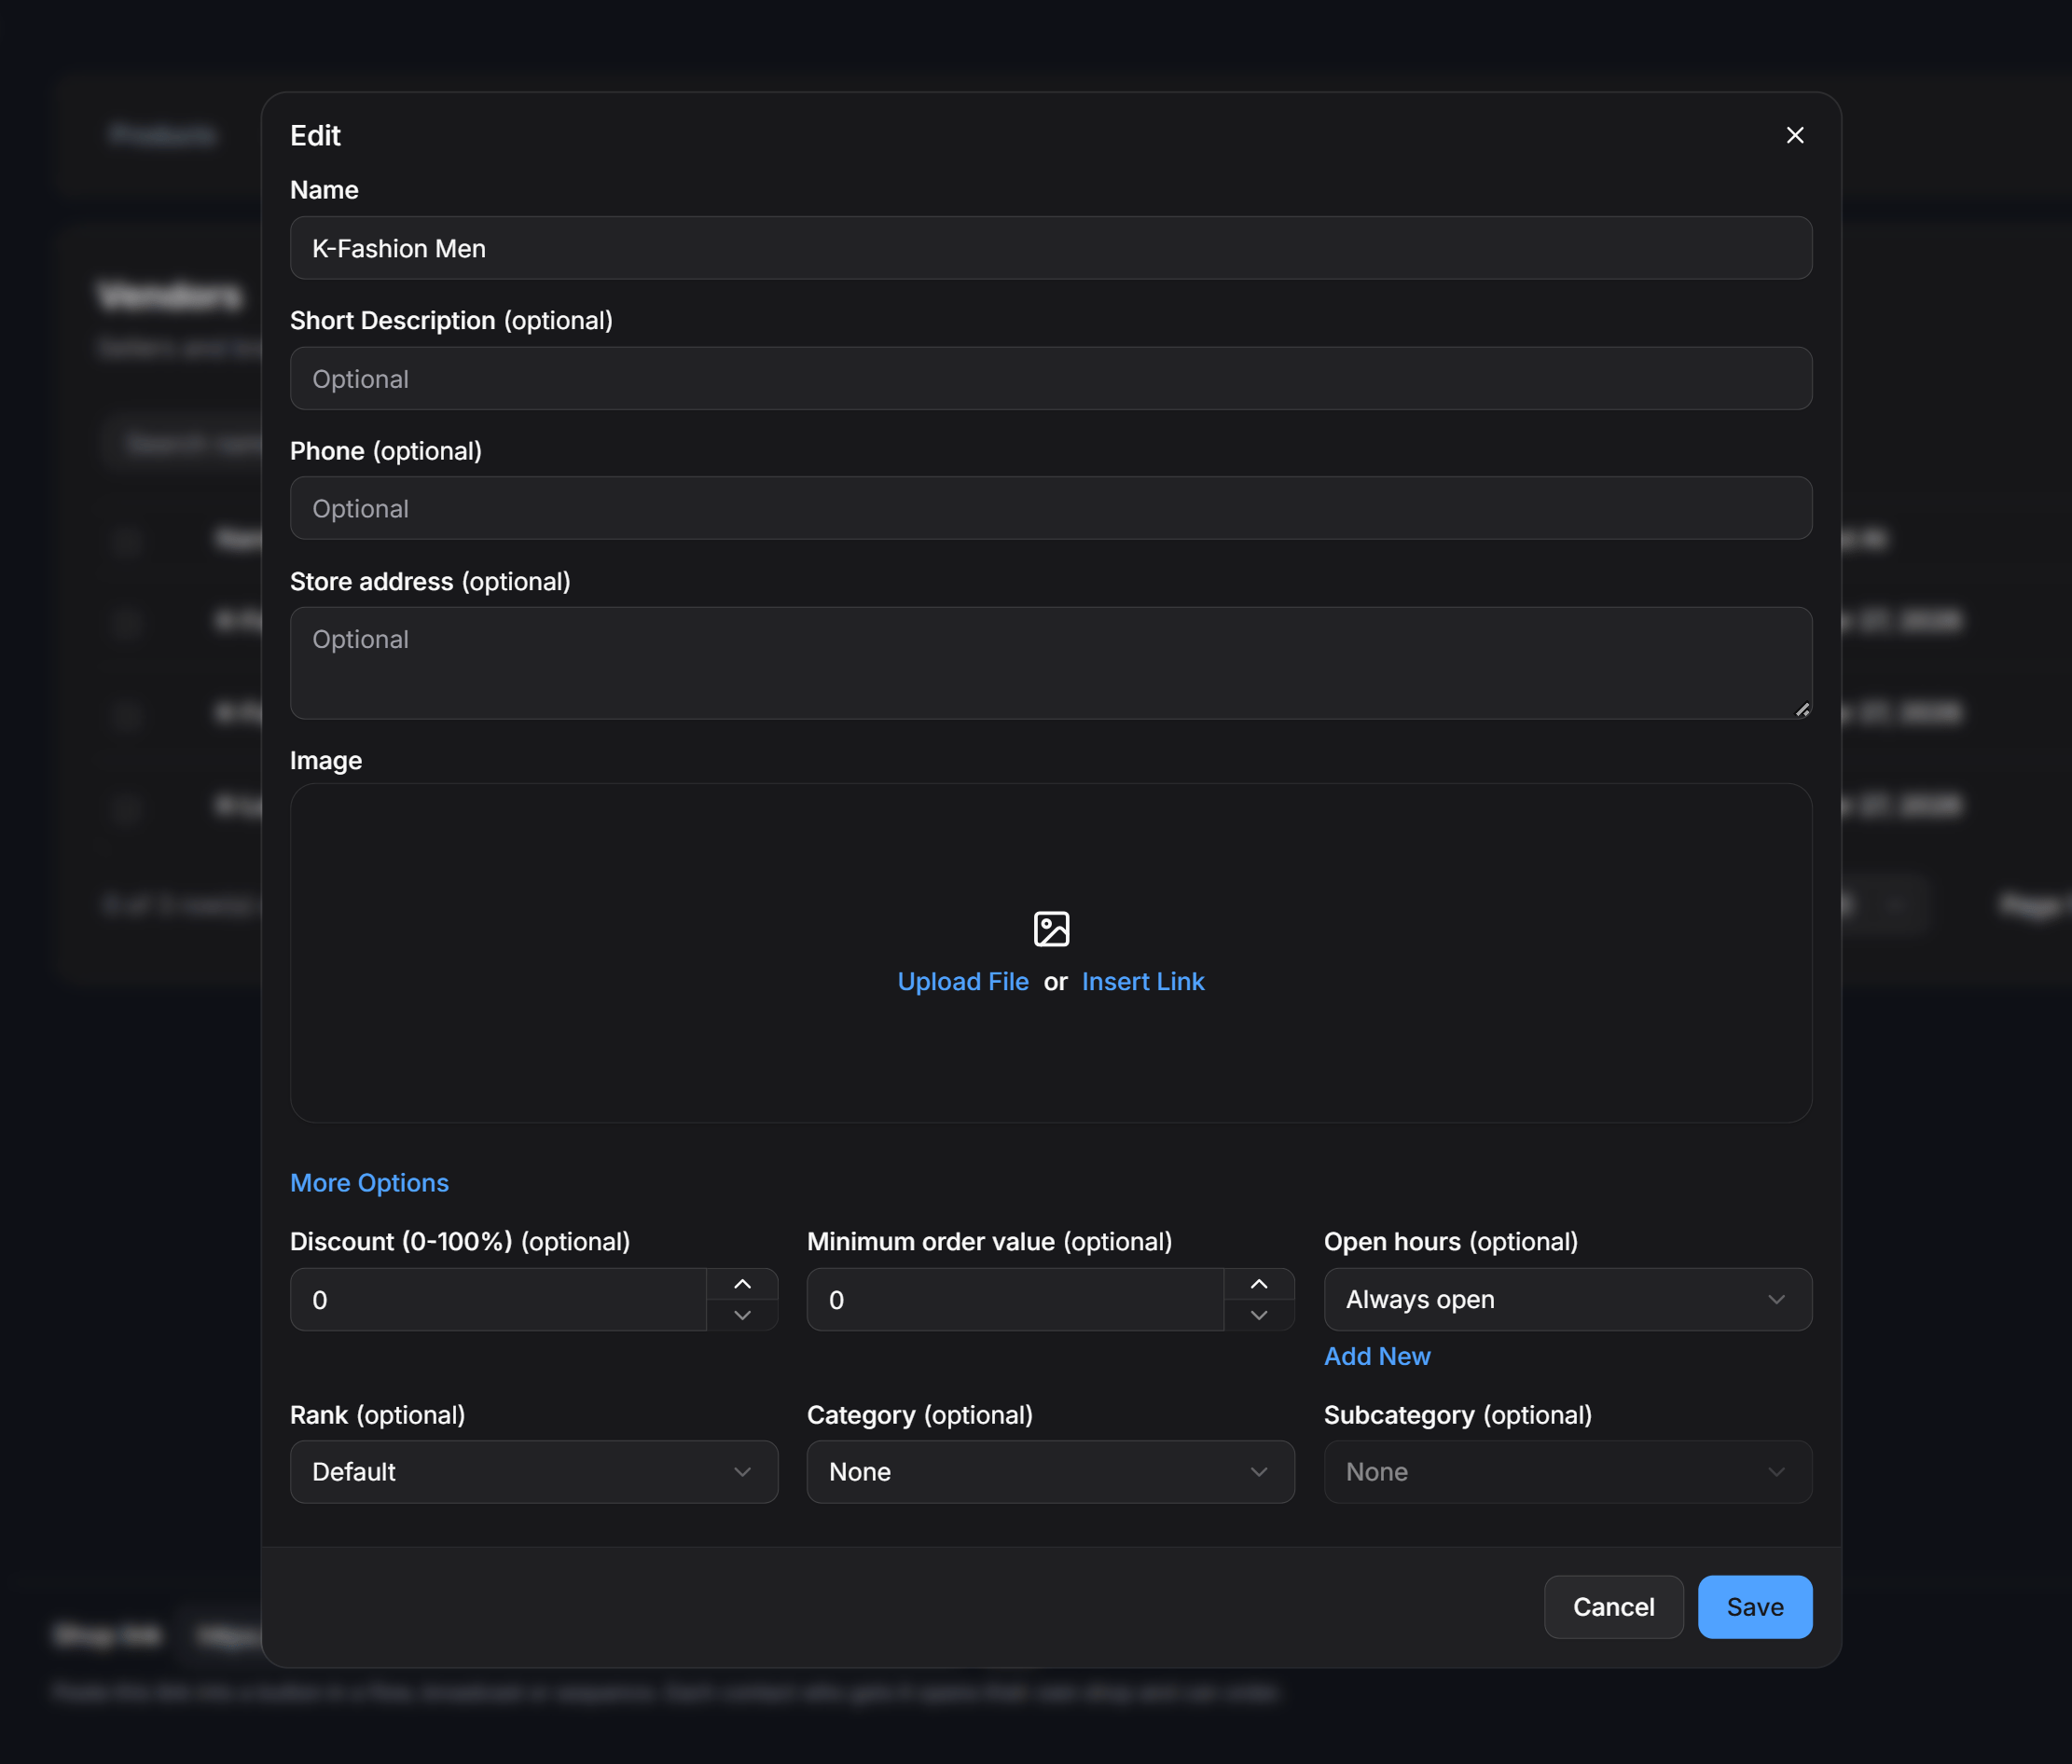
Managing Products
The Products tab is the central hub for managing all items sold in your store.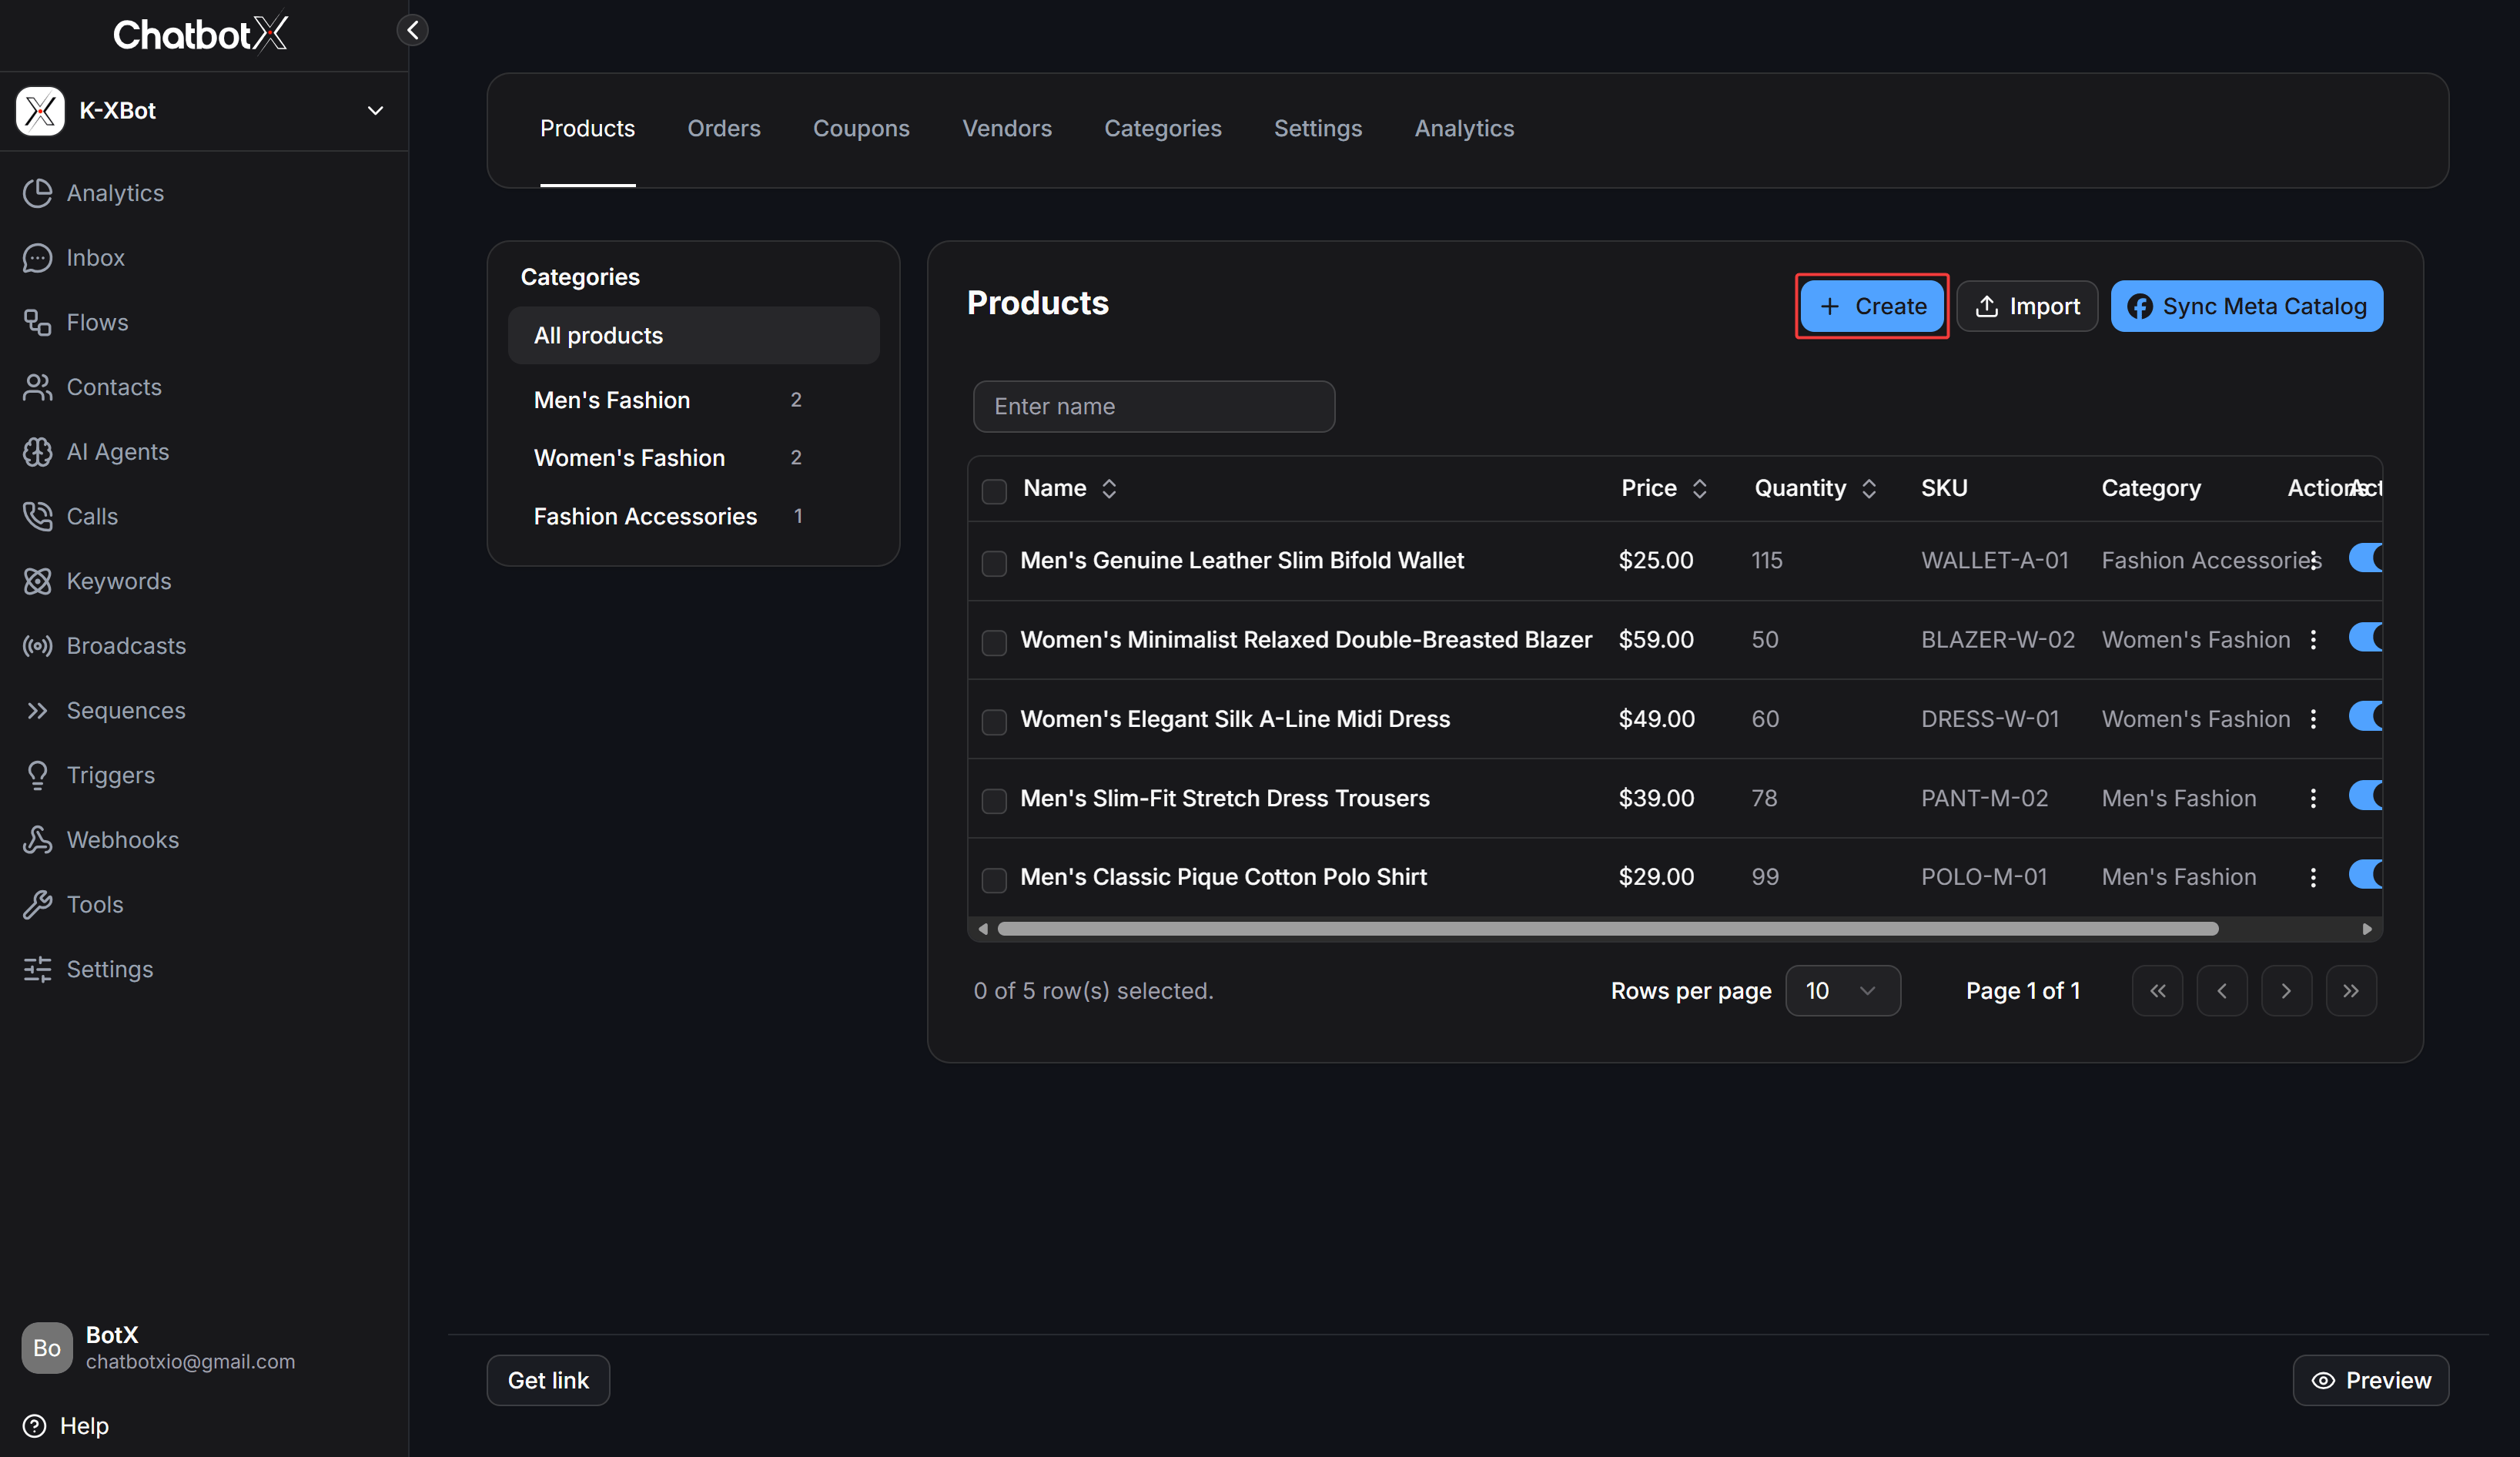
- Left Categories Sidebar: Shows total product counts alongside individual category filters. Click any category to filter the product table immediately.
- Search Input: Type a product name to filter items in real time.
- Top Action Buttons:
- + Create: Opens the form to add a new product.
- Import: Bulk import products from a data file.
- Sync Meta Catalog: Opens the modal for two-way synchronization with Meta Commerce Manager.
- Product Table: Lists each item’s thumbnail,
Name,Price, stockQuantity,SKU,Category,Activevisibility toggle, andActionsmenu.
Product Information, Pricing, and Images
Click + Create (or Edit on an existing product) to open the product editor. The upper section defines descriptions, pricing, and media: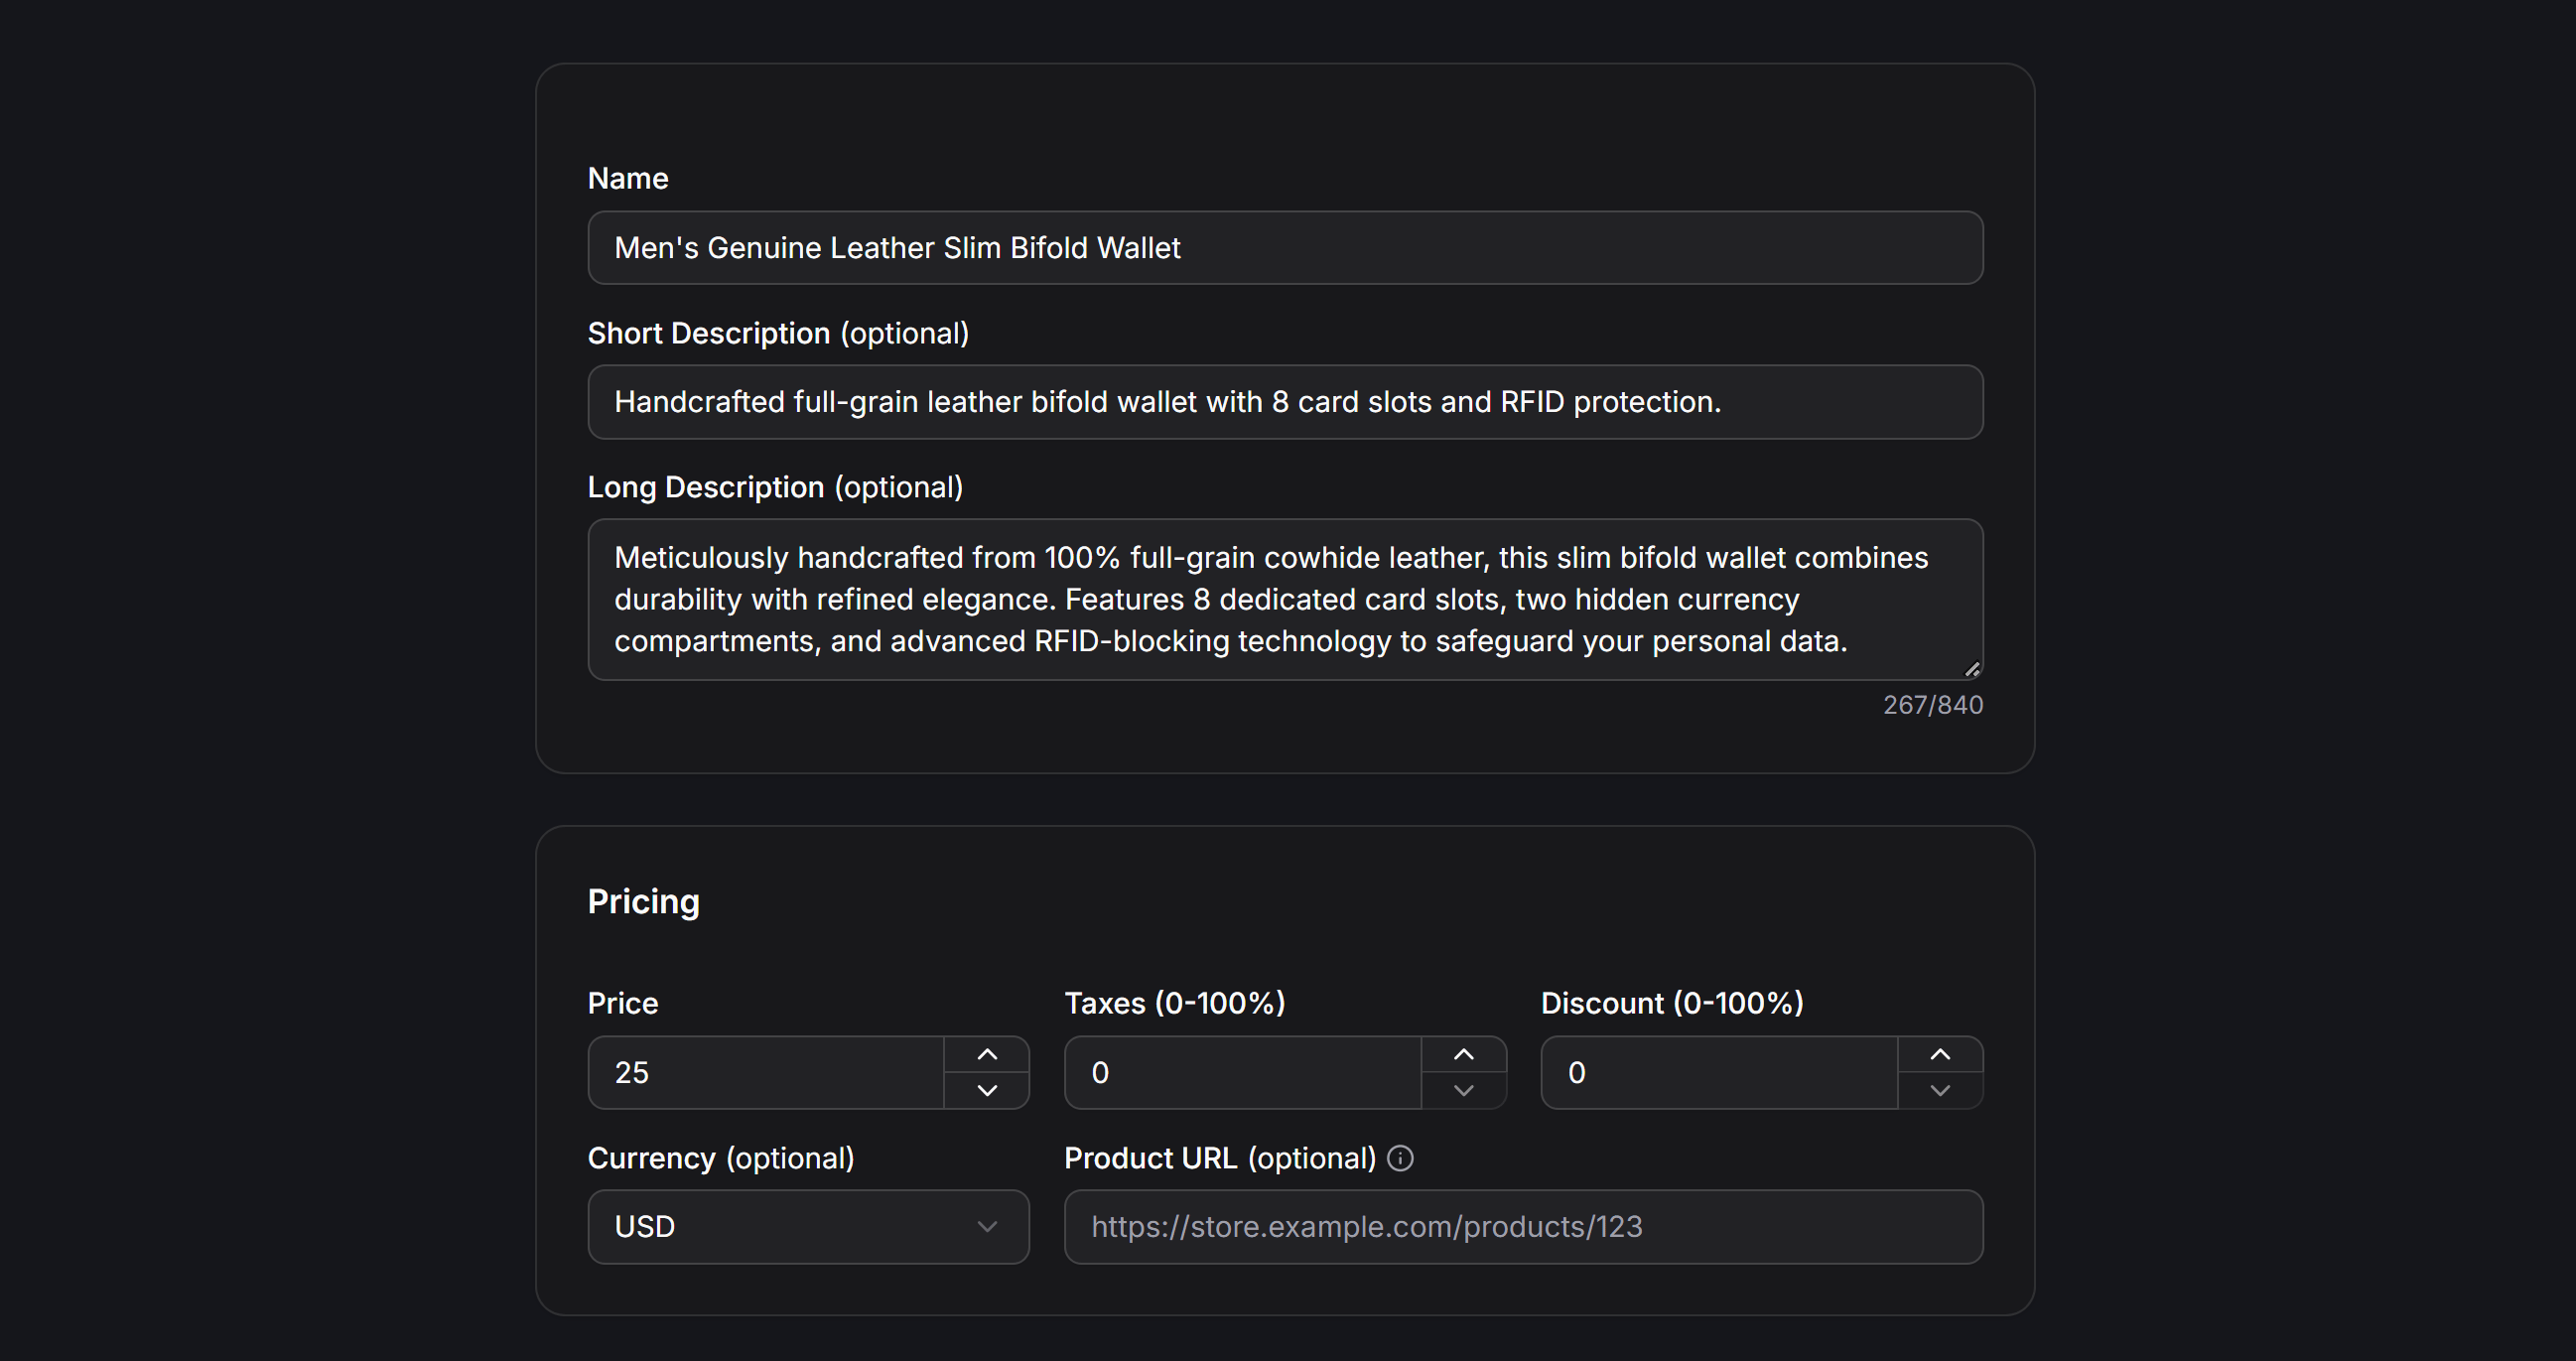
- Name: Full product title displayed on chat cards and the Webview store.
- Short Description (optional): Brief summary shown directly below the product title.
- Long Description (optional): Detailed product specifications, materials, care instructions, or sizing guides (up to 840 characters).
- Pricing:
- Price: Base retail price of the product.
- Taxes (0 - 100%): Optional tax percentage applied to the item.
- Discount (0 - 100%): Direct percentage discount on the product. The storefront displays the original price crossed out alongside the discounted price.
- Currency (optional): Custom currency override if different from the default store currency.
- Product URL (optional): External webpage URL used when the store’s Checkout mode is set to redirect buyers to an external product page.
- Images: Upload product photos from your device or insert direct image URLs.
Inventory Tracking and Product Variants
Scroll down to Inventory and Variants to manage stock levels and configurable options: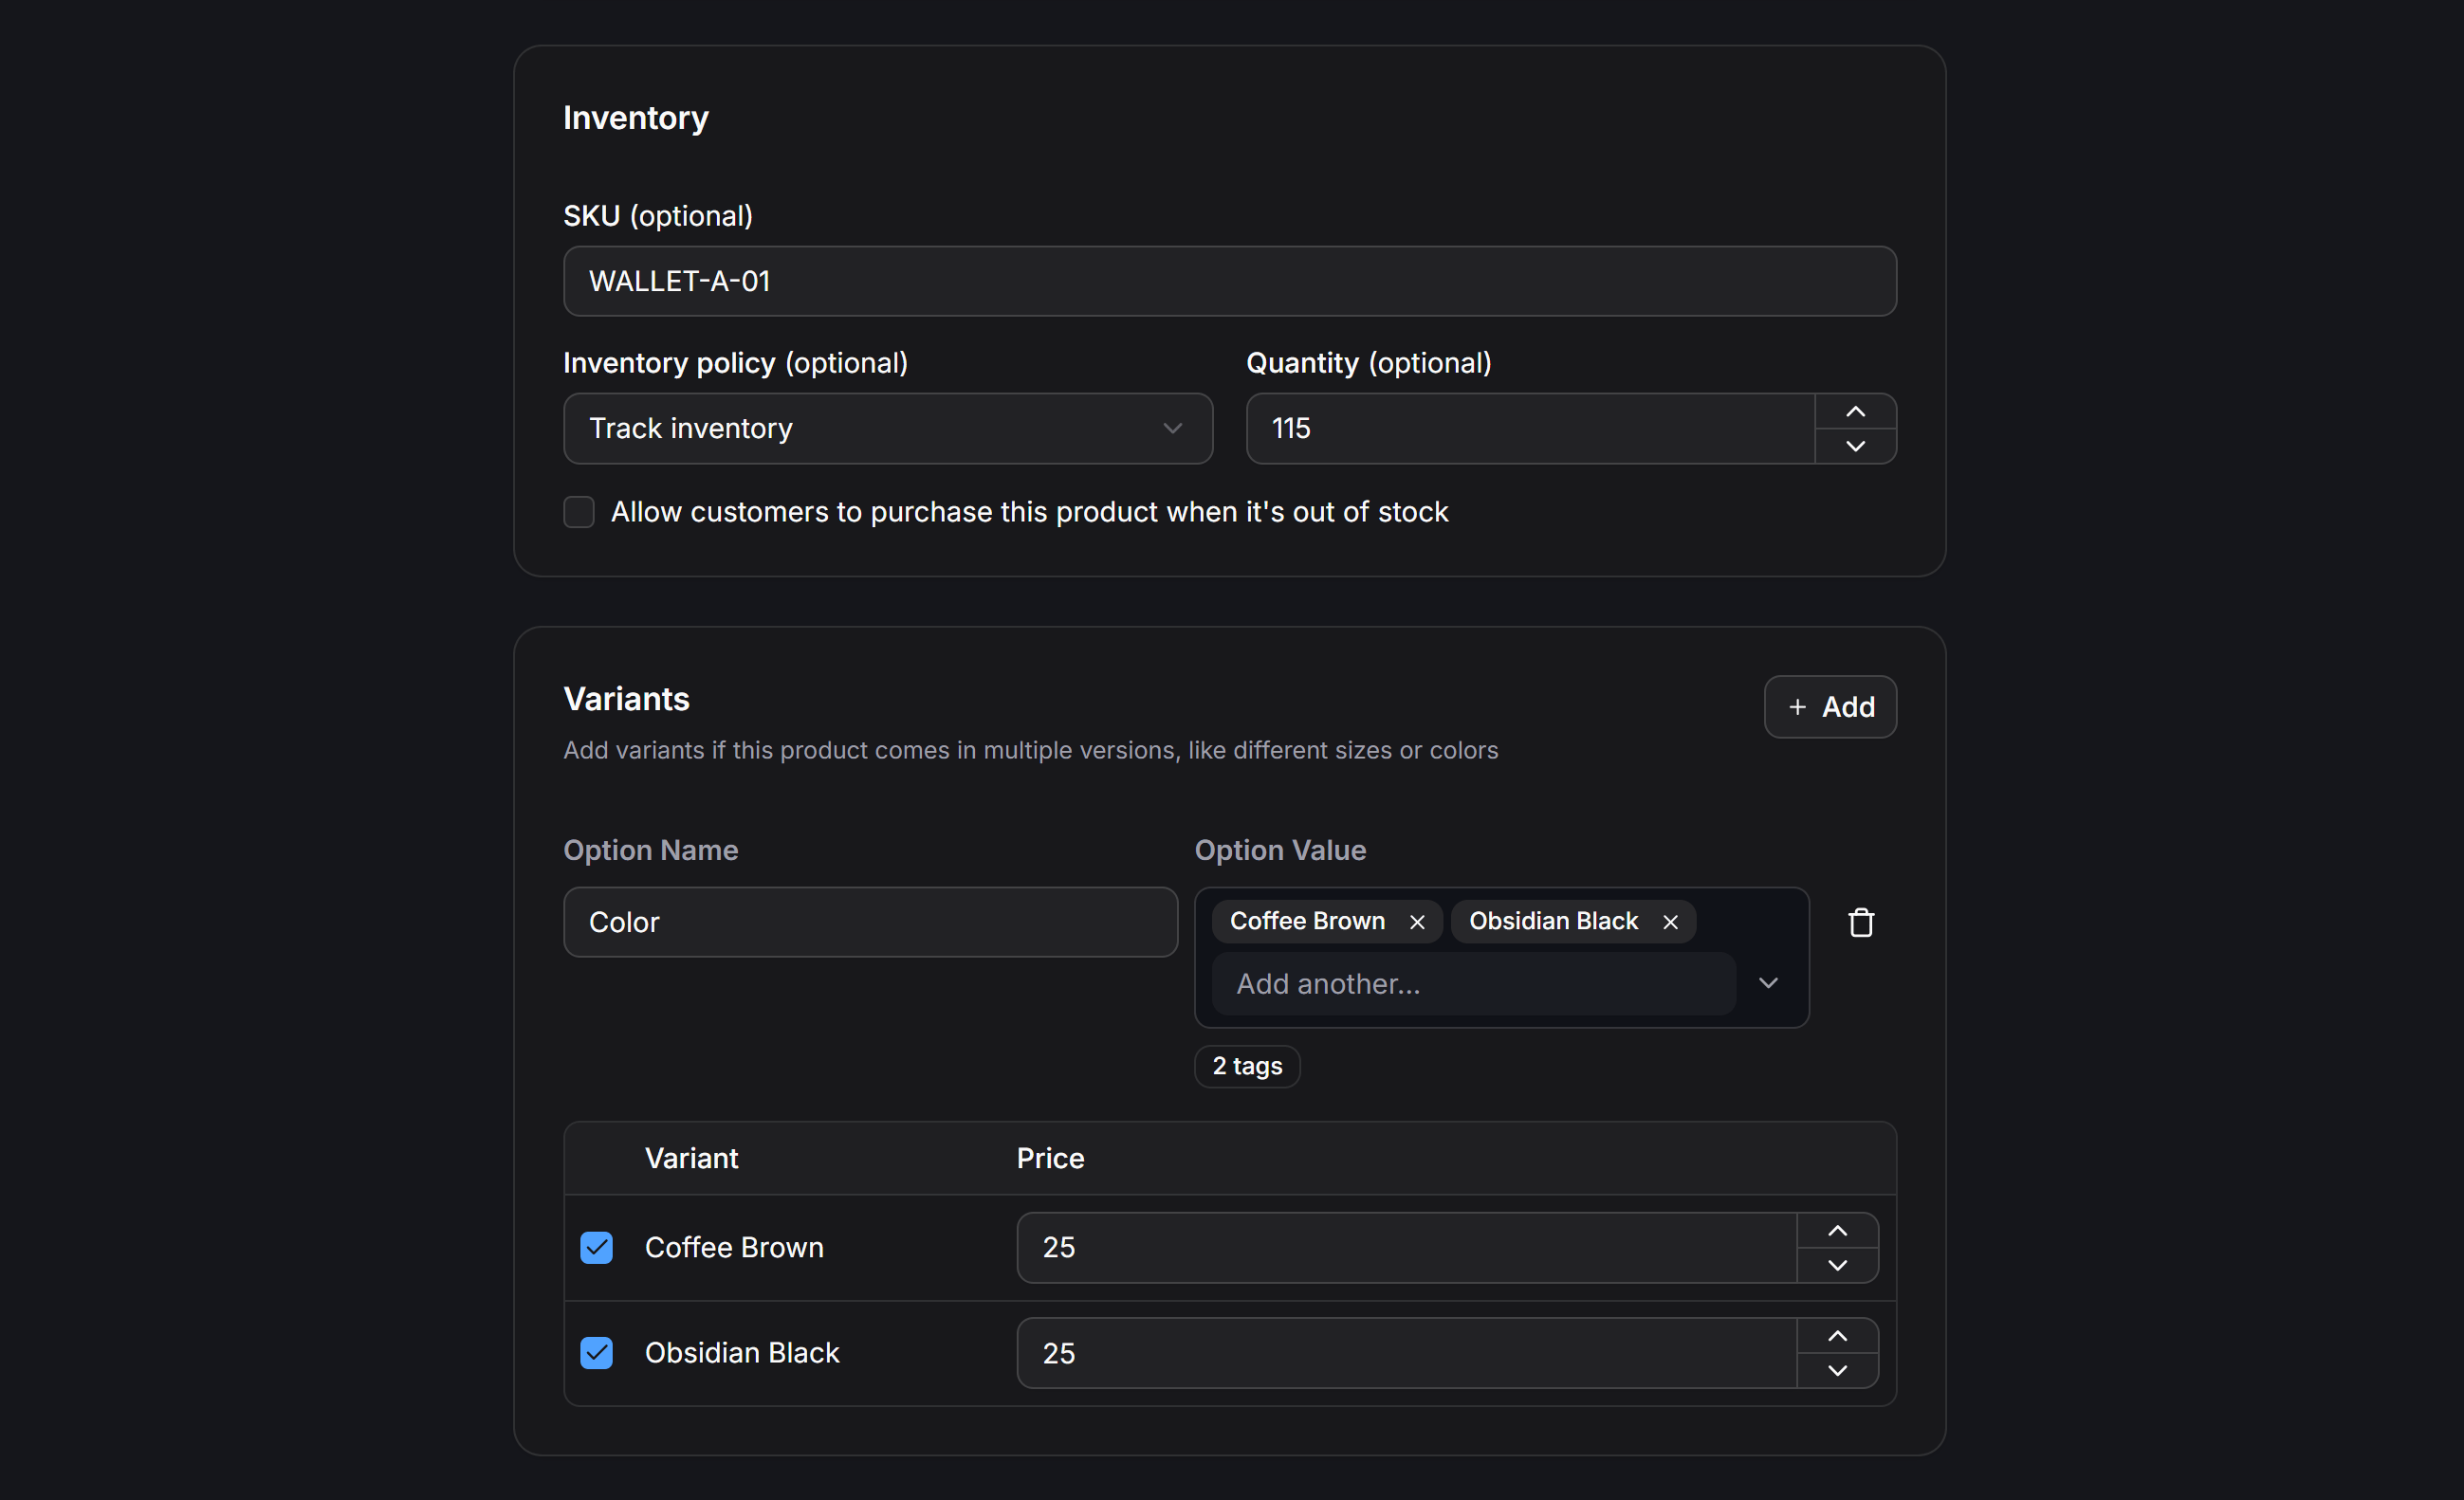
- SKU (optional): Unique stock keeping unit identifier, also used as the retailer ID when syncing with Meta Catalog.
- Inventory policy:
- Don’t track inventory: Suitable for digital goods, services, or made-to-order items.
- Track inventory: Enter the available stock quantity. ChatbotX automatically deducts stock when orders are placed.
- Click + Add next to Variants to create option groups such as Size, Color, or Material.
- For each variant option, you can define a specific price, toggle availability, and nest sub-variants if needed.
Add-ons, Tags, and Display Options
The bottom section of the product editor controls cross-sells, searchability, and direct links: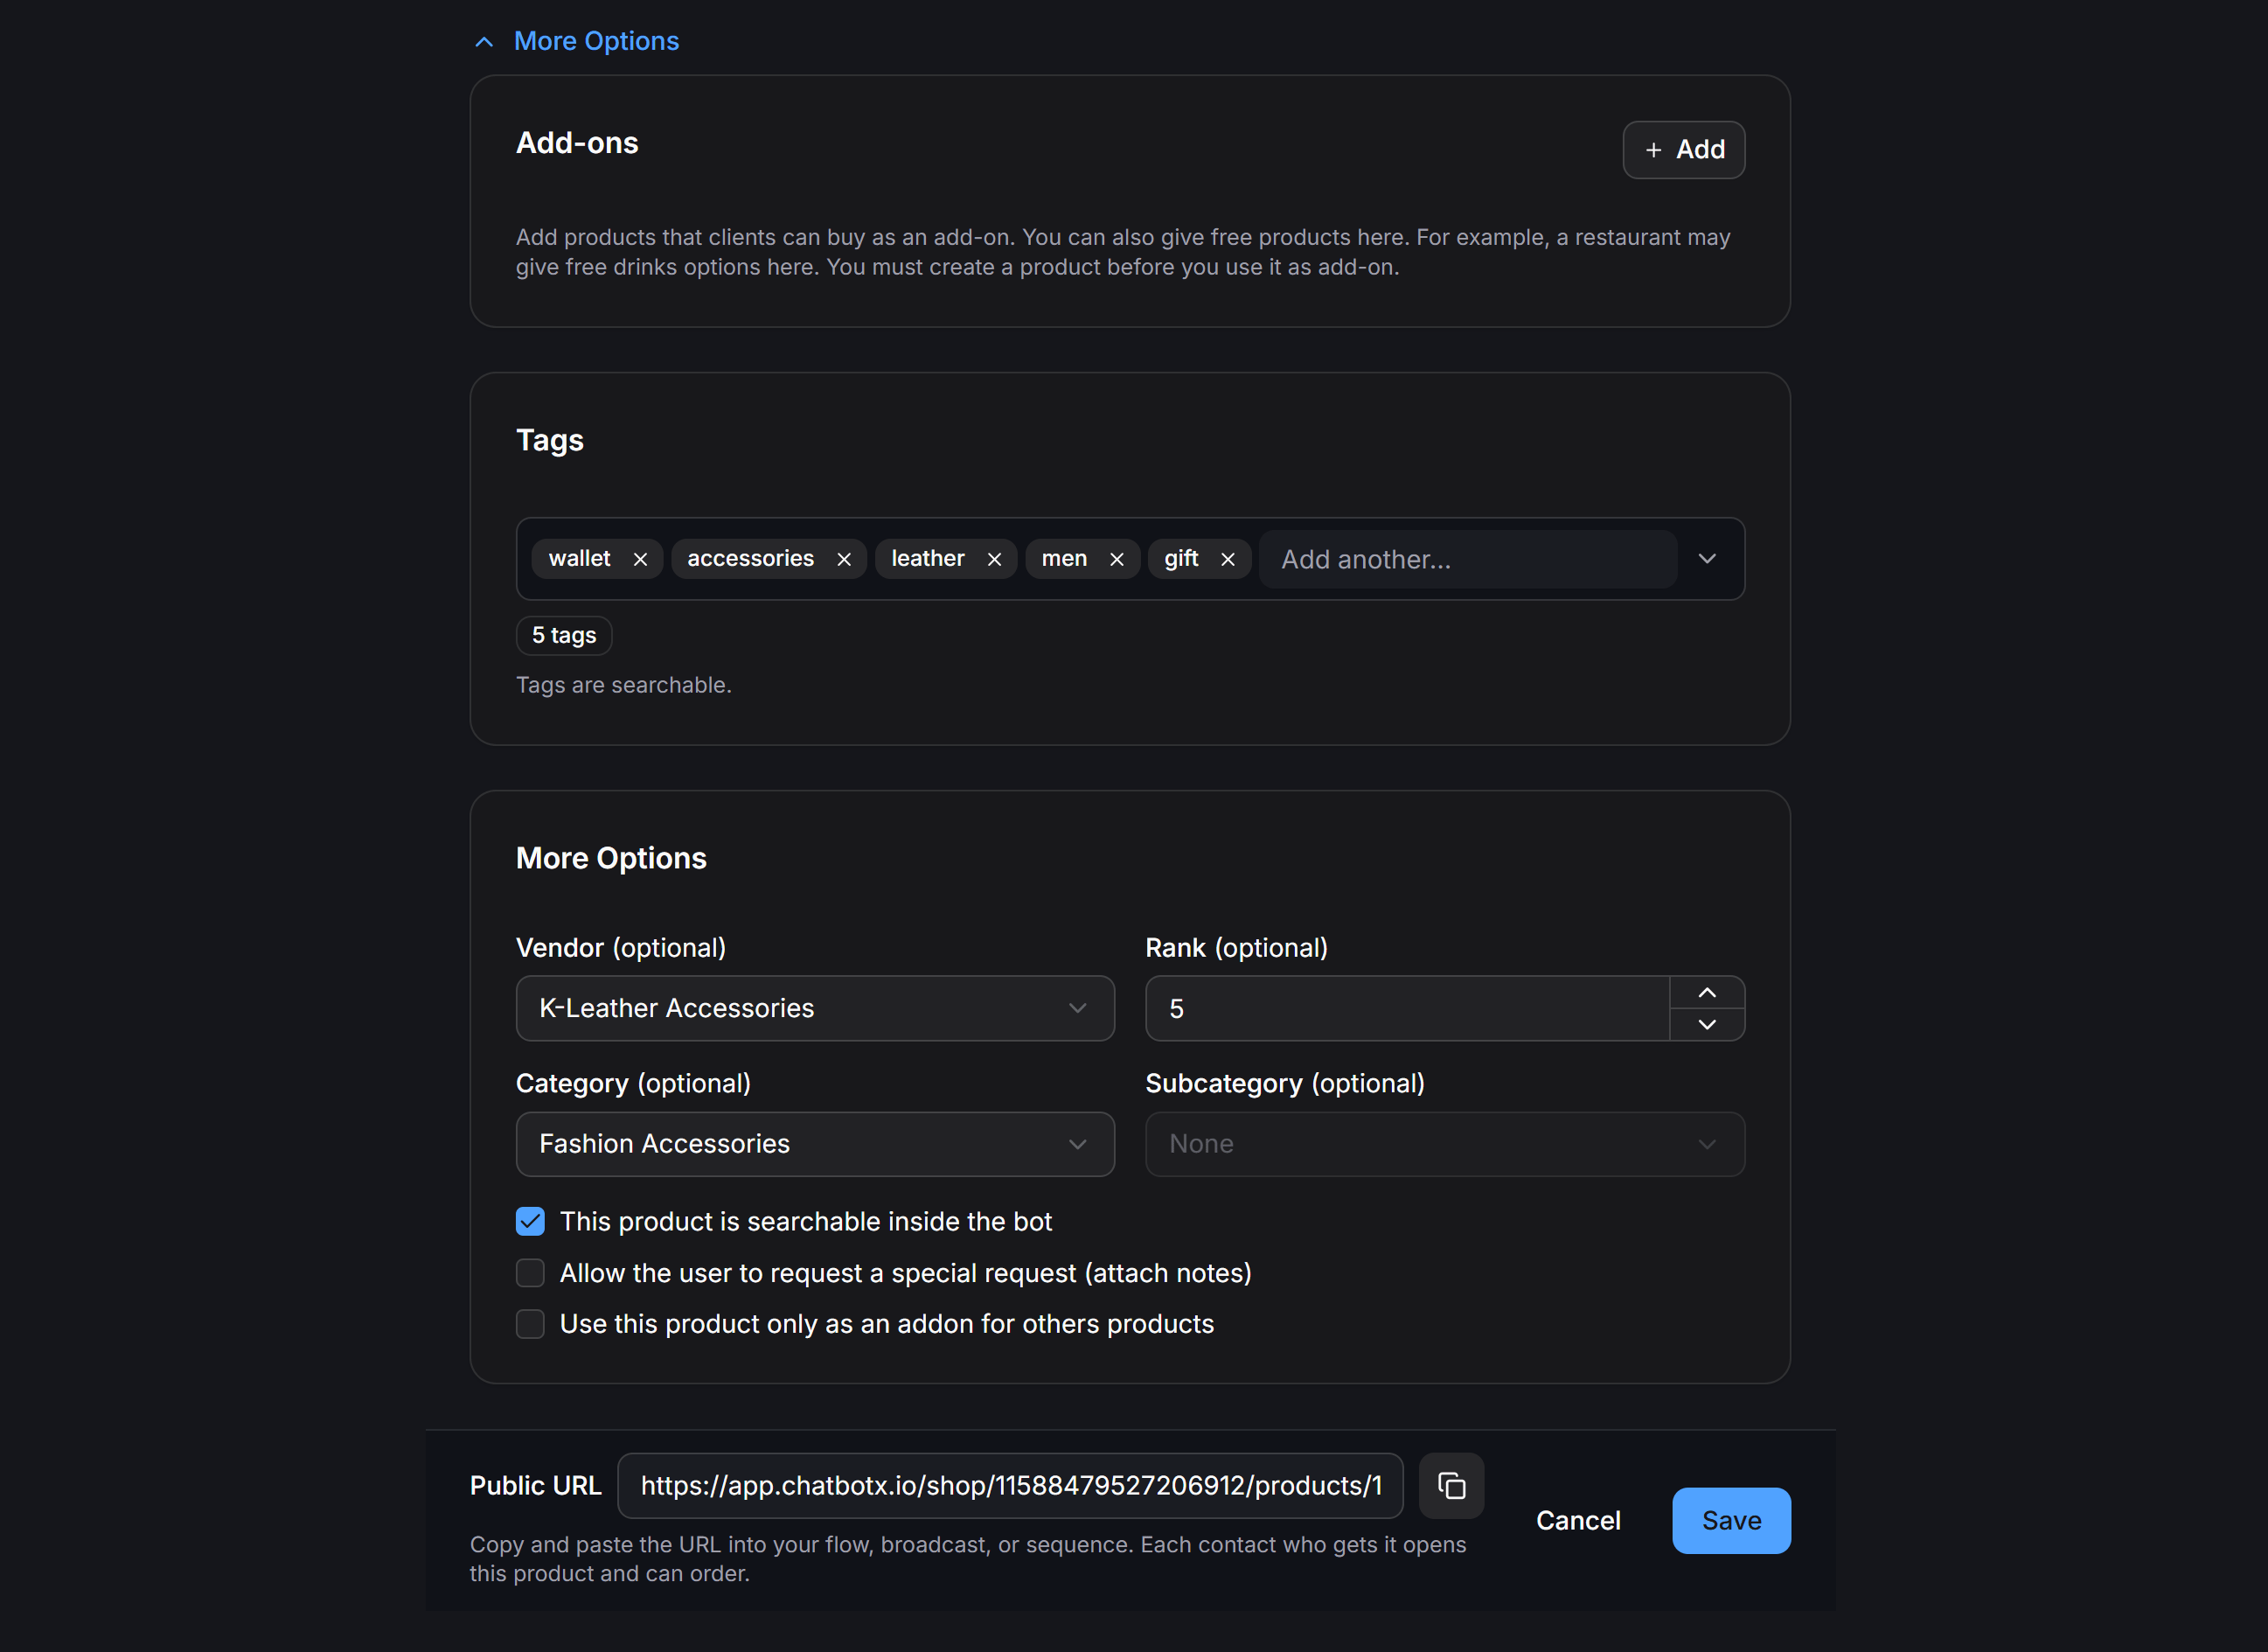
Click Save to publish the product.
Managing Discount Coupons
The Coupons tab lets you create promotional discount codes or automatic cart discounts to boost conversion rates.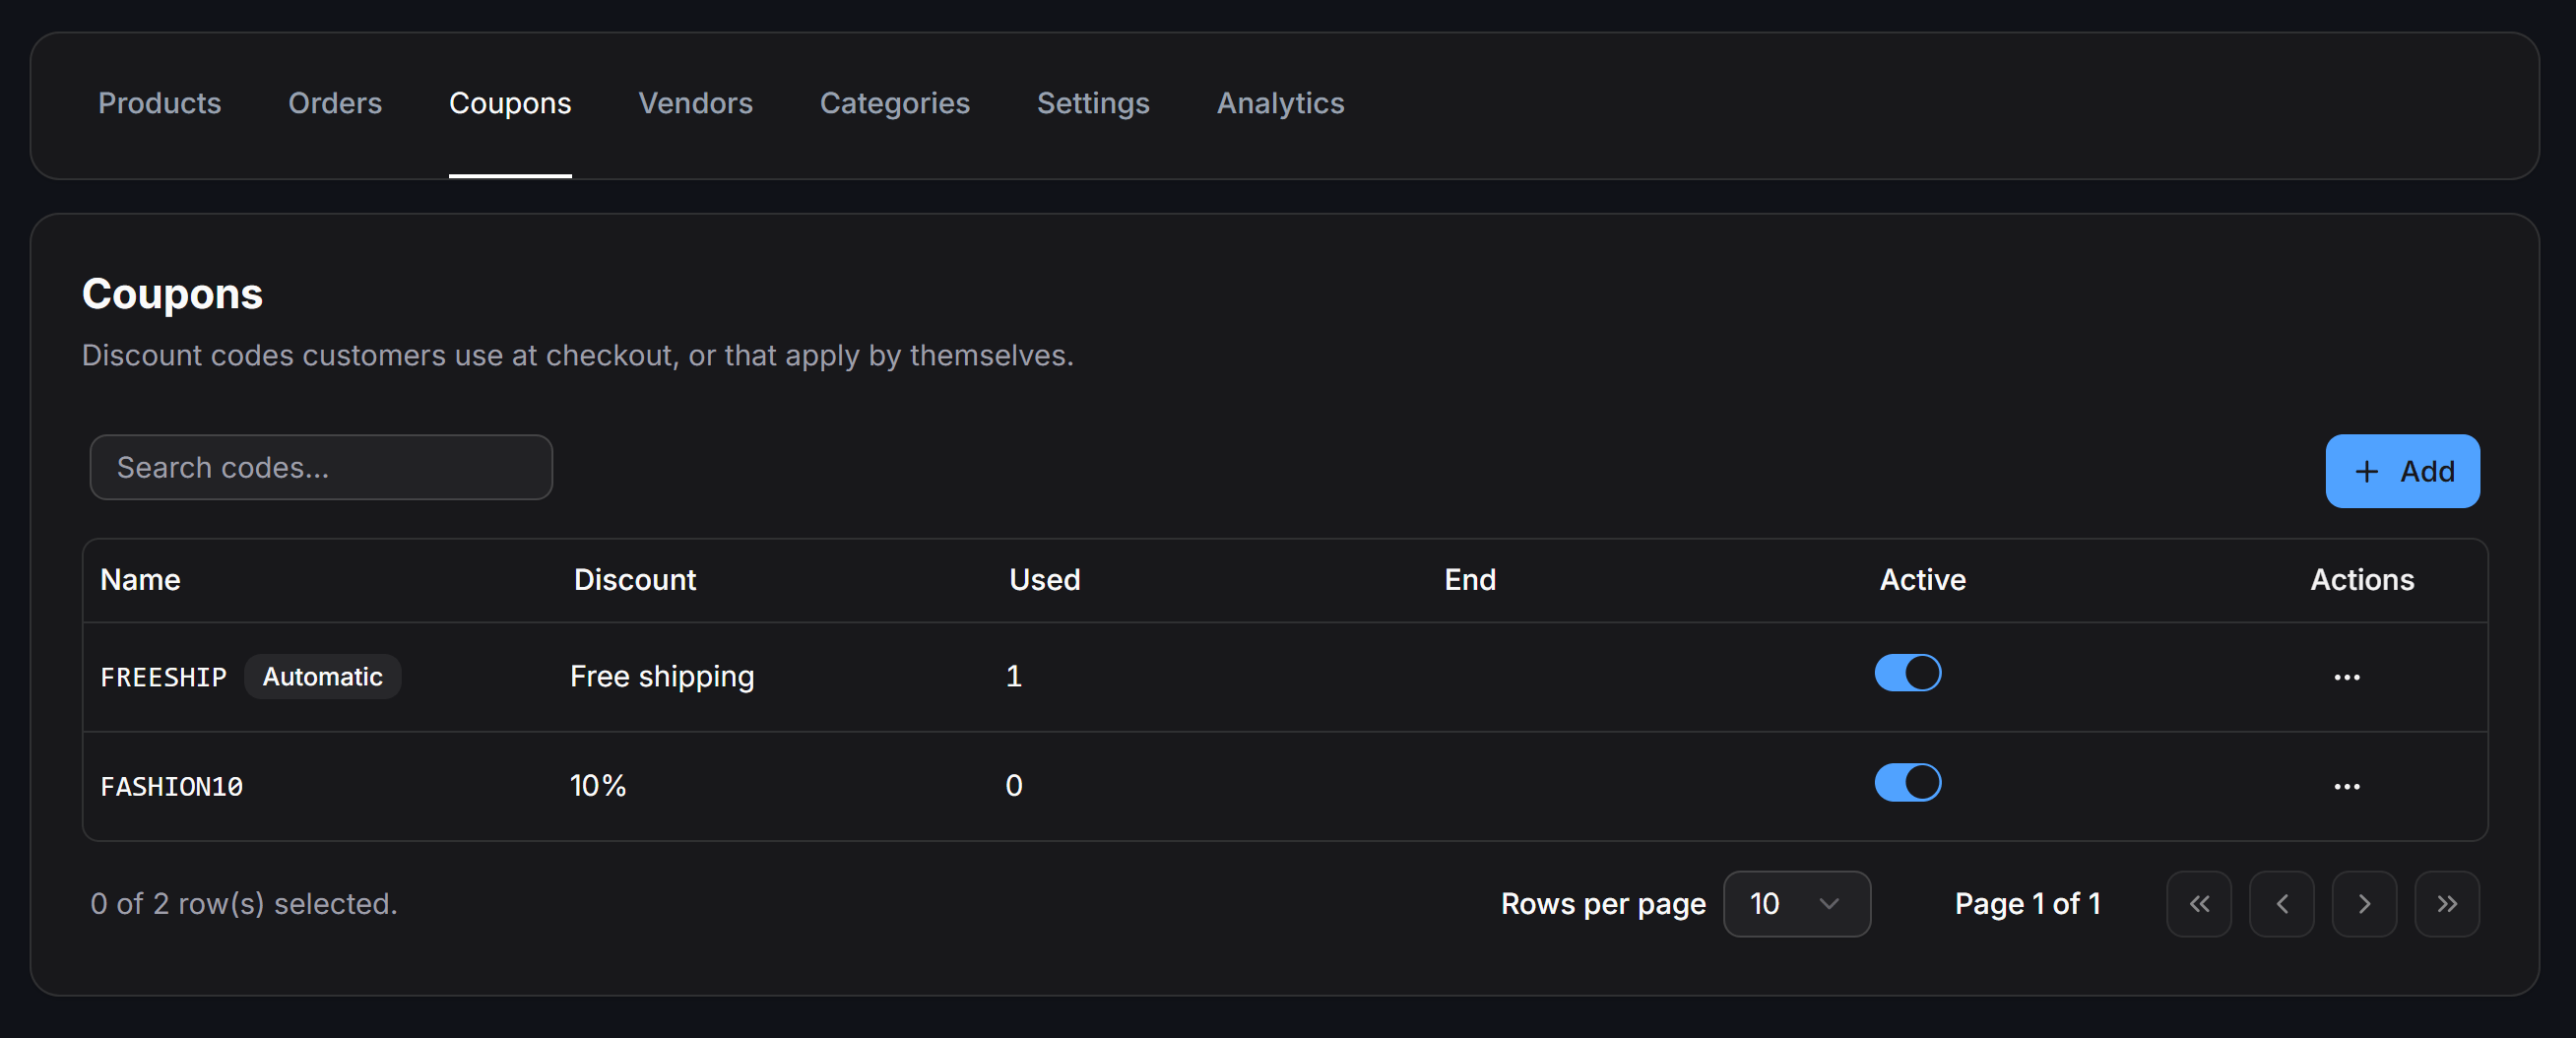
- Name: The coupon code (badged with
Autoif configured to apply automatically to carts). - Discount: The discount value (percentage off, fixed amount off, or
Free delivery). - Used: Number of times the coupon has been redeemed out of its total usage limit.
- End: Expiration date and time.
- Active: Toggle to enable or pause the coupon immediately.
- Actions: Menu to edit or delete the coupon.
Creating a Coupon and Discount Scope
Click + Add at the top right of the Coupons tab to configure a new discount: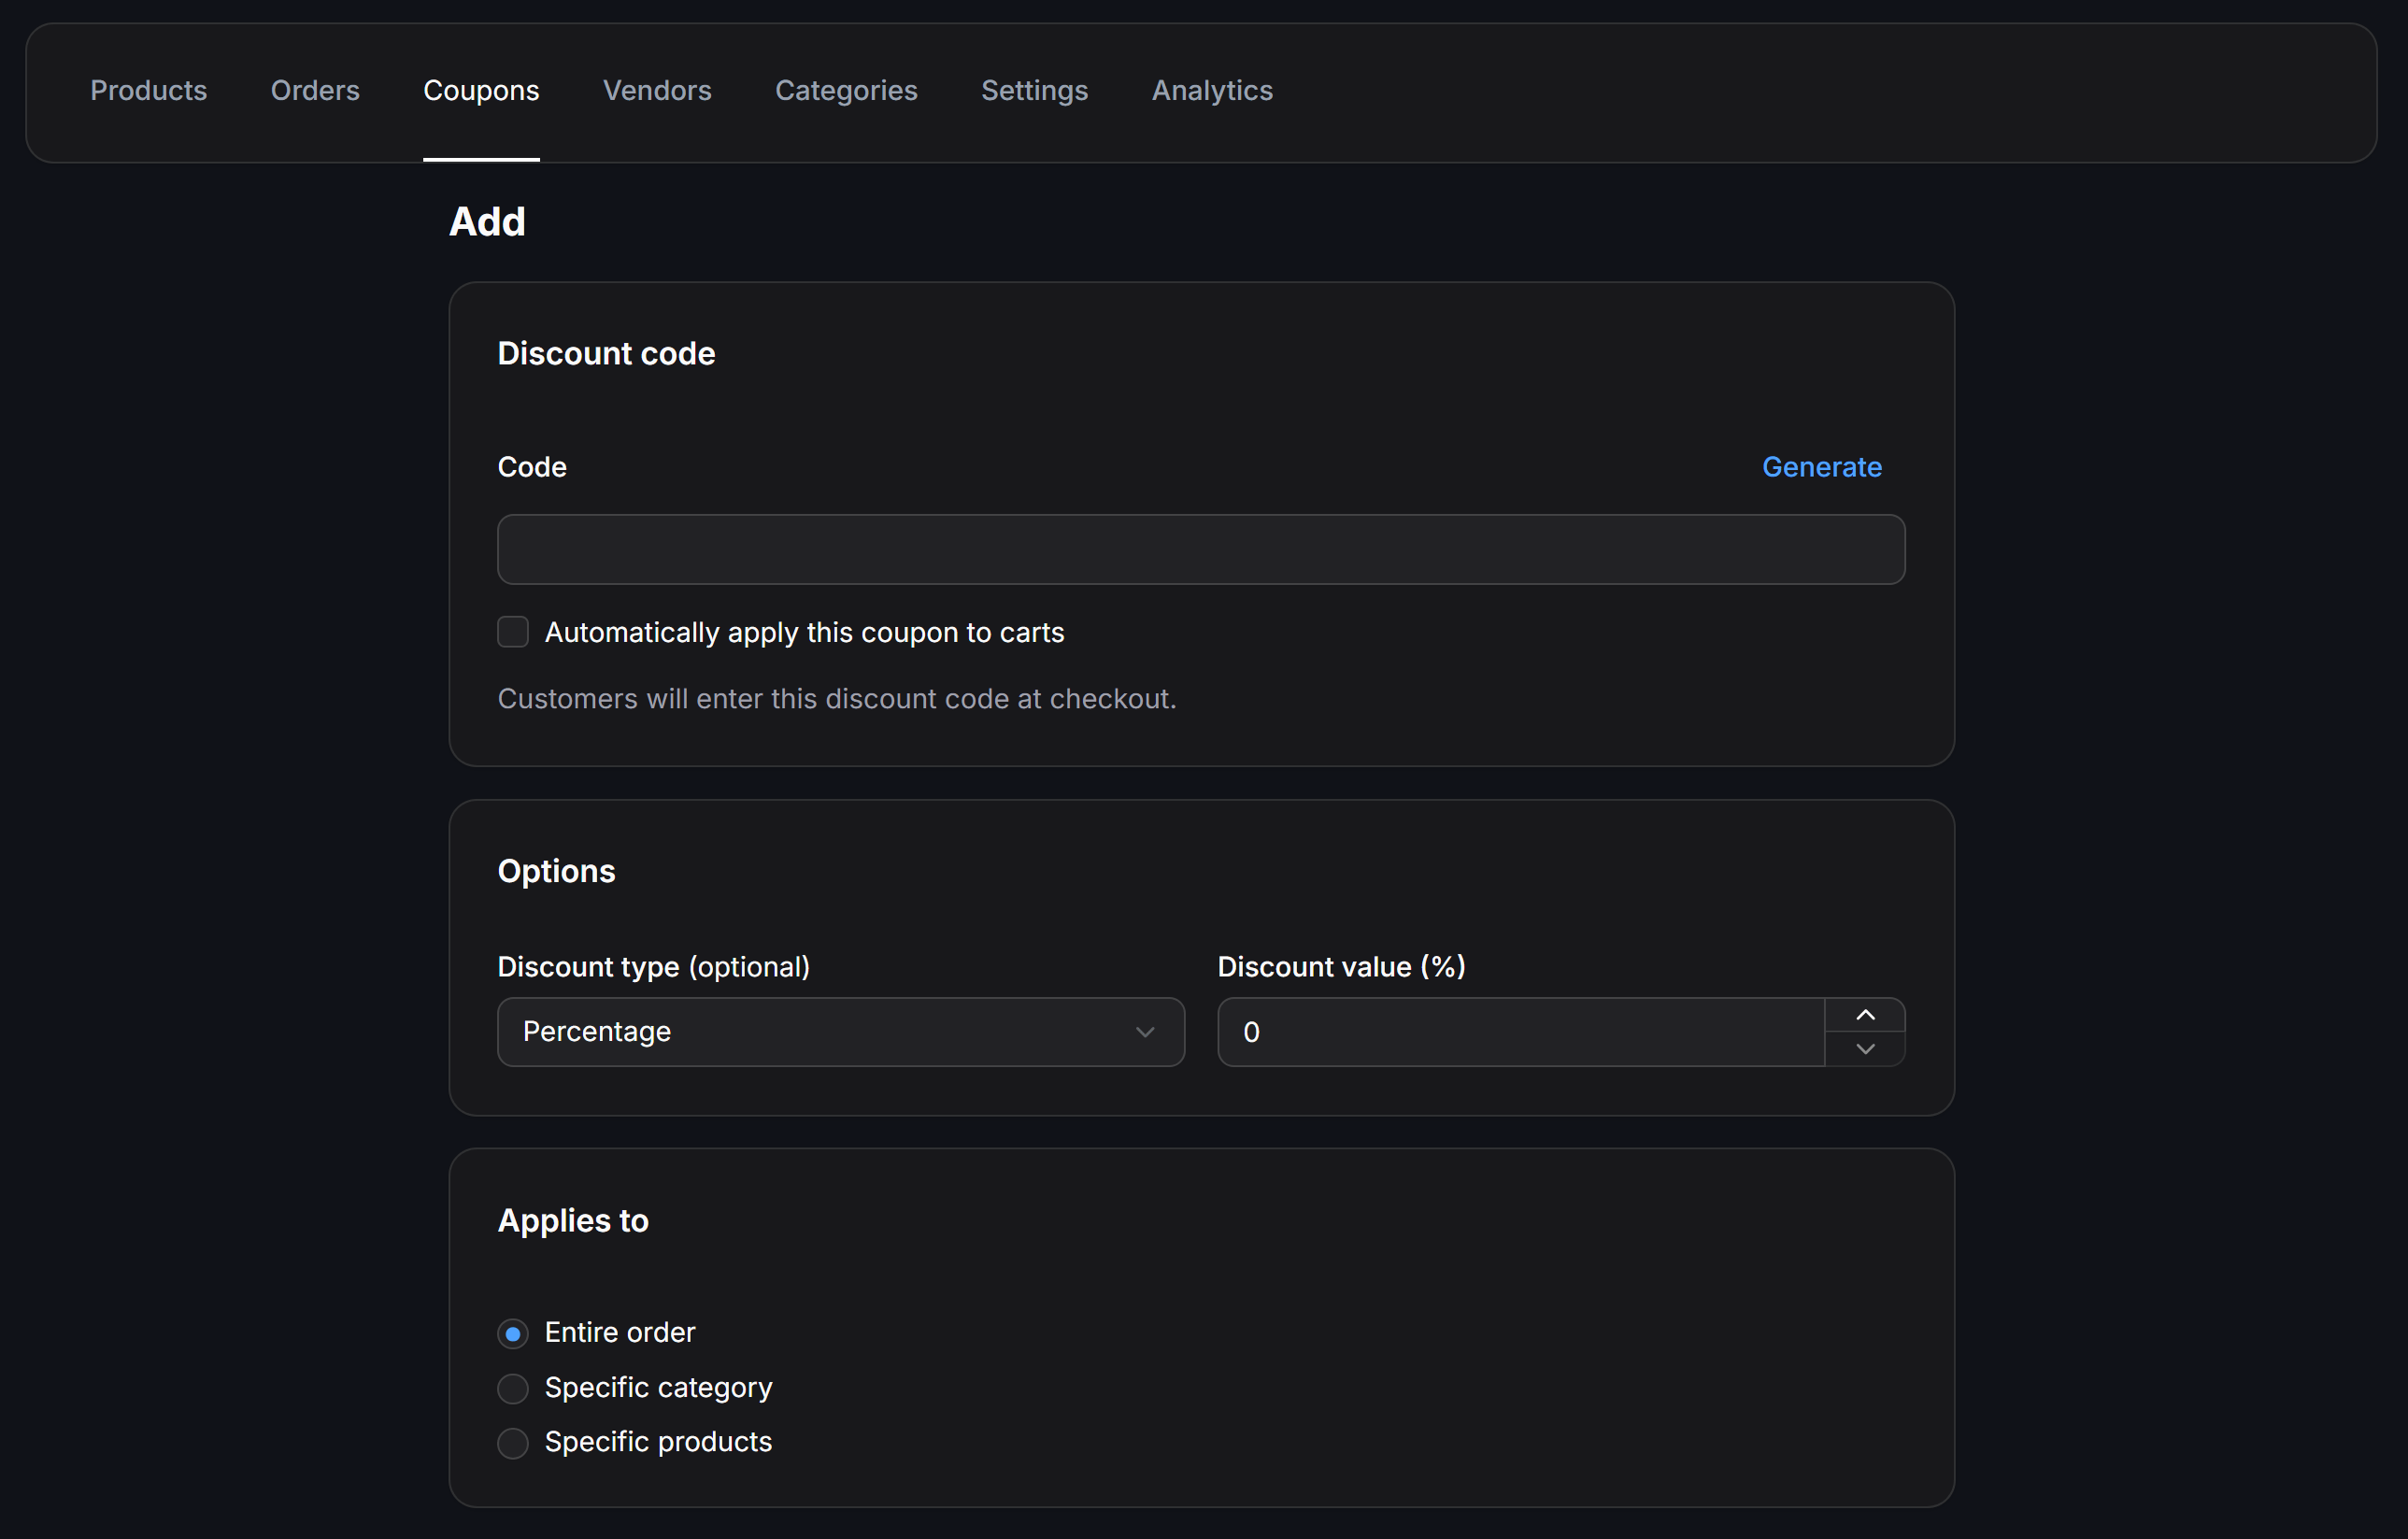
- Discount code:
- Code: Enter a custom promo code or click Generate to create a random code.
- Automatically apply this coupon to carts: Enable this checkbox to apply the discount automatically whenever a cart meets the coupon’s conditions, without requiring the shopper to type a code.
- Options:
- Discount type: Select Percentage, Fixed amount, or Free delivery.
- Discount value: Enter the percentage or monetary amount to deduct.
- Applies to:
- Entire order: Applies the discount to the entire cart.
- Specific category: Restricts the discount to items in a chosen category.
- Specific products: Restricts the discount to selected products.
Minimum Requirements, Usage Limits, and Active Dates
Scroll to the lower half of the coupon form to configure eligibility rules and validity dates: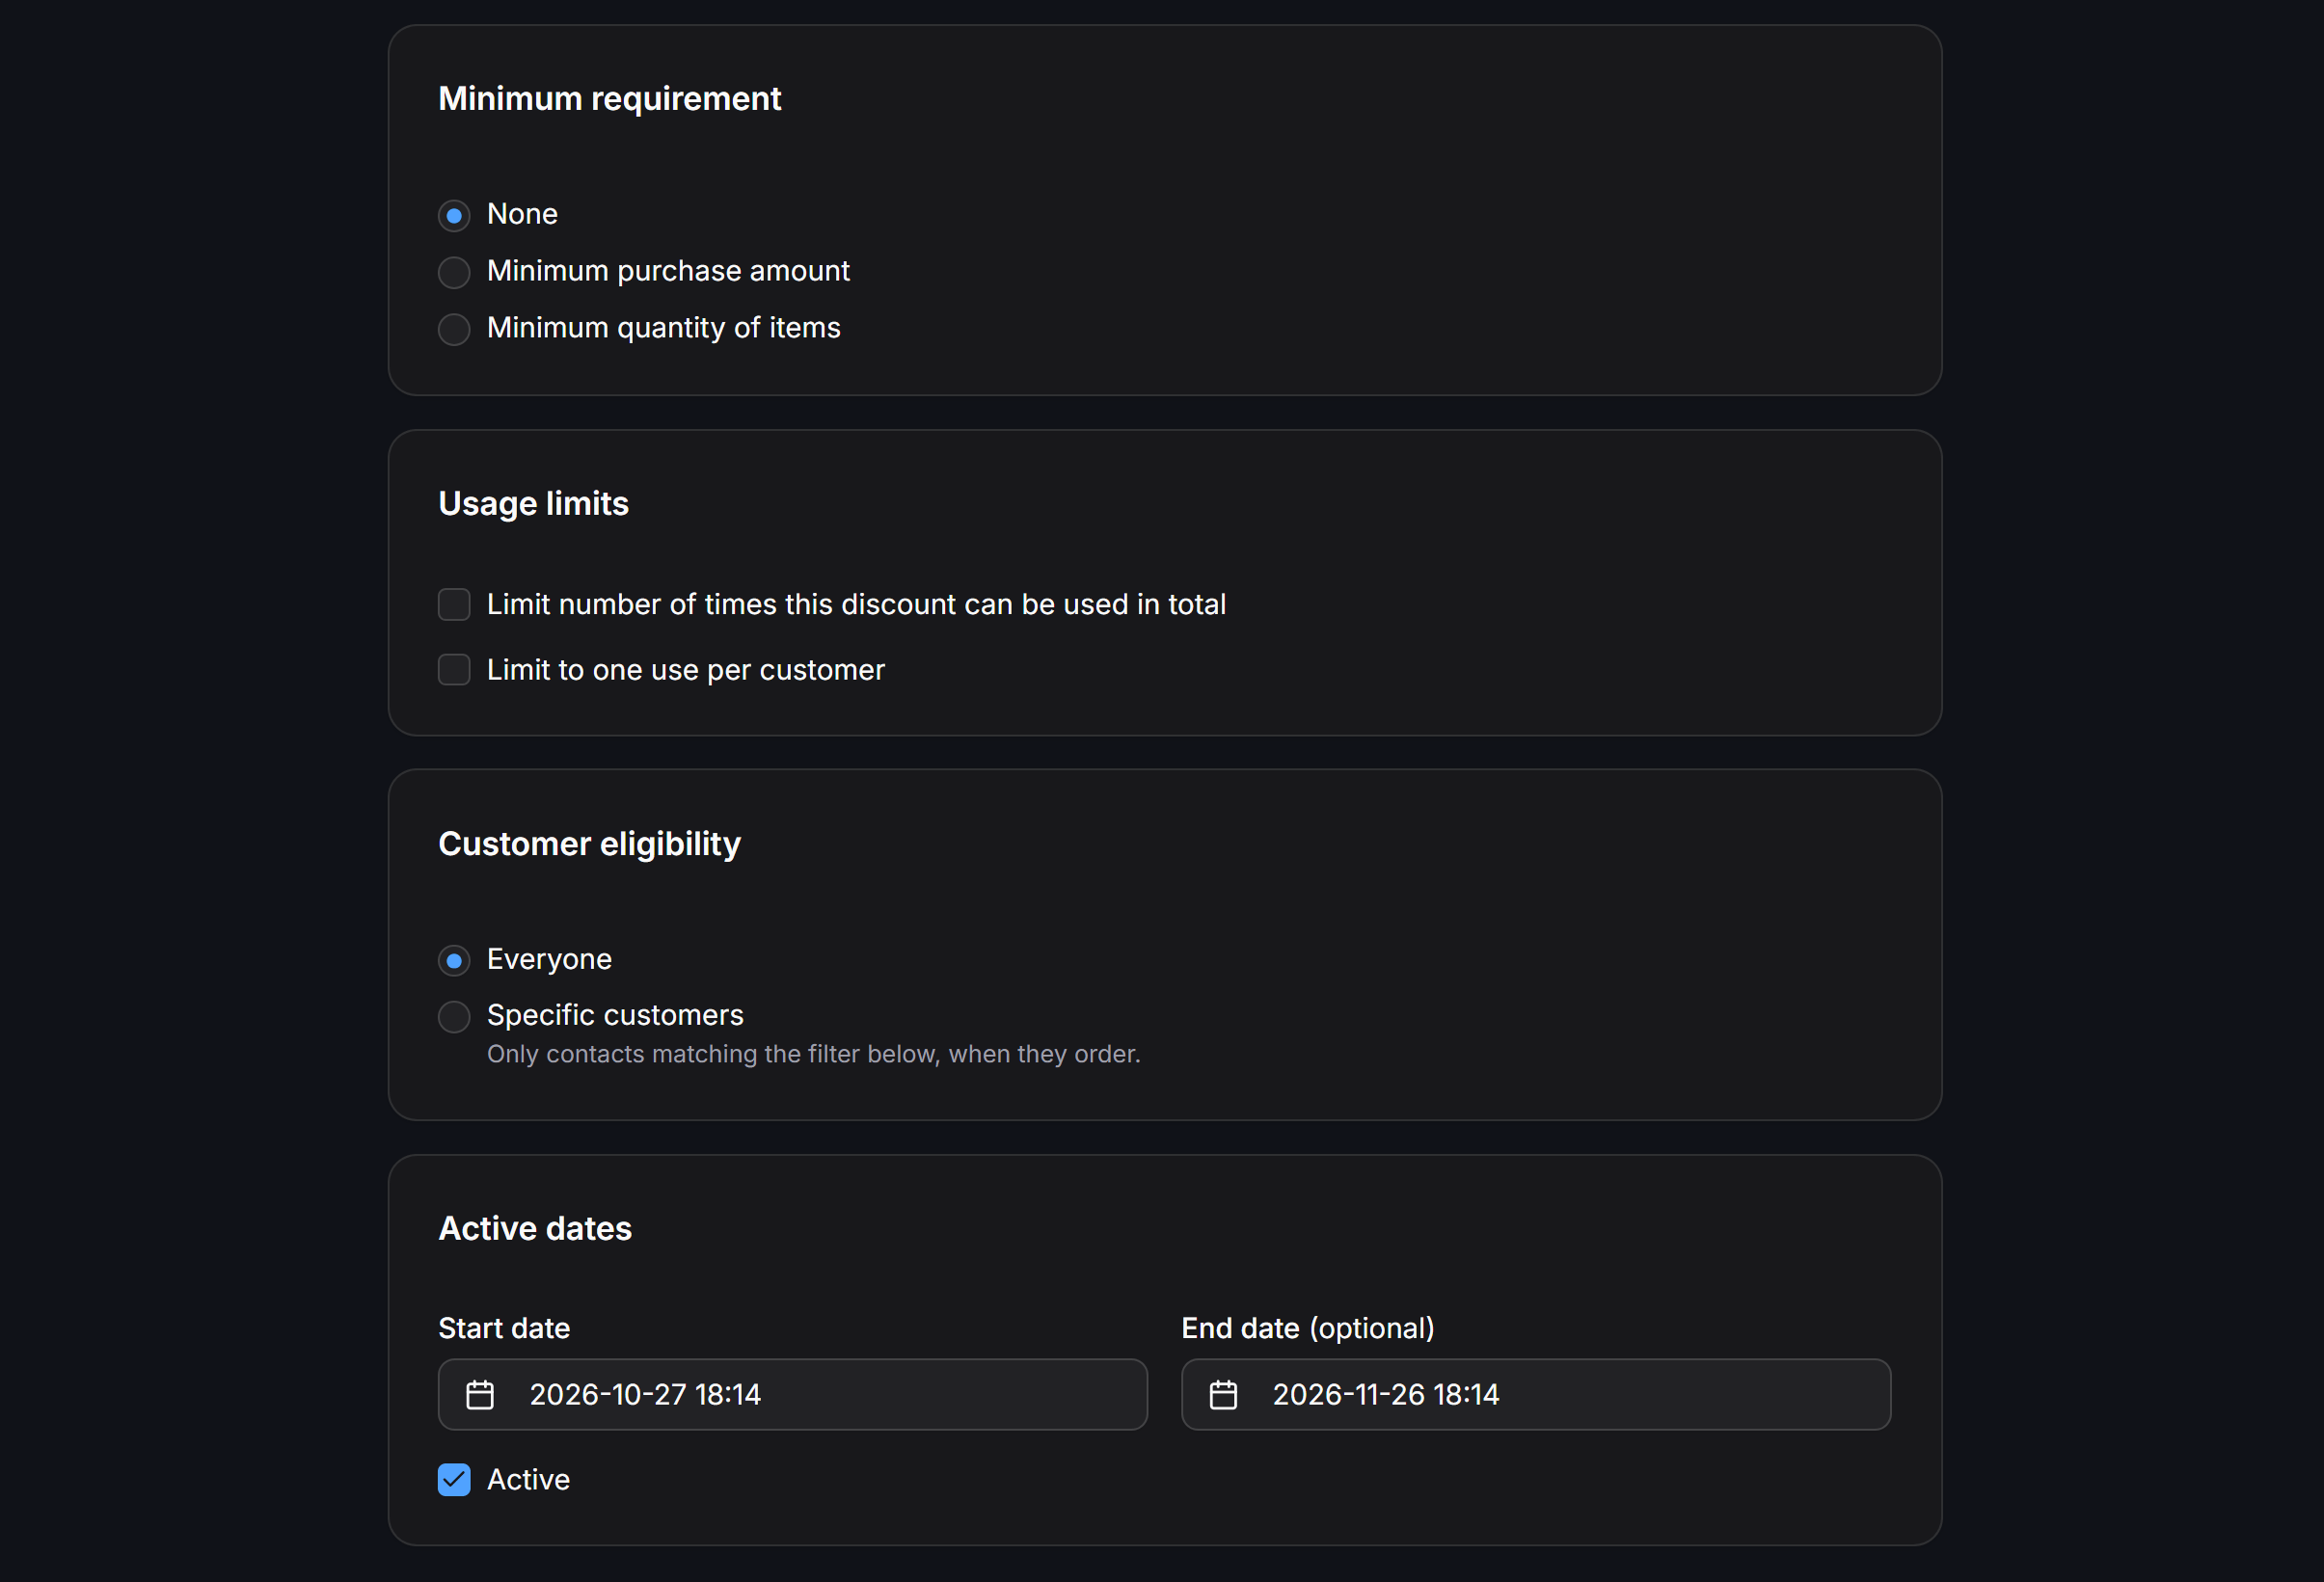
Click Save to activate your coupon.