

Global Card Acceptance
Accept all major international cards backed by PCI-DSS Level 1 certified security standards.
Direct Account Payouts
Buyer funds are credited directly to your connected bank account linked to Stripe.
Automated Webhook Provisioning
ChatbotX automatically registers webhook endpoints and encrypts your secret key upon connection.
30-Minute Order Protection
Orders and product inventories are safely reserved for 30 minutes while customers complete payment.
Obtaining Your Secret Key from the Stripe Dashboard
To link your Stripe account with ChatbotX, obtain your Secret Key from the Stripe Dashboard.1
Log In to the Stripe Dashboard
Visit the Stripe administration portal at
dashboard.stripe.com and log in with your administrative account credentials.2
Navigate to Developers API Keys
In the top navigation header, select Developers and click on the API keys tab.
3
Copy the Appropriate Secret Key
Select the key type matching your operational stage:
- Test key (
sk_test_...): Used while testing your store checkout with Stripe test cards without moving real funds. - Live key (
sk_live_...): Used for production commerce to accept real customer payments. - Restricted key (
rk_...): Supported as long as it includes permissions to read account details and write Checkout Sessions, Refunds, and Webhook Endpoints.
Connecting Stripe to Your Workspace
1
Open Integrations in Settings
From the left navigation sidebar in ChatbotX, click Settings (gear icon) and select the Integrations tab along the top bar.
2
Locate Stripe and Click Use Secret Key
Scroll down to the Stripe integration entry and click the red Use secret key button.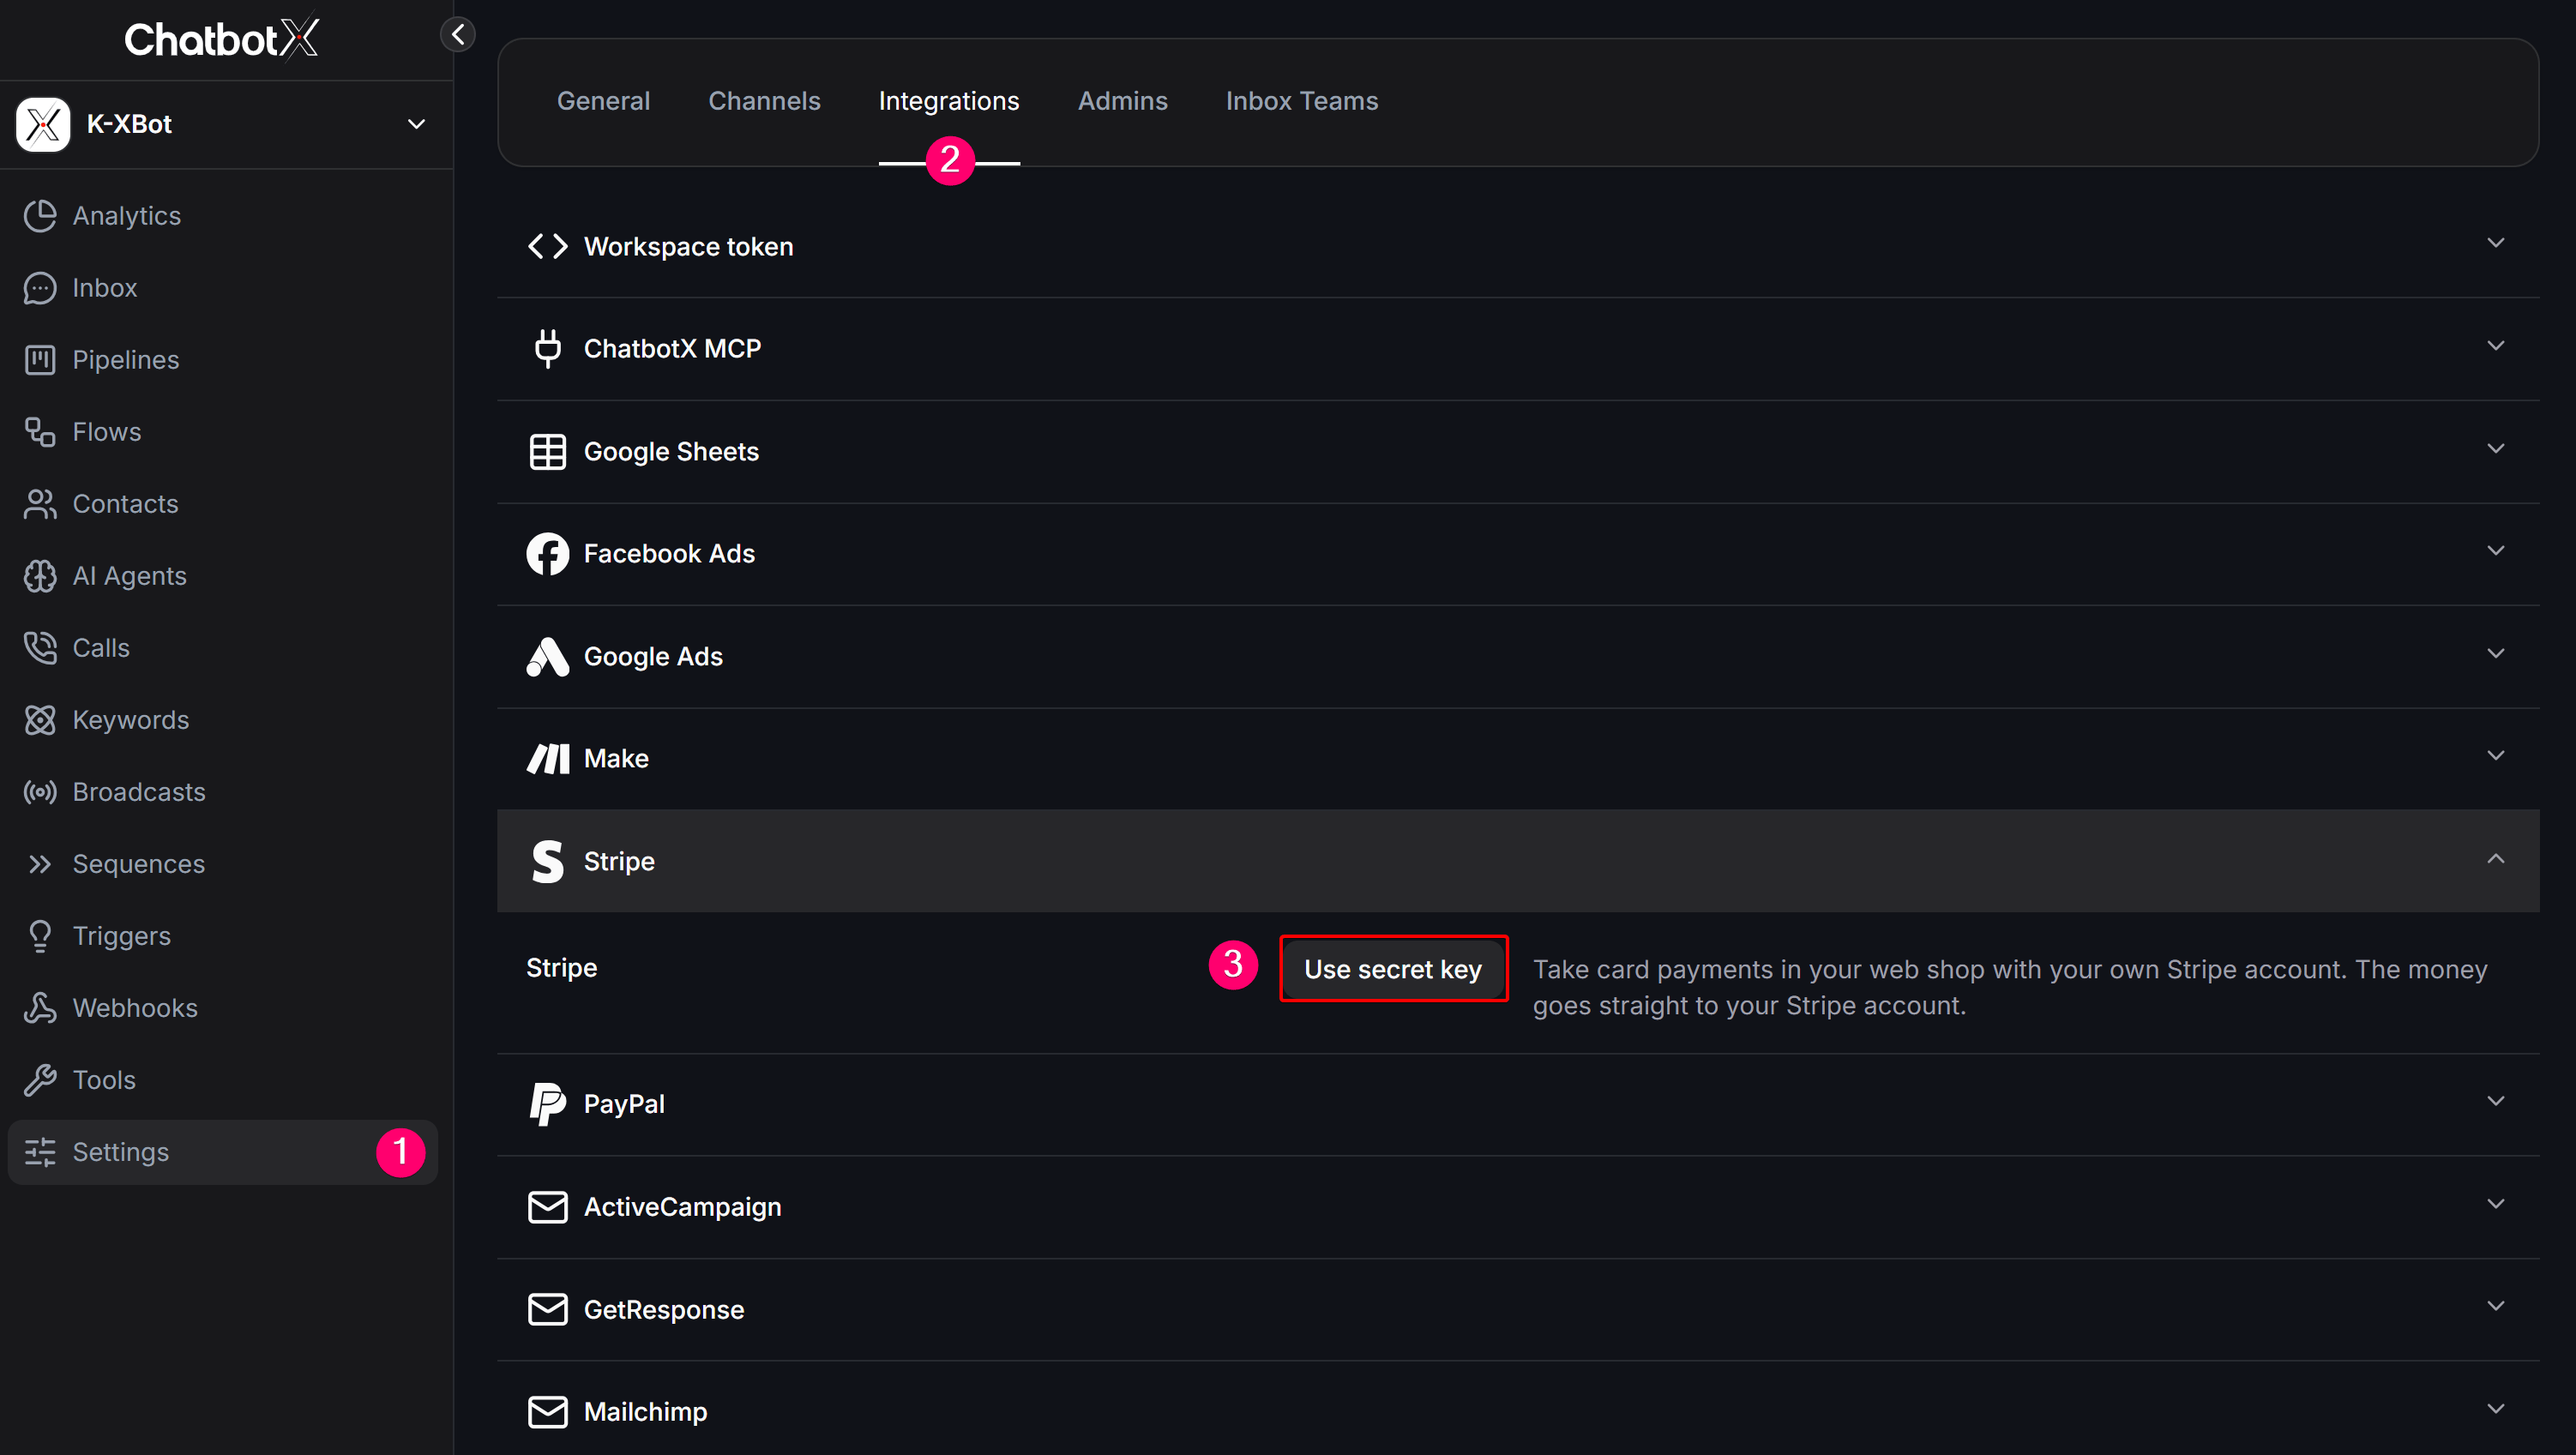
3
Enter Your Secret Key
In the Connect Stripe dialog, paste your copied secret key into the Secret key field.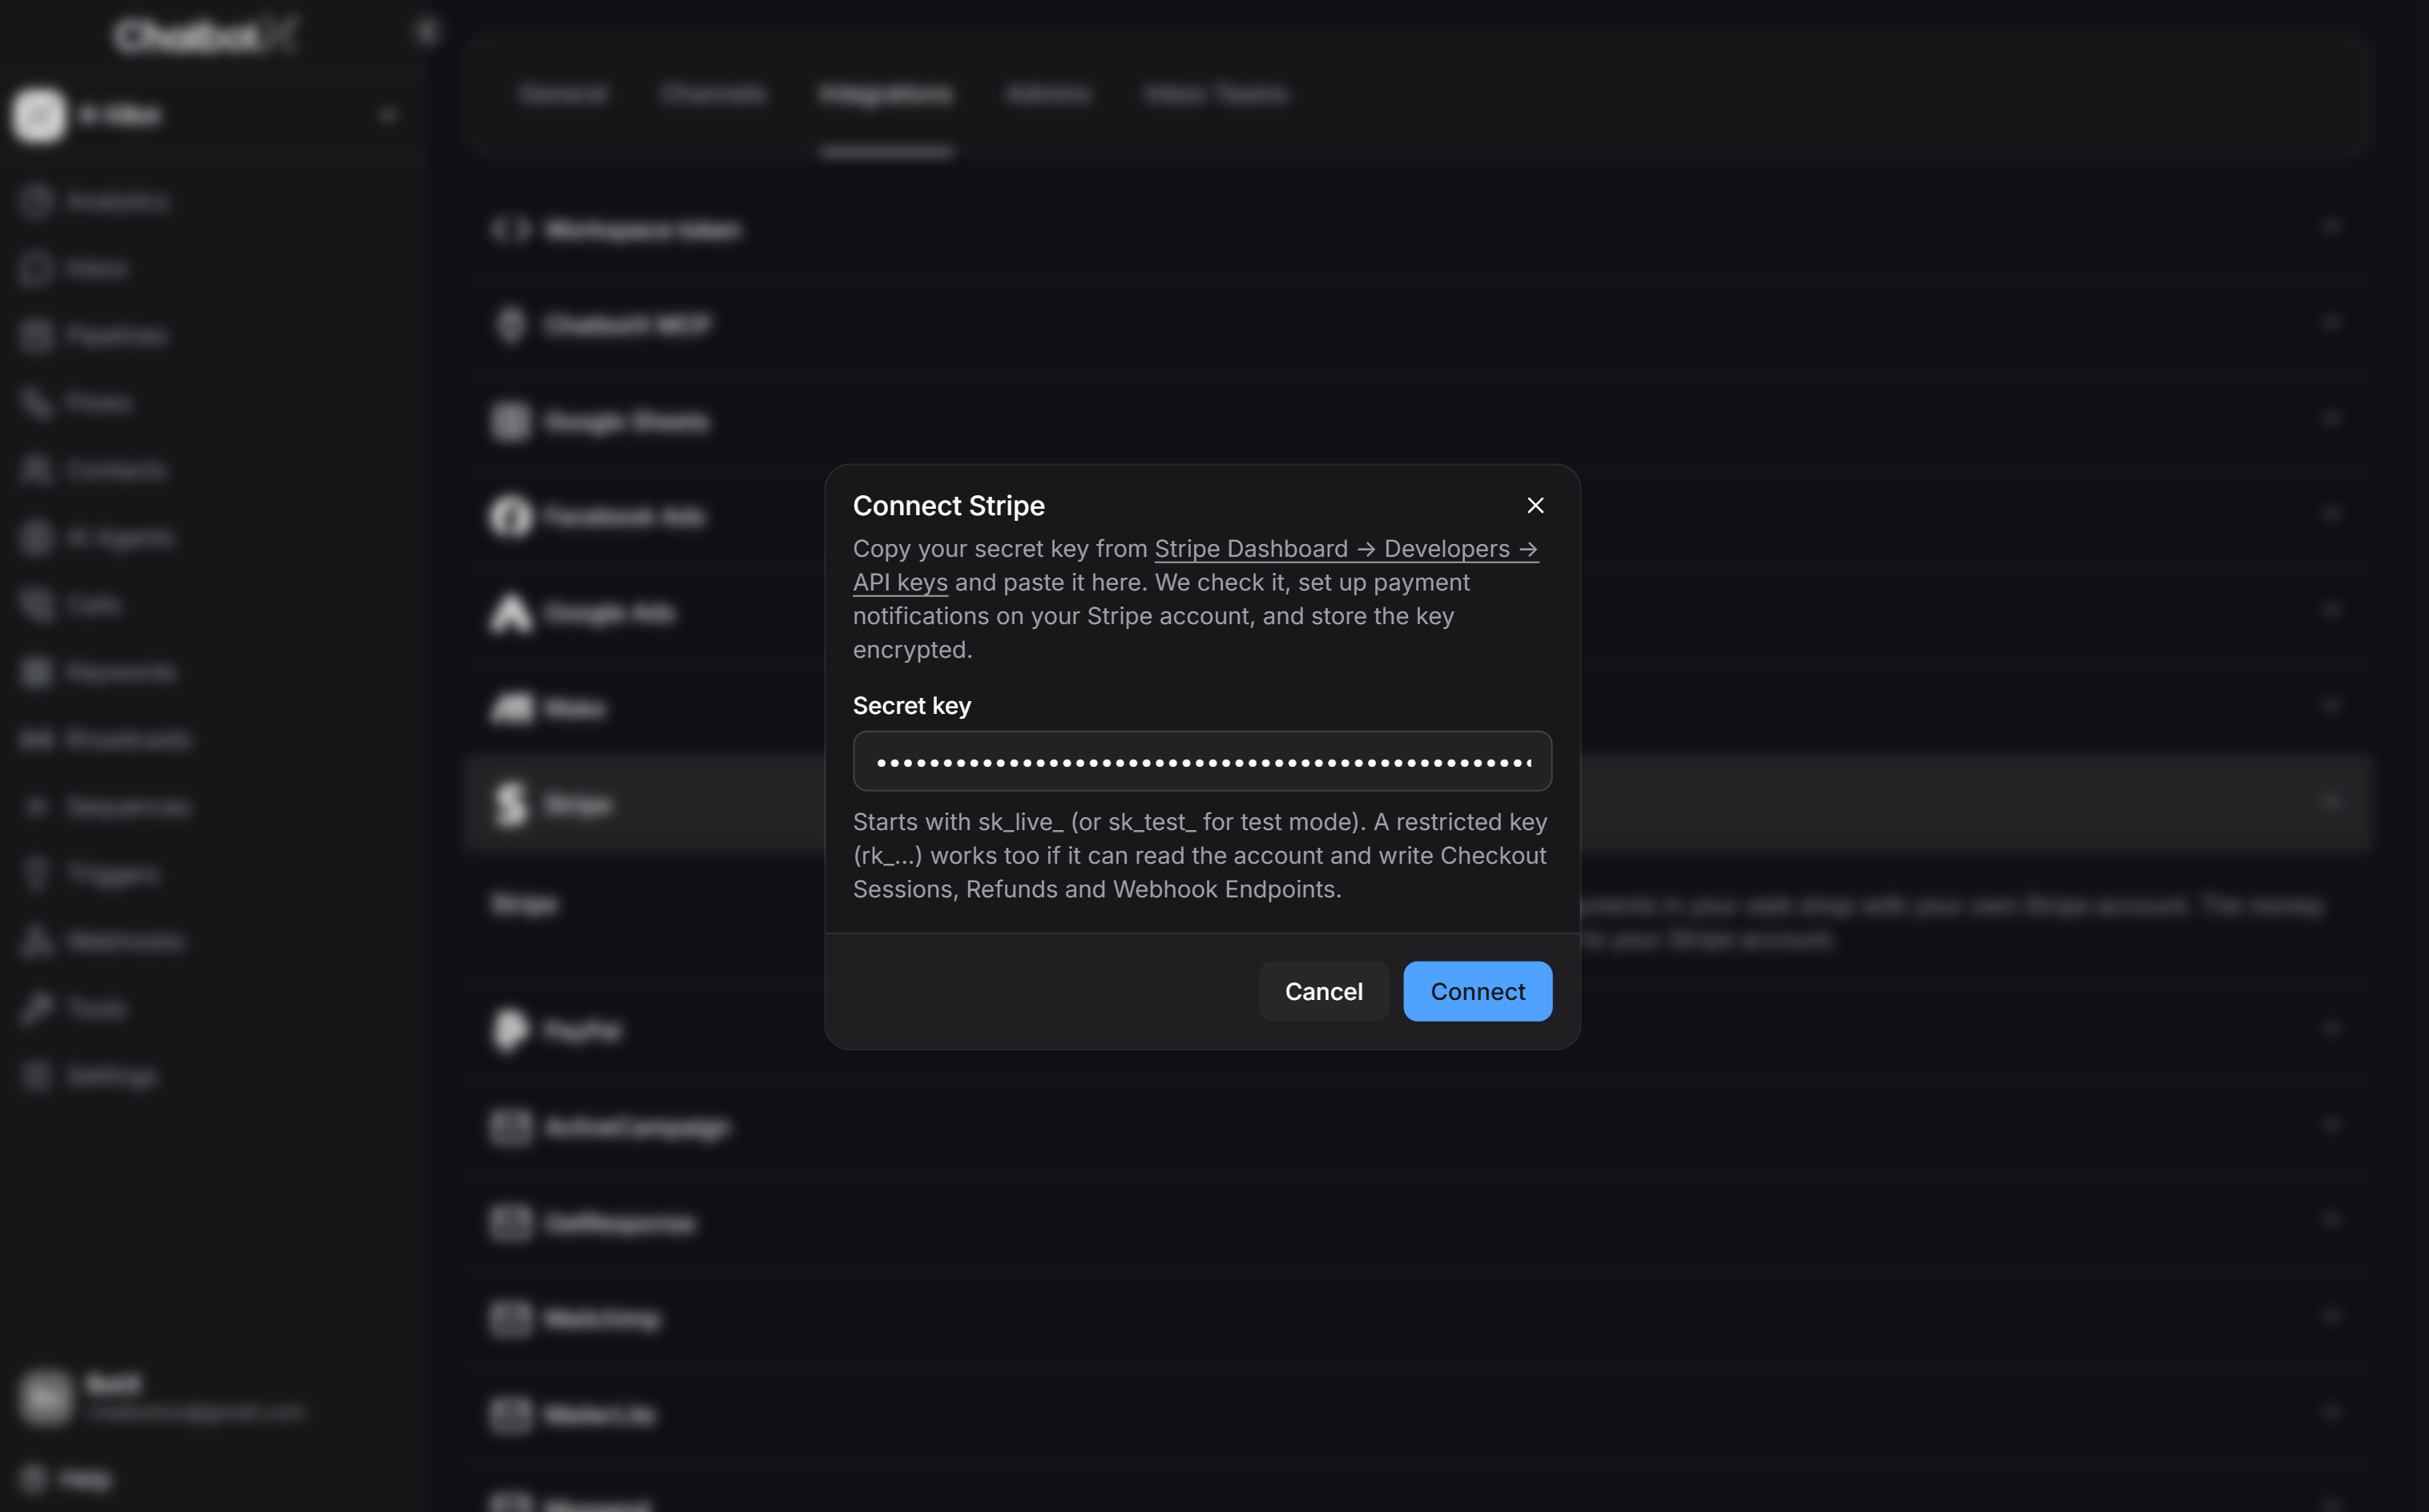
Upon submission, ChatbotX verifies key validity, automatically configures real-time webhook endpoints on your Stripe account, and encrypts the key at rest.
4
Finalize the Connection
Click the blue Connect button. Once successfully authenticated, the Stripe integration displays an active status.
Activating Card (Stripe) in Ecommerce Settings
After linking Stripe under Integrations, enable card payments for your web store:1
Open Ecommerce Payment Settings
From the left sidebar, navigate to Tools > Ecommerce, switch to the Settings tab, and select Payments on the left menu.
2
Select Card (Stripe) Under Payment Methods
Click the Payment methods dropdown and check the Card (Stripe) option.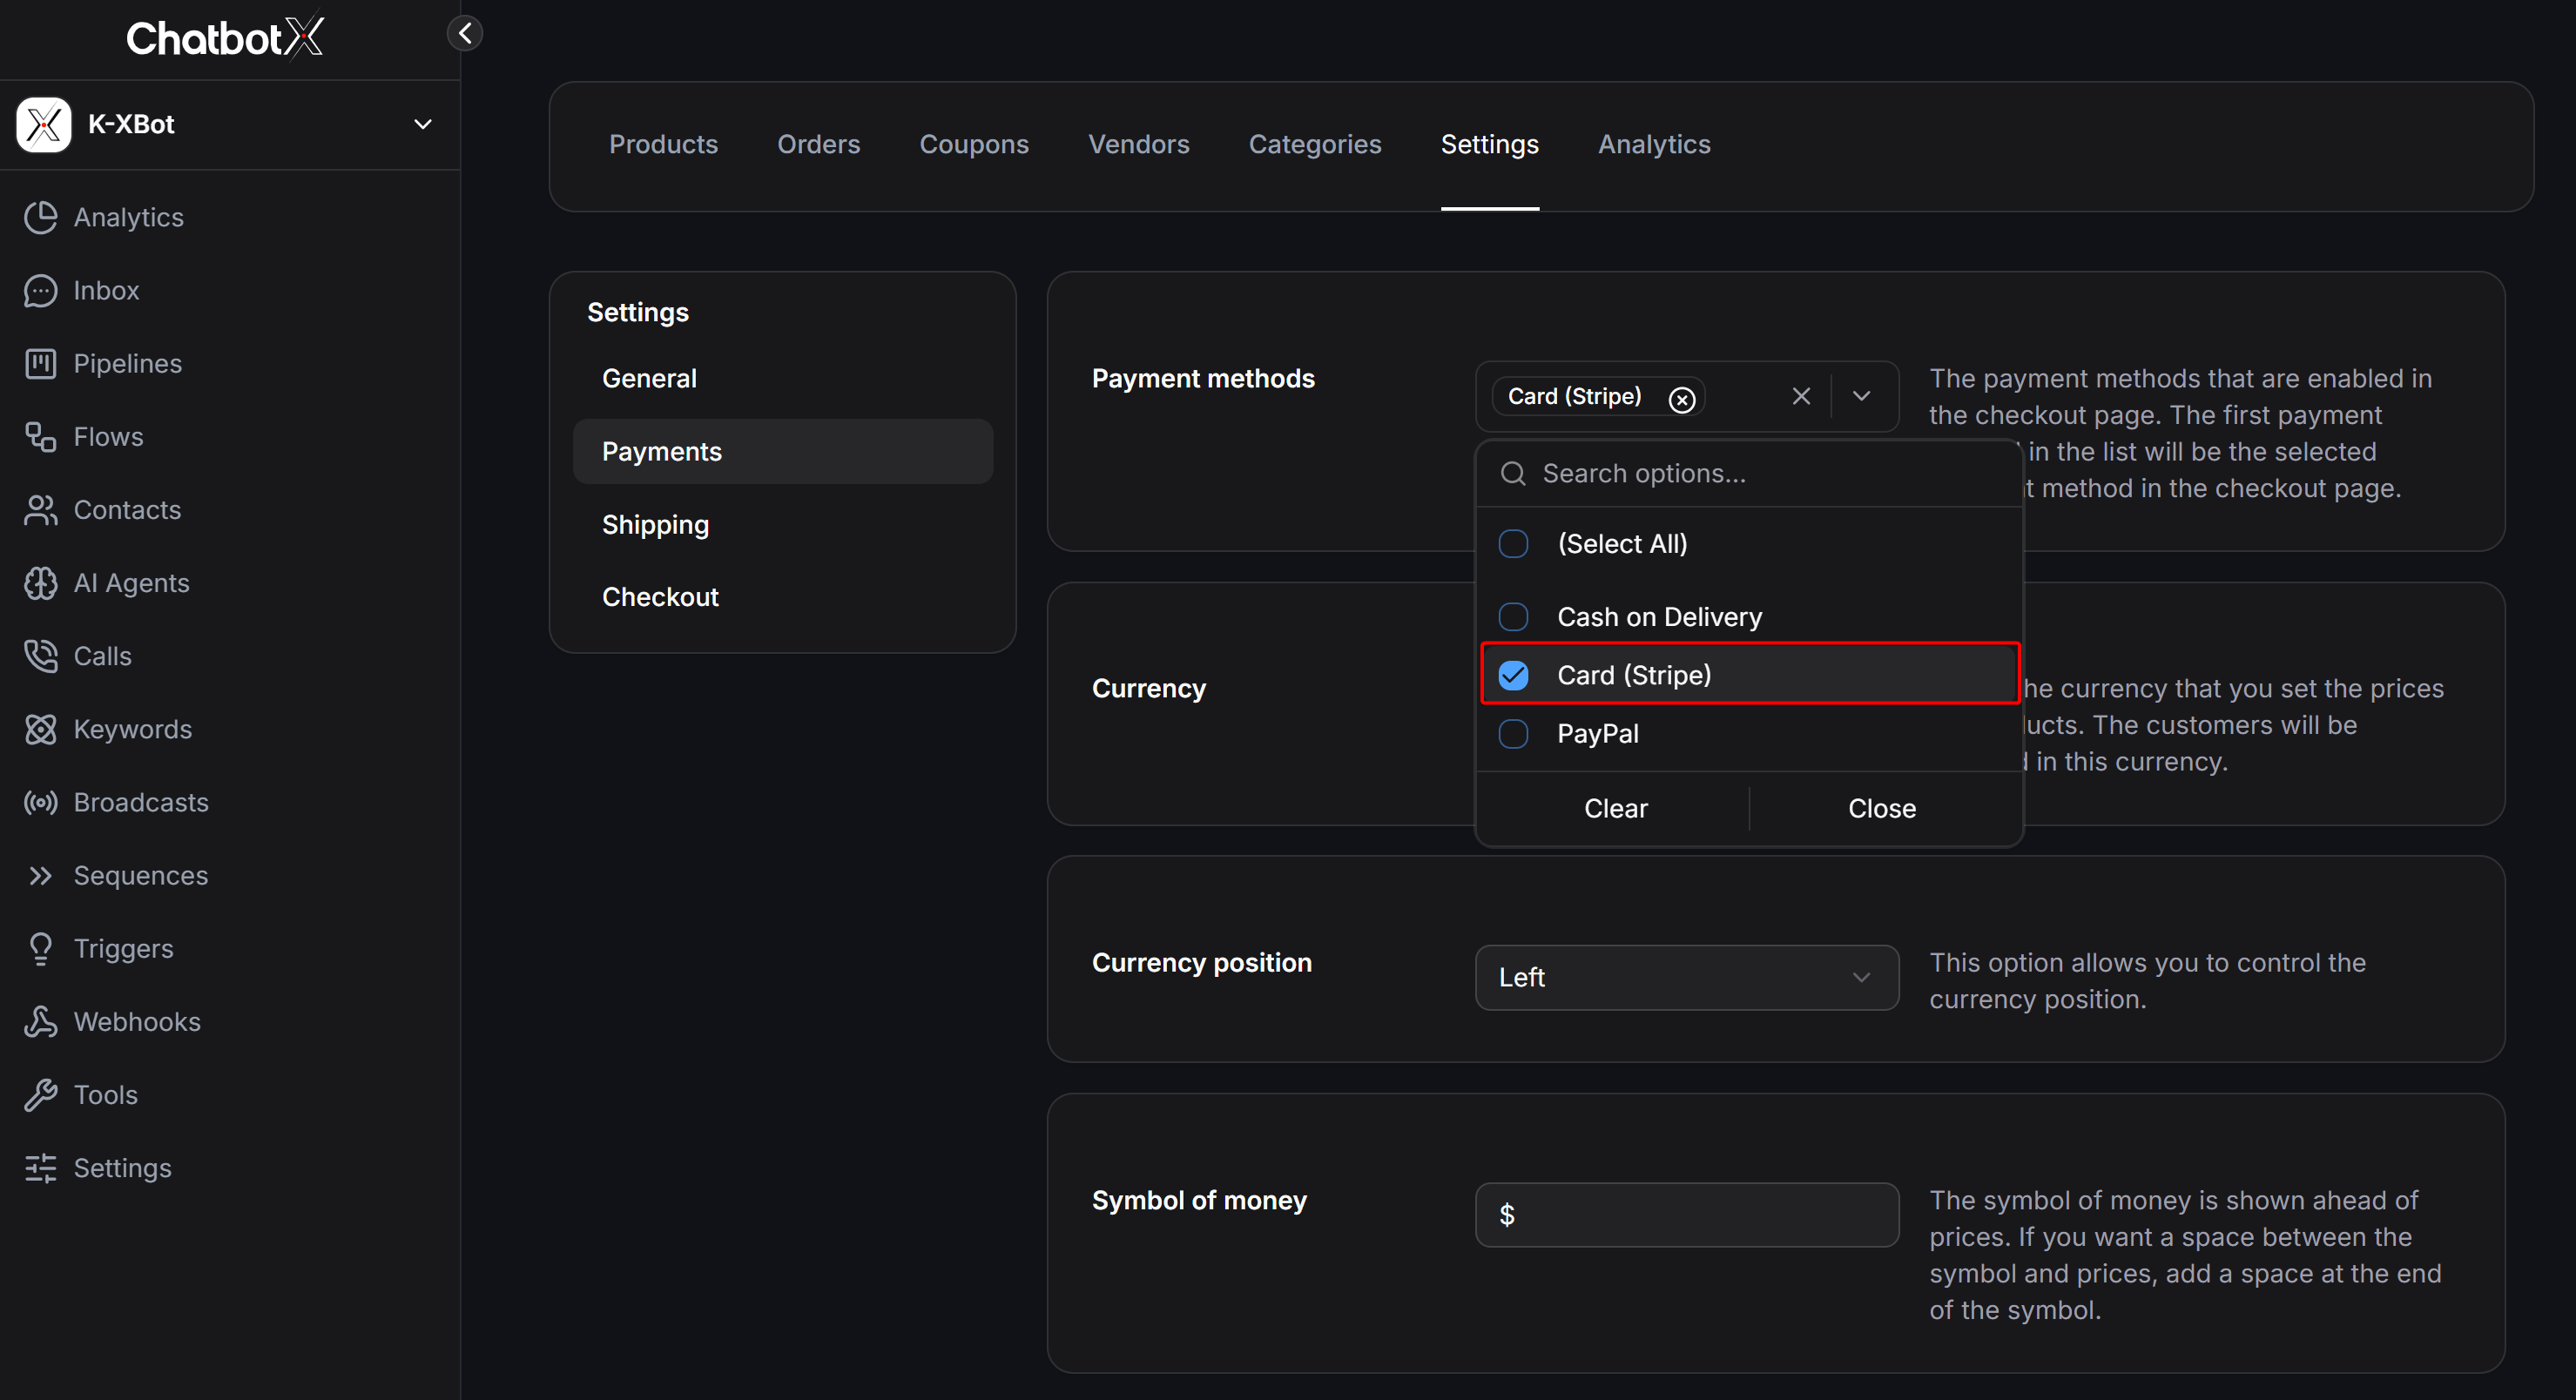
You can offer Cash on Delivery, PayPal, and Card (Stripe) concurrently. The first method listed in your selection is pre-selected as the default payment option on the Webview checkout screen.
3
Save Configuration
Click Save at the bottom right corner to apply the new payment option across your storefront.
Customer Card Checkout Experience on Webview
When customers place an order, paying with an international card follows a straightforward path:1
Selecting Card Payment at Checkout
On the Webview checkout screen, after entering delivery information, the buyer selects Card under Payment.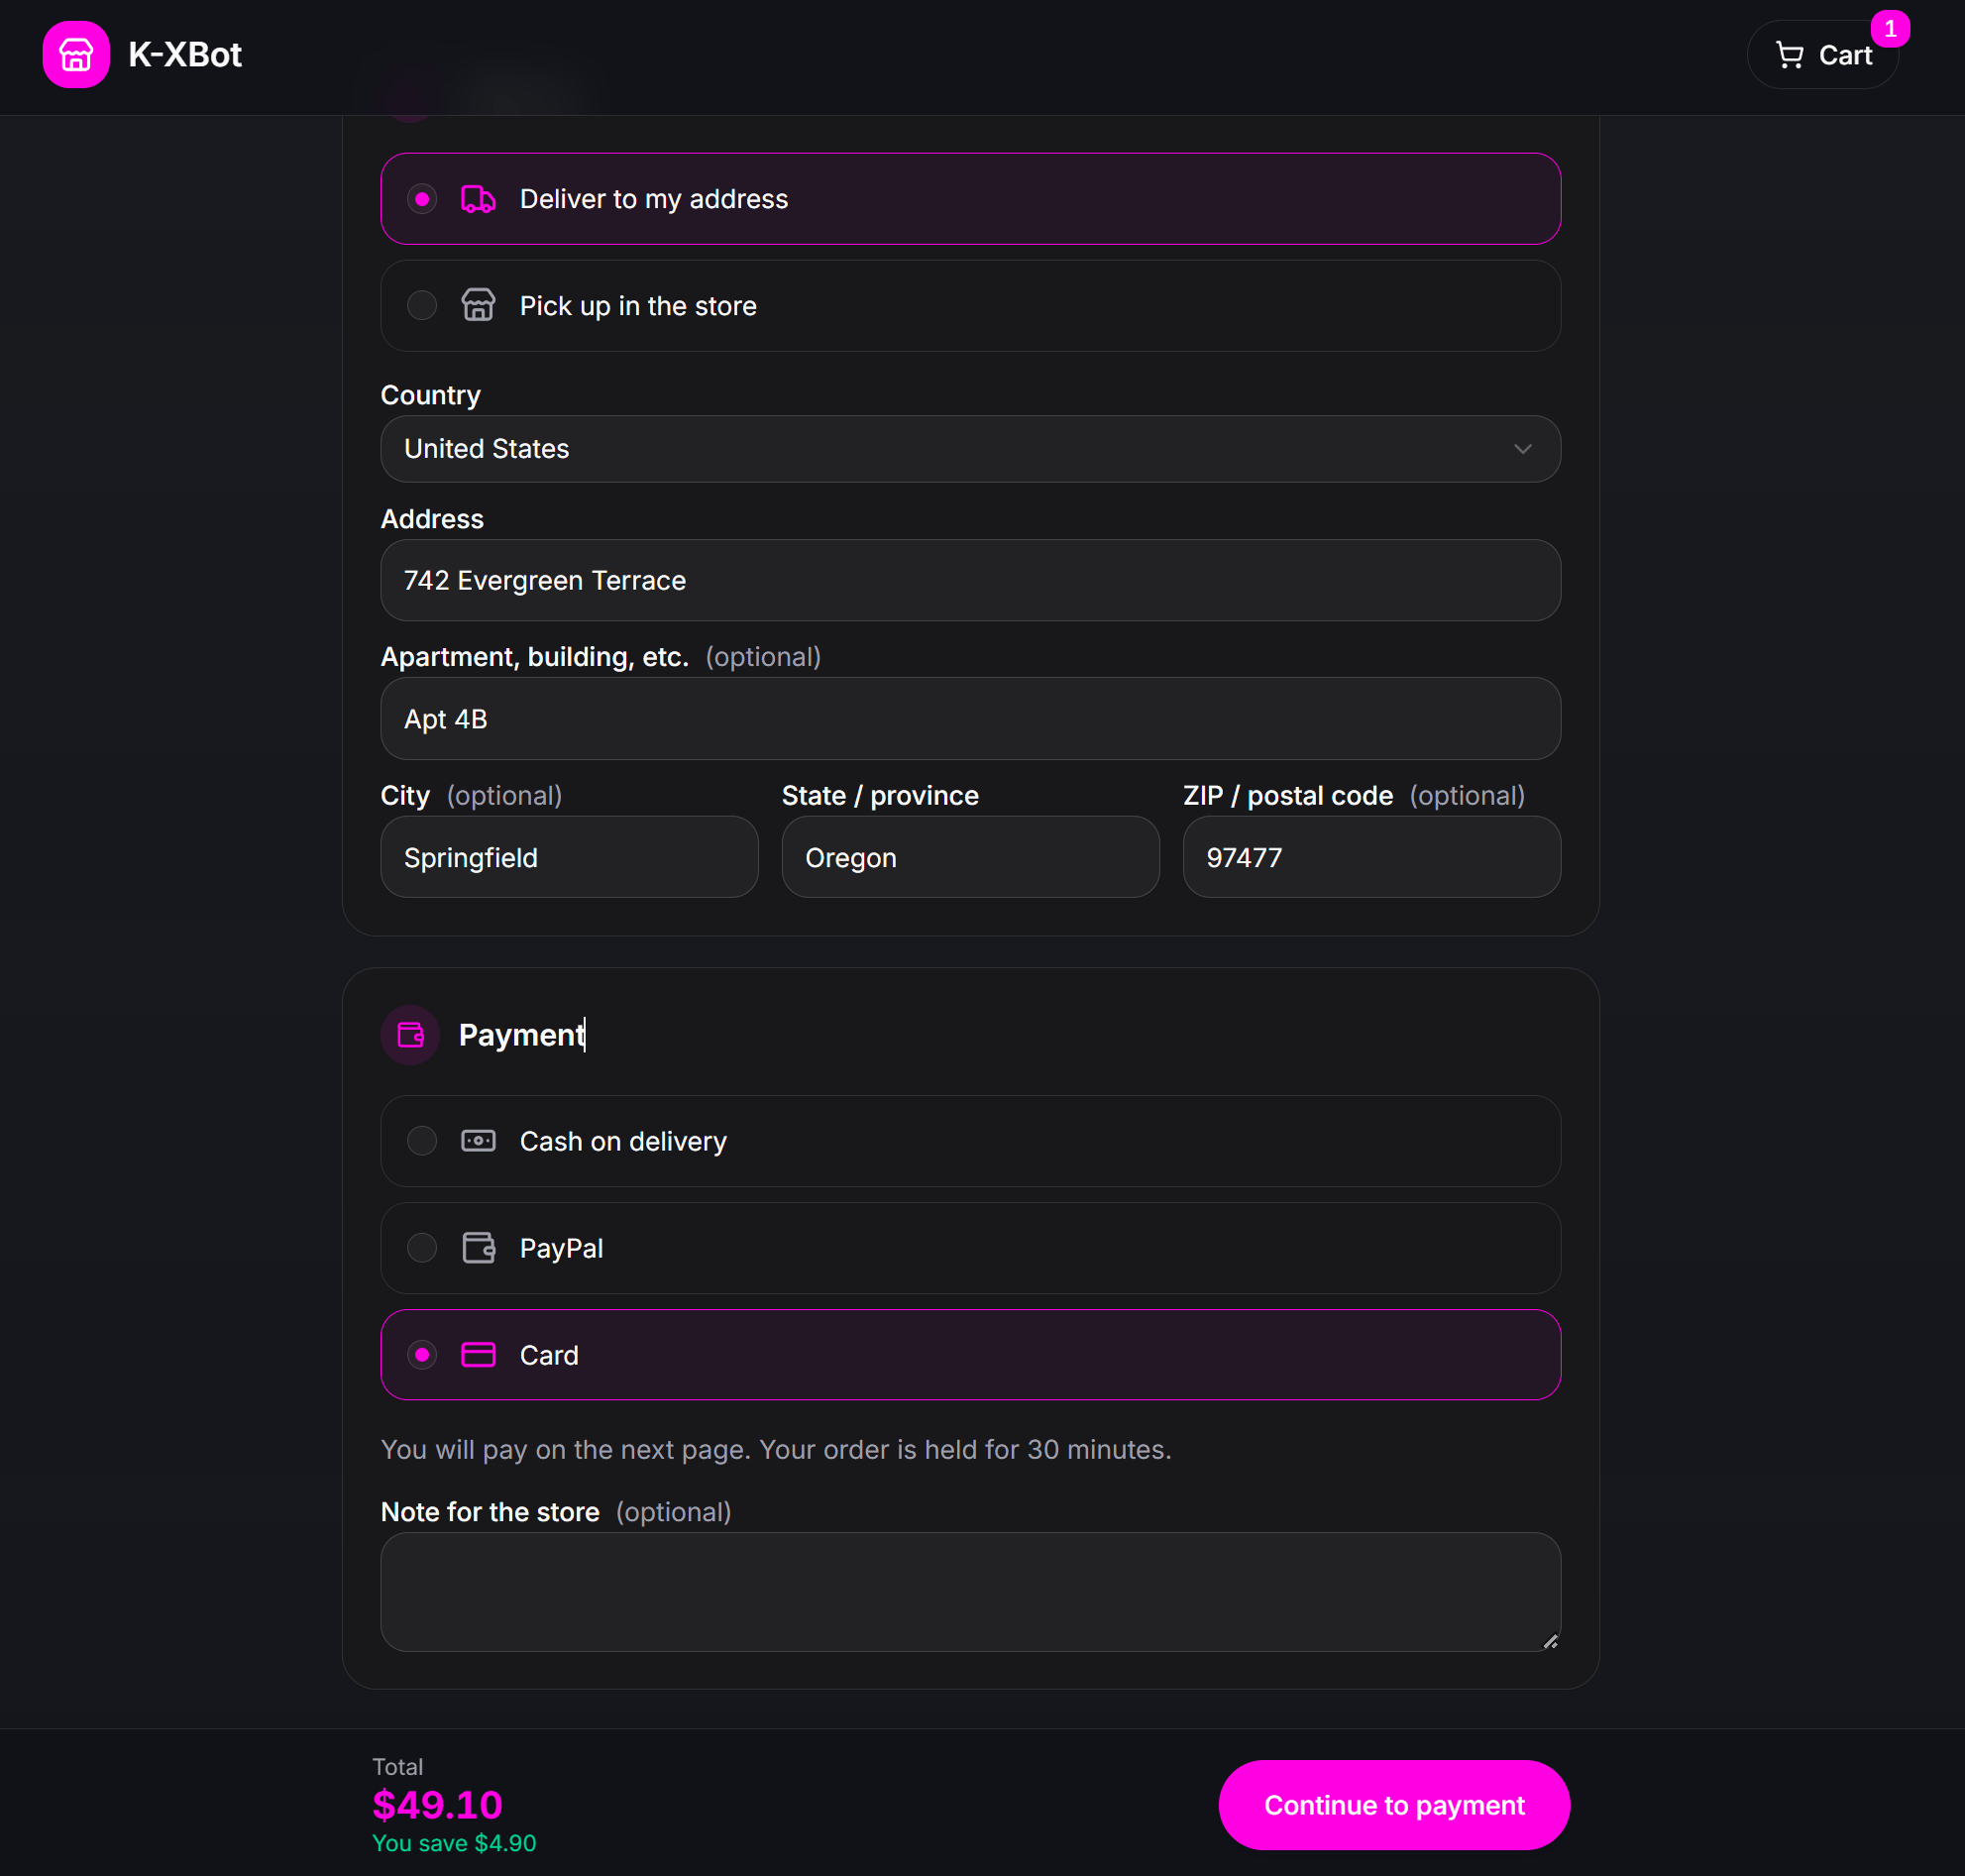
- You will pay on the next page: Informs the customer that card entry takes place on the next screen.
- Your order is held for 30 minutes: Protects the order and reserves inventory for 30 minutes.
2
Entering Card Information on Hosted Stripe Checkout
The customer reviews the order total and taps Continue to payment. Stripe’s PCI-compliant hosted payment interface opens, allowing the customer to enter their card number, expiration date, and CVC, or pay using supported mobile wallets.
3
Receiving the Order and Payment Confirmation
Once the card issuer authorizes the charge, the buyer is redirected back to the Webview order receipt: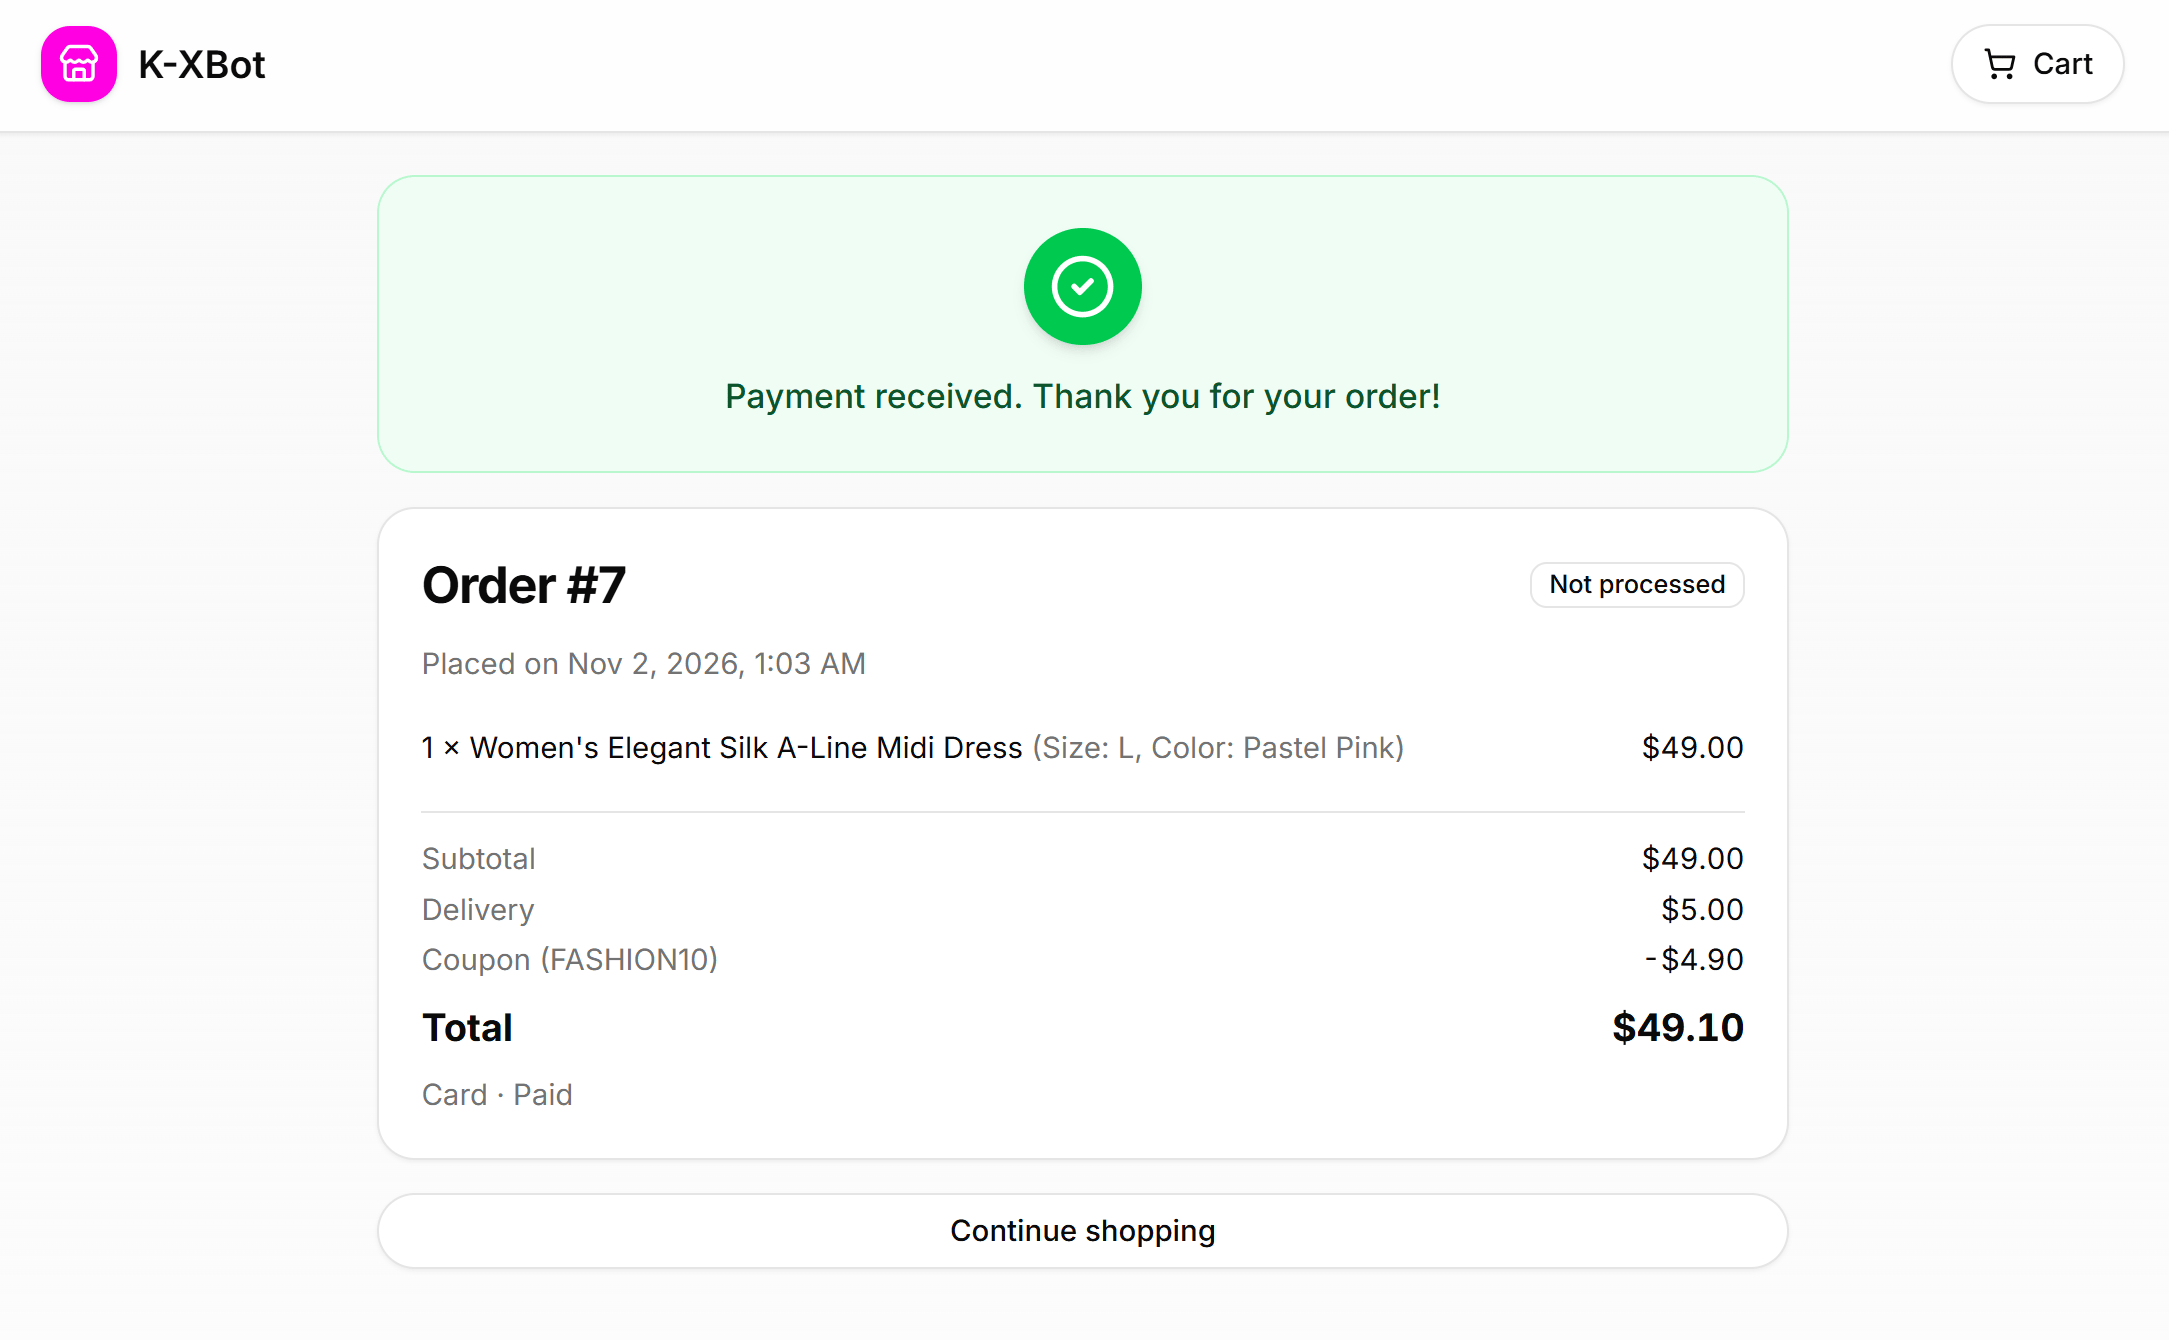
- A green confirmation banner states: Payment received. Thank you for your order!
- The summary details the assigned order number (such as
Order #7), items, delivery fee, and total paid. - The payment indicator confirms: Card · Paid.
Monitoring Stripe Orders in the Orders Dashboard
Orders paid via Stripe synchronize instantly to the Orders tab in ChatbotX Ecommerce: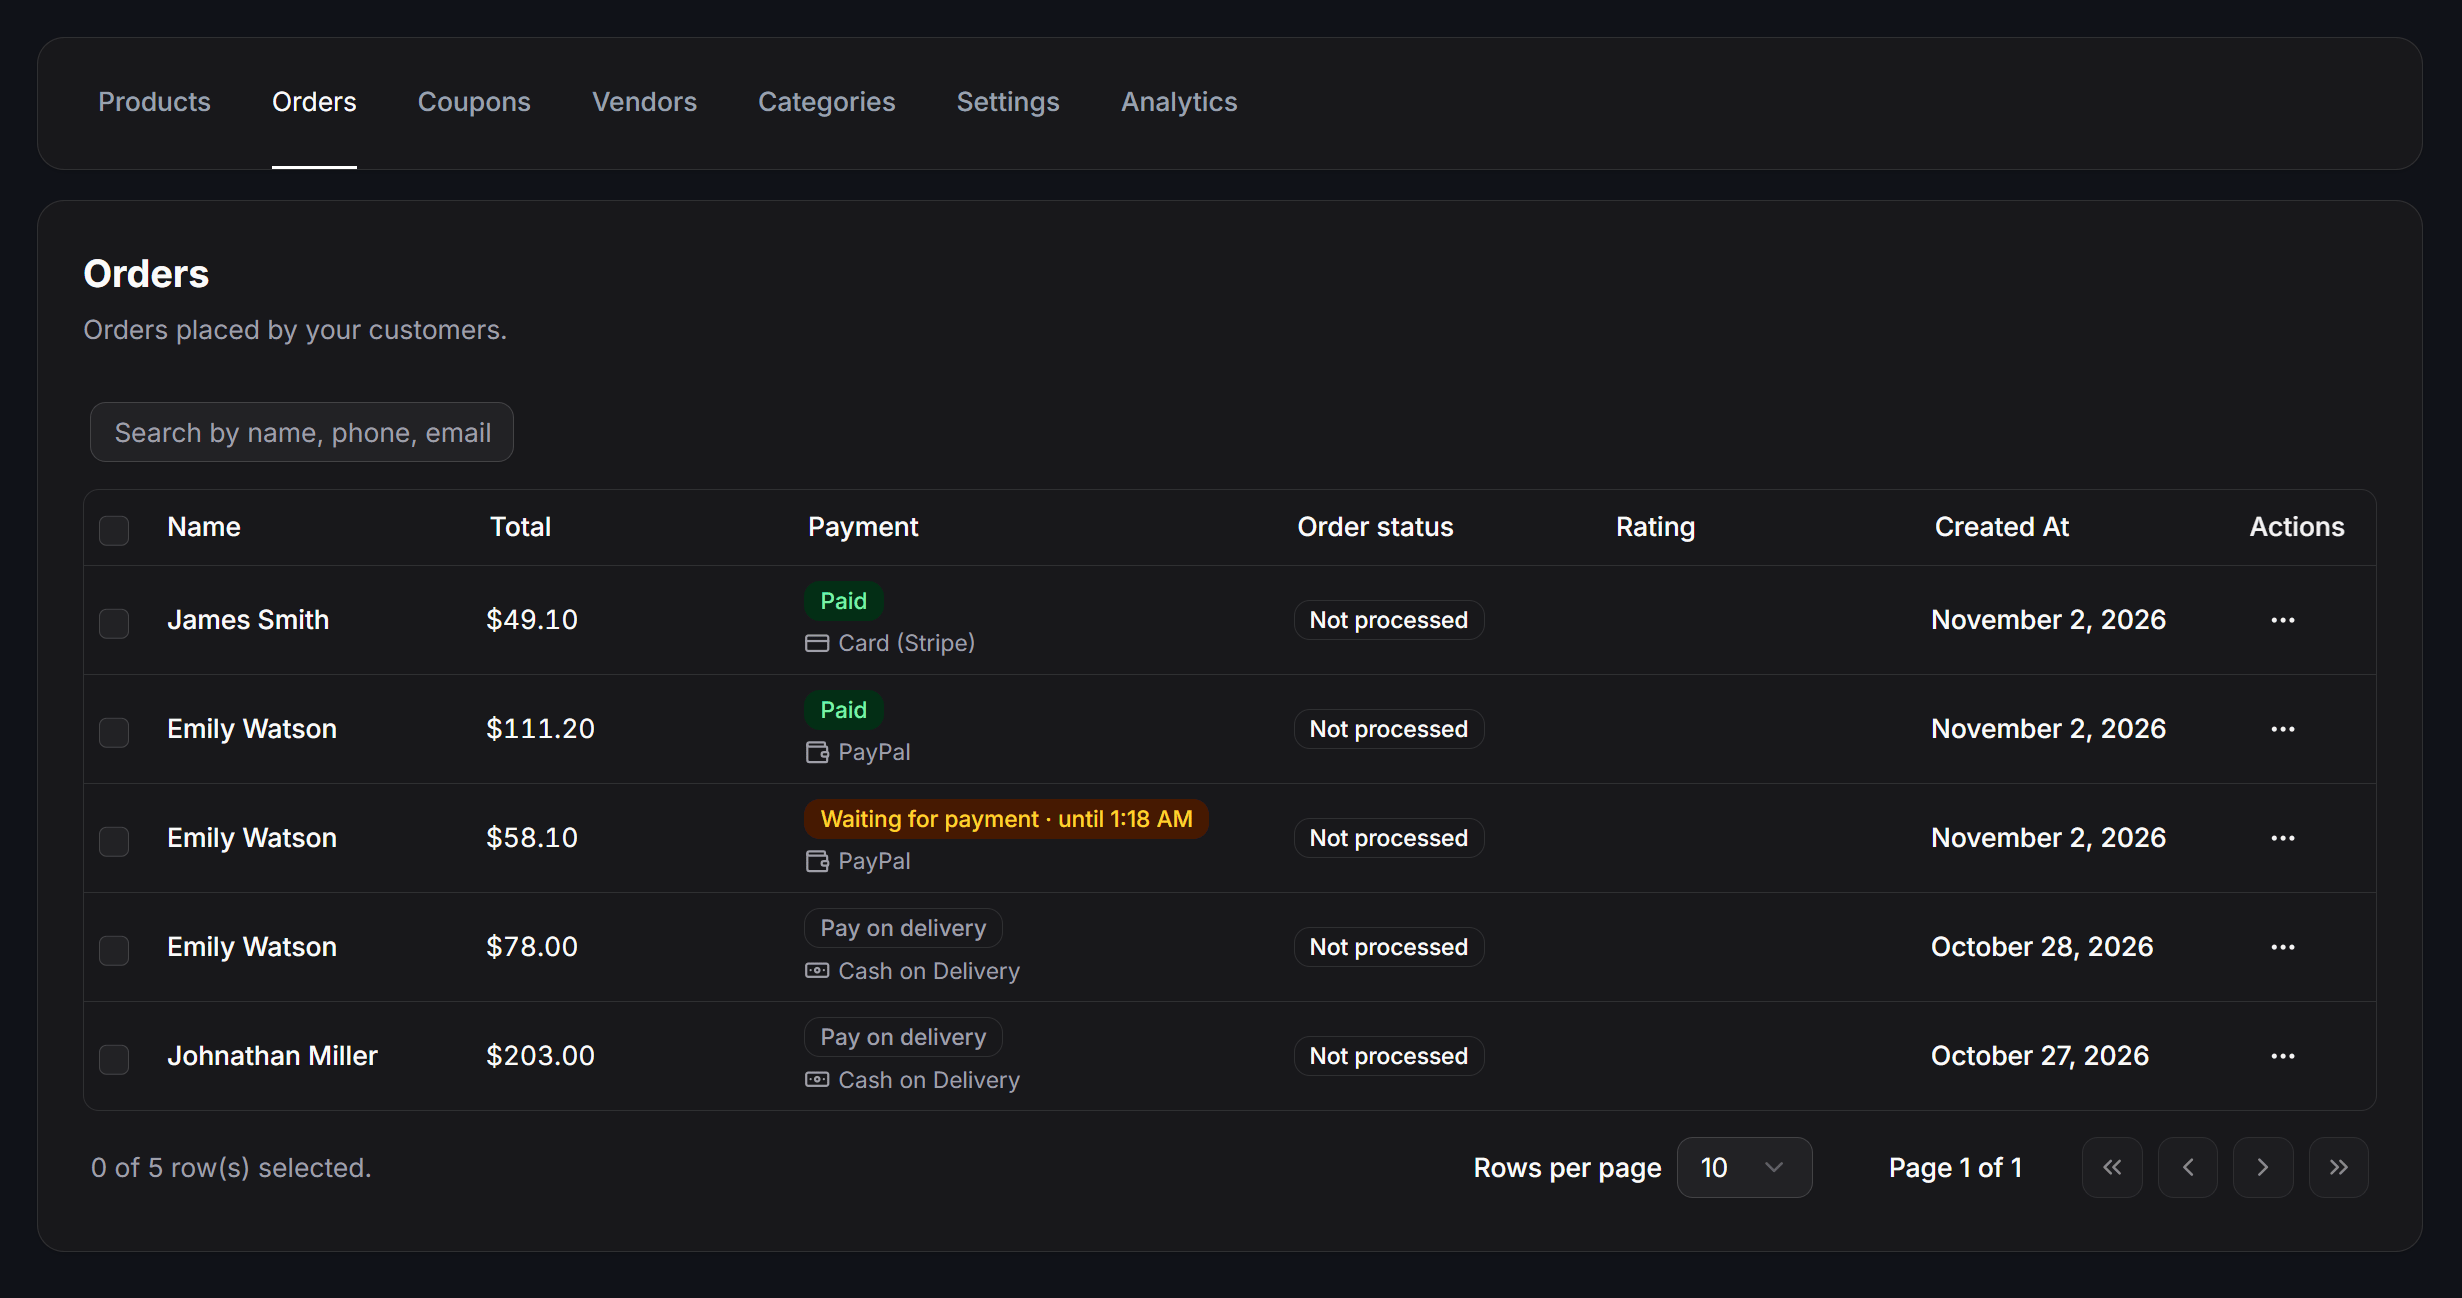
When an online card payment succeeds, ChatbotX also transmits an automated order confirmation message with an itemized receipt directly into the buyer’s Messenger chat.