

Trusted Global Payments
Accept payments from hundreds of countries via PayPal digital wallets and major credit or debit cards.
Automated Reconciliation
Orders automatically update to paid status as soon as the customer completes the transaction on PayPal.
Smart 30-Minute Order Hold
Inventories and orders are reserved for 30 minutes while buyers complete their PayPal checkout securely.
Automatic Environment Detection
Seamlessly switches between Sandbox and Live modes based on your provided API keys.
Preparing PayPal Developer API Credentials
Before connecting PayPal to ChatbotX, create a REST API app in the PayPal Developer Dashboard to obtain your Client ID and Secret Key.1
Log In to the PayPal Developer Portal
Visit the PayPal Developer Dashboard at
developer.paypal.com and log in with your verified PayPal Business account credentials.2
Create a REST API App
Navigate to Dashboard > Apps & Credentials. Choose your target environment:
- Sandbox: Use this mode for test orders and checkout simulations without charging real money.
- Live: Use this mode for production transactions to collect payments from real customers.
3
Copy the Client ID and Secret Key
In your app details view, copy the string under Client ID and click Show under Secret to reveal and copy your secret key. You will paste these credentials into ChatbotX in the next step.
Connecting PayPal to Your Workspace
1
Open Integrations in Workspace Settings
From the left navigation sidebar in ChatbotX, click Settings (gear icon at the bottom) and select the Integrations tab along the top navigation bar.
2
Locate PayPal and Click Connect
Scroll down to the PayPal integration item and click the red Connect button.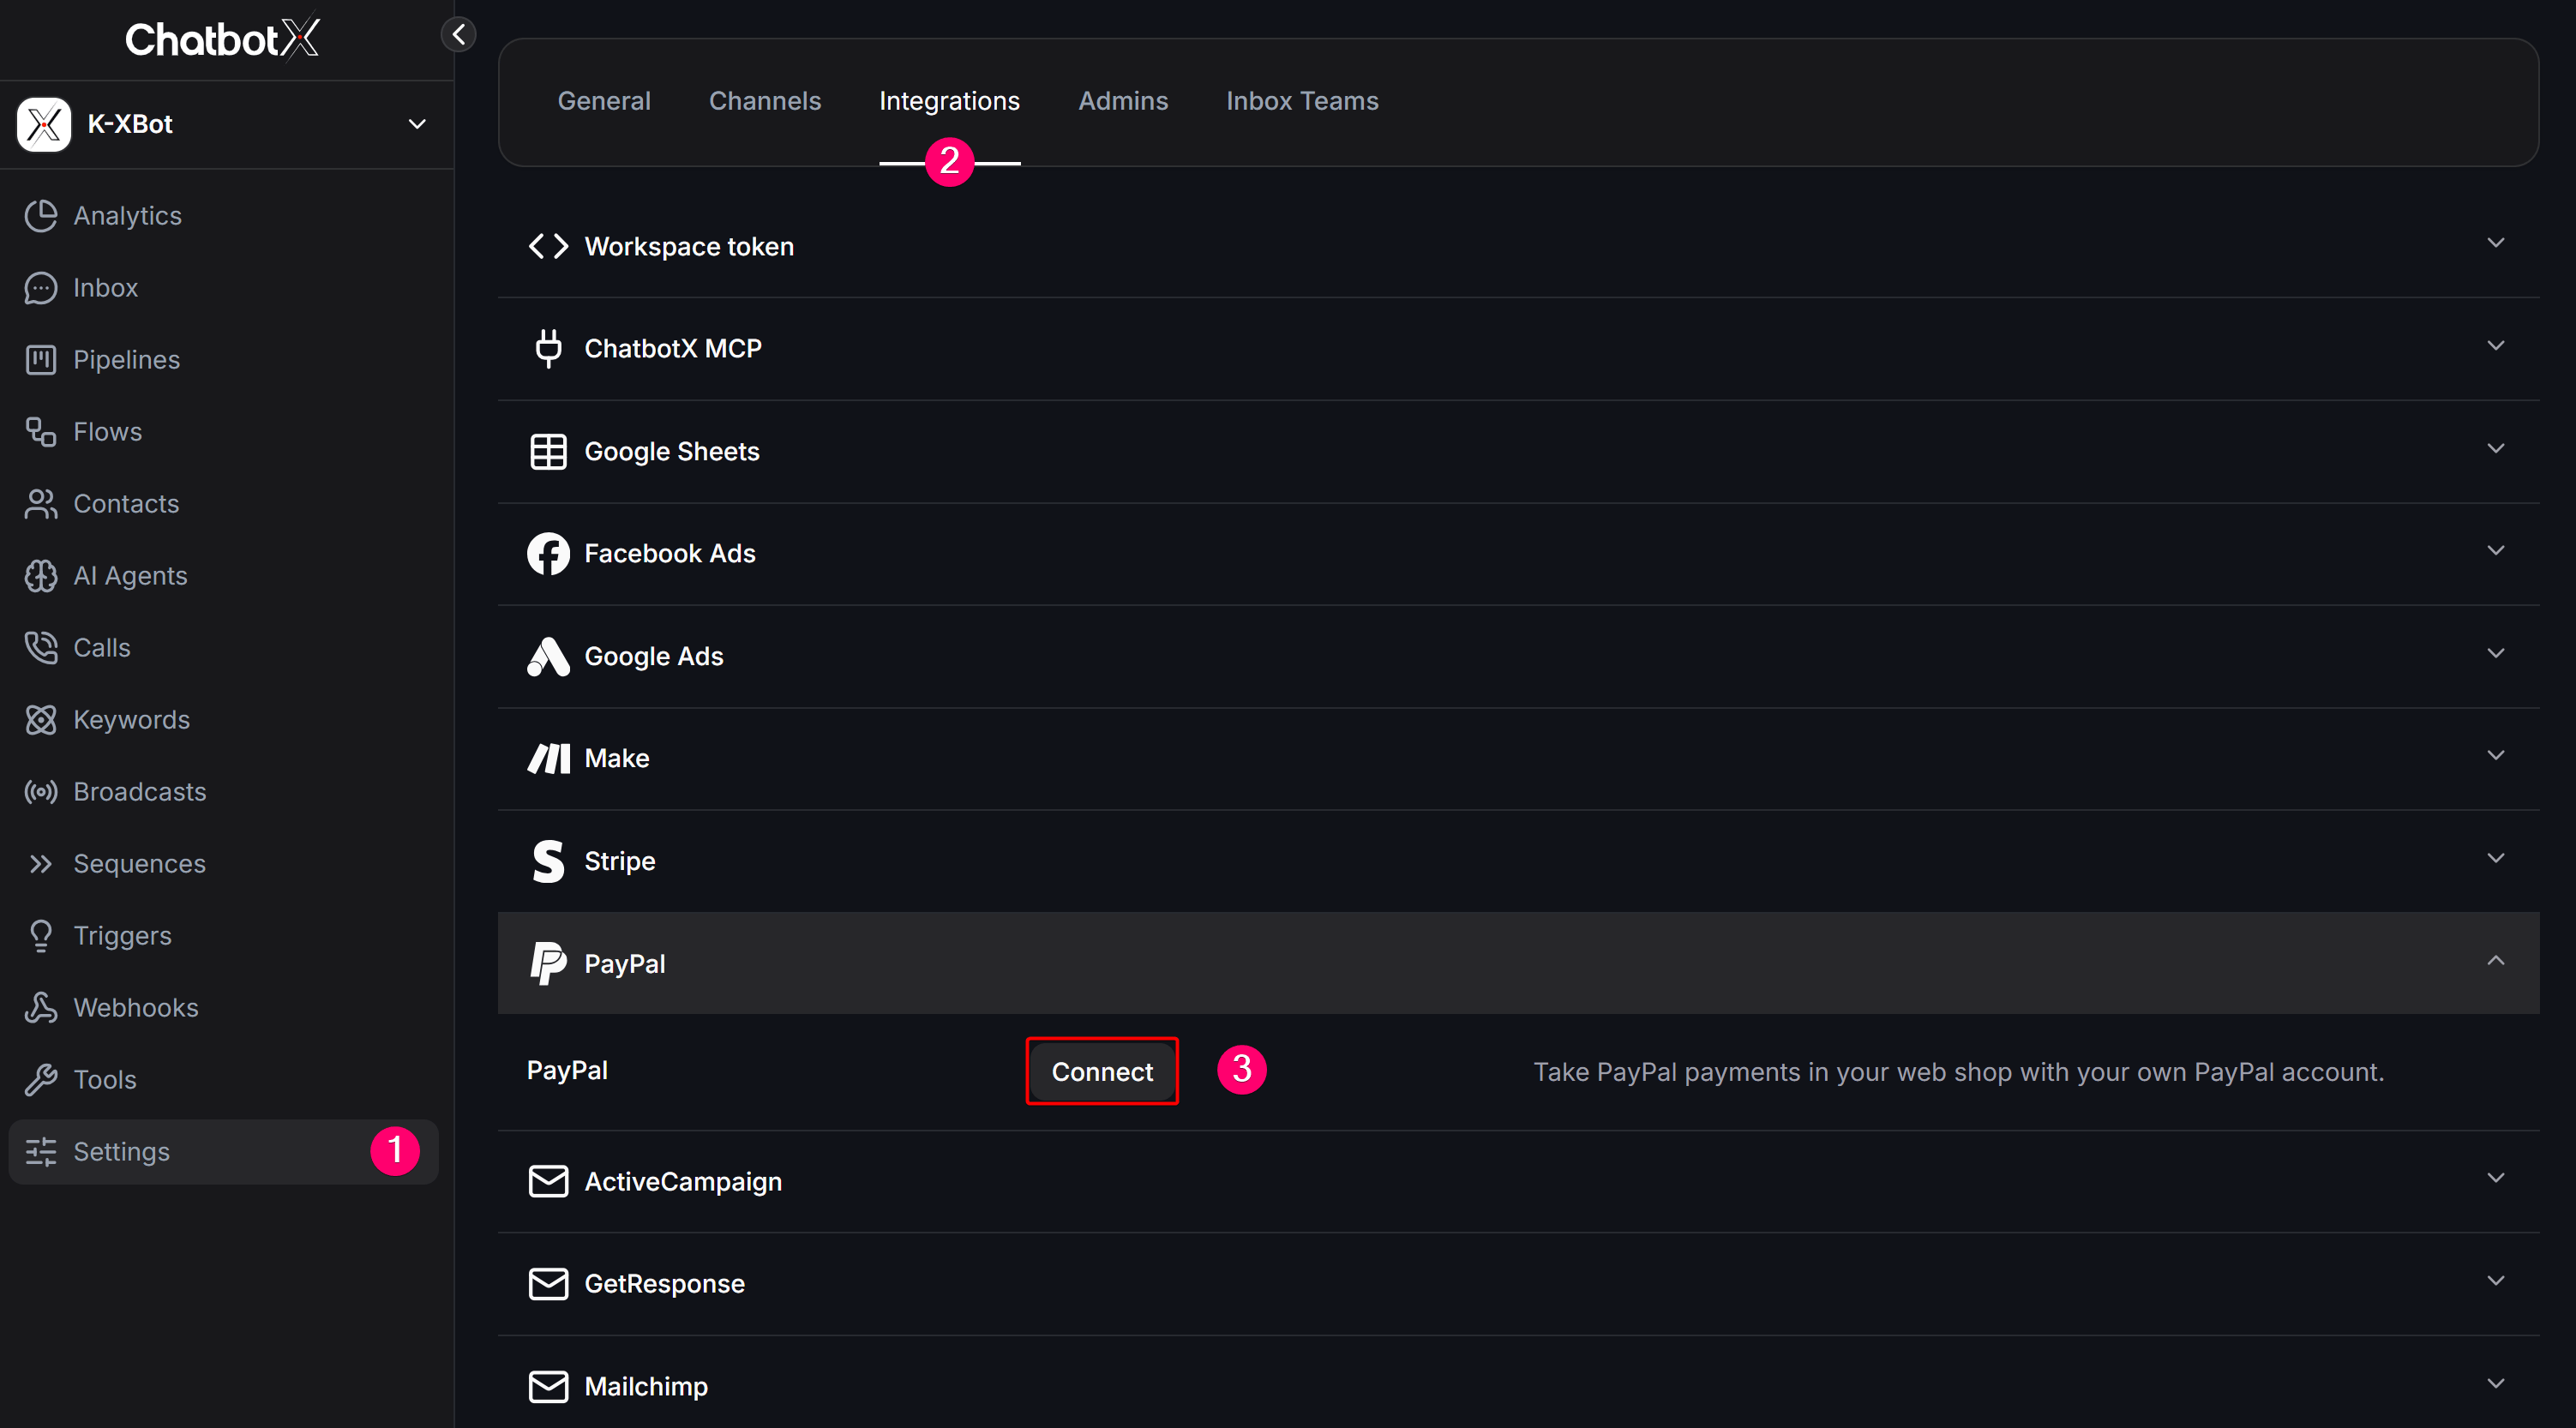
3
Enter Client ID and Secret
In the Connect PayPal modal, enter the credentials generated in PayPal Developer: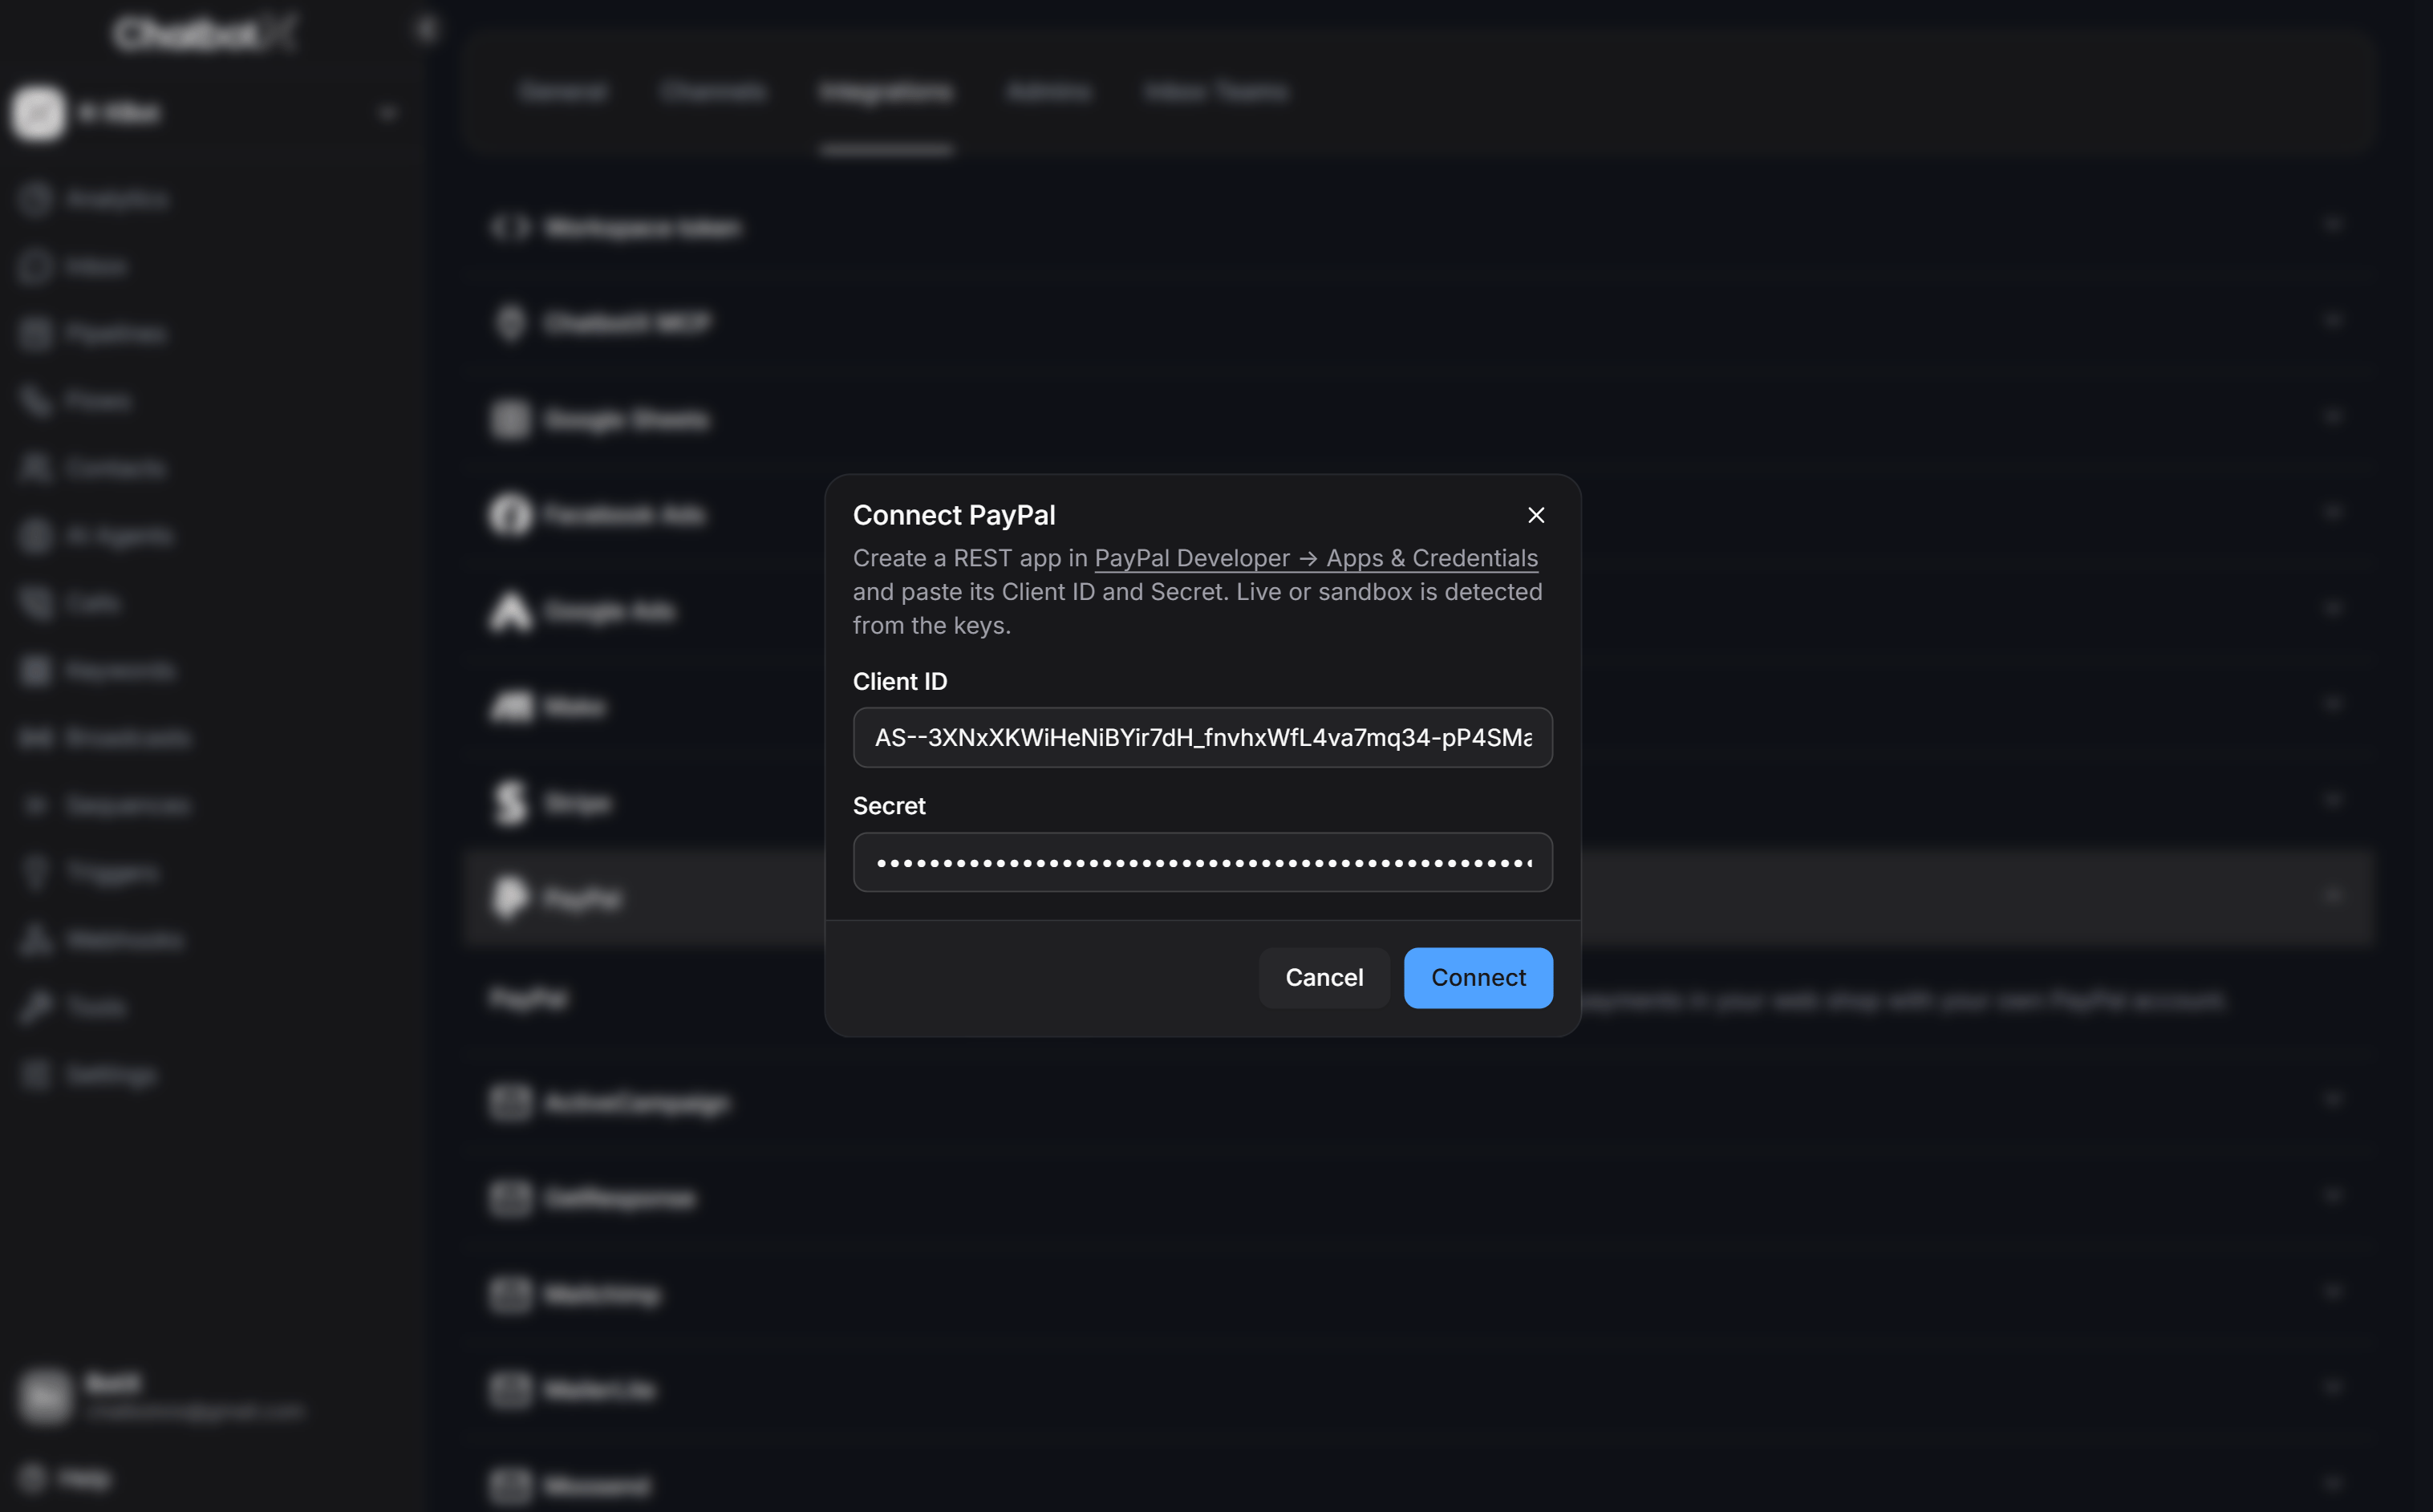
- Client ID: Paste your PayPal REST app Client ID.
- Secret: Paste the corresponding Secret key.
ChatbotX automatically detects whether your credentials belong to Sandbox or Live mode based on key prefixes. No manual environment selection is required.
4
Finalize the Connection
Click the blue Connect button to save and activate the integration. Once connected, PayPal will display an active connection badge.
Activating PayPal in Ecommerce Settings
After linking PayPal under Integrations, enable it for your web shop:1
Navigate to Ecommerce Payment Settings
From the left menu, select Tools > Ecommerce, switch to the Settings tab, and choose Payments from the left-hand sub-navigation.
2
Select PayPal Under Payment Methods
Click the Payment methods dropdown and check the PayPal option.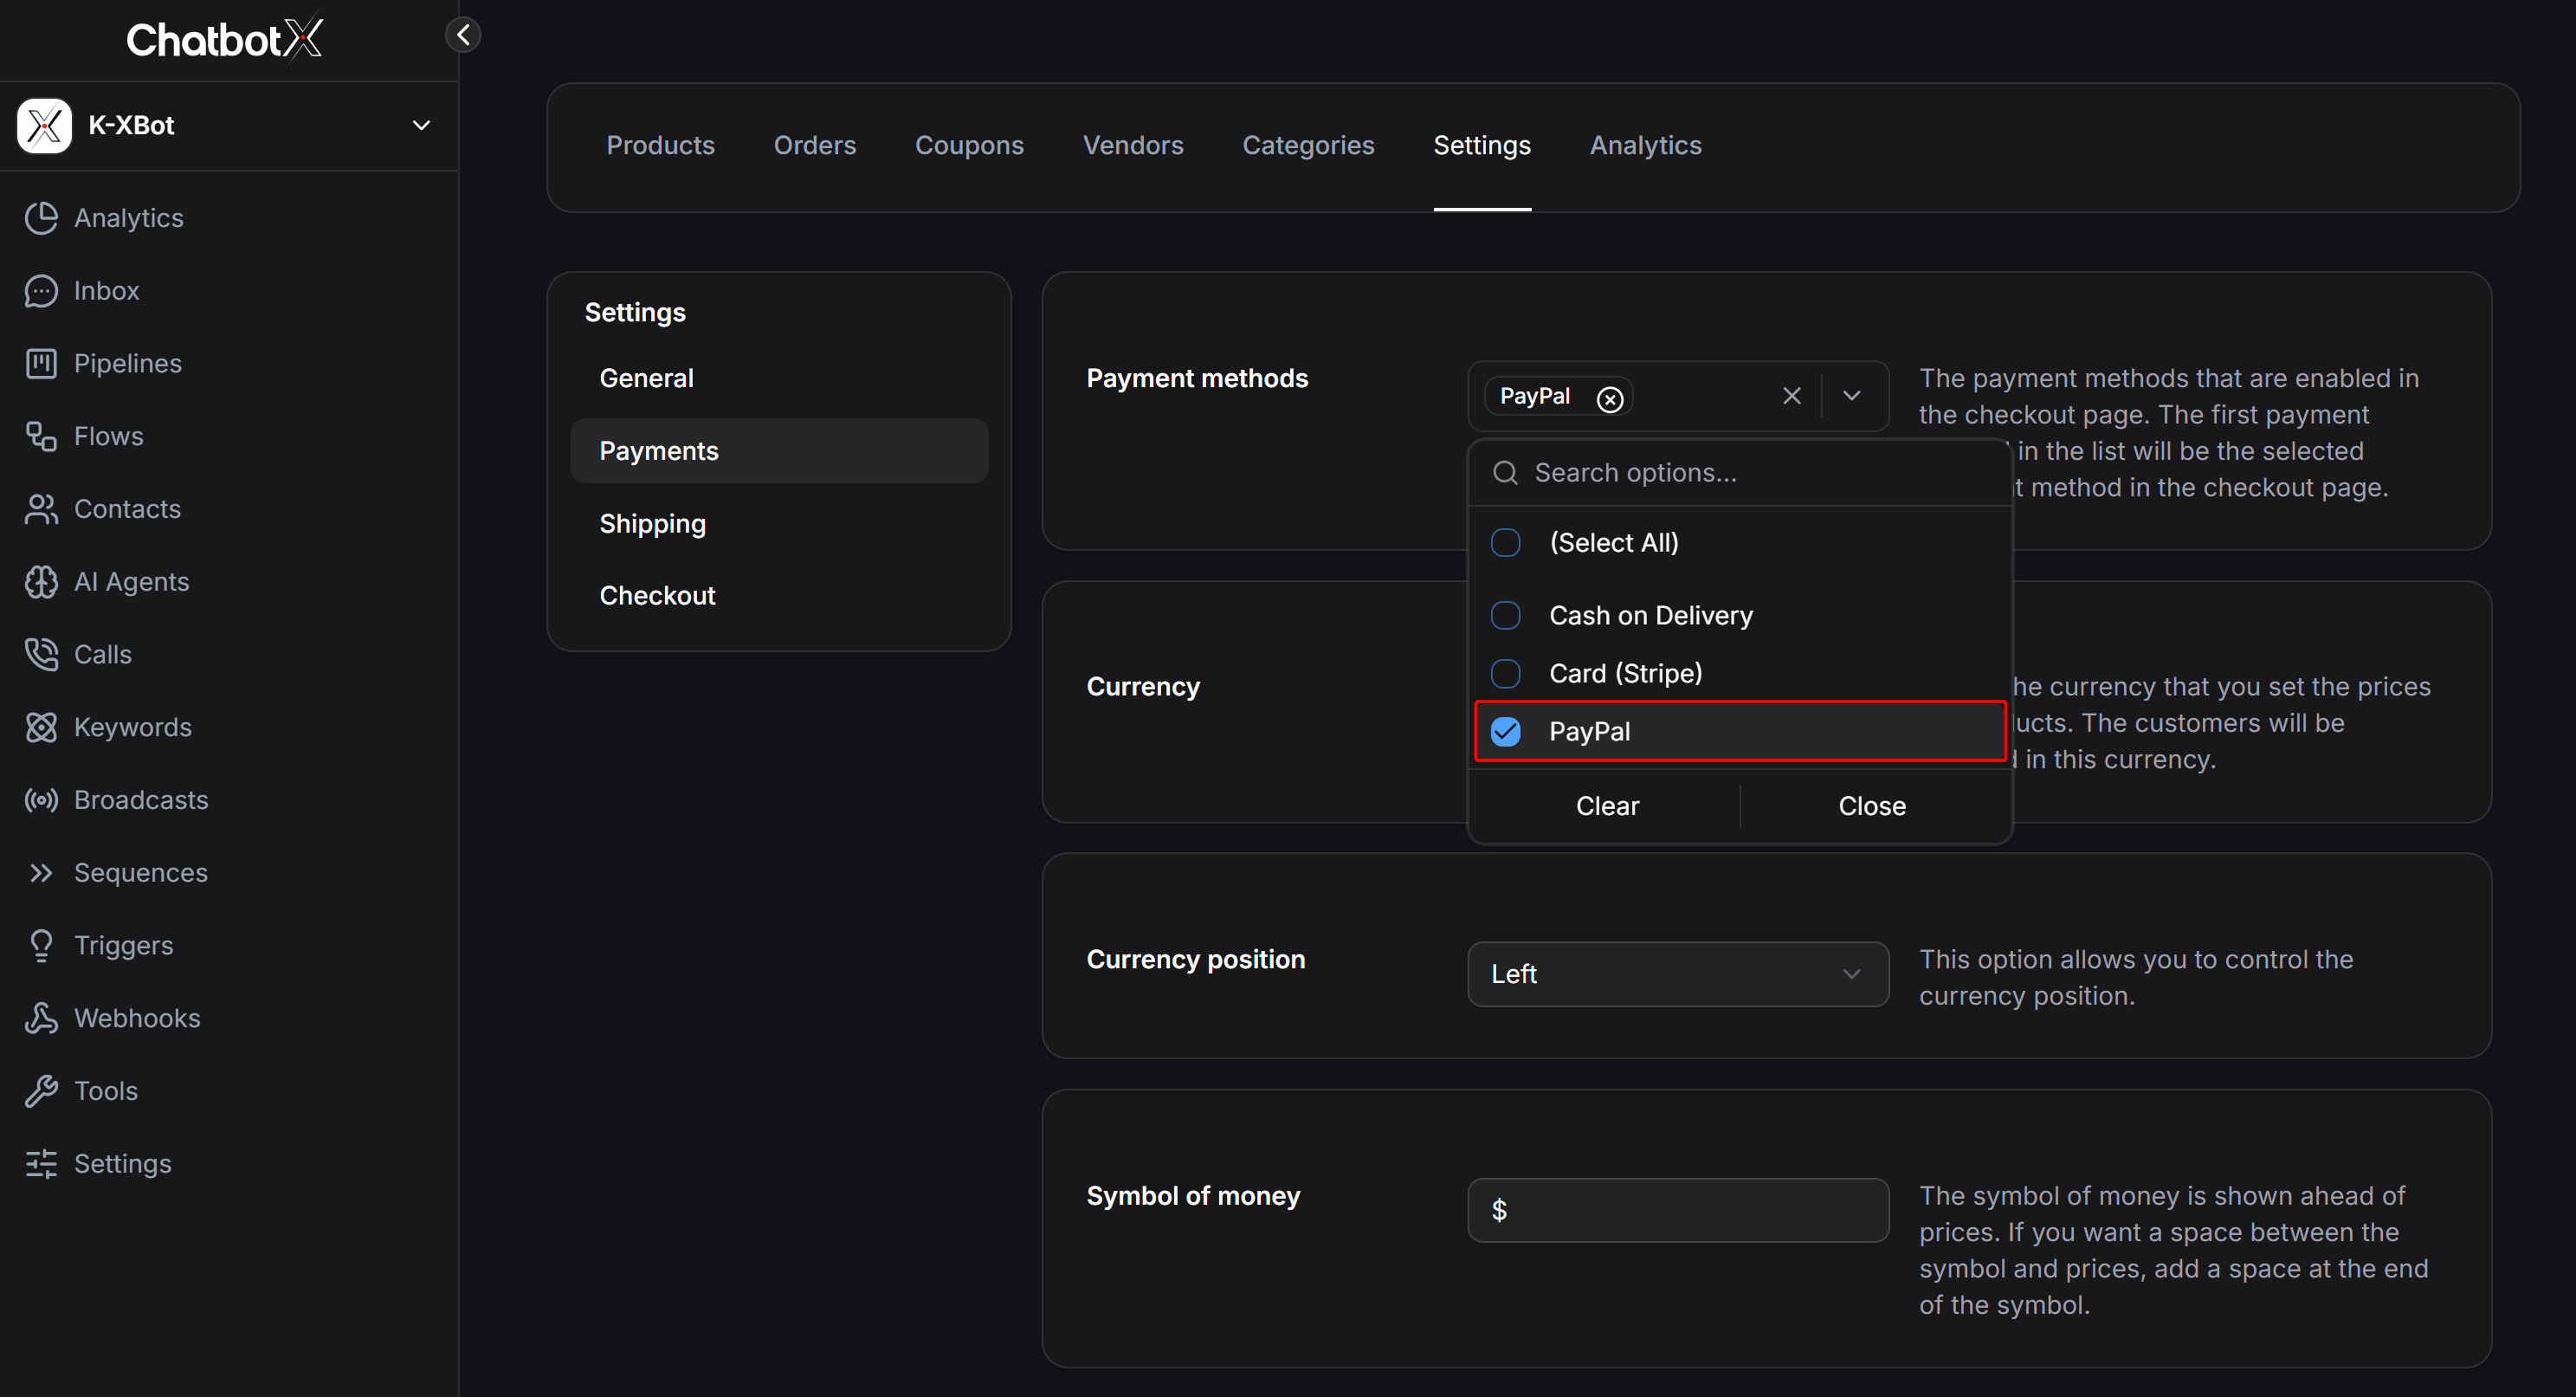
The first payment method in your selected list is automatically pre-selected as the default option at checkout. You can enable multiple payment options simultaneously, such as Cash on Delivery, Card (Stripe), and PayPal.
3
Verify Store Currency Compatibility
Ensure your configured Currency is supported by PayPal for international settlement (such as
USD, EUR, AUD, CAD, GBP, or SGD).4
Save Configuration
Click the Save button in the bottom right corner to activate PayPal across your storefront.
Customer Webview Checkout Experience with PayPal
When customers shop and proceed to checkout, the PayPal flow unfolds through the following sequence:1
Selecting PayPal at Checkout
On the Webview checkout screen, after entering recipient and shipping address details, customers scroll to Payment and select PayPal.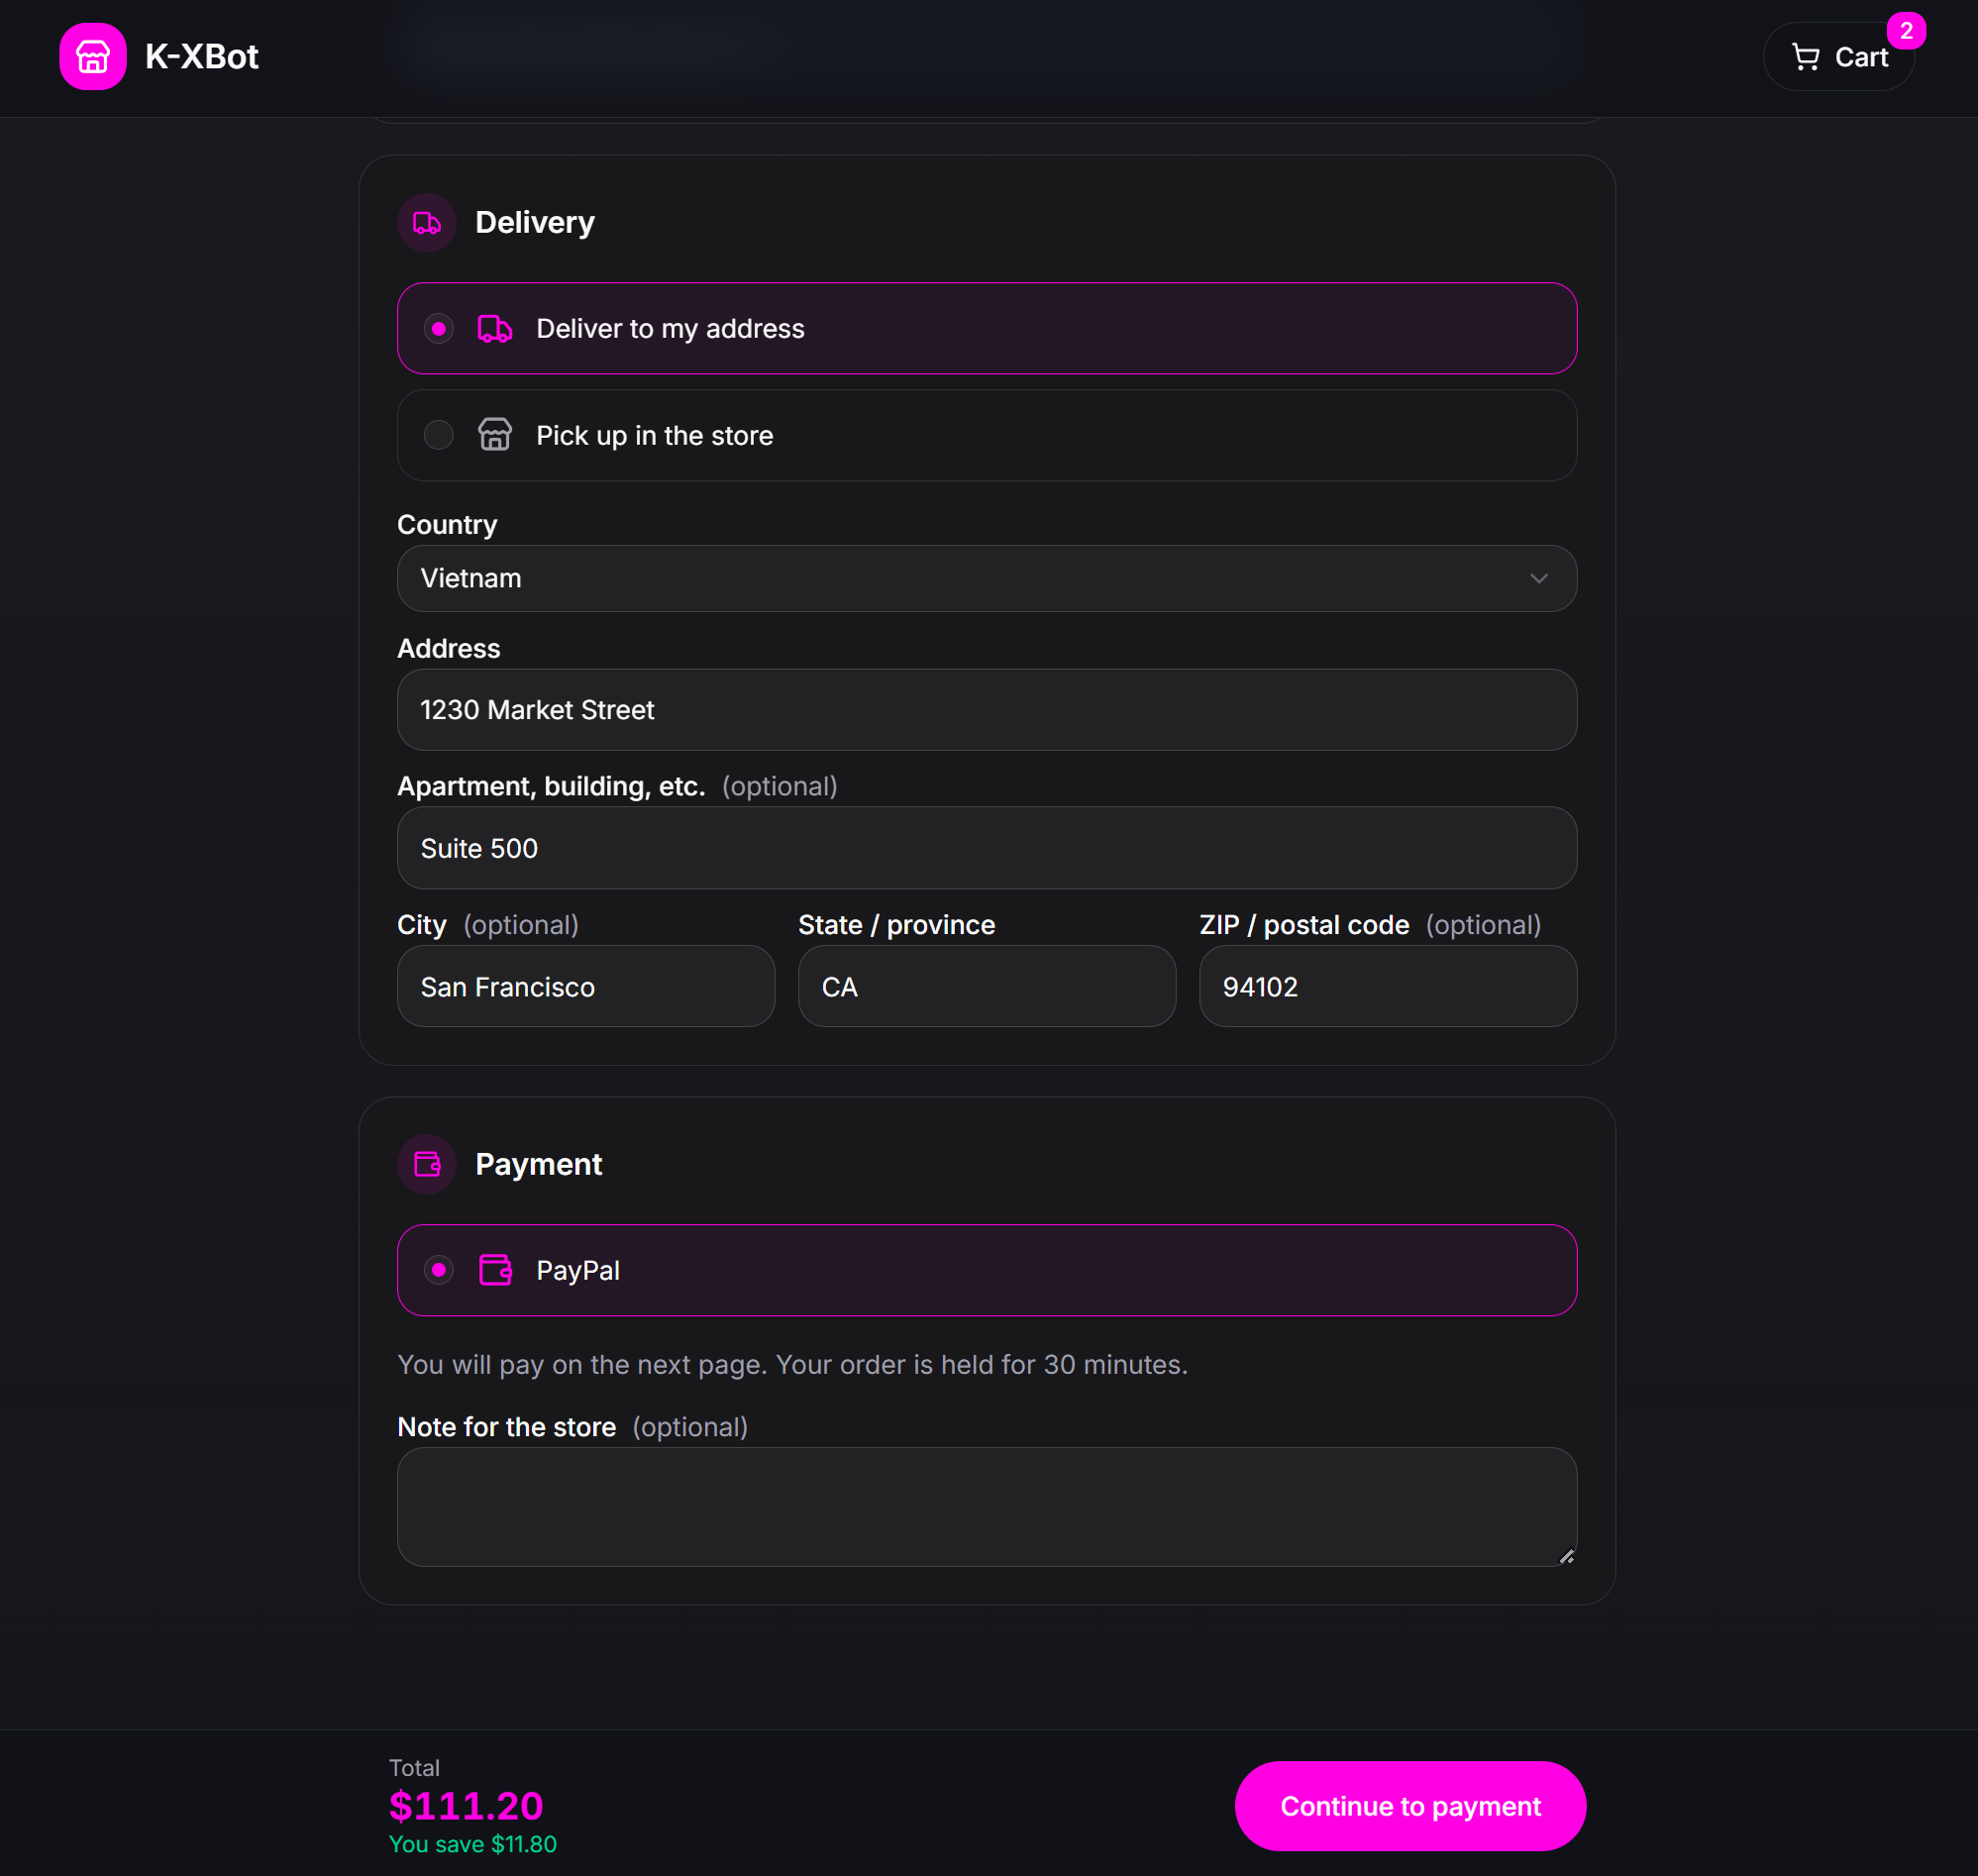
- You will pay on the next page: Informs the customer that payment occurs on the subsequent step.
- Your order is held for 30 minutes: Reserves the order and inventory for 30 minutes while the buyer completes authorization.
2
Redirecting to PayPal Secure Payment
After reviewing the order summary, the customer taps Continue to payment. The Webview redirects securely to the PayPal login or hosted card entry screen.
3
Reviewing the Payment Confirmation Receipt
Once transaction funds are captured, the customer is routed back to the Webview order confirmation page: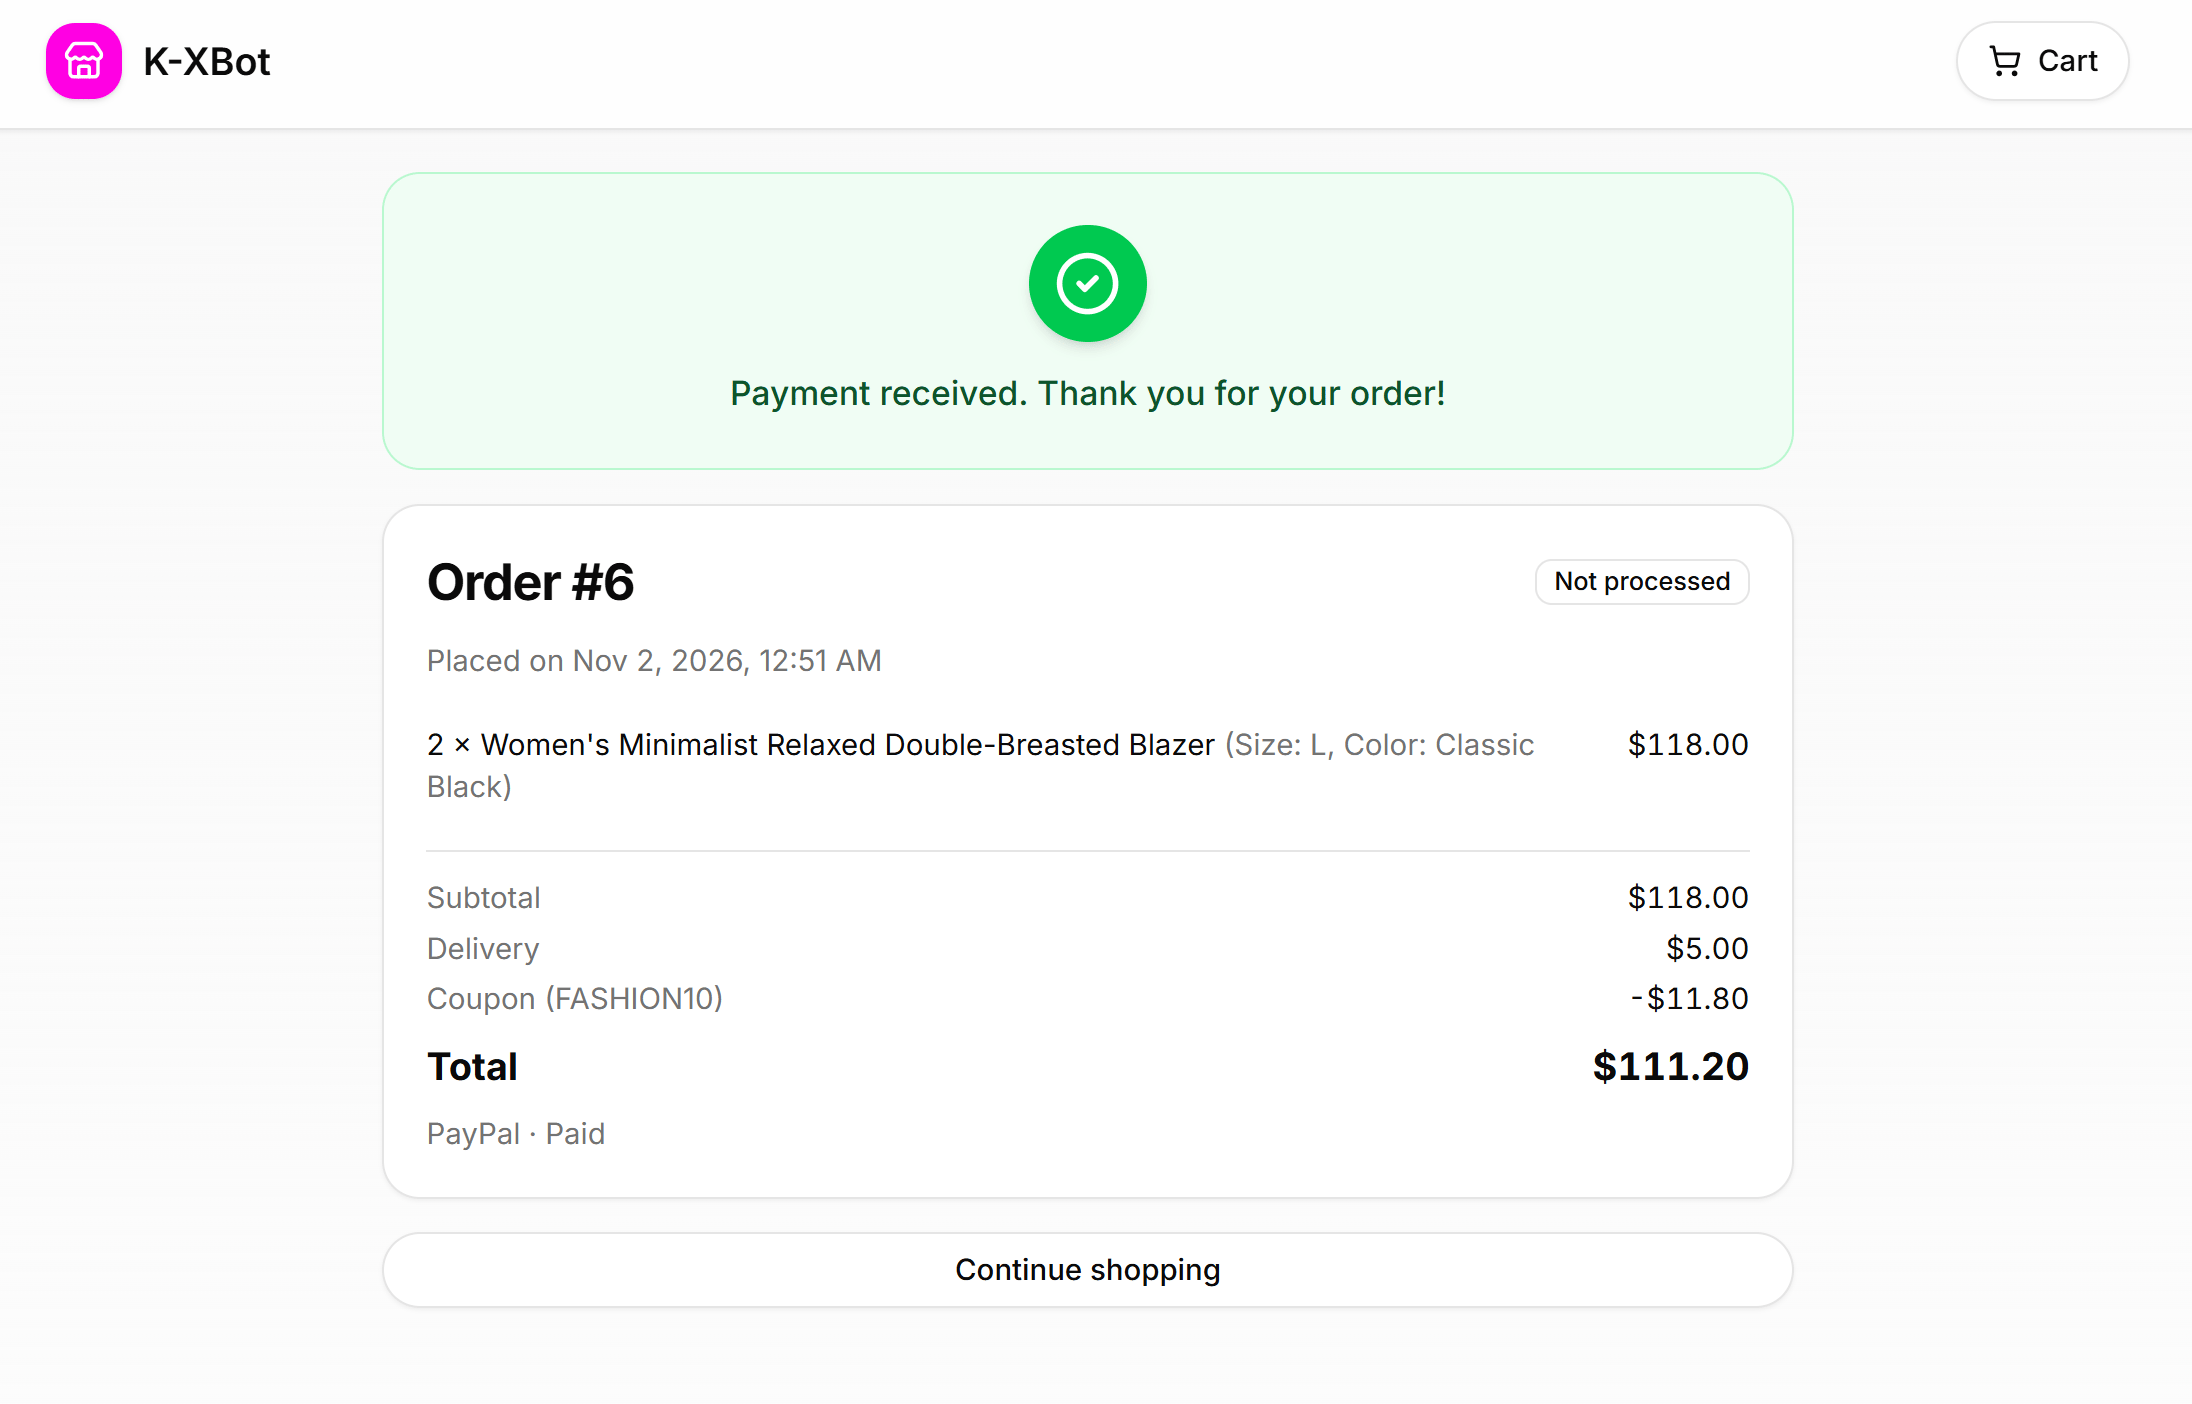
- A green confirmation banner indicates: Payment received. Thank you for your order!
- The receipt details the assigned order number (such as
Order #6), item breakdown, subtotal, delivery fee, and final amount. - The payment line displays: PayPal · Paid.
Monitoring PayPal Orders in the Orders Dashboard
All PayPal orders synchronize in real time to the Orders tab within ChatbotX Ecommerce: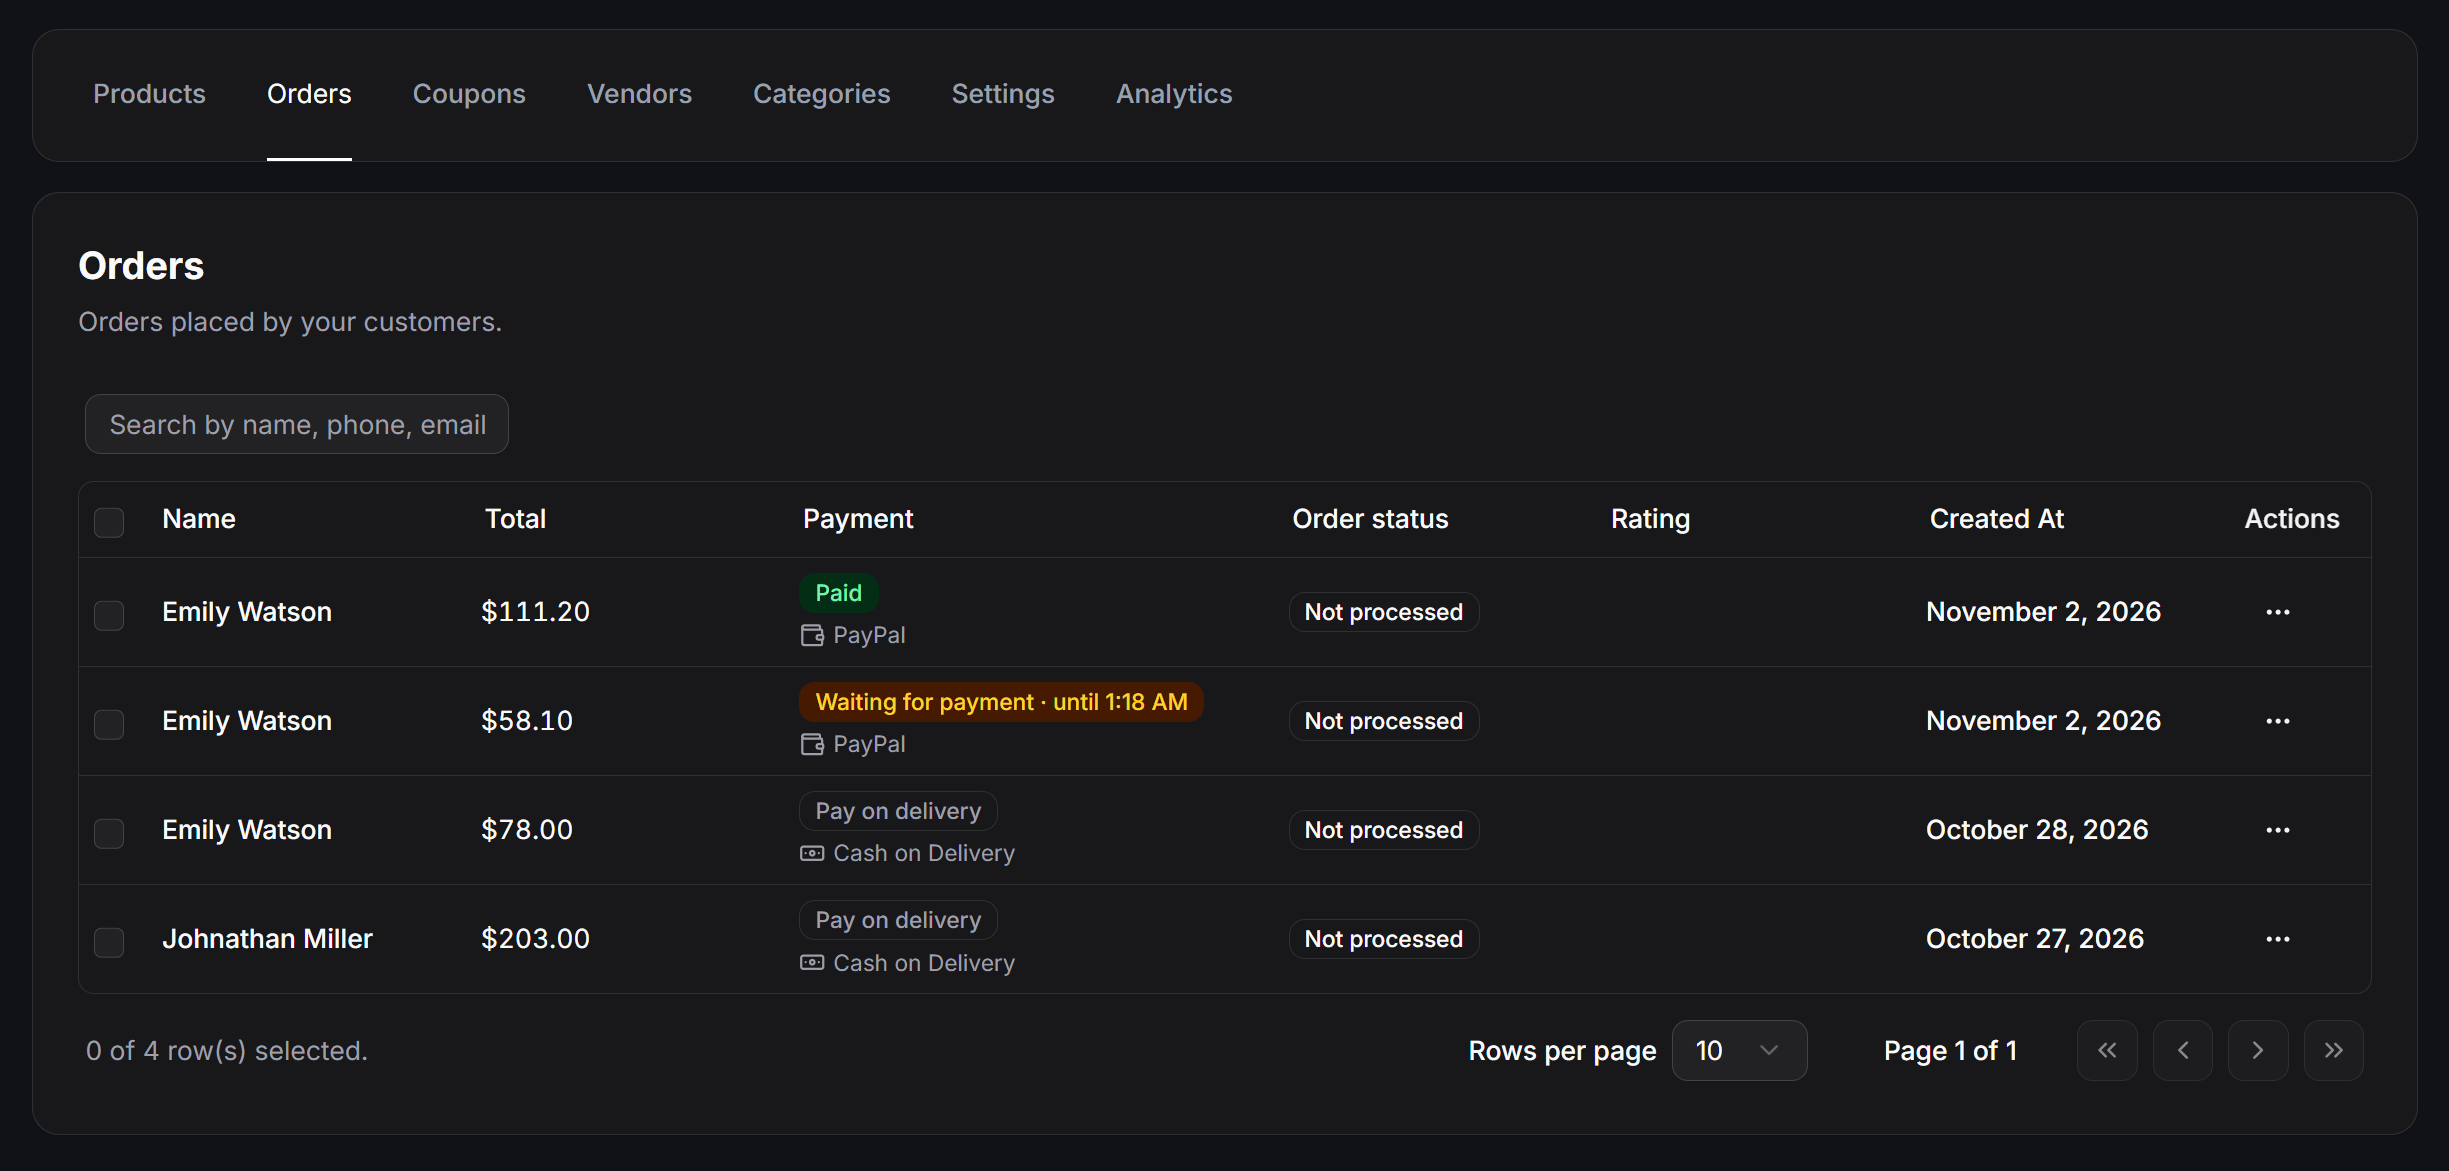
Upon successful payment capture, ChatbotX also transmits an automated order confirmation message and itemized receipt directly into the customer’s Messenger chat according to your configured confirmation flow.